

1⁄35Maximum Firepower: DML's
16
Comments
Fighting Compartment Interior
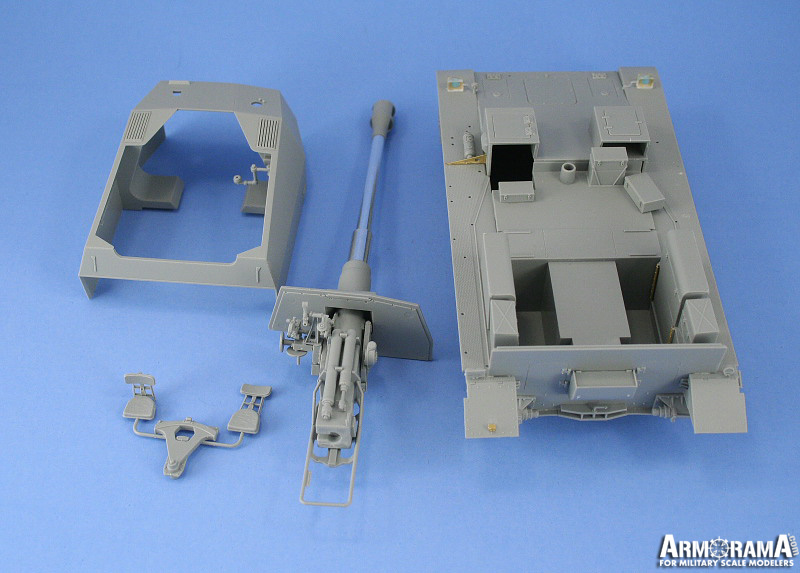
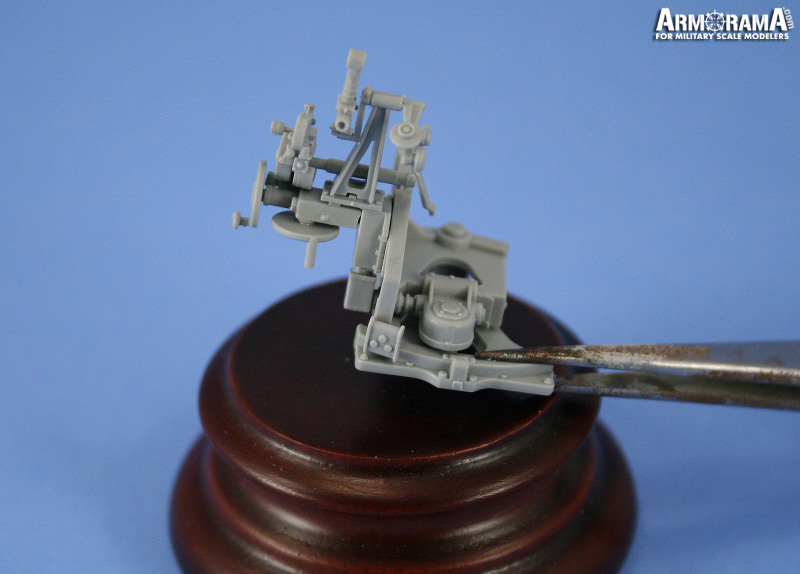
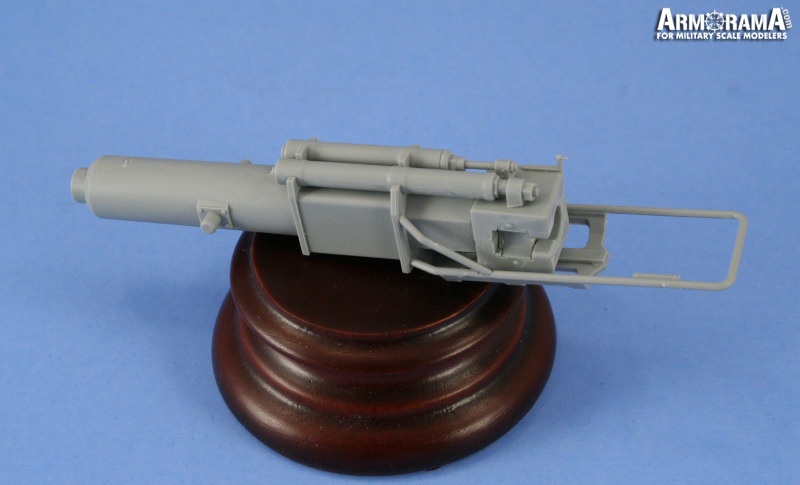
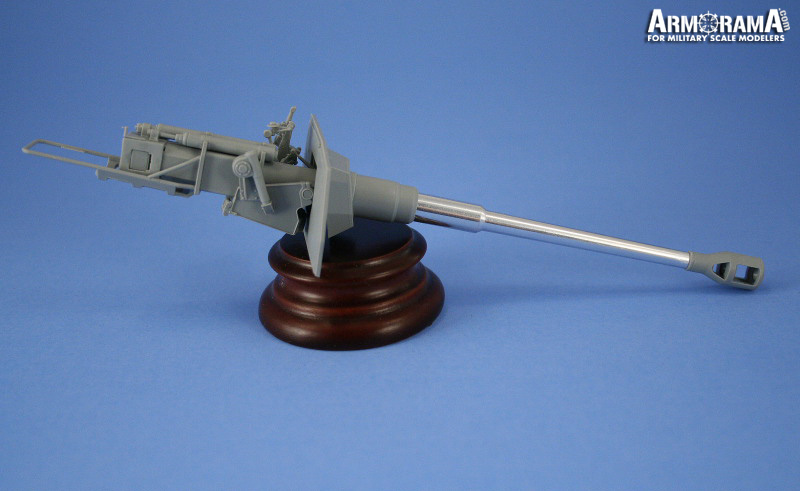
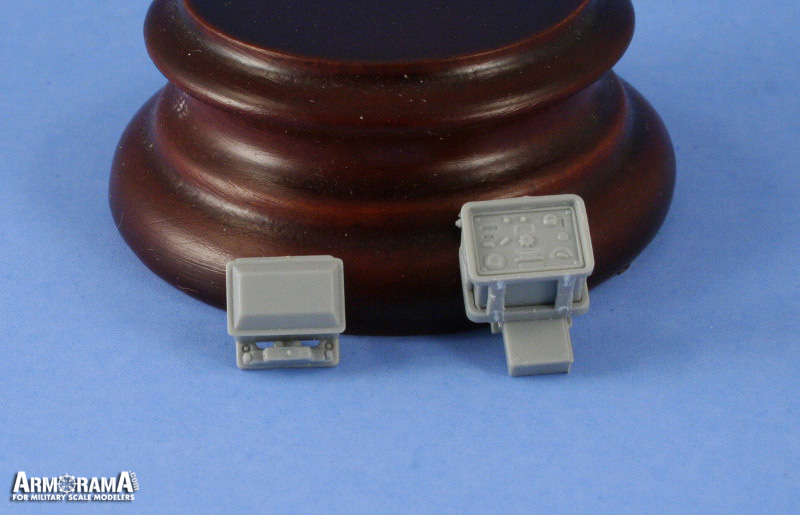
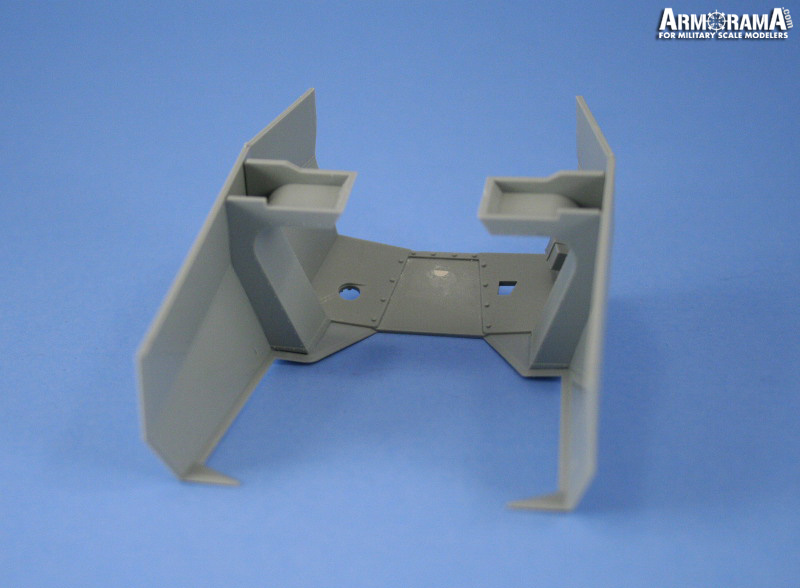
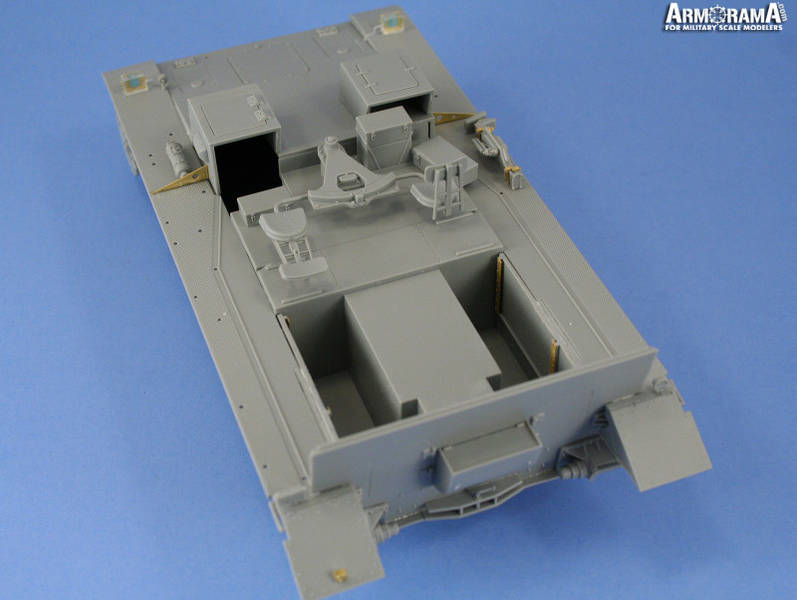
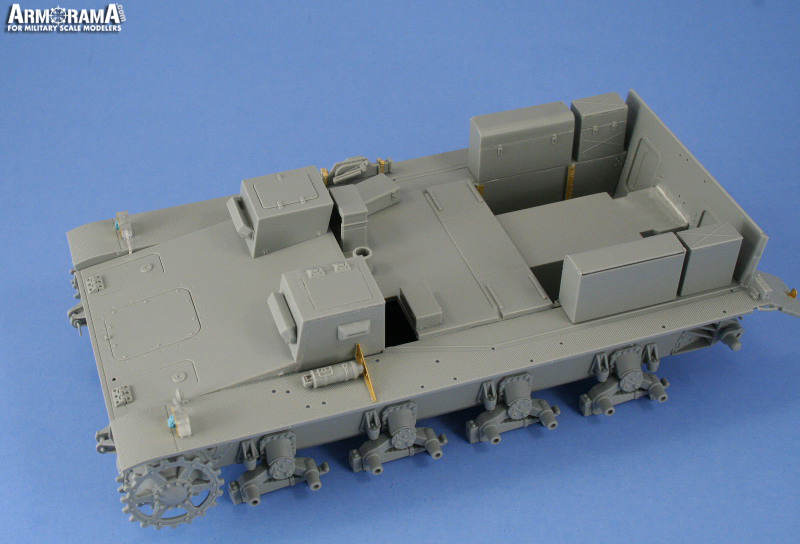
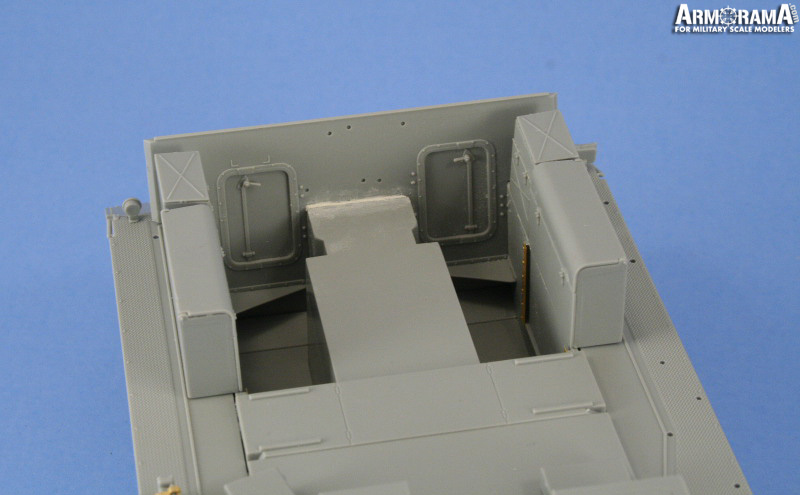
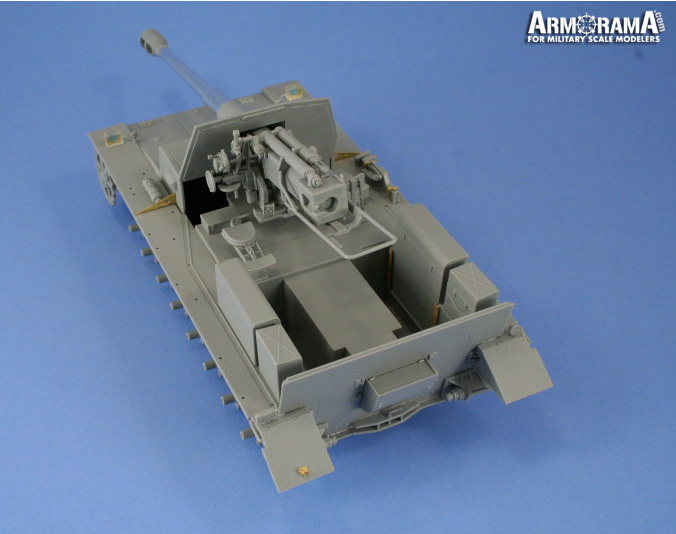
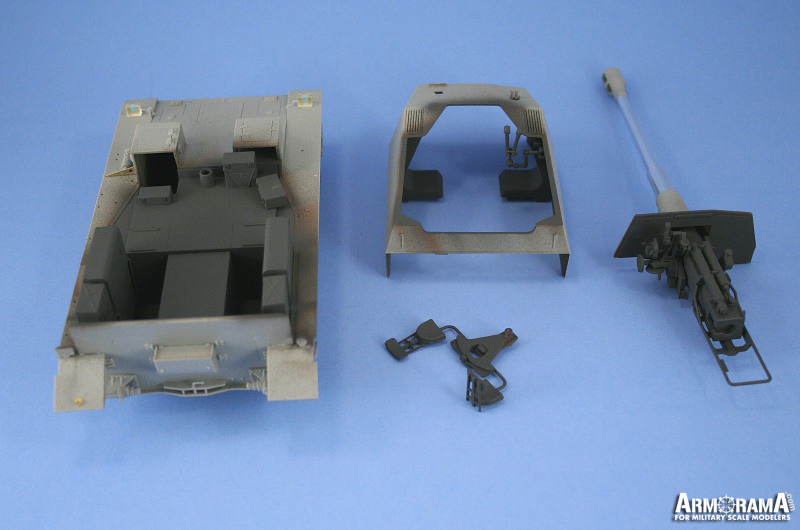
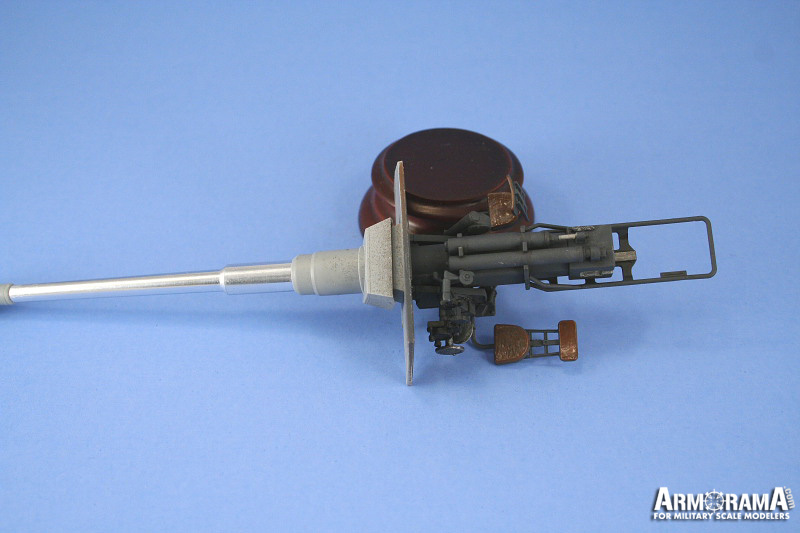
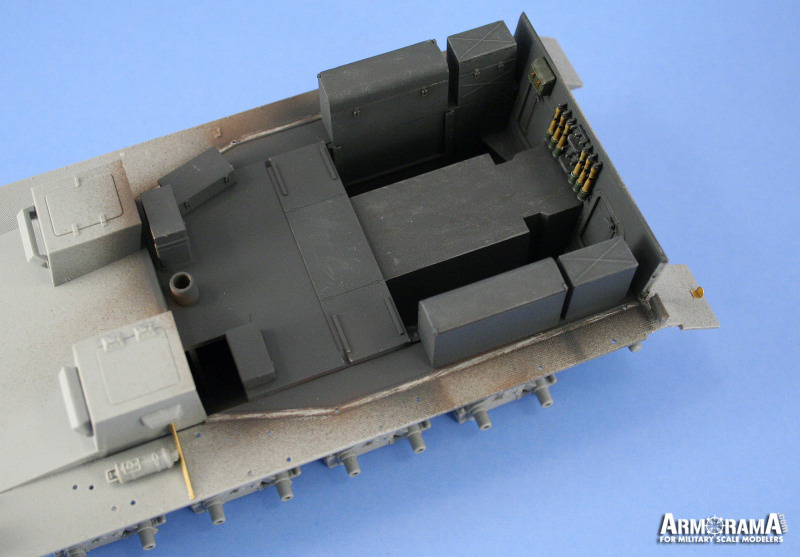
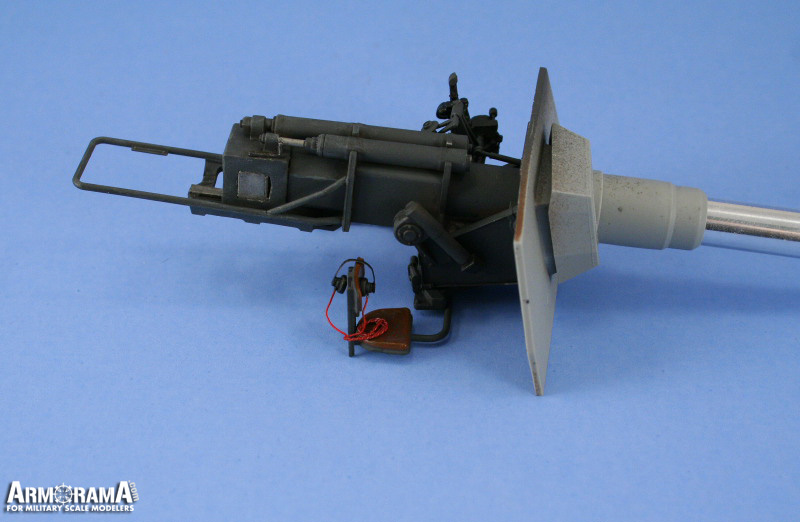
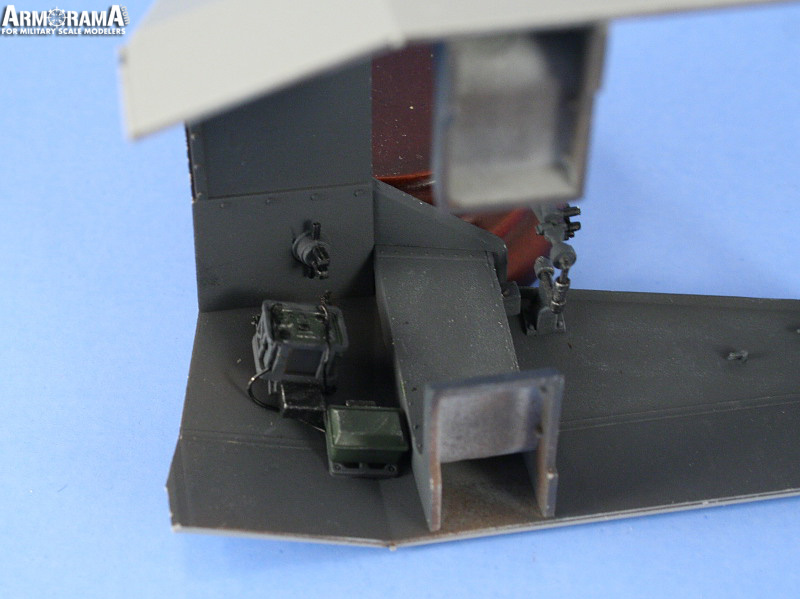
After studying the assembly steps for the interior, I decided to approach it as a series of sub-assemblies that would be left detachable to facilitate painting and detailing as much as possible. The first sub-assembly dealt with the main gun and the highly detailed sight, cradle, recoil mechanisms, and elevation/traverse elements. These in turn consist of several sub-assembly steps involving some very detailed, and in many cases small, pieces that come together in the end for the final assemblies. The kit provides the option of a one-piece styrene or turned aluminum barrel and I opted for the aluminum out of personal preference, requiring the removal of the slot tab meant for the styrene barrel as the only modification. I also opted for the field-use muzzle brake, using liquid glue and careful sanding to produce a seamless assembly from the 3 parts provided. The gun crew seats and gun mount base were another sub-assembly that I left unattached to facilitate detailing and installation. The option is given to install the seats in either the upright or folded down position and I mirrored the instructions with the commanders seat in the upright and the gunners seat folded down. The compartment superstructure presented a unique challenge in that on each side there are air intake ducts to the engine that need to mate up with both the superstructure sides and the base of the compartment. After several test fits back and forth, I decided to install the ducts to the superstructure rather than to the base of the compartment as the instructions directed. I also installed the commanders radio and junction box along with other internal details such as the rabbit ears periscope and mount and some of the rear stowage items that needed to be painted to complete this sub-assembly. The final interior details were installed to the hull directly in the form of various stowage boxes for the front of the compartment and the ammunition lockers for the rear areas. The option to have the lockers open with interior detail is there, but I elected to close mine up. As a final added touch, I also scrounged some door latch handles, parts D72 and D73 that are on the sprues but marked as not for use, for the crew hatch doors on the rear hull.Interior Painting and Assembly
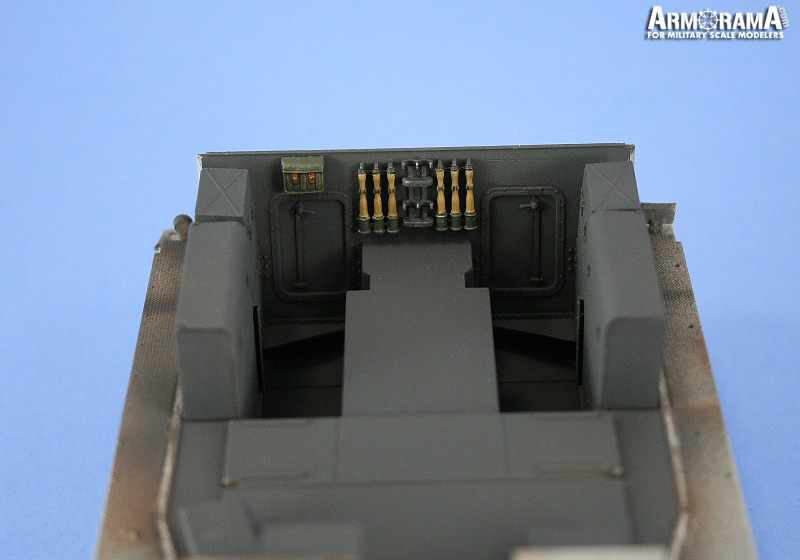
All paints used in this stage are from Testor's "Model Master" line of enamel paints unless otherwise indicated. The interior was broken down into the sub-assemblies and given a base coat of Italian Dark Brown followed by several thin coats of Panzer Schwarzgrau via airbrush. The detail work on the interior focused heavily on the gun breech area and mount. The elevation and traverse wheels were painted with Non-buffing Metalizer Gunmetal and dry brushed with Steel, the gun sight was finished in Aircraft Interior Black, and the breech block and breech interior finished in Steel to round everything out. The grenade racks were also detailed and installed along with the stowage items for the lower rear hull plate. The areas behind the gun breech, the ammo lockers, and the crew area floors were treated to dry brushing with first Steel, followed by Burnt Umber, and then an 80/20 lightened mix of Panzer Schwarzgrau/Light Gray to provide a foundation for weathering. A very light pin wash of Burnt Umber was also applied to various areas to bring out some of the details. I also added some wiring detail to the radio set using fine gauge solder and created a radio headset and coiled wire for the commanders chair by using a leftover headset from the spares bin and solder for the wire.Final Construction
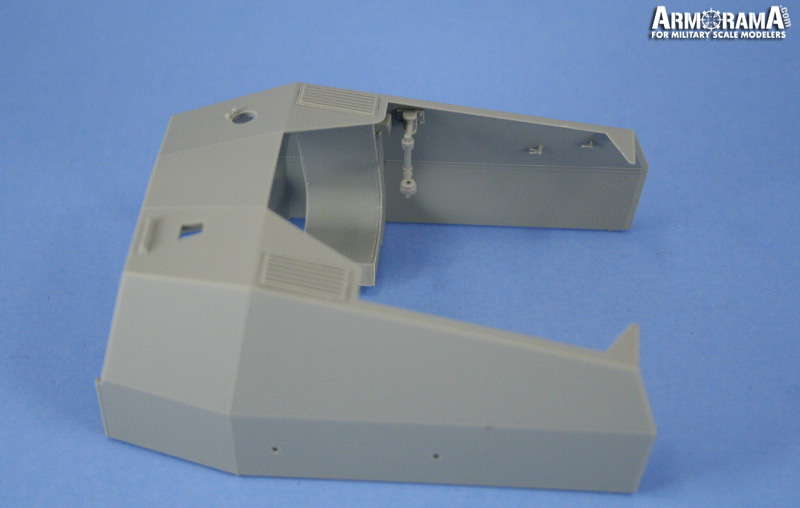
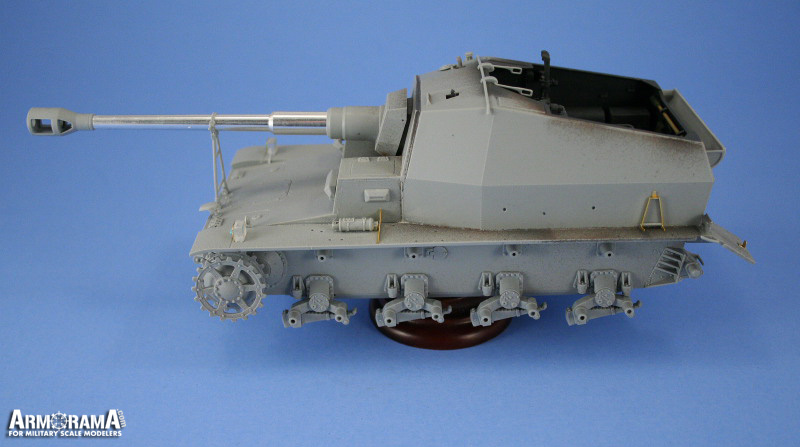
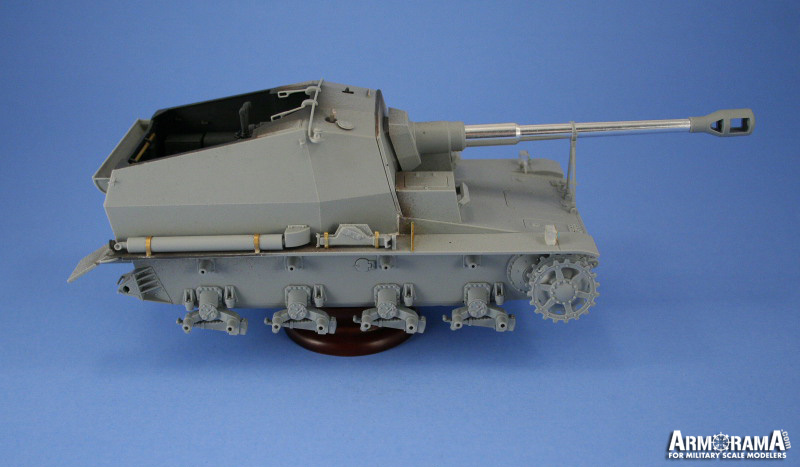
With the interior painted, the various sub-assemblies were put into place, beginning with the superstructure front plate and gun mantlet secured to each other, then installed directly to the hull along with the gun mount base and chairs to insure a good fit with the glacis and drivers hood areas. Once set, then the fenders were secured to the superstructure base. This required some use of liquid glue to loosen the fenders slightly from the previous installation and some finger pressure to correct the droop and get them to sit properly, working my way front to back one side at a time. The final step was to use liquid glue on the rear join between the superstructure and the rear hull plate, fusing the molded weld seams in the process. A small gap that resulted at the rear was filled with putty and sanded down. On the left side, the step ladder was constructed from the kit-supplied PE and styrene parts and installed against the superstructure side after checking the placement vs. the pioneer tools. On the right side, the exhaust was installed along with the PE retaining brackets which were annealed first before forming into the necessary curved shape. The PE brackets have small feet that secure to the fender itself and include separate small PE bolt heads as an extra detail. The right side fender bracket and the jack were also re-installed prior to painting.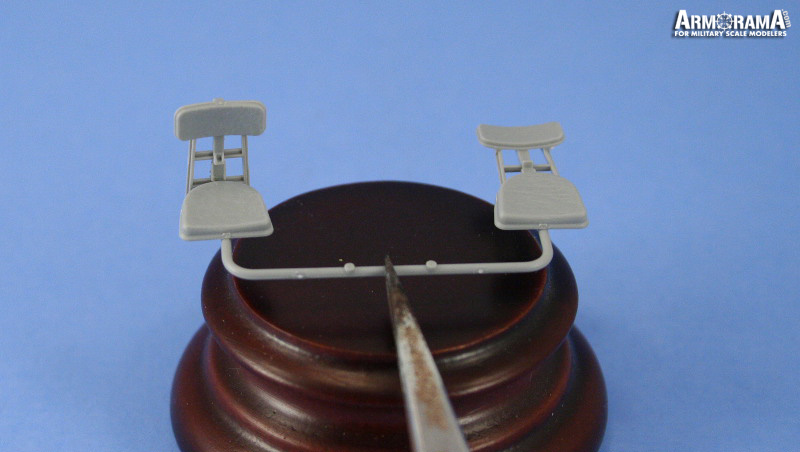
About the Author


FROM: TEXAS, UNITED STATES
Like many, I started out in the hobby as a kid building airplanes to hang from my bedroom cieling. I took a long break from the hobby, returning in 2001 with an interest in armor inspired mostly by online gaming. WW2 armor, 1/35 scale, is my preferred genre with a special taste for the stranger vehi...
Comments


Bill
Great job and thanks for the report. Went out and bought one for myself.
Can't wait to put it together.
SEP 05, 2007 - 07:48 AM


Hi Bill,
Excellent build, the finish is tops. Tis a shame the vehicle never caught on as its got great lines ........
cheers
Brent
SEP 05, 2007 - 01:55 PM

Hi Bill,
You really did a good job on the "Dicker Max" there.
The only thing that is off a bit is the story about the K.Pz.Sfl. IVa.
It was originally developed in 1939 by Krupp in the Grusonwerke in Magdeburg. The demands from the Wehrmacht where to design a vehicle with enough firepower to be able to destroy bunkers and penetrate armour (under a 30 degree angle) at long ranges (over 2 km's).
Krupp started to design two different vehicles, both based on the PzKpfW-IVA. The first would be equipped with the 10.5 cm schwere Feldhaubitze K 18 L/52 (which was conveniently produced by their neighbours) and the other with a 12.8 cm gun.
Because the 10.5 cm gun was produced next door and it was easier to install, Krupp settled for the K-18.
Eventually 2 vehicles where produced as prototypes (even though Hitler wanted to start serial production right away) and where sent to the 521st Panzerjäger Detachment for a proposed attack on Gibraltar. When this never eventuated, they were transferred to the 3rd Panzer Division and saw combat on the Eastern Front in 1941.
Eventually one prototype was captured by the Russians after it got hit. The hit caused a fire, resulting in the ammo to ignite rendering the vehicle useless.
The second vehicle was then sent back to the Grusonwerke in Magdeburg to be refitted as a normal PzKpfW-IV.
The serial production of the "Dicker-Max" never started because the Germans decided to build the Nashorn instead. That vehicle could be produced a lot faster, but also packed less of a punch. Looking in hindsight, serial-production of the "Dicker-Max" could have proven to be more useful since it's 10.5 cm gun would even have been lethal for the later JS-2 tanks.
Greetz Recce
OCT 25, 2007 - 07:04 AM


Recce,
Thanks for the additional information on the history of the Max.
Kevin,
Thanks as well for your comments.
OCT 25, 2007 - 09:25 AM
Copyright ©2021 by Bill Plunk. Images and/or videos also by copyright holder unless otherwise noted. The views and opinions expressed herein are solely the views and opinions of the authors and/or contributors to this Web site and do not necessarily represent the views and/or opinions of Armorama, KitMaker Network, or Silver Star Enterrpises. All rights reserved. Originally published on: 2007-05-20 00:00:00. Unique Reads: 38303

WEB HOSTING BY


Copyright ©2021 Armorama and Kitmaker Network, a subsidiary of Silver Star Enterprises
All Rights Reserved. Please read our Conditions of Use and Privacy Policy.
All Rights Reserved. Please read our Conditions of Use and Privacy Policy.