

1⁄35Maximum Firepower: DML's
16
Comments
Painting and Finishing
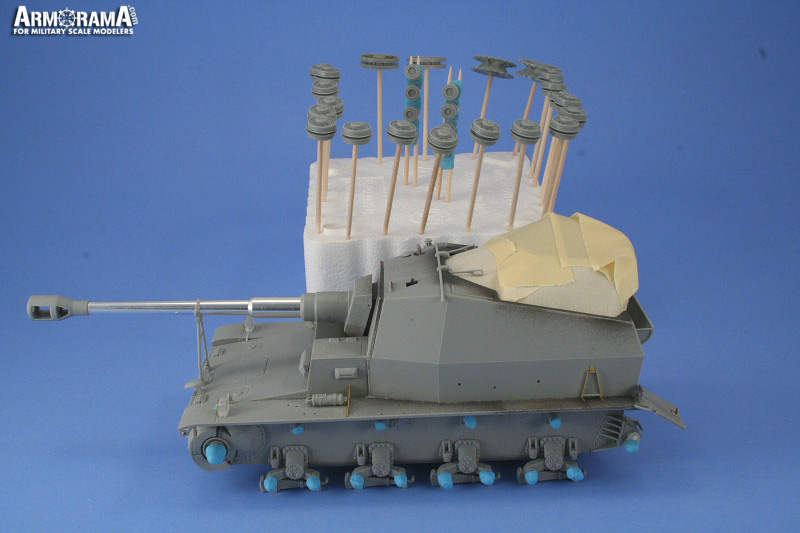
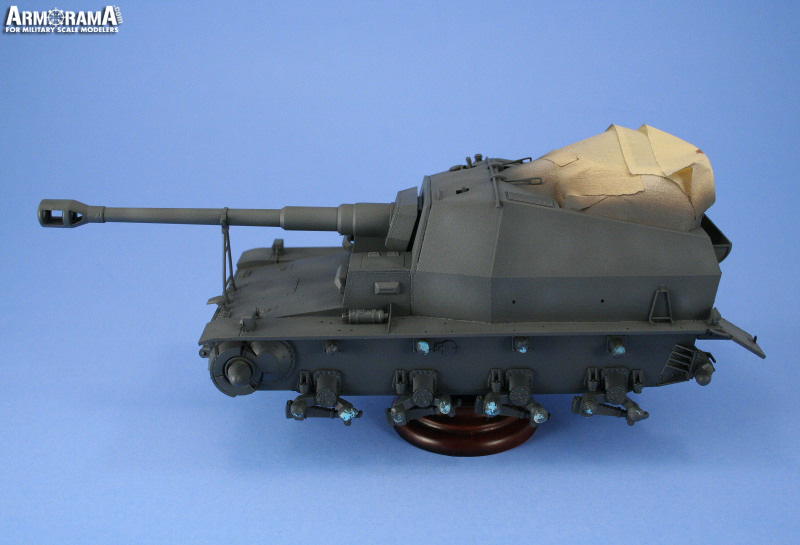
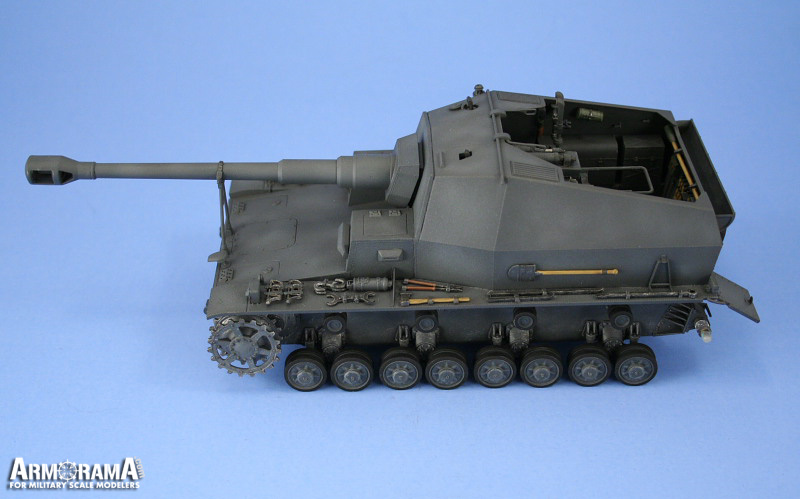
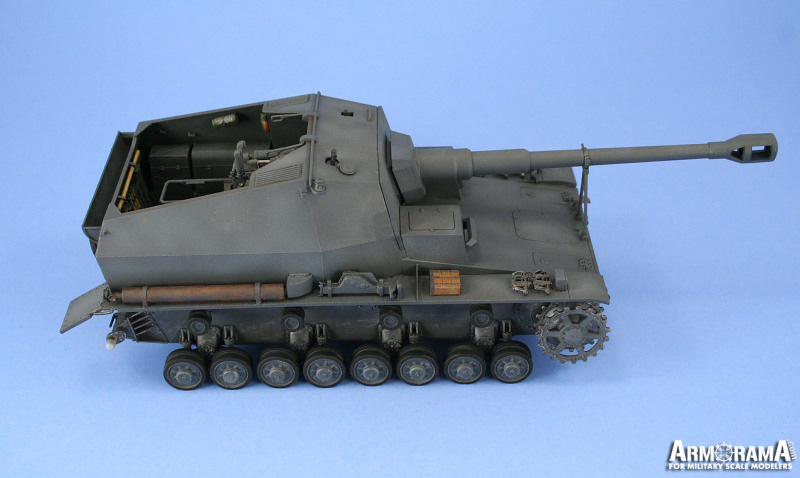
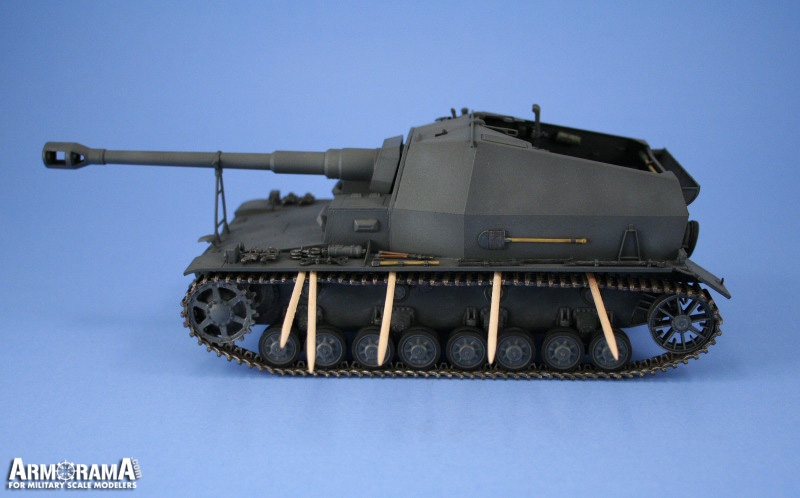
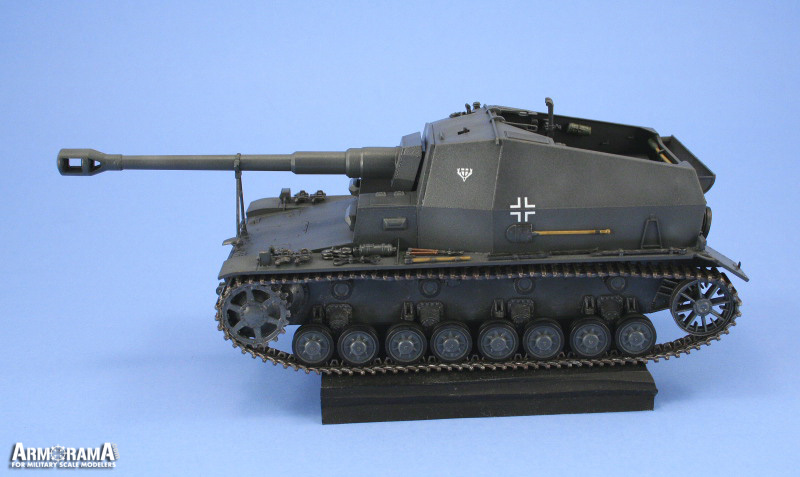
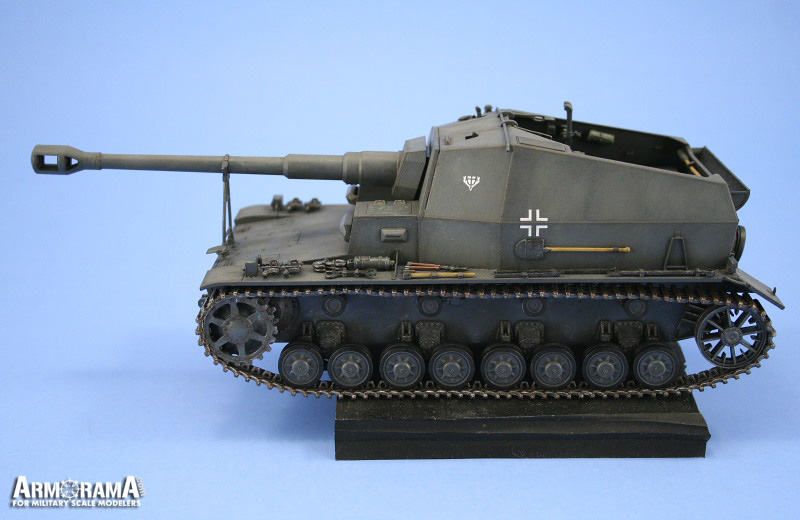
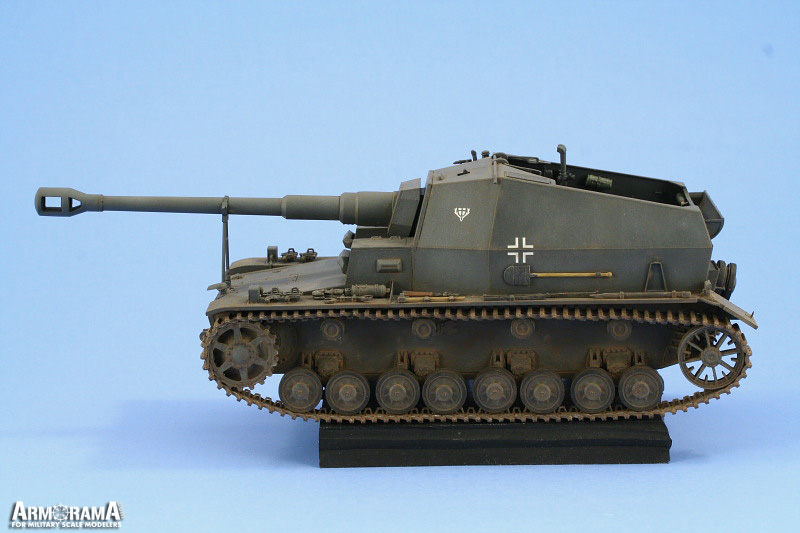
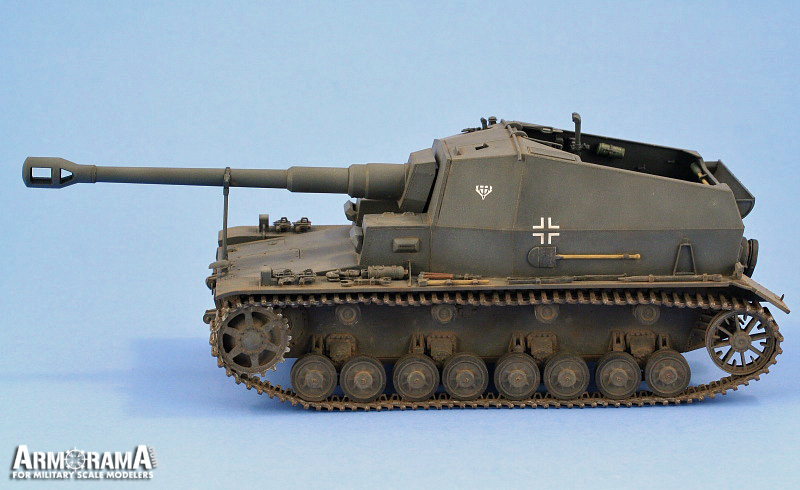
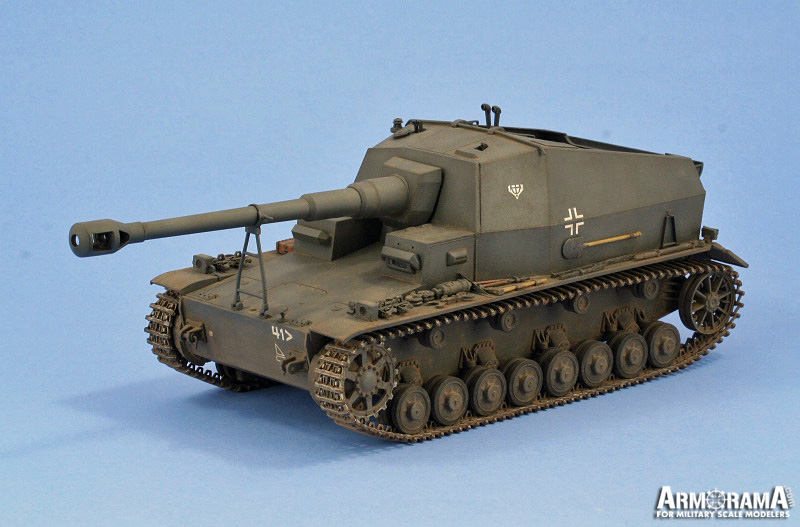
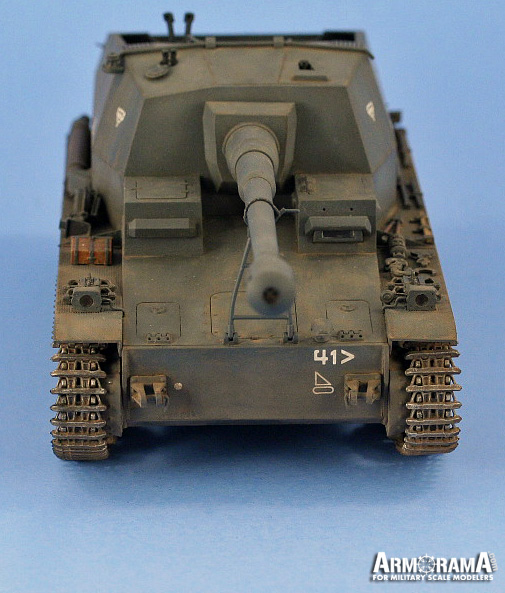
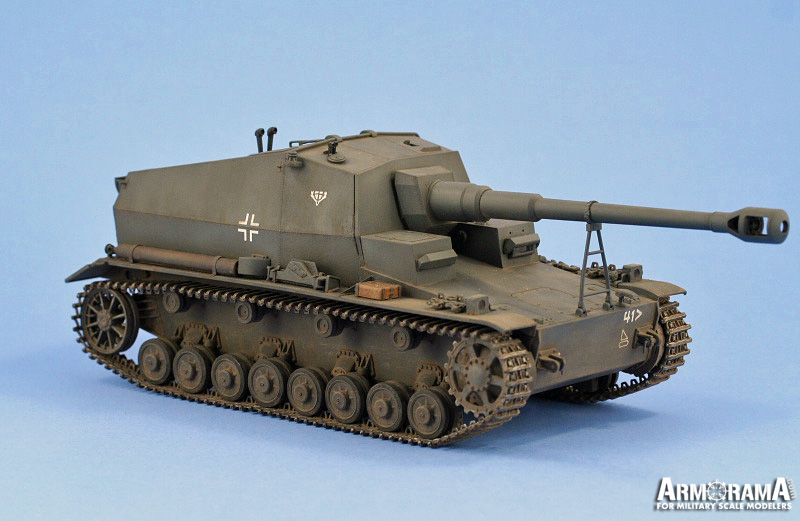
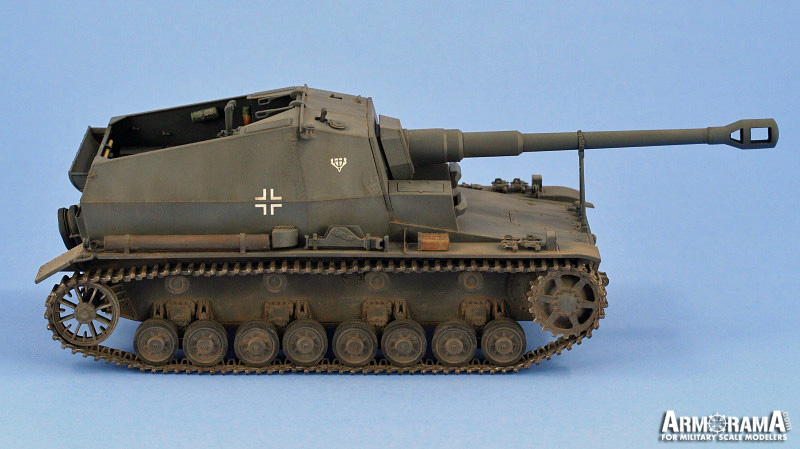
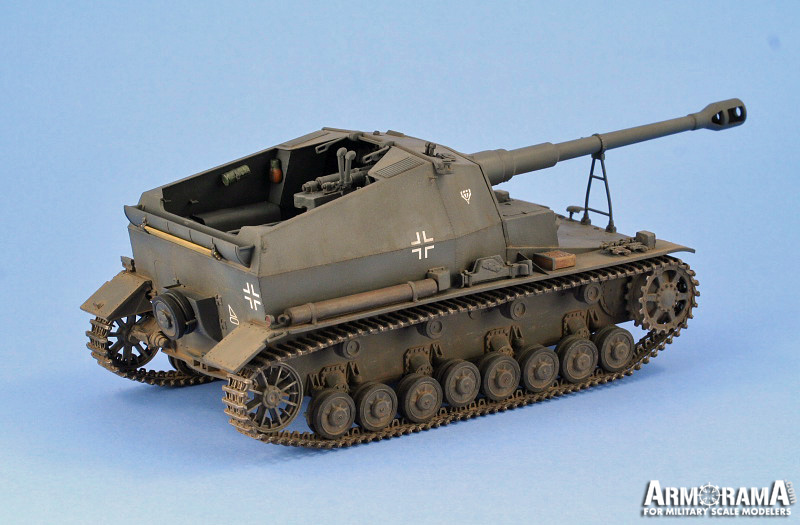
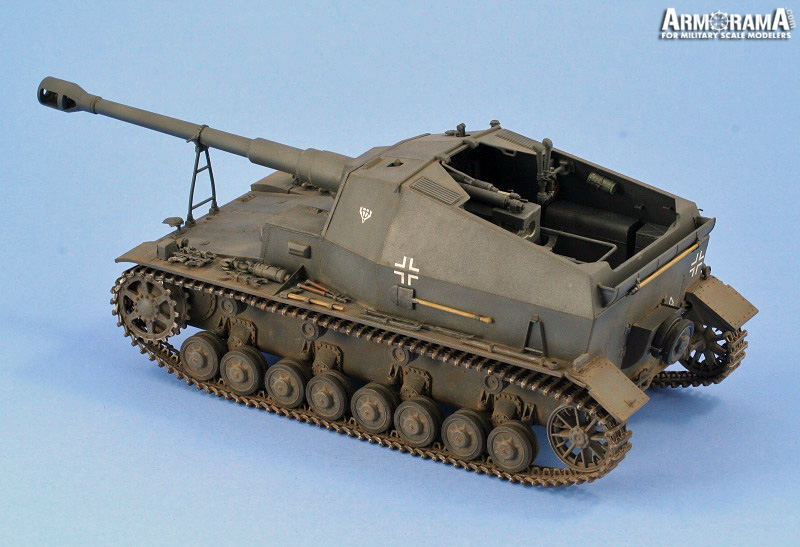
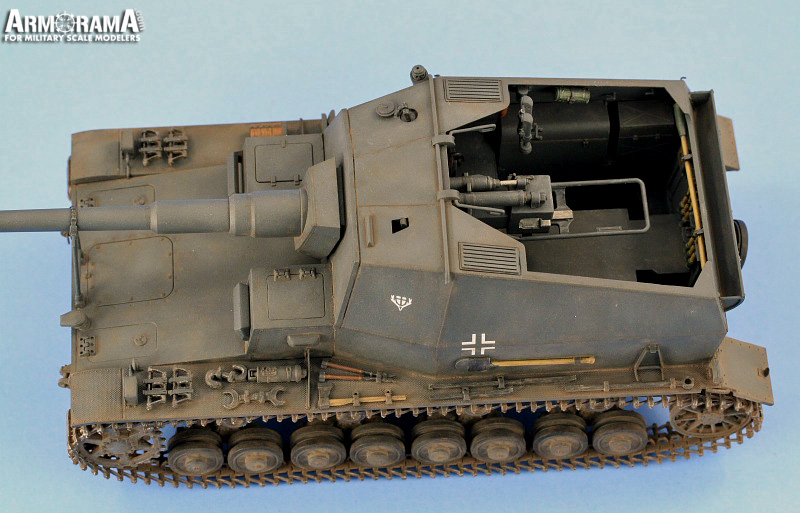
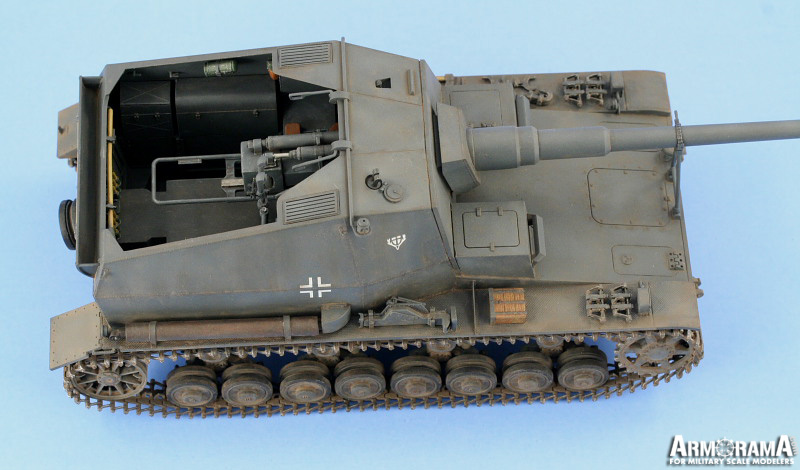
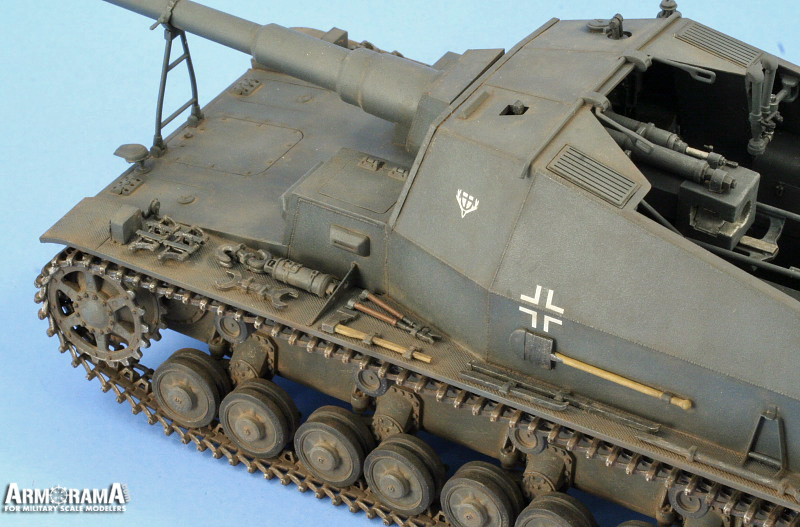
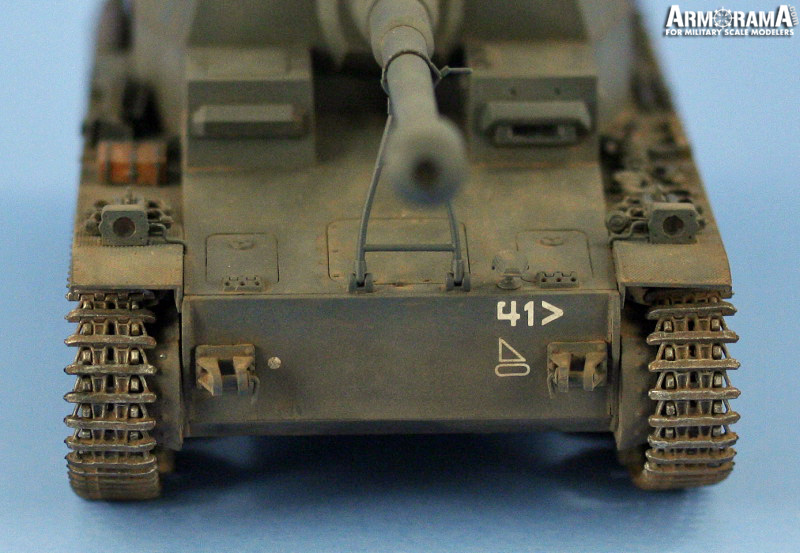
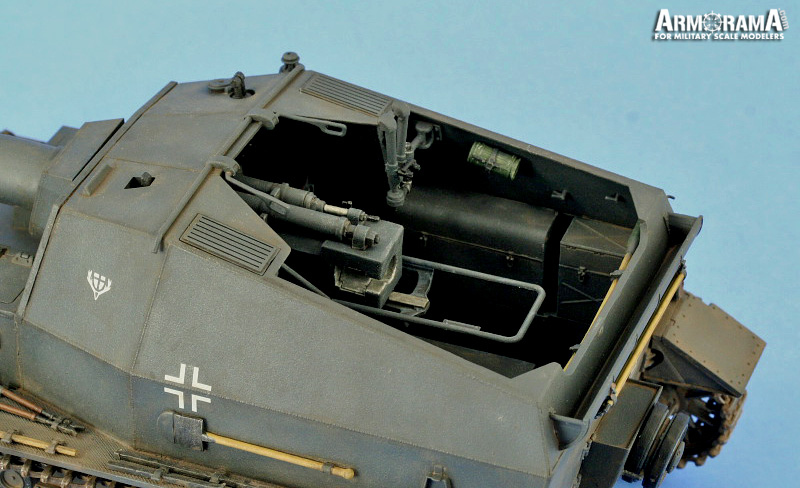
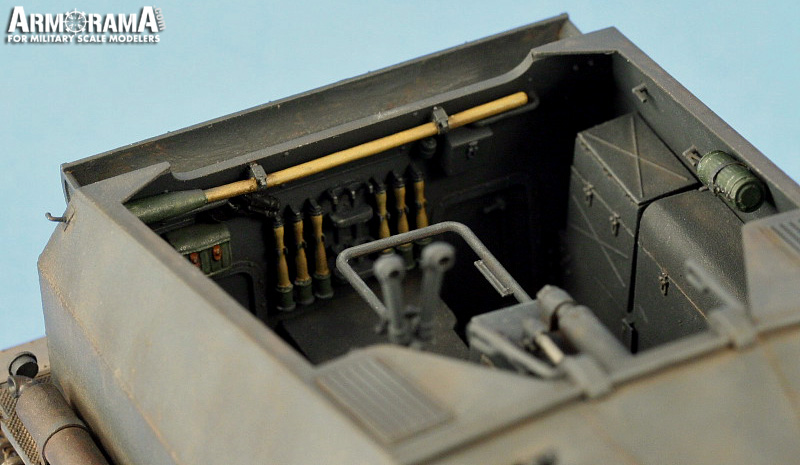
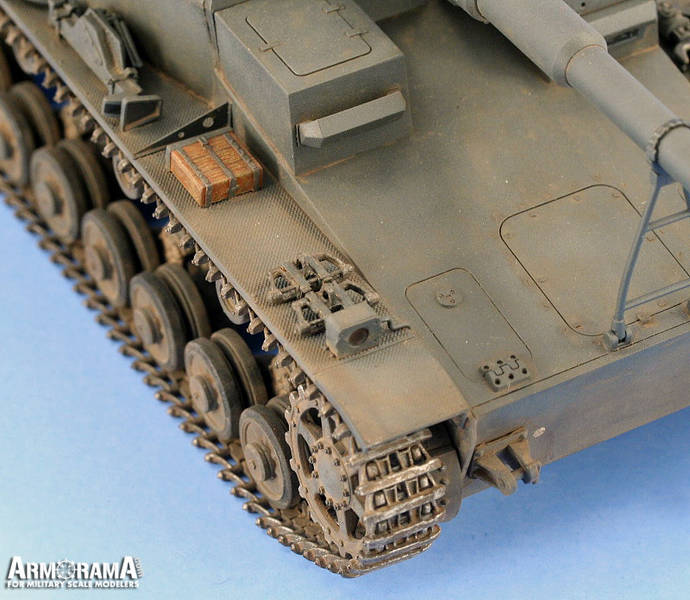
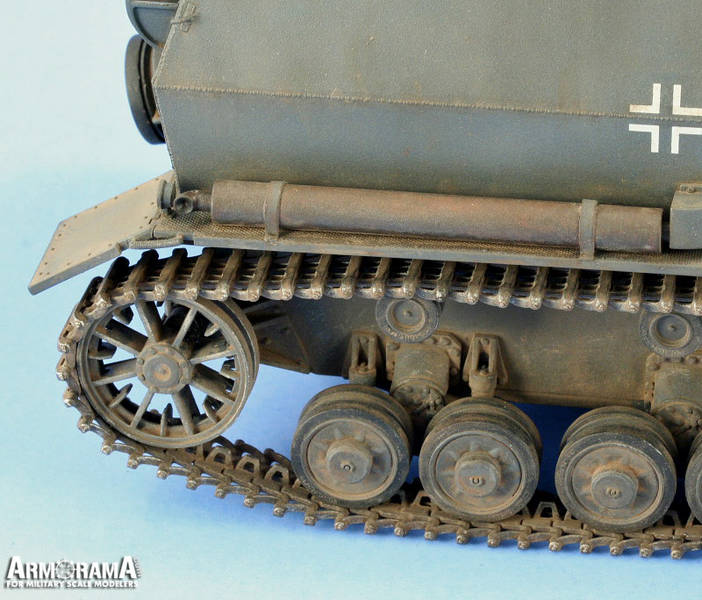
In preparation for the exterior painting, I masked off the interior with masking tape and mounted all of the road wheels, sprockets, idlers, and return rollers on toothpicks using blue tack poster putty. Blue tack was also used to cover all the suspension arms to protect them for later gluing of the wheels and a basecoat of Italian Dark Brown applied followed by overcoats of Panzer Schwarzgrau. The same 80/20 mix used earlier was sprayed very lightly in various places at low pressure to simulate paint fading/variation and then a light wash of 90/10 thinner/Schwarzgrau was sprayed as a mist coat to tie the finish together. The road wheel hubs had their rubber rims put in place using their friction fit and the entire wheel sprayed Flat Black. Once dry, the rubber rims were then removed and a circle template used to spray the Panzer Schwarzgrau on the hubs, keeping the mating surface for the rubber rims free of paint in the process. The road wheels were then dry brushed with the 80/20 lightened gray mix to simulate wear and the sprockets and idlers were dry brushed with Steel, Burnt Umber, and Lightened Gray as well. The remaining fender tools and items were detailed and installed as needed. The spare track link racks were the trickiest since they are multi-part PE items and I also added some styrene rod to simulate the track retaining pins. The exhaust was also detailed, first with a basecoat of Non-buffing Metalizer Gunmetal followed by a light 90/10 wash of Rust and then dry brushed with Burnt Umber. I attempted to use the kit supplied steel wire to install the towing cables but the mount hooks proved too fragile to handle the wires tension as the steel wire is very springy and difficult to form. I replaced the lost hooks with bent brass rod and after looking at several field photos of the Dicker Max in action, elected to leave the cables off entirely. The tracks provided in the kit are handed Magic individual links molded in two different colors to make it easier to tell them apart and I assembled these in sections of 5 links, joining the sections together and using metal rulers to keep the run straight. The left side required 102 links while the right side needed 103 and the ability to adjust the idler arm as needed proved very handy. The tracks were painted with Non-buffing Metalizer Gunmetal, dry brushed with Steel, then given successive washes of 90/10 Rust and Burnt Umber. The tracks were then installed while still semi-workable as the glue hadnt fully set yet and some slight sag introduced using toothpicks to hold them down on the return rollers and left to set up over night. The sprockets and idlers were glued into position to finalize the installation. The entire vehicle was sealed with Future and the decal markings applied for the 1941 vehicle. I used Walthers Solvaset to get the decals to snug down cleanly and then applied a second coat of Future to seal everything prior to weathering. I used the dot method to apply successive filters of Raw Umber, Raw Sienna, and the 80/20 Lightened Gray. Small dots of paint were applied with a spotter brush and then a thinner dampened sable brush used to pull the dots downward and blend into each other. An additional pin wash of Burnt Umber was applied to the raised detail and weld seams and adjusted as needed. For the tracks and suspension, I mixed up a combination of Mig Russian Earth, Rubble Dust, African Earth, and Europe Dust and, mixed in ordinary water, applied wet to the lower hull and running gear and allowed to air dry. The same mix but heavily thinned down with water was also applied to the superstructure and hull and interior surfaces to provide a dust coat. The applications were then adjusted using stiff bristled brushes to remove the excess and both wet and dry q-tips where needed. A small amount of Steel was dry brushed onto the raised track faces and sprockets and followed with some black artist pastel to complete the overall finish.Conclusion
Overall the build was very enjoyable. The kit contains a lot of detail, particularly in the interior fighting compartment, and the engineering overall is of good quality with some fine tolerances to watch out for in the assembly steps. There are a few instances where the instruction order isnt always the best and the usual mislabeling of parts here and there does occur to keep you on your toes. The end result though is a nicely designed and detailed representation of the Max in its hey-day. A full Step-by-Step Build Log is also available via the Armorama forums.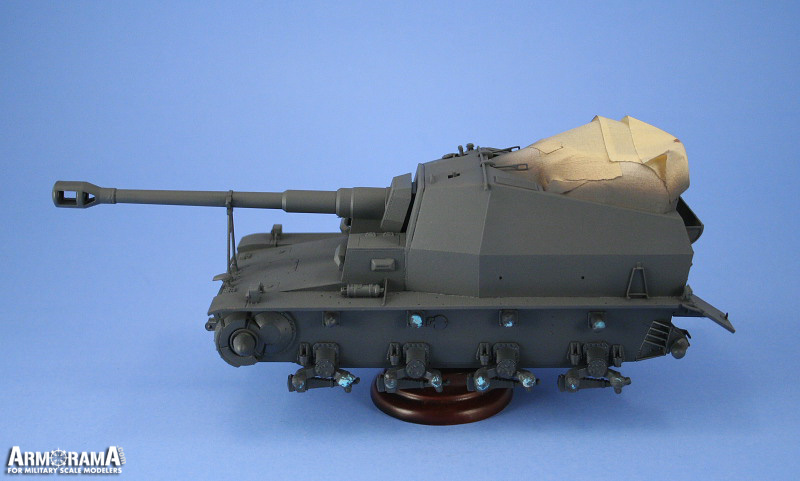

About the Author


FROM: TEXAS, UNITED STATES
Like many, I started out in the hobby as a kid building airplanes to hang from my bedroom cieling. I took a long break from the hobby, returning in 2001 with an interest in armor inspired mostly by online gaming. WW2 armor, 1/35 scale, is my preferred genre with a special taste for the stranger vehi...
Comments

Bill
Great job and thanks for the report. Went out and bought one for myself.
Can't wait to put it together.
SEP 05, 2007 - 07:48 AM


Hi Bill,
Excellent build, the finish is tops. Tis a shame the vehicle never caught on as its got great lines ........
cheers
Brent
SEP 05, 2007 - 01:55 PM

Hi Bill,
You really did a good job on the "Dicker Max" there.
The only thing that is off a bit is the story about the K.Pz.Sfl. IVa.
It was originally developed in 1939 by Krupp in the Grusonwerke in Magdeburg. The demands from the Wehrmacht where to design a vehicle with enough firepower to be able to destroy bunkers and penetrate armour (under a 30 degree angle) at long ranges (over 2 km's).
Krupp started to design two different vehicles, both based on the PzKpfW-IVA. The first would be equipped with the 10.5 cm schwere Feldhaubitze K 18 L/52 (which was conveniently produced by their neighbours) and the other with a 12.8 cm gun.
Because the 10.5 cm gun was produced next door and it was easier to install, Krupp settled for the K-18.
Eventually 2 vehicles where produced as prototypes (even though Hitler wanted to start serial production right away) and where sent to the 521st Panzerjäger Detachment for a proposed attack on Gibraltar. When this never eventuated, they were transferred to the 3rd Panzer Division and saw combat on the Eastern Front in 1941.
Eventually one prototype was captured by the Russians after it got hit. The hit caused a fire, resulting in the ammo to ignite rendering the vehicle useless.
The second vehicle was then sent back to the Grusonwerke in Magdeburg to be refitted as a normal PzKpfW-IV.
The serial production of the "Dicker-Max" never started because the Germans decided to build the Nashorn instead. That vehicle could be produced a lot faster, but also packed less of a punch. Looking in hindsight, serial-production of the "Dicker-Max" could have proven to be more useful since it's 10.5 cm gun would even have been lethal for the later JS-2 tanks.
Greetz Recce
OCT 25, 2007 - 07:04 AM


Recce,
Thanks for the additional information on the history of the Max.
Kevin,
Thanks as well for your comments.
OCT 25, 2007 - 09:25 AM
Copyright ©2021 by Bill Plunk. Images and/or videos also by copyright holder unless otherwise noted. The views and opinions expressed herein are solely the views and opinions of the authors and/or contributors to this Web site and do not necessarily represent the views and/or opinions of Armorama, KitMaker Network, or Silver Star Enterrpises. All rights reserved. Originally published on: 2007-05-20 00:00:00. Unique Reads: 38303

WEB HOSTING BY


Copyright ©2021 Armorama and Kitmaker Network, a subsidiary of Silver Star Enterprises
All Rights Reserved. Please read our Conditions of Use and Privacy Policy.
All Rights Reserved. Please read our Conditions of Use and Privacy Policy.