

1⁄35Return of the Tiger
18
Comments

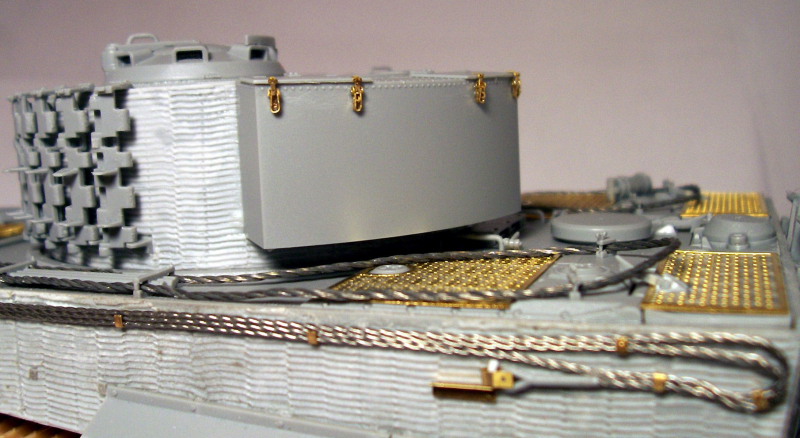
Upper Hull
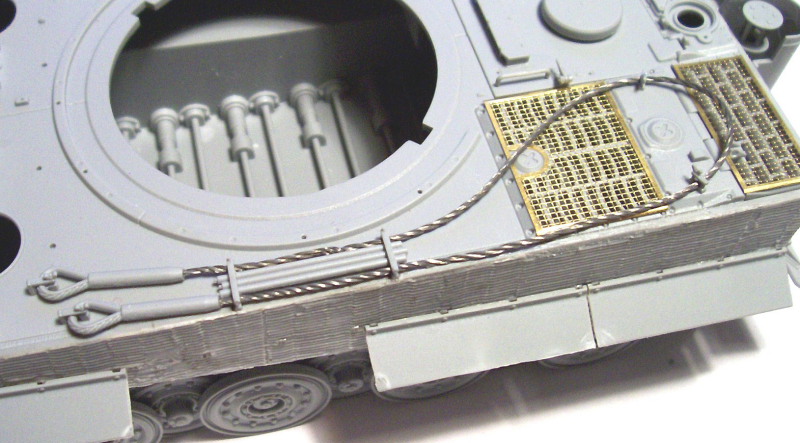
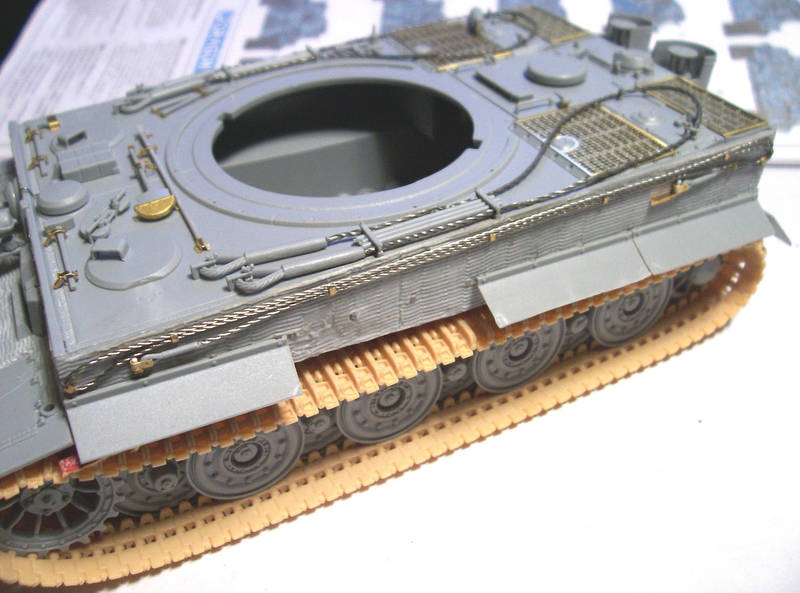
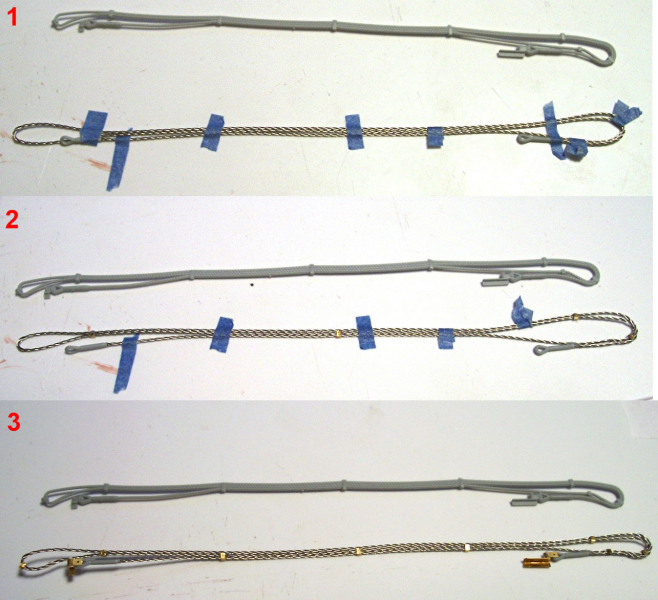
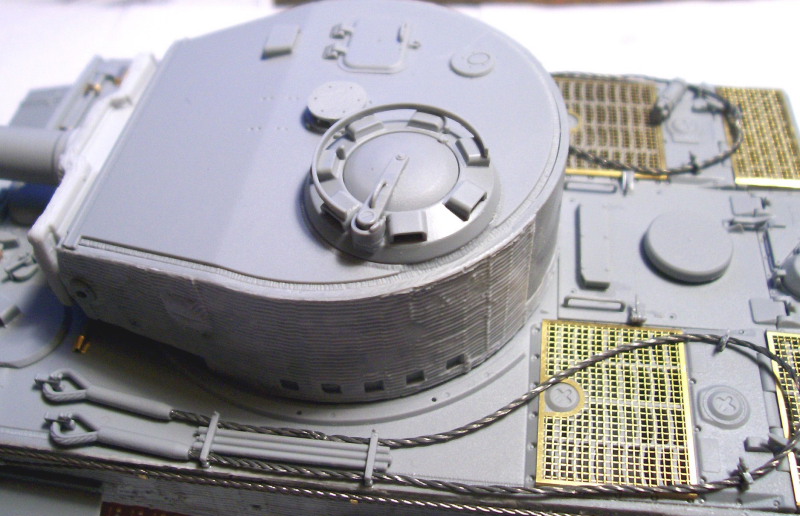
Back to the main deck details! I began with the Bosch light which is straight forward and includes the use of a nice piece of pre-bent wire for it. I did have to shorten mine a little for it to fit however. Then I moved on to the engine deck and once again decided to jump around on the instructions to get everything installed. Step 9 calls for the tow cables to be assembled and attached yet the instructions don't call for the metal grills until step 12. This seemed like it may be difficult to do after the cables were in place, so I went ahead and added all the details including the grills and then proceeded with the tow cables' installation. When it came to the on vehicle equipment, the choice of tools with molded on clasps or ones without and PE clasps needed to be made. While the plastic ones are not bad, the PE ones are obviously better and these are what I went with. There is a nice little jig included on sprue TA for bending the clasps which really helps things move along. One thing to point out, if using the PE clasps it calls for you to use the replacement pry bar TA2 without molded on clasps instead of K2 but TA2 is too short, so I just cleaned the clasps off the original piece and used it with the PE items. All that remained to do before moving onto the turret was the hatches and the track cables on the left side of the hull. There was no problem with the hatches and the detail is nicely done on the inside should you choose to display them open. The track cables come with two choices, either a plastic molded set or a wire and PE one. I decided to give the wire ones a go, reserving the option to revert to the plastic ones should it prove too troublesome. I figured out a way to use the wire items that worked quite well and I liked the outcome. Using the plastic set as a guide, I laid the wire down on a sheet of plastic and taped it in place using thin strips at many intervals. Then, one by one, I glued the PE brackets in place, adding the pins which the end pieces hook onto. The results look quite nice if I do say so myself.Turret Construction
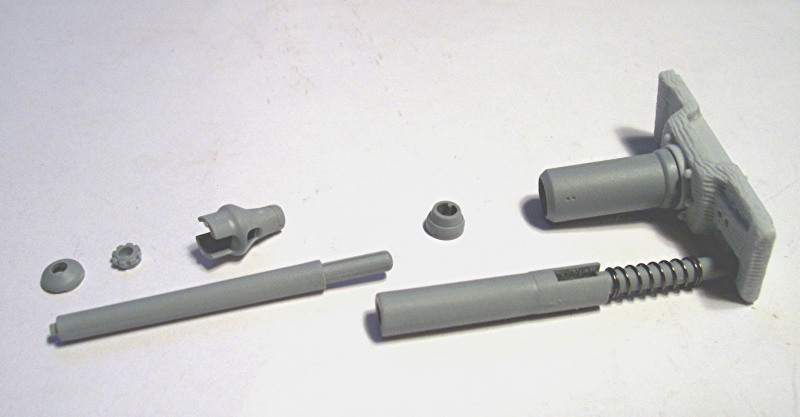
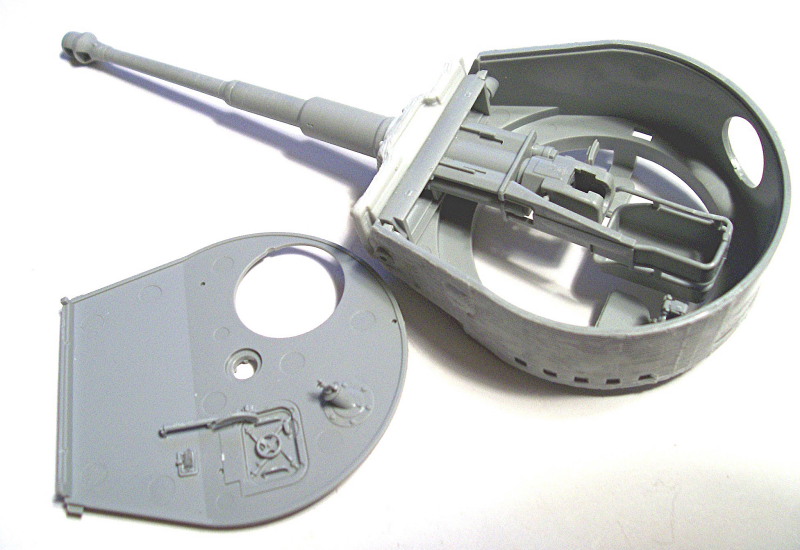
Moving on to the last phase of the build which was the turret, I began by applying the zimmerit and then went on to the barrel assembly. The barrel included in this kit is plastic and made up of multiple parts which clean up fairly easily and will look fine when done. Although I imagine a lot of people will still be a little disappointed with the lack of a metal one, the assembly went well. The only thing I had to do was sand down the "u" clip that holds the spring loaded barrel in place. It was a little tight when sandwiched between the two halves of the recuperator housing but easily remedied. Once the main gun and mantle were assembled, I continued on with the inside of the turret by adding the seats and hatch details. The commander's cupola was a straight forward affair with no problems and following that I installed the turret bin and escape hatch. The spare tracks and brackets were installed and the spare tracks themselves are two piece with the guide horns being separate and hollow. Lastly, it was time for me to tackle the dreaded turret bin latches. These are PE and very small and tedious and my gnarled hands are more suited to hammers and nails than these dainty little objects. I did manage to fumble my way through them and they ended up looking ok, but in the right hands could look awesome. I did elect however to leave off the padlocks as I thought the latches looked fine as they were. I wasn't prepared to risk messing them up but again, in the right hands, they could look great attached. With a final good looking over to make sure I had everything on, it was time to call the build part of this project done.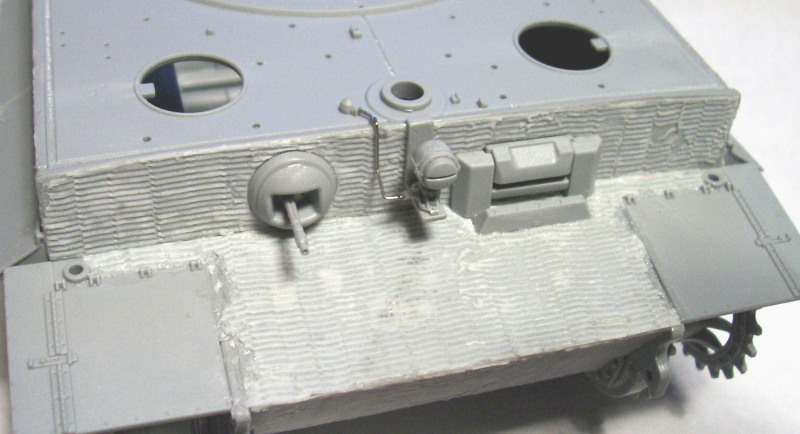


About the Author


FROM: TENNESSEE, UNITED STATES
My name is Ron and i began modeling in january of 2005 while off work with knee surgery i have always been interested in the military and 1/35 scale vehicles and armour are my main subjects, i will build just about any brand of kit there is as long as it interests me and i build for my own collectio...
Comments

Thanks guys i appreciate the comments Dave i agree the metal covers are nicer but like Rick as shown the plastic ones can be damaged too and normally im all about beating things up a bit but i was happy doing minimal damage on this one sorry for the late reply i have been at the beach for the past week heh.
Ron.
JUL 26, 2007 - 08:27 AM

Great Job on the Tiger. Ron.
Nice finish and all.
Have to look into this Shadowed Steel.
Now you say Model Master Amber for barrel is this correct?
Thanks
AUG 05, 2007 - 10:55 PM

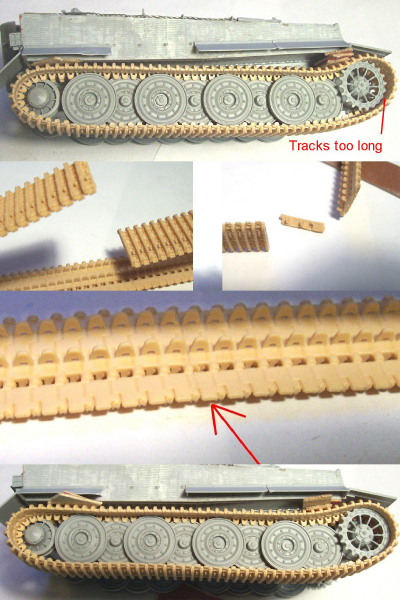
I'm so excited reading about your build. I just got my cavalier zim from the mail and I'm about to start my Tiger kit very soon and the timing of your article could not have been more perfect. My kit though is one of the first that came out so I have the separate track version.
good luck to both of us!
AUG 06, 2007 - 11:57 PM
Thanks Jeff, and to answer your question no "amber" is wrong it is supposed to be "insigia yellow" by modelmaster i do not know why i got those two mixed up like that thanks for pointing that out,. i wonder how much trouble it would be for Bill to change that
Thanks Noli, you will love the original release, right after this one i built another for a friend using the original release and it is awesome, there is lots of extra's, have fun and share with us if you can.
Ron.
AUG 07, 2007 - 11:14 AM

Thanks for the reply.
I need to redo mine that is why I asked.
Killer looking Tiger you have their.
AUG 13, 2007 - 10:22 PM

This has been very helpful to me as I build my Tiger I 3-in-1. Many thanks!
AUG 01, 2008 - 04:07 AM
You do us proud! The article, photos and your skills created a superb model. Well done!
AUG 01, 2008 - 04:35 AM

I am glad to see this thread got pulled back to the front. I looked at it again, and immediately went to my stash. I think I need to do one of these, sometime soon.
AUG 01, 2008 - 01:38 PM
Thanks guys for the nice comments im glad this article is still of use it was a wonderful kit to build and still one of my favourites
Ron.
AUG 08, 2008 - 09:19 AM
Copyright ©2021 by Ron Goins. Images and/or videos also by copyright holder unless otherwise noted. The views and opinions expressed herein are solely the views and opinions of the authors and/or contributors to this Web site and do not necessarily represent the views and/or opinions of Armorama, KitMaker Network, or Silver Star Enterrpises. All rights reserved. Originally published on: 2007-07-17 00:00:00. Unique Reads: 47259

WEB HOSTING BY


Copyright ©2021 Armorama and Kitmaker Network, a subsidiary of Silver Star Enterprises
All Rights Reserved. Please read our Conditions of Use and Privacy Policy.
All Rights Reserved. Please read our Conditions of Use and Privacy Policy.