

1⁄35Return of the Tiger
18
Comments
Introduction
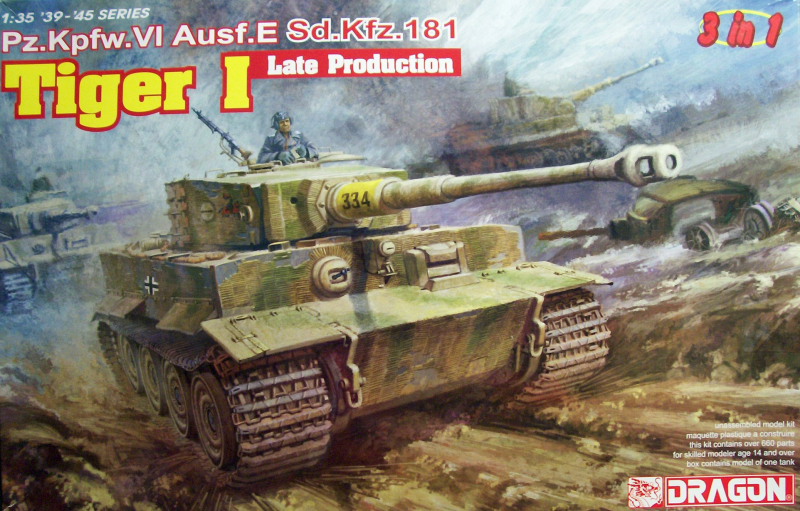
The Dragon Pz.Kpfw.VI Ausf.E Tiger 1 Late 3 in 1 kit #6253 is probably one of the most talked about kits since it was released. After its first and short lived production run, it has since been sought after by many who missed out on getting one the first time around. Dragon has re-released this kit as kit #6406 and not a moment too soon for some. The kit is basically the same as the previous release with only a few modifications, the primary changes being the inclusion of one piece DS (Dragon Styrene) tracks, lack of a metal barrel, and the absence of the assortment of extras that were included in the original release. For this project the build is straight OOB except for the addition of a Cavalier Zimmerit set which was made for the previous release kit but should work fine on this one too. The kit includes markings for six vehicles and I decided to go with the 1./s.Pz.Abt.505 Tiger at Nowe Koszary in 1944. This features the charging knight emblem and, although the instructions call for green over dark yellow base paint scheme, I will be doing a red-brown over a dark yellow base camouflage scheme.Lower Hull and Suspension
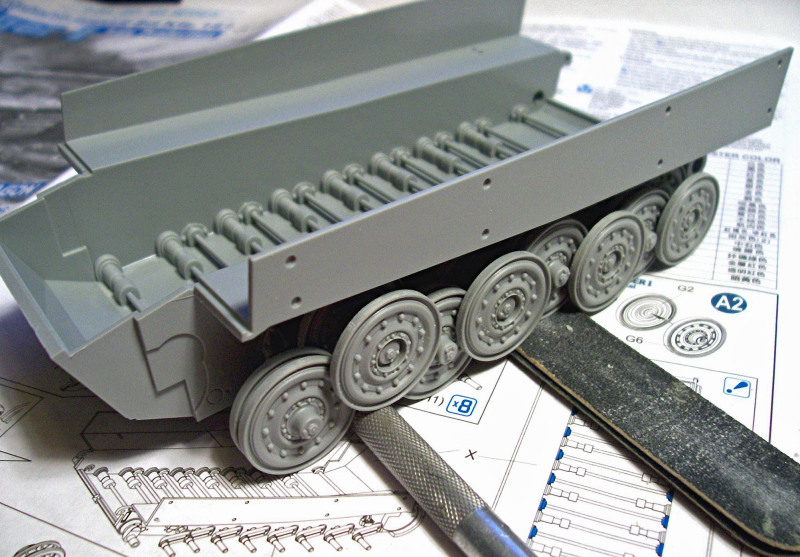
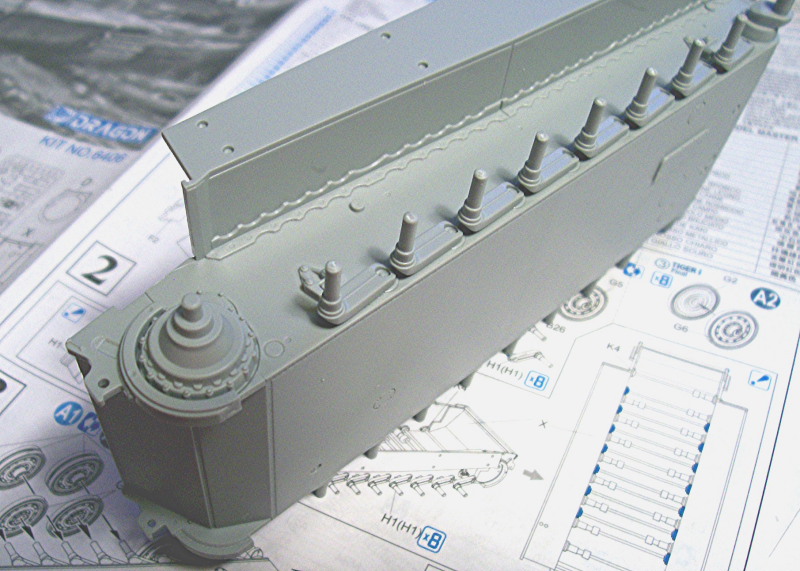
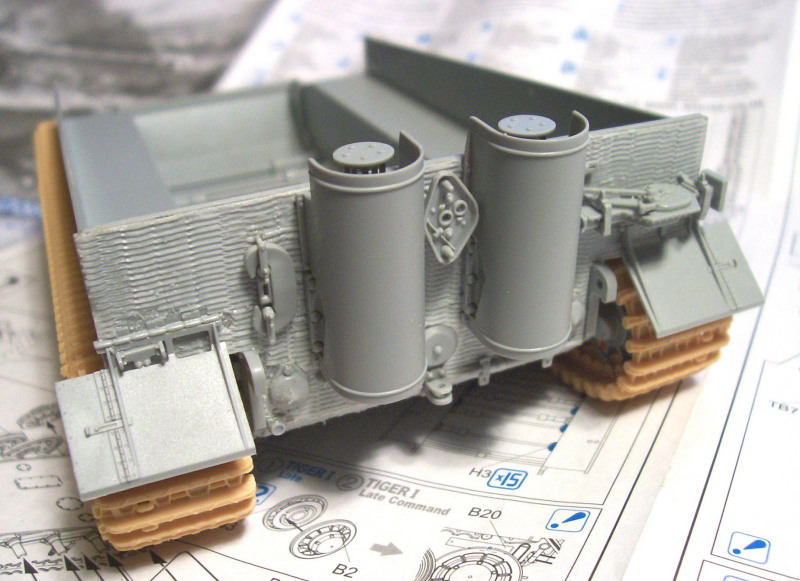
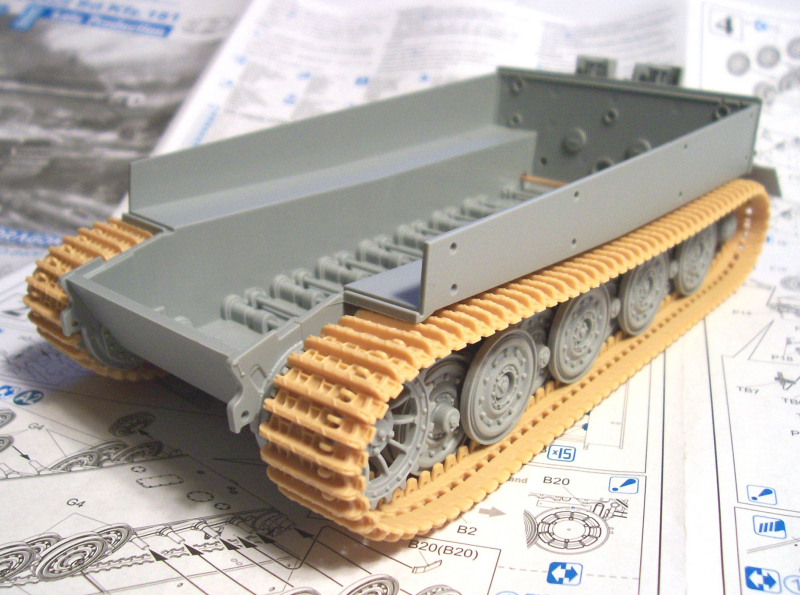
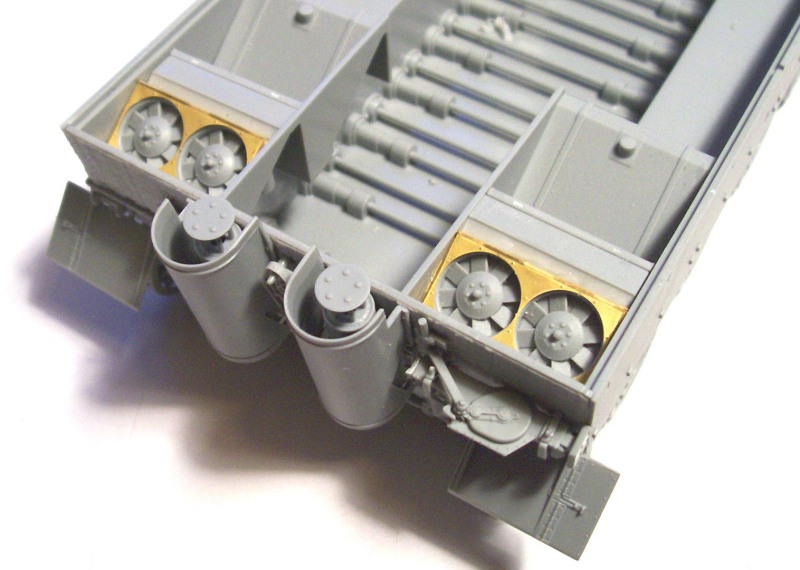
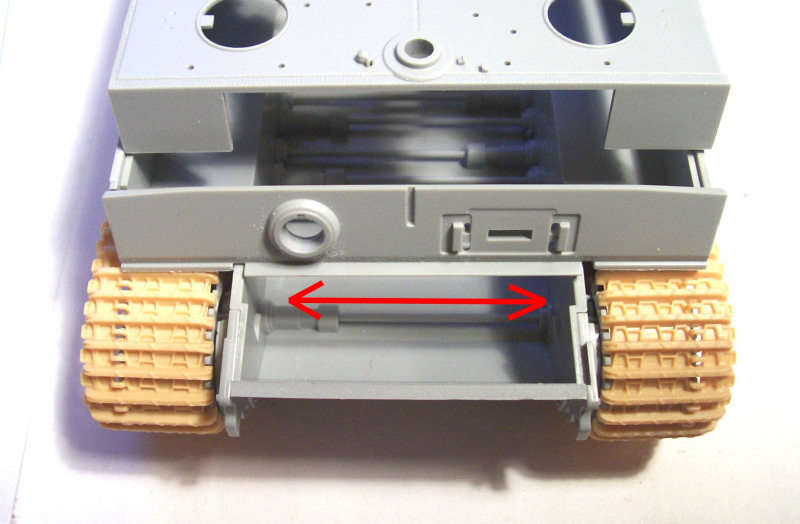
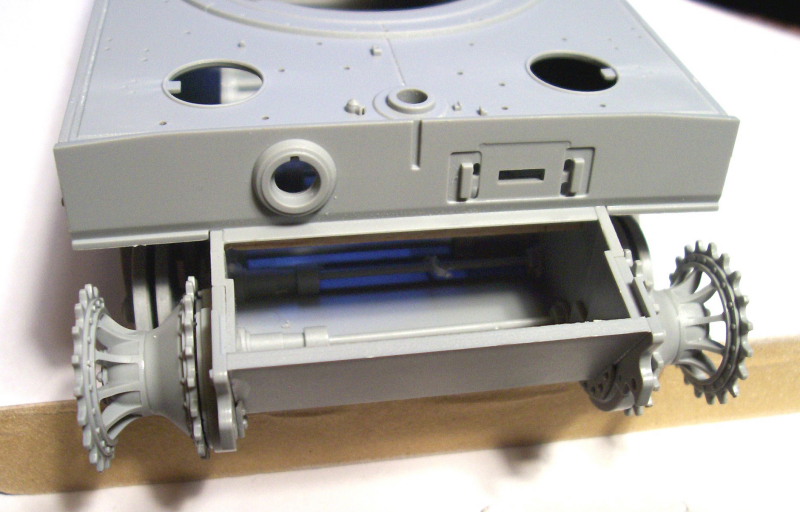
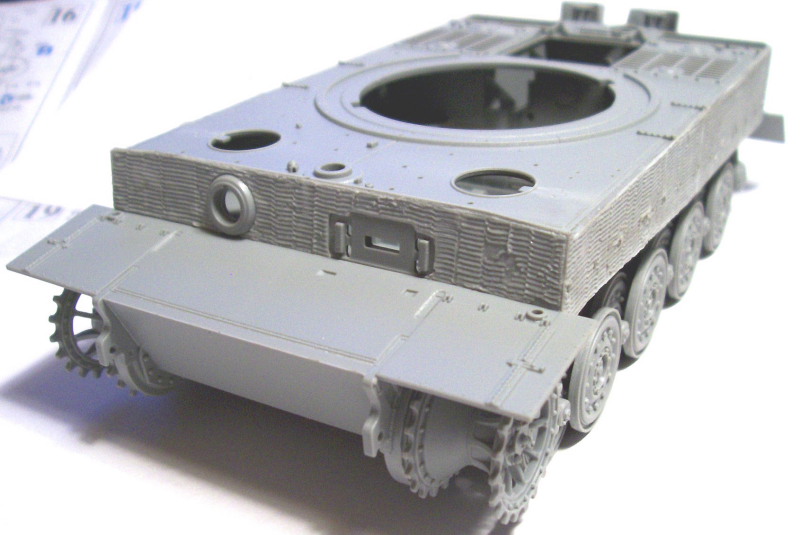
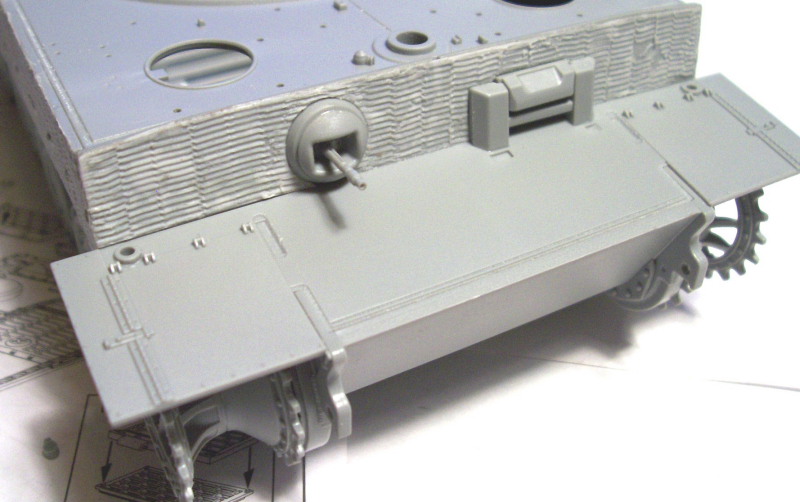
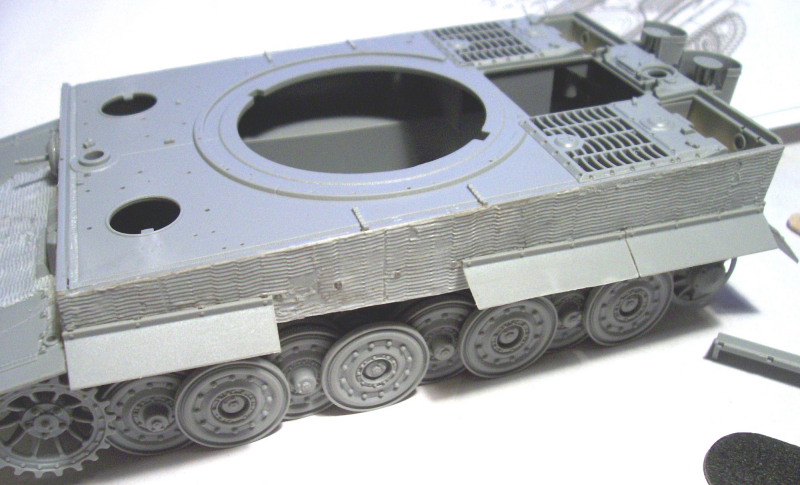
I began my build with the cleaning and assembly of all the road wheels. There are two different types with a choice of building the "Late" and "Late command" which share one type or the "Final" had to be made here as part of the 3-in-1 decision approach. The clean-up went very quickly, just a quick swipe with the knife and they were done so I was able to move right along onto the lower hull and the assembly of the torsion bar suspension. This is designed to be a "working" affair for those who wish to portray their model in a diorama setting. The design is very simple yet beautifully done I must say, even though I personally am not going to use this feature, I was still quite impressed by it all. Next up was the idler wheel and drive sprockets. There are two choices for the idler wheel, the larger one (parts B3 and B2) or the smaller one (parts G8 and G7), so be sure to go with the smaller one as this is the correct one. The idlers were left loose until the final fitting of the tracks which turned out to be too long. I ended up having to remove one link but they could have stood removing two links safely to achieve the right fit. To perform the surgery, I did a straight cut and removal of a single link and using regular liquid cement re-glued the tracks which held together nicely and resolved the issue. All that remained for the completion of steps 1 through 4 was the installation of the rear hull plate. Before I added it, I went ahead and applied the zimmerit which i did slightly different than usual. Instead of removing the details on the rear plate,I removed the details from the resin zimmerit because the kit details looked better to me. At the same time, I also added a little more damage to the zimmerit using my exacto knife and just scraping some of the resin away around details and along the edges. Moving on to steps 5 and 6, I finished up the rear plate by adding the exhausts, mud flaps and tools, checking the instructions carefully to insure I installed the right configuration for this variant vs. the others. One of the most obvious differences to note is which side the jack mounts to, for the "Late" and "Final" it will be on the right and on the "Late command" it's on the left. The jack itself is quite a piece of work being made up of no less than nine parts counting the two mounting brackets and looks superb when done. The exhausts fit very nicely also and with this completed, I added the zimmerit to the narrow angled section below the main plate thus finishing up the lower hull. This cleared the way for me to go ahead and attach the wheels and add the tracks before moving on to the upper hull. Work on the upper hull began with building and installing the engine fans . These are very well done but I doubt they will be seen enough to be really appreciated when the grills are put in place. With that done, I intended to move on to the side plates and from there I wanted to get the front plates attached so I could proceed with the zimmerit before tackling all the details. I immediately ran into problems with this plan however. When attaching the sides, there are eight location points but they would not line up with each other so i had to shave the front four off in order to set the plates correctly. After the sides went on, I attempted to dry fit the front plate and noticed the front section of the tub was warped inward very badly. This prevented the deck from fitting without someway of straightening the tub out. To solve this, I used a wooden strut glued between the tub lower walls to straighten it out, after which everything else went together as intended and I was able to continue. With the hull constructed, I went ahead and assembled the hull MG and the driver's vision slit. The MG consists of ten parts if you count the ball mount assembly and is very well detailed but, once again, little can be seen of this in the finished model even with the hatches open. I then finished applying the zimmerit to the front and sides. There was just one more thing I wanted to add before getting back on track with the instructions and that was the side fenders. These are molded in one continuous piece and lack character in my opinion. I shaved off the supports on the back side and cut them into separate fenders then sanded the backs to thin them out, replacing the supports using plastic card before attaching them to the model. I also left a couple off for visual effect.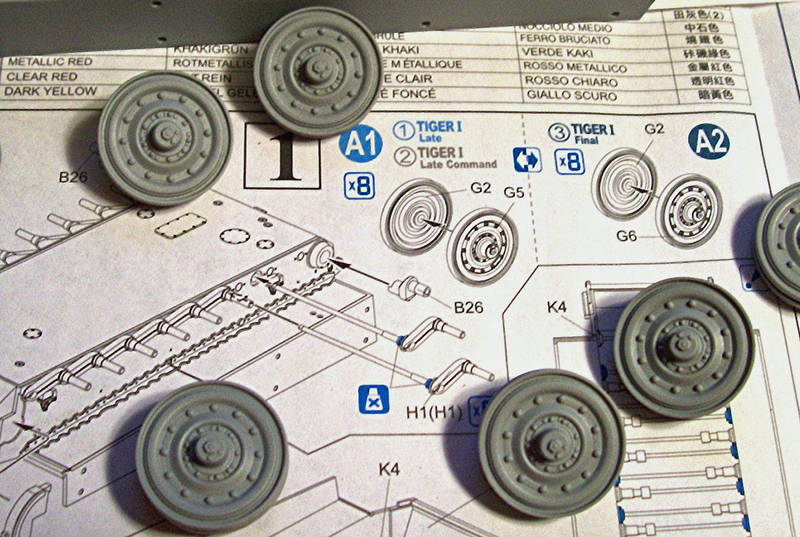

About the Author


FROM: TENNESSEE, UNITED STATES
My name is Ron and i began modeling in january of 2005 while off work with knee surgery i have always been interested in the military and 1/35 scale vehicles and armour are my main subjects, i will build just about any brand of kit there is as long as it interests me and i build for my own collectio...
Comments

Thanks guys i appreciate the comments Dave i agree the metal covers are nicer but like Rick as shown the plastic ones can be damaged too and normally im all about beating things up a bit but i was happy doing minimal damage on this one sorry for the late reply i have been at the beach for the past week heh.
Ron.
JUL 26, 2007 - 08:27 AM

Great Job on the Tiger. Ron.
Nice finish and all.
Have to look into this Shadowed Steel.
Now you say Model Master Amber for barrel is this correct?
Thanks
AUG 05, 2007 - 10:55 PM

I'm so excited reading about your build. I just got my cavalier zim from the mail and I'm about to start my Tiger kit very soon and the timing of your article could not have been more perfect. My kit though is one of the first that came out so I have the separate track version.
good luck to both of us!
AUG 06, 2007 - 11:57 PM
Thanks Jeff, and to answer your question no "amber" is wrong it is supposed to be "insigia yellow" by modelmaster i do not know why i got those two mixed up like that thanks for pointing that out,. i wonder how much trouble it would be for Bill to change that
Thanks Noli, you will love the original release, right after this one i built another for a friend using the original release and it is awesome, there is lots of extra's, have fun and share with us if you can.
Ron.
AUG 07, 2007 - 11:14 AM

Thanks for the reply.
I need to redo mine that is why I asked.
Killer looking Tiger you have their.
AUG 13, 2007 - 10:22 PM

This has been very helpful to me as I build my Tiger I 3-in-1. Many thanks!
AUG 01, 2008 - 04:07 AM
You do us proud! The article, photos and your skills created a superb model. Well done!
AUG 01, 2008 - 04:35 AM

I am glad to see this thread got pulled back to the front. I looked at it again, and immediately went to my stash. I think I need to do one of these, sometime soon.
AUG 01, 2008 - 01:38 PM
Thanks guys for the nice comments im glad this article is still of use it was a wonderful kit to build and still one of my favourites
Ron.
AUG 08, 2008 - 09:19 AM
Copyright ©2021 by Ron Goins. Images and/or videos also by copyright holder unless otherwise noted. The views and opinions expressed herein are solely the views and opinions of the authors and/or contributors to this Web site and do not necessarily represent the views and/or opinions of Armorama, KitMaker Network, or Silver Star Enterrpises. All rights reserved. Originally published on: 2007-07-17 00:00:00. Unique Reads: 47255

WEB HOSTING BY


Copyright ©2021 Armorama and Kitmaker Network, a subsidiary of Silver Star Enterprises
All Rights Reserved. Please read our Conditions of Use and Privacy Policy.
All Rights Reserved. Please read our Conditions of Use and Privacy Policy.