

1⁄35Post-War Finnish T-34/85
8
Comments
Painting & decals
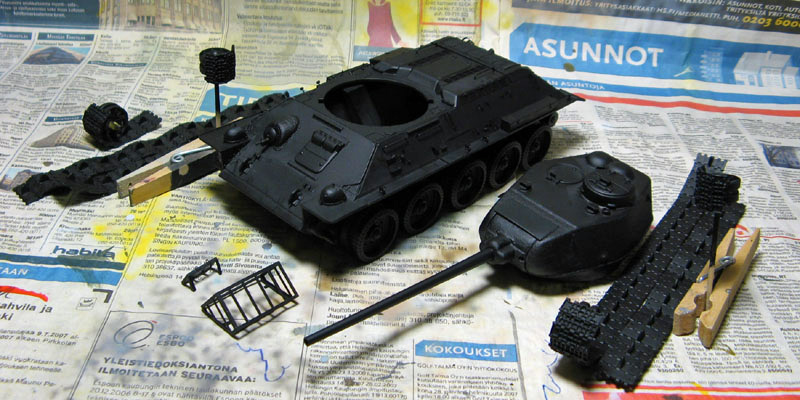
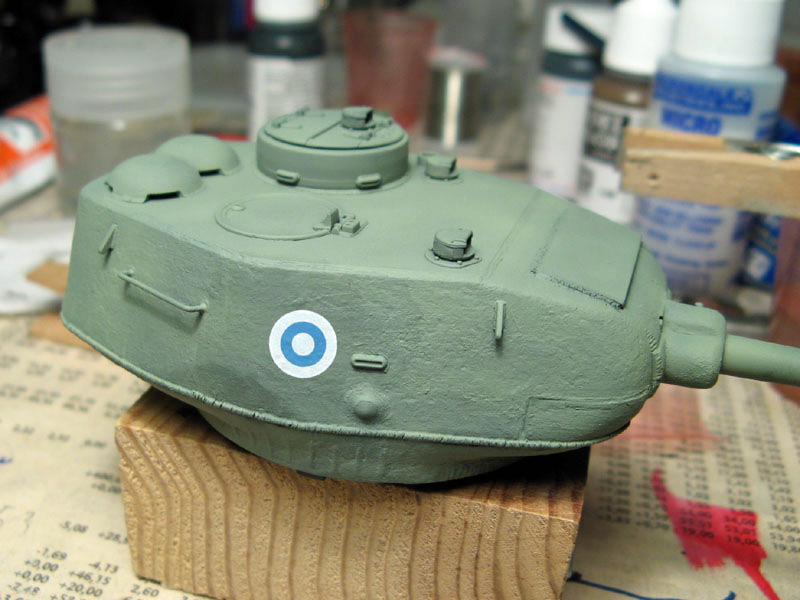
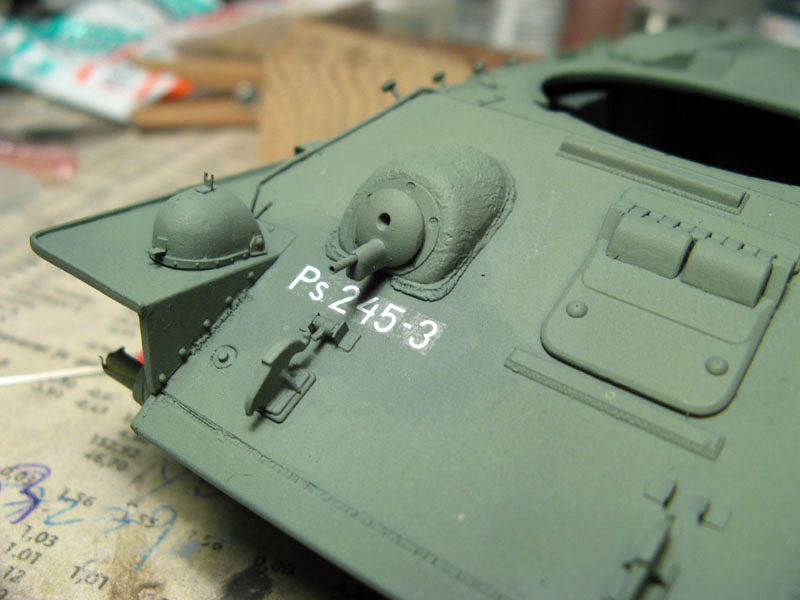
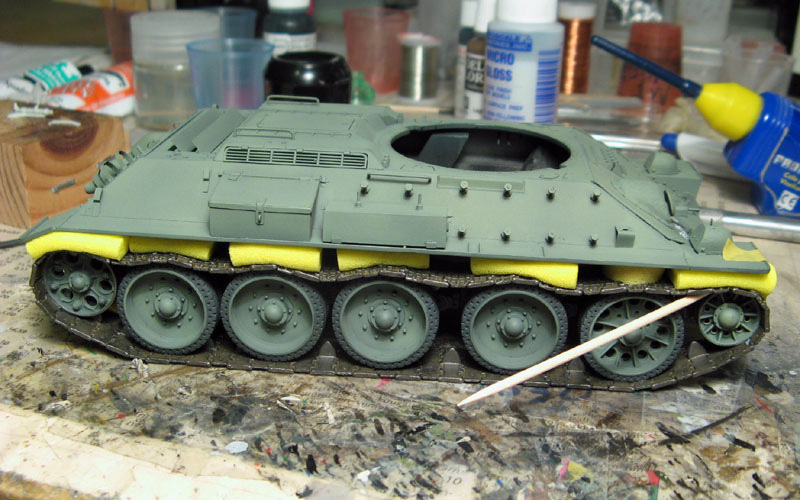
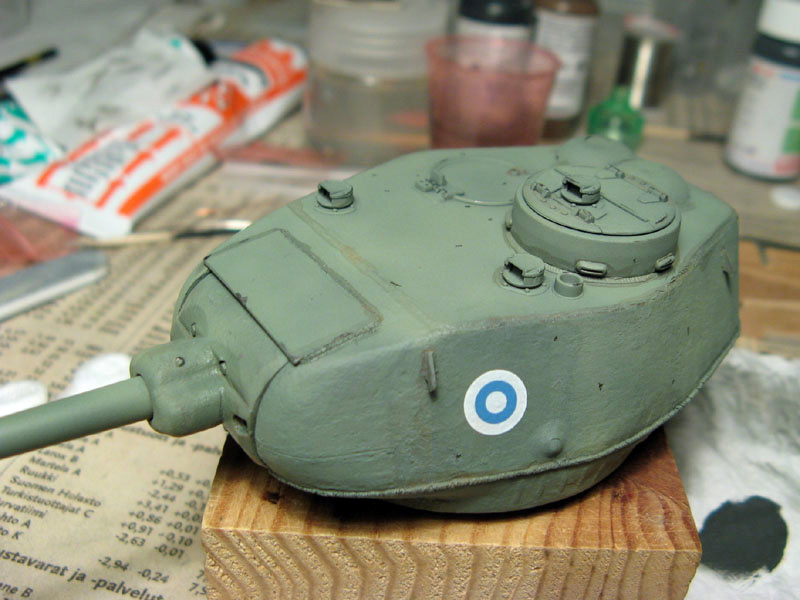
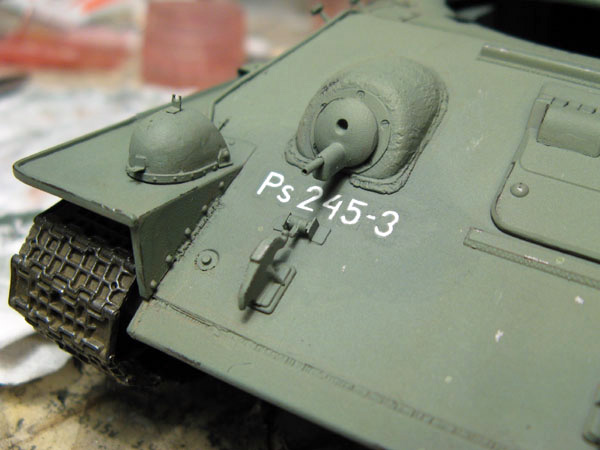
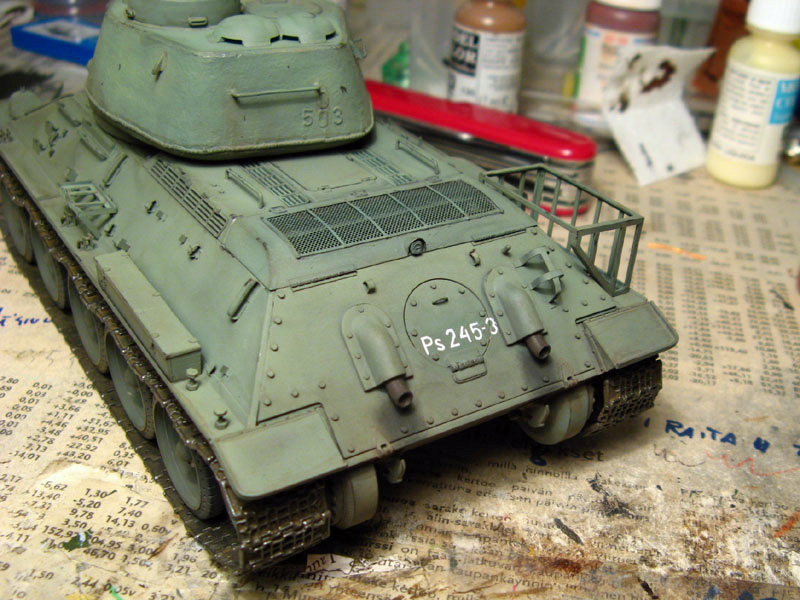
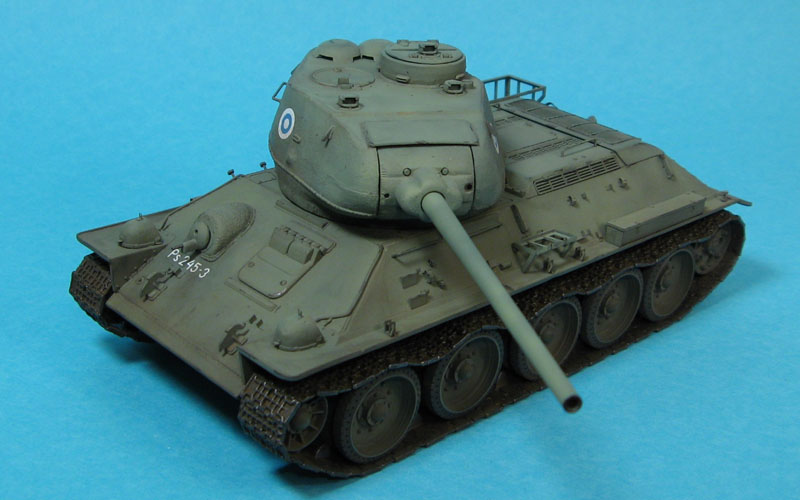
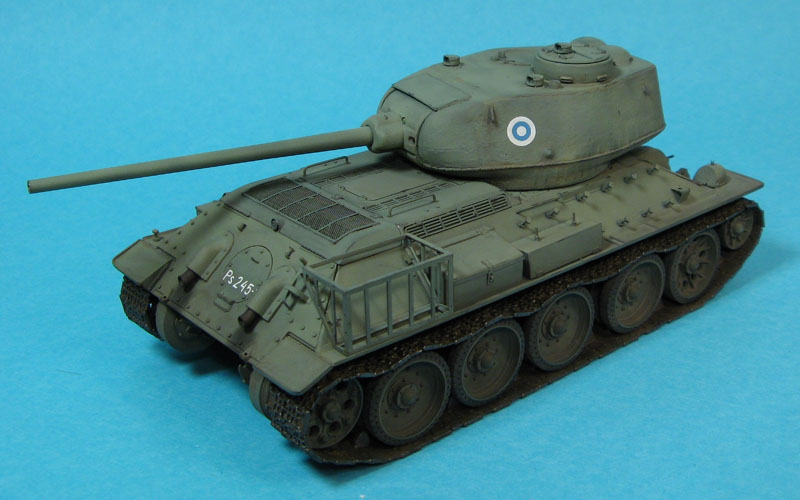
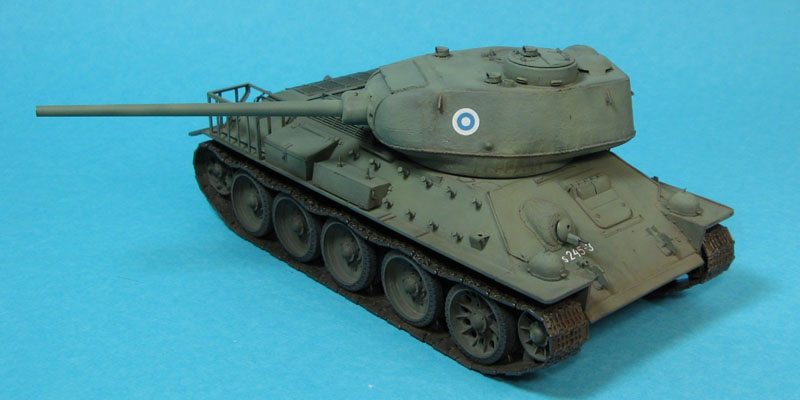
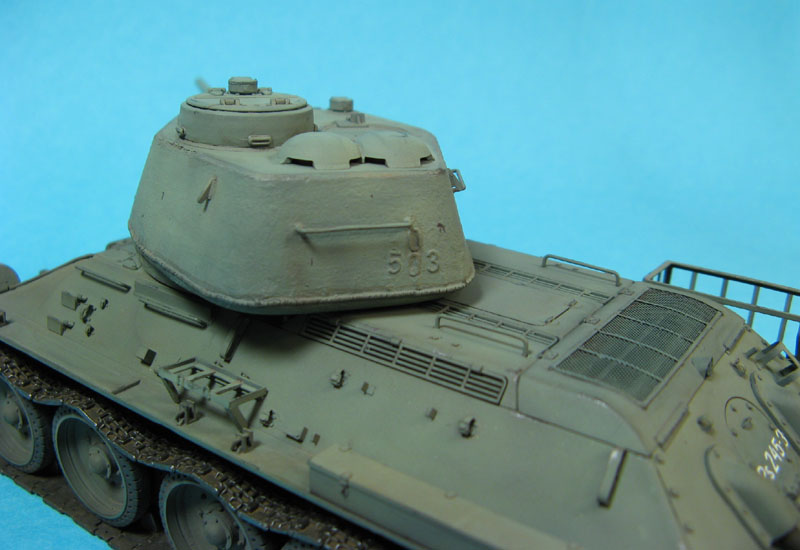
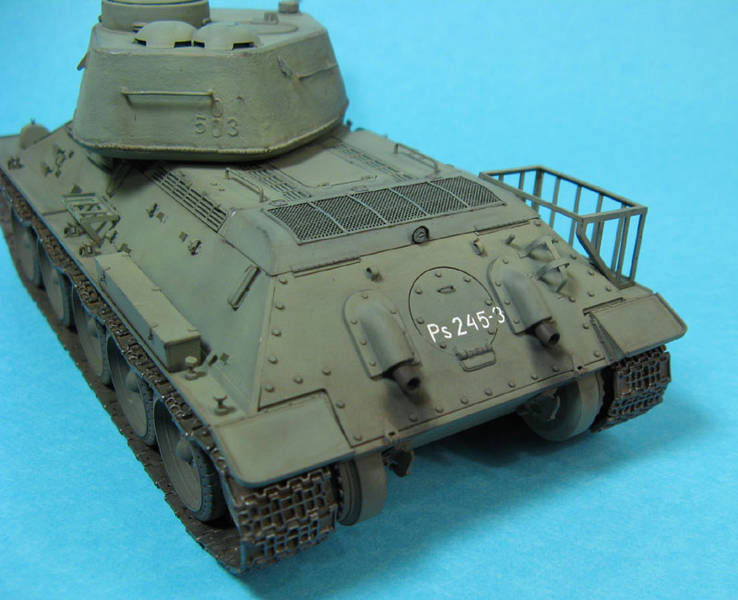
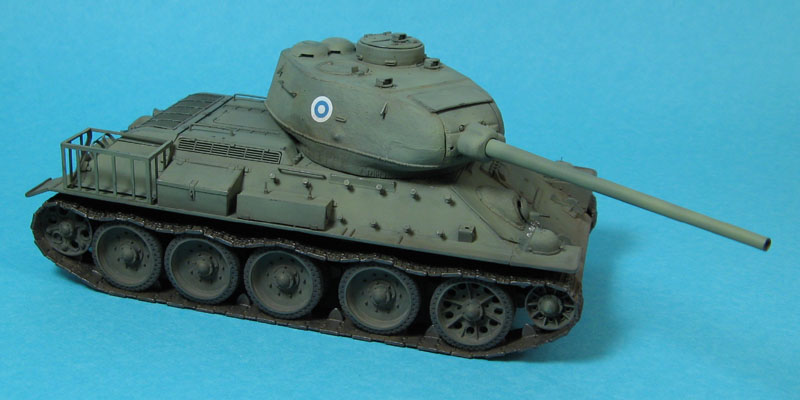
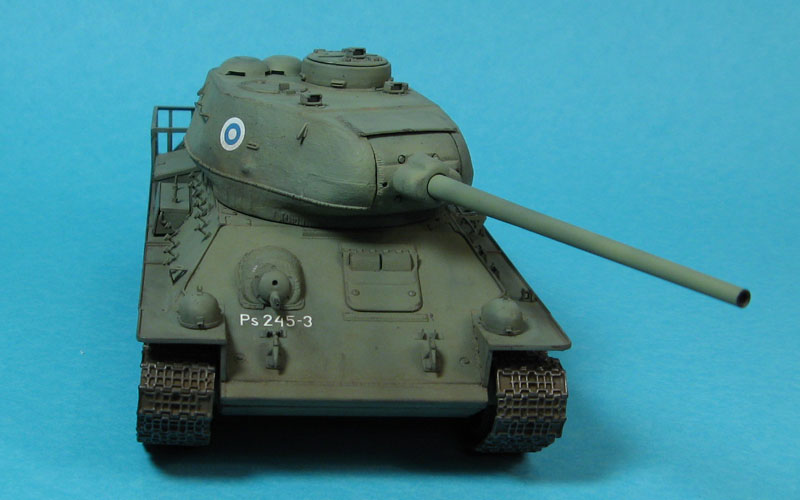
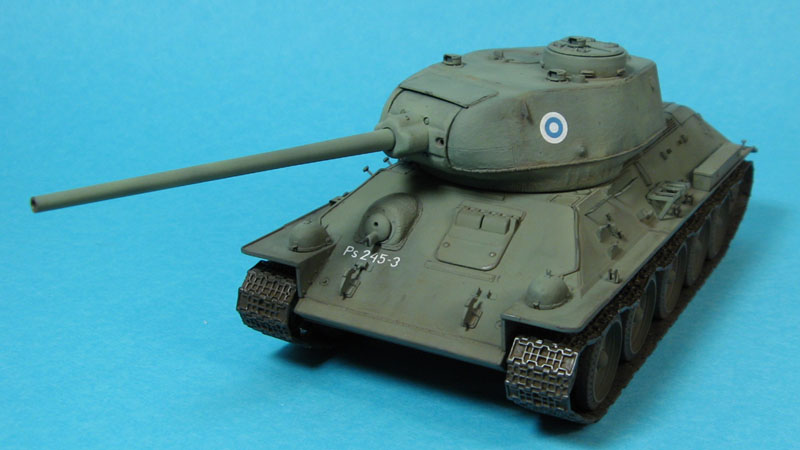
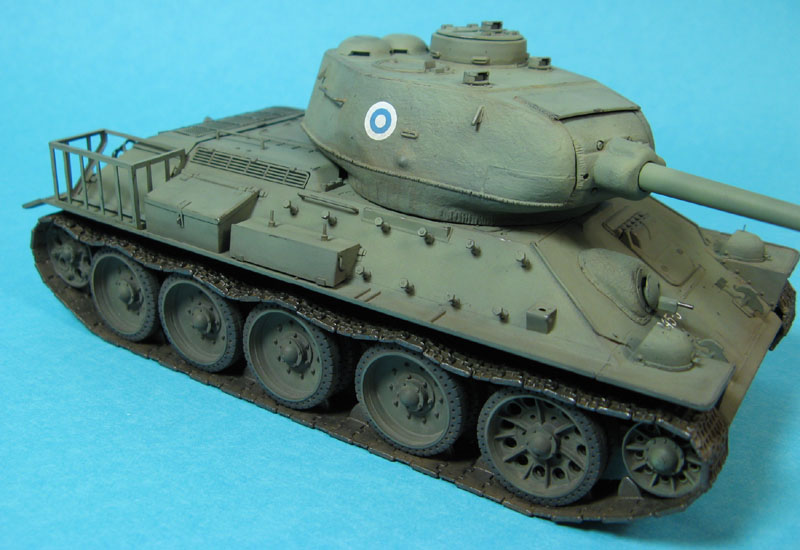
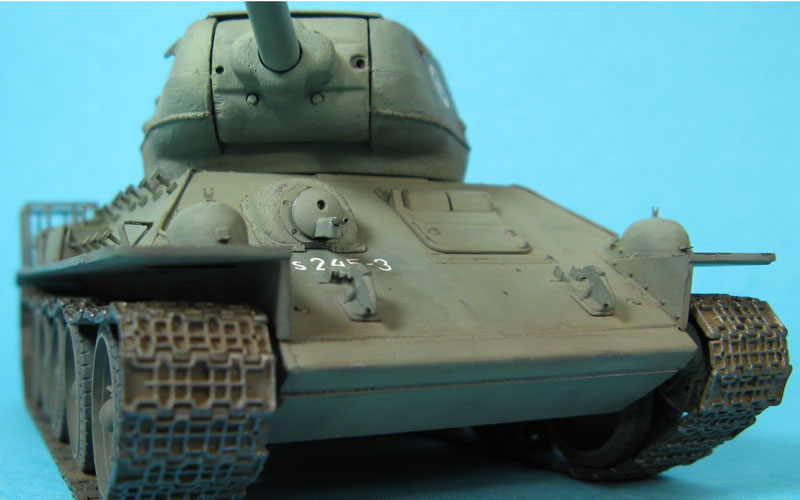
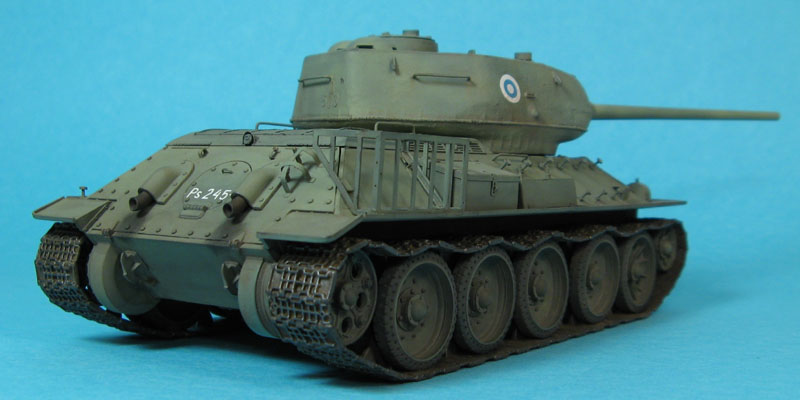
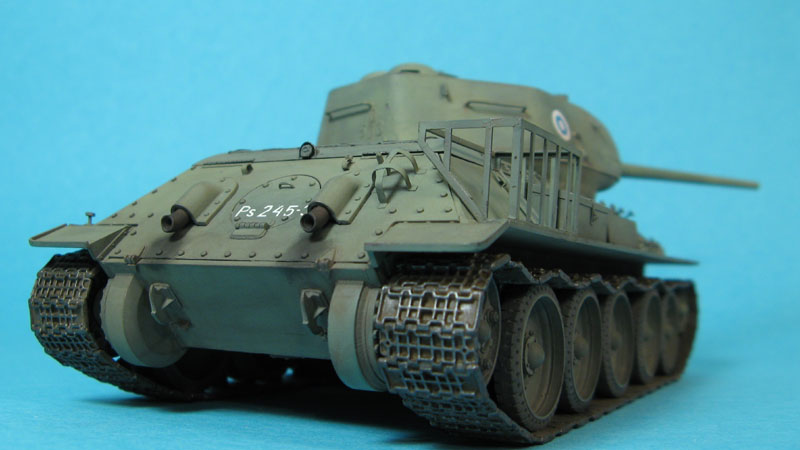
Now came the fun part, trying to determine a suitable color for the tank. Wartime colors are well documented as is the field green adopted in 1959. But the green armor exterior color adopted after the war ended and used until 1959 is an informational black hole. No documentation of the color has been discovered yet as I was told on IPMS Finlands forum. The only thing known is that museum vehicles are all painted in more or less inaccurate colors. With no better references, I decided to use my primary reference as the guideline for the color to come. After looking around my paint selection, I settled on Xtracrylics British interior green. While the color was quite light straight from the bottle, using a black primer and making the first coats with paint mixed with black would hold back the lightness. After an overall black primer coat, I kicked off the painting stage by laying down the first coat of green darkened with black. A word of announcement: The following photos onwards from the painting stage show quite an array of colors, because the pics where taken at two different spots with different lights, and while testing out different camera settings to get the colors reproduced as realistically as possible. After the first green coat, I brushed a thin black wash (lifecolors oil weathering fluid, straight from the bottle, I know, Im lazy ) to corners, recesses and other details I wanted to accent. When that was dry, I mixed a still darkened but lighter green and sprayed it over everything, trying to keep the wash-treated spots darker. The mix could have been even lighter, thinking about it later, but that didnt matter much, because after that I sprayed on pure interior green, misting it on to avoid a monotone look thats easy to end up with subjects wearing monochromatic camo schemes. With the green done, I jumped back to assembly for a moment and painted and mounted the tracks. I had put these together during the first building, making sure the ends would connect. Or so I recalled Having glued the idler wheels mounts in place, I had been forced to make the tracks a little saggier than I wanted because removing the minimum of two links resulted in a too short track. Dry-fitting the tracks now, the left side was OK, but the right was a couple of millimeters too short. But thanks to the upper lengths droopiness, I could put clamps on it, straightening them to gain length. With the ends meeting, I painted the tracks. Over the black primer, I applied a thickish dark brown wash, followed by dry-brushing with a dark metallic mixture. After that, I glued on the tracks using earplugs to keep the tracks in place over the wheels. After the glue had dried, I touched up the joints in the tracks with the same steps I used before (black, brown wash, metallic dry-brushing). To prepare for the decals, I brushed a couple of coats of Microscale'ss gloss where the decals would go. The registry numbers had to be assembled several cut-up decals, since the sheet didnt feature T-34/85s. Following my references, I cut off the periods from the codes and modified number 2s (I needed open styled, the ones in the sheet were ones with a looped top). Number 3s werent 100% right, but I left them as they were since I would have had to repaint them otherwise. The turret roundels went on perfectly, but the registry numbers on the hull proved troublesome. Apparently my gloss coat wasnt gloss enough for them and they silvered quite badly. Several applications of micro-sol helped a little though. When I sprayed a flat coat over the decals, the silvering looked even worse. With no way to remove the decals without destroying the paint job underneath, I bit the bullet and decided to paint over the silvering with a small brush. With an out-of-the-bottle color it would have been easy, but this one had several mixes sprayed over each other to create the look. Starting from a dark mixture of green and black (2:1 ratio), I lightened the mix one drop of green at a time, painting a sample from each step on a piece of cardboard. The mix started to look right at 5:1 ratio, to which I stopped. After waiting for the sample to dry, I compared it to the paint near the decals and decided it was close enough. With a small brush (5/0) I touched-up the silvering on the registry codes, making a few corrections at the same time as well, the most visible being the erased horizontal line extending behind number 4s, and the refined number 2s. With the silvering gone, I gave them a flat coat.Finishing & weathering
I kicked off the final phase by gluing the small separately painted storage box mount on the left fender and painted the hull machine gun. For the MG barrel, I used the same dark paint mixture as on the tracks. As this was built as a peacetime vehicle, I didnt apply tons of mud. I made it appear to have roamed the countryside, but not soaked-in. Two different shades of pigments were brushed on first and, after they looked quite stark and blotchy, I brushed the whole model with distilled water, taking care not to allow the pigments to run and pool in. The exhausts being still green from the previous stages, I first gave them a black wash of Lifecolors oil weathering fluid, basically a pre-thinned wash. After that two other washes followed, a dark and lighter brown one. The latter made it a little too light so toned down the color with another careful black wash. Ground up black pastel was used to blacken the exhausts and stain the hull right under the pipes. With weathering done, I slipped the fruit crate stowage rack in place and called it done.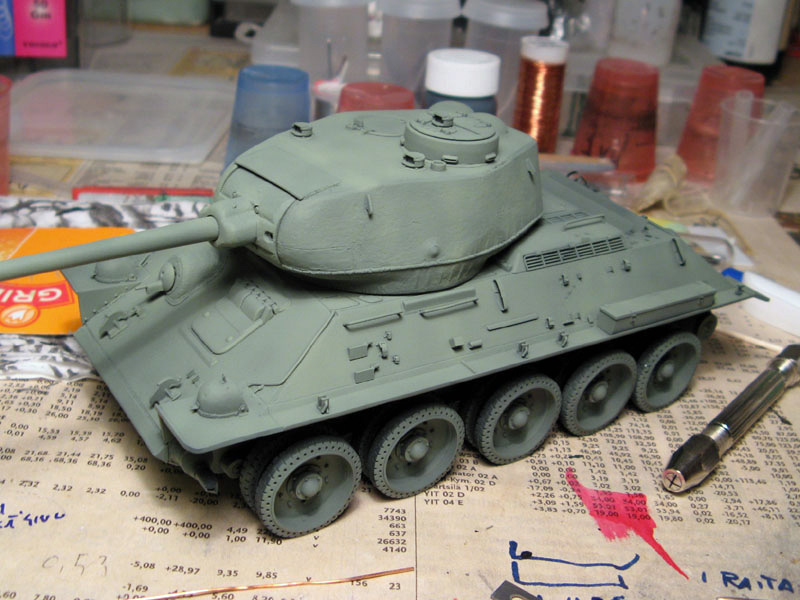


About the Author


Comments
Extremely nice and clean detail work! Also the painting and finishing is really nice (good tips for me, as I'm a "green armor builder" as well Thank you for this feature!
PS: I should have known all these details when it came to vote in the DMOM! Congratulations to that very nice piece of work again!
NOV 15, 2007 - 09:40 PM

I like the weathering it is very subtil!!!!!!!!!!!!!!1 Nice one!
I like also you scratch skill!
NOV 16, 2007 - 02:02 AM

Well done Eetu, great to see the article up after following this build closely.
Makes me ashamed to say I still havn't got my captured flak universal carrier article done!
Youv'e done a great job mate, well done!
James
NOV 16, 2007 - 02:10 AM
Eetu,
The model looks great! I have a love for the obscure and a soft spot for small armies. If you had done a little searching on this site, you may have saved yourself some time and work. My company, Decalcomaniacs! makes a decal sheet of everything you need to mark postwar Finnish AFV's. We also do a T-72 sheet with markings for T-72's. If you are still interested, stop by the website. Also, here's a link to Frank DeSisto's review: Time on Target. Hope that helps!
Regards,
Georg Eyerman
Decalcomaniacs!
NOV 16, 2007 - 03:20 AM


Thanks for the compliments.
^^ I've been aware of Decalcomaniacs making several sheets of Finnish armor decals, the problem has just been availability, and me being unable to make purchases from ebay, which seems to be the only place to buy them. Now when I got a visa electron from another bank where it actually works properly in online stores, I'll sure consider getting a sheet or two.
NOV 16, 2007 - 05:01 AM
Eetu, fantastic job on the T-34/85. I have been following your projectin the campagn tread. interesting the read the whole build in an article. Great project and fantastic details.
Thanks for sharing
NOV 16, 2007 - 10:45 PM
Eetu proves he's the man, especially when it comes to scratching the beast. You have my compliments under the campaign thread, yet again I congratulate you on a job very well done!
NOV 17, 2007 - 09:08 PM
Copyright ©2021 by Eetu Tahvonen. Images and/or videos also by copyright holder unless otherwise noted. The views and opinions expressed herein are solely the views and opinions of the authors and/or contributors to this Web site and do not necessarily represent the views and/or opinions of Armorama, KitMaker Network, or Silver Star Enterrpises. All rights reserved. Originally published on: 2007-11-16 00:00:00. Unique Reads: 22155

WEB HOSTING BY


Copyright ©2021 Armorama and Kitmaker Network, a subsidiary of Silver Star Enterprises
All Rights Reserved. Please read our Conditions of Use and Privacy Policy.
All Rights Reserved. Please read our Conditions of Use and Privacy Policy.