

1⁄35Scratchbuilt M1134 Stryker ATGM Variant
25
Comments
Stage 5
The extra armor were simulated using 15mm styrene sheet. I could have bought the Edwards PE version but then again...I did not feel that it was necessary for this build. Cutting the plastic sheet to fit the hull structure was simply done using the original AFV Club kits armor as a guide, when cutting the plastic sheet. I then used small styrene rods to space out the extra armor onto the hull. After that I continued to glue most of the original kit parts onto the extra plastic armor that I cut out. See pic 4
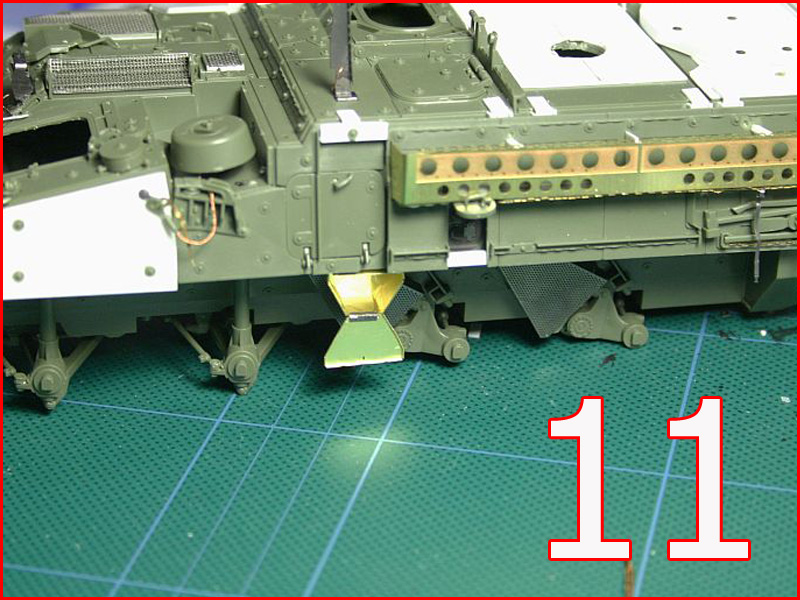
Stage 6
One thing I did use was the Trumpeters PE Storage bin part from the upgrade set that they introduced after the release of the Trumpeters ICV M1126 Stryker kit. As I wanted to have one of the storage bins opened I decided to use the ones from the upgrade set, which is a nicely done part. The storage bin also has a separate door and hinge PE part that makes the extra details worth the effort. See pic 11
Stage 7
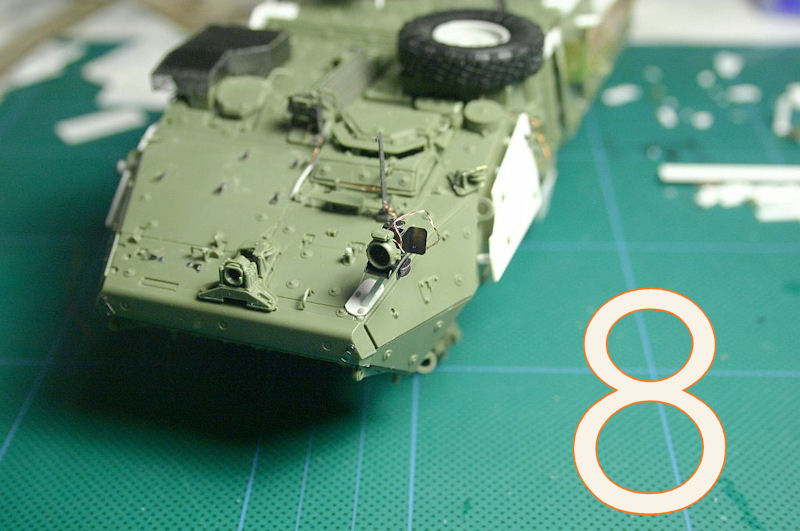
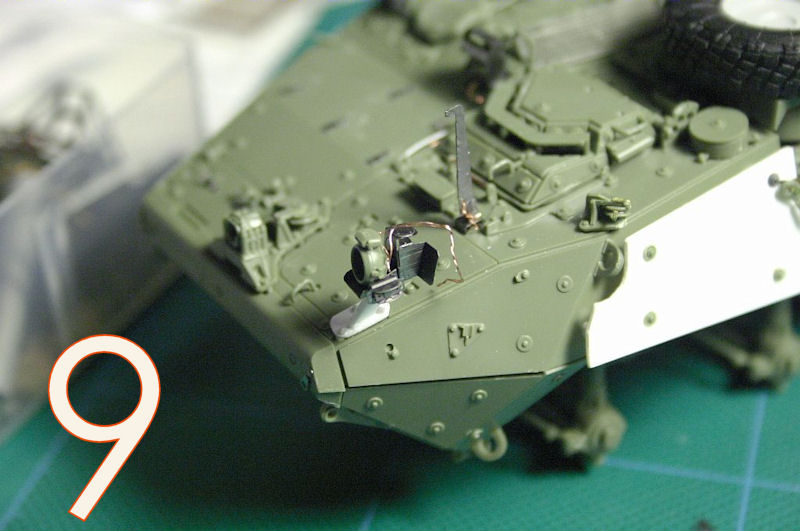
One of the things that I liked on the Strykers is the raised lights on the front hull which were added after the introduction of the Slat armor. The purpose is to increase the clearance for the light cluster that would have been blocked by the Slat if the lights were left in its original location.
I used square styrene rods and 0.5mm styrene sheet for the foot base. Here, I added PE parts from the Edwards upgrade Stryker kit. The parts included the light cluster components. I must admit that the PE upgrades from Edwards are very good and more accurate than the AFV Clubs own kit parts. But, the metal parts can be really irritating to glue together. Probably my bad luck
but after fitting the parts I was happy with the result. To make the cluster more interesting I added small cables to give it some life but unfortunately I saw that I should have made the wiring thicker than the 0.2mm brass wire I chose. I will not make that mistake on my next Stryker. See pic 7, 8, 9
Stage 8
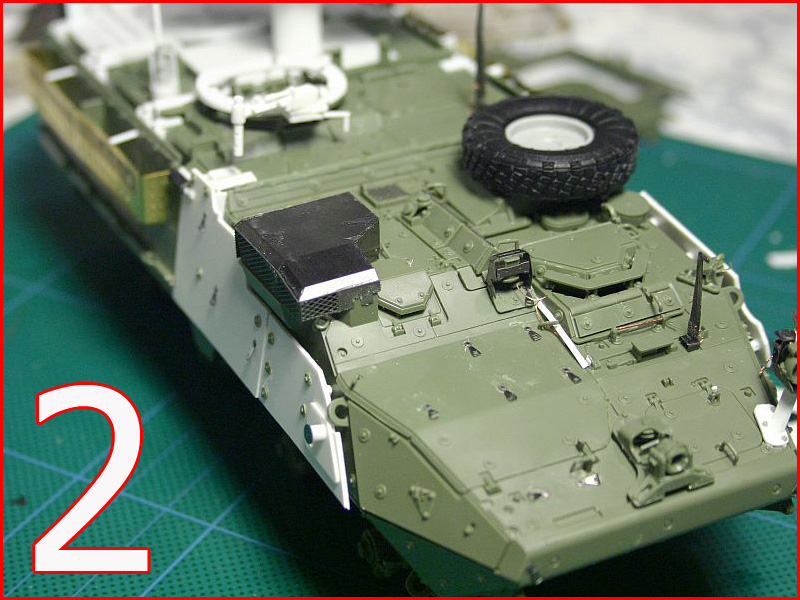
Another PE part I used from the Edward set was the Grill Deflector which is a brilliant addition to the strykers awesome rugged feature. The look of this beast with the Deflector is brutal and honestly, does it justice. The laser edges where you where suppose to fold the flaps to form the deflector went together like a charm. This particular Edwards PE part was a great addition to this build. The deflector was something well worth the purchase. See pic 2 & 4
Stage 9
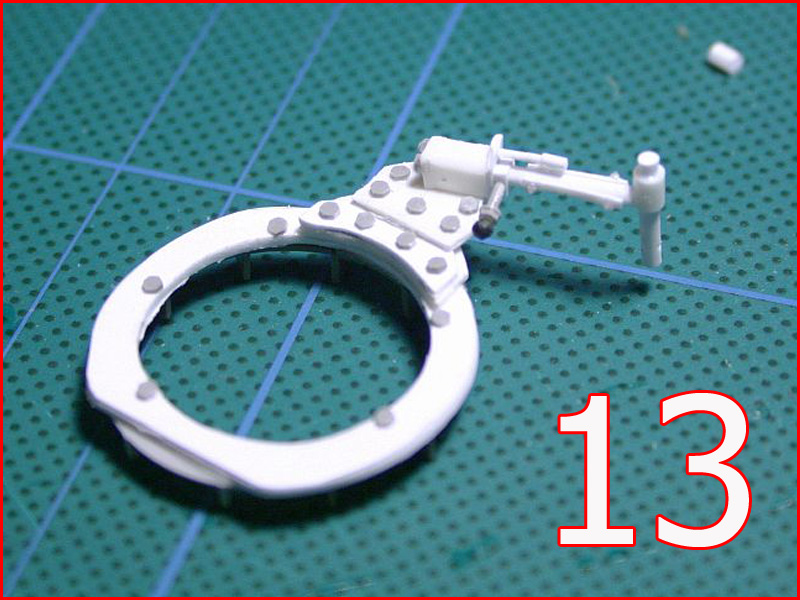
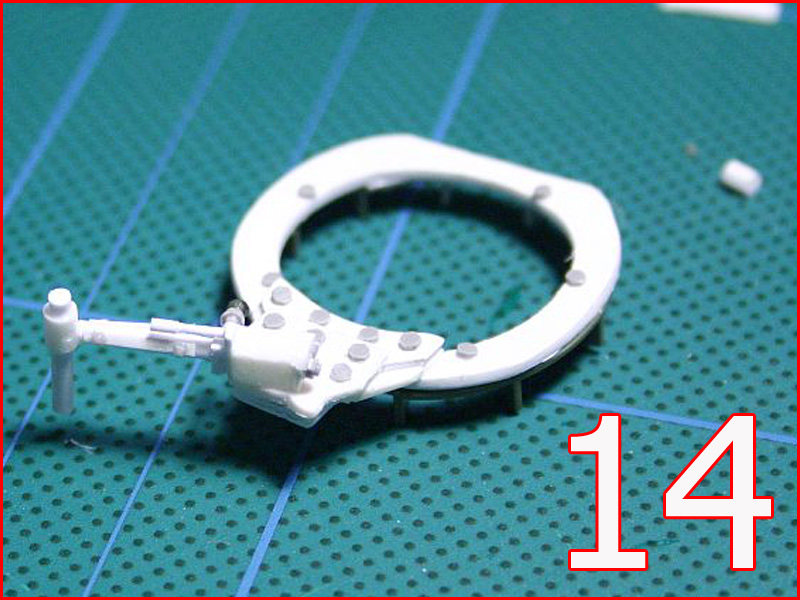
The next stage in making the original kit look more like the ATGM variant was to replace the kits original gun ring mount. The standard .50 cal, gun mount, and ring are not used on this variant. I replaced this entire area with a new scratch built mount using the original mount as a guide to make a new one. I cut and ground the ring to shape for the new mounts, I used 0.20mm styrene sheet for this. The support arch-shaped ring mount were added using the same thickness styrene sheet. The new support arm for the gun was also scratch built using a similar design style as most mounts of this caliber. I used everything from small tiny .02mm styrene rods to tubes for the actual gun mount. See pic 13, 14
Stage 10
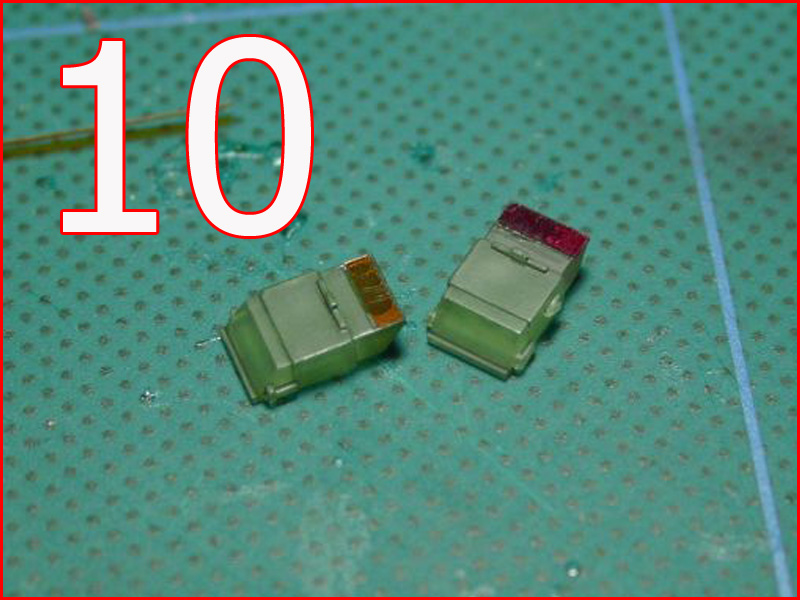
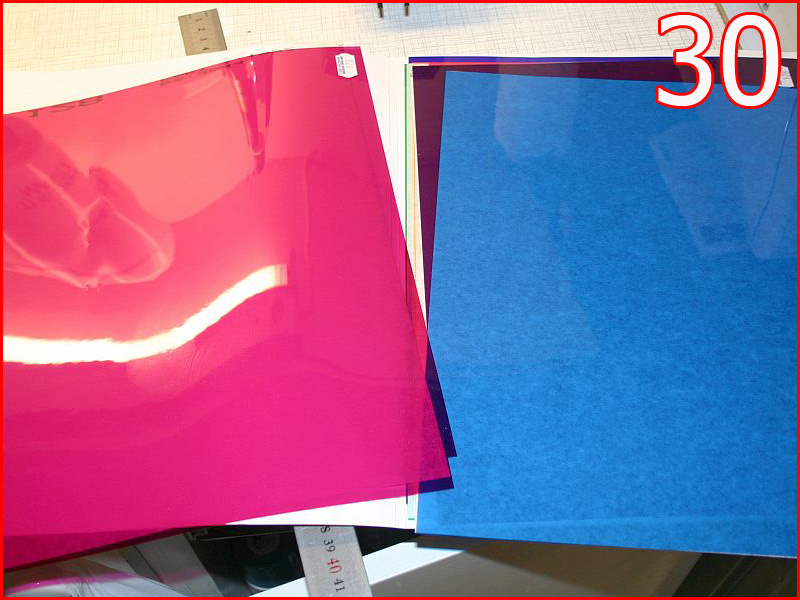
The next modification was to make the periscopes realistic in appearance. I use LEE lightening gels, bought at a Photo lighting store. There are other brands of filters but I just happened to get the LEE ones. I prefer this method better than painting. It also looks more realistic this way. I first measured the dimensions of one of the periscopes and proceeded to cut strips of the different gels to the specifications needed for the periscopes. After painting the periscopes green I attached the color gels with a little touch of modelers glue. I used orange, red and blue. Standing back and looking at it I must say it really looks the part without no doubt. See pic 10, 29, 30, 31, 32,
Stage 11
One of the last and simple additions to completing this build is the usage of strips of paper for tie down straps. I could have used the PE straps but decided to use paper and save the PE for another project instead. I guess it was just laziness.


About the Author


FROM: DALARNAS, SWEDEN
Charles King hails from Sweden. He has been interested in modeling since he was 12; though there was other interest that took priority at the time, he would eventually fall into the modeling soon enough. Not until recent,in 2002 that his interest was rekindled. While browsing the Internet, he ca...
Comments

thanks charles. will be looking forward to see the update. Thanks.
MAR 19, 2008 - 12:25 PM
Jason, here are two pics after I made the changes...I added the tarp and weathered it some more:


MAR 21, 2008 - 04:51 AM
sorry to answer so late. Was outta town. Ti, the updates looks awesome. I particularly like the tarp. How did you achieve the look? looks real to me. Care to share your method...than you. Again, this styker beast looks fantastic.
I hope one of the manufacturers come out with it soon. Or maybe Miloslav can put one together for us.
APR 22, 2008 - 08:12 AM
[quote]sorry to answer so late. Was outta town. Ti, the updates looks awesome. I particularly like the tarp. How did you achieve the look? looks real to me. Care to share your method...quote]
Thanks Jason. Method was simple. 1. Wet tissue papper rolled up 2. Then painted with wate based paint while still wet. 3. weathered with pigments when it was completely dried. That's it.
Nice to see you're coming out with this variant...as always, I'm always the last to know So all my work was for nothing..
APR 22, 2008 - 08:34 PM
Such a simple method for a great looking item. Thanks Ti. Miloslav, I did not doubt you would be doing this variant.
APR 23, 2008 - 10:14 AM

Thanks for a great article.
If I may ask, how far away did you hold the rattle can when spraying on the "dirt"?
APR 24, 2008 - 01:09 AM
You're welcome John. Glad you enjoyed it. I held the can about 20cm from the model. I also used a piece of cardboard as a reflector to reduce the over spray these cans cause as you spray. I also used a kitchen strainer or fryer strainer to reduce the amount of spray particles.
My picture taking abilities is left to be disired. The model looks much better in person than in the pictures...so I would like to think..
APR 24, 2008 - 04:43 AM

Ti, In your last paragh you said you used Spray paint for the dirt. What make was it? btw, Trumpeter has come out with a M1134 now. Have you seen it?
SEP 28, 2008 - 11:19 PM
Copyright ©2021 by Charles King. Images and/or videos also by copyright holder unless otherwise noted. The views and opinions expressed herein are solely the views and opinions of the authors and/or contributors to this Web site and do not necessarily represent the views and/or opinions of Armorama, KitMaker Network, or Silver Star Enterrpises. All rights reserved. Originally published on: 2008-02-11 00:00:00. Unique Reads: 30177

WEB HOSTING BY


Copyright ©2021 Armorama and Kitmaker Network, a subsidiary of Silver Star Enterprises
All Rights Reserved. Please read our Conditions of Use and Privacy Policy.
All Rights Reserved. Please read our Conditions of Use and Privacy Policy.