

1⁄35Scratchbuilt M1134 Stryker ATGM Variant
25
Comments
Painting
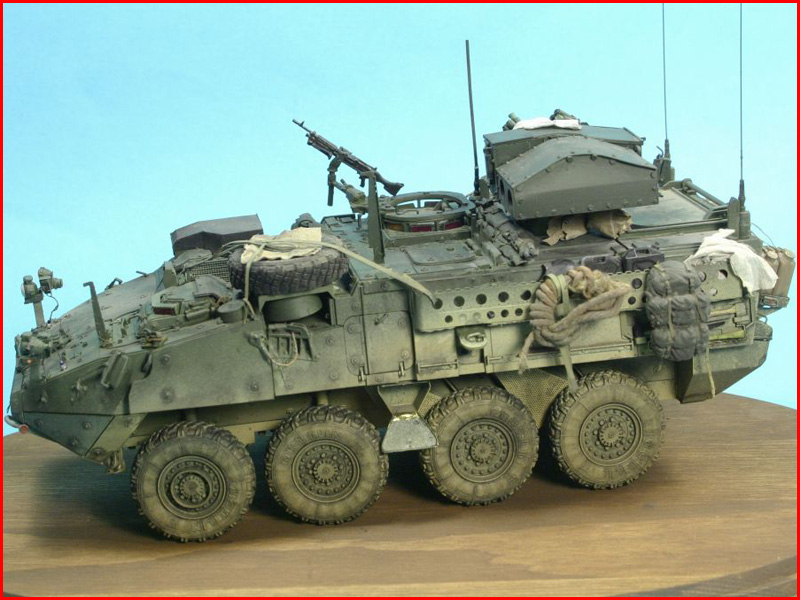
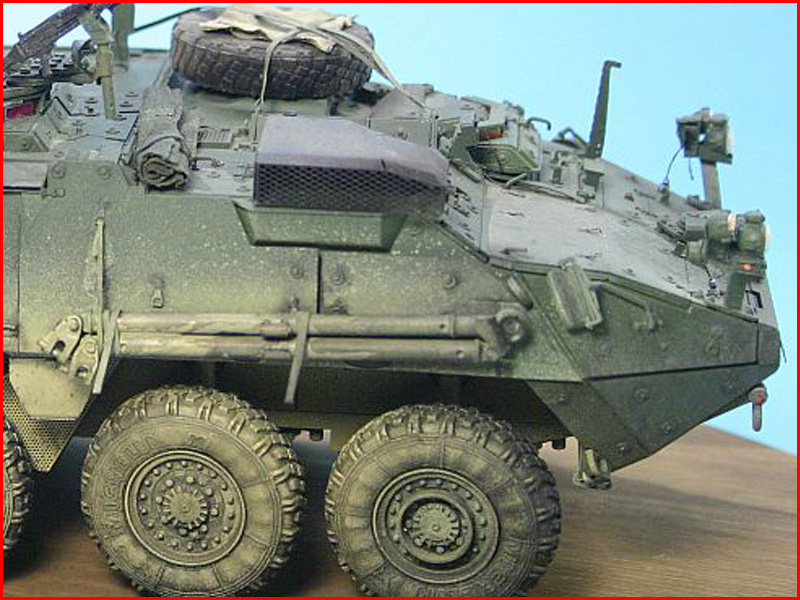
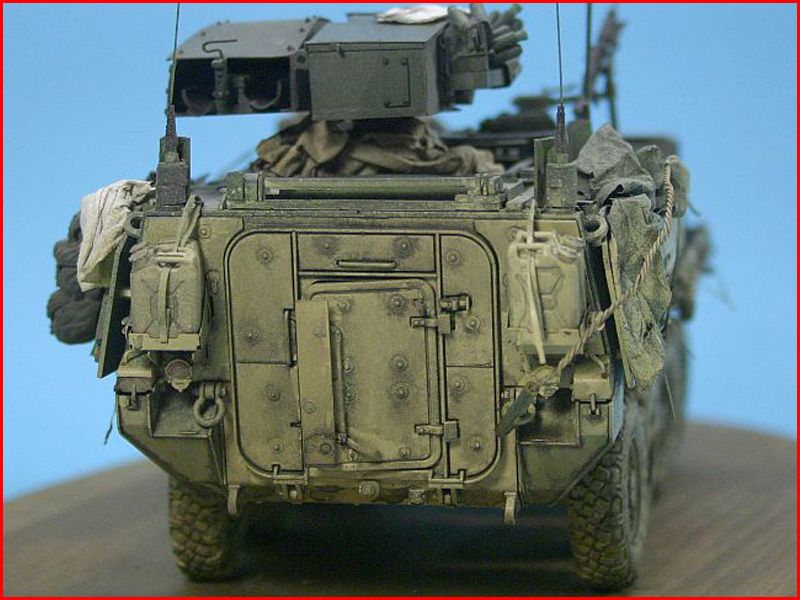
It was now time for painting this baby which was pretty much straight forward. I do not own an airbrush or any fancy painting apparatus. So I used Tamiyas rattle cans, Nato Green, to be exact, to paint the entire model. Then to represent the splattered mud effect I used Desert yellow rattle can by Humbrol. After letting everything dry for about 10 minutes, I then went over the entire model with a well diluted mixture of artist black, water and some window cleaner. I waited until the first black wash dried then went over it again. I continued like this until I got the result I wanted. I am a person who likes simplicity. Not everything works for everyone and I think it is a hassle to read about long complicated procedures. I try different methods that are less elaborate with somewhat good results. At least I think so.Weathering
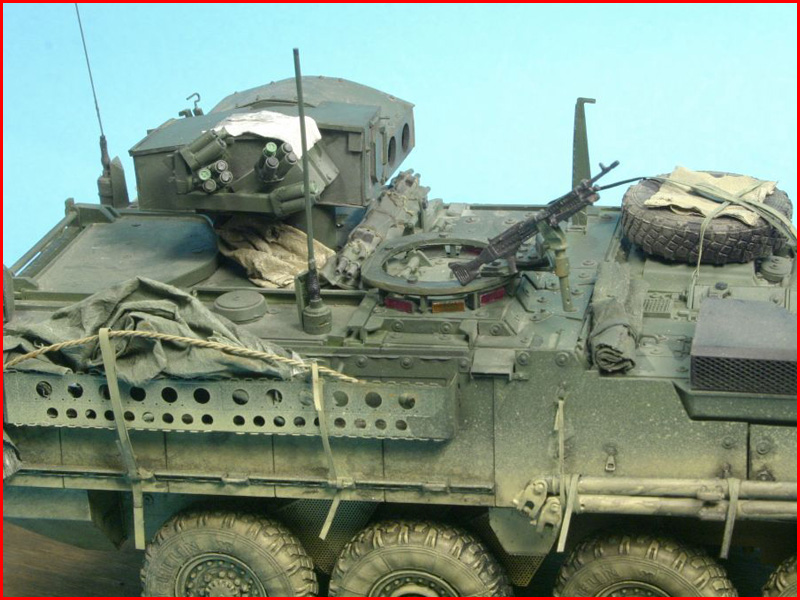
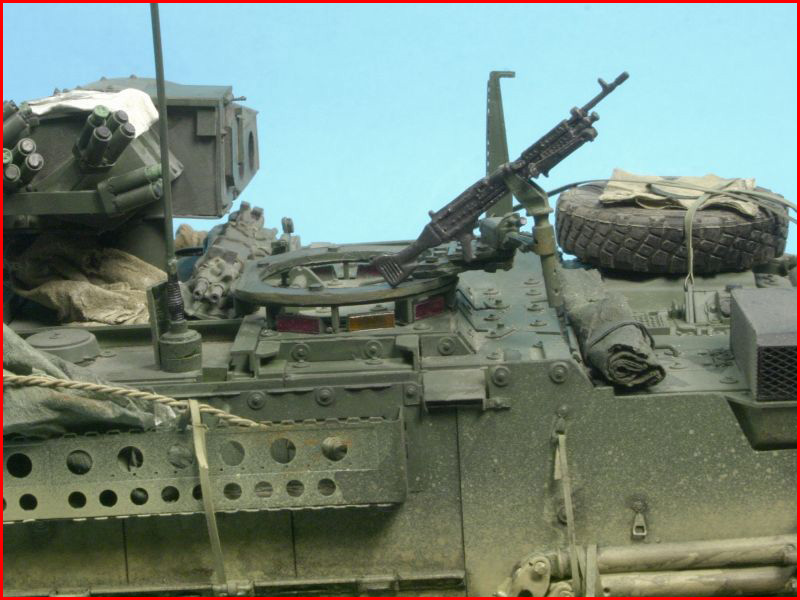
Now it is time for the best part of building this model or any model for that matter. Weathering! There are many different opinions about how much weathering there should be on a finished model. For me, I like anything between moderate weathering to heavy weathering. I have got to have a model weathered otherwise it will not appeal to me. It has to have the used look. Something that says, yes, it is not just for show but a piece of equipment that has been through hell, so to speak. My major weathering ingredients are real dirt, powder pigments (black, grey & brown) & real rust. One thing I see a lot at shows is show weathering. Weathering that looks pretty. Do not get me wrong, they look good thats just it It looks good. To me it is not real but who am I to argue. Everyone is different and if the judges like pretty weathering than I am never going to win anything. Everything becomes too perfect which is not real. I call it Show weathering I gave the entire model a dusting of real dirt and brushed off the excess. I repeat this method until I get the look I am looking for. I try different blends and ease them into all areas to bring out the different details. Sometimes it is just a trial & error thing. Once everything looked the way I wanted it, I stood back and looked at the model I was satisfied. Hope you enjoyed this short build article.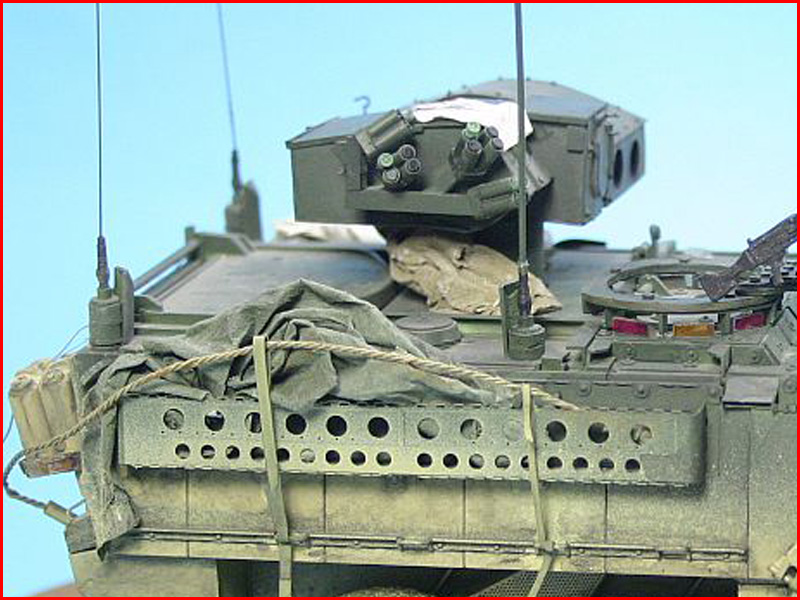


About the Author


FROM: DALARNAS, SWEDEN
Charles King hails from Sweden. He has been interested in modeling since he was 12; though there was other interest that took priority at the time, he would eventually fall into the modeling soon enough. Not until recent,in 2002 that his interest was rekindled. While browsing the Internet, he ca...
Comments

thanks charles. will be looking forward to see the update. Thanks.
MAR 19, 2008 - 12:25 PM
Jason, here are two pics after I made the changes...I added the tarp and weathered it some more:


MAR 21, 2008 - 04:51 AM
sorry to answer so late. Was outta town. Ti, the updates looks awesome. I particularly like the tarp. How did you achieve the look? looks real to me. Care to share your method...than you. Again, this styker beast looks fantastic.
I hope one of the manufacturers come out with it soon. Or maybe Miloslav can put one together for us.
APR 22, 2008 - 08:12 AM
[quote]sorry to answer so late. Was outta town. Ti, the updates looks awesome. I particularly like the tarp. How did you achieve the look? looks real to me. Care to share your method...quote]
Thanks Jason. Method was simple. 1. Wet tissue papper rolled up 2. Then painted with wate based paint while still wet. 3. weathered with pigments when it was completely dried. That's it.
Nice to see you're coming out with this variant...as always, I'm always the last to know So all my work was for nothing..
APR 22, 2008 - 08:34 PM
Such a simple method for a great looking item. Thanks Ti. Miloslav, I did not doubt you would be doing this variant.
APR 23, 2008 - 10:14 AM

Thanks for a great article.
If I may ask, how far away did you hold the rattle can when spraying on the "dirt"?
APR 24, 2008 - 01:09 AM
You're welcome John. Glad you enjoyed it. I held the can about 20cm from the model. I also used a piece of cardboard as a reflector to reduce the over spray these cans cause as you spray. I also used a kitchen strainer or fryer strainer to reduce the amount of spray particles.
My picture taking abilities is left to be disired. The model looks much better in person than in the pictures...so I would like to think..
APR 24, 2008 - 04:43 AM

Ti, In your last paragh you said you used Spray paint for the dirt. What make was it? btw, Trumpeter has come out with a M1134 now. Have you seen it?
SEP 28, 2008 - 11:19 PM
Copyright ©2021 by Charles King. Images and/or videos also by copyright holder unless otherwise noted. The views and opinions expressed herein are solely the views and opinions of the authors and/or contributors to this Web site and do not necessarily represent the views and/or opinions of Armorama, KitMaker Network, or Silver Star Enterrpises. All rights reserved. Originally published on: 2008-02-11 00:00:00. Unique Reads: 30177

WEB HOSTING BY


Copyright ©2021 Armorama and Kitmaker Network, a subsidiary of Silver Star Enterprises
All Rights Reserved. Please read our Conditions of Use and Privacy Policy.
All Rights Reserved. Please read our Conditions of Use and Privacy Policy.