

1⁄72SAS Jeep
6
Comments
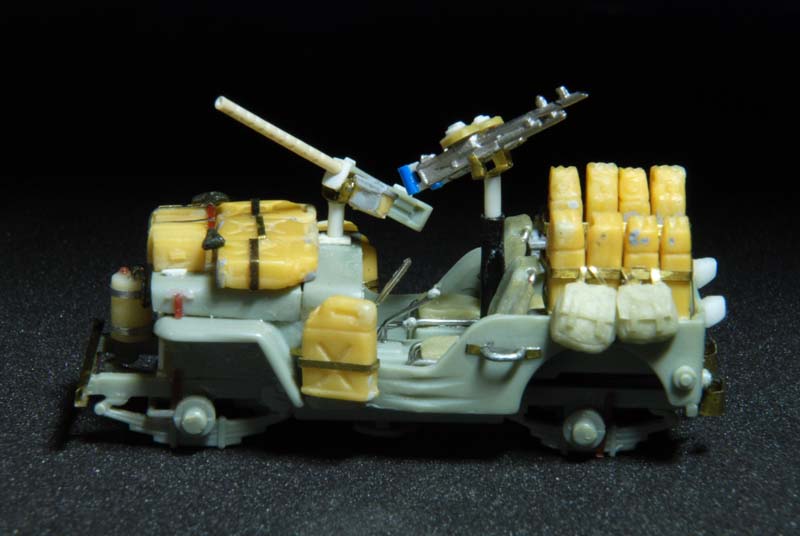
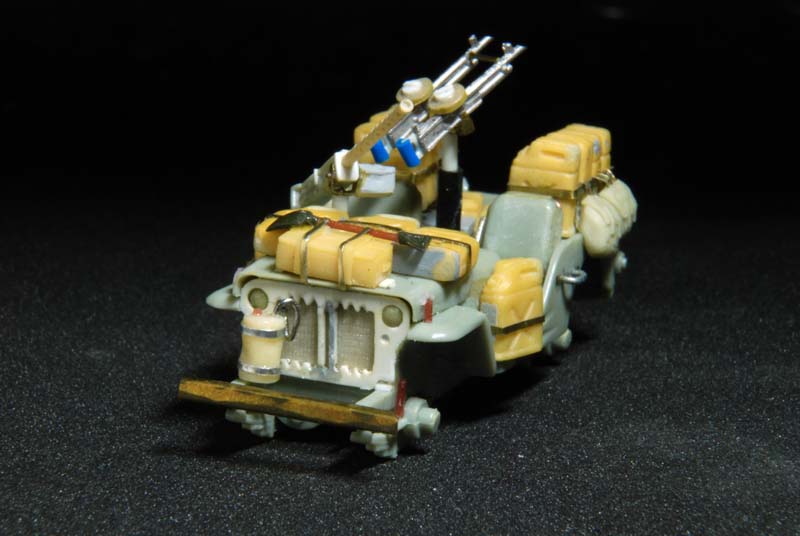
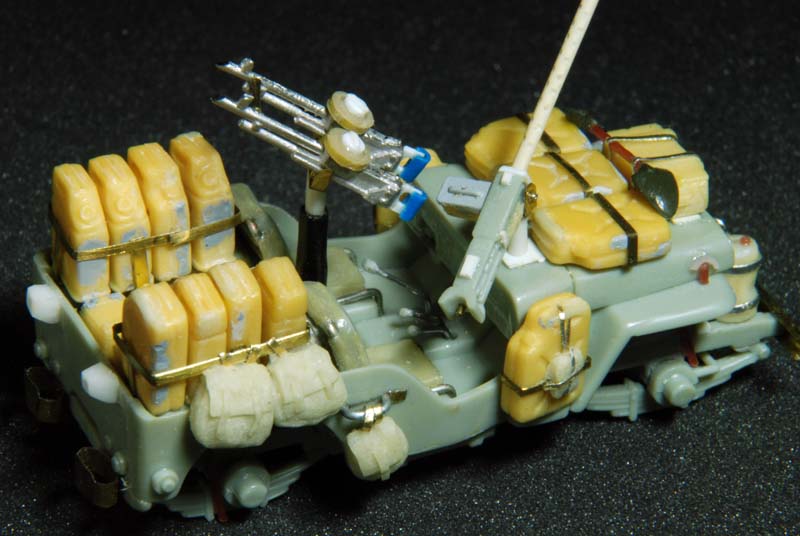
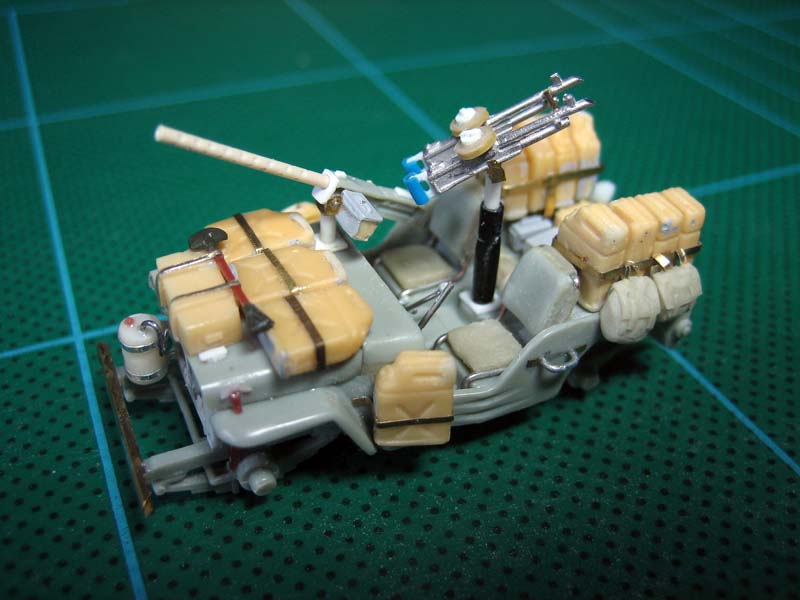
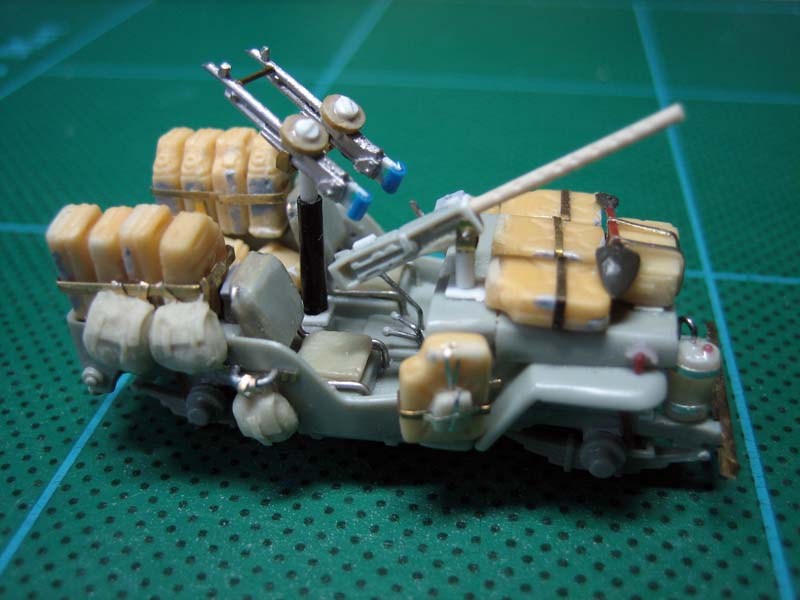
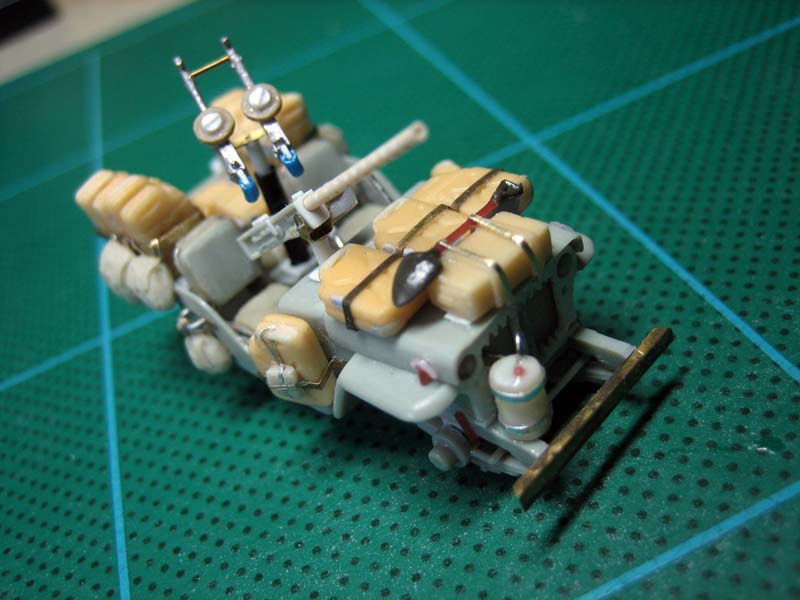
Jerricans
Like tires, most braille scale kits fail miserably when it comes to jerricans. Number one problem of course is having only one wide handle when in fact there should be three. The jerricans that come with the Academy kit are guilty as charged. They also suffer from having a simplified shape with poor lid details. I'm always impressed whenever I see a braille scale model with correct looking jerricans. There seems to be 2 common solutions to the 3 handle problem. One method was to use some sort of photo etched piece and another method was to glue 3 pieces of wire or stretched sprue. I couldnt find any suitable looking photo etched piece, while at the same time I wasn't prepared to glue 3 tiny lengths of wire to 11 jerricans. Yes 11, thats why I like SAS jeeps, they've got loads of jerricans. I was too stingy to buy resin jerricans online so I decided to make my own. Using the academy jerricans as a starting point, I stuck pieces of sheet styrene to get the correct size and shape - wider with rounded edges and a lip at the base for US style jerricans. For the German ones; these had wide chamfered corners and a groove running around the sides where they had welded the 2 halves together. Actually this should be a double groove, but thats too small even for me to do in this scale. For the handles I glued 3 tiny strips of styrene, making sure I had a nice groove between the pieces. For the gap at the bottom of the handles, I had to be satisfied with just a depression instead of see through gap, this was necessary because I wanted to make one piece castings for each jerrican. More bits of plastic were used for the lids. Brass sheet was used to form the straps and brackets used to secure the jerricans on the jeep.Weapons
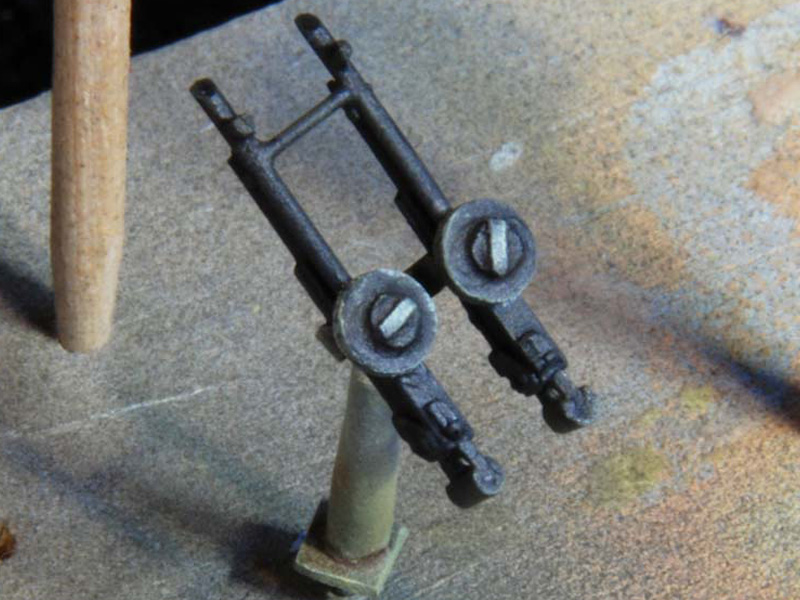
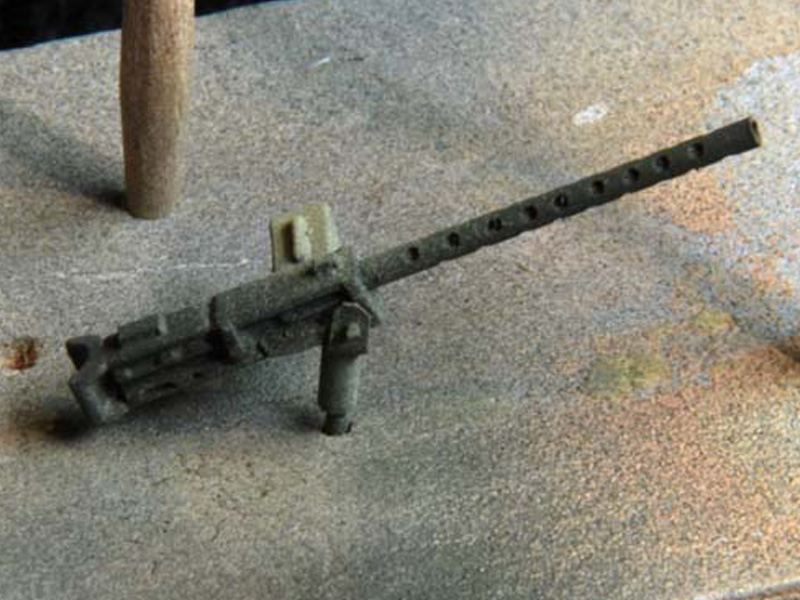
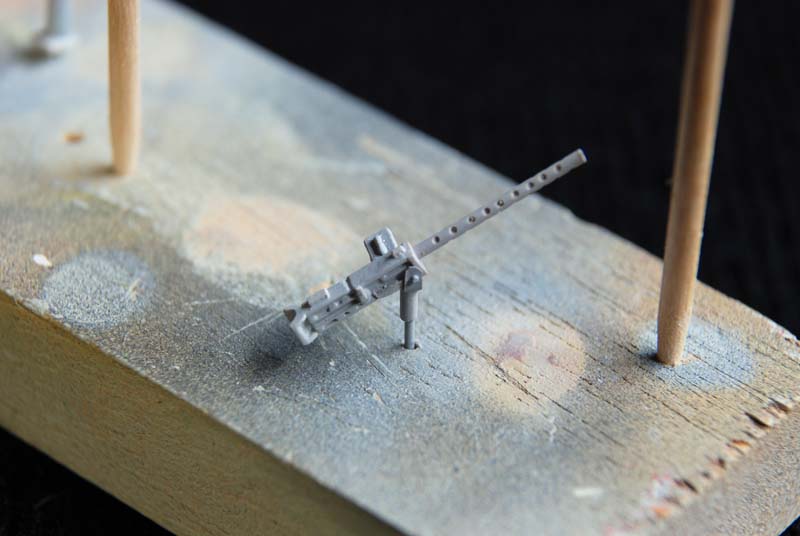
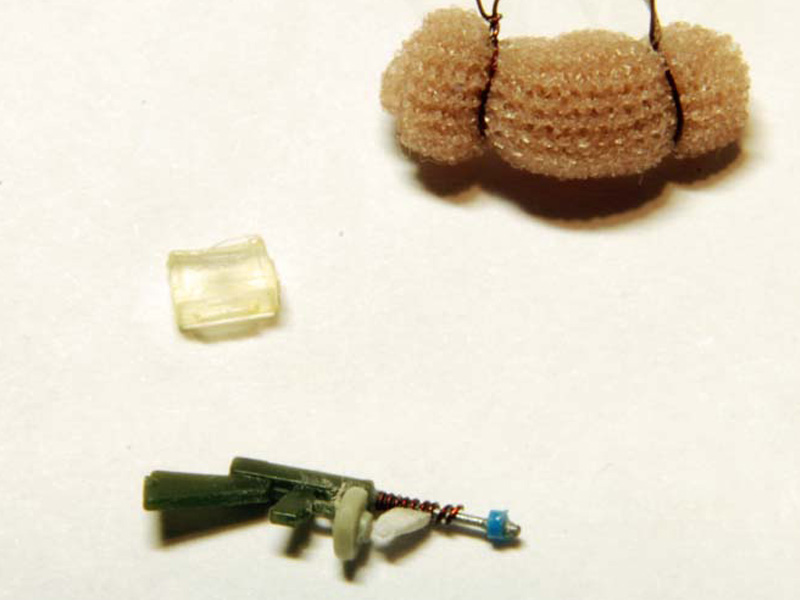
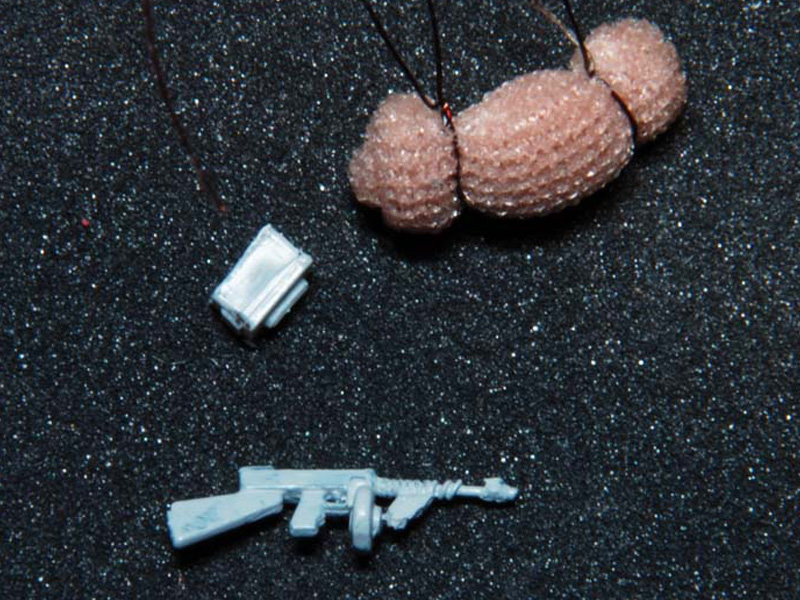
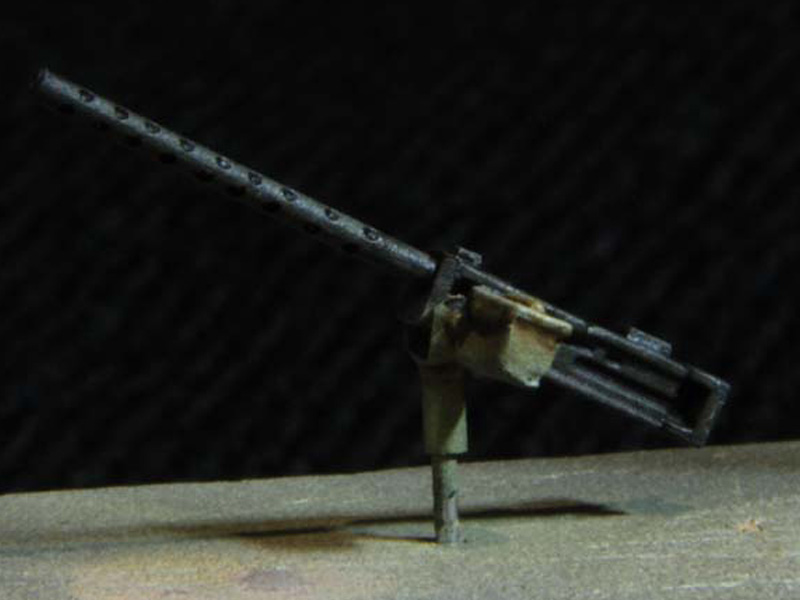
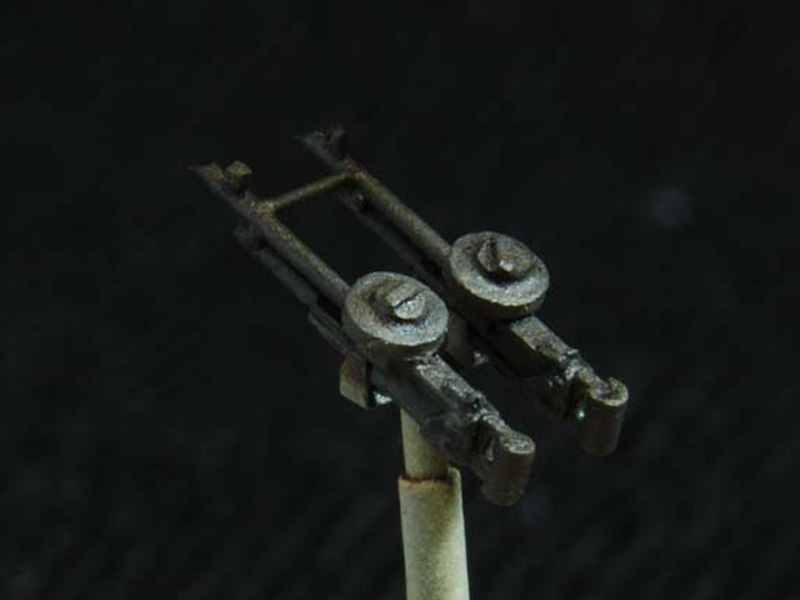
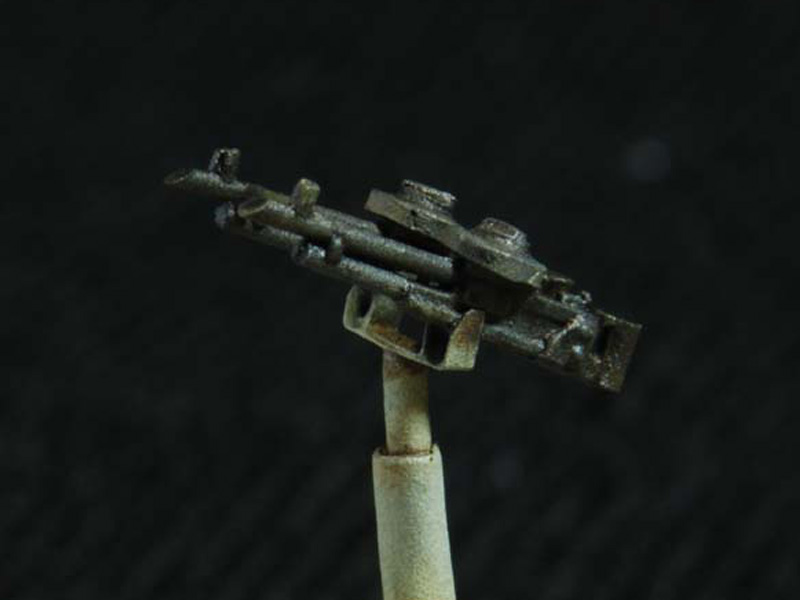
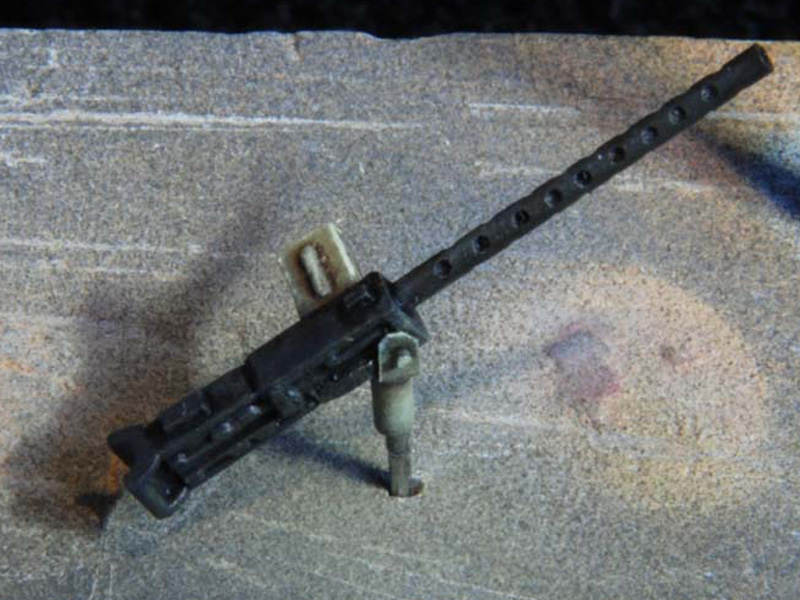
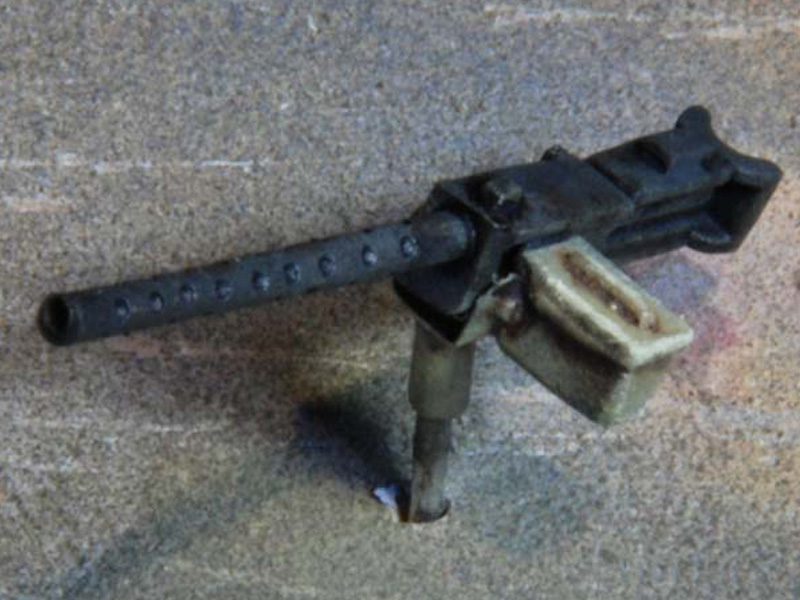
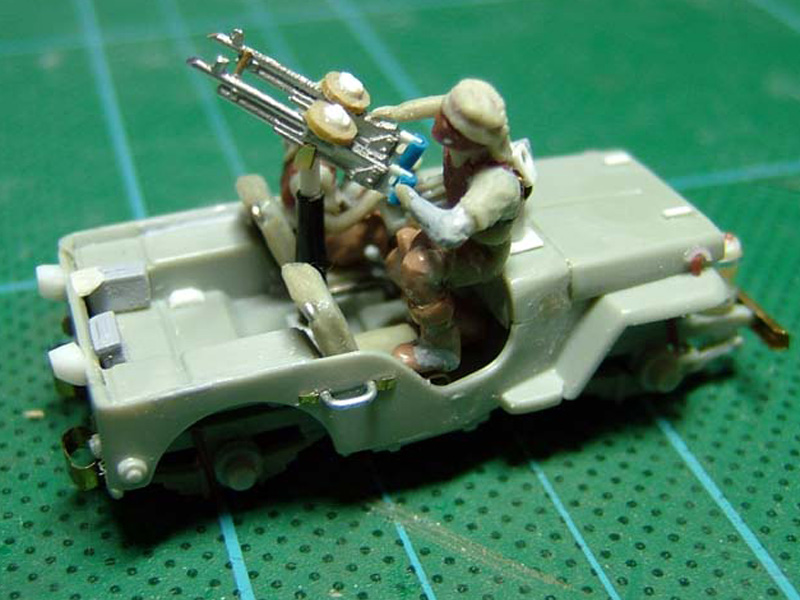
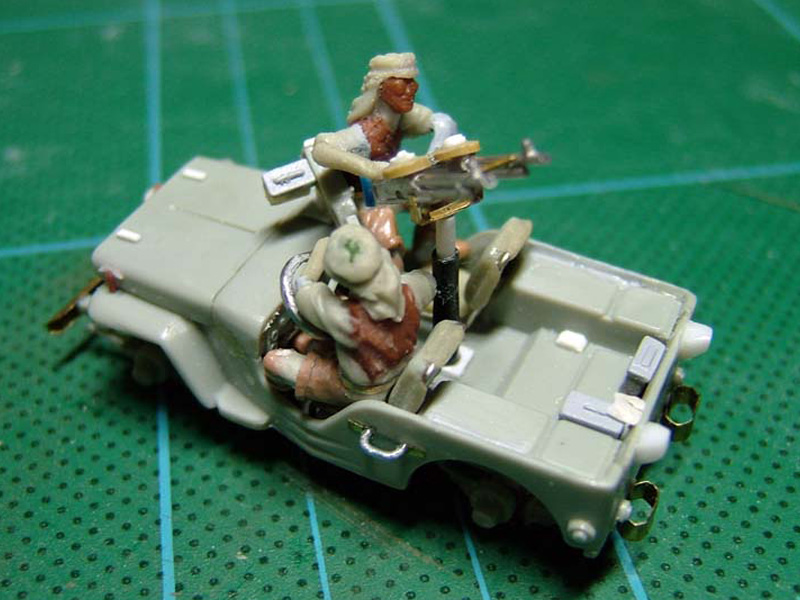
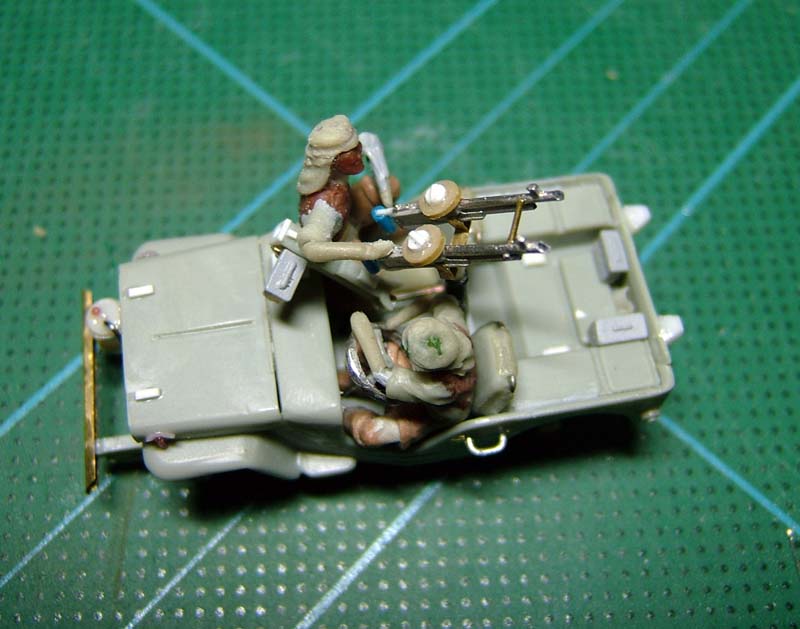
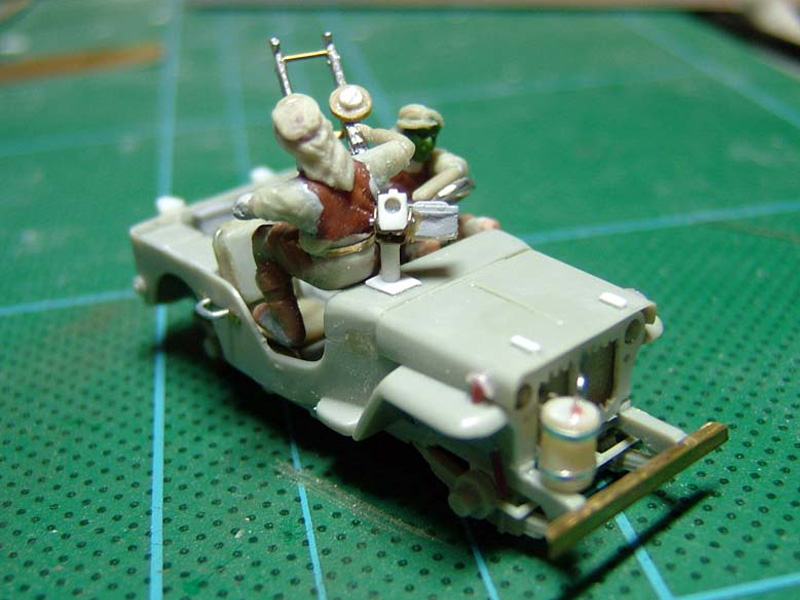
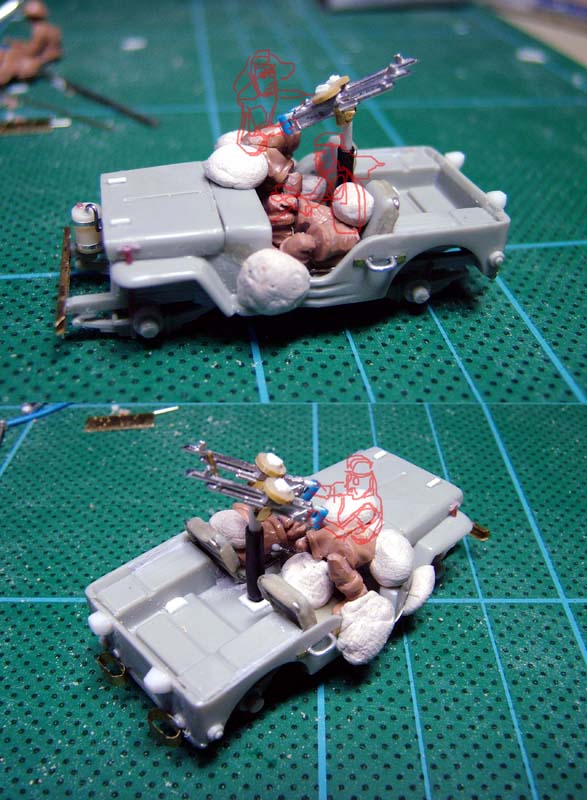
Each SAS jeep had a unique weapons configuration. I chose the meanest looking configuration based on a photo that keeps popping up whenever SAS jeeps are mentioned. This combo featured a .50 cal browning machine gun in front of the front passenger seat and a twin Vickers mounted on an anti-aircraft pedestal in the middle of the jeep. For the browning, I used the piece that came with the academy jeep. I had to modify it to reflect the "air pattern" version which had a different cooling jacket for the gun barrel. A groove was cut into some wood forming a simple jig that allowed me to drill the numerous holes on the side of the gun barrel. The ammo box came from a Roco accessory pack. Brass sheet was cut into strips and bent to form the swivel mounts. For the twin Vickers, I modified a couple of white metal modern US M240 machine guns from a company called Continental Model Supply Co. The butt stock was cut out and new handles were added from sheet plastic and wire insulation. The pedestal mount is again made up of brass sheet and plastic rods. I often see models of SAS jeeps with the gangster version of the Thompson SMG, though I dont recall seeing any photos of them using it. Anyway, I think this bit of kit is pretty cool. I made mine by chopping off the ammo clip and front end of a regular Thompson SMG from Hasegawa's US Infantry Combat Team. A small plastic disc was glued to represent the round ammo drum used in gangster version. A bit of wire for the gun barrel and a small bit of plastic for the forward grip was added to complete this weapon.Additional Stowage
More goodies were added to emulate the look of the heavily laden desert jeeps. Wooden boxes and crates are resin castings of originals that I had made with plastic sheet. Ammo boxes are from Roco Minitanks. Duffel bags were sculpted in place with 'magic sculpt'. Small strips of foil were added to represent the straps that secured them to the vehicle. Sand channels were formed by punching holes into brass sheet. In order to get the right alignment for the holes, I drew the hole locations on some masking tape, this was laid on top of the brass sheet. I then hammered a pin into the brass to form the holes. The shovel is again from Roco Minitanks but I replaced the center bit with a piece of stretched sprue. A small piece of stocking was rolled up and painted to represent camouflage netting. I used some wire to tie it up.Figures
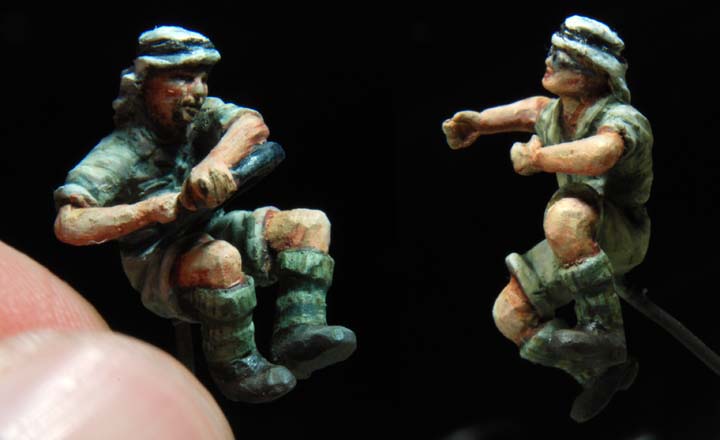
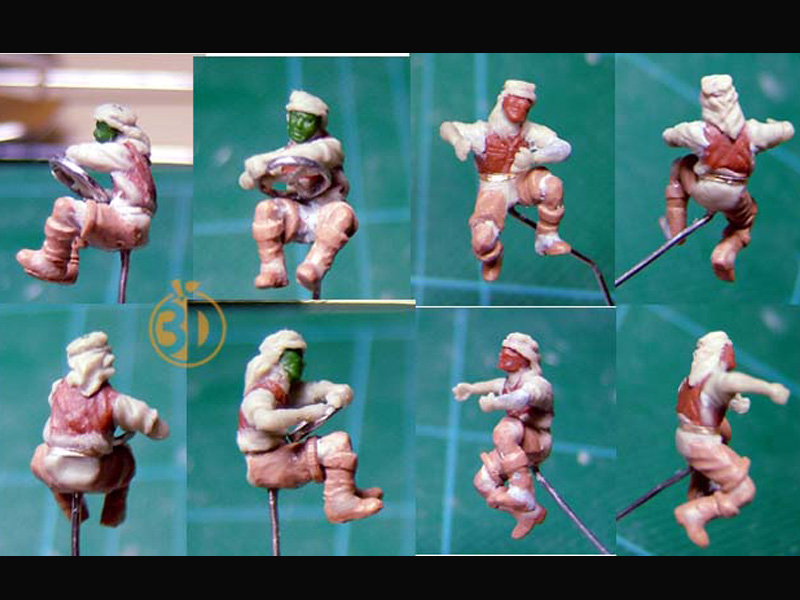
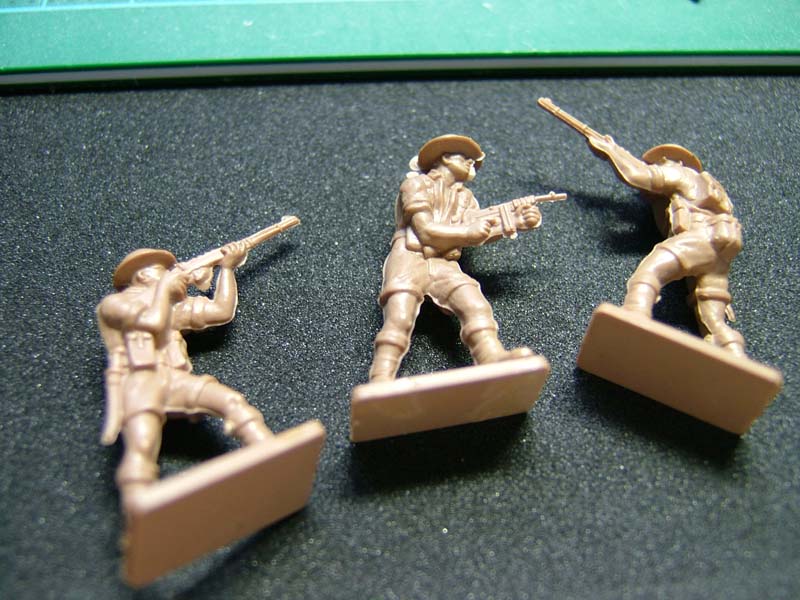
Over the years, Ive seen countless models of SAS jeep. Most are either stand alone models or incorporated into a diorama that depicts some form of relatively sedate scene. But for me the SAS story evokes images of action. I wanted to represent this dynamism with the figures on my model. I started off by chopping up some legs from the old hard plastic Esci British 8th army figure set. I posed them on the jeep, and used blue tac to hold them into place while the super glue dried. The gaps between joint were then filled with magic sculpt. The upper torso and head were made from copies of Hasegawas US Pilot/Ground Crew set. I used the head from the guy with a helmet in his arms for the driver. The torsos and passenger head came from the guy wearing a beret and sunglasses. The arms were sculpted using magic sculpt and so were the headgear. The steering wheel was assembled with the driver figure. The figures were painted first. I used Tamiya fine surface primer (white) from a spray can. Then I airbrushed a basecoat of Tamiya red brown acrylic paint. Subsequent layers were hand brushed using Vallejo model color acrylic-vinyl paint. I only have a small selection of Vallejo paints, so I mixed my own flesh tones. The colors used were: Burnt Umber, Golden Yellow, Purpleheart, Light Flesh, Black and Iraqi Sand. My best advice for painting figures is to use the best brushes. It simply allows you to place paint exactly were you want it. I used number 0 Vallejo Kolinsky Sable brush.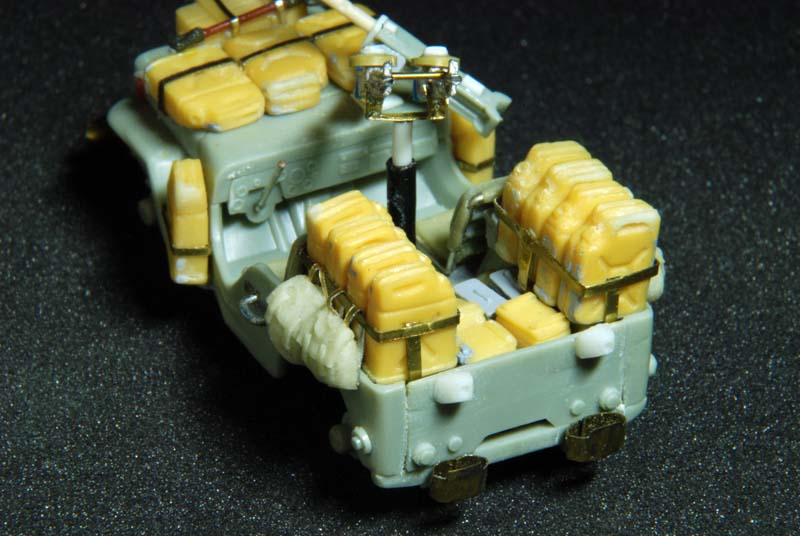


About the Author


Comments


YEEEE HA Great action that jeep is really moving. The driver looks like he is holding on, waiting for the crash, bang wollap! Great sense of speed. love it!
NOV 27, 2008 - 02:47 PM

Sonny, holy cow!!!! The patience that you have in building something in 1/72 is incredible. How do you do that!? That is a great build, make some black and white photos and it would fool everyone!!
DEC 01, 2008 - 07:39 AM
Thanks guys, the reception to the model has been very encouraging. I hope the build feature is informative for you guys.
Also comments and crits are welcome.
Cheers,
Sonny
DEC 09, 2008 - 03:26 AM
Looks great, Sonny. A very action packed little scene.
Thanks for sharing
DEC 10, 2008 - 03:57 AM

Looks real cool, hope mine turns out as good, I am working on 1 now. jeepkid019
MAR 01, 2009 - 03:43 PM
Copyright ©2021 by Sonny Sy. Images and/or videos also by copyright holder unless otherwise noted. The views and opinions expressed herein are solely the views and opinions of the authors and/or contributors to this Web site and do not necessarily represent the views and/or opinions of Armorama, KitMaker Network, or Silver Star Enterrpises. All rights reserved. Originally published on: 2008-11-27 00:00:00. Unique Reads: 40461

WEB HOSTING BY


Copyright ©2021 Armorama and Kitmaker Network, a subsidiary of Silver Star Enterprises
All Rights Reserved. Please read our Conditions of Use and Privacy Policy.
All Rights Reserved. Please read our Conditions of Use and Privacy Policy.