

1⁄35TAMIYA LECLERC UNIFIL 1/35
2
Comments
The build
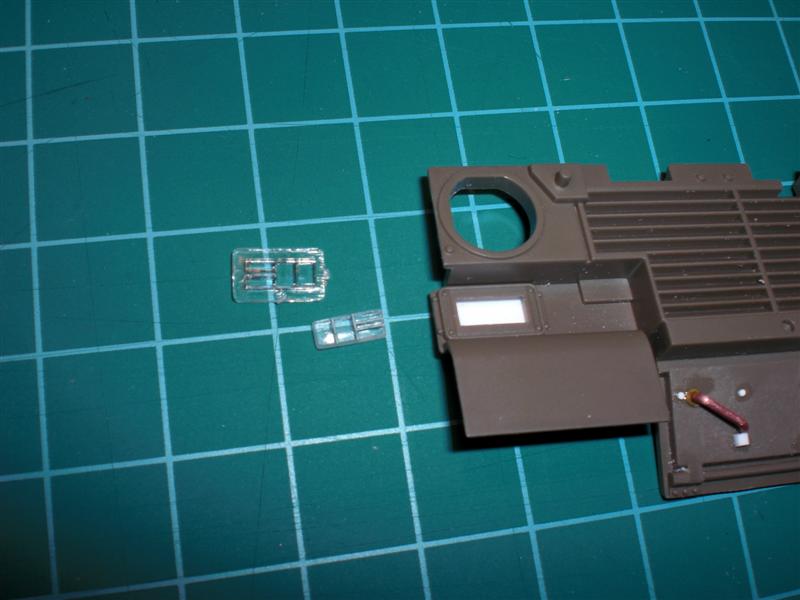
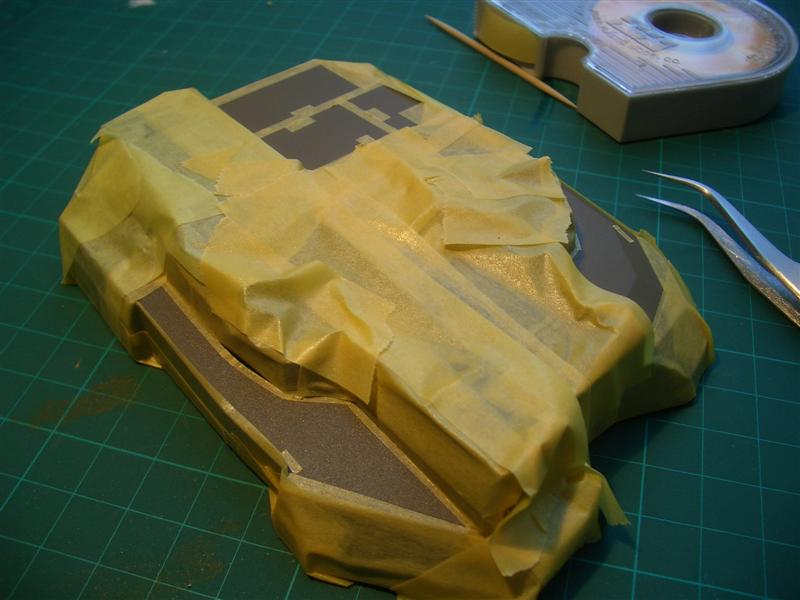
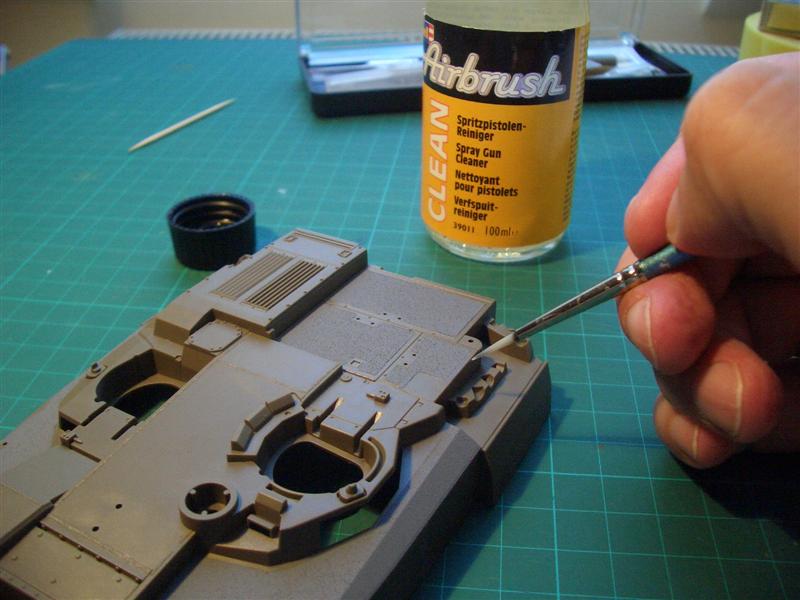
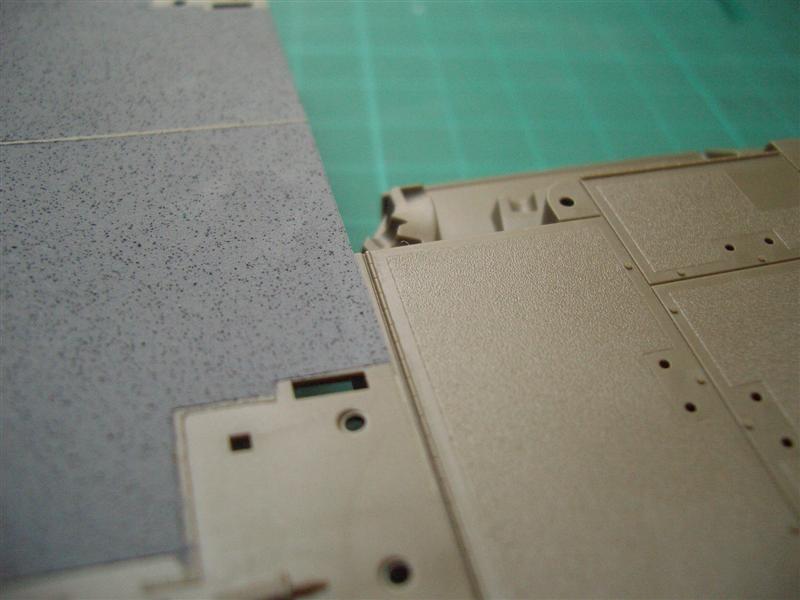
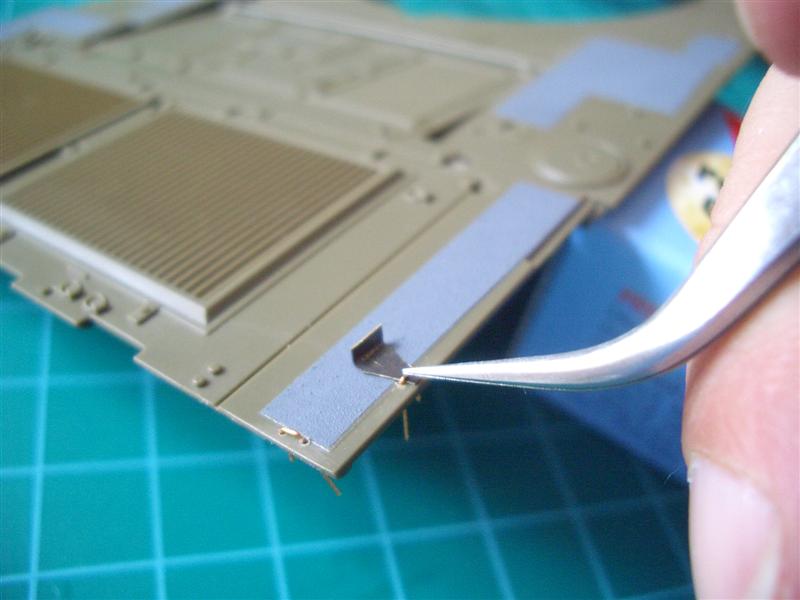
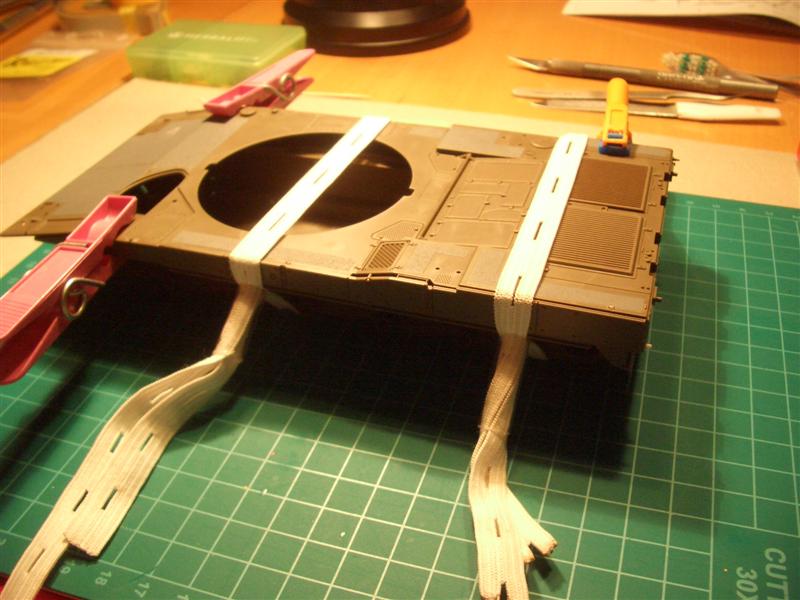
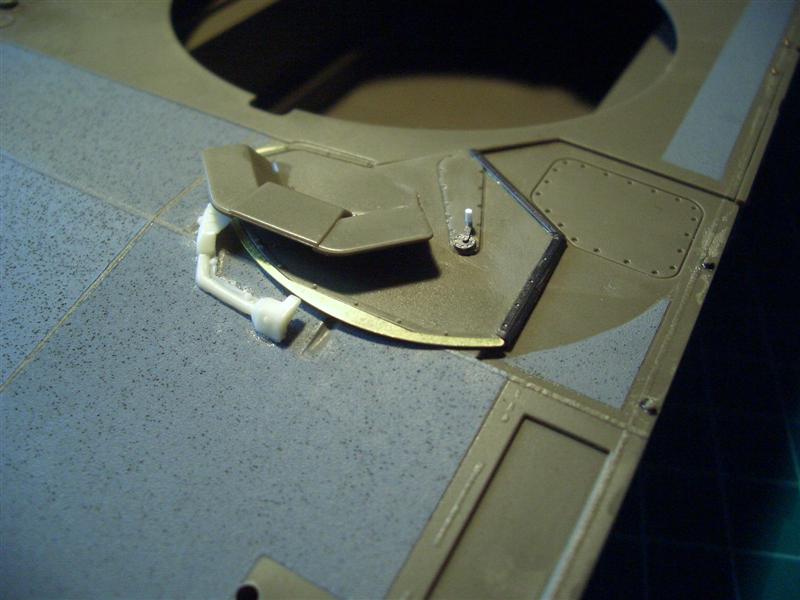
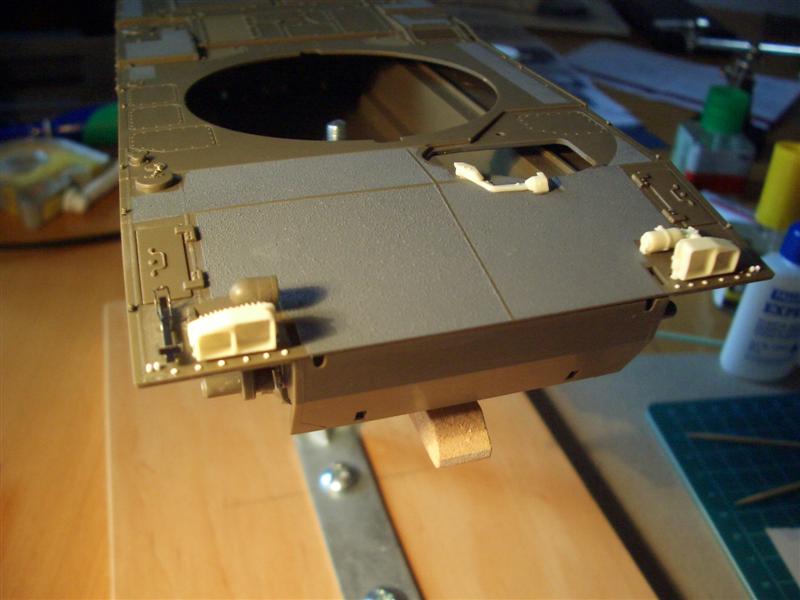
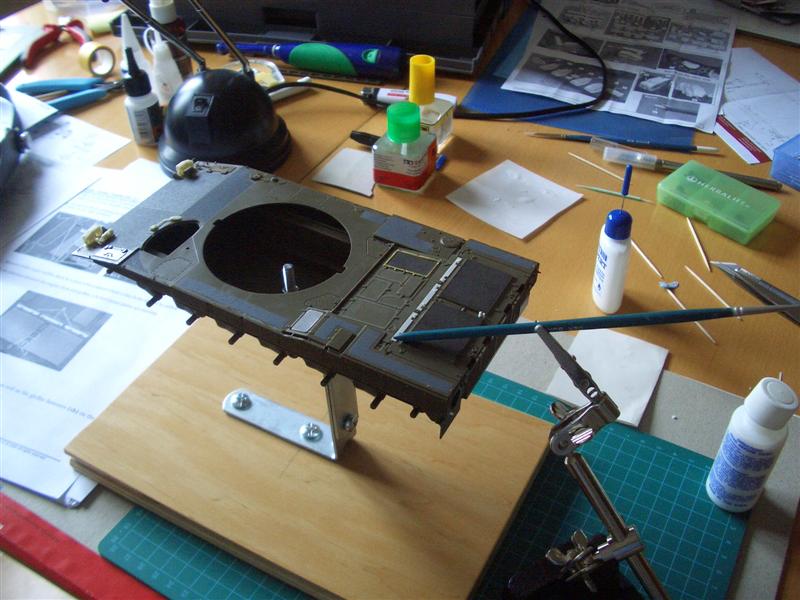
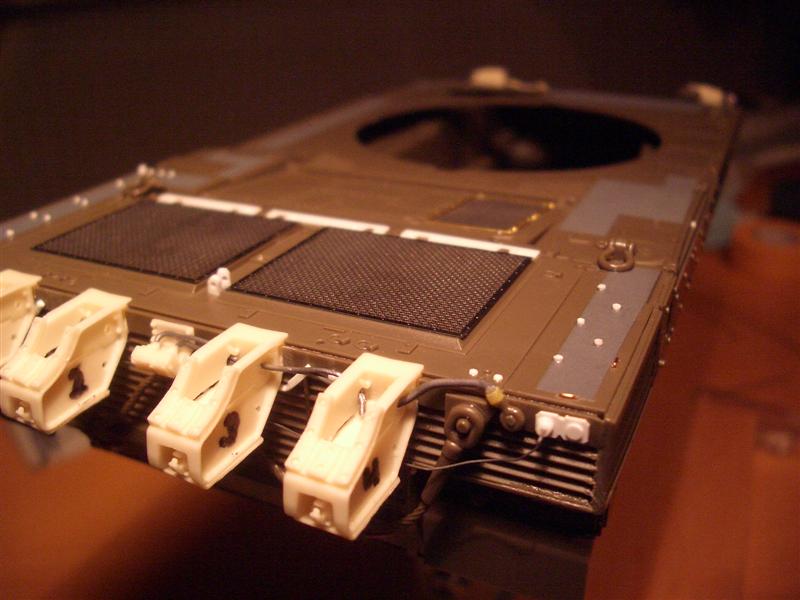
ANTISLIP SURFACE WITH ROUGH COAT (GAMES WORKSHOP): For modern armor modellers the anti slip surface is always a challenge. Tamiyas anti slip surface looks quite undersized. So I used the Rough Coat Spray from Games Workshop to replicate a thicker structure. Before I started spraying there was a lot of work masking the model to prevent over spray. Shake the bottle well before spraying and make sure you work in a well ventilated area. I sprayed from a distance of 30 cm. In varying distance you can easily influence the grain of the coat. If necessary you can apply two or three coats to achieve thicker results. Of course - the overspray will sometimes creep under the masking tape. To remove rough coat overspray I used a brush moistened with Revell Airbrush Clean. Hull front The top and the bottom of the hull will be glued together. To keep the parts together tightly I use a simple clamping tool made from rubber sleeves and plastic tubes you find as tip-protector for brushes. The drivers hatch was detailed with some aftermarket parts from Blast Models, Eduard and Voyager model. (white = from blast set, gold = from voyager set, silver = from Eduard set) Then the front plate was detailed with some rivets, to make these I used a punch-and-die set, PE-parts from the Eduard Set replaced the kit parts (fire extinguishers) and the front lights came from the Blast update set. Hull rear The rear access hatches were replaced with brass wire and the four bracket rods were replaced with hollow styrene rods. I closed the holes for the rear lights from behind with evergreen sheet and cut the glasses to size. Later I was easily able to paint the lenses and put them into the open mounts after the base colour was applied. So I didnt need to mask them with masking tape. My chosen real tank - the UNIFIL 642 - shows some differences. First a covering box on the right side on the rear was not mounted so I had to replicate some connectors (banjo-fittings). Second the fuel pipe connector (middle of the rear) is missing the two tubes. The kits barrel mounts are replaced with mounts from the Blast update set - they are more accurate and better detailed. Larger holes for the fuel lines have been drilled into the blast resin parts for the barrel mounts. For the cable / fuel lines I used lead wire from plus model in different sizes. You can bend them easily and they stay in place without the use of glue. Hull top and rear Several missing bolts were added again using my punch-and-die set. Also engine grills from Eduard and Voyager model were mounted. For bonding PE-parts I use white glue instead of cyanoacrylate. If I use too much white glue or something went wrong I can easily remove the white glue with a moistened brush. In the past I had a lot of problems with the application of cyanoacrylate. The disadvantage of this method is the longer curing time of white glue - therefore I use funny constructions with the "third-hand". Missing bolted metal plates on the engine compartment were replicated with evergreen strips cut to size. Also missing were 4 snorkel brackets which were added.


About the Author


FROM: LOWER AUSTRIA, AUSTRIA
I've been building models since I was a child. I took several off-times (military-duty, un-services, occupational career, my family, set up my company e.g. ) but never lost interest. I am stuck with modern armor - especially white un-vehicles - but also with early aviation from austro-hungarian empi...
Comments

Great feature Walter. Your BLog was already fun to follow. If I could nitpick, the MBT name is Leclerc and not LeClerc.
It has been named from Marshal Philippe Leclerc de Hautecloque former CO 2nd French AD in WWII.
Olivier
NOV 08, 2010 - 05:31 AM

What a great peice! Your photos are great, the text is informative, and the model itself is superb. Bravo!!
Chris
NOV 10, 2010 - 06:04 AM
Copyright ©2021 by Walter Lampel. Images and/or videos also by copyright holder unless otherwise noted. The views and opinions expressed herein are solely the views and opinions of the authors and/or contributors to this Web site and do not necessarily represent the views and/or opinions of Armorama, KitMaker Network, or Silver Star Enterrpises. All rights reserved. Originally published on: 2010-11-08 00:00:00. Unique Reads: 21243

WEB HOSTING BY


Copyright ©2021 Armorama and Kitmaker Network, a subsidiary of Silver Star Enterprises
All Rights Reserved. Please read our Conditions of Use and Privacy Policy.
All Rights Reserved. Please read our Conditions of Use and Privacy Policy.