

1⁄35TAMIYA LECLERC UNIFIL 1/35
2
Comments
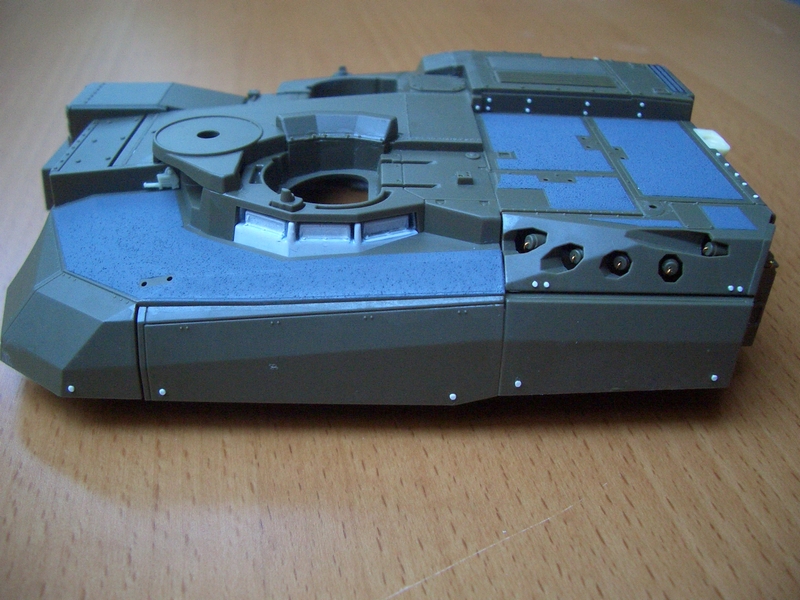
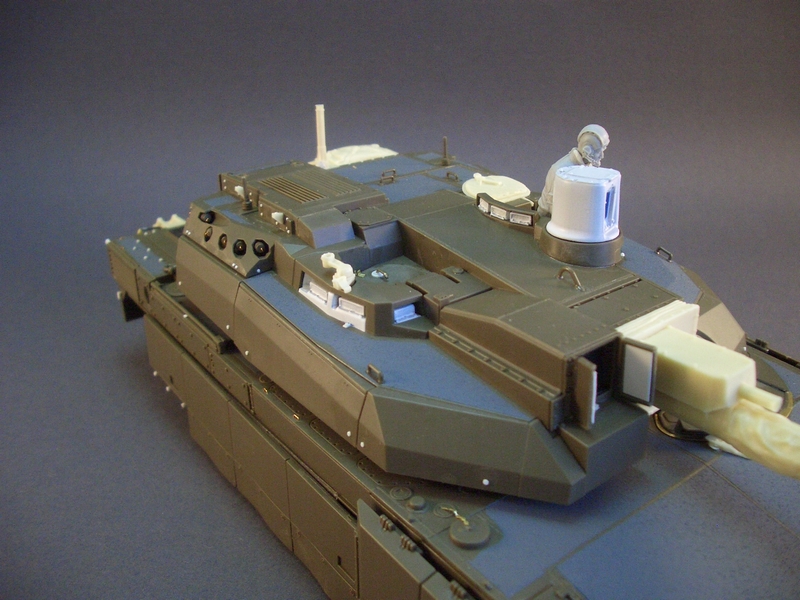
Turret
For further detailing my punch-and-die set was again excessively used. Especially the prominent locks on the turrets side bins are missing on the kits parts. The smoke dischargers were detailed with wire. A grill of the Eduard PE-Set also found its way to the top of the air condition.
The base for the side wind-sensor comes from the Blast set. Surprisingly, there is a large opening on the right back side of the turret (air conditioning), where later a PE grill will be installed. I had fears that light might shine through this opening, so I closed it with Evergreen sheet and painted it with dark color.
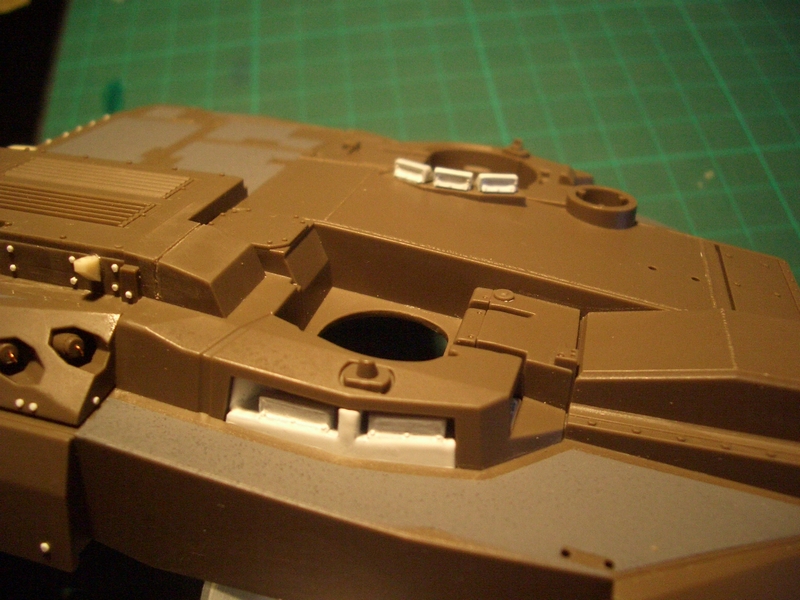
Vision blocks
For the vision blocks I used the Blast Update Set - they are more accurate than the kit parts, but because here the mirrors can not be subsequently installed on the inside of the openings (as can be easily done with the original kit parts) I had to paint the mirrors before gluing them into place using Citadel Mithril Silver diluted with blue from Tamiya, and masking with fine MICRON Masking Tape.
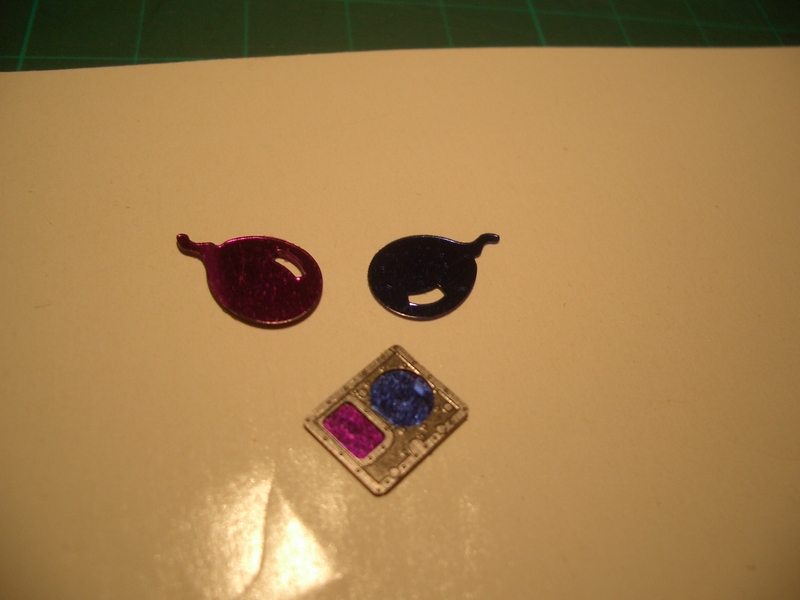
Optics made from confetti
To represent the colour shift effect in modern optics I tried the "Confetti method". Children's party confetti in the correct color were cut to size and glued into place - a first attempt, but it looks promising. At least the colors match to some extent. Next time I would seal them with clear cote because the confettis surface is delicate and can easily be scratched with your tweezers.
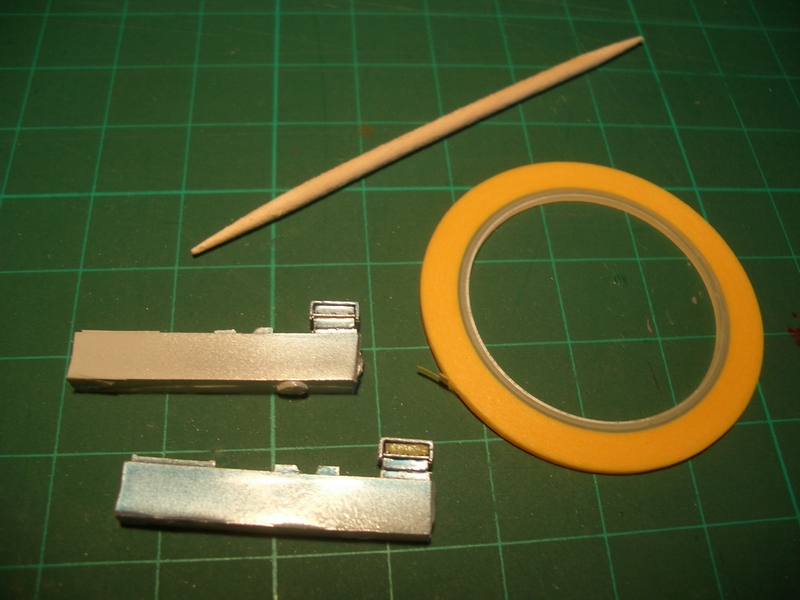
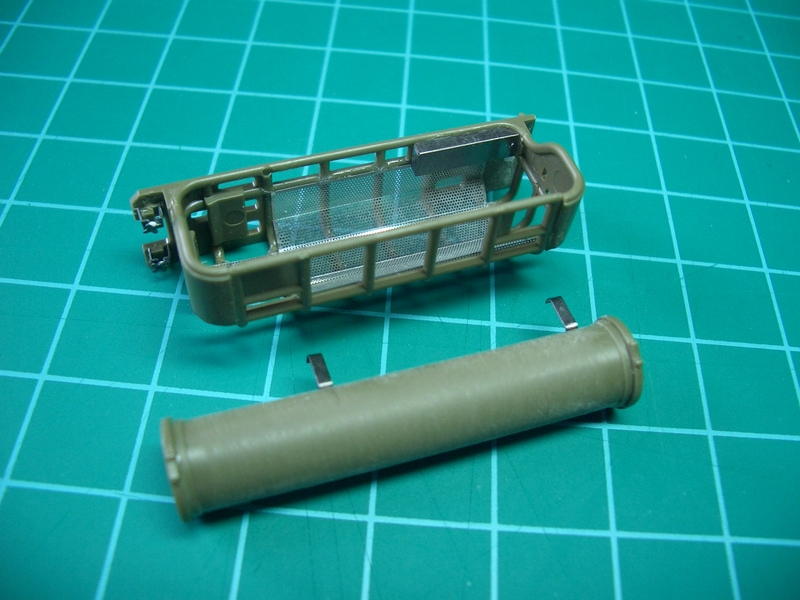
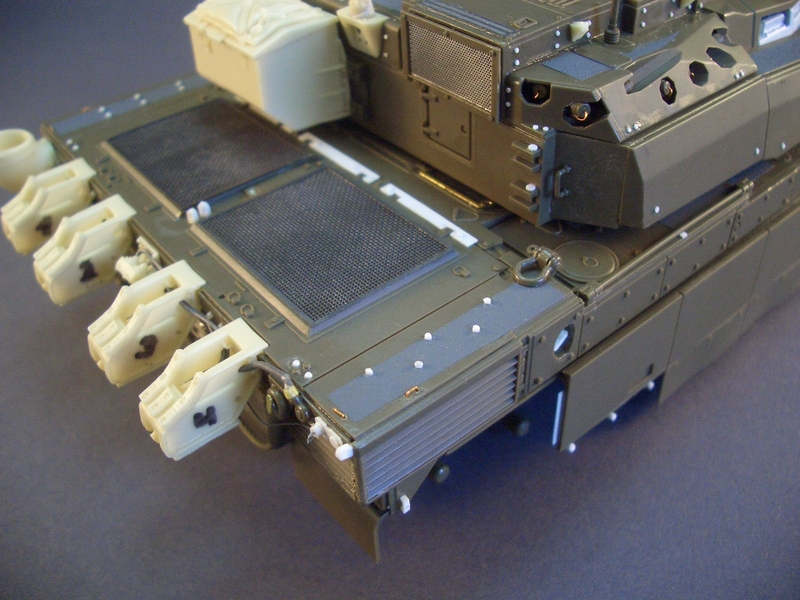
Storage box and snorkel
For detailing the storage basket I used PE-Screws from Eduard and a grill from the Voyager set. The gluing of the grill into the basket was a bit tricky, because the mesh must be bent into the correct angles before gluing, otherwise it absorbs from the position permanently. The white-glue-method was not going to cut it- solved the problem by using thin superglue. The larger part of the snorkel (why the heck do the French need a snorkel in the southern Lebanon? a mystery to me) was sanded off of the cast-on chunky and unrealistic looking basket holders. They were replaced from spare PE-parts.
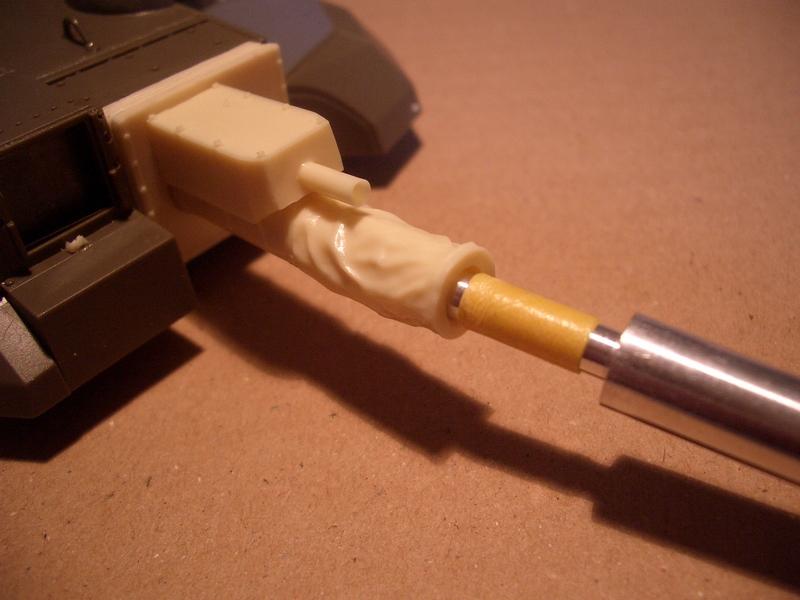
Barrel
The metal barrel comes from the Voyager Set - I'm not able to glue 2 barrel halves into one clean part, so I'm always looking for possible replacements. Unfortunately, the pipe does not fit neatly into the cuff. The barrel looks distorted and shaky. I have thickened it with Tamiya Tape and now it fits tight and clean.
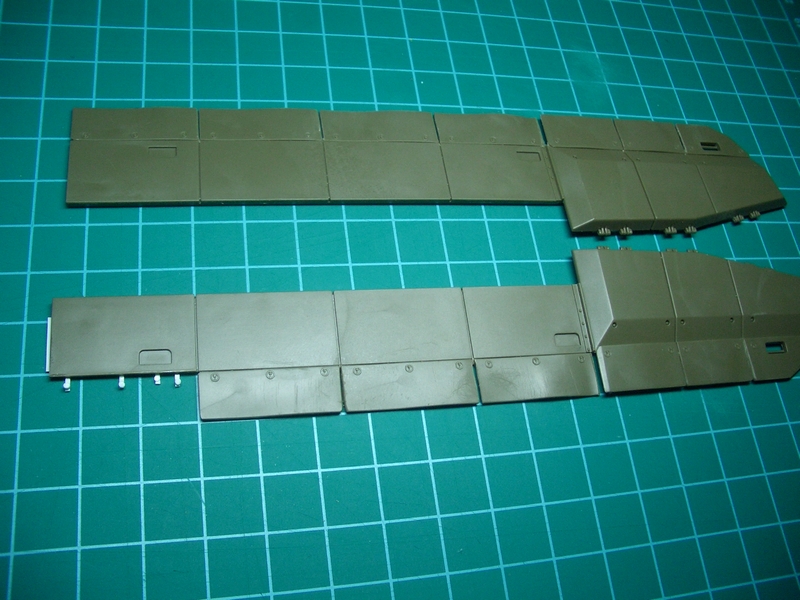
Side skirts
When I thought I was finished with the worst of the building I stumbled on the side skirts in the kit's box ... ups.
OK so lets go again. The left and right side skirts were shortened by one element, as well as on the right hand side, the rearmost rubber apron. Since it still had to be supplemented with mounting points made of thin Evergreen strips, I opened the gap between the aprons with a micro saw to make it look a little livelier.


About the Author


FROM: LOWER AUSTRIA, AUSTRIA
I've been building models since I was a child. I took several off-times (military-duty, un-services, occupational career, my family, set up my company e.g. ) but never lost interest. I am stuck with modern armor - especially white un-vehicles - but also with early aviation from austro-hungarian empi...
Comments

Great feature Walter. Your BLog was already fun to follow. If I could nitpick, the MBT name is Leclerc and not LeClerc.
It has been named from Marshal Philippe Leclerc de Hautecloque former CO 2nd French AD in WWII.
Olivier
NOV 08, 2010 - 05:31 AM

What a great peice! Your photos are great, the text is informative, and the model itself is superb. Bravo!!
Chris
NOV 10, 2010 - 06:04 AM
Copyright ©2021 by Walter Lampel. Images and/or videos also by copyright holder unless otherwise noted. The views and opinions expressed herein are solely the views and opinions of the authors and/or contributors to this Web site and do not necessarily represent the views and/or opinions of Armorama, KitMaker Network, or Silver Star Enterrpises. All rights reserved. Originally published on: 2010-11-08 00:00:00. Unique Reads: 21243

WEB HOSTING BY


Copyright ©2021 Armorama and Kitmaker Network, a subsidiary of Silver Star Enterprises
All Rights Reserved. Please read our Conditions of Use and Privacy Policy.
All Rights Reserved. Please read our Conditions of Use and Privacy Policy.