

1⁄35Defeat of France, 1940
5
Comments
Composition
As I started to construct the tank, I was able to position it across the street corner with the idea of leaving some room in the street for the German infantry figures already mentioned. As the photos will show, the large tree formed an environment for the tank and the small well made the composition a little more balanced by letting your eye move away from the tank. (pic2)The Tank Construction
I spent some time researching the tank I wanted to model and I decided I liked the look of the longer barreled H39. Color reference came from a book loaded with color plates of all kinds of WWII tanks, of all countries. The technical reference was harder for me to digest, as I was able to find some information via the web and in two publications on the 1940 campaign. All of it was in French though and thats a bit of a struggle for me. Through this phase, I became aware the Heller kit wasnt perfect and I tried to make a couple of changes that were easy enough to tackle. For the most part, I left the kit as is and really wanted to concentrate on the overall concept of the burning vehicle. The French armor experts will have to forgive me but I was impatient to see the project through.I left all the tools off the tank and indicated their clamps with metal strips. I rebuilt the jack and crank and placed them on the ground. Most of the reference photos I have, show the tools have been scavenged and I thought this made sense considering the setting I was creating. I was able to tame the flexible kit tracks by pinching them to the top of the return rollers with wire coming out from the hull sides. The length in front of the tank was wired to the ground by drilling two small holes in the base and tying it down with wire.
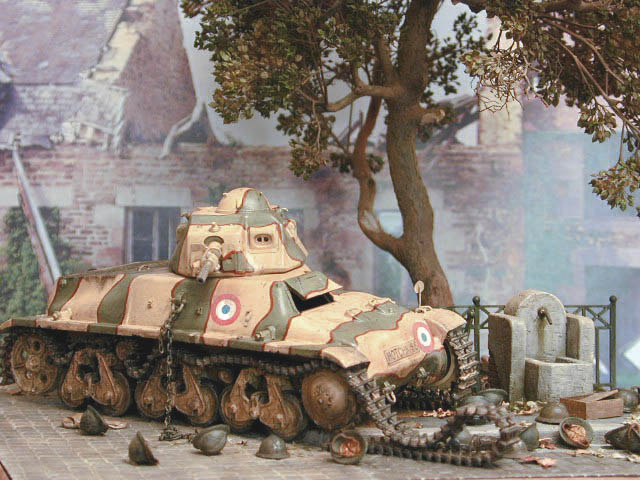
Painting The Tank
The tank was airbrushed with an overall coat of a tan that really leaned more towards a peach color instead of yellow. I then drew the outlines of the camouflage areas with a brown colored pencil and hand painted the olive/medium green areas. I then hand painted the chocolate brown outlines with a fine lettering brush and went back and forth with the base peach and green to clean up the lines and make the width consistent. I hand painted the roundels by using the pencil and a circle template for the outline and just eyeballing the colors until they looked consistent. The turret numbers were hand painted using a sort of a stencil. I have some text stickers from the craft store that can be peeled and arranged to personalize craft projects. The sticky negative part of the sheet was used to make the mask and the number 2 was painted in white with a brush. The tank was given some weathering of burnt umber to age the colors and some pastel powder mixed with alcohol. Graphite was added to some edges and all across the tracks. Black pastel was rubbed onto the engine deck to indicate scorching. The tank was painted after assembly, right on the base. The base and well were also painted with the tank already in place. This wasnt too difficult as the base is a lot of earthy, non-exact colors. The tree and fence were painted separately and touched up after attaching to the base. (pic3)
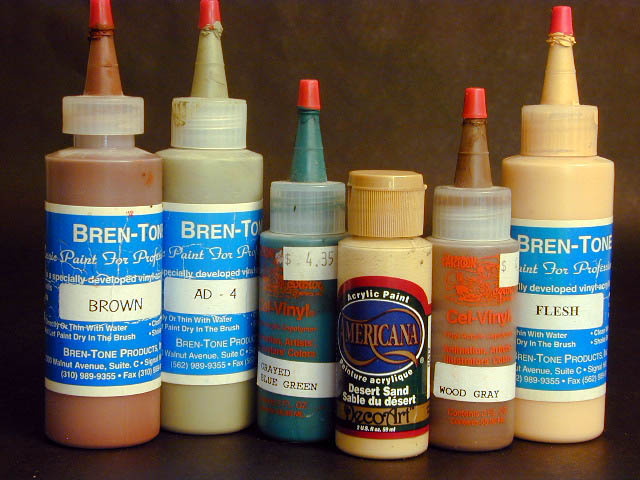
| A note about painting I primarily use acrylic paints that are marketed to cartoon animators, as well as all the brands of ceramic paints for painting plaster casts. I have very few true model brand paints and I guess Im settled into a process that works for me. I like the animators (or cel paints) because they dry flat and cover extremely well, light over dark as in the case of the roundels and turret numbers. The other example is the ease with which I could paint back the camouflage colors to narrow the brown outlines. They airbrush easily after thinning and because they are formulated to stick to clear acetate sheets, you can even get by with painting resin and plastic with no primer if you want. The range of colors is extensive and I consider them economical because of the amount you get in one bottle. The ceramic paints are great for washes and staining, again for their economy and vast color range. (pic4) |
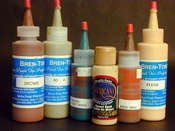 Pic 4
Pic 4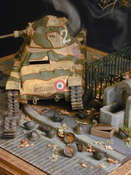 Pc 3
Pc 3 Pic 2
Pic 2

About the Author


FROM: CALIFORNIA, UNITED STATES
I work as a full time model maker and painter while trying to develop my own business providing diorama products to other modelers. I am happily married and live in Ventura County, California.
Comments

Great article Mike. The layout looks terrific with or without the smoke. I like the "drop everything and run" look of the scene. Well done.
I must say you don't often see a tank with a semi-gloss finish, but here, on the Hotchkiss, it looks very realistic as opposed to being dead flat. It captures the steel of the tank.
Thanks for sharing that with us.
MAY 16, 2004 - 01:31 PM

It was indeed an interesting article. It was a good idea to use the smoke generator and LED's to simulate fire and smoke.
MAY 16, 2004 - 06:26 PM

Great article indeed!
The effects are something to cheer up the scene!
Congratulations!
MAY 17, 2004 - 02:36 AM

Mike,
thanks for this excellent article. I think you did another great job. I'm very much impressed with the tree, it looks so darn real.
again, great article ! Thanks.
MAY 20, 2004 - 04:48 AM
A terrific job on both the diorama and the article. The smoke generator was a great effect and very creative.
MAY 20, 2004 - 06:50 AM
Copyright ©2021 by Mike Bishop. Images and/or videos also by copyright holder unless otherwise noted. The views and opinions expressed herein are solely the views and opinions of the authors and/or contributors to this Web site and do not necessarily represent the views and/or opinions of Armorama, KitMaker Network, or Silver Star Enterrpises. All rights reserved. Originally published on: 2004-05-16 00:00:00. Unique Reads: 14342

WEB HOSTING BY


Copyright ©2021 Armorama and Kitmaker Network, a subsidiary of Silver Star Enterprises
All Rights Reserved. Please read our Conditions of Use and Privacy Policy.
All Rights Reserved. Please read our Conditions of Use and Privacy Policy.