

1⁄35Never Abandoned
9
Comments

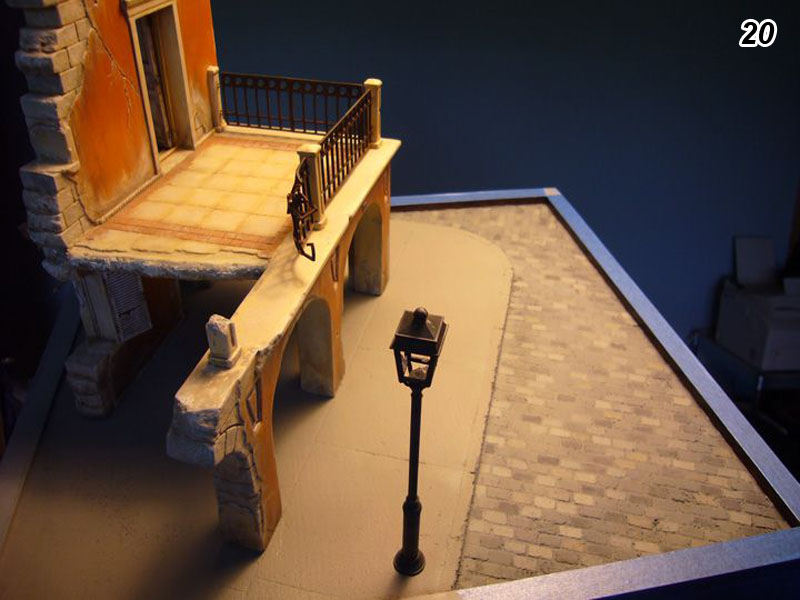
I added the roof elements to the building as well as the doors and window frames. I also added some plumbing details using brass tubing something a bit unique. I then proceeded to paint the base. I painted the sidewalk area a warm gray and the road a cool gray. I then hand painted the cobblestones a variety of colors, from browns to blue grays to reddish grays. Then I over sprayed both areas with one neutral gray tone to unify the overall look and tone down the random cobblestone colors. (Photo 20)
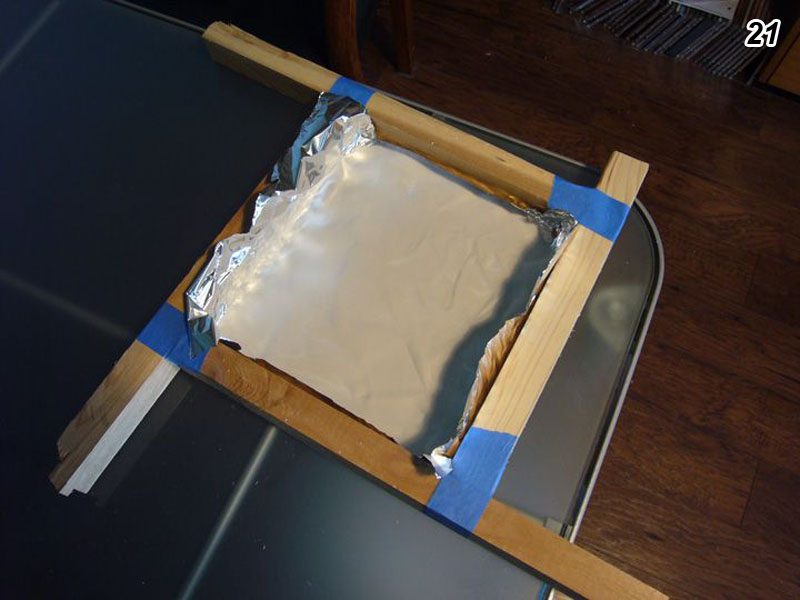
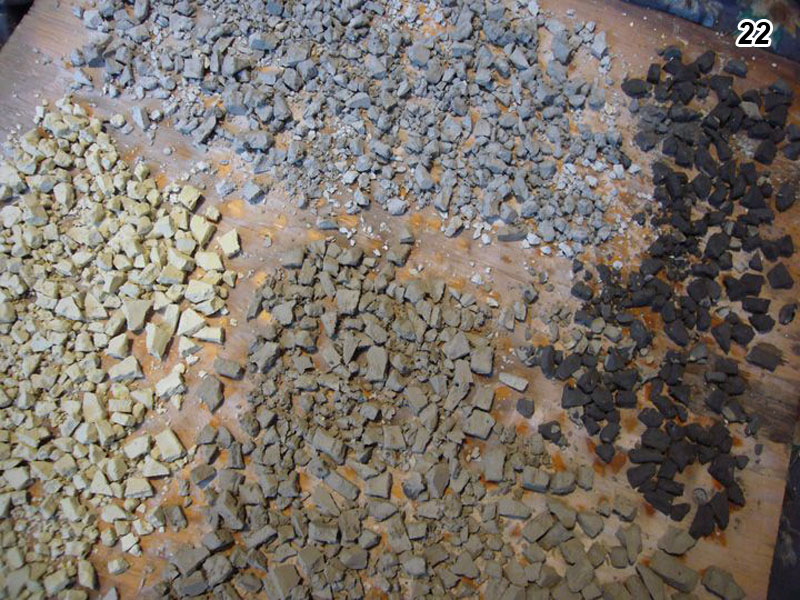
Next I began making rubble. I used a basic frame lined with aluminium foil to get started. The rubble is made from mixing plaster of paris with Liquitex Acrylic paint from a tube that I had stored in my paint box for over 20 years. You can use any water based paint to "dye" the plaster, just a bit tricky to get the color right as it dries quite a bit lighter. The rubble was allowed to dry enough for me to start breaking it into smaller pieces which helped to speed up the drying time. It was allowed to cure for 3 days before I began laying it out on the base. For the diorama I had to make a variety of coloured rubble as the stonework of the building is made from various colored blocks. (Photos 21 & 22)
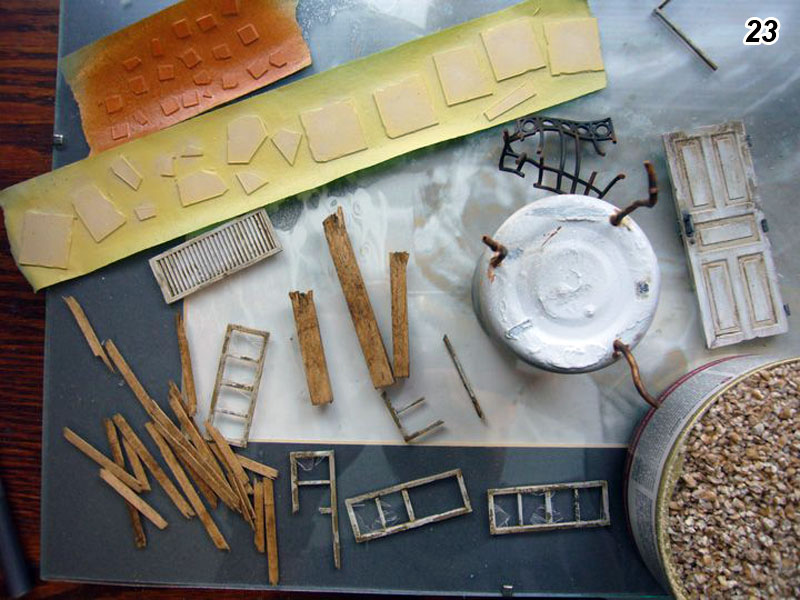
I created some "accessories" for the debris to make the rubble more dynamic. I made some tiles from styrene, extra pieces of plumbing, wood planking, a piece of railing, etc... all painted and weathered to match the building. (Photo 23)
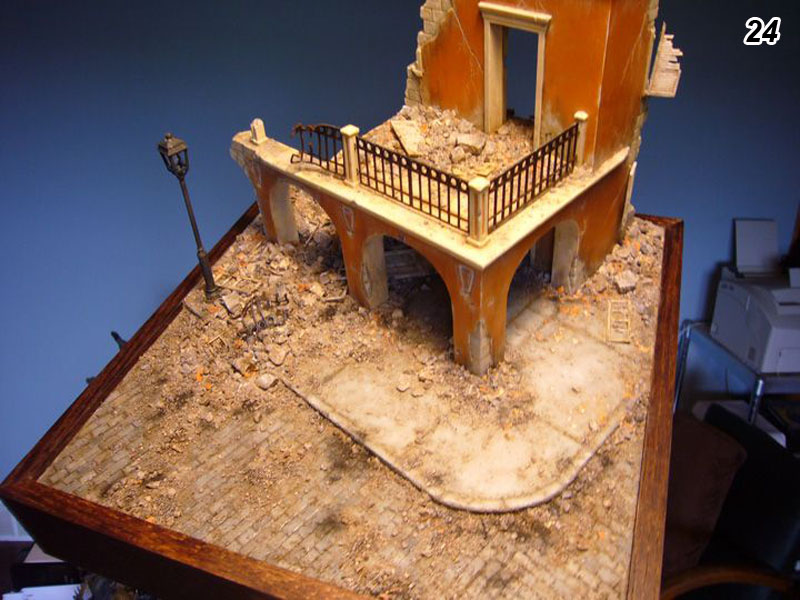
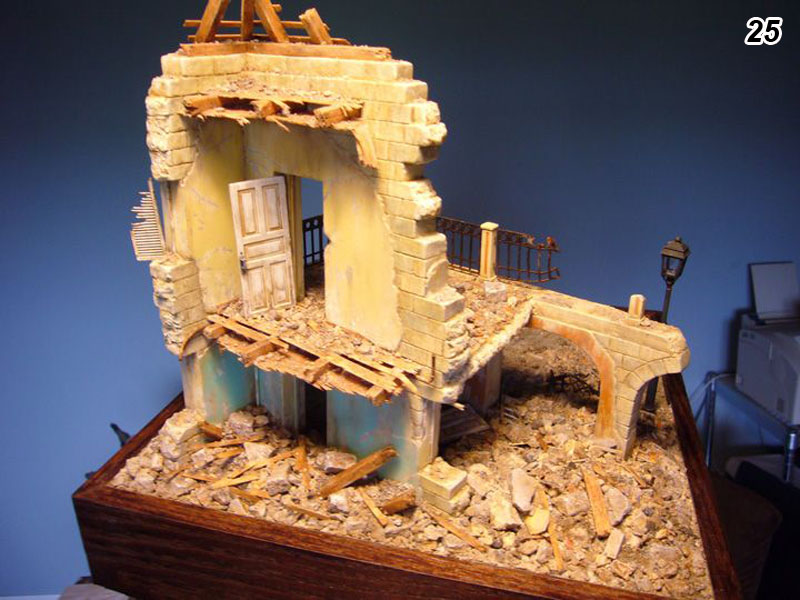
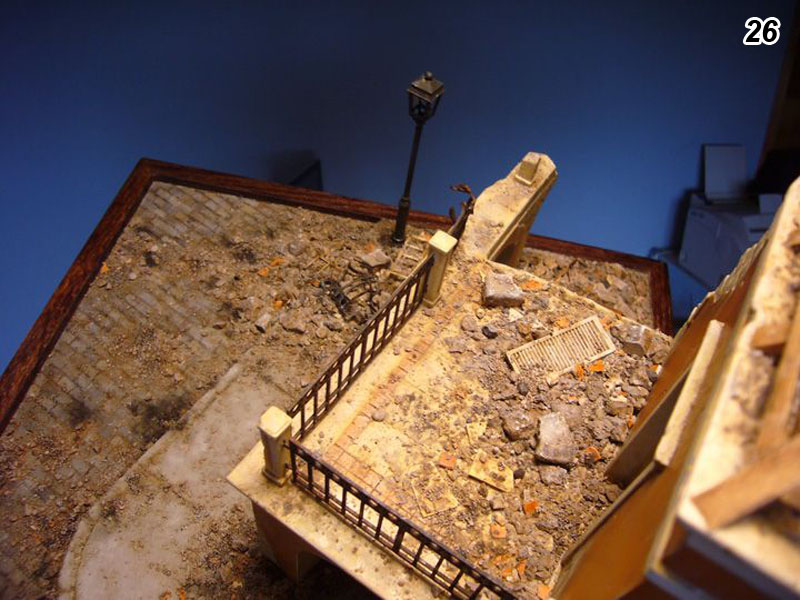
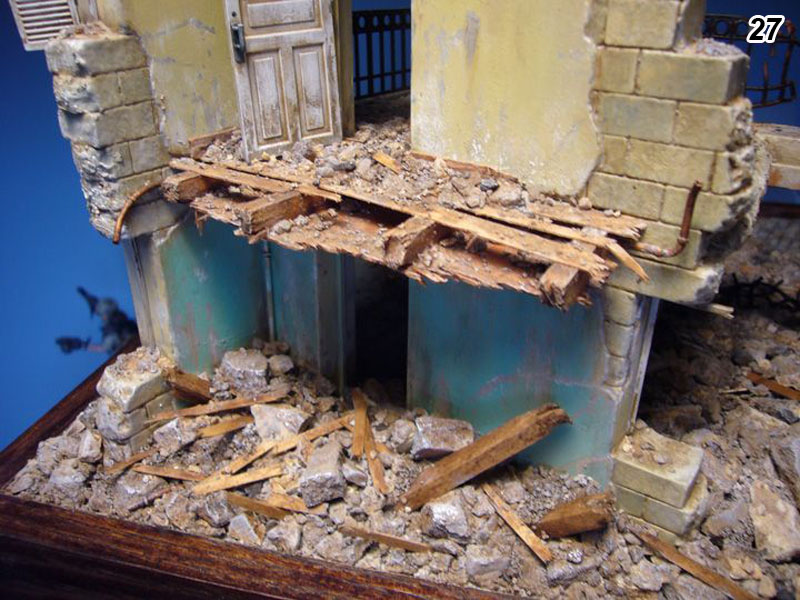
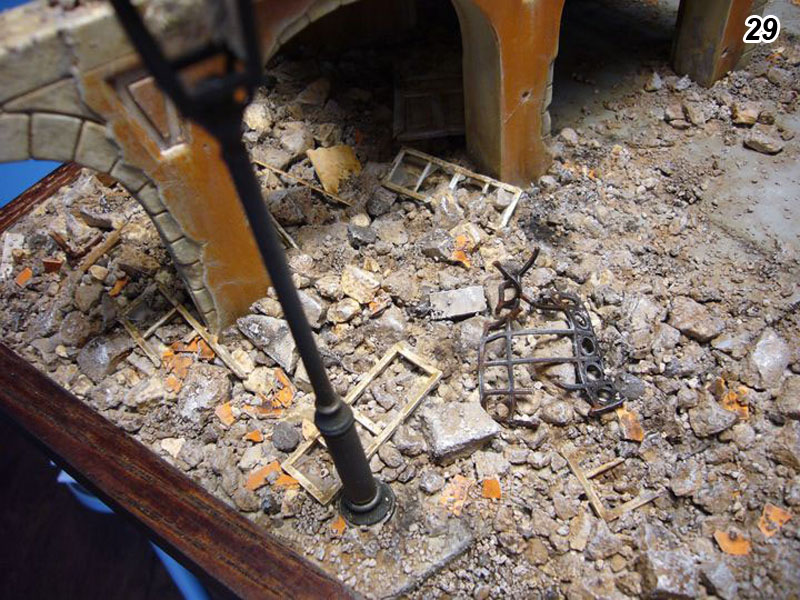
I then placed all the rubble on the base in a fashion that looked realistic to the damage the building appeared to have sustained. The rubble was then glued down by diluting white glue with water and applying it with a spray bottle. The debris was then weathered with oil washes, dry brushing with oil paints (both brushed on and sponged on) and then Mig pigments were applied to add lights and darks to the overall feel of the diorama. I had made a set of very thin plaster pieces that I airbrushed terracotta and which I then placed in strategic areas near where the building had wall damage to add a touch of bright color to the rubble. (Photos 24-29)

About the Author

FROM: ALBERTA, CANADA
first time i built a model it was a hot rod and i was five year old. i painted it using blue nail polish and it was the best model i had made yet (given it was my first it wasn't that impressive). but i have tried to keep that feeling for over 40 years, each model i finish gives me the gratification...
Comments
Really nice write-up, well detailed.
Thanks for putting it together, really good work.
cheers
JAN 16, 2011 - 06:32 AM


Thanks for sharing this as a build story, I remember following this as well. Inspirational as always my good man
JAN 16, 2011 - 06:29 PM

thanks guys for the kind words and cheers to Darren, Keith and the Armorama staff for their work in putting this feature together. bd.
JAN 17, 2011 - 05:04 AM

Bruce,
Exceptionally great piece of work! Well thought out. Nice composition and detail. Freedom has a price that is paid with the sacrifice of so many lives in so many ways. We must never forget all those around the world that fought for freedom then or now especially those that have ultimately paid with their lives. You've captured just such a moment in time.
-Eddy
JAN 23, 2011 - 11:37 AM

Hi Bruce,
Good article and excellent build, I like you mix of kits. Great lttle dio, well thought out and executed.
Al
FEB 02, 2011 - 04:23 AM
thanks Eddy and Alan as well a big thank you for all those who have contributed their work and techniques online. with that extra knowledge i have seen much improvement in my builds and i have the courage to push a little further with each project.
cheers, bd.
FEB 02, 2011 - 04:51 AM

An incredible and inspiring build Bruce! Fantastic job on all aspects of the diorama. Thanks for sharing with the rest of us!
FEB 27, 2011 - 09:07 AM
just wanted to thank all the great people i met at the local model show today who were kind enough to share their positive feedback on this diorama and also offered me constructive feedback as to how i could improve my projects.
a special thank you to Roger and Terry who took the time to share their input and a chance to check out their wonderful works for inspiration.
this was my second model show i have entered and it was an interesting experience. cheers to all the fellow modelers and their great projects, bd.
JUN 04, 2011 - 05:29 PM
Copyright ©2021 by Bruce D. Images and/or videos also by copyright holder unless otherwise noted. The views and opinions expressed herein are solely the views and opinions of the authors and/or contributors to this Web site and do not necessarily represent the views and/or opinions of Armorama, KitMaker Network, or Silver Star Enterrpises. All rights reserved. Originally published on: 2011-01-16 00:00:00. Unique Reads: 35996

WEB HOSTING BY


Copyright ©2021 Armorama and Kitmaker Network, a subsidiary of Silver Star Enterprises
All Rights Reserved. Please read our Conditions of Use and Privacy Policy.
All Rights Reserved. Please read our Conditions of Use and Privacy Policy.