

1⁄35Never Abandoned
9
Comments
The Jagdpanther Interior Construction
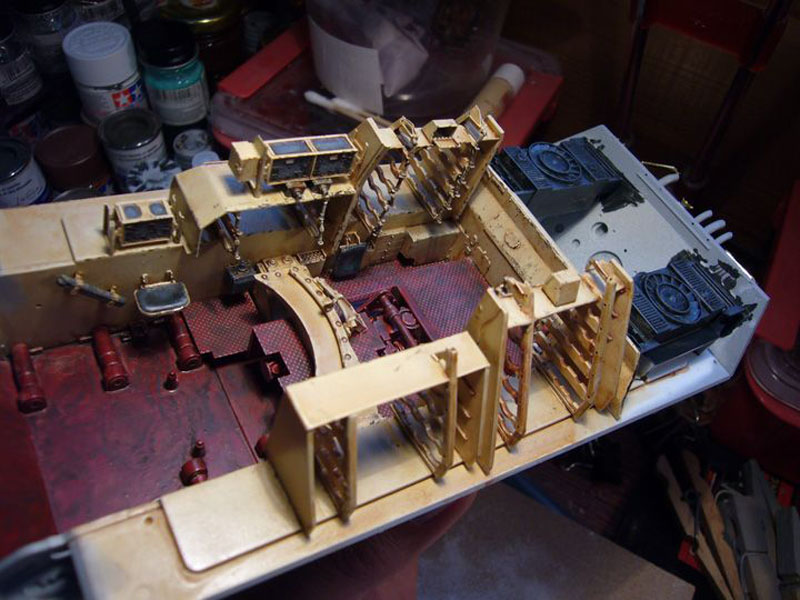
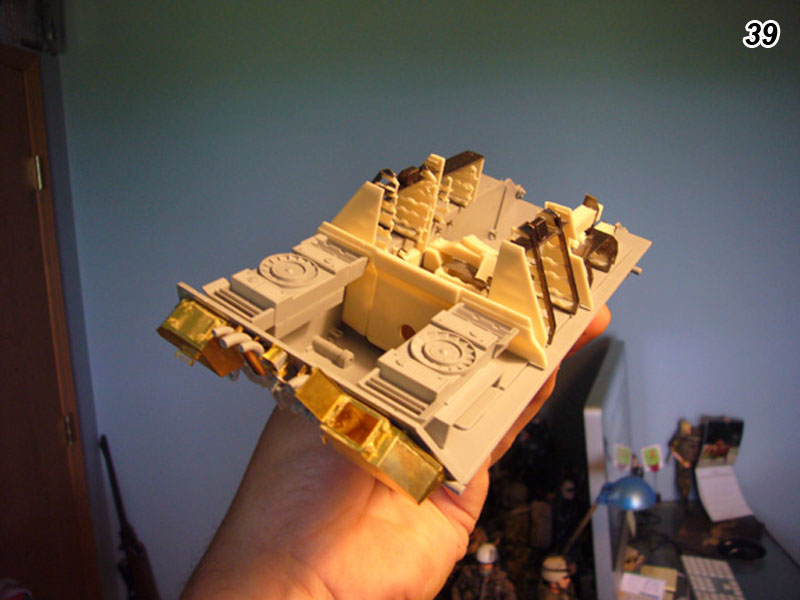
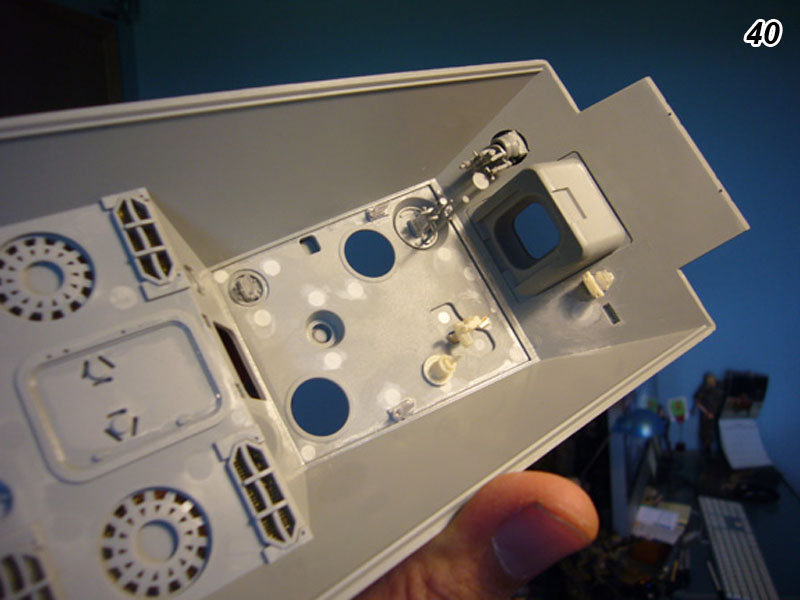
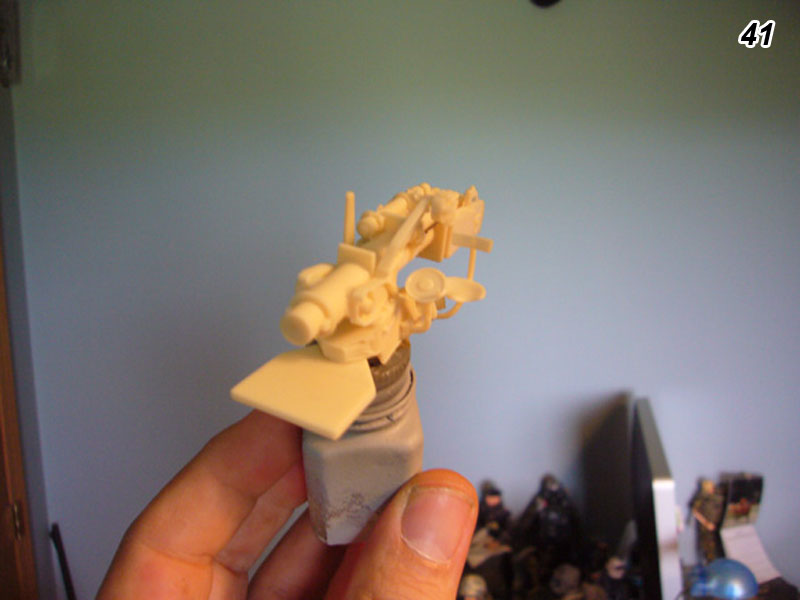
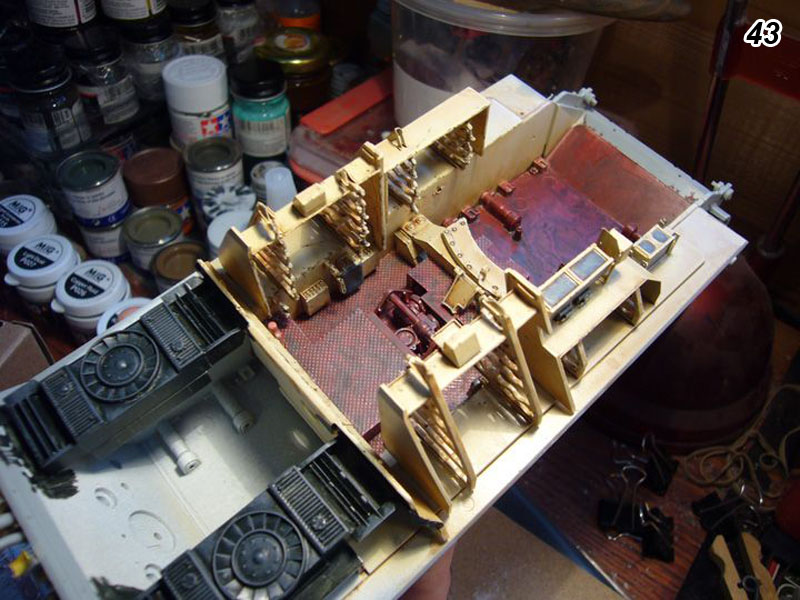
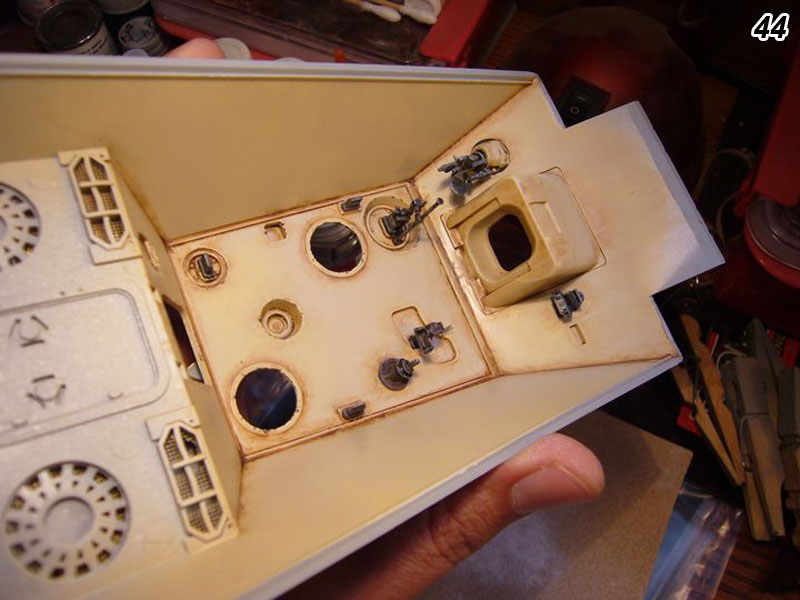
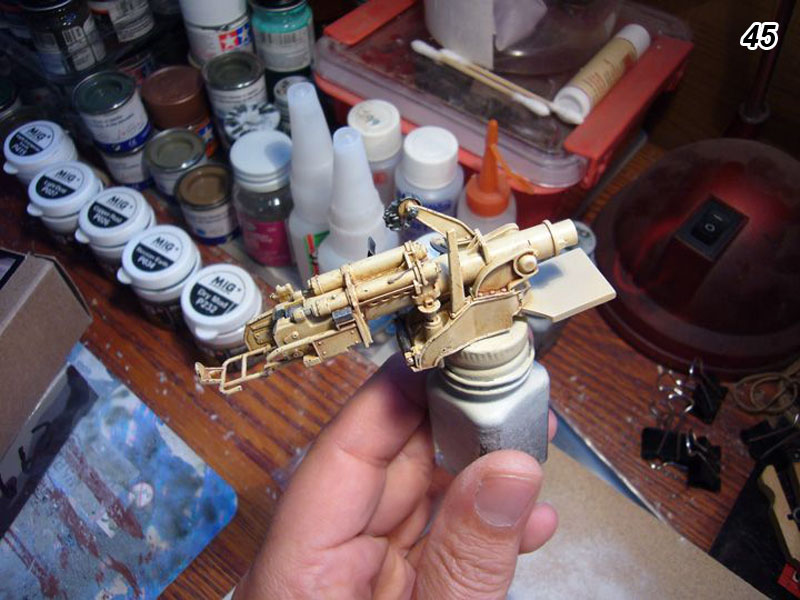
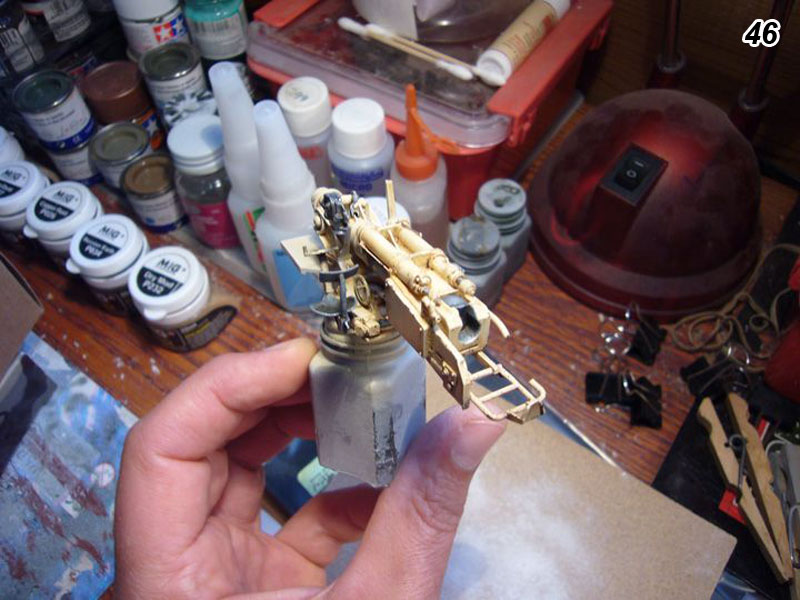
I started with the interior elements for the Jagdpanther. The Dragon Late Production model was shown to be ideal for the CMK Interior Detail Set. Though the CMK kit is marked as "made for Dragon kit," the instructions refer to the Tamiya model. Nicely cast resin and fairly decent fit made it work but there are some issues. The racks are too tall to get a good fit of the hull roof. The gun breach is a bit too long to fit inside without warping the upper hull during my test fits. I usually build interiors from scratch so these points were just minor. CMK allowed me to create a good interior in a fraction of the time it would normally be. (Photos 38-41) Most of the elements of the interior were painted with heavy contrast between washes and dry brushing because they will be under poor lighting conditions when viewed from the completed model. This will allow the interior to be interesting without looking out of scale. (Photos 42-46)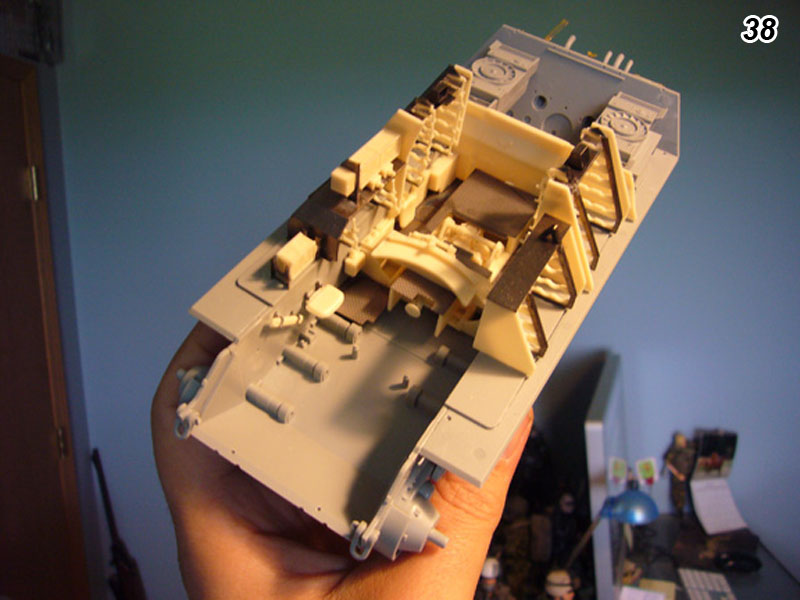

About the Author

FROM: ALBERTA, CANADA
first time i built a model it was a hot rod and i was five year old. i painted it using blue nail polish and it was the best model i had made yet (given it was my first it wasn't that impressive). but i have tried to keep that feeling for over 40 years, each model i finish gives me the gratification...
Comments
Really nice write-up, well detailed.
Thanks for putting it together, really good work.
cheers
JAN 16, 2011 - 06:32 AM


Thanks for sharing this as a build story, I remember following this as well. Inspirational as always my good man
JAN 16, 2011 - 06:29 PM

thanks guys for the kind words and cheers to Darren, Keith and the Armorama staff for their work in putting this feature together. bd.
JAN 17, 2011 - 05:04 AM

Bruce,
Exceptionally great piece of work! Well thought out. Nice composition and detail. Freedom has a price that is paid with the sacrifice of so many lives in so many ways. We must never forget all those around the world that fought for freedom then or now especially those that have ultimately paid with their lives. You've captured just such a moment in time.
-Eddy
JAN 23, 2011 - 11:37 AM

Hi Bruce,
Good article and excellent build, I like you mix of kits. Great lttle dio, well thought out and executed.
Al
FEB 02, 2011 - 04:23 AM
thanks Eddy and Alan as well a big thank you for all those who have contributed their work and techniques online. with that extra knowledge i have seen much improvement in my builds and i have the courage to push a little further with each project.
cheers, bd.
FEB 02, 2011 - 04:51 AM

An incredible and inspiring build Bruce! Fantastic job on all aspects of the diorama. Thanks for sharing with the rest of us!
FEB 27, 2011 - 09:07 AM
just wanted to thank all the great people i met at the local model show today who were kind enough to share their positive feedback on this diorama and also offered me constructive feedback as to how i could improve my projects.
a special thank you to Roger and Terry who took the time to share their input and a chance to check out their wonderful works for inspiration.
this was my second model show i have entered and it was an interesting experience. cheers to all the fellow modelers and their great projects, bd.
JUN 04, 2011 - 05:29 PM
Copyright ©2021 by Bruce D. Images and/or videos also by copyright holder unless otherwise noted. The views and opinions expressed herein are solely the views and opinions of the authors and/or contributors to this Web site and do not necessarily represent the views and/or opinions of Armorama, KitMaker Network, or Silver Star Enterrpises. All rights reserved. Originally published on: 2011-01-16 00:00:00. Unique Reads: 35996

WEB HOSTING BY


Copyright ©2021 Armorama and Kitmaker Network, a subsidiary of Silver Star Enterprises
All Rights Reserved. Please read our Conditions of Use and Privacy Policy.
All Rights Reserved. Please read our Conditions of Use and Privacy Policy.