

1⁄35Sd. Kfz. 231 Early Type
3
Comments
steps 28 37
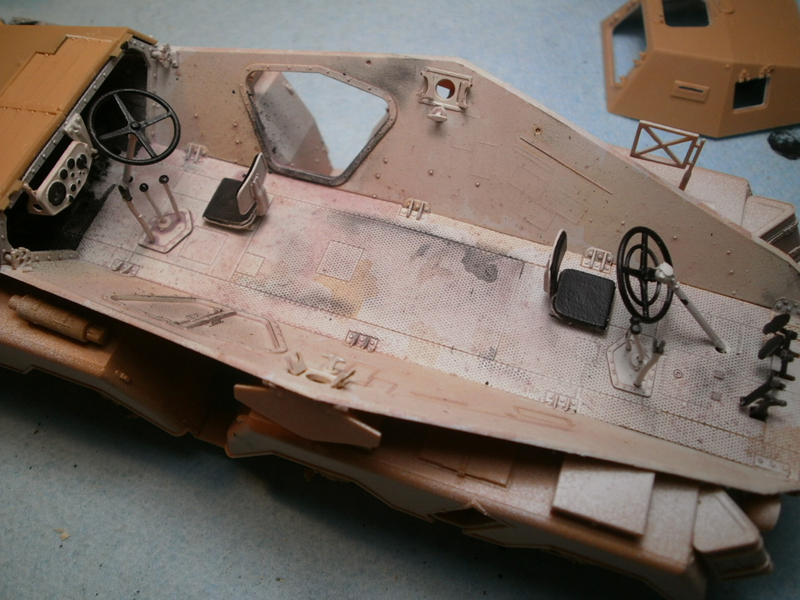
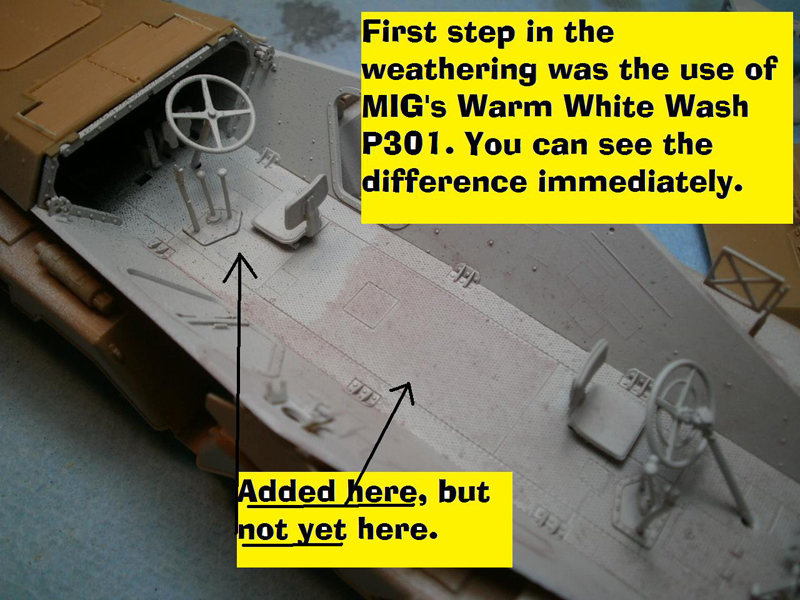
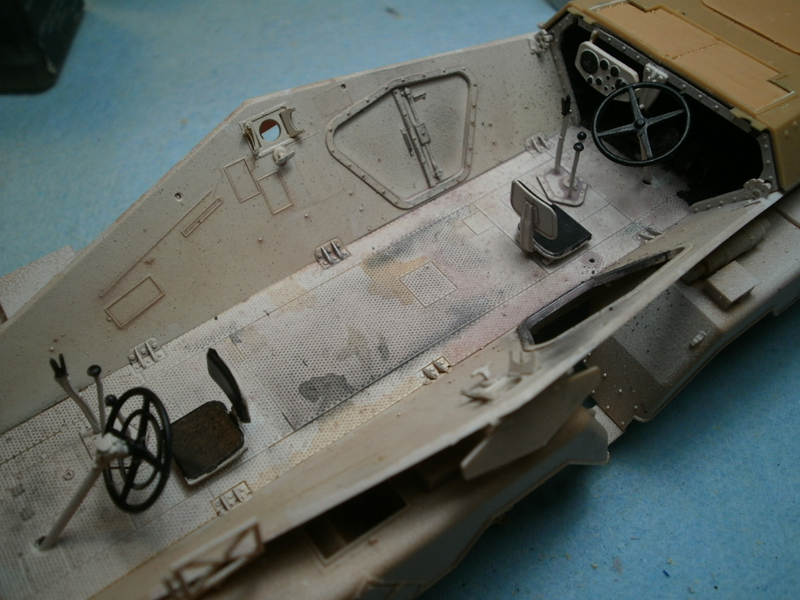
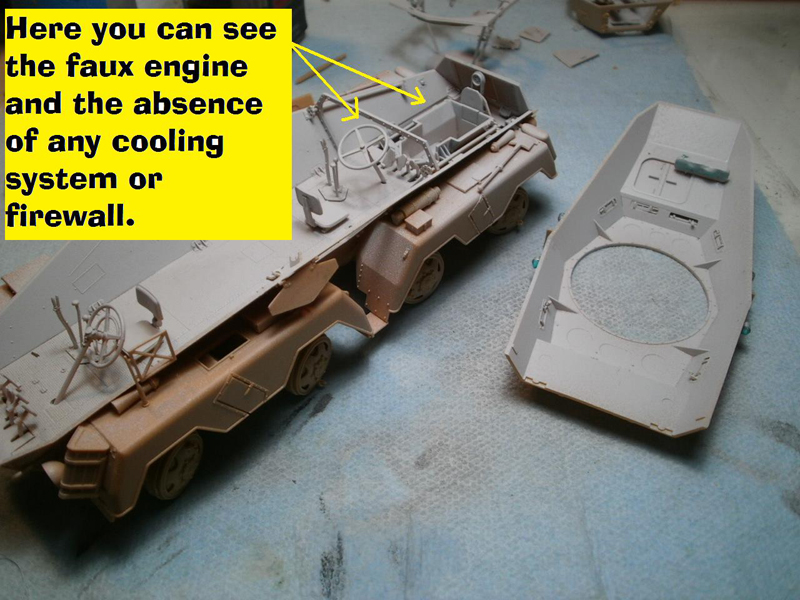
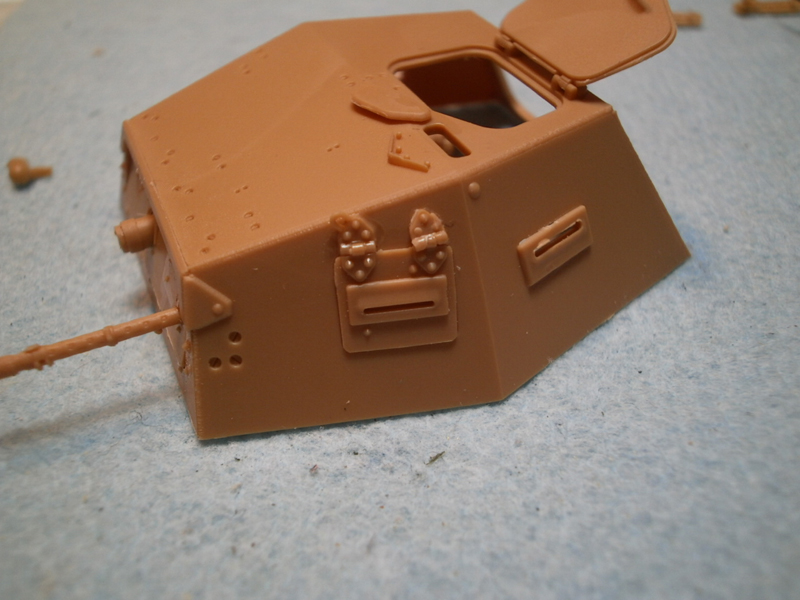
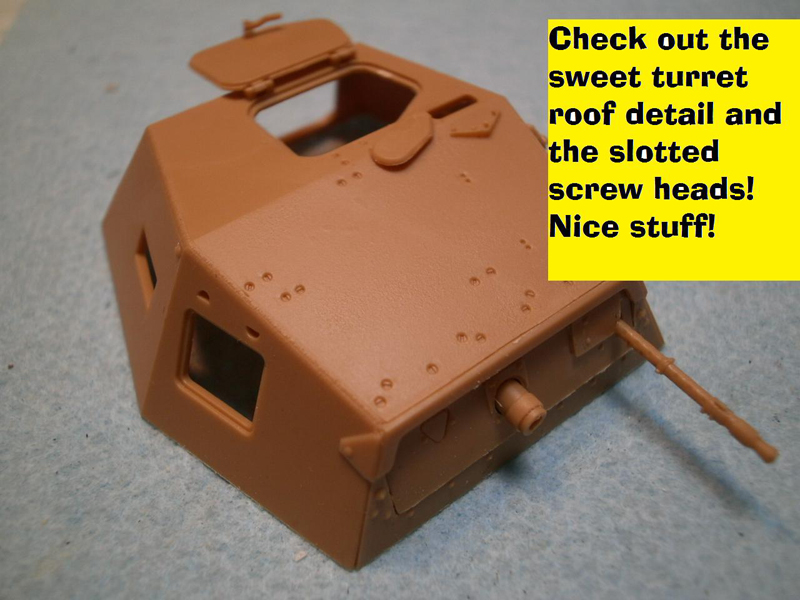
Step twenty-seven B: No, there is not really a step 27B, its just where I chose to stop and paint and weather the interior. You could choose a few spots to do this, of course if you are planning on hatches all being closed, skip this and just plow on my friend. I painted the interior with Vallejo Model Air 045 US Grey Light. I like it better than a more stark flat white. The seats and shifter knobs etc were picked out with Vallejo Model Air Black 71057, and I sealed with Vallejo Satin Varnish 522 before starting to weather. For the first step in weathering I gave a wash of MIG Productions P301 Warm White Wash followed by a bit of here and there with AK Engine Grime AK082, AK Light Rust Wash AK046, MIG Earth Wash P300, and AK Pigments Dark Steel AK086. I knew that most of this would be hard to see after everything was closed up so I didnt spend a lot of time here, just enough to give it something other than a monochromatic finish. Step twenty-eight through thirty: These three steps finish off the hull of the vehicle. Here is where you add the central hull roof as well as all the vision ports and rain gutters and other various small fittings. The pioneer tools for the front portion of the hull are added; I thought the level of detail here was very good; brass pieces finish off the hold downs for a nice look. Front drivers hatch is added with separate hinge detail as well. The rain gutters can get a bit tedious as can the vision ports, there are quite a few, and the tiny interior knobs to open or close them are molded as separate parts which love to fly out of the tweezers. Some people might like to replace the gutters with photo-etch but the level of detail on the plastic is quite good, it is not just a flat piece that sits above the port but an actual channel. Each gutter has the hinges attached for the port, but they are a bit delicate so be careful trimming. The small lights on the hull side are provided in clear plastic; I masked the front, painted silver for the reflector and then attached them to the hull side. After painting and weathering I removed the mask and the lights were good to go. Step thirty-one: Now construction moves to the final phase, the turret. This step is where you build the gun cradle for the 20mm and install it and the co-axial machine gun into the turret mantlet. The detail on the gun and the cradle are superb with nicely drilled out barrels muzzles for both. However, the locator pins for the gun cradle are incredibly tiny and some of the locations are poorly marked. Take your time and check your references throughout. The spent ammo collector does sport a rather prominent join seam that will need to be taken care of before you can attach it and set the whole assembly aside to dry. Step thirty-two to thirty-five: Now you start to play inside the turret itself. You will need to paint the interior of the turret shell, but happily I could find not a single knockout plug that needed to be corrected so the painting can go pretty quickly. Of course you will want to paint it the same color as the rest of the interior that you already painted, right? Some small issues inside the turret, the two trunnions on the side that hold the mantlet and allow the gun to elevate or depress are shown in the instructions but the part numbers are not marked, they are parts F12 and F13. Once again the interior of the turret should be a very busy set-up behind the mantlet but lots of detail is missing, the most glaring omission is the telescopic sight, the commanders seat, and the master cylinder firing apparatus as well as the attendant plumbing. These may be items that an aftermarket collaboration will bring later on down the road. Other than that the turret needs some hatches, vision ports, and periscopes. They are all well done, finely detailed pieces that fit like a glove. If you are careful with the glue on the separate hatches for the rear you will find that, along with the top hatch, they are operable. The interior detail on the hatches is really nice, however, once again the instructions forget to give the part number on the photo-etch pieces for the inside slide hinge; they are parts G5 and G6, although the instructions do show where they belong. Step thirty-six: Construct the turret basket and floor. I thought this might be a bit tricky, trying to get the three struts that connect the race/ring to the turret basket floor all lined up without collapsing, but it actually went together very easily. The kit also provides the gun mounting balance gear and the traverse/elevating mechanism and the gunners seat. The detail that is provided all is well done with excellent fit throughout. With the hatches open the kit still provides enough detail to look sufficiently busy to a non-discerning eye. Step thirty seven: The end. Okay, you do need to add the front license plate and the swinging bracket on the side (I omitted mine as I found more photos without it than those that sported it) for a dismounted machine gun?? And that is a wrap for the building, on to the painting and weathering and the struggle for an empty spot on the shelf!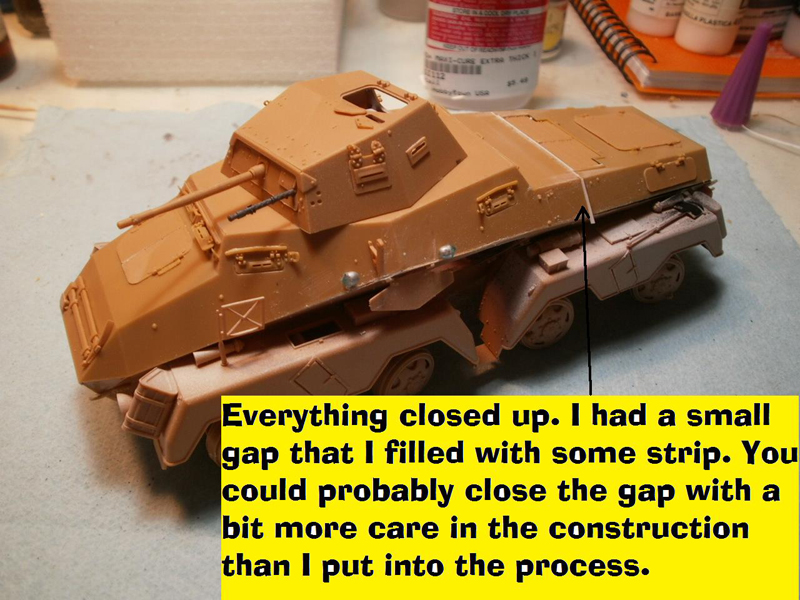
About the Author


FROM: CALIFORNIA, UNITED STATES
I have been modeling for about 30 years now. Once upon a time in another century I owned my own hobby shop; way more work than it was worth. I tip my opti-visor to those who make a real living at it. Mainly build armor these days but I keep working at figures, planes and the occasional ship.
Comments


Yes, 1:35 scale...apologies, I had a broken link to the video review...all fixed now
MAY 19, 2012 - 02:50 AM
Copyright ©2021 by Rick Cooper. Images and/or videos also by copyright holder unless otherwise noted. The views and opinions expressed herein are solely the views and opinions of the authors and/or contributors to this Web site and do not necessarily represent the views and/or opinions of Armorama, KitMaker Network, or Silver Star Enterrpises. All rights reserved. Originally published on: 2012-05-05 00:00:00. Unique Reads: 14238

WEB HOSTING BY


Copyright ©2021 Armorama and Kitmaker Network, a subsidiary of Silver Star Enterprises
All Rights Reserved. Please read our Conditions of Use and Privacy Policy.
All Rights Reserved. Please read our Conditions of Use and Privacy Policy.