

1⁄35Tasca M4A3E8
13
Comments
painting
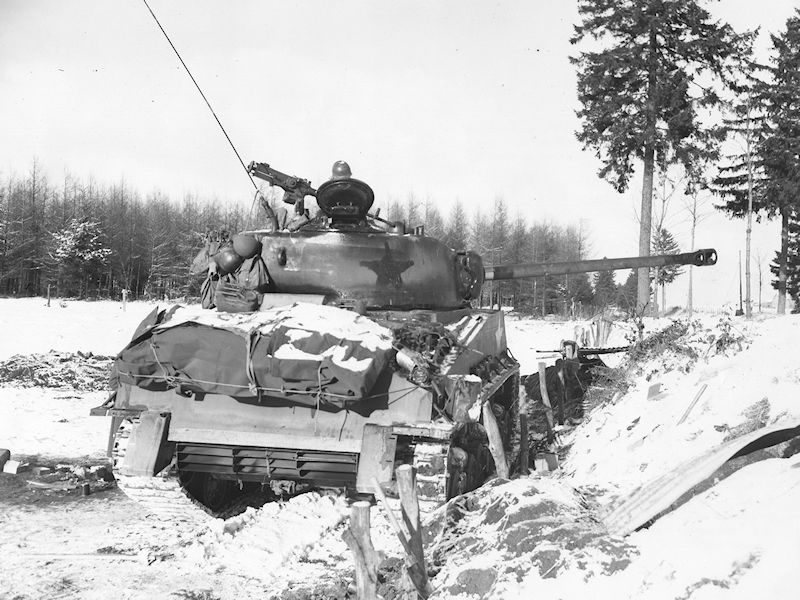
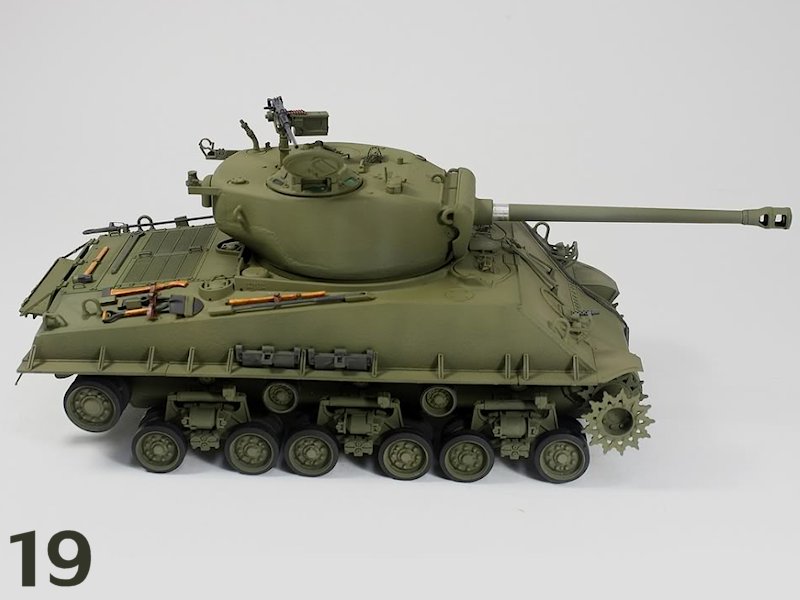
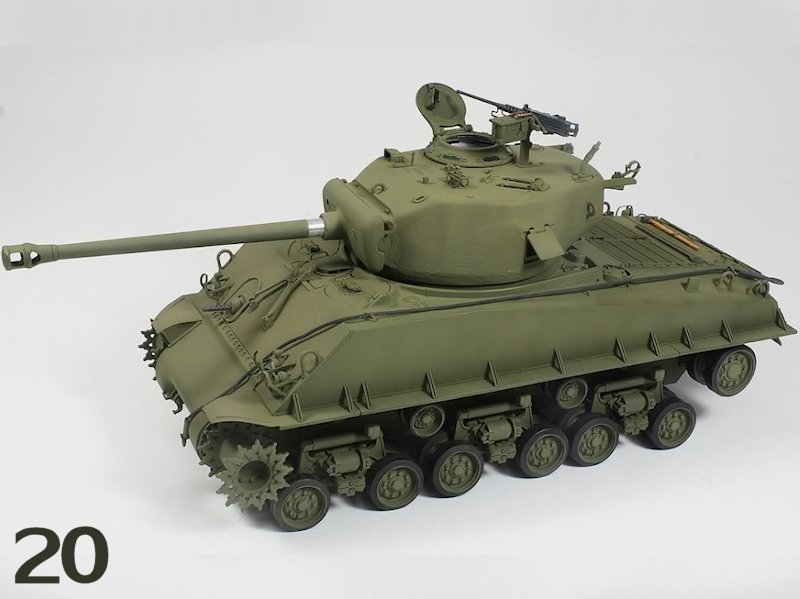
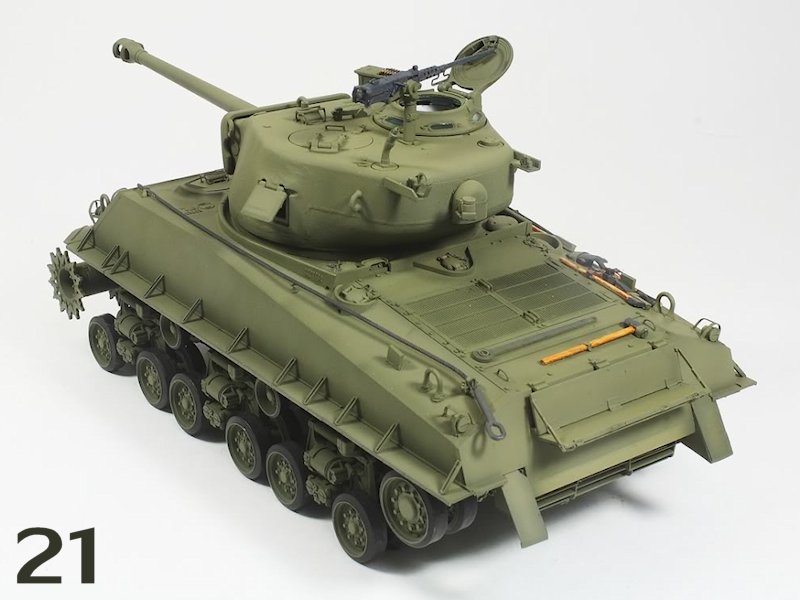
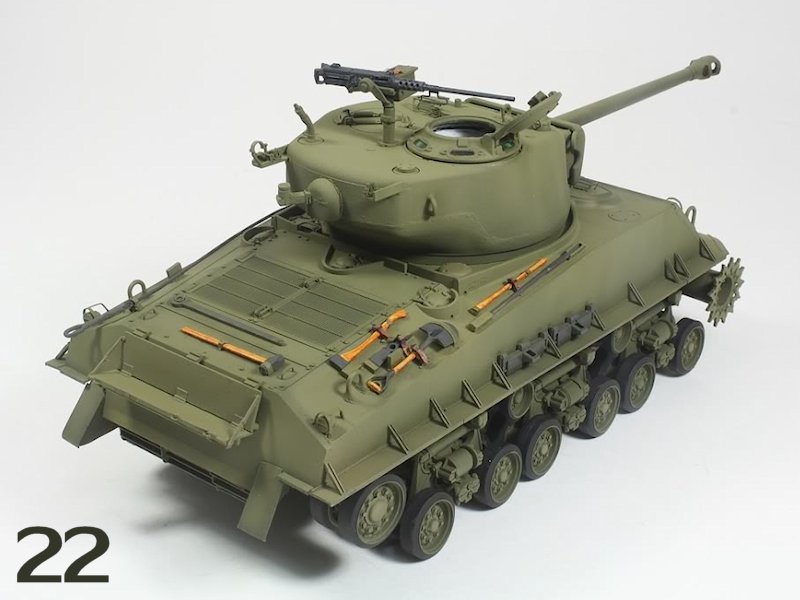
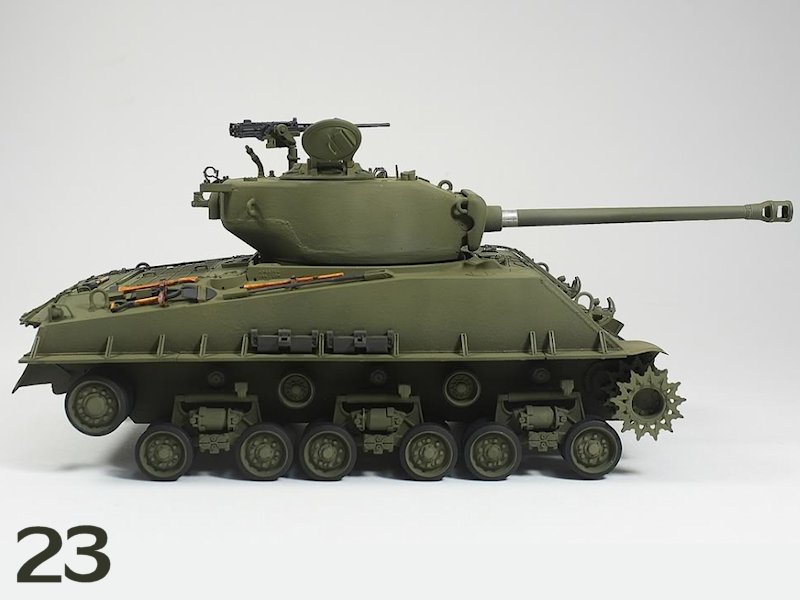
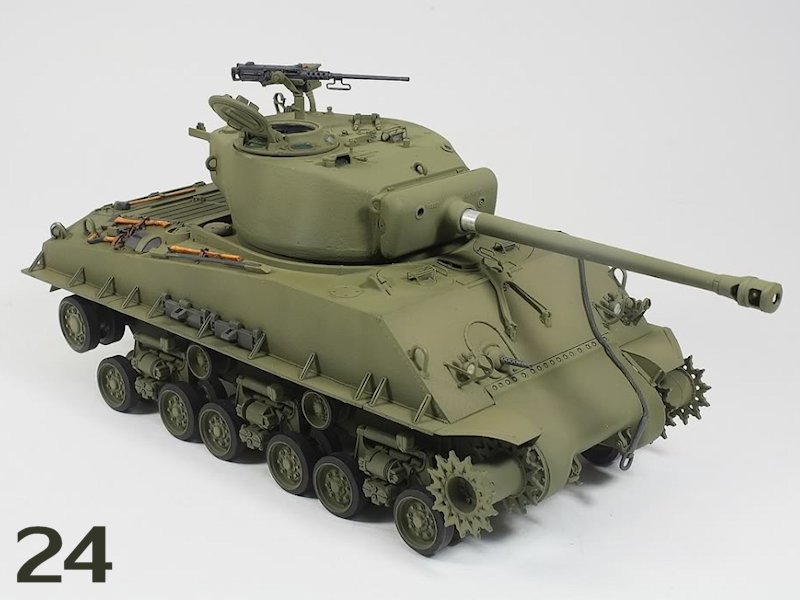
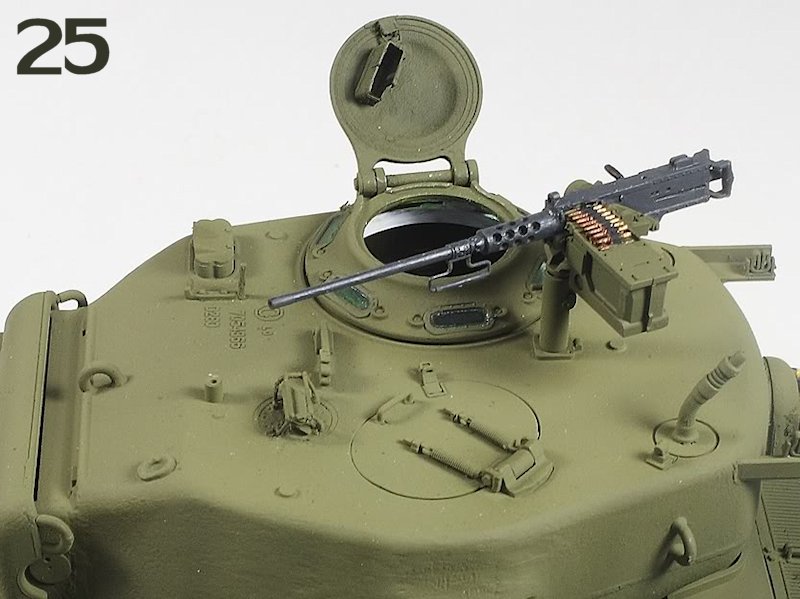
18. I had been checking various pictures of M4A3E8's in the European Theater of Operations near the end of the war and finally settled on this one. This particular tank served with the U.S. 4th Armoured division during the Battle of the Bulge. The M4A3E8 entered service during the Battle of the Bulge and this example is a fairly new one. Of particular interest is the painted out star on the turret, although the original white one remains on the hull; you can also see the remains of the sand shields on the rear of the tank, looking like narrow flaps. As I understand it these tanks were delivered with the sand shields fitted, but due to snow build up and the difficulty of getting access to the running gear for repairs they were quickly discarded. I built these shields from plastic sheet. 19 24. Here are some shots with the basecoat on. I did not use any primer on this tank other than the subtle surface texturing I did on the turret sides, hull sides, glacis and final drive with some diluted Mr. Surfacer 500. I took a page out of Steve Zaloga's Osprey books on modelling the Sherman Tank, in which he states that today's acrylic paints are so good that you really don't need to prime in most cases. Additionally, primer can sometimes cover up some of the surface details. In terms of painting the tank itself I wanted to exhibit some Olive Drab colour variations on various surfaces and so did some colour modulation by spraying the horizontal and upper vertical surfaces using Tamiya's XF62 Olive Drab mixed with XF60 Dark yellow in a 60/40 ratio. For the darker lower areas I used a 70/30 and an 80/20 mix of XF62/XF60. Where I had more of a stark or clearly defined transition between the darker and lighter shaded areas I lightly misted the area with the lighter colour to tie both colours in. The rear fenders for the sand shields were fashioned out plastic card stock. The tow cable and ends are from Eureka XXL ER-3503. I also added a resin tow cable retainer, which is near the front left driver's hatch, as well as a towing clamp near the rear left side to hold down the tow cable, both from Formations. 25. I also finished off the .50cal machine gun: in the photo it is not glued on but I threw it on the tank to see what it looked like. M4A3's had a bit of a different set up for loading the .50cal ammo into the gun, as I learned from John Guld and Tim Streeter's excellent site Modelling the US Army in World War 2. The ammo box lid had to be removed before it could inserted into the D80030 (6580030) ammo box holder. I hollowed out the appropriate ammo box where the ammo would be fed from, then cut off a small piece of the ammo belt that comes with the kit and put it in the hollowed out area, my goal here being to make the ammo box look like it was full. I then cut a longer strip and bent it using hot steam from a kettle, as per the Tasca instructions, to serve as the portion of the belt being fed into the machine gun, then glued it in place. I think it looks pretty good, but let me know what you think. I painted the machine gun in a greyish colour to represent the grey parkerized finish that was common on WWII .50 Cal MG's. For the commander's hatch I added the locking latch with some plastic stock and photo etch from the Aber buckle set. The periscope housing is also a photo etched piece from Aber's Sherman set.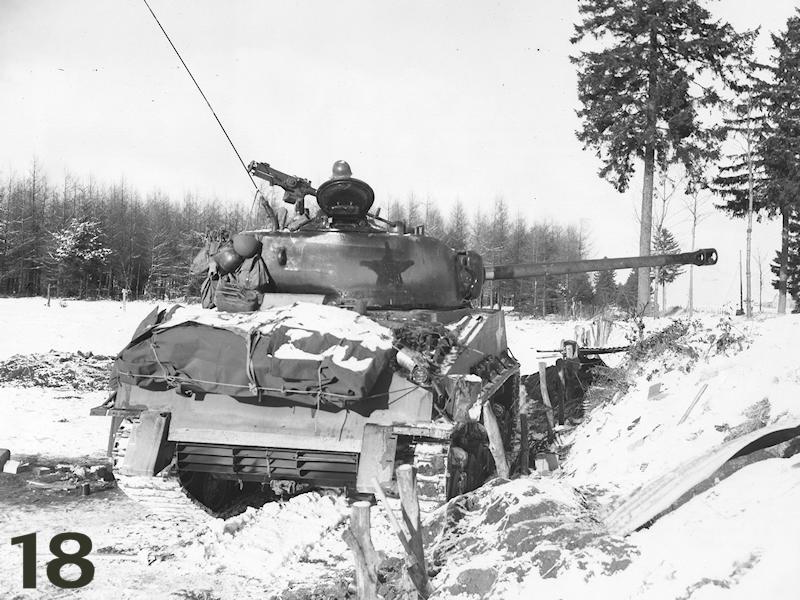
About the Author


Comments
Outstanding job on these vignette David!
What did you used for the grass? It looks very realistic.
JUN 21, 2012 - 09:30 PM

An outstanding piece of work all round, not least in the finished effect. This diorama isn't overcrowded with extraneous stuff, as so many are. You've clearly taken the lesson that "less is more" to heart, with a very salutary effect on the finished result.
Along with Jeremy Hengest above, I'd like to thank you for the exceptionally well-written and -illustrated build log. Also, I second Hengest's suggestion that, if you find this task to your liking, you consider authoring a tutorial on painting 1/35th scale figures. Your Sherman's chilly commander with his colorful scarf and his freezing fingers was all too believable, and almost too realistic!
JUN 22, 2012 - 06:14 AM

Roman:
Thanks very much for having a look at my Sherman project. I am pleased you found it interesting and worthy of your comments.
All the best.
Dave.
Gary:
Thanks so much for commenting on my project. After seeing your excellent work and following your recent build of the Greif I am indeed very grateful for your comments.
Thanks Buddy.
Dave.
Jeremy:
Wow a very big thanks to you for your comments on the build. They are very much appreciated.
With regards to the build I wanted to be as descriptive as I could in order to share what little I know. I want to share my works with others as other do here so that we can all learn from each other and improve our skill set. In that vein if you believe it would be helpful to our community to do a tutorial on figures I shall do it.
Cheers,
David.
Istvan:
Thank you for viewing the build and taking the time to post your comments.
The material I used is called Wildgras from Heki. Heki is a well known suppiier of model railroad material. The SKU number for this product is 1574.
Cheers,
David.
Fred,
Thank you so much for the very kind comments about my build. I wanted to do a simple vignette that was representative of the photo yet not have the natural environment around it overwhelm the model. I am very pleased you like it and I will keep endeavoring to improve my skills and share my efforts with those that might have an interest.
Best regards,
David.
JUN 22, 2012 - 09:28 AM

Very nice work .
Well done David, the Sherman has captured the scene just right.
Michael
JUN 22, 2012 - 11:28 AM
I second the opinion about figures. The tutorial would be of great help!
JUN 22, 2012 - 11:35 AM

My pleasure, it really is an excellent piece of work. Truthfully I think that there is a lot that many of us here could learn from any tutorial that you made, or even an active build log. I am very serious about a figure painting tutorial. It is the Achilles heal to a lot of us regardless of our skill level, especially when it comes to painting convincing faces. Fred, Roman and myself are merely the ones who have openly expressed interest in learning from you.
Whatever you choose to do, please don't stop sharing your work here
Jeremy
JUN 22, 2012 - 01:00 PM
Hey Dave!
Congrats on the excellent execution of this E8 Sherman. You definitely captured the feel of the photograph. Your skills of building and finishing are most evident!
Outstanding work!
Best Regards
Eric

JUN 22, 2012 - 10:47 PM
Roman and Jeremy,
I will definitely look into doing a tutorial on figures.
Thanks again for your support.
Dave.
JUN 24, 2012 - 04:26 AM
Hey Eric,
thanks for having a look and for all your support through out the build log for this project. It is very much appreciated.
Dave.
JUN 24, 2012 - 04:31 AM
Copyright ©2021 by Dave DaSilva. Images and/or videos also by copyright holder unless otherwise noted. The views and opinions expressed herein are solely the views and opinions of the authors and/or contributors to this Web site and do not necessarily represent the views and/or opinions of Armorama, KitMaker Network, or Silver Star Enterrpises. All rights reserved. Originally published on: 2012-06-21 00:00:00. Unique Reads: 21400

WEB HOSTING BY


Copyright ©2021 Armorama and Kitmaker Network, a subsidiary of Silver Star Enterprises
All Rights Reserved. Please read our Conditions of Use and Privacy Policy.
All Rights Reserved. Please read our Conditions of Use and Privacy Policy.