

1⁄35M16 Multiple Gun Motor Carriage Part Two
5
Comments
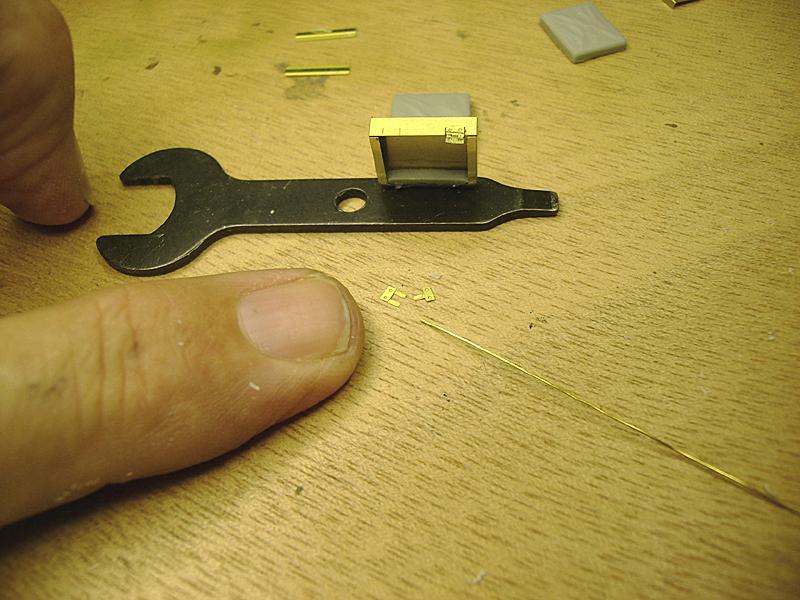
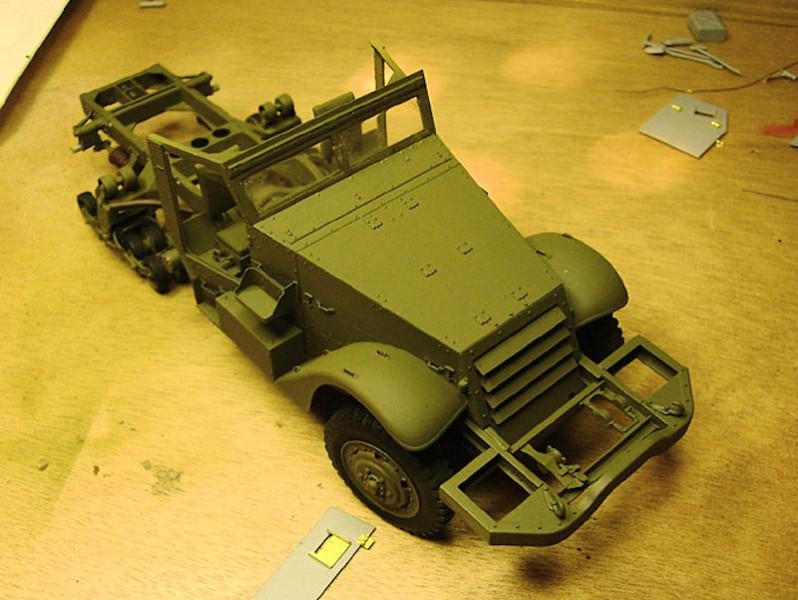
Once you have those seats assembled, you need to make two more of those tiny hinges. These are for the front edge of the passenger seat. Once ready, attach to the floor but be sure you have the position correct, the back wall of the fighting compartment has to go behind the seats, flush with the rear edge of the floor; be sure the seats dont hang over the back.
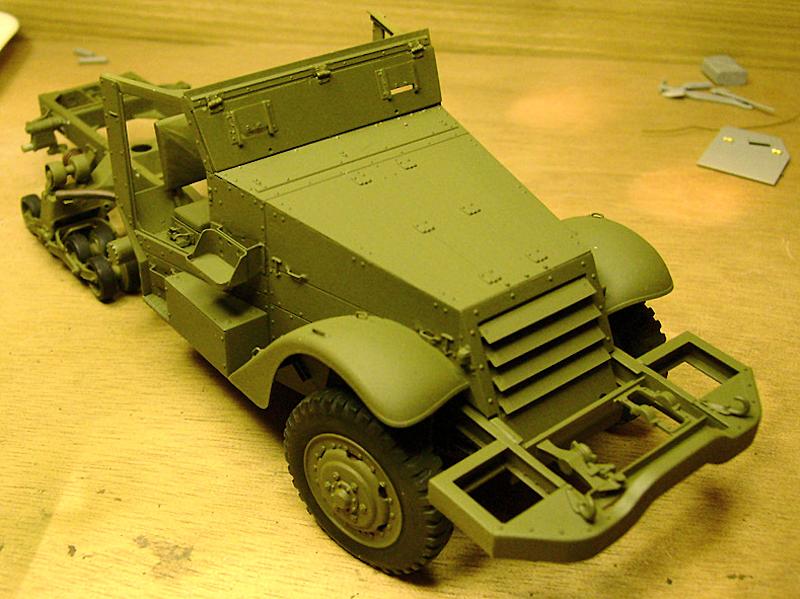
The sides of the cab have lots and lots of cool stuff to detail too. First thing to do, way before trying to assemble them to the floor pan, is cut those blocks of styrene intended as the jerry can mounts clean off. Theyre just wrong. Fill the holes created by this with a piece of the styrene you just cut off, and mud it over with styrene filler putty (Im using Testors). At this stage I did assemble the sides to the floor pan. With the putty smoothed and sanded flat, then Im ready for jerry can holders
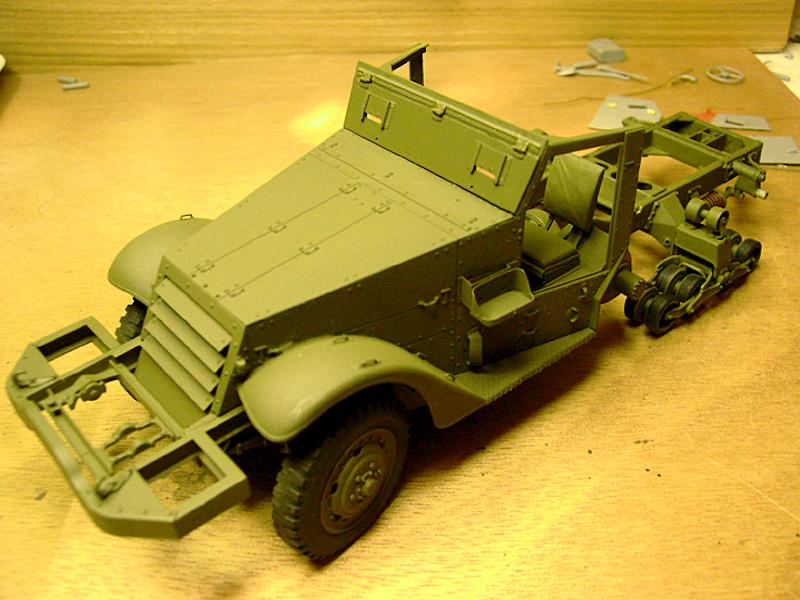
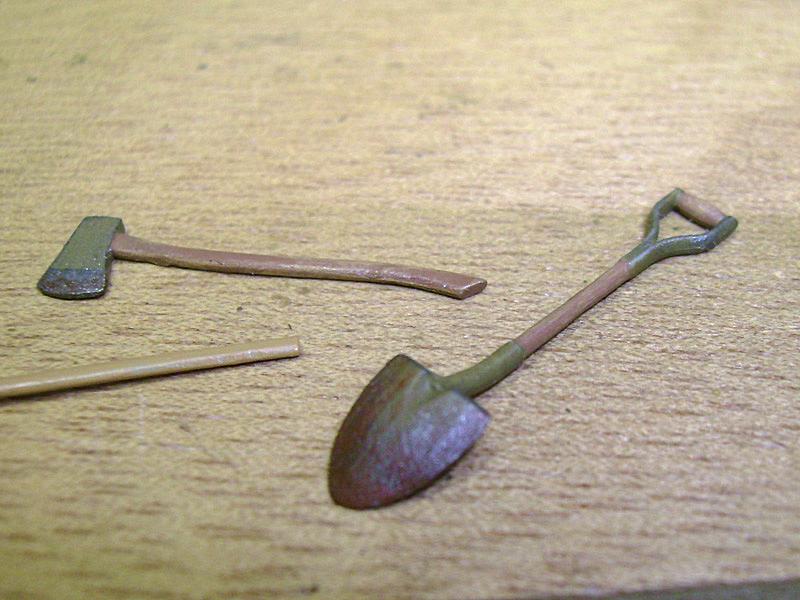
the bracket is easy and correct, and the Griffon can holder is perfect and correctly to scale. I do both sides of the body and work all the details, using dry time for one thing to work with another, so in this period I assemble the jerry can holders for both sides, then go to work carving all the compromised details stuff off the tools: the mounts and brackets and holders which Dragon just molded on as a lump. Carve it all off and make proper tools of them. Now Ill give you a tip: theres a sprue in the Dragon halftrack kits with un-mounted tools, so if you choose to take a faster route, there they are. Personally I like to sculpt. I used the front shovel holder from the Eduard PE set, as I felt it was the more accurate, but everything else on the tool holders is from Griffon. All of the tools are now left loose until the final painting, of course.
A note on WW2 jerry cans: I own some, so I know the size and details. The most accurately scaled jerry cans are by Tamiya from their WW2 Allied Vehicles Accessories kit. In second place are the Dragon jerry cans, which are a mere fraction too small, but not enough to notice. Cans with the screw on caps always had a small chain from the cap center to the can, so I took some extras from the K59 M2HB kits Id used previously; for me the mount pin chains work beautifully for jerry cans. Your choice: use the Dragon cans, which are the flip top type, or the Tamiya cans, which need chains for their screw on caps.
Also done in this phase were all of the tiny handles for the engine covers and the tie downs on the fenders. These are challenging little bits of PE, made quite precisely by Griffon. I work on a wood panel on a drafting table in white formica on a flat tile floor. No carpet demons shall have my PE! I keep a white halogen flashlight there because it makes dropped PE parts just glow when dropped. Some of these handles and tie downs were indeed retrieved using this light.
The armored slat grille was next, and went together trouble free. I used the Eduard cross brace for the radiator as Griffon doesnt provide one. Moving along, both Griffon and Eduard parts are used for the fender inner details and track well details.
About the Author

FROM: JIHOCESKY KRAJ, CZECH REPUBLIC
I am one of the fortunate ones who has been gifted all my life with the Charm of Making..I am professionally an Artist / Illustrator at this stage of my life, and am or have been a Musician, Commercial Artist, Movie Effects Tech, Set builder, Mechanic, Machinist, Motorcycle Racer and Builder, and ev...
Comments

Nice progress Gary! Love the added MG mount.
I just finished my M-16 (it's blogged on Armorama as well) and it was an enjoyable six months!
Keep up the good work!
Terry
JUL 24, 2012 - 12:57 PM


These intense PE builds are fun to watch! I've used one of the smaller Griffon halftrack sets, and it was enough to stress me out. This is really looking great!
AUG 05, 2012 - 11:08 AM

Yeah, Terry, I was looking at yours..very nice! I actually asked James about putting mine up because yours was so well done, didn't want to be redundant! But as it turns out, I'm going to do several things differently, and add some interesting detail, especially in the weapons. Also, the vehicle is for a big action diorama I am planning, so lots of toys n goodies will be added..crew in action, gear, weapons, belt links and shell casings everywhere! Now that I'm fully moved to Europe, I can get on with it! Thanks to all you guys for your kind words of support!
JAN 15, 2013 - 11:16 PM
UPDATE on M16 HT build: Major issue of accuracy has come up, which I hope to resolve soon..it is holding the build at dead stop until resolved.
The drum mags for the quad .50s don't fit in the rear body correctly. this may be a major error from Dragon, working on answers now..stay tuned!
APR 30, 2013 - 10:30 PM
Copyright ©2021 by Gary Roberts. Images and/or videos also by copyright holder unless otherwise noted. The views and opinions expressed herein are solely the views and opinions of the authors and/or contributors to this Web site and do not necessarily represent the views and/or opinions of Armorama, KitMaker Network, or Silver Star Enterrpises. All rights reserved. Originally published on: 2012-07-22 00:00:00. Unique Reads: 15182

WEB HOSTING BY


Copyright ©2021 Armorama and Kitmaker Network, a subsidiary of Silver Star Enterprises
All Rights Reserved. Please read our Conditions of Use and Privacy Policy.
All Rights Reserved. Please read our Conditions of Use and Privacy Policy.