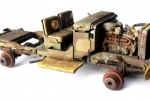
1⁄35Retired War Veteran: WC-51
13
Comments
History
The Dodge WC-51 Weapons Carrier ‘Beep’ (Big Jeep) was used in all theaters of WW2. It was a capable off road vehicle and very reliable as a work horse. 123,500 were produced. The series included weapon carriers, telephone installation trucks, ambulances, reconnaissance vehicles, mobile workshops and command cars.The kit
Skybow/AFV Club ¾ Ton Weapond Carrier Beep WC51 1:35 scale, kit 35S15The project
Many of these Dodge trucks were left behind by the Allied forces after WW2 ended. Soon they became very popular among civilians and were used as tractors, milk trucks, fire trucks and so on. I decided to build and paint my Beep as a junkyard style rust bucket with a story. It had to be a rusty WW2 veteran, used for many years by a bricklayer and finally retired, together with an old concrete mixer in the trunk bed.Building & Painting
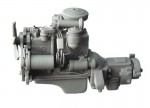
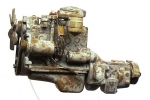
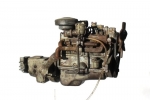
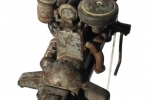
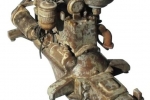
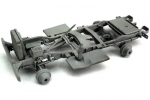
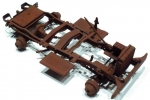
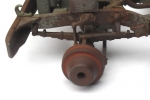
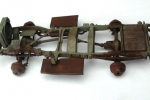
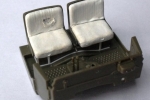
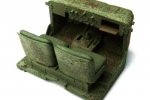
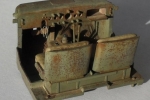
The kit was a joy to assemble with no major fit problems. Parts show crisp detail and the engine especially looks great with just a bit of extra wiring/cabling. The horn needed to be drilled out, and the fan blades were too thick, so I sanded them; not hard work. When the lump was completely assembled I applied Tamiya Liquid Surface Primer (see photo 1). Now it was time to start all the fun! Why not combine the very popular hairspray method with the salt technique? The first thing to do was spray on a couple of rust browns (Tamiya Acrylics are my favorite). I then filled my airbrush to carefully spray the hairspray. Here and there I sprinkled on a bit of salt in the drying hairspray layer. A bright grey was then applied. After careful picking and rubbing with a short, stiff brush dipped in water, the lump started to look somewhat old, but not old enough of course… (see photo 2). To begin the weathering, I brushed on a dirty oil paint wash (burnt umber / raw umber / mineral spirits), immediately followed by gently dabbing AK Engine Grime, giving extra attention to the oil pan. Different rust pigments (AK and MIG) were worked in to the wet surface where necessary. I then applied AK Light Rust with a fine brush to create subtle chips and scratches. AK Engine Oil was the solution to create greasy, oily effects. There had to be dust too! I added the dust pigments dry and sealed these with AK Pigment Fixer (see photos 3+4+5). The chassis was primed with Tamiya Liquid Surface Primer (see photo 6), and a rusty dark brown was airbrushed on; to create a bit of depth a lighter rust tone was also added (photo 7). Again I went for the combined hairspray / salt method, and this time a faded olive drab paint layer was sprayed on. Very realistic effects can be created easily (photo 8+9). Washes completes the weathering of the chassis. The driver’s compartment was finished the same way (hairspray / salt, washes, AK rust products…) (see photos 10+11+12). The steps were given a yellow paint layer to add a bit of interest to the model. The seats were painted, weathered and completed with fine fibres to create a bit of damage (see photo 13).Comments
Pawel, to create the rusty surface I did this :
- first a rust color as a base coat was added,
- I then applied a rust color oil wash,
- followed by dabbing rust pigments in the wet oil wash,
- I then sprayed on the body color under low air pressure to protect the pigments,
- the top layer was then picked away in places by a tooth pick, and by rubbing with a stiff brush.
John, your words were a fantastic support !
James, this is exactly what I've tried to achieve !
Thanks a lot guys !
NOV 19, 2012 - 05:25 AM
Beautiful work G!!! Love this piece!! Well done feature my friend!!!
NOV 25, 2012 - 12:34 PM
Hey G. This is one of my favorite rust buckets. Well done feature, text and pics. Glad James posted this one up here for all to check out your incredible work.
DEC 10, 2012 - 06:47 AM
Thank you s much guys, this means a lot to me, as you are all very talented modellers here on Armorama.
Rob, special thanks to you my friend !
DEC 17, 2012 - 11:59 PM
Thank you Bill, it's kinda ootb thinking indeed. I didn't buy upgrade sets for this one and I tried to make it look interesting without spending money.
DEC 21, 2012 - 08:33 PM
Copyright ©2021 by Guy Van Ginneken. Images and/or videos also by copyright holder unless otherwise noted. The views and opinions expressed herein are solely the views and opinions of the authors and/or contributors to this Web site and do not necessarily represent the views and/or opinions of Armorama, KitMaker Network, or Silver Star Enterrpises. All rights reserved. Originally published on: 2012-11-18 22:13:46. Unique Reads: 17446


