

1⁄35Tamiya BT-7 Review and Build
15
Comments
Onto the Weathering
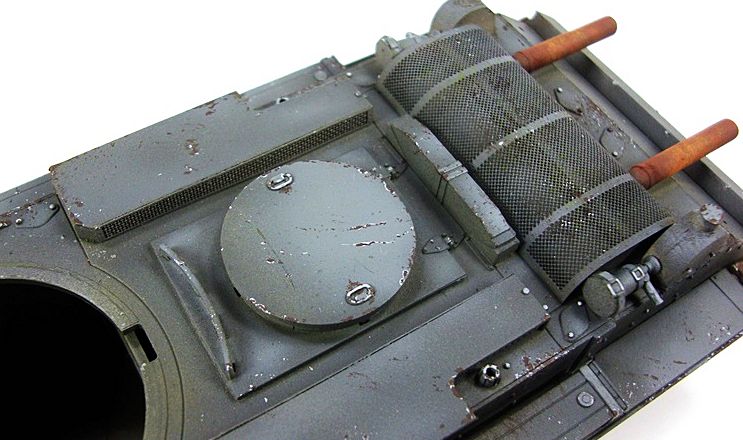
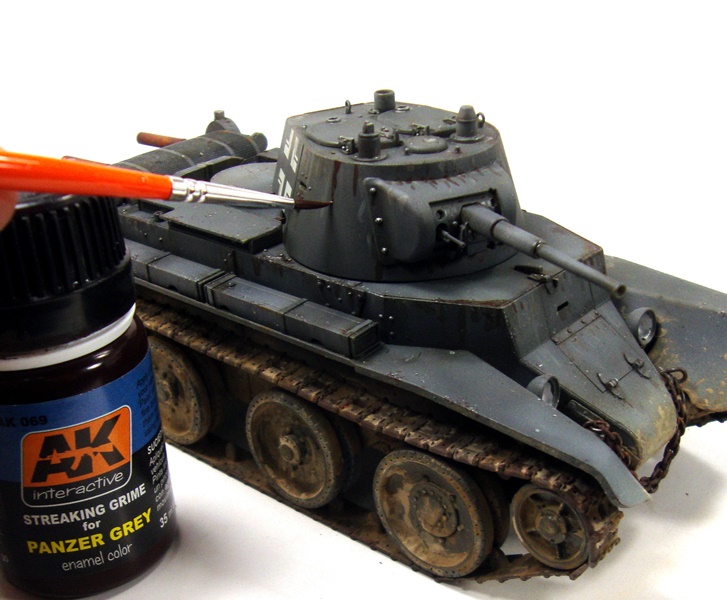
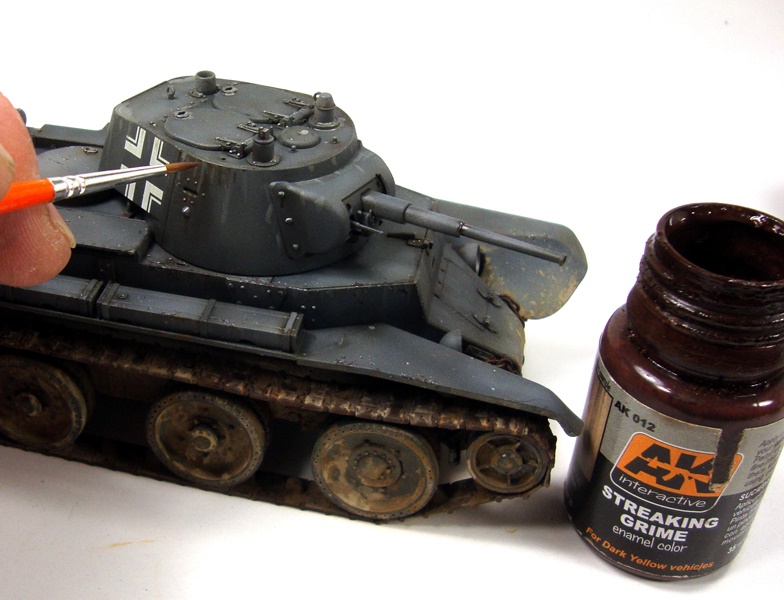
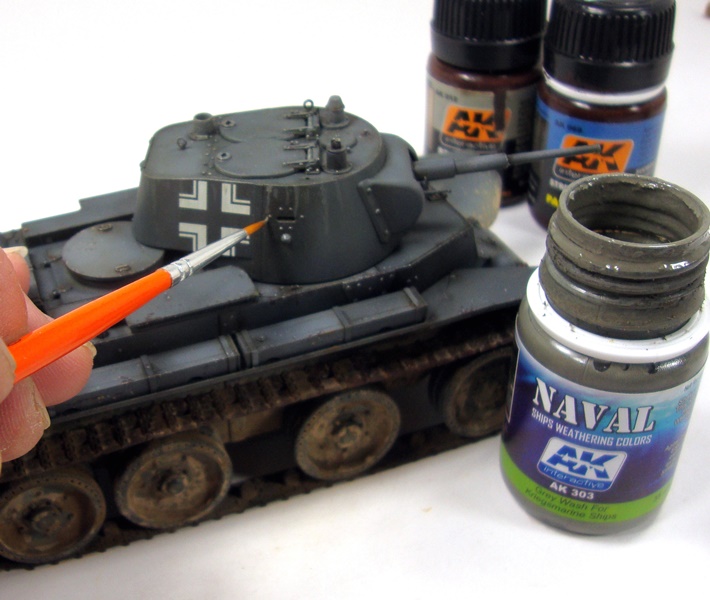
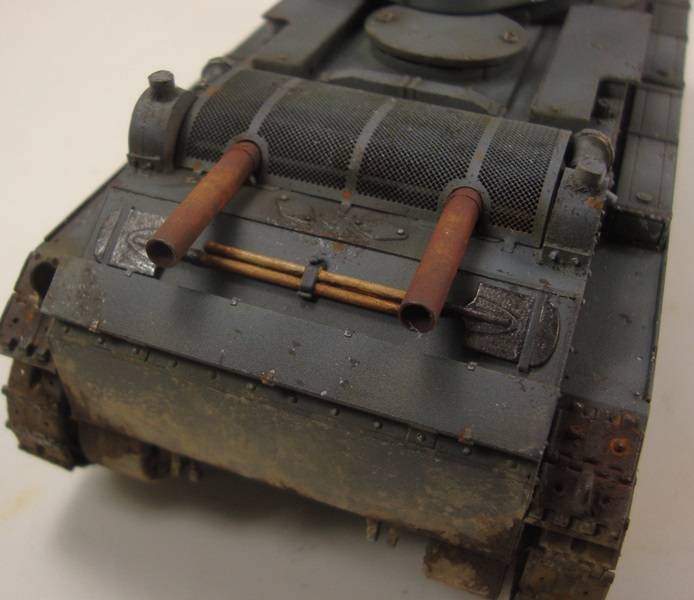
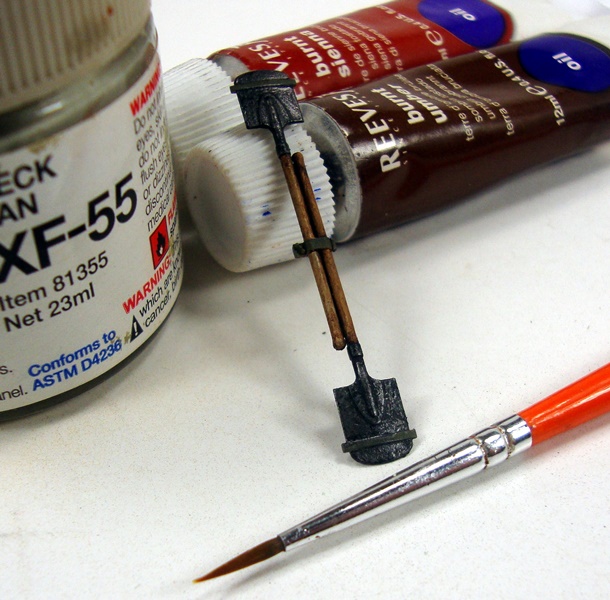
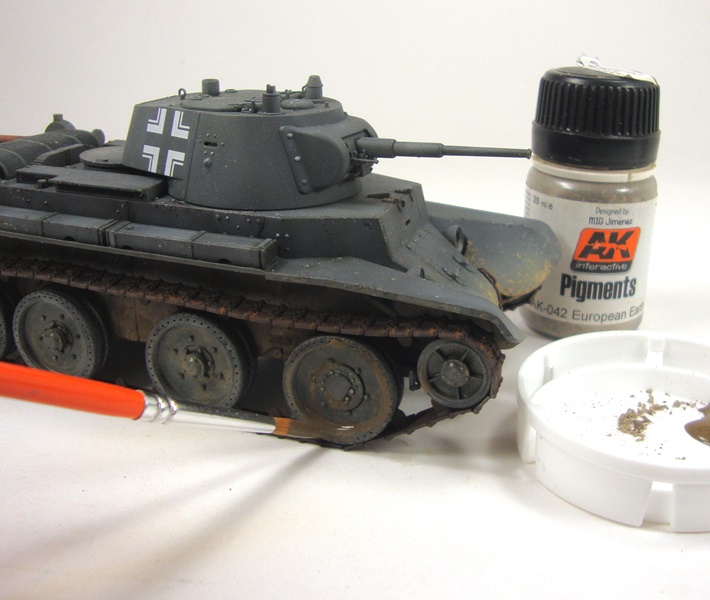
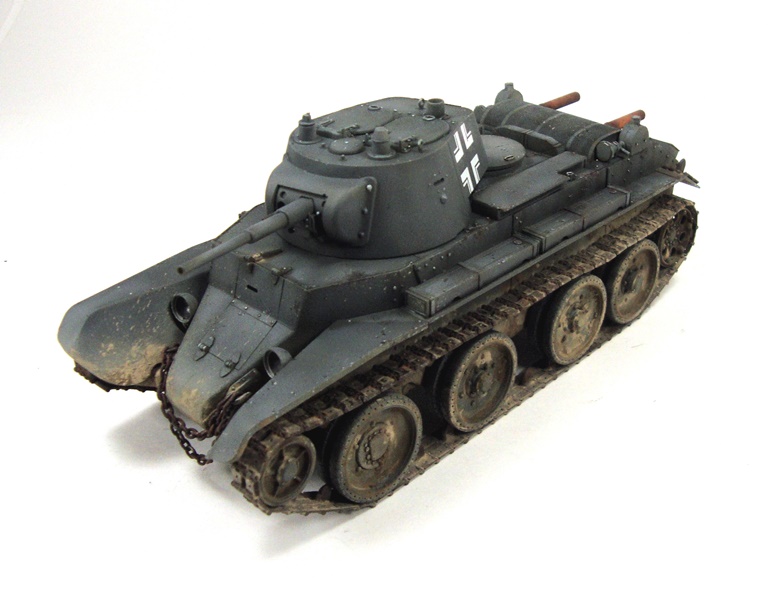
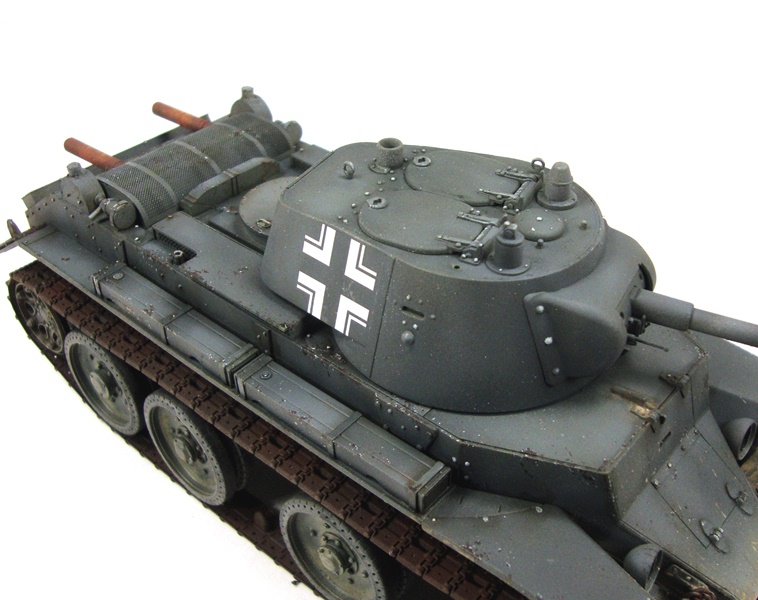
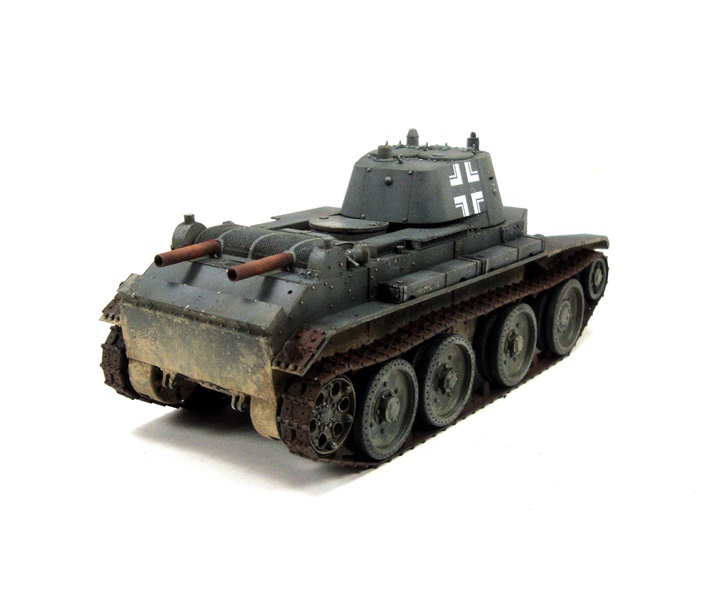
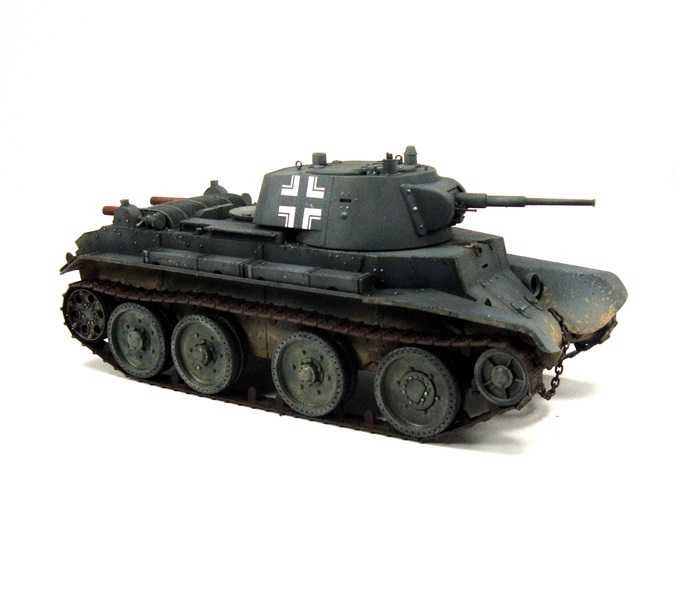
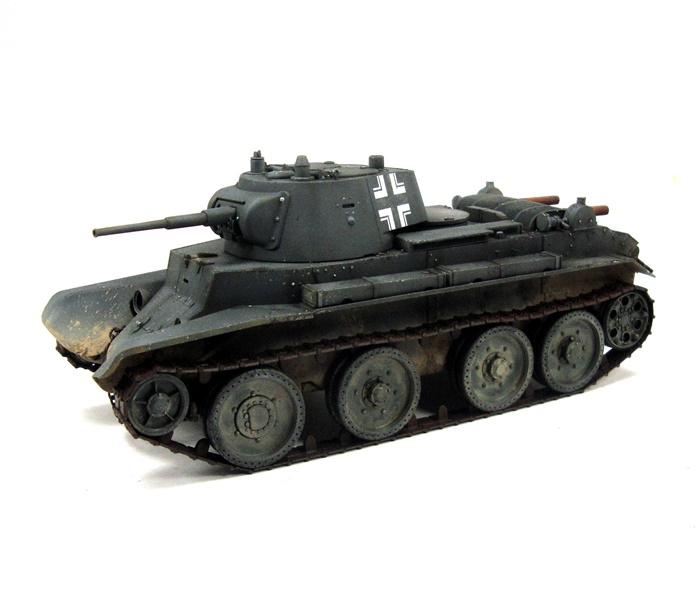
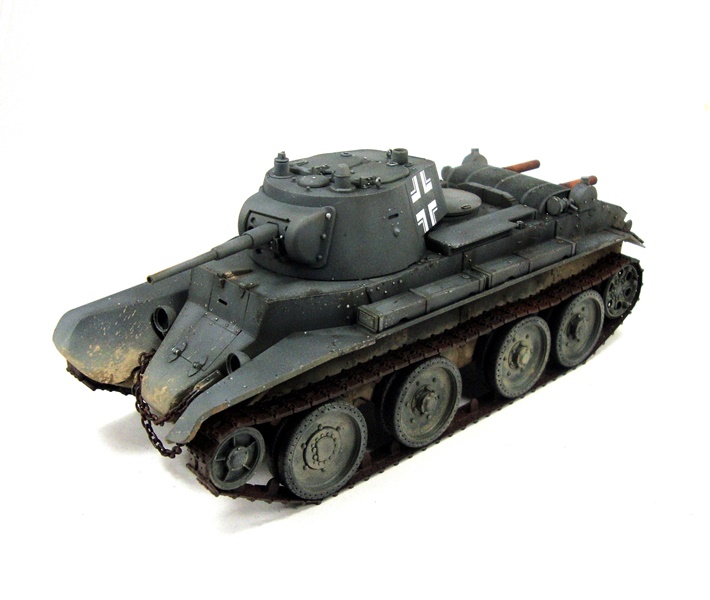
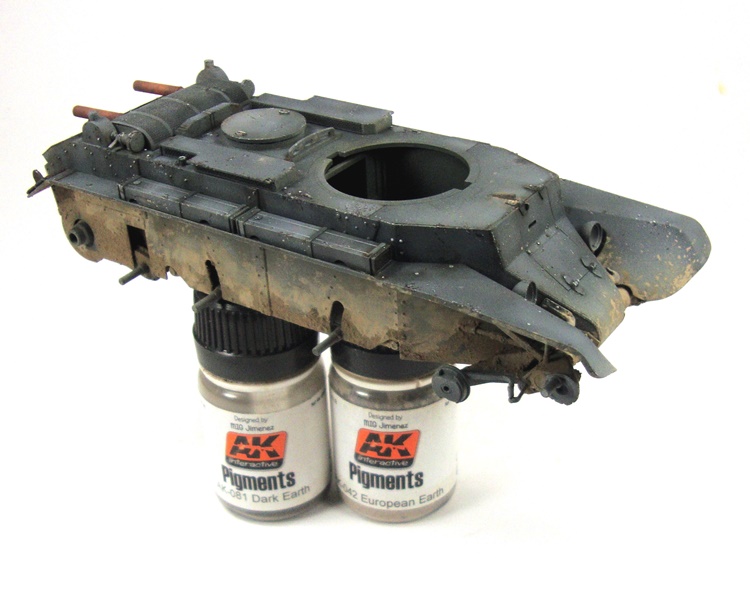
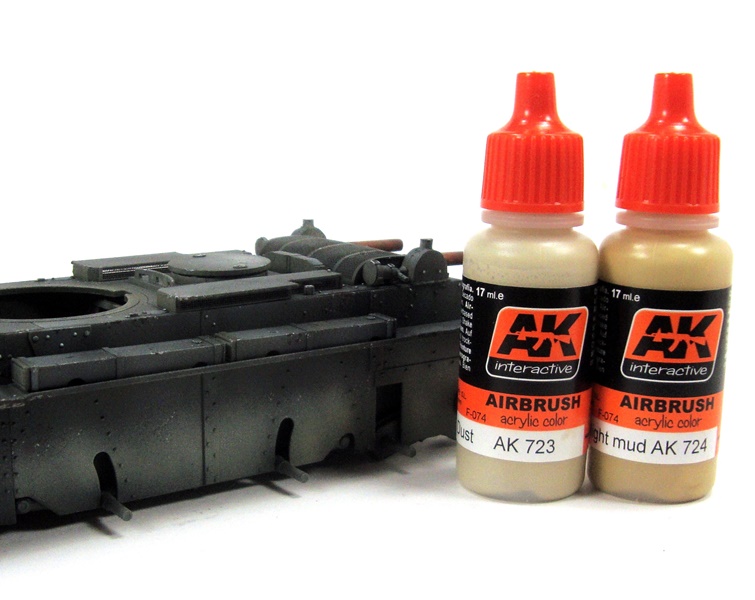
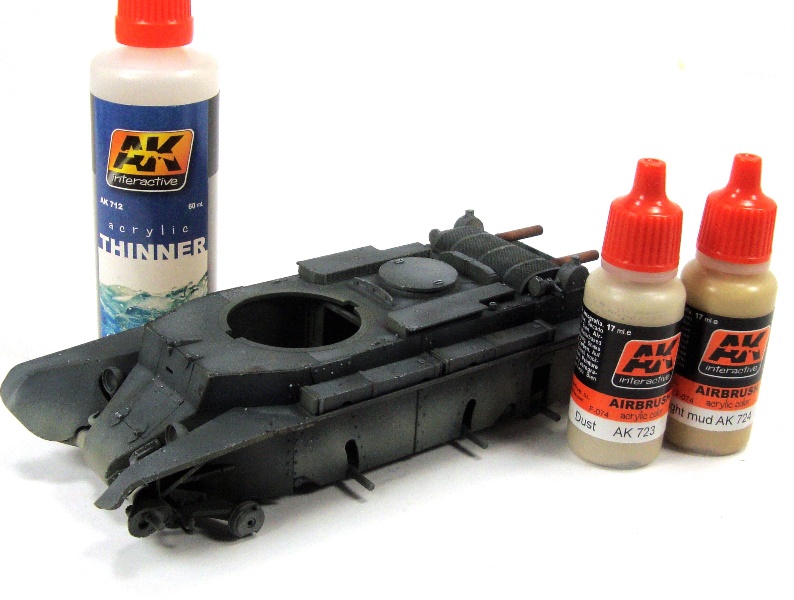
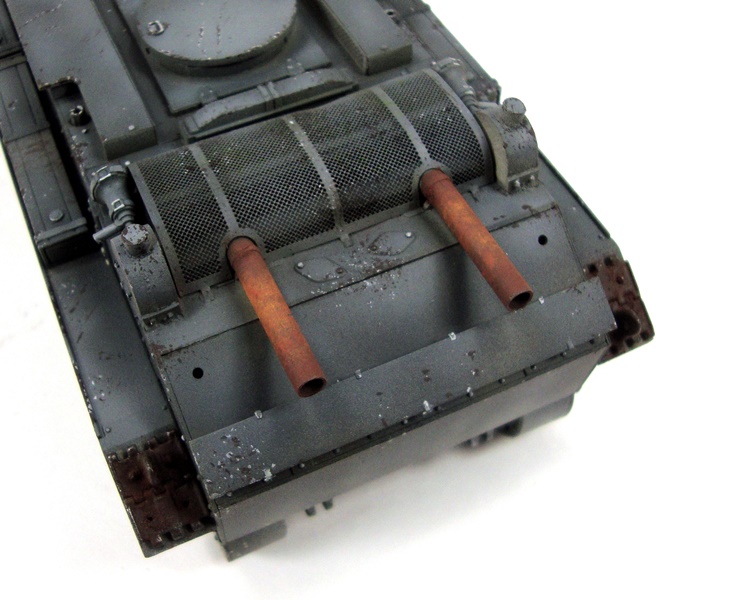
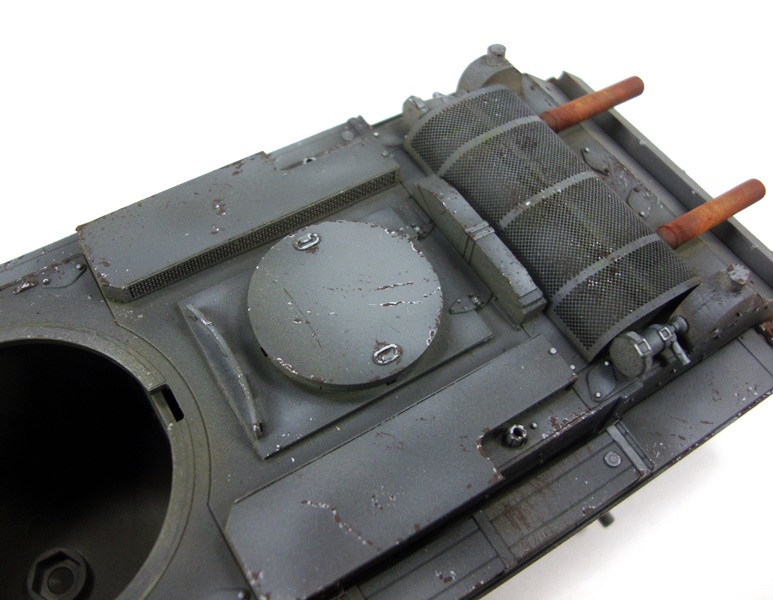
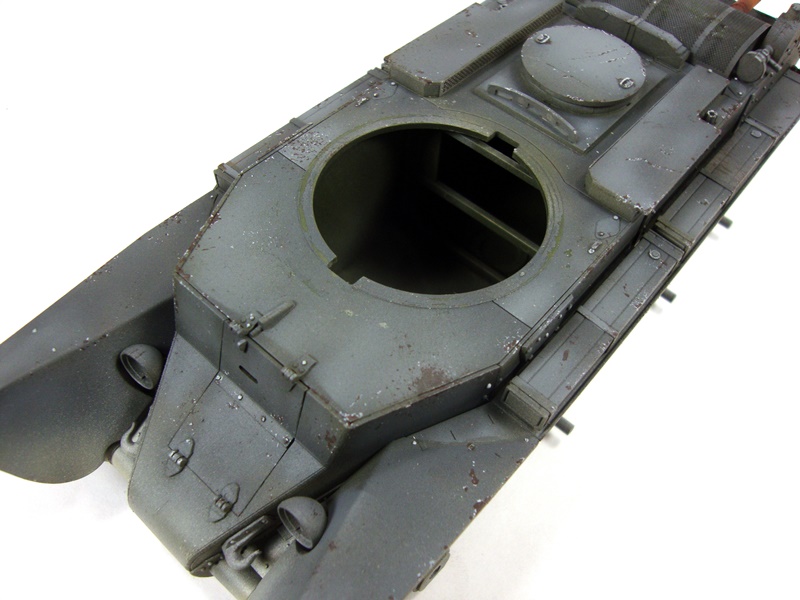
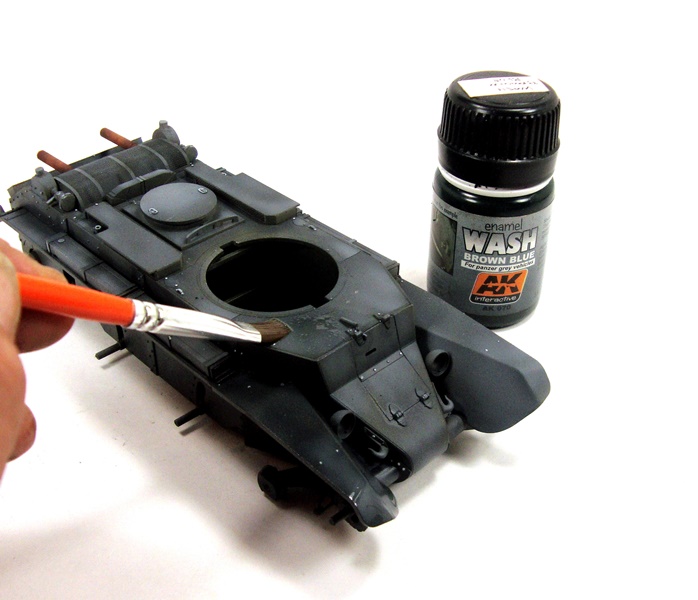
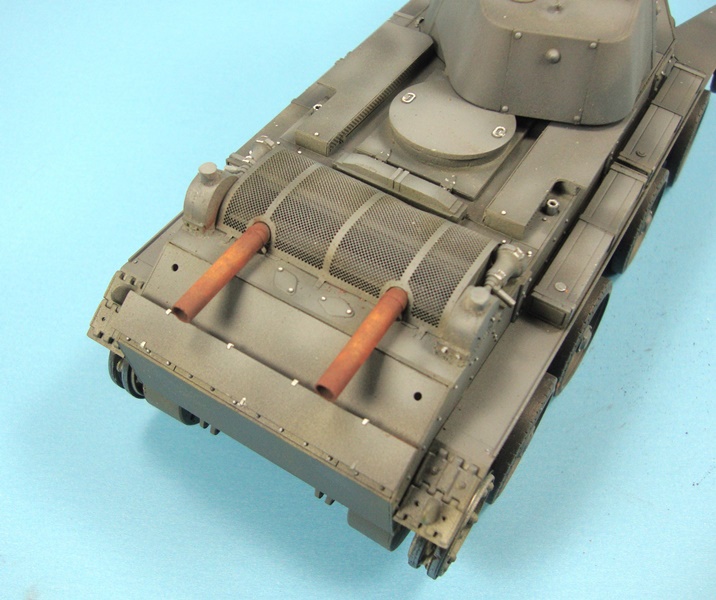
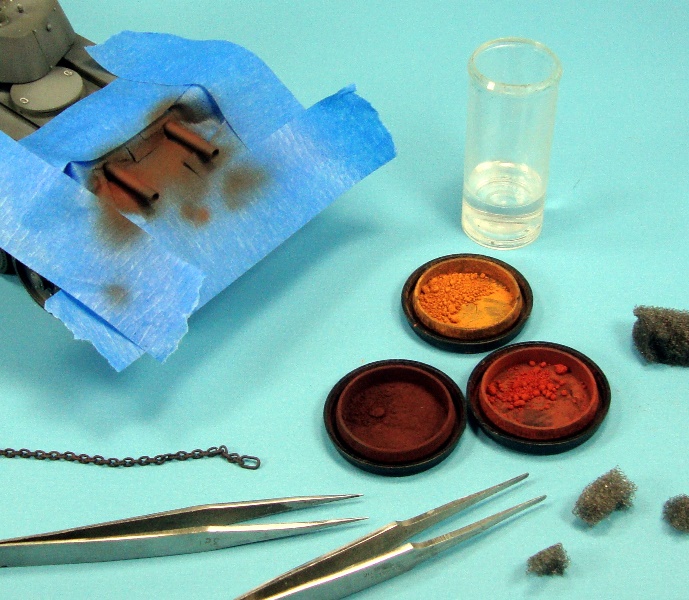
My first order of business after some drying of the paint is to lay down a nice wash over the model. I went with AKs Brown Blue Wash. This was designed for the Panzer Grey coloring. I used this effect more like a filter, whereas I thinned down the wash prior to application and then applied very thin, light coats. Throughout the weathering process I go back to the washes and filters, building up the layers and adding contrast. I needed to mask off the exhaust pipes now so I could paint and add some rusting effects. The base color was airbrushed on using Dark and Light Track Rust from AKs Track and Wheel set. I felt these paints were the best choice for my base. I then stippled dark, medium and light rust pigments using white spirits as my medium. All throughout any build, I will dry fit things like the wheels and tracks. This helps me better see where things are heading as the build ensues. I decided to go after weathering the lower hull next. Normally I would continue with washes and streaking effects, all the while darkening and lightening different areas of the model. Sometimes, I just get ahead of myself I guess! Basically I was too excited not to start adding dirt and mud remnants!! This is all fun stuff for me!! So, armed with a couple of bottles of paint and some pigments I began layering the effects. I spray down some dusting effects, light and dark, to blend the areas on the lower hull. Starting with the lightest pigment, as this will represent drier dirt, and then going over this with darker pigments to show damper, fresher earth. Again, as in any weathering effect it is best to add multiple layers, building up slowly as you go. I then mixed a slurry of pigment with a dash of plaster. This was then splattered on using my airbrush set to a low psi so as not to blast the mix everywhere, but to get the directional splatters where I want them. This can also be obtained using a stiff bristled brush, and taking your finger, or small piece of cardstock, and effectively letting the bristles snapback in the direction you wish the splatters to go. Both methods work well. Over and over again, wash after wash, I build up layers until I am happy with what I am seeing. I periodically will change colors of the washes to add variation to the surface and small points of interest as you look over the model. After some splattering and more washing I installed the wheels for the final time. Along with the wheels, come the tracks. Then some more washes and all followed by more rounds of pigment layering for the dirt and mud on the wheels and tracks. Not getting too far ahead of myself and taking a break to allow sufficient drying time of the effects, I went after a little painting of the tools. A quick shot of a light basecoat of Deck Tan with the airbrush and then I used some Burnt Umber and Burnt Sienna to replicate the wooden handles on the shovels. The blade of the shovel was painted with flat black and I then touched up the finish with my graphite pencil. These were then set aside to dry. So far this build has been a ton of fun! The kit was easy to assemble and layers of paint and weathering begin to transform the piece of plastic into a display model. There are a few more layers to add as things progress. I now go back to adding more washes to add depth to the bolts and panel lines, and using washes and pigments to work the dirty/muddy lower hull, giving a more realistic look to how the tank might have been. Using some of AKs streaking effects, light streaking is added to the flat panels throughout. Once the first streak is on, simply wait a few minutes for it to set up, and then with a clean brush humid with white sprits, I feathered the streaks in one direction all the while trying to balance the colors through blending. The tracks were fun! Adding pigment layer after pigment layer, slowly building up to a damp muddy appearance, then a quick swipe with the graphite pencil is enough to give a steely shine to the high point of the tracks.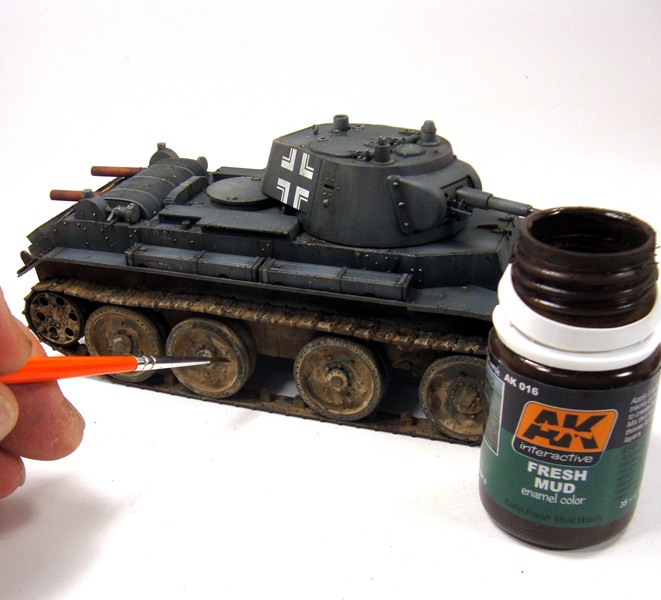


About the Author


FROM: MASSACHUSETTS, UNITED STATES
I am building what I like, when I like and how I like it; having fun doing it. I have been building and finishing models on and off my whole life but the past ten years things really exploded. Just about anything goes when it comes to hitting the bench, but wrecked armor, rusted hulks, ships or ...
Comments


Hi Todd,
Lovely build. I do like this vehicle and it's straightforward construction. The link and length tracks look to be a a great improvement on the normal Tamiya style rubber band tracks.
Excellent work.
Al
AUG 08, 2013 - 02:42 AM

AWESOME Review Todd and BT-7 is stunning to say the least! Well done sir.
AUG 08, 2013 - 03:30 AM

Hi Alan! Thank you kindly Sir!! Big improvent with the tracks! Easy to clean too! Small pin marks but like I said in the review...sand and done or leave and cover with mud!! LOL!!
Brotha Gary!! Thanks bud! Appreciate it...thanks!!!
AUG 08, 2013 - 04:27 AM
Excellent write up, T. A modeler and an author.... truly a man for all seasons!
AUG 08, 2013 - 04:40 AM

The is great, I wish more modelers would write up build-reviews like this! I just copied it onto file for my references.
AUG 09, 2013 - 06:17 PM
Thank you very much Jeremy! Sometimes it takes a bit longer...but it can be fun to go through the process!!
AUG 09, 2013 - 10:14 PM

What I like the most from the article is the part about scratch building of the "lost" details. How often we see posts on forums asking for help, because some detail got lost. With little bit of internet search and some work a new part can be built, which may look even better than the lost original one. The author definitely didn't have a heart attack from losing a couple of parts! Kuddos for that!
I only would like to add that "the two white scratch-built parts on the rear deck" are not to fill with fuel, but to adjust the rear suspension shock absorbers.
 I wouldn't put too much trust in your historical sources, though.
>>>"By the onset of the German invasion of the Soviet Union in June 1941, and with tank losses soaring higher and higher, the BT-7 was still in full production."
No BT-7 was produced past September of 1940 as the T-34 started to go into mass production.
>>>"By the time of the Battle of Kursk, the BT-7 was making up nearly half of the armor in the Soviet Army."
Hardly over 5,000 BT-7 were produced at all time, and most of them lost in 1941-1942. More than 15,000 T-34 were built before 1943; plus, another 15,000 were built in 1943 alone. Plus all kinds of light tanks, KV tanks and SPGs. Not exactly "...BT-7 was making up nearly half of the armor...".
Anyway, great build! Thanks for sharing with us!
And good luck on your future projects!
I wouldn't put too much trust in your historical sources, though.
>>>"By the onset of the German invasion of the Soviet Union in June 1941, and with tank losses soaring higher and higher, the BT-7 was still in full production."
No BT-7 was produced past September of 1940 as the T-34 started to go into mass production.
>>>"By the time of the Battle of Kursk, the BT-7 was making up nearly half of the armor in the Soviet Army."
Hardly over 5,000 BT-7 were produced at all time, and most of them lost in 1941-1942. More than 15,000 T-34 were built before 1943; plus, another 15,000 were built in 1943 alone. Plus all kinds of light tanks, KV tanks and SPGs. Not exactly "...BT-7 was making up nearly half of the armor...".
Anyway, great build! Thanks for sharing with us!
And good luck on your future projects!
AUG 13, 2013 - 03:46 PM
Copyright ©2021 by Todd Michalak. Images and/or videos also by copyright holder unless otherwise noted. The views and opinions expressed herein are solely the views and opinions of the authors and/or contributors to this Web site and do not necessarily represent the views and/or opinions of Armorama, KitMaker Network, or Silver Star Enterrpises. All rights reserved. Originally published on: 2013-08-07 22:50:25. Unique Reads: 28217

WEB HOSTING BY


Copyright ©2021 Armorama and Kitmaker Network, a subsidiary of Silver Star Enterprises
All Rights Reserved. Please read our Conditions of Use and Privacy Policy.
All Rights Reserved. Please read our Conditions of Use and Privacy Policy.