

1⁄35Tiny ASU -57
7
Comments
shooting arn'
The main gun tube on my kit was warped so I cut the muzzle break off of it and used a piece of copper tube and aluminum tube to replace it. While I was working on the gun tube, I added some hydraulic lines, control boxes and other little bits and pieces to dress the office up a little. The gunners sighting unit was pretty blah as well, so I re-made one using two different sizes of brass tubing and some plastic disks. The interior floor is bare and I know that in a fighting vehicle there is usually some form of anti-skid surface. I replicated this using some copper mesh screen that was cut to shape and size. Small disks were punched with my Waldron set to make the bolts around the perimeter of the flooring.After scratch building the gun tube I discovered that the fabric cover where the gun tube and the frontal armor meet was too small for the tube to fit thru. I substituted this with some Magic-sculpt two part epoxy putty and called it even. Finally things were beginning to come together!
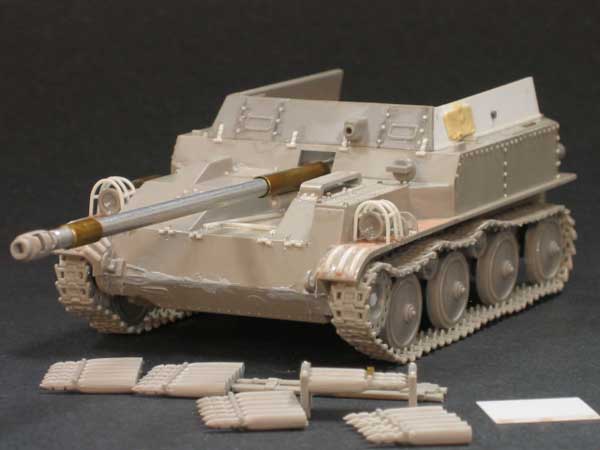
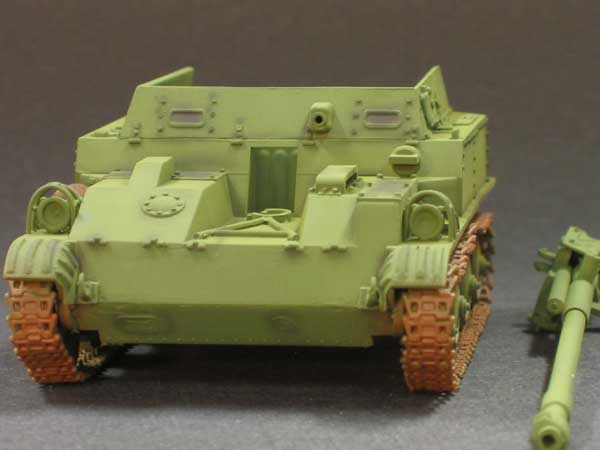
the outside
I did a Google image search for the ASU-57 and found several pictures of one at a museum in Russia. Boy did I have a lot of work to do yet! The kit sides are molded smooth with no detail on them at all. The real vehicle had rivets along the top of the hull and also in just about every other place I could see. Pulling out the evergreen strip I began to slice small rivets to fix this problem. The rivets I cut werent all uniform, but I had a plan to fix this. Once they were solidly glued in place, I used a fine sanding stick and knocked the taller ones down. Once this was done, another coat of Testors Liquid Glue was applied over the newly sanded rivets. This caused them to round over and looked more like rivets.While I was at it, I scratch built the headlight guards out of .010 styrene rod as the kit parts did not want to cooperate and broke when I tried to bend them into shape. I added the ribbing on the front fenders from half round styrene strips and although they are a little over scale, I like the looks of them. For my headlights I used MV Lenses. I really like the way these make an armor piece look once its done. So much nicer than just a silver painted piece of plastic. I couldnt figure out how to add the distinctive hinges of the frontal armor, so I cheated here and made some generic looking ones. Even though they arent the same as the real ones, I think they look alright. The intake screens on the front deck also looked a bit bland so these were dressed up with some added bolt heads as well.
making tracks
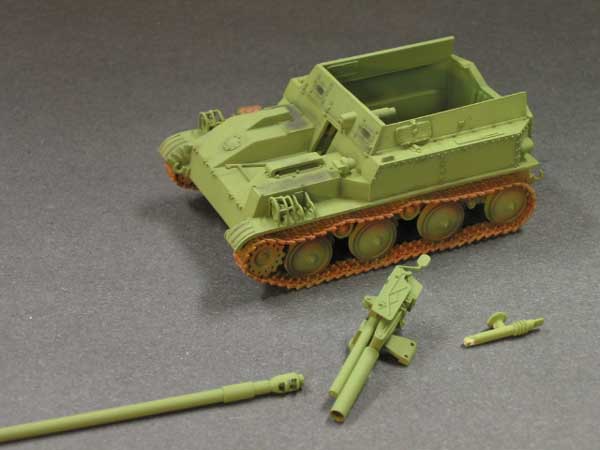
One thing I can say on a positive note about this kit is the tracks. Although they are small I had no problem cleaning them up and they responded well to the Weld On that I used to glue them. I used Testors initially, but it took too long to set up for handling. Once I switched to the Weld On, things progressed quickly. After looking at a couple of the builds online of this kit, the one thing that stood out was the tracks and road-wheels. They all seemed to sit on the guide teeth as opposed to between them, so I was faced with an additional challenge here.I used two different methods to fix the problem. The first was easy. I merely sanded down the thickness of the last road wheel with a file until the road wheel fit in between the guides. The next was a little trickier. Once the bottom run of tracks were assembled, I checked to see where the road wheels would touch, and marked them with a black Sharpie marker. I cut the guide teeth off that were on the inside of the tracks and werent going to be seen. I did the same with the top runs, but because these were so much smaller and had the excessive sag in them they were a little tricky to deal with.
Another problem I noticed with the tracks dealt with the sprocket area. The holes in the tracks are a little smaller than the teeth on the sprocket. I tried thinning the sprocket down by sanding them, but this didnt help enough. Enlarging the holes would be difficult at best so I cheated. I figured out where the tracks and sprocket would meet and simply cut the sprocket teeth off. Once I got a little mud and debris around the area, it would be hard to see this. The result is that the tracks now set on the sprockets, return rollers, and road wheels like they should. A little cheating and some clever clipping helped it all happen.


About the Author


FROM: CALIFORNIA, UNITED STATES
After a several year break from the hobby I have happily returned to it. Slowly, but surely getting my mojo back.
Comments
Vinnie, I just read thru my article again. Under the "kit" portion it double lists the same information. Did it come thru like this when I sent it? I also forgot to add one pic that actually had a German figure standing next to the vehicle prior to being mounted on the base. Should I leave it as is or what? Thanks for posting it so soon. Didn't think it would go up that quick. Thanks again. "Q"
JUN 02, 2005 - 03:56 AM


Matt,
Is that your Tank Destroyers Campaign submission? In the words of Chris Farley " Holy Schnikes!" :-)
JUN 03, 2005 - 04:13 AM

Vinnie,
Awesome job for a kit someone else voted as "Worst model ever" on another thread. Just goes to show what can be achieved with perseverance.
Mika
JUN 03, 2005 - 10:02 AM


Matthew You did a great job with a dog of a kit! I was the one that posted the comment about the ASU-57. The kit was TOGAs kit but i'm sure its the same molds. Mine was molded in heavy white plastic with soft surface detail, poor fit, and terrible directions. One day I will crack it back open and finish the job. Your wonderful model may just be the inspiration I need.
JUN 04, 2005 - 02:52 AM
Sorry for the slow response... Yeppers, that will be one of my entries. The other is the M10 by Tamiya. I can't get the pics to come out right...hence the delay in posting them. Thanks. "Q"
JUN 09, 2005 - 01:26 PM
Copyright ©2021 by Matthew Quiroz. Images and/or videos also by copyright holder unless otherwise noted. The views and opinions expressed herein are solely the views and opinions of the authors and/or contributors to this Web site and do not necessarily represent the views and/or opinions of Armorama, KitMaker Network, or Silver Star Enterrpises. All rights reserved. Originally published on: 2005-06-02 00:00:00. Unique Reads: 23037

WEB HOSTING BY


Copyright ©2021 Armorama and Kitmaker Network, a subsidiary of Silver Star Enterprises
All Rights Reserved. Please read our Conditions of Use and Privacy Policy.
All Rights Reserved. Please read our Conditions of Use and Privacy Policy.