1⁄35Am I late for the tram?
19
Comments
Breaking Away
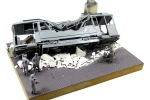
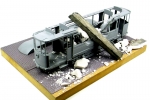
The first process in making a wreck and/or burnt-out model is effectively destroying it. All this does sounds kind of counterproductive, but look at it this way; you are kind of building the kit and then building the damage. Part of this process, is thinking in reverse. You have to see the item actually in its finished form, if you have not constructed it already, and work backwards to see how the damage would happen. Once you figure out how want to wreck things, time to get to it.Most of the damage I created started out by simply using some sprue cutters to snip thing apart. I made a point to not make clean cuts for the most part; unless it was a joint that would easily break free from the force of the incident be it contact or fire. In some cases a lot of the plastic can be softened through the use of a common hairdryer. Where pinpoint bending and twisting of a part is needed, a small handheld torch, soldering iron or even a lighter can be used. The idea, in most cases, is not to melt the part but to soften it so it can be bent in to a position that is typical of the damage you want to create.
In my case here, with the Tram, I wanted to essentially burn out the center portion of the Tram leaving the ends less affected. I actually did not know whether I wanted the damage to look like it came from and artillery round or from the building crumbled behind it. So I took the middle ground and left that to the interpretation of the person looking at it. So with that said, the Tram is wrecked and will get burnt, after that, it is in the eye of the beholder.
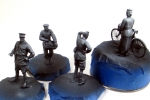
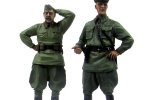
Around the same time I thought about wrecking the Tram, I looked for figures I wanted to add to the scene. Originally I came up with four figures form the stash; two Armor35 cast resin figures and two styrene figures from MiniArt’s French Civilians figure box set. Once getting into painting the figures I realized on of the French civilians was not up to snuff really. The base figure was nice but the head and face needed some work. In the end I decided to stick with the two Armor35 Russian figures. These would give a sense of scale as well as a plausible setting.
Comments
Yes,"thumbnails", hope they come in economy packs for those of us who are all thumbs!
MAR 07, 2015 - 07:44 AM
Wow, great job Todd, very realistic! Thank you for the great step-by-step, I have something I want to try and this will help me out, hope it turns out as well as yours!
MAR 07, 2015 - 11:03 AM
Thank you Colin! I'm sure things will turn out just fine my friend! Play around with things and have some fun! If a question pops up, let me know. If I can't answer it, I'm sure we can find one!!
MAR 07, 2015 - 11:35 AM
Todd, great job! Seems a shame to put 600 pieces together and not have it bright and shiny, but I like this scene better! Your damage and weather is great.
MAR 08, 2015 - 07:16 AM
Thank you Fred!! It does seem just like that sometimes my friend! I look at in terms of complete in either case. If I had decided earlier to make a wreck though, I probably would have done half the work underneath and had it probably standing upright. Kind of a "luck of the draw" thing!
MAR 08, 2015 - 07:30 AM
Hi Jim!! Thank you!! I to am glad to see this one reach the finish line!! ....
MAR 08, 2015 - 04:57 PM
Nice project and reference. I'm doing one now..a tropical tramcar. thanks. It's sunny over here.
APR 13, 2015 - 10:22 AM
Thanks Ed!! Best of luck on the build!! It's getting sunnier over here too....only really slowly!!!
APR 13, 2015 - 03:19 PM
Copyright ©2021 by Todd Michalak. Images and/or videos also by copyright holder unless otherwise noted. The views and opinions expressed herein are solely the views and opinions of the authors and/or contributors to this Web site and do not necessarily represent the views and/or opinions of Armorama, KitMaker Network, or Silver Star Enterrpises. All rights reserved. Originally published on: 2015-03-07 10:35:40. Unique Reads: 25930


