1⁄35Am I late for the tram?
19
Comments
The Fun Part
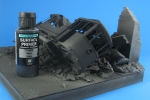
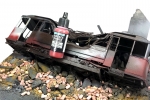
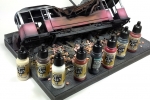
One of the best parts of any project for me is the painting. Something about watching what I am working on come to life right in front of my eye I guess. With any painting job, primer is the crucial first step. Primer not only seals the surface you are working on but it gives a perfect base for the paint that follows to bite into. I used Vallejo’s 70.602 Black acrylic primer. I like to use black primer on many of my projects as it not is a smooth primer it effectively pre-shades my work and primes, all in one step.I often here that the Vallejo Primers do not perform the same as other primers; spitting, clogging tips, peeling and even cracking. All of these items come down to several items actually unrelated to the paint itself. Depending on how the individual actually applies the prime and/or paint, which has a lot to do with these problems, it comes down do several other crucial supporting factors; air pressure, internal and external environmental conditions, the surface you are trying to prime, thinning and curing.
While Vallejo’s Primers and Model Air paints are airbrush ready right out of the bottle, some thinning is required for possible thickness of the paint depending preference and actual needle size. If you shoot with a small tip and needle, thinning is recommended as these are acrylic paints and not typically as thing as solvent based paints. Personally I like to thin the darker primers. I like to use Vallejo’s Airbrush Cleaner, and not their actual thinner, to cut the primers and paints. The surfactants in the cleaner help to suspend the paint better and allow for a smother finish in my opinion. My application of primer is laid down in multiple thin layered coats. The primer bites the surface better is applied in this manner and has less chance of peeling and/or cracking as this eliminates buildup in the creases and corners. Also, I will let the piece fully cure 12 to 24 hours before handling. Acrylics by nature dry extremely fast; however, they need time to cure to provide the solid impervious base I need to paint on top of. After 24 hours the paint is fully cured and I can use my scratch test, where I take my thumb nail and scratch the surface, resulting in no paint being removed.
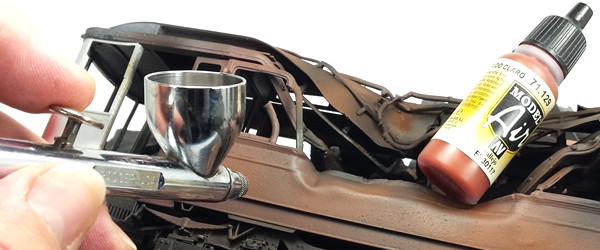
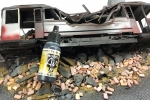
Moving one to the next steps of creating a burn pattern to the Tram, I want to apply a solid rust base coloring. This consisted of Vallejo’s Model Air 71.042 German Camouflage Black Brown. This is almost a perfect rust base color. The next step is to lay down some color. I want to show the Tram’s exterior paint coloring and a demarcation line between the paint and the burn pattern. To do this there are a couple things I need to do first. Number one will be to clear coat the entire model to protect the work I have done and because I want to use a chipping medium to make it easy to remove some of the paint I lay down next this is the recommended base for under the chipping medium.
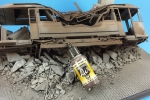
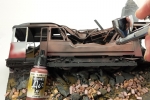
I laid down a good coat of Chipping Medium and allowed this to dry to the touch before moving on. The process of painting is a kind of “color on the fly” method of what I thought looked good. I figured the Tram would have a worn faded appearance, guessing the upkeep on these modes of transportation would be low during wartime efforts along with possible heavy usage. A combination of Vallejo paints were used to get this color and basically I just kept working my way through some red tones and then finish things off with some highlighting. In addition to the Chipping Medium helping me remove the somewhat red base color to the Tram’s paint, it will help me with the rusting of the burnt area.
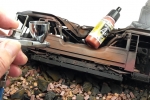
When it comes to burnt areas, not all surfaces burn identically. There are variances depending on the base metals, the paint on top of that metal, and environment and so on. So I chose to a simple, straightforward burn pattern where the paint would burn away quickly and reveal a thin metal beneath. Thinner metals will take on a wide variety of coloring from browns to bright oranges. So working through some basic rust colors from Vallejo, I started to layer the paint with a somewhat random approach. As you can see in the first round before chipping back the paint, the number of colors I used and the base coloring of the first step.
Comments
Yes,"thumbnails", hope they come in economy packs for those of us who are all thumbs!
MAR 07, 2015 - 07:44 AM
Wow, great job Todd, very realistic! Thank you for the great step-by-step, I have something I want to try and this will help me out, hope it turns out as well as yours!
MAR 07, 2015 - 11:03 AM
Thank you Colin! I'm sure things will turn out just fine my friend! Play around with things and have some fun! If a question pops up, let me know. If I can't answer it, I'm sure we can find one!!
MAR 07, 2015 - 11:35 AM
Todd, great job! Seems a shame to put 600 pieces together and not have it bright and shiny, but I like this scene better! Your damage and weather is great.
MAR 08, 2015 - 07:16 AM
Thank you Fred!! It does seem just like that sometimes my friend! I look at in terms of complete in either case. If I had decided earlier to make a wreck though, I probably would have done half the work underneath and had it probably standing upright. Kind of a "luck of the draw" thing!
MAR 08, 2015 - 07:30 AM
Hi Jim!! Thank you!! I to am glad to see this one reach the finish line!! ....
MAR 08, 2015 - 04:57 PM
Nice project and reference. I'm doing one now..a tropical tramcar. thanks. It's sunny over here.
APR 13, 2015 - 10:22 AM
Thanks Ed!! Best of luck on the build!! It's getting sunnier over here too....only really slowly!!!
APR 13, 2015 - 03:19 PM
Copyright ©2021 by Todd Michalak. Images and/or videos also by copyright holder unless otherwise noted. The views and opinions expressed herein are solely the views and opinions of the authors and/or contributors to this Web site and do not necessarily represent the views and/or opinions of Armorama, KitMaker Network, or Silver Star Enterrpises. All rights reserved. Originally published on: 2015-03-07 10:35:40. Unique Reads: 25930


