

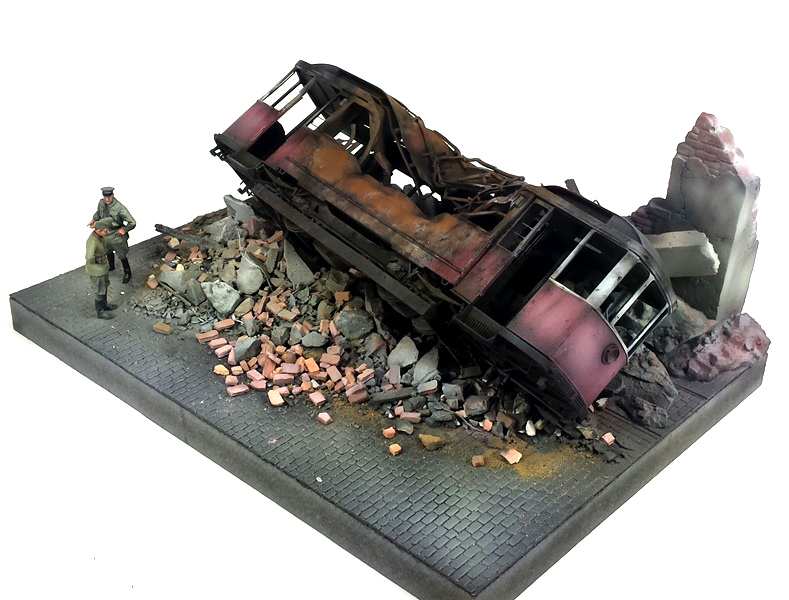
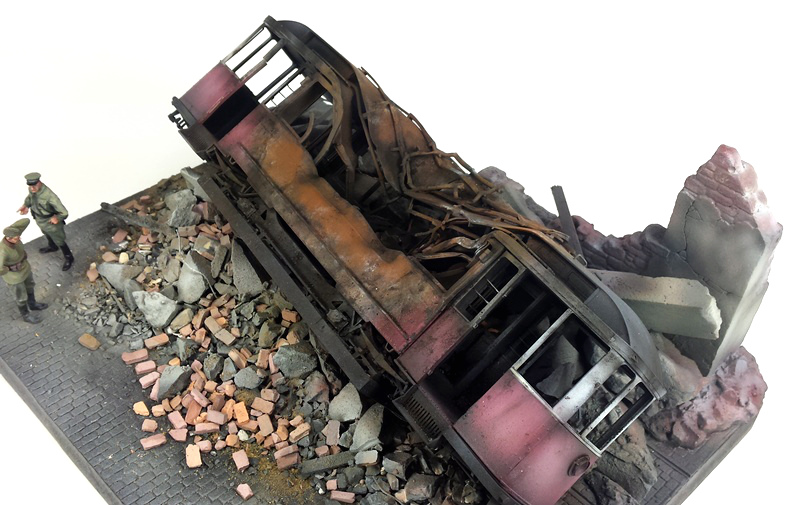
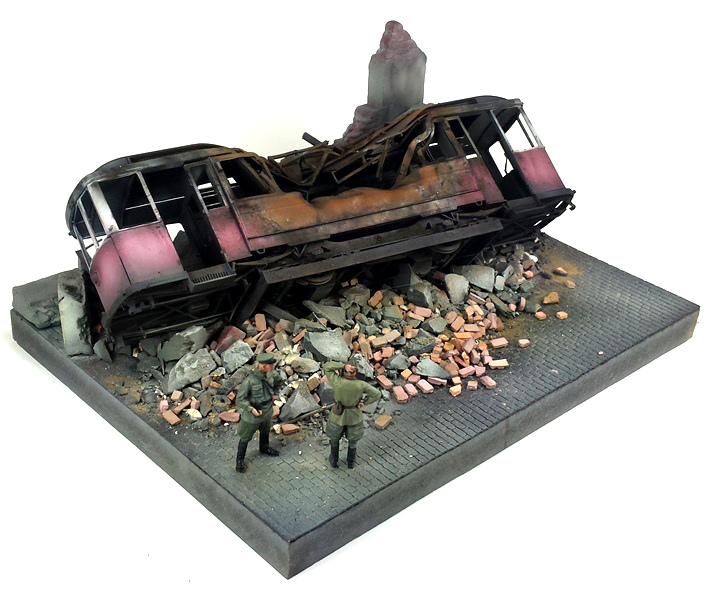
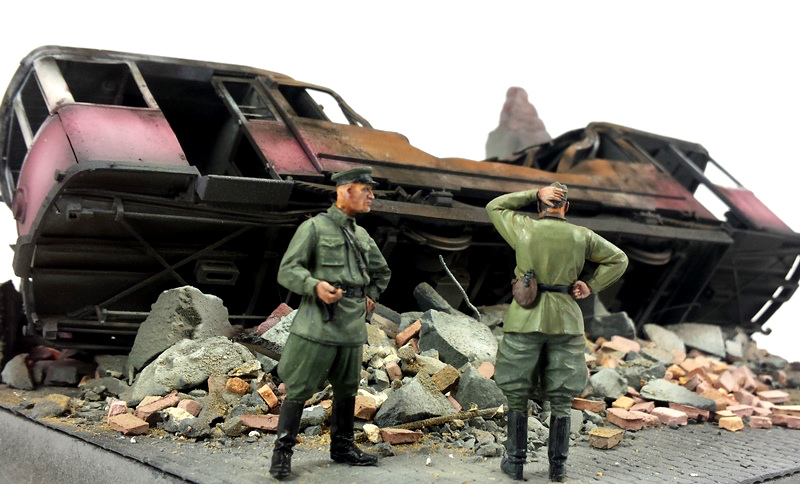
1⁄35Am I late for the tram?
19
Comments
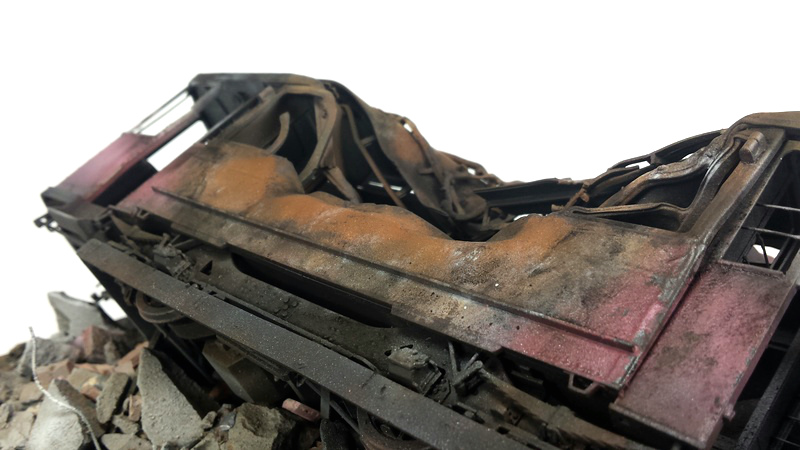
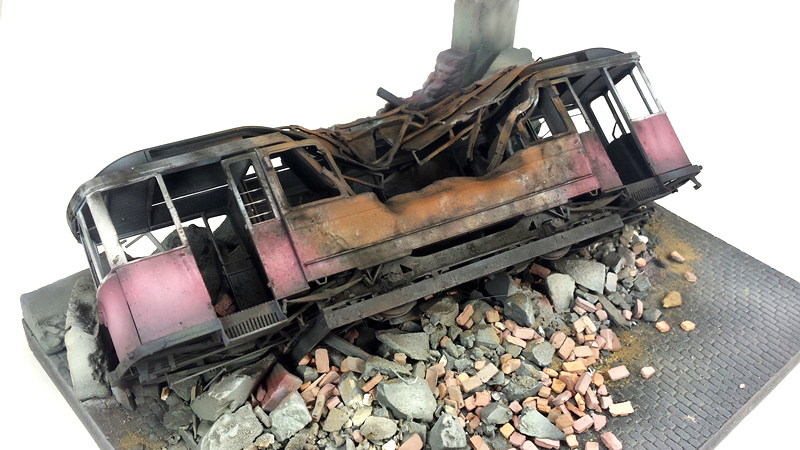
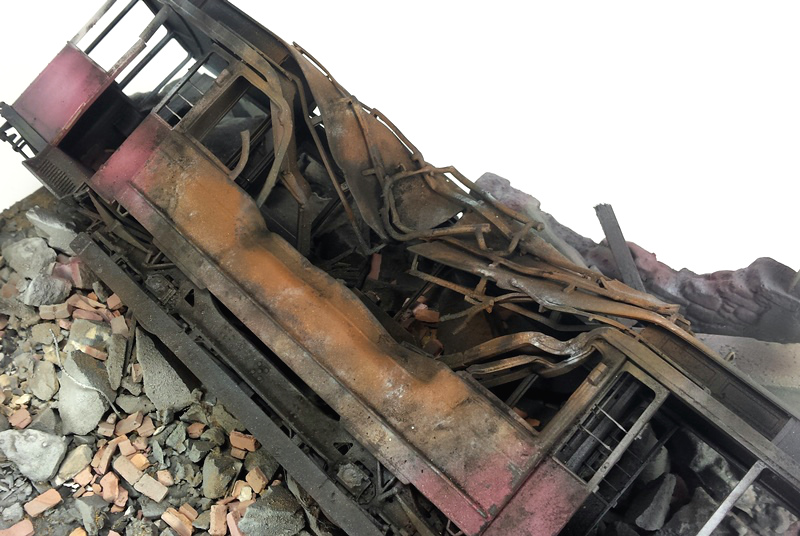
By taking a brush wet with water I am able to remove the layer of paint to reveal the base rust coloring I started off with in the beginning. When it comes to using the Chipping Medium from Vallejo, the amount of Chipping Medium applied and the amount of water used to remove the paint directly affects the amount of paint that is removed as well as the look of the chipped paint. The less chipping fluid results in having to work a little harder to remove the paint you applied and the chipping will be lighter; more chipping fluid would act exactly how you would expect by removing larger amounts of paint more easily. I applied my coat of Chipping Medium kind of in the middle of both of these applications. The area was wet when sprayed but not dry and not dripping with the fluid. By applying a larger amount of water, the absorption and undermining will be larger. After a few moments of being wet, a soft bristled brush is all that is needed to remove the paint giving me a mottled line of paint between the burn patter area and the paint itself.
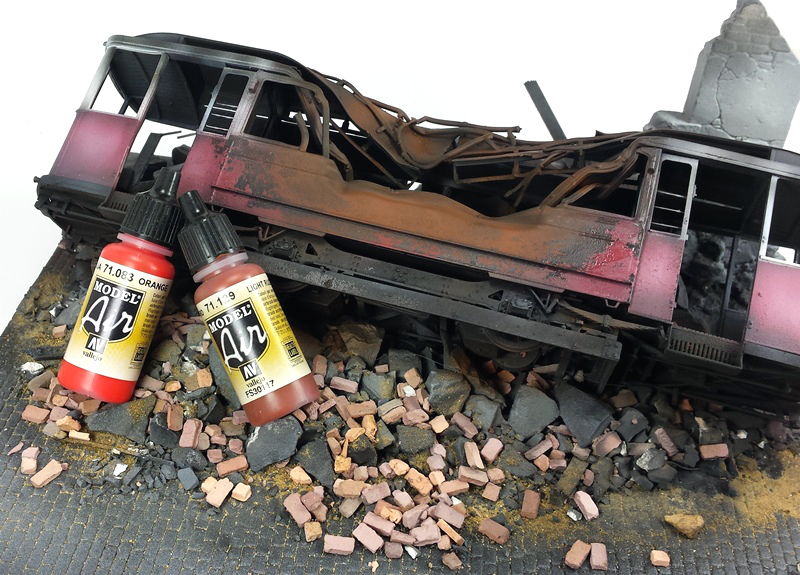
My next step is to add a little more color variance to the burn pattern. Again, I reached into my box of Vallejos Model Air Colors and picked out Light Rust and Orange. I applied them mixed to the area in a light dusting approach similar to highlighting of ant faded panel on a vehicle. After that, it came down to applying the white colored charring that happens with a lot of burn patterns. This was a combination of Antique White and White Grey. I took and old green scrubby pad from under the kitchen sink and spread out the fibers and shot the paint directly through this material. This is a quick and dirty way to get and irregular pattern of this heat transferred charring that occurs sometimes.
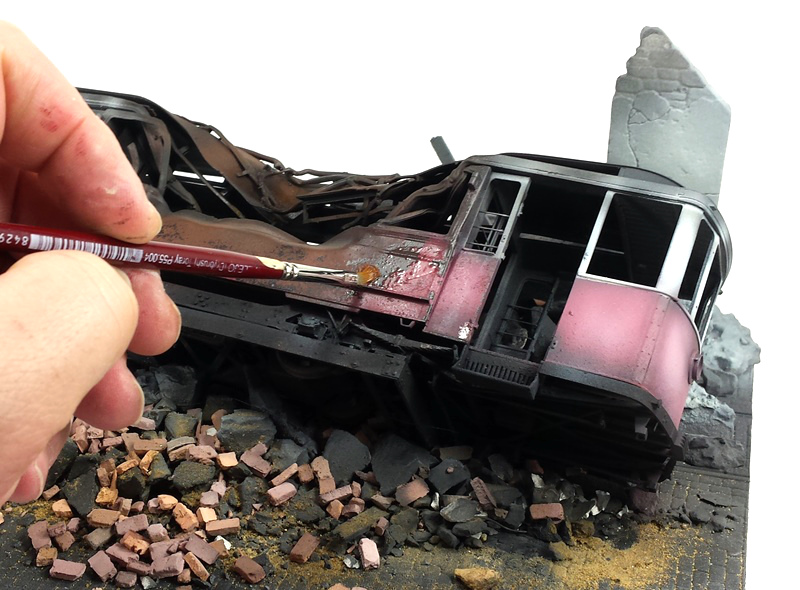
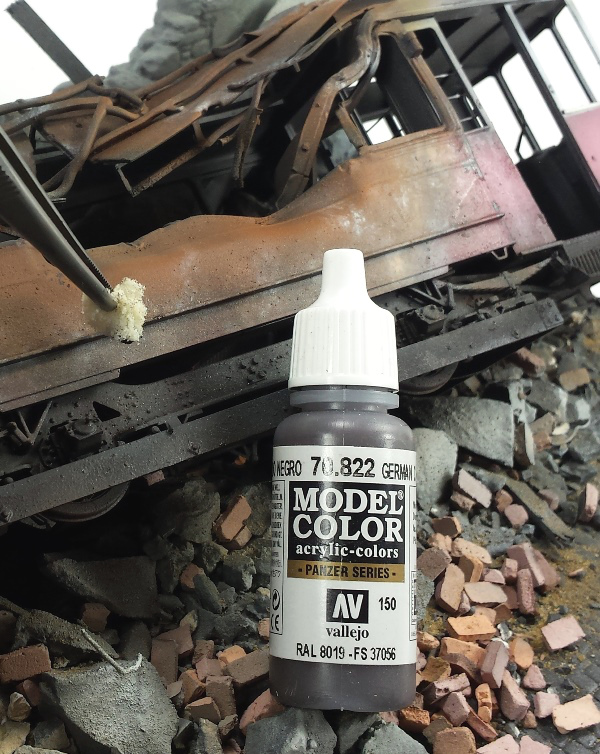
Now that the paint removal through use of the chipping medium was completed, I added some darker chipping using Model Color German Camo Black Brown as this ass some tonal variations to the burn as well as some light chipping to the Trams original paint job. A quick clear coat was applied and it was off to washes and pigments. After looking things over, I didnt feel the need to go crazy on more washes than I needed to do. Basically I added a filter using an acrylic was; Model Wash Oiled Earth. A filter is only a diluted wash. In this case about 50/50 wash to water mix and evenly applied throughout. Some darker shading was applied to the lower panels using the same wash, but full strength. The wash is applied to a section of the panel I want to tint the color on and with a clean damp brush (not wet) I feathered out the edge of the wash to soften any tide marks that would appear if I left it to dry.
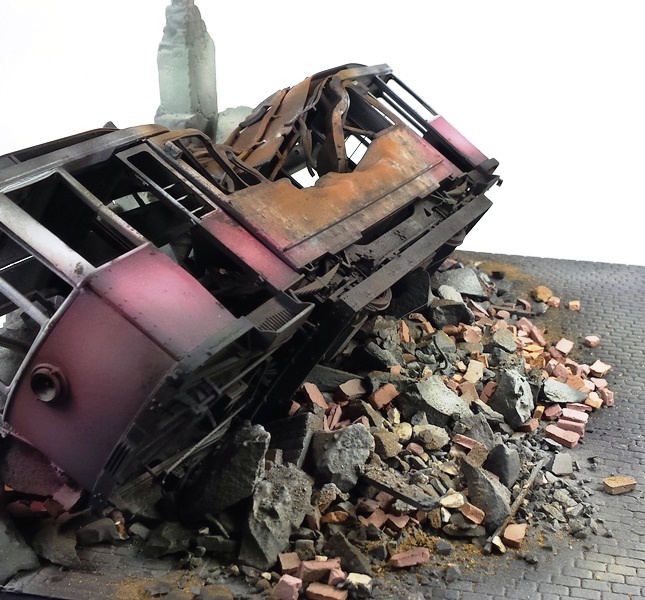
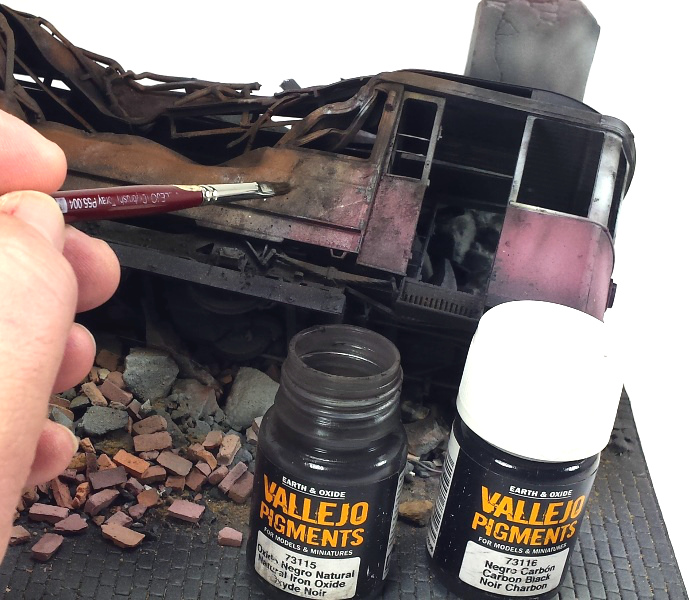
The final stage of trying to get the burn look, in this instance, is to add some pigments. The pigments add depth and texture to the paint. In this case I felt that only some dusting of black soot was needed to get the look I was thinking of. A mix of Carbon Black and Natural Iron Oxide pigments from Vallejo was dry brushed into random areas of the piece.
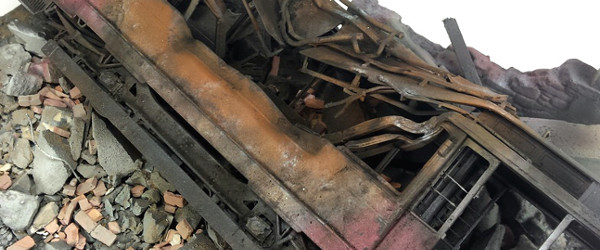
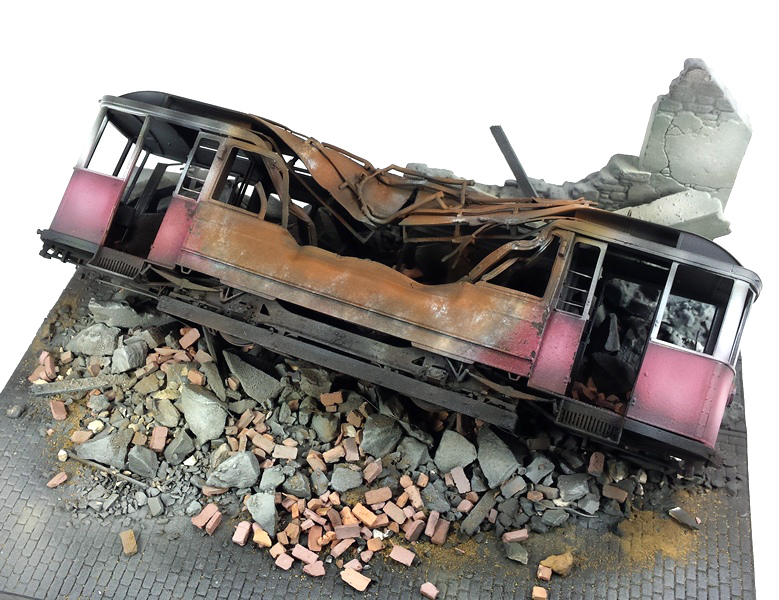
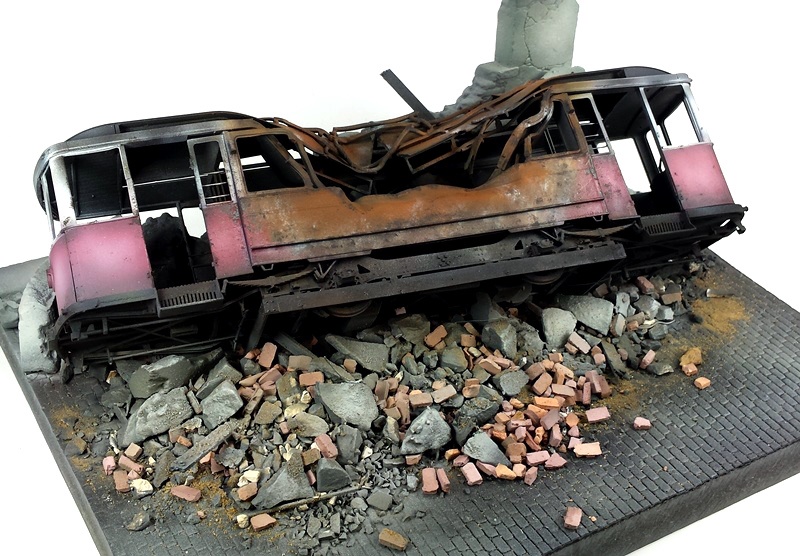
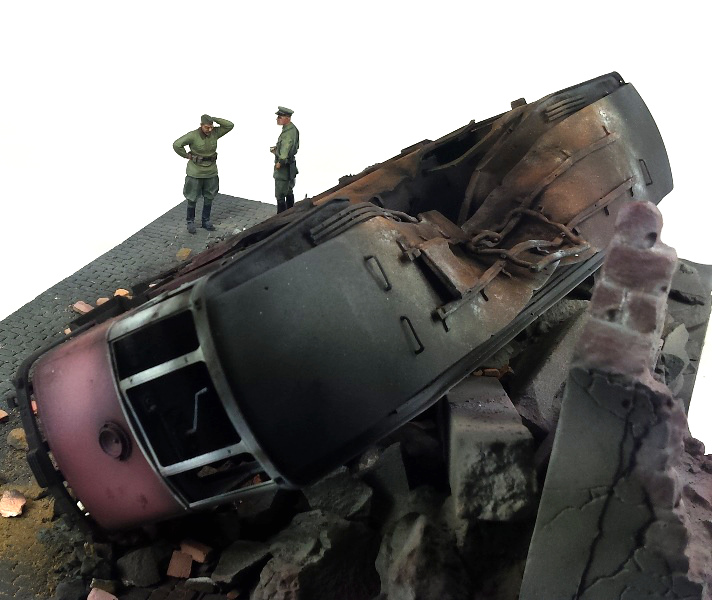
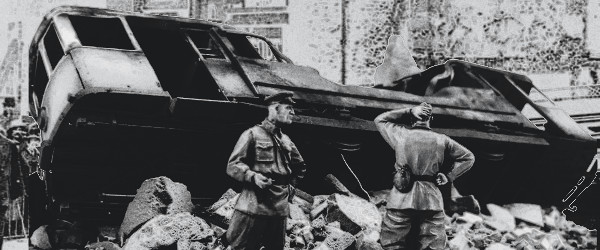
So there you have it, my burnt out MiniArts European Tram. Burn patterns can be quite effective in a static display model and there are many, many different ways to achieve these effects, this is merely one; but its a good start I think. Basically the best way to get started on making a burnt out model is to take the time to study plenty of reference photos of various metals and how they look after they have been exposed to fire and just start playing with ideas and of course playing with paint! Oh yeah Have Fun Too!
About the Author


FROM: MASSACHUSETTS, UNITED STATES
I am building what I like, when I like and how I like it; having fun doing it. I have been building and finishing models on and off my whole life but the past ten years things really exploded. Just about anything goes when it comes to hitting the bench, but wrecked armor, rusted hulks, ships or ...
Comments

Yes,"thumbnails", hope they come in economy packs for those of us who are all thumbs!
MAR 07, 2015 - 07:44 AM

Wow, great job Todd, very realistic! Thank you for the great step-by-step, I have something I want to try and this will help me out, hope it turns out as well as yours!
MAR 07, 2015 - 11:03 AM

Thank you Colin! I'm sure things will turn out just fine my friend! Play around with things and have some fun! If a question pops up, let me know. If I can't answer it, I'm sure we can find one!!
MAR 07, 2015 - 11:35 AM

Todd, great job! Seems a shame to put 600 pieces together and not have it bright and shiny, but I like this scene better! Your damage and weather is great.
MAR 08, 2015 - 07:16 AM
Thank you Fred!! It does seem just like that sometimes my friend! I look at in terms of complete in either case. If I had decided earlier to make a wreck though, I probably would have done half the work underneath and had it probably standing upright. Kind of a "luck of the draw" thing!
MAR 08, 2015 - 07:30 AM

Hi Jim!! Thank you!! I to am glad to see this one reach the finish line!! ....
MAR 08, 2015 - 04:57 PM

Nice project and reference. I'm doing one now..a tropical tramcar. thanks. It's sunny over here.
APR 13, 2015 - 10:22 AM
Thanks Ed!! Best of luck on the build!! It's getting sunnier over here too....only really slowly!!!
APR 13, 2015 - 03:19 PM
Copyright ©2021 by Todd Michalak. Images and/or videos also by copyright holder unless otherwise noted. The views and opinions expressed herein are solely the views and opinions of the authors and/or contributors to this Web site and do not necessarily represent the views and/or opinions of Armorama, KitMaker Network, or Silver Star Enterrpises. All rights reserved. Originally published on: 2015-03-07 10:35:40. Unique Reads: 25930

WEB HOSTING BY


Copyright ©2021 Armorama and Kitmaker Network, a subsidiary of Silver Star Enterprises
All Rights Reserved. Please read our Conditions of Use and Privacy Policy.
All Rights Reserved. Please read our Conditions of Use and Privacy Policy.