

1⁄35In Over My Head
21
Comments
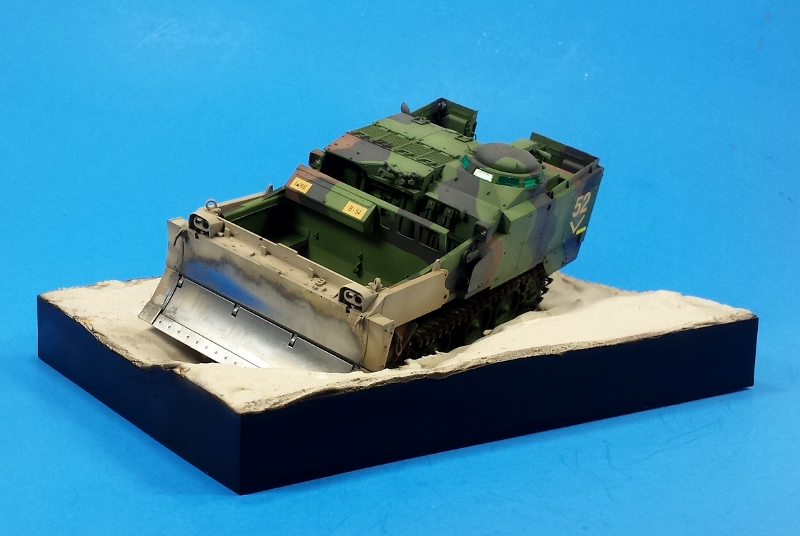
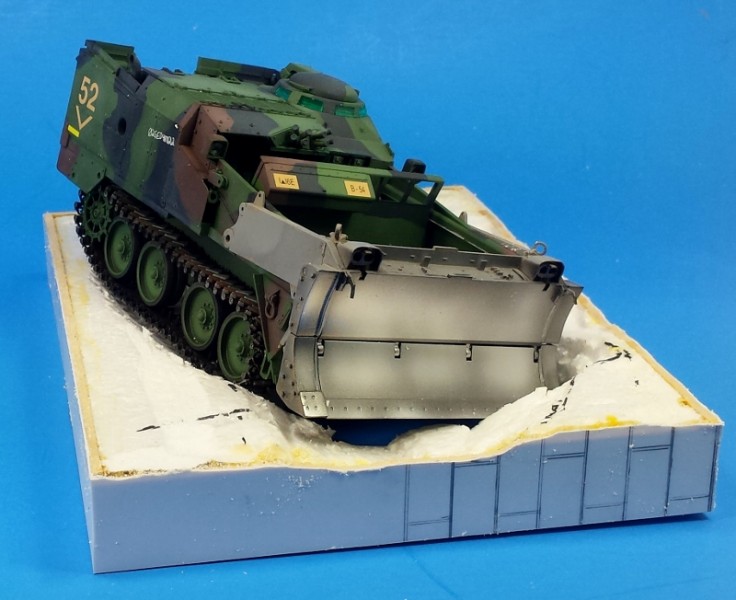
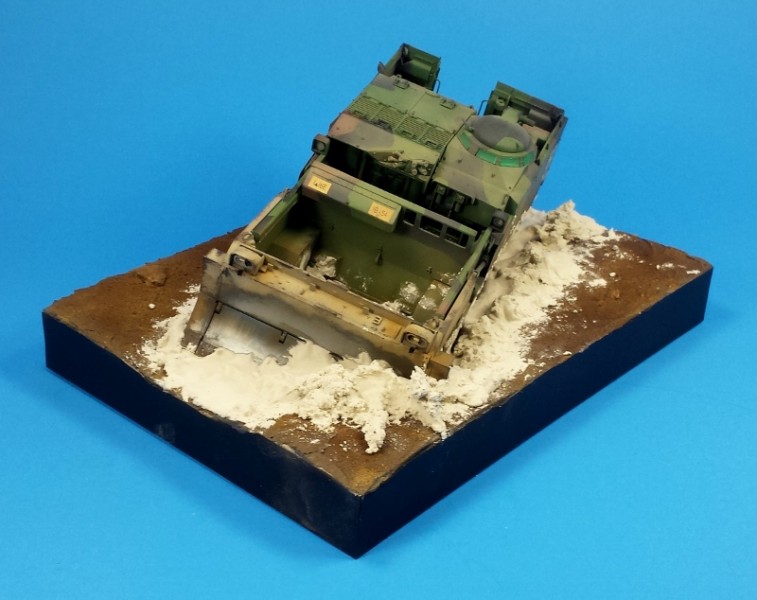
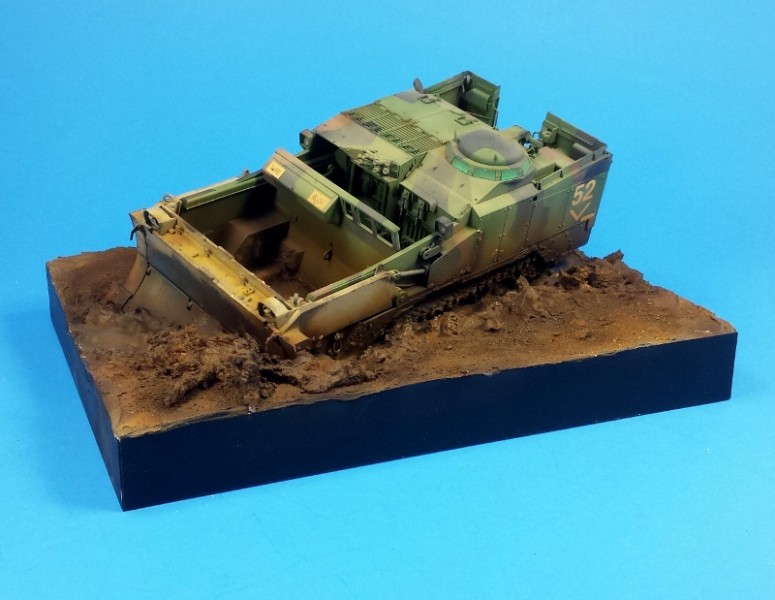
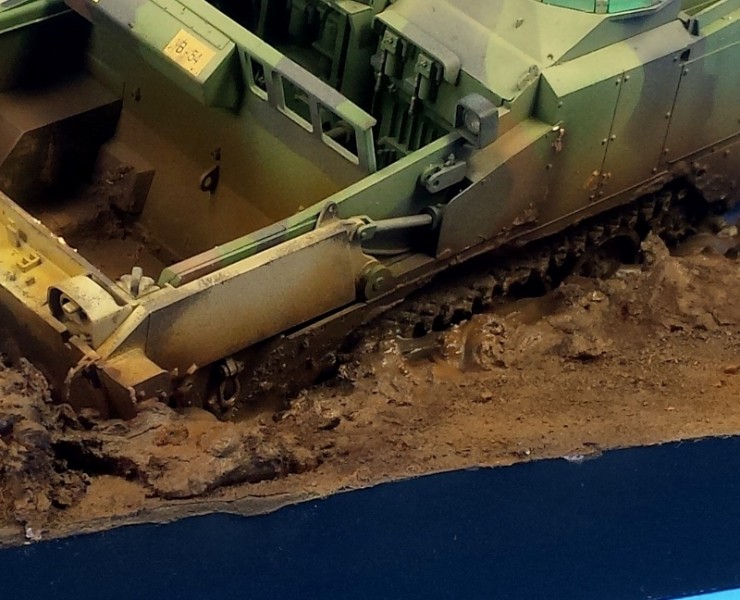
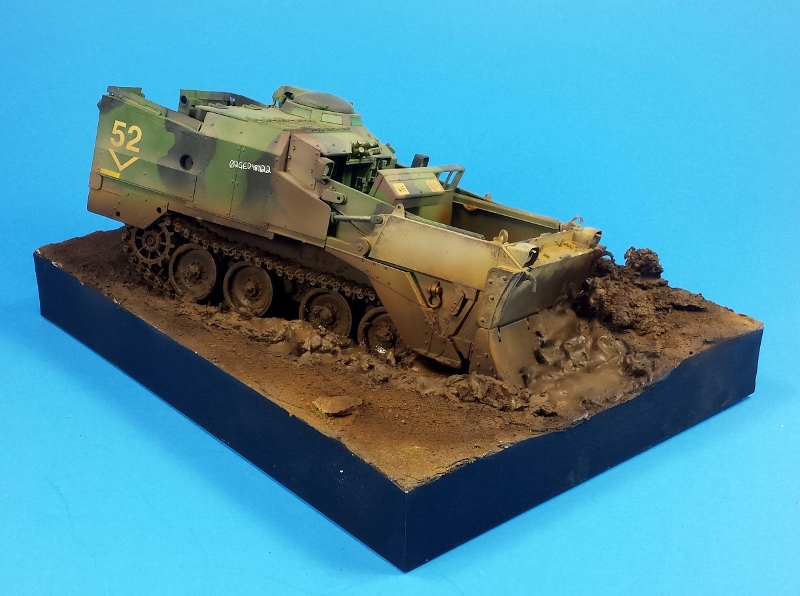
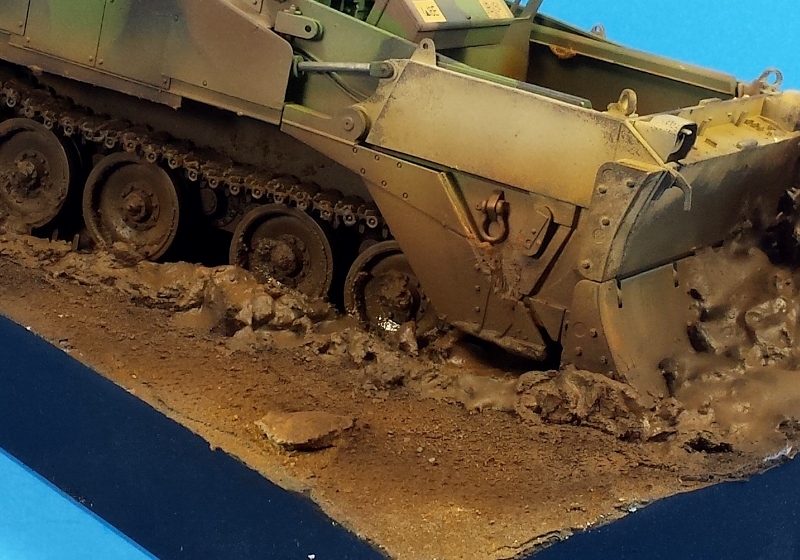
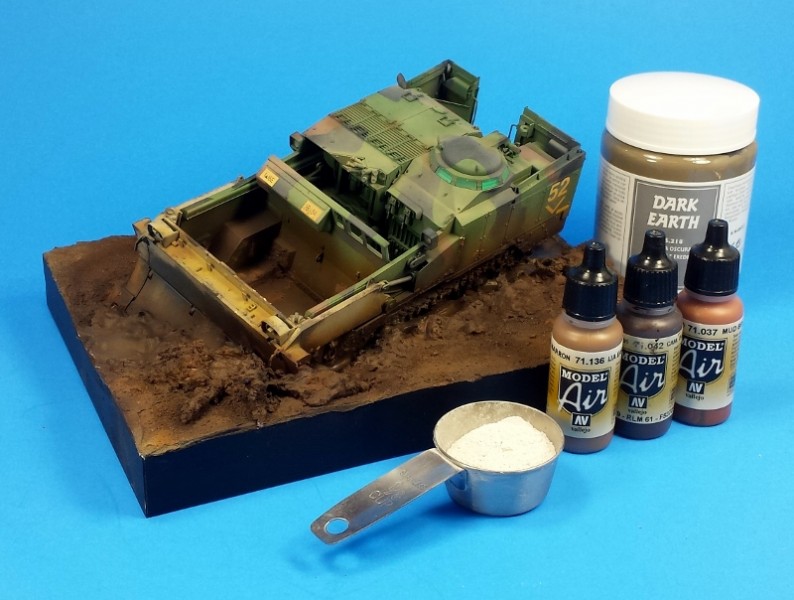
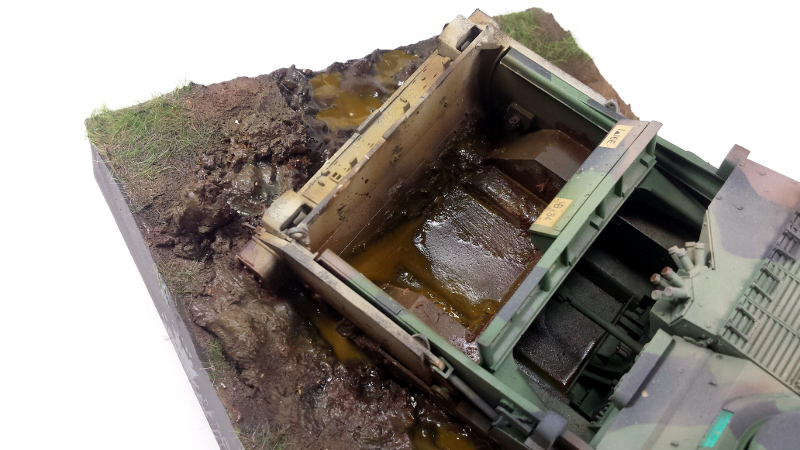
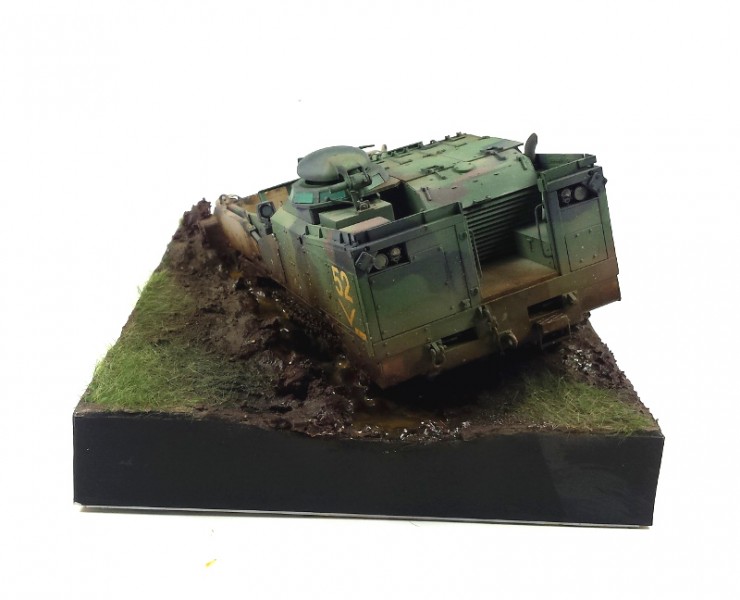
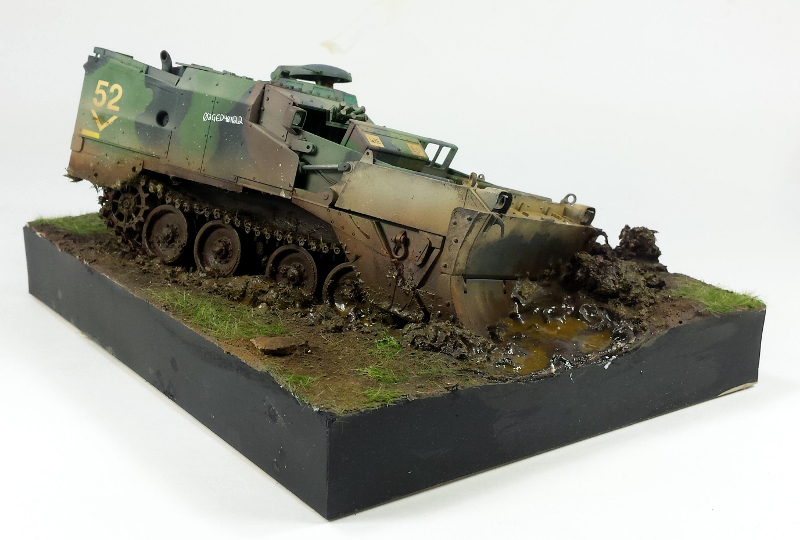
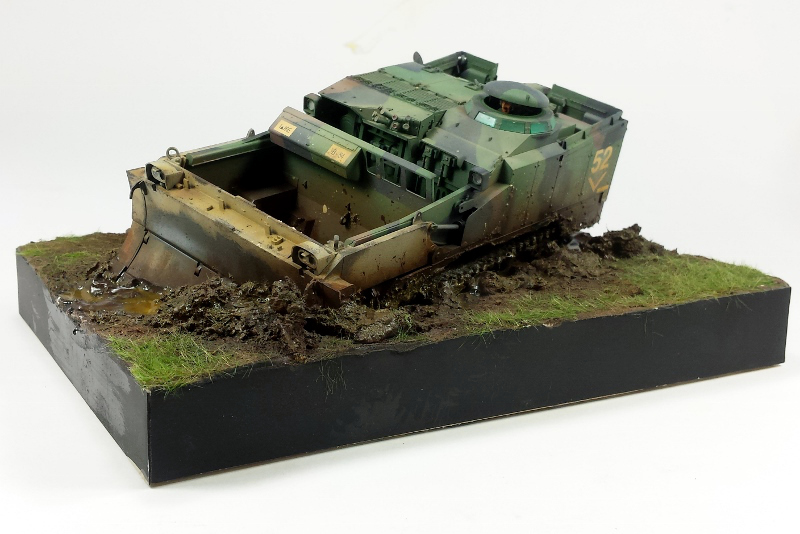
Once I had the base model finished, it was time to figure out how to display it. My first thought was something simple such as a flat plinth and just show of the model. Then I thought, where is the fun in that?. I grabbed some EPS (extruded polystyrene Styrofoam to the rest of us) and carved out part of the top. This allowed the M9 to sit tilted downward into the base itself. The base then was wrapped with strips of styrene plastic card to smooth out the exterior. Time to lay some ground work! I first lathered down a layer of Vallejos Dark Earth Effects (26.218). This base covering paste does have tiny granules embedded in it to give texture, but I added a little sifted sand I had to give the piece more continuity to the surface. Once the base coat was dried, I mixed up a little dry joint compound to a stiff consistency and put down the ridges to the edge of the hole the M9 was in. Once the compound had dried, I followed things up with yet another layer of Dark Earth. This was all finished off with random dust coats of IJA Earth Brown (71.136), German Camo Black Brown (71.042) and Mud Brown (71.047). This gave me variations in tone to the surface. Then for the real muddy stuff! I grabbed some of Vallejos Still Water and mixed it with a few drops of Model Air Dirt (71.133) paint. The mix was then poured into the recesses around the M9 in the hole along with a small amount inside the extruder of the dozer. This were starting to shape up quickly with this now.
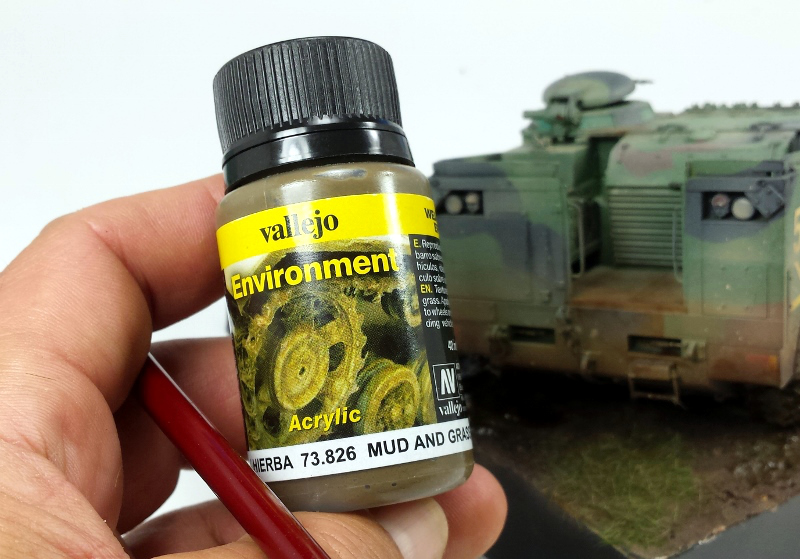
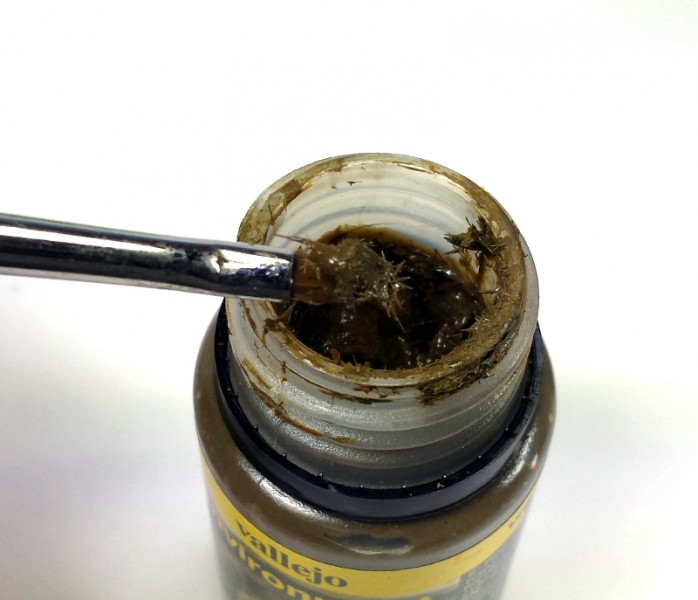
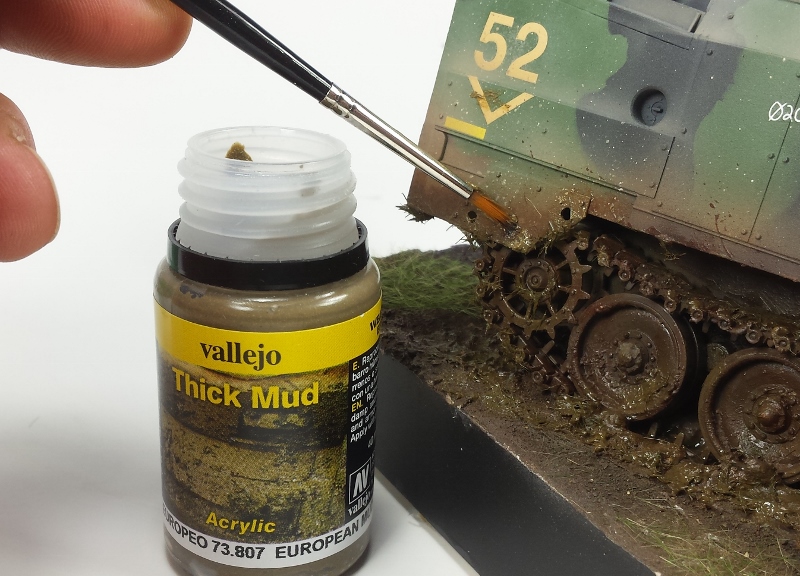
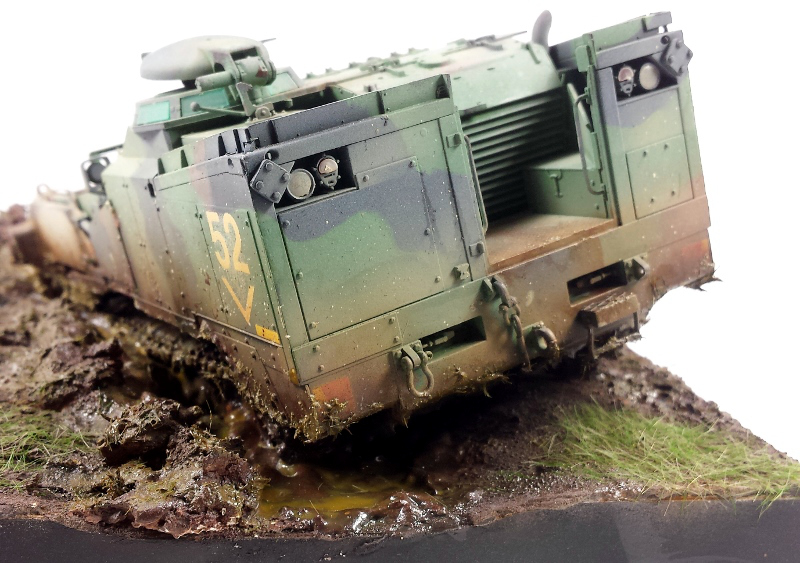
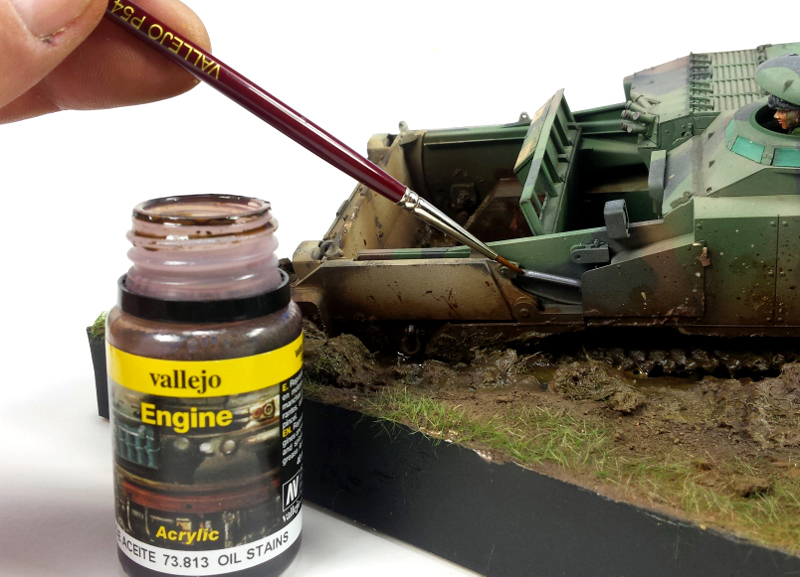
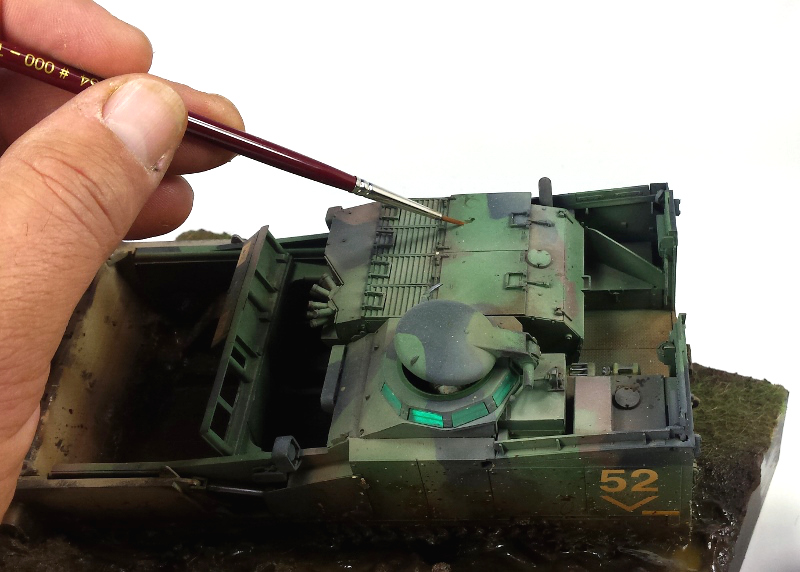
Letting the Still Water mix dry for a day or so, it gave me a chance to look things over and see what I wanted to add or modify. While I was happy with what I was seeing, the piece seemed to be missing something. I decided to add a little color surrounding the M9 by adding grass flock. Anticipating early on I might want to add a figure and after cutting the hole in the hatch area, I painted up a modern driver figure I had and stuck him inside. Since the figure was not going to be the prominent focal point, I went with basically closing the hatch about onto his head. Now came the finishing touches that would hopefully bring the piece together. I was fortunate enough to obtain some of Vallejos New Weathering Effects. There are a number of Thick Mud, Mud and Splashing Mud colors to choose from. I found that the range of


About the Author


FROM: MASSACHUSETTS, UNITED STATES
I am building what I like, when I like and how I like it; having fun doing it. I have been building and finishing models on and off my whole life but the past ten years things really exploded. Just about anything goes when it comes to hitting the bench, but wrecked armor, rusted hulks, ships or ...
Comments


You may have been up to your ears in mud there, but you most definitely pulled it off. Excellent job Todd!
MAY 31, 2016 - 11:38 PM

Your work is definitely professional work and really neat, absolutely cool! Congratulations mate and really a nice sharing! ^^
OCT 08, 2016 - 11:57 AM


Copyright ©2021 by Todd Michalak. Images and/or videos also by copyright holder unless otherwise noted. The views and opinions expressed herein are solely the views and opinions of the authors and/or contributors to this Web site and do not necessarily represent the views and/or opinions of Armorama, KitMaker Network, or Silver Star Enterrpises. All rights reserved. Originally published on: 2016-05-29 05:51:57. Unique Reads: 22989

WEB HOSTING BY


Copyright ©2021 Armorama and Kitmaker Network, a subsidiary of Silver Star Enterprises
All Rights Reserved. Please read our Conditions of Use and Privacy Policy.
All Rights Reserved. Please read our Conditions of Use and Privacy Policy.