

1⁄72Trumpeter E-100 Ausf-B
19
Comments
Construction part 1
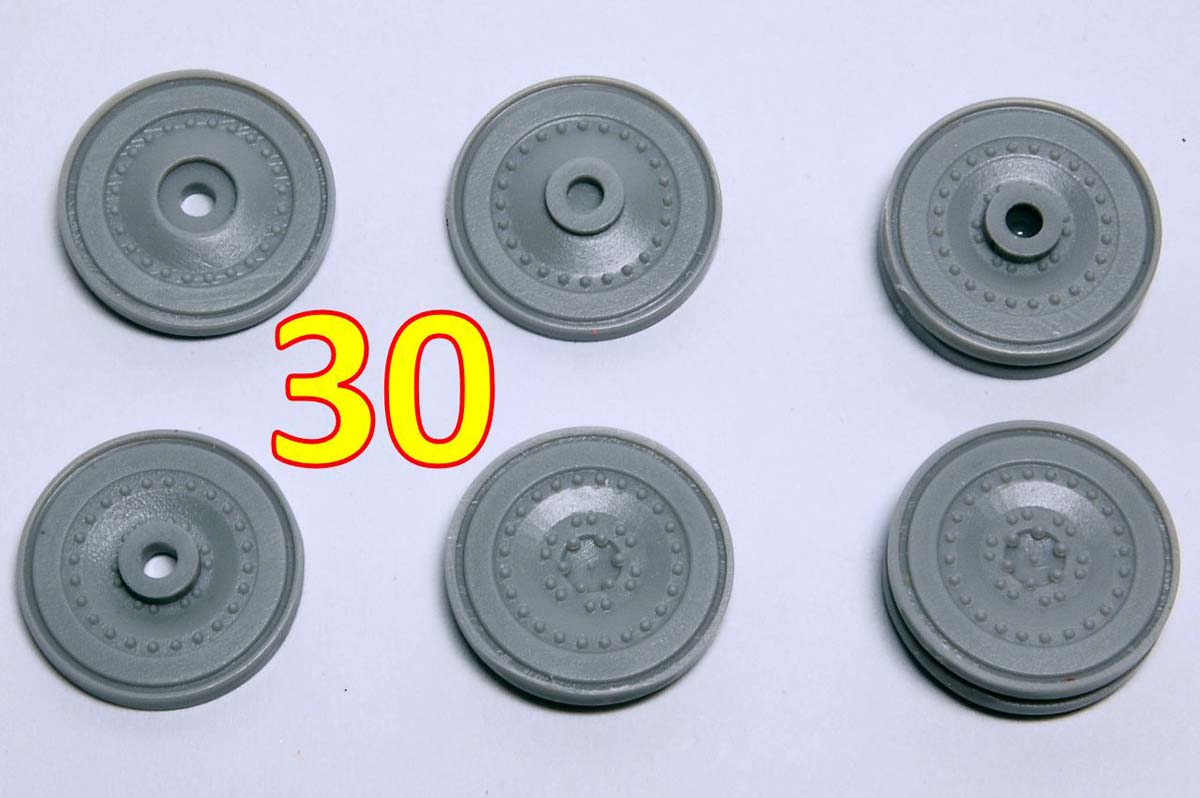
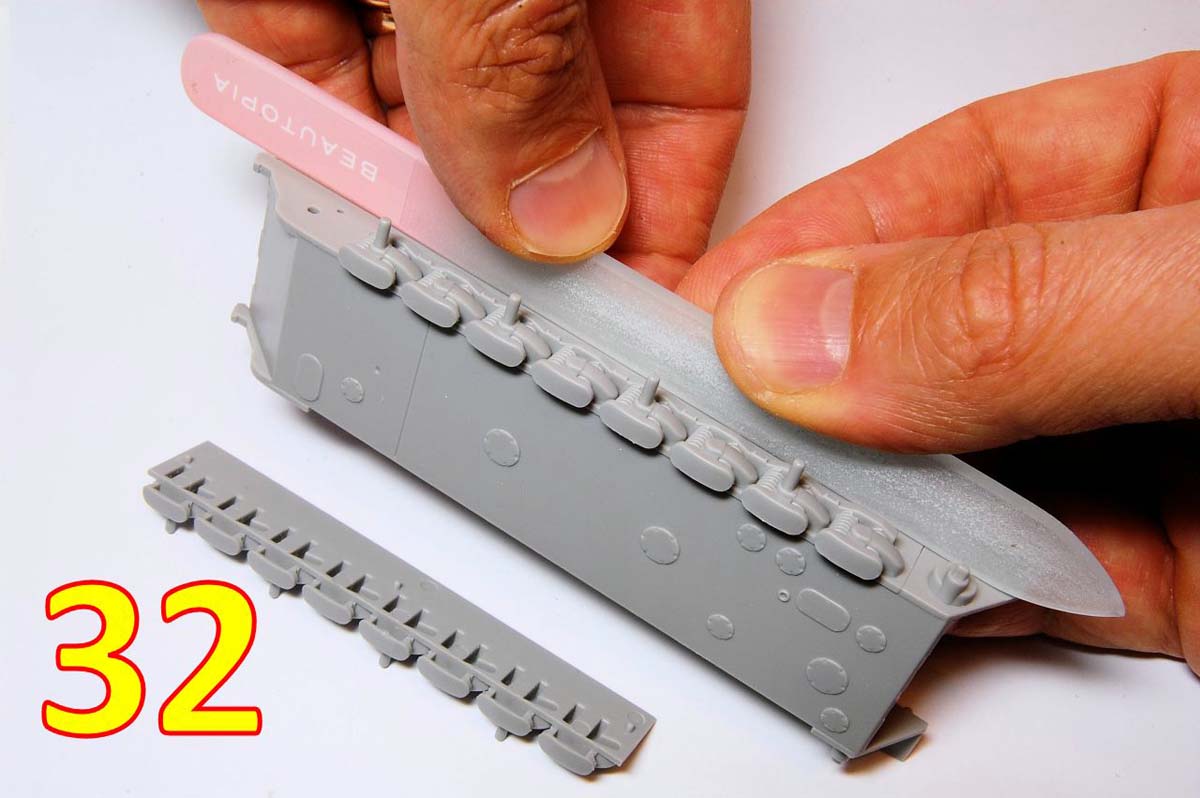
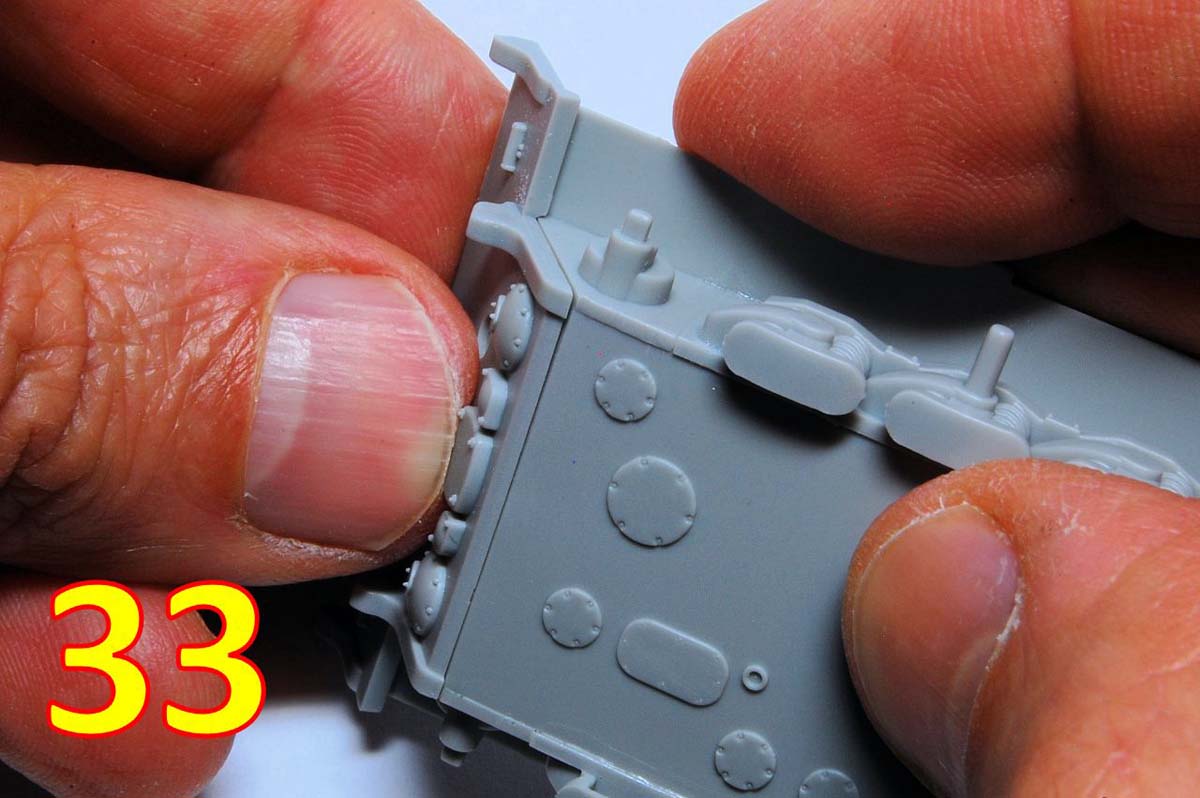
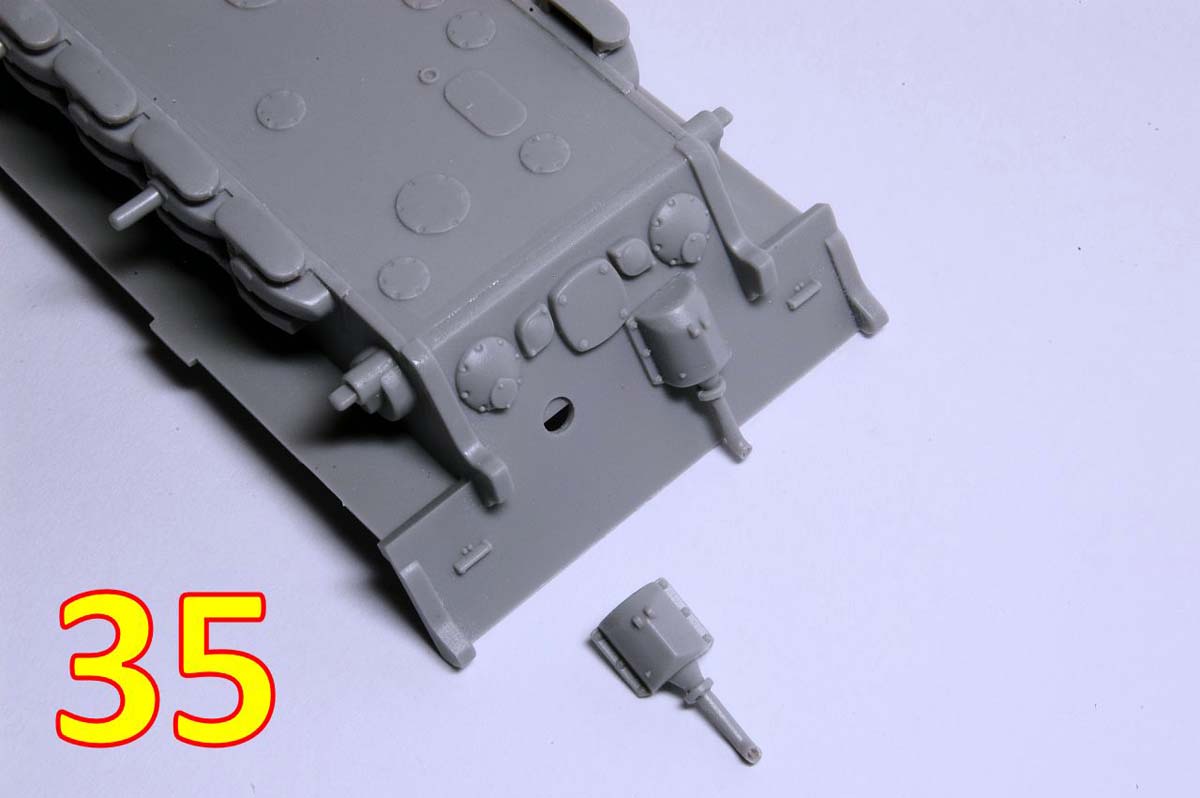
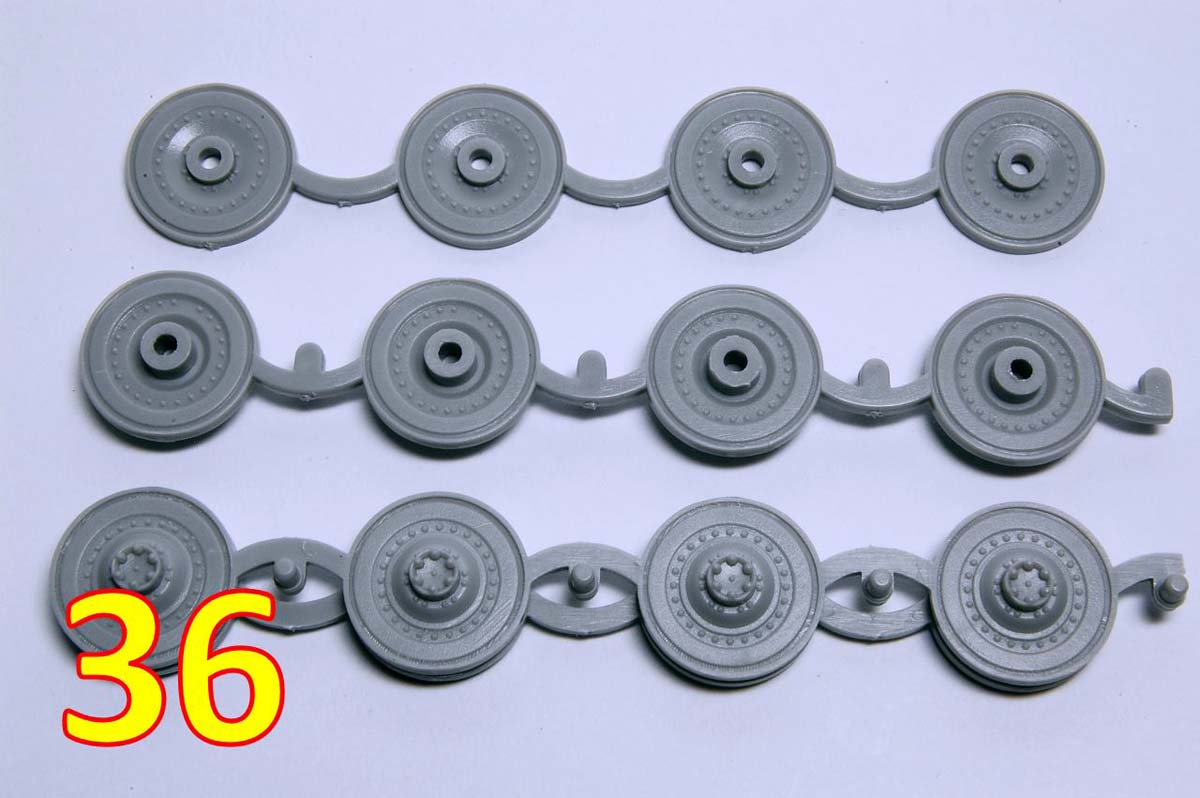
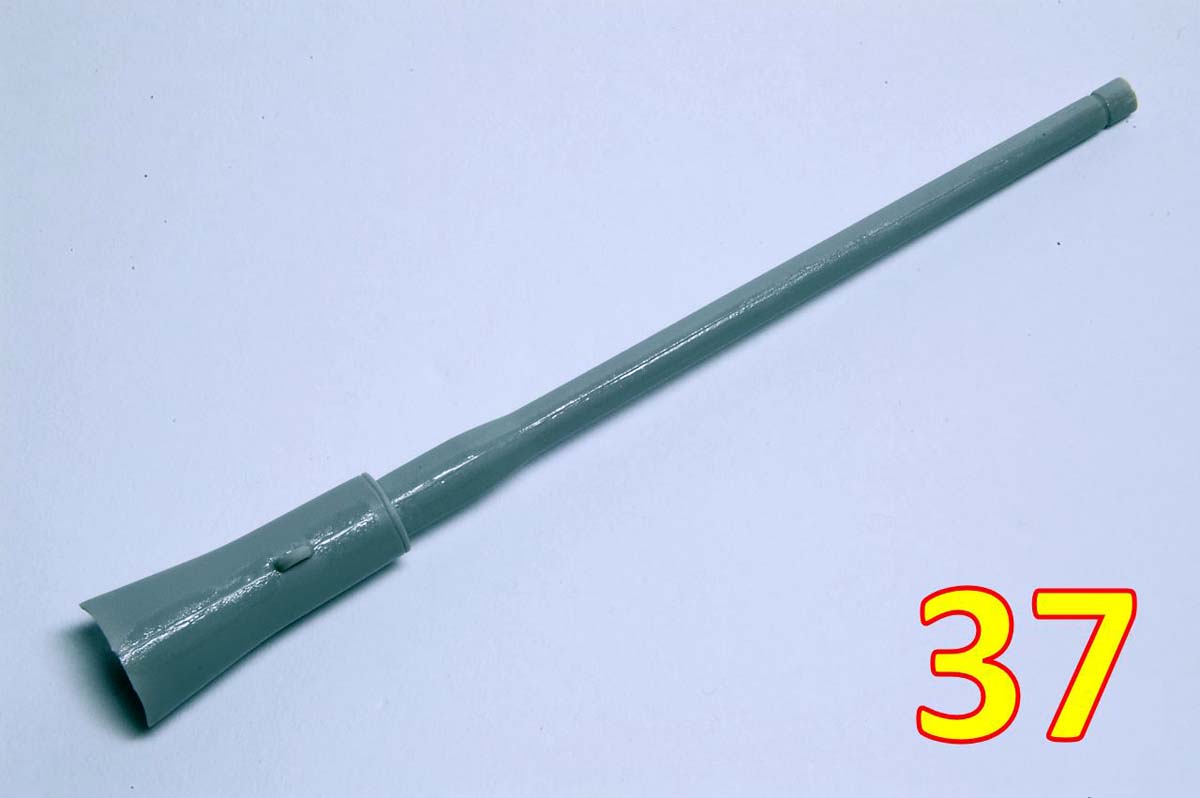
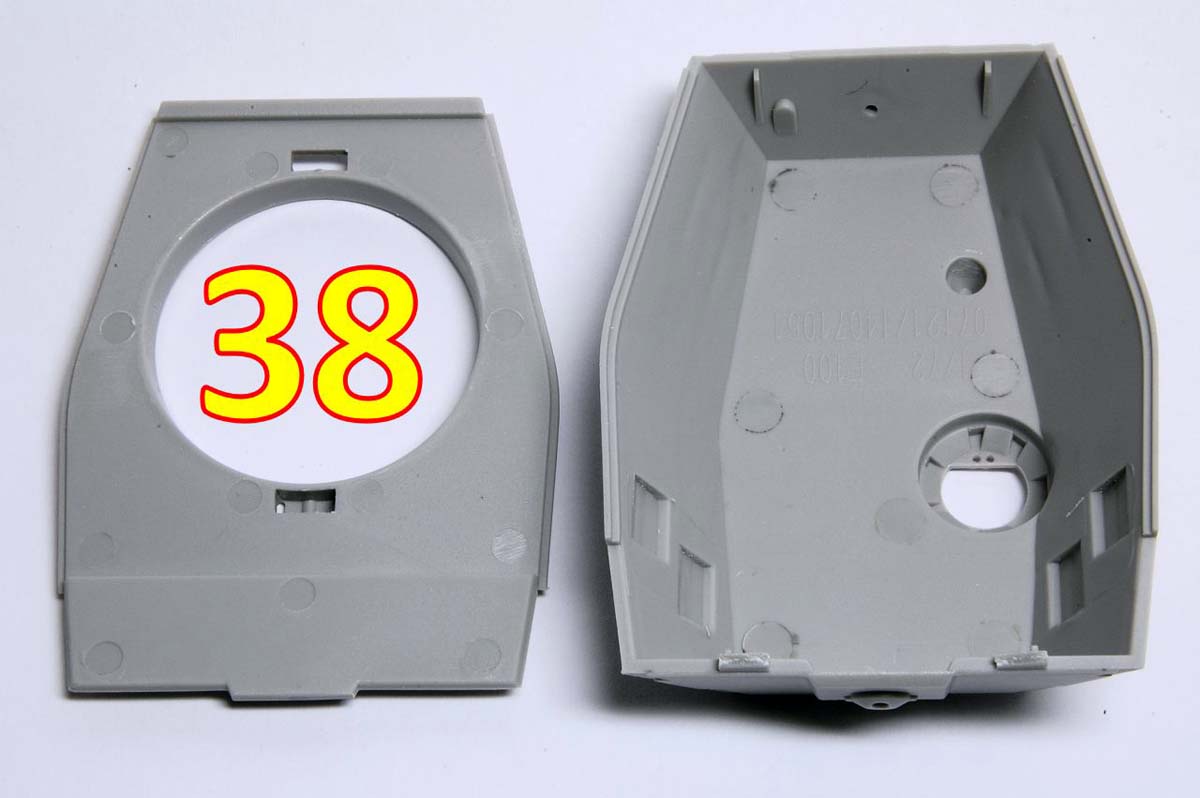
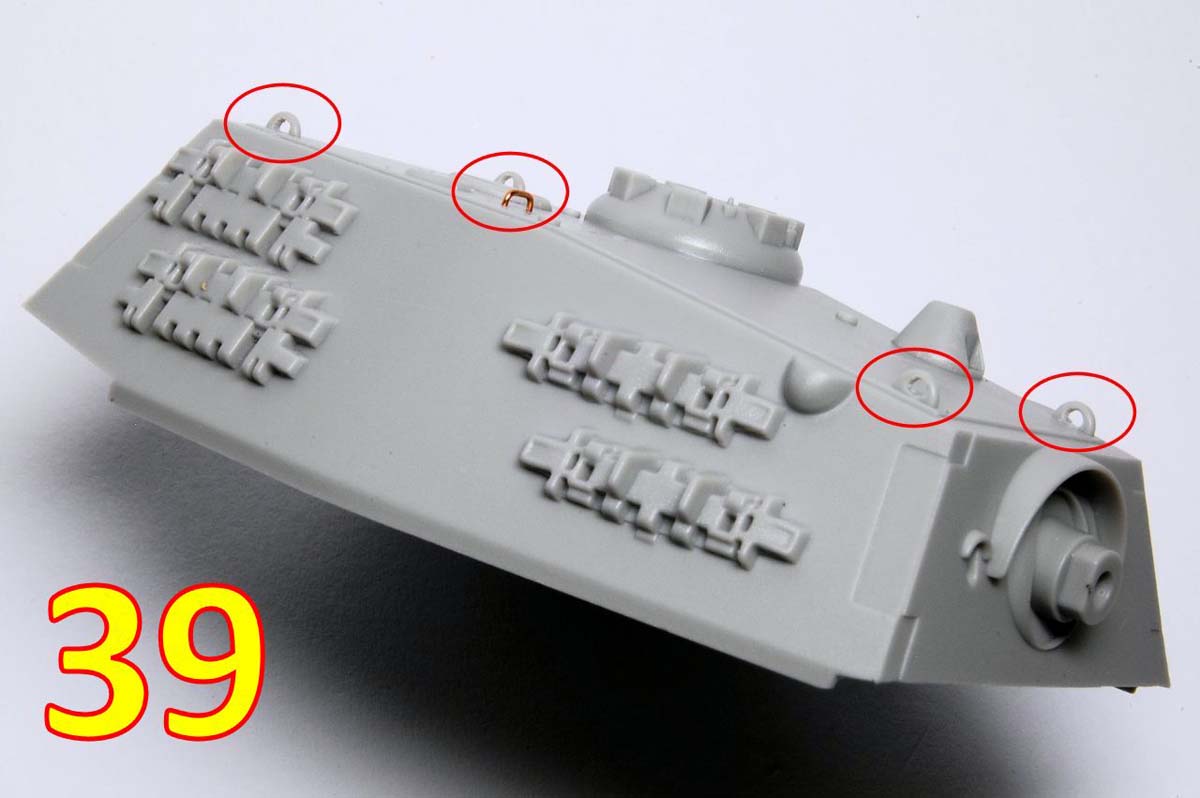
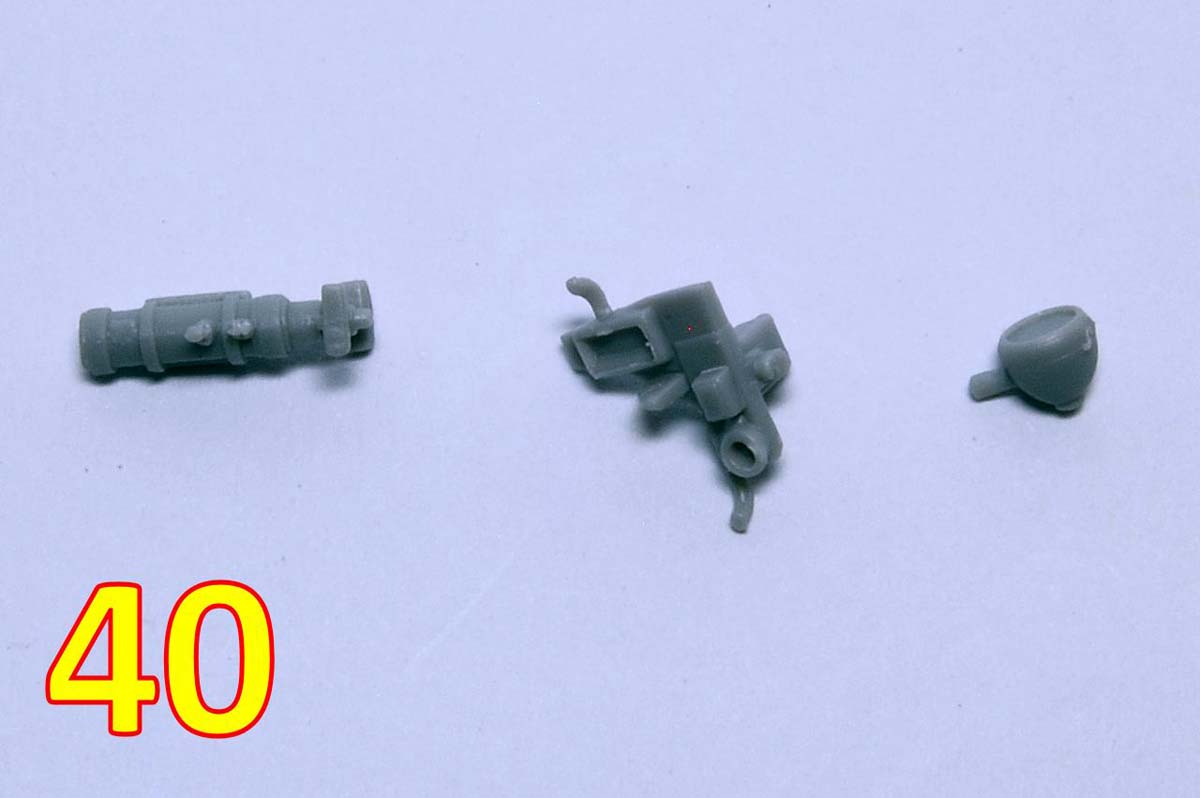
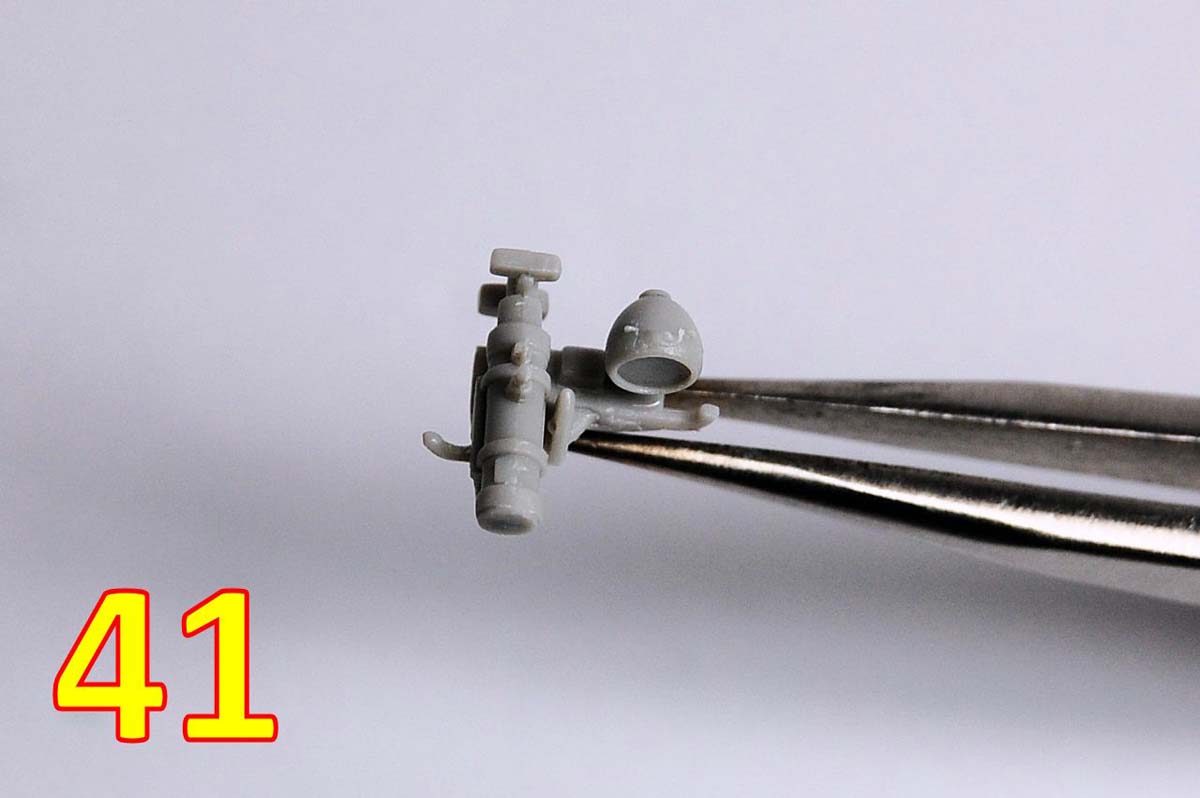
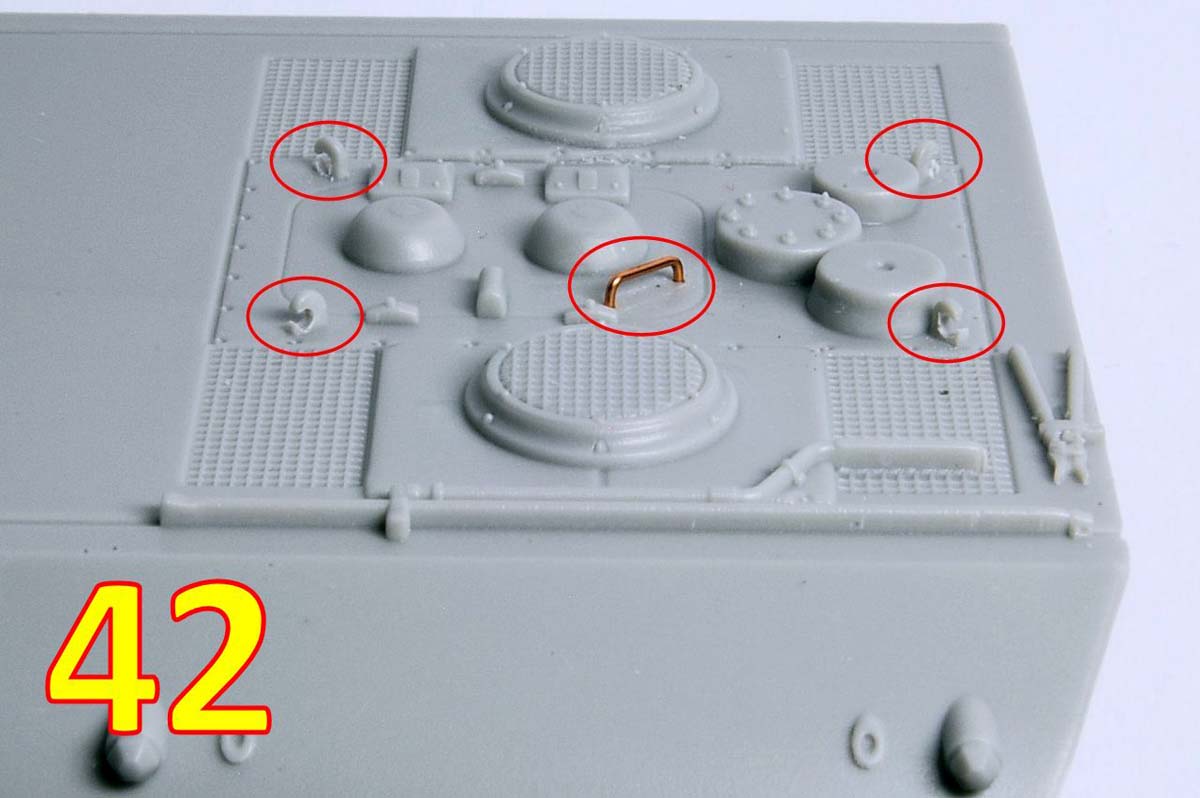
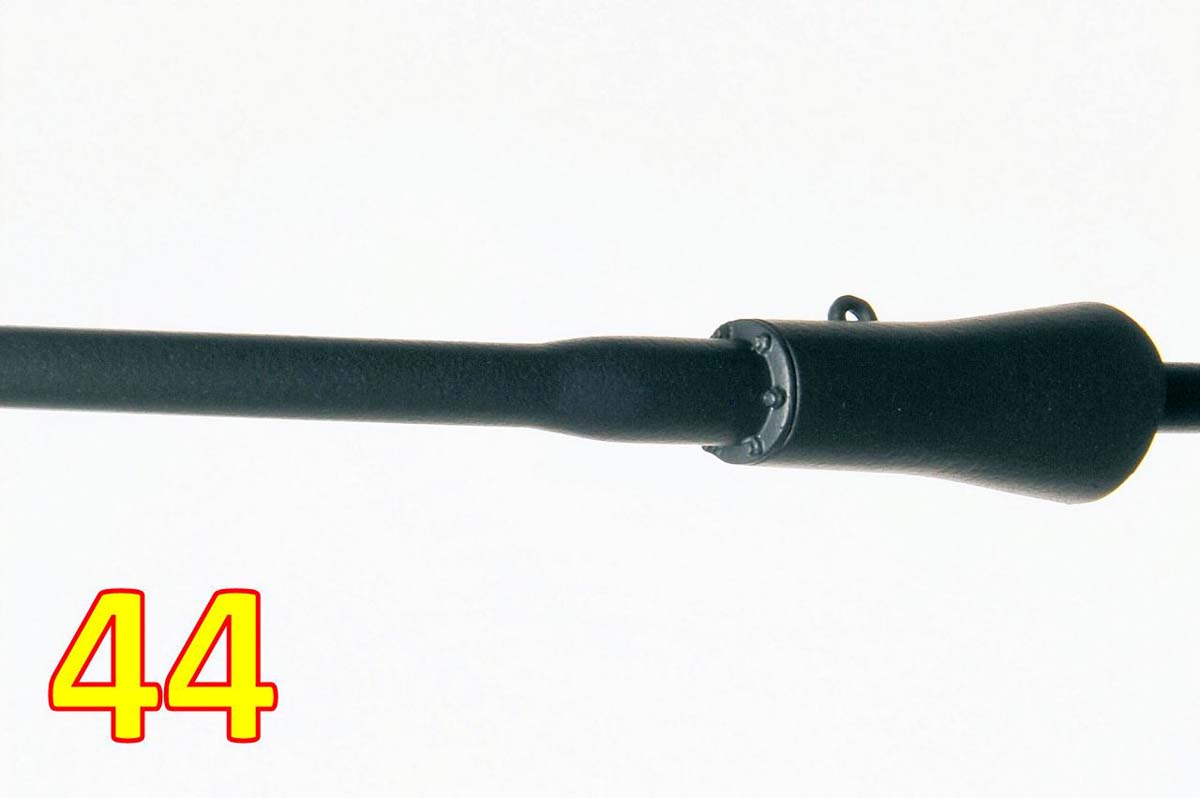
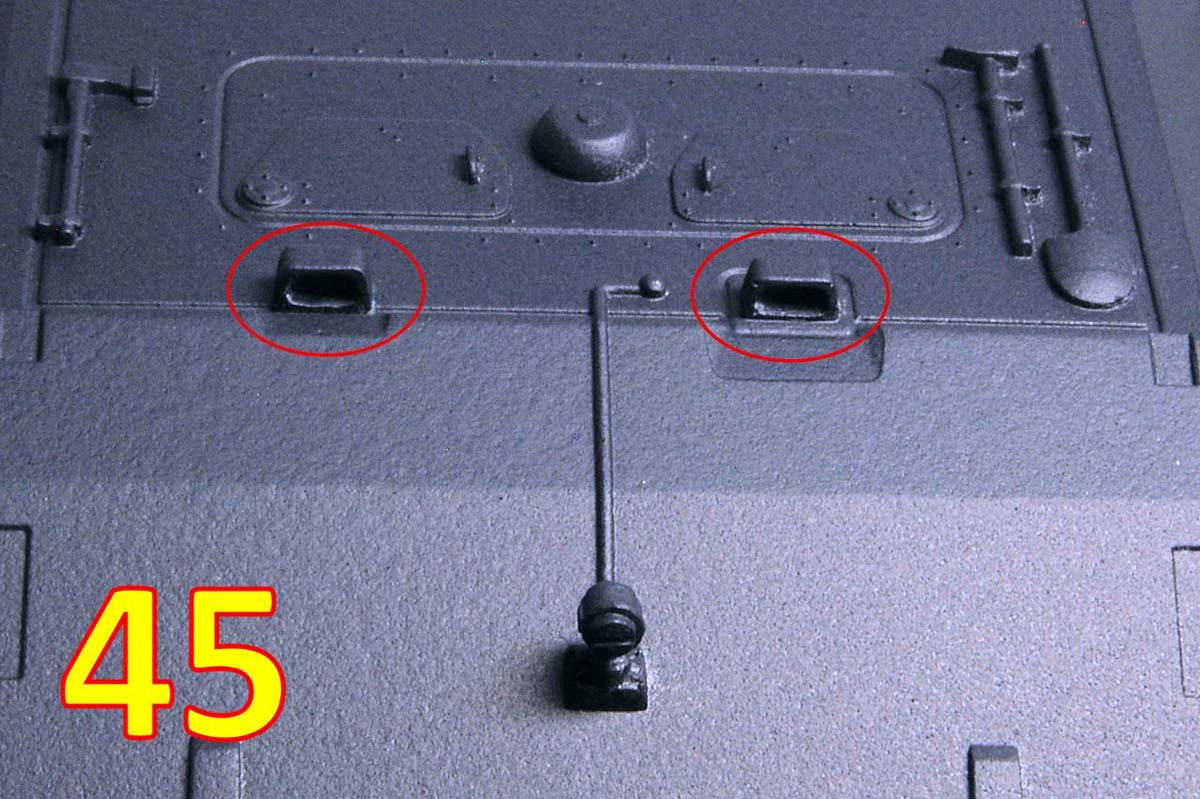
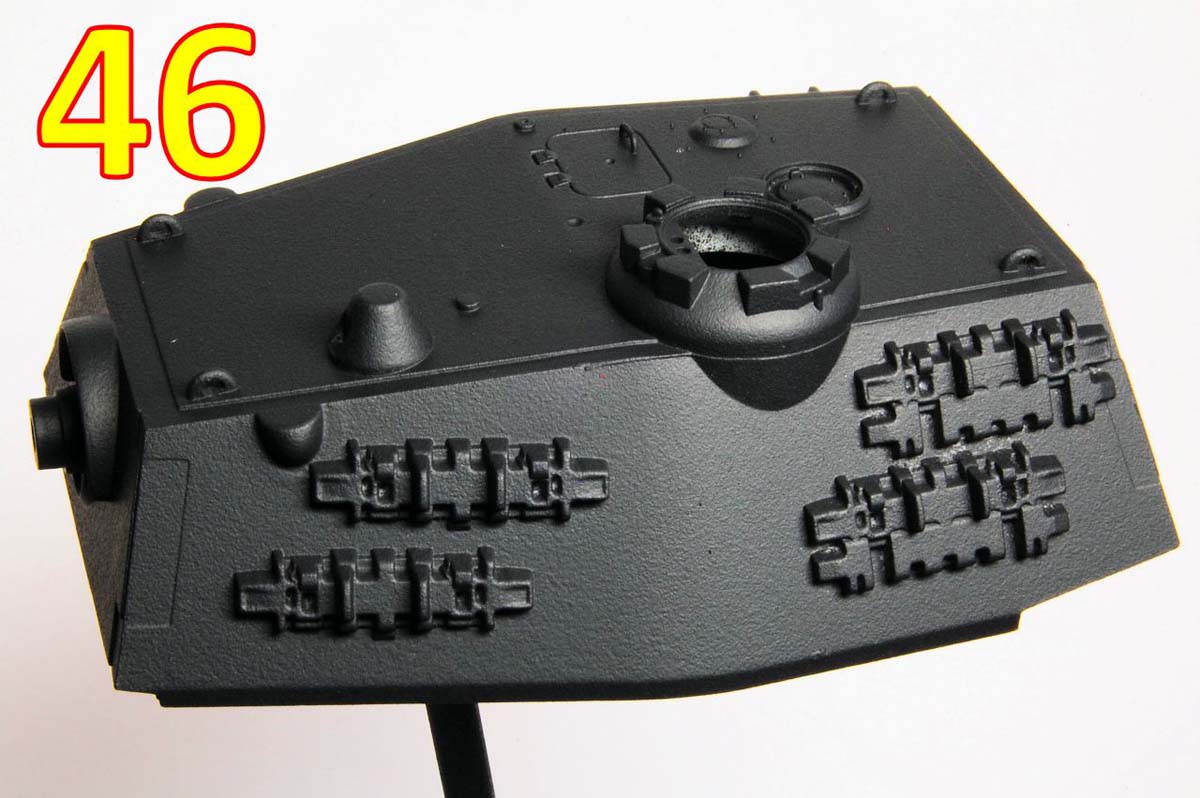
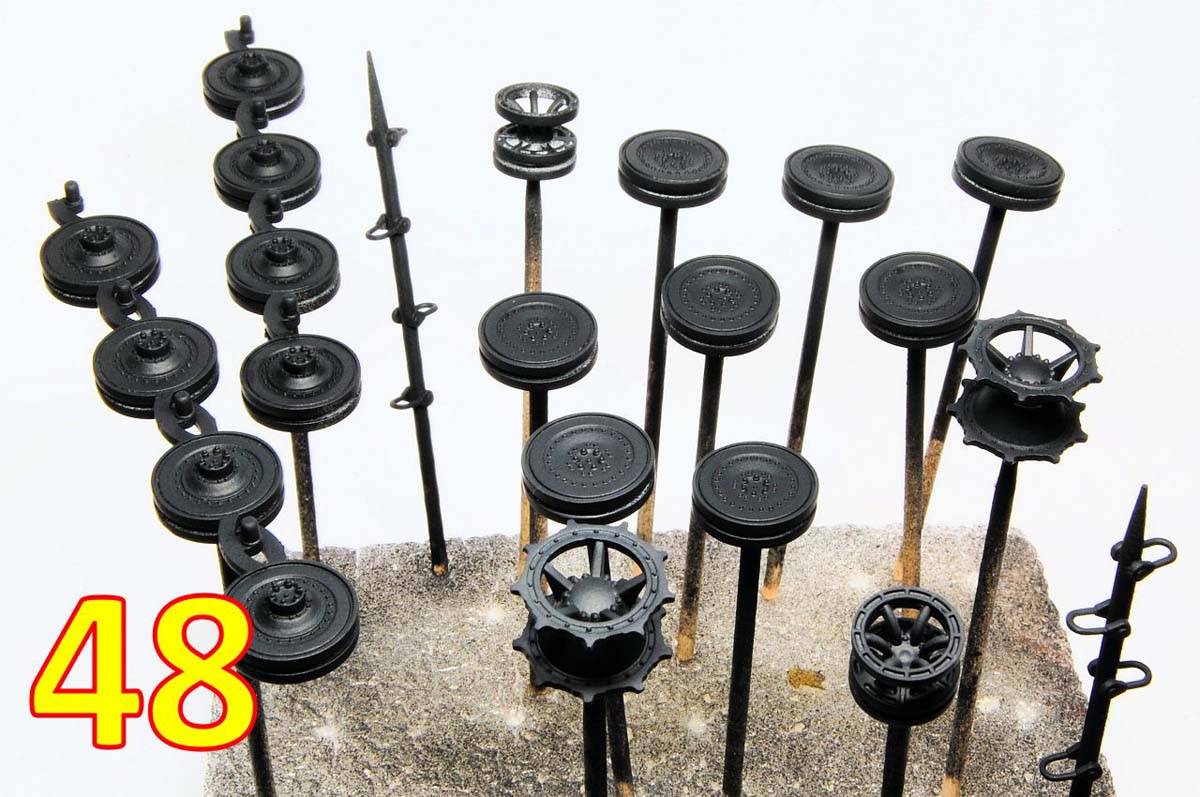
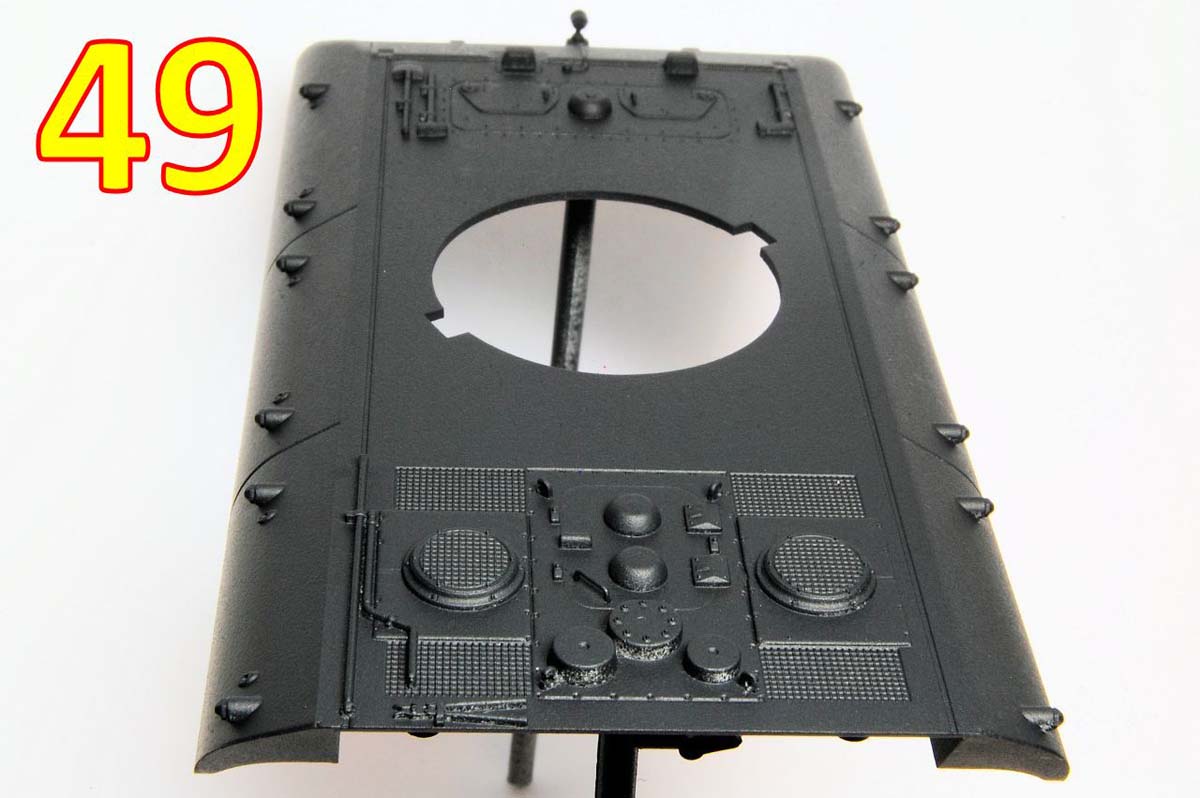
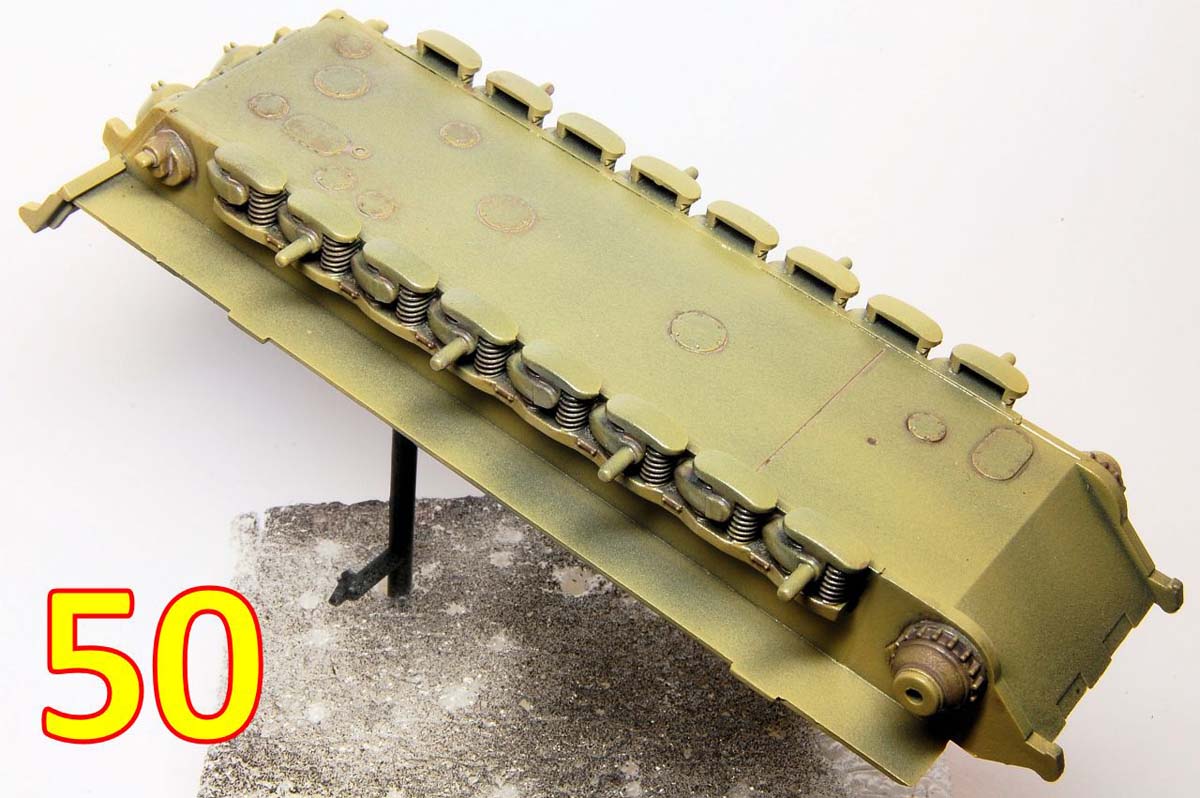
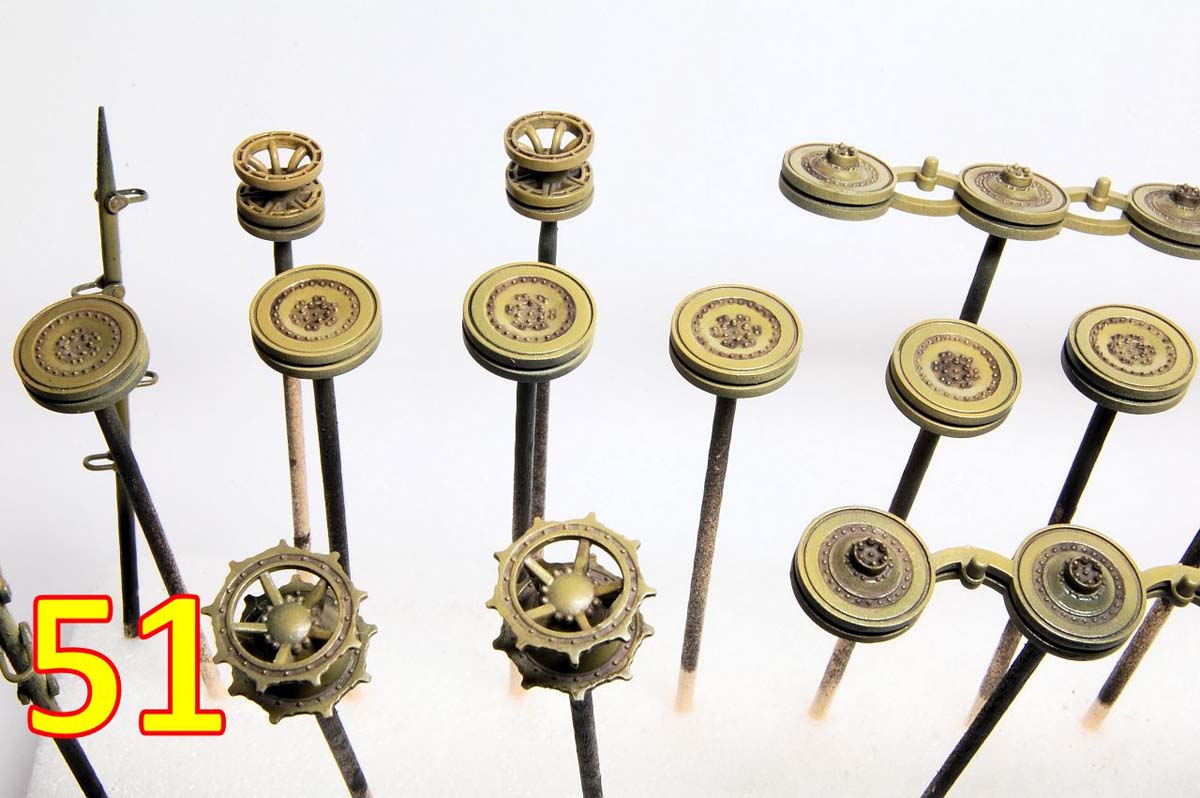
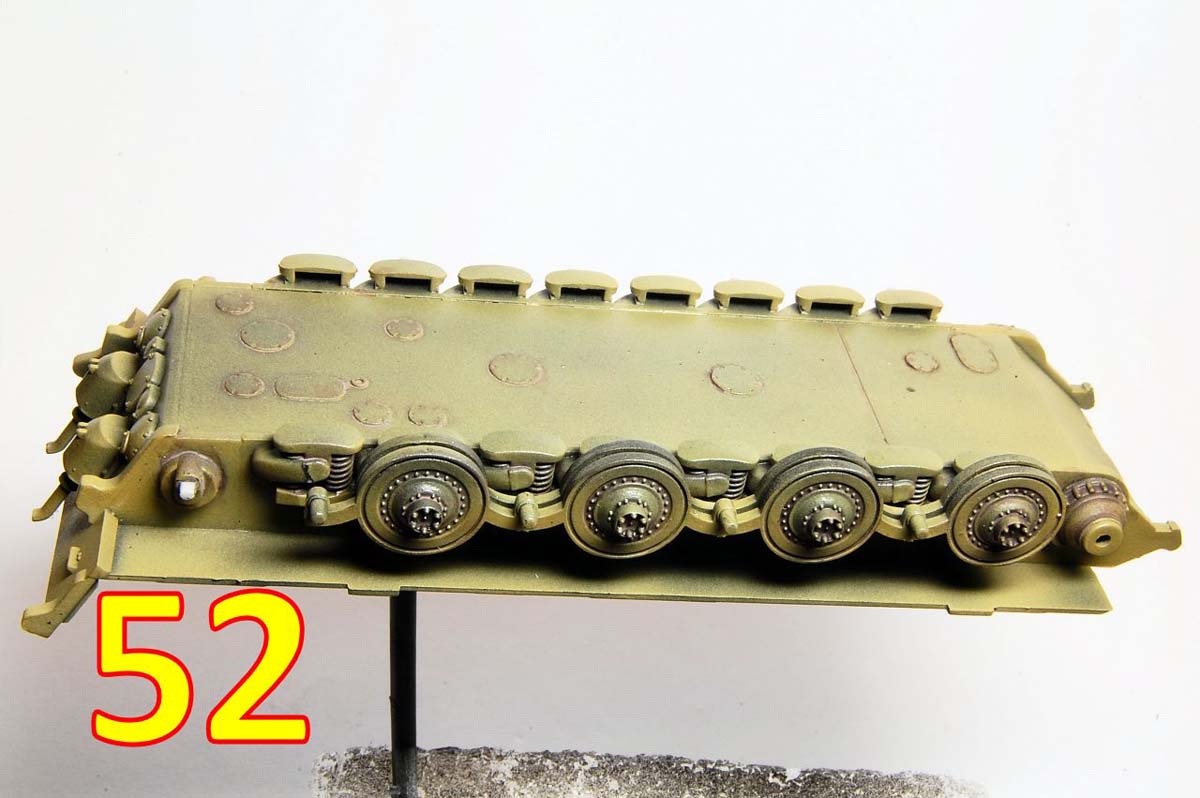
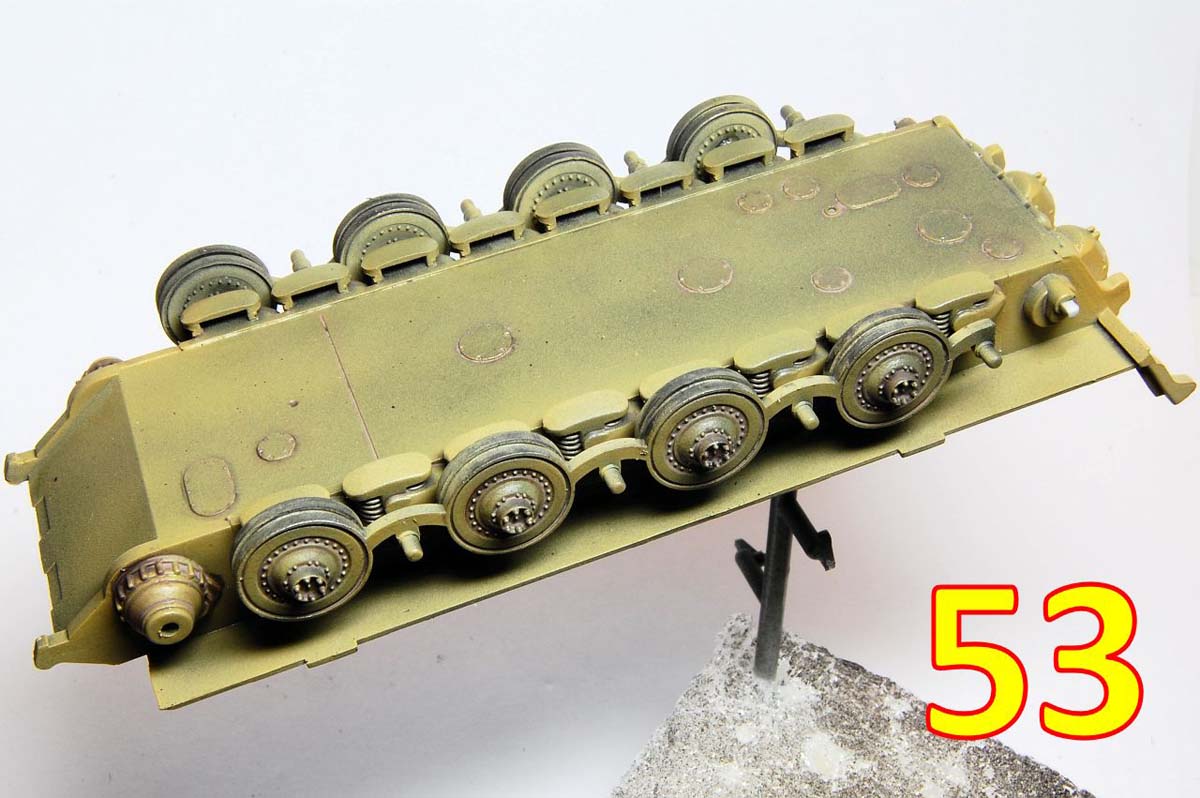
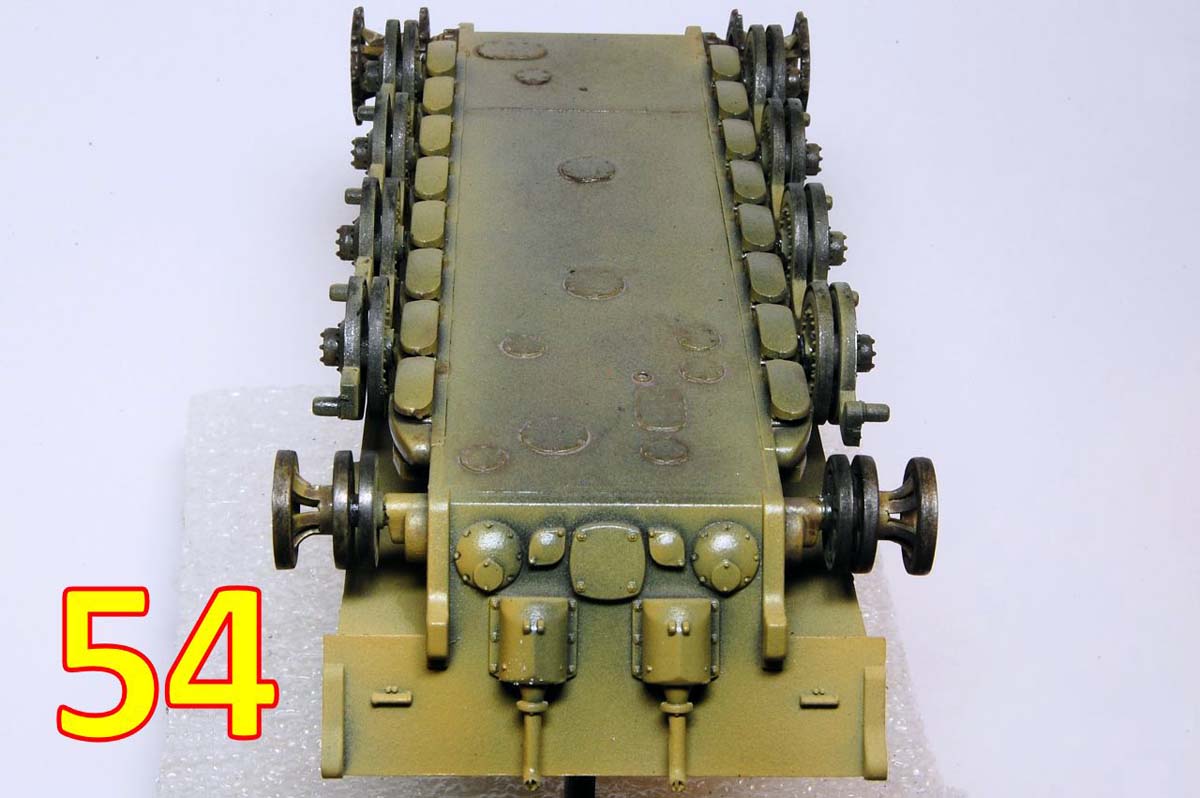
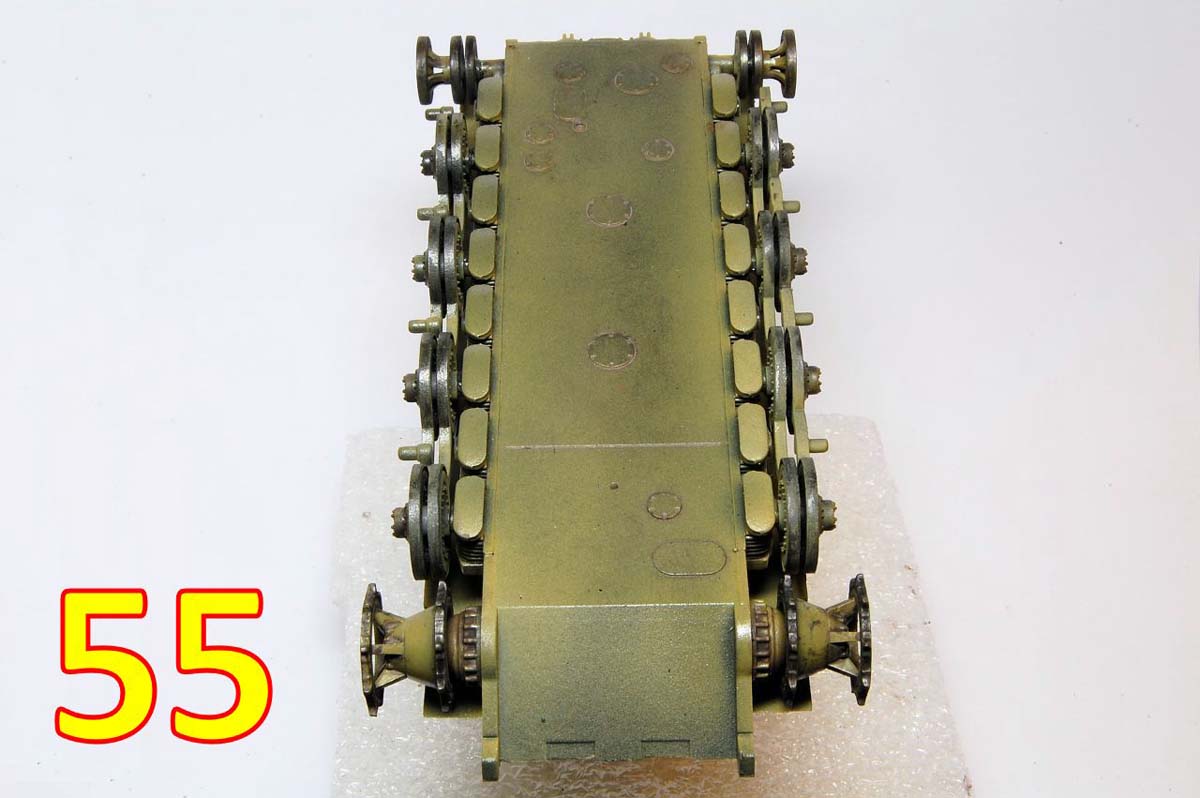
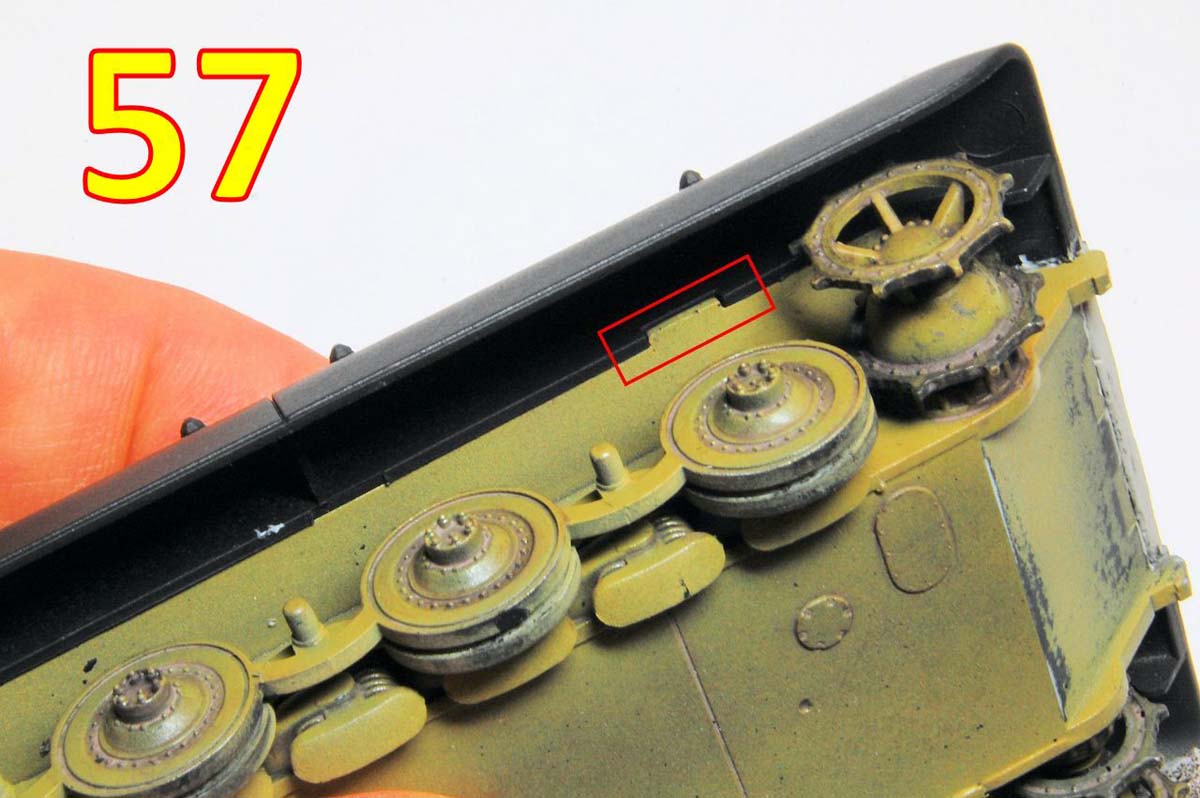
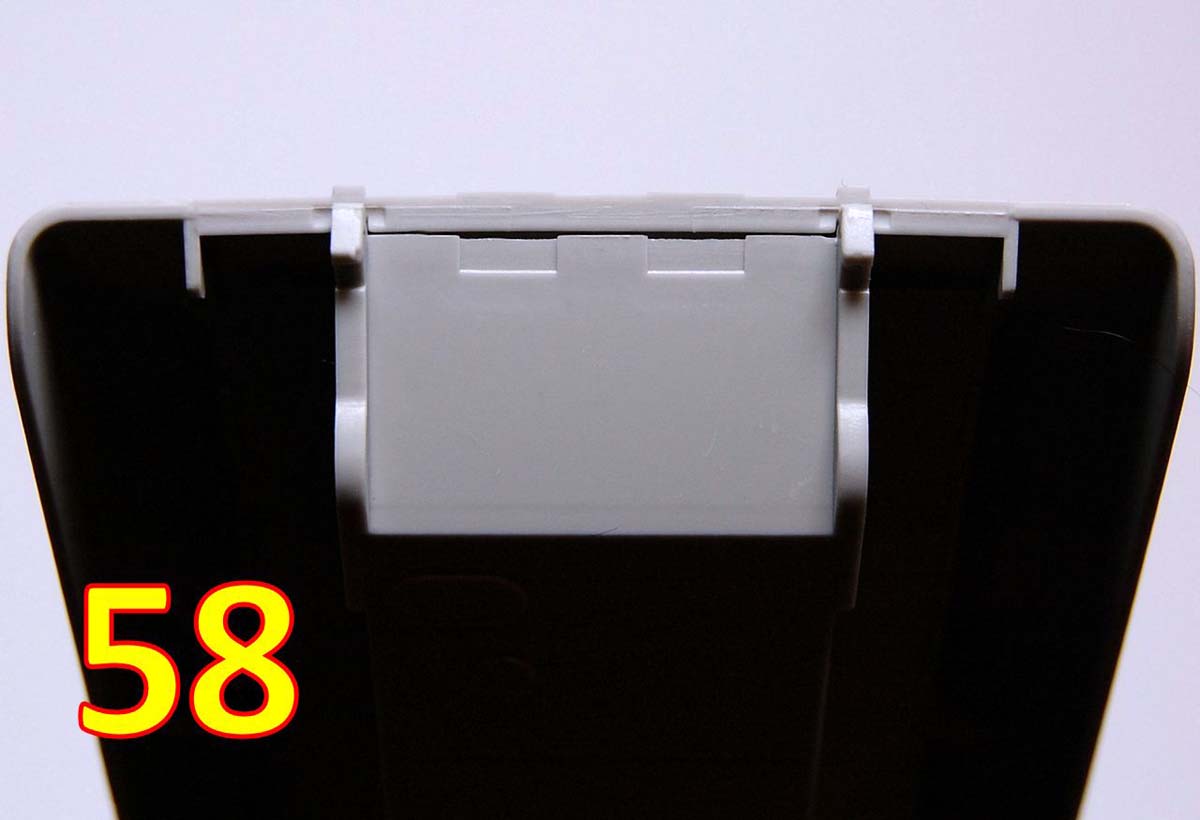
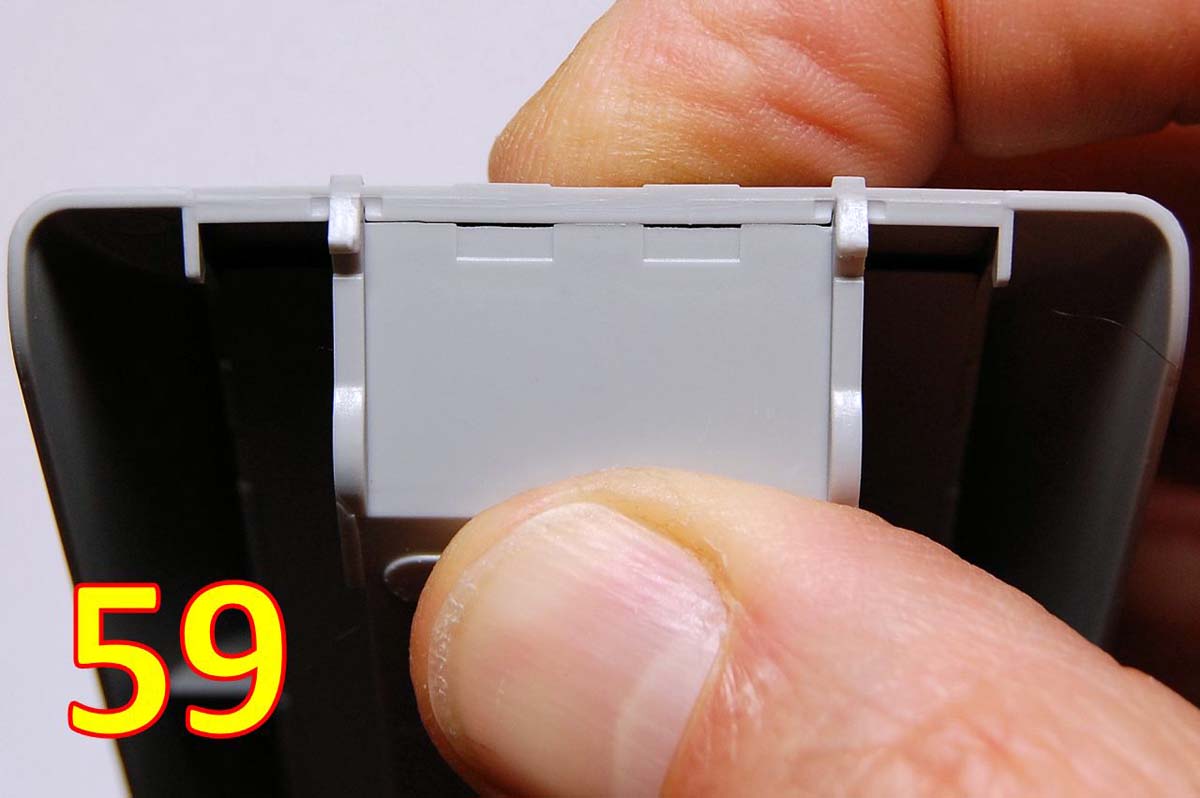
Building kicks off with the idlers (29), which have some minor but awkward flash inside the quite complex dished outer section, then combining two halves to make up just eight outer road wheels (30) followed by the sprockets (31), which thanks to having only nine teeth, are easy to tidy up and assemble; thats step 1. In step 2 were fitting the suspension units into recesses on the lower hull; in photo 32 Im using the unbending and dead flat edge of a glass file to ensure full contact while the cement sets. There is then a vertical join line to be eliminated just in front of the idler axle, although it will be fairly unnoticeable later on. The rear plate (33) includes the ends of the hull side plates, so we have a non-authentic joint that cuts across what should be one thick plate, but this is simplification to allow an easier build. Photo 34 is the final drive covers going on, nothing much to say there, then the exhausts are added (35) and despite being moulded in one piece, the detailing is quite decent, including the end of the pipe featuring the vertical bar across the opening. The inner road wheel units are assembled in step 3 (36). Apart from taking care to distinguish what are the removable injection tabs, virtually no clean-up is required as the sprue attachments are not on the wheel rims. Step 4 attaches these wheel units to the hull, but they can be kept separate for painting purposes, and in fact I skipped over steps 4, 5, 6 and 7, moving straight to step 8, where we start by joining the gun halves (37). The fit is good, and that lifting ring is on one barrel half only, so with plenty of cement added it was put aside for 24 hours. The turret base (38) fits into the superstructure perfectly and is virtually invisible when assembled (39). Ringed in this photo are the modifications to the lifting rings, where the tabs have been drilled and carved out, and the loaders hatch handle, which was removed and replaced with copper wire. The slightly rough cut edges of the armour plate interlocks were enhanced a little. From step 9, just the three parts of the IR device (40) are assembled (41). Taking the hull, the engine deck was modified in a similar way to the turret, with the hatch handle tab replaced with wire, and the corner lifting hooks drilled and carved to look more like hooks (42), with the hull front hatches also receiving wire handles (43). This 1/72 version lacks the six bolts around the gun mantlet sleeve that are a feature of the 1/35 version, and hence the photo on the box top, as well as on Michael Rinaldis original kitbash. I had some Grandt Line bolts that just happen to fit perfectly, as shown in photo 44, coated with black primer. The final modification at this stage was to hollow out the perfectly flat fronted hull periscopes so that I could add in separate lenses later (45) though part of me wishes that following the black primer I had simply stuck on a rectangle of masking tape, to be removed at the very end much simpler. Photos 46-49 show the major parts being primed black, then with a light coating of the base dark yellow, and a preliminary pin wash (50, 51). Now the inner wheel units are added to the hull (52, 53) making sure that they are perfectly vertical in photos 54, 55, in which you can see the idlers and sprockets have also been added. The instructions are to add all the wheels, then the tracks, before adding the hull top, so this is what I was going to do, apart from the outer row of road wheels, hence the pre-painting. Its been a long time since I used rubbery tracks, and my misguided plan was to pre-paint and weather the tracks, then join them around the wheels. Things turned out bad in four different ways I used white spirit while painting the tracks, which made them softer and stickier; the linkage joining the tracks didnt work; when flexed, the paint cracked off; on trying to attach them, the idler axle bent. This was all quite depressing, and if it wasnt a review sample Id probably put it to one side and buy resin tracks (for example from OKB Grigorov). However, for about the same price as resin tracks, you can just buy another complete kit, so thats what I did. So what follows is the second attempt, and what Id recommend for this kit. As before, dont add the outer row of road wheels yet. Cut off the idler axle, drill it out and replace it with a length of steel pin glued in with CA, then give it several hours to set, then glue on the idler and give that 24 hours. Now cement the hull top on. When the hull top and bottom were assembled, I had a gap right at the front (56). I still dont really get why it was this big, but convinced I had done something wrong I turned it over to check the location of the two parts, but as can be seen in photo 57, it is located correctly. Looking at these parts from the back up kit, completely unpainted, the gap is much less (58), but to close it up there is still a need to press the top part onto the bottom, and even then there is a gap at the plate interlocks (59). I can only assume that the not too perfect fit was made worse by the thickness of my paint. My solution was relatively simple: plate it over with a thin sheet of styrene; photo 60 shows it primed, with the wheels masked off.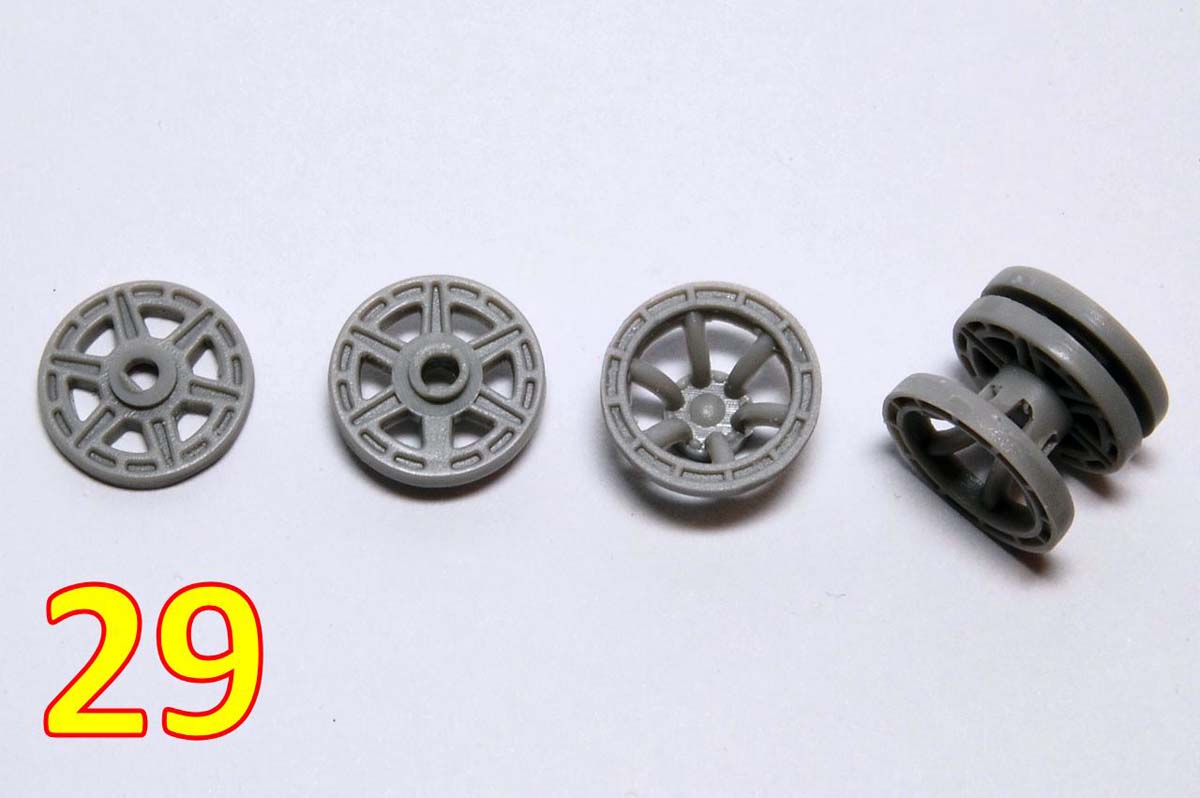


About the Author

FROM: ENGLAND - SOUTH EAST, UNITED KINGDOM
Earliest model memory is a Super Sabre my grandmother bought for me around 1972. Have always dabbled in painting and making things, and rediscovered doing that with plastic in 2008. Vowed then to complete the 30 year old stash, and have made some progress. Hobby goes hand in hand with BBC Radio 3...
Comments

This isn't a Paper Panzer, Trumpeter delibrately changed the shape of the turret in this kit to make it closer to that on King Tiger, which the Germans never planned to do
OCT 12, 2017 - 07:46 PM

Tim... Internetiquette supertip: Never comment without reading the article.
The turret was designed by Mike Rinaldi, Trumpeter copied his kitbashed / scratched turreted E-100 model. Seriously, please read at least the first page of the feature which explains it, otherwise you're just asking for Mike himself to come back on here (possibly with a big exasperated sigh as he has) to explain it "one more time..."
By the way, what did you (and Patrick) think of the feature apart from that?
OCT 12, 2017 - 08:18 PM
Matthew,
While "Paper Panzers" are not in the slightest an area of my interest, your feature article rather captured my interest and especially your build and finishing explanations and accompanying images. Although an overall simple vehicle as far as its "lines" are concerned your finishing of it was superb and brings this otherwise "plain shaped" subject to life. I must particularly comment on the marvellous paint job you achieved on the vehicles' figure.
The size of this model is also quite impressive especially when you compare it to a 1/72 Abrams that measures out at 110 X 52 mm. The article appears quite concise and informative and I for one appreciate the effort that you must have put in to complete it. Seems to me like it might possess a winning combination of points to win notice in a model show or competition.
Cheers,
Jan
OCT 12, 2017 - 09:16 PM
Whatever you do, don't mention "Paper Panzers" - I mentioned it once but I think I got away with it...
So I used the terms '46 and PPs, partly I wasn't sure if Panzer'46 or Panzerwaffe46 was copyright, but now I think not. Anyway, I get the distinction Mike made above, although I guess this model is a mix of both.
Jan, thanks for the compliments, particularly on the figure, who doesn't look too bad when viewed at real size, despite the fact that I think I accidentally removed most of one his ears while cleaning up the mould line on the polythene Caesar head; slightly ironic as one of the things I didn't like about the original CMK head was that the head was tiny, but the ears a bit too prominent - FA Cup syndrome.
Thanks too to Mike R for the positive feedback.
OCT 12, 2017 - 10:35 PM

You've got your facts and intentions confused. Paper Panzers is an actual term referring to proposed armor concepts/designs on the drawing board during the war. It's been in use for years, long before video games reinvented it's definition. They are a collective finite groups of designs. We see them in the modern era as redrawn by Hilary Doyle in the well known Panzer Tracts books.
Panzer 46 (and Luft 46) is a term(s) used to describe the what-if fantasy collective of the hypothetical ideas and vehicle concepts -- loosely based on what happened regarding vehicle design and production during the war. (There are also Allied designs, as such too). That's what this model is, it's fictional what-if, loosely based on a Paper Panzer, but by definition NOT one of them. Panzer 46 is more appropriate term for this group of vehicles.
Politics have nothing to do with this terminology, that's not what any of this is about.[/quote]
+1
OCT 13, 2017 - 03:13 AM

Thanks for sharing Matt. Hey, I see that you've used blue tack -- I remember reading something about using toothpaste as mask
Seriously, I commend the effort you put on this very detailed build feature, especially the finished product. Good to see as well that the photos are now sorted in ascending order.
Having read the exchanges on terminologies got me curious as to the origins of the term "paper panzers". Anyways I guess that may be best for separate thread.
Cheers,
Tat
OCT 13, 2017 - 04:23 AM
Thanks Tat. I have used toothpaste before, but this camouflage is quite big and simple so blue tack seemed easier, although it did cause the breakage of one of the hooks on the engine deck, ringed in photo 69, which had to be replaced with wire and repainted.
As Mike said, Paper Panzers goes back at least to the two Panzer Tracts books on the subject that used that term as part of the title, published in 2002, I think. I don't know if there is a record of it being used much before that.
OCT 13, 2017 - 01:48 PM

"Paper Panzer." "Panzer 46." Politics? (Yyyyaaaawwwwnn.) Matthew, wonderful feature building this little-big Paper Panzer 46. I like what you wrote, "... something started to happen as the parts came off the sprue, and it was that thing that we all look for when building models: enjoyment." Your build with the weathering really does the kit justice. Thanks for taking up the challenge.
OCT 15, 2017 - 11:59 PM

Of course I know Michael built the model that Trumpeter based the turret for this kit on, you were still calling it a Paper Panzer when it's a invented design that was never even on paper/blueprints.
OCT 31, 2017 - 12:11 AM
Copyright ©2021 by Matthew Lenton. Images and/or videos also by copyright holder unless otherwise noted. The views and opinions expressed herein are solely the views and opinions of the authors and/or contributors to this Web site and do not necessarily represent the views and/or opinions of Armorama, KitMaker Network, or Silver Star Enterrpises. All rights reserved. Originally published on: 2017-10-10 14:26:24. Unique Reads: 16120

WEB HOSTING BY


Copyright ©2021 Armorama and Kitmaker Network, a subsidiary of Silver Star Enterprises
All Rights Reserved. Please read our Conditions of Use and Privacy Policy.
All Rights Reserved. Please read our Conditions of Use and Privacy Policy.