

1⁄72Trumpeter E-100 Ausf-B
19
Comments
Construction part 2
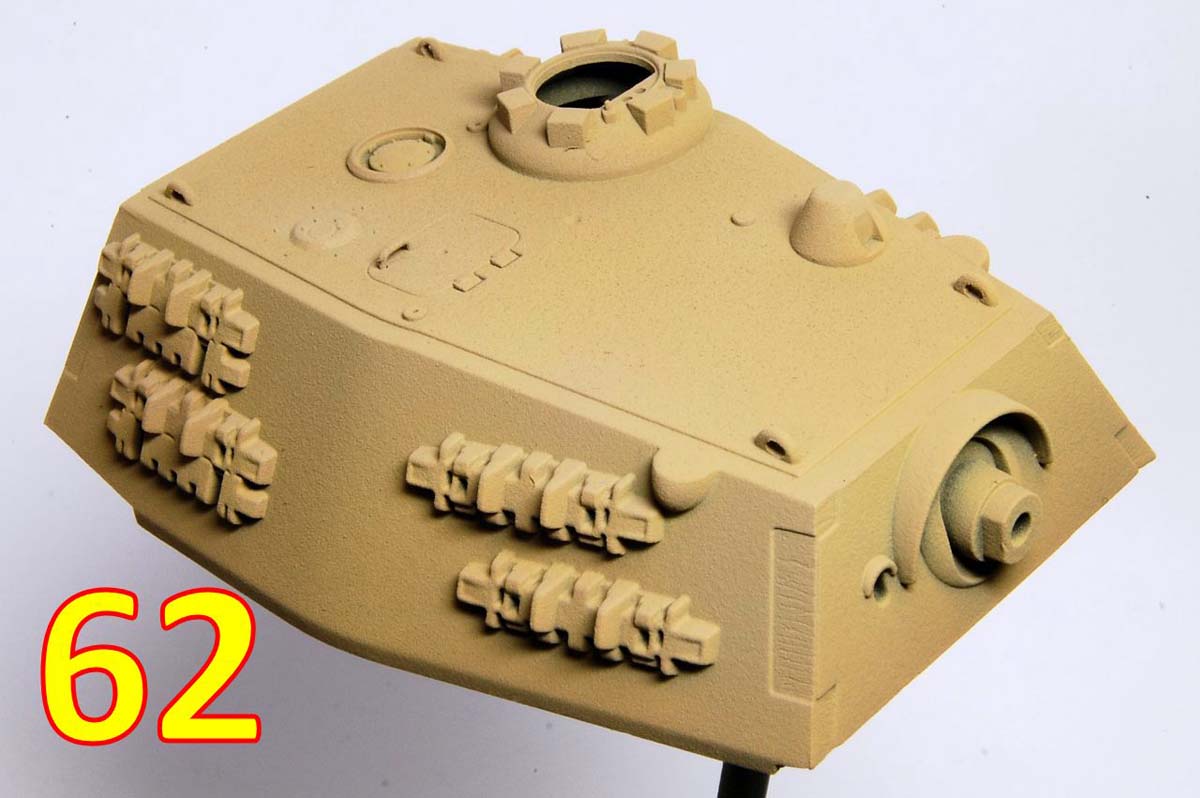
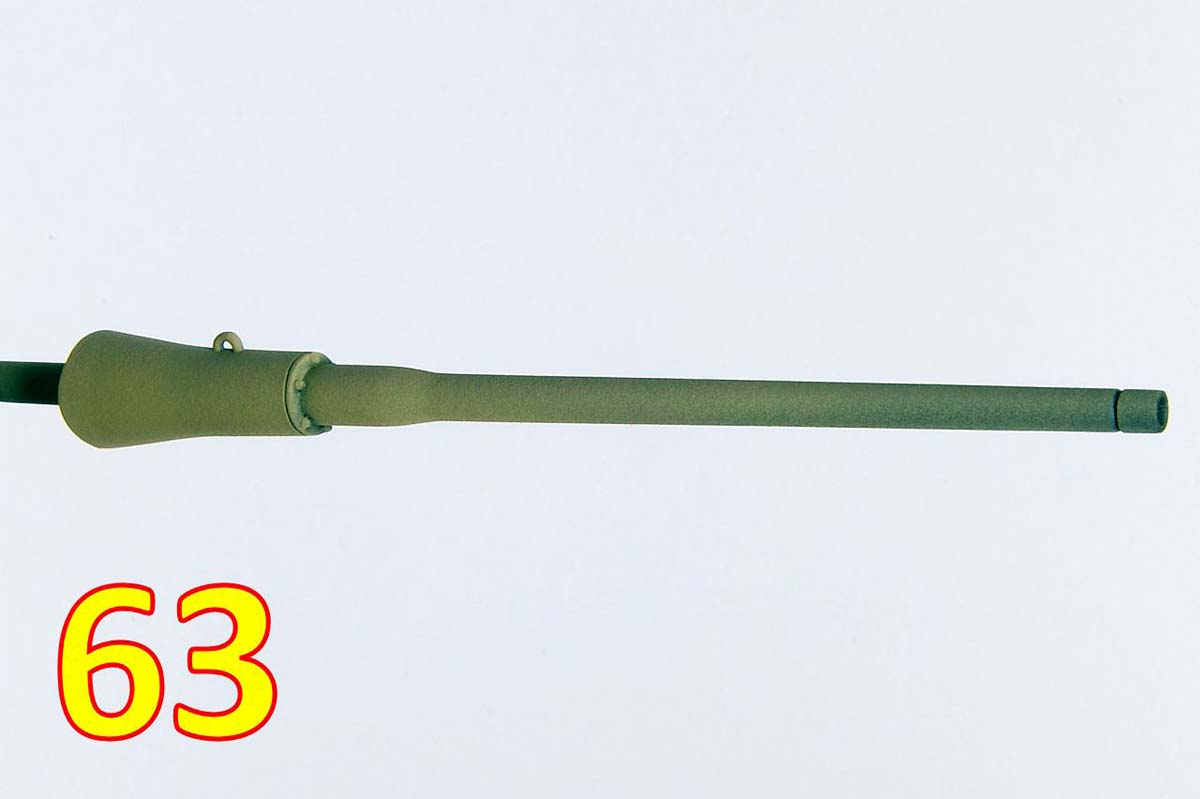
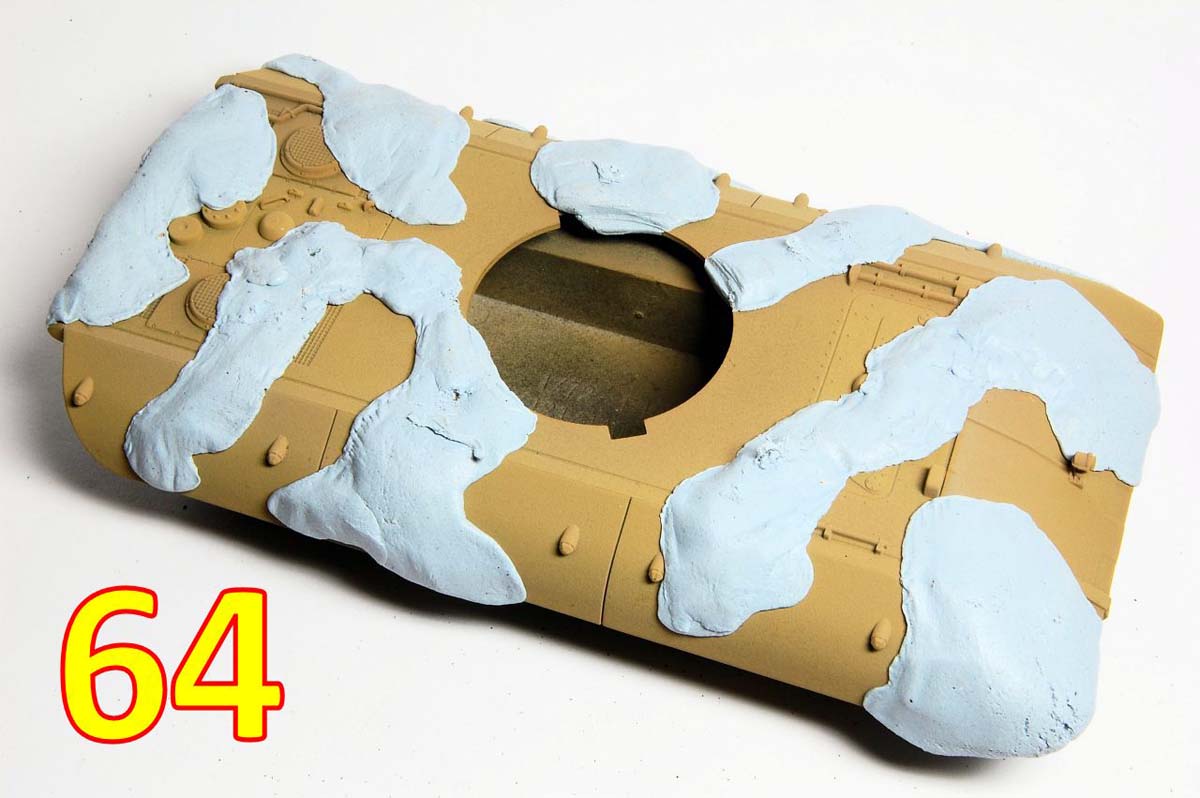
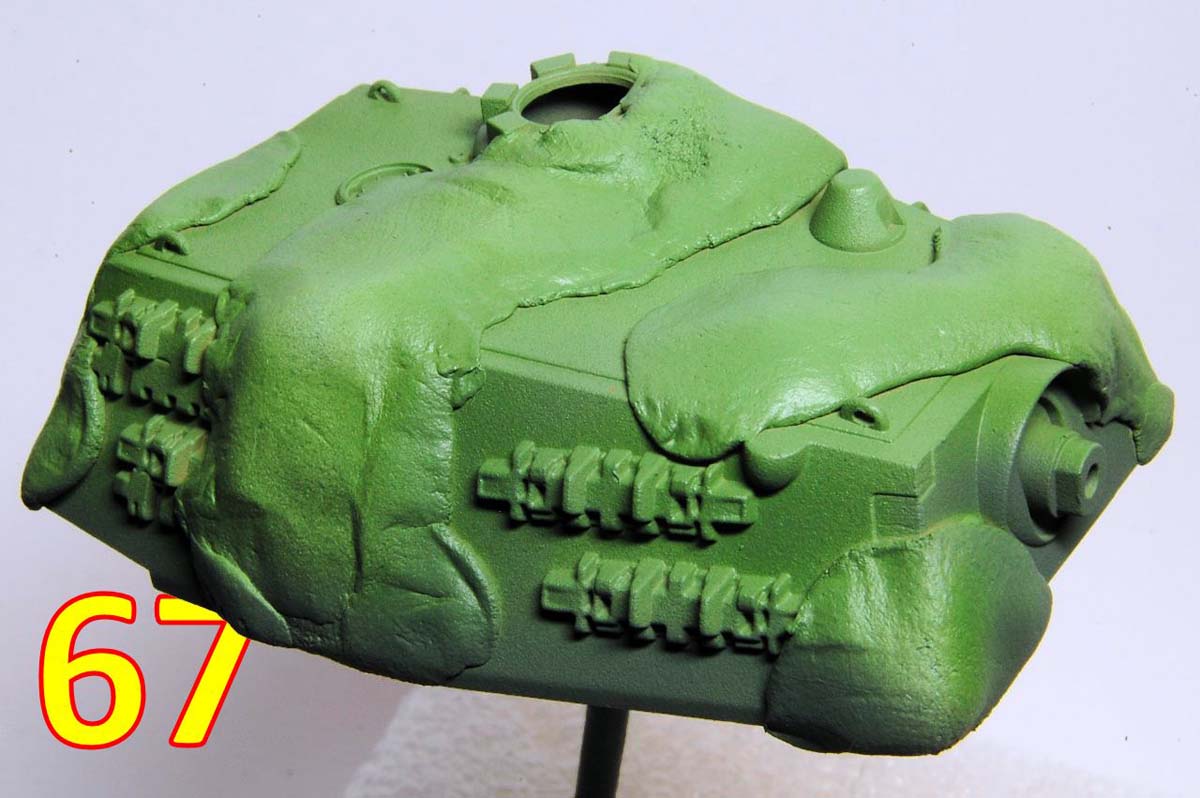
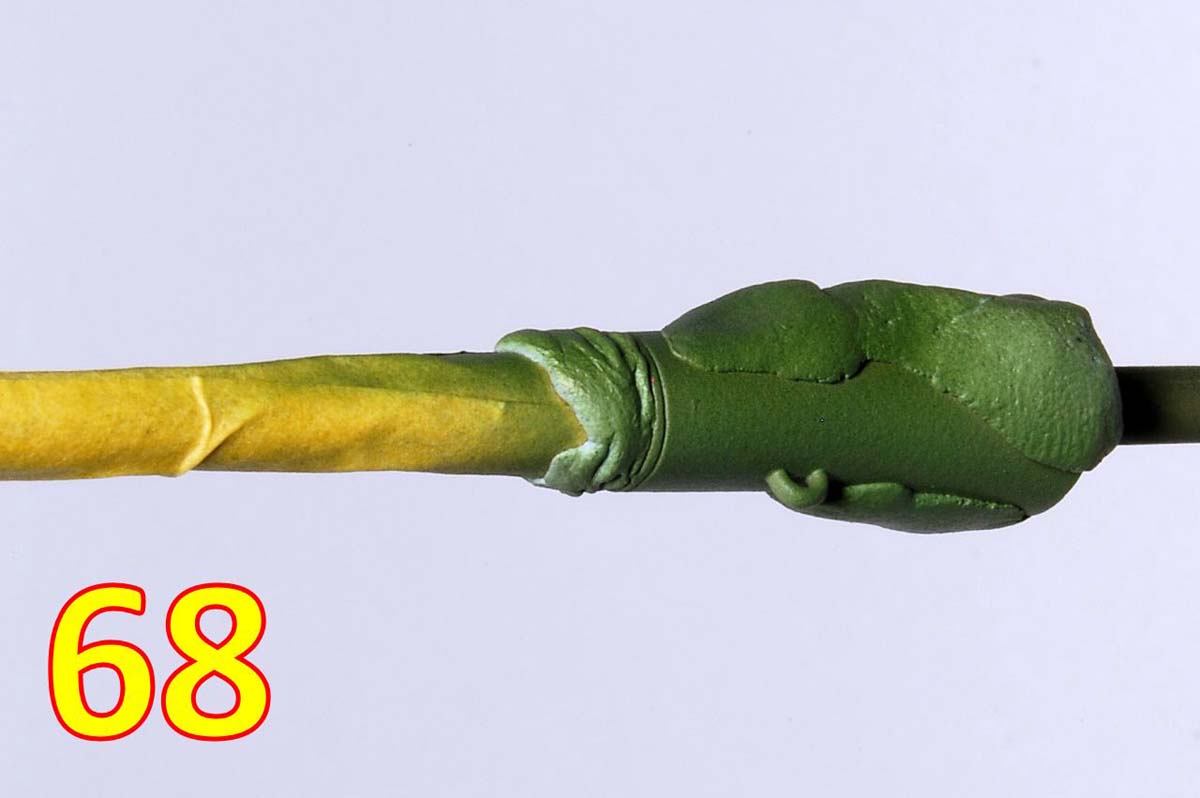
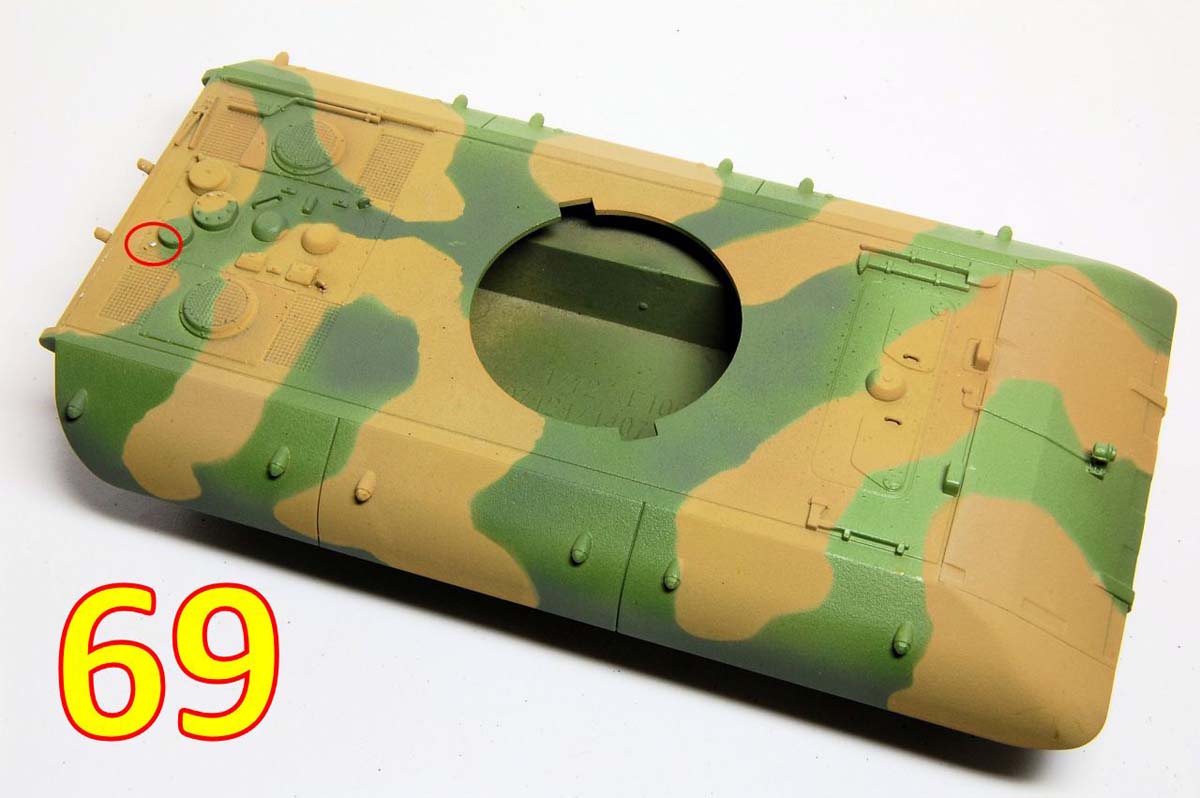
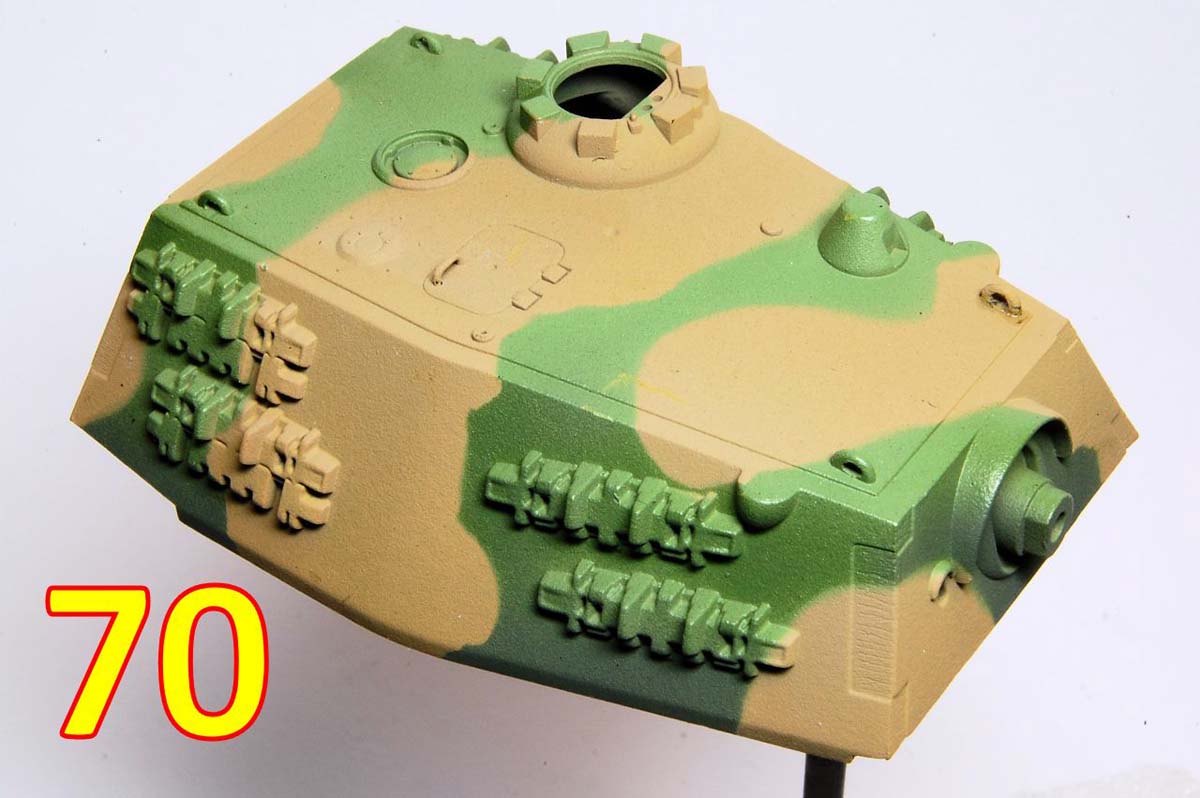
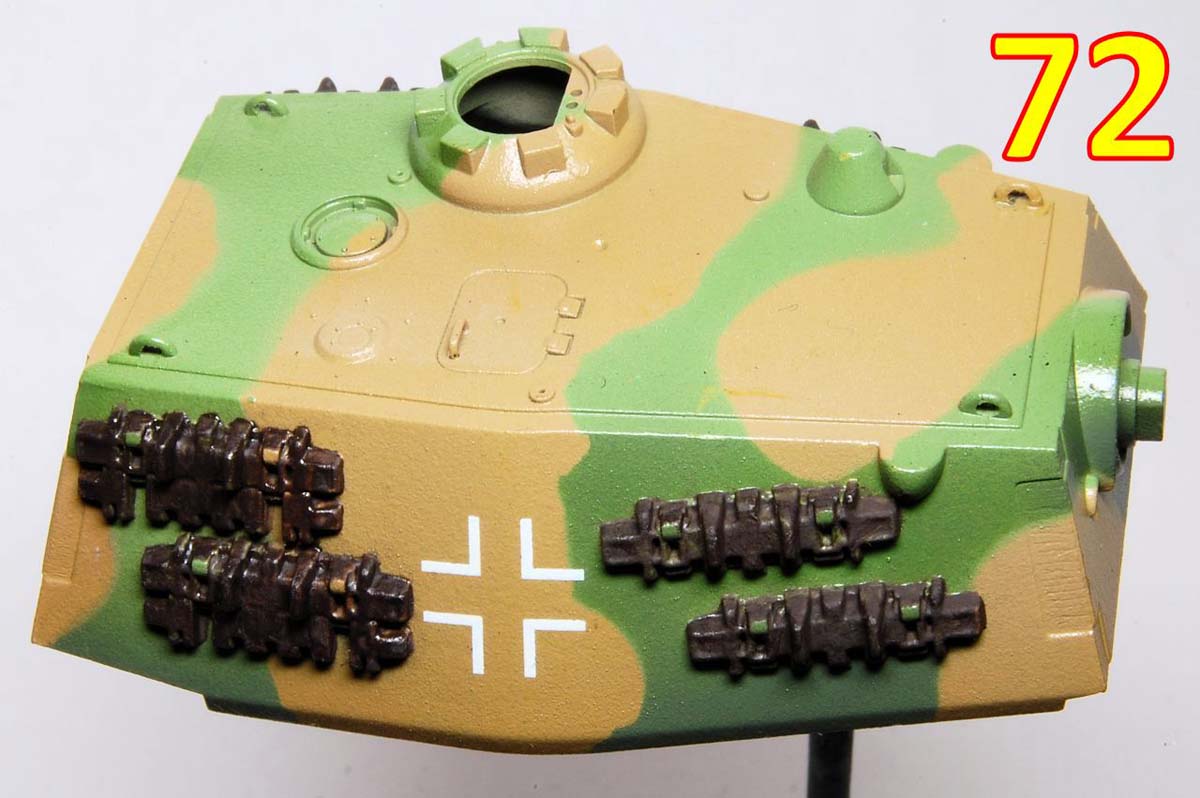
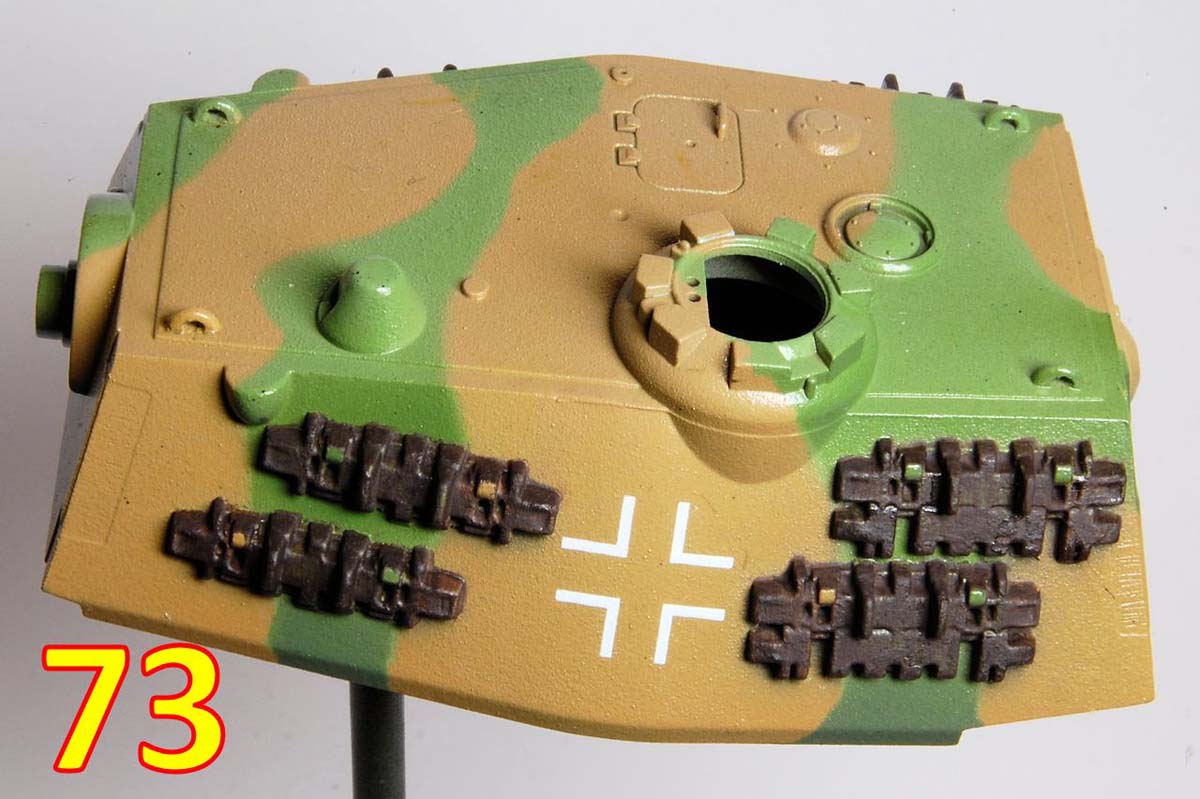
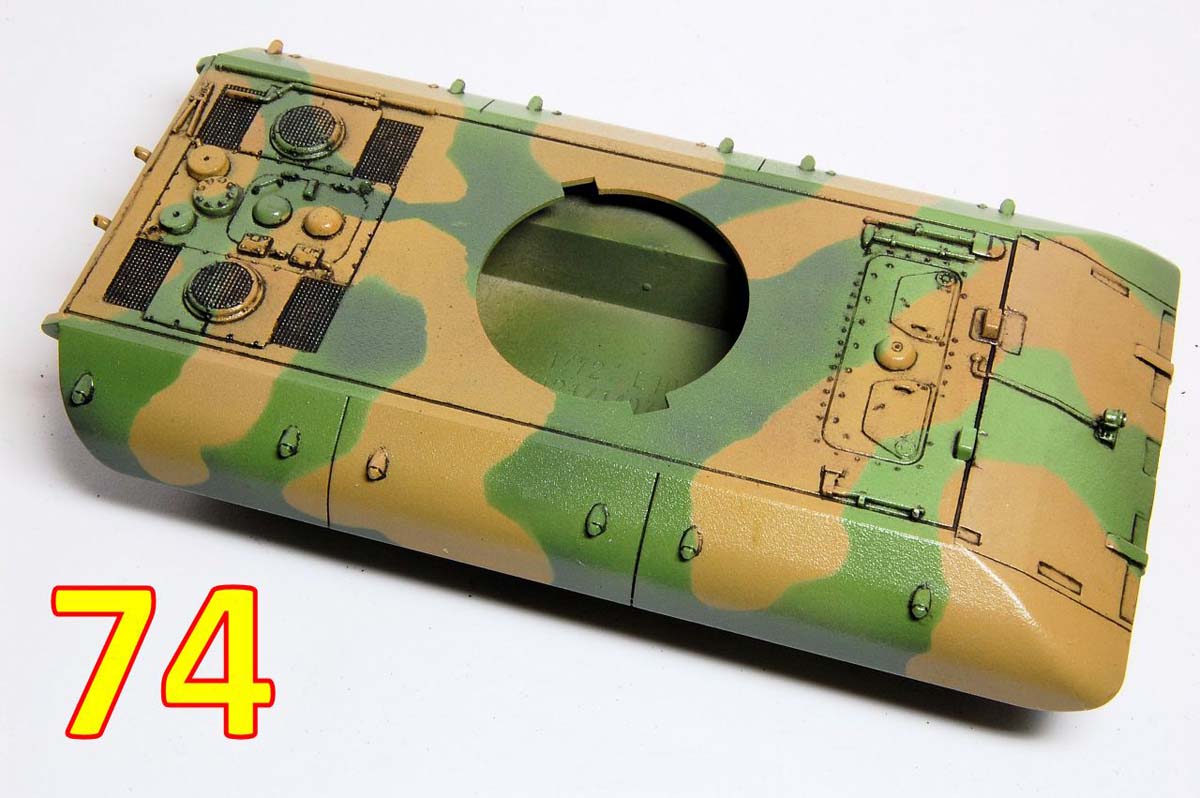
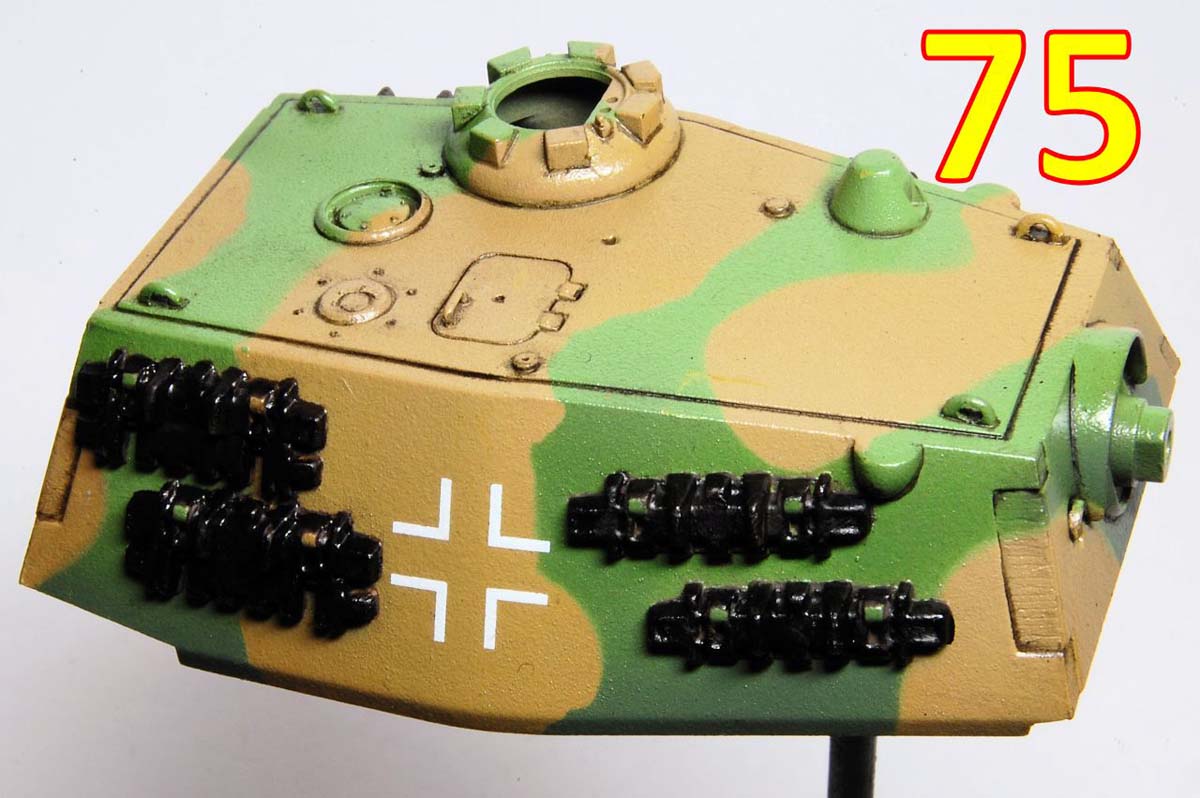
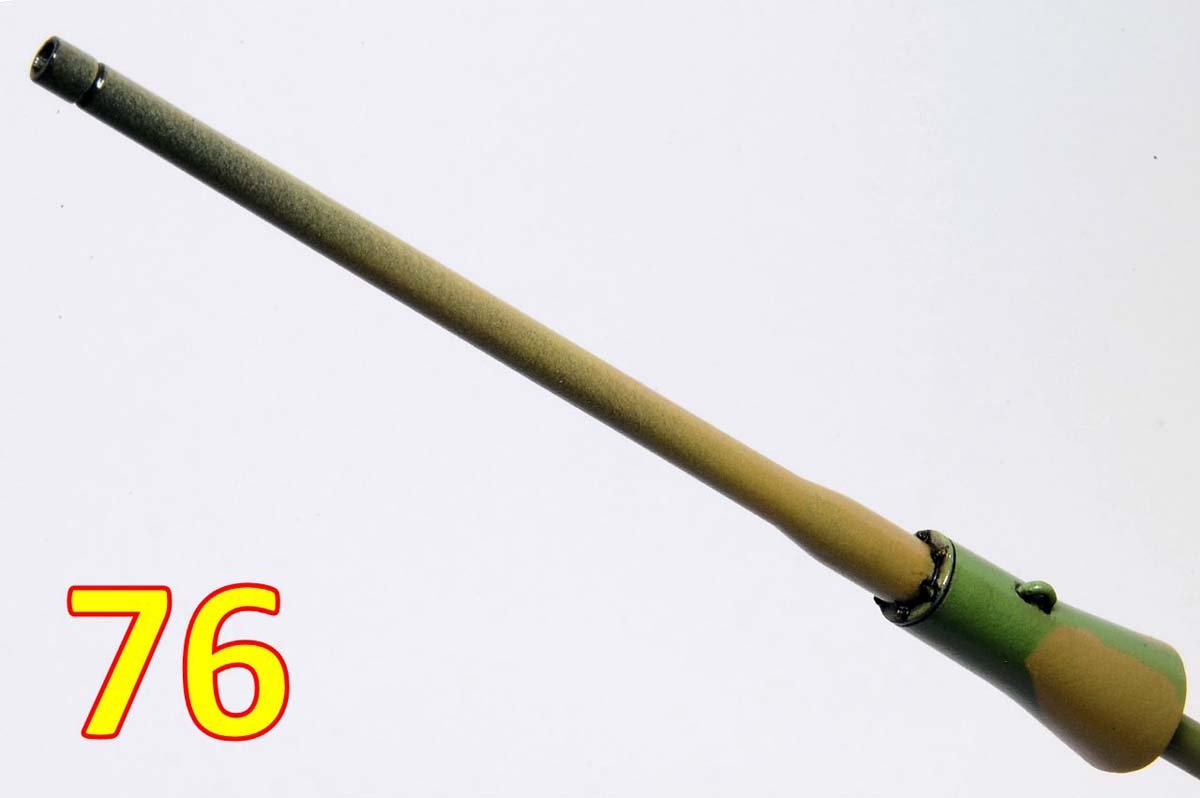
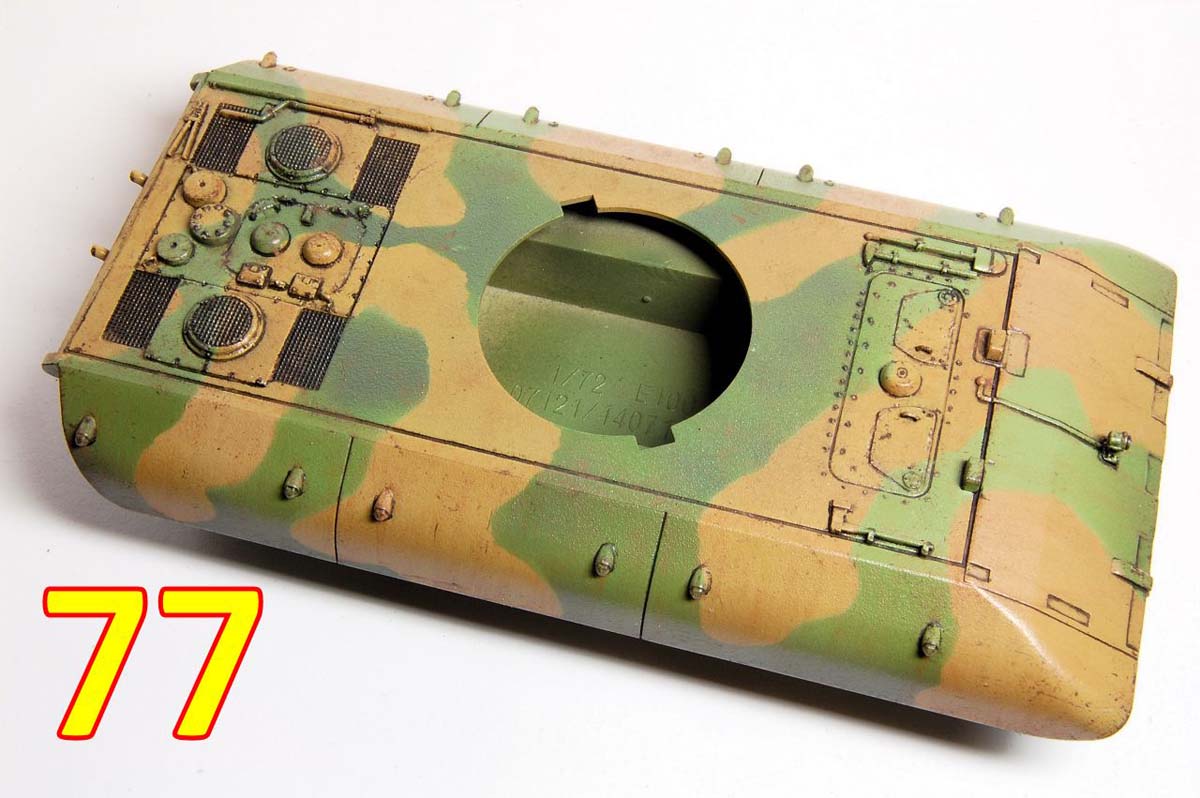
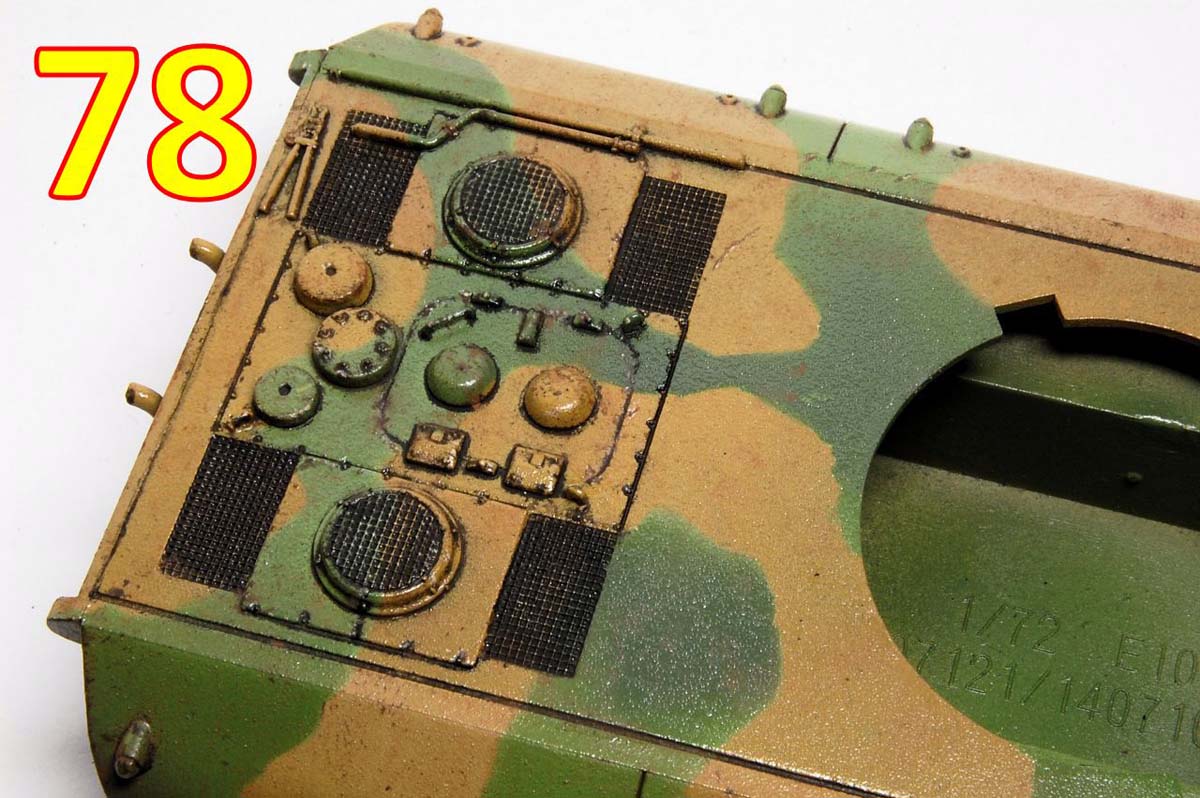
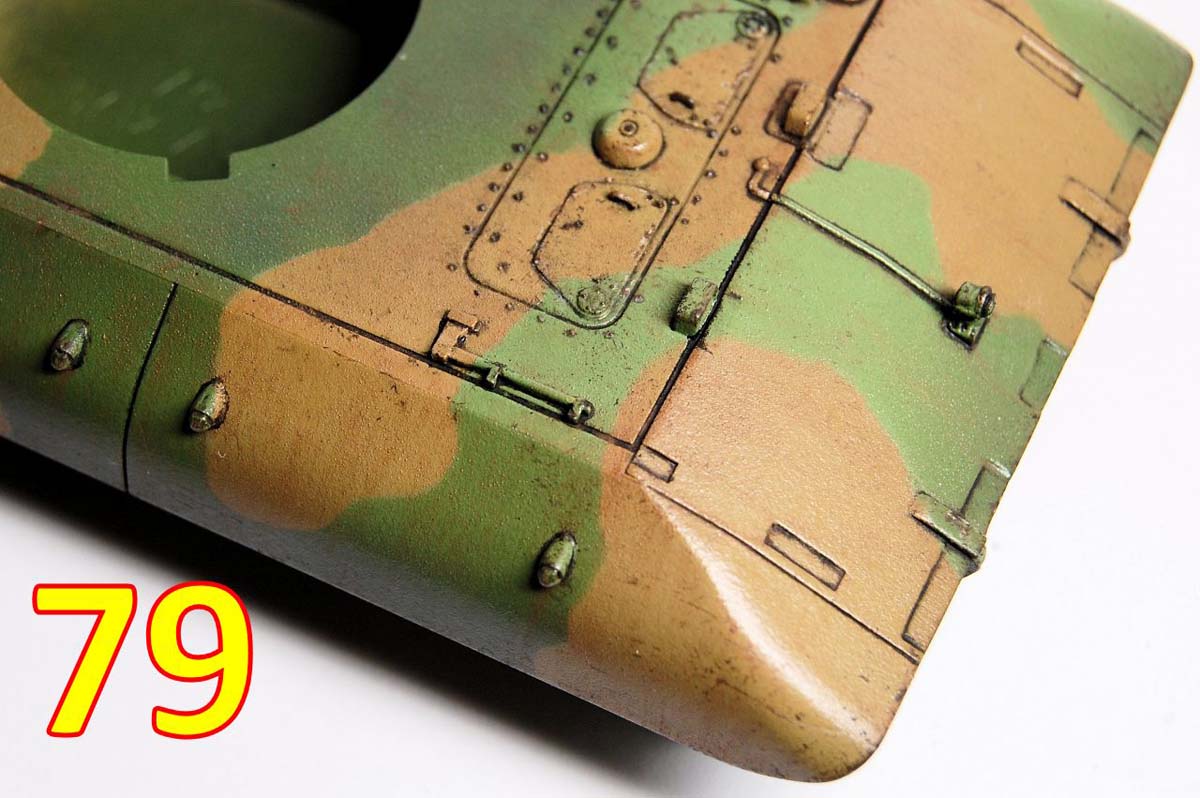
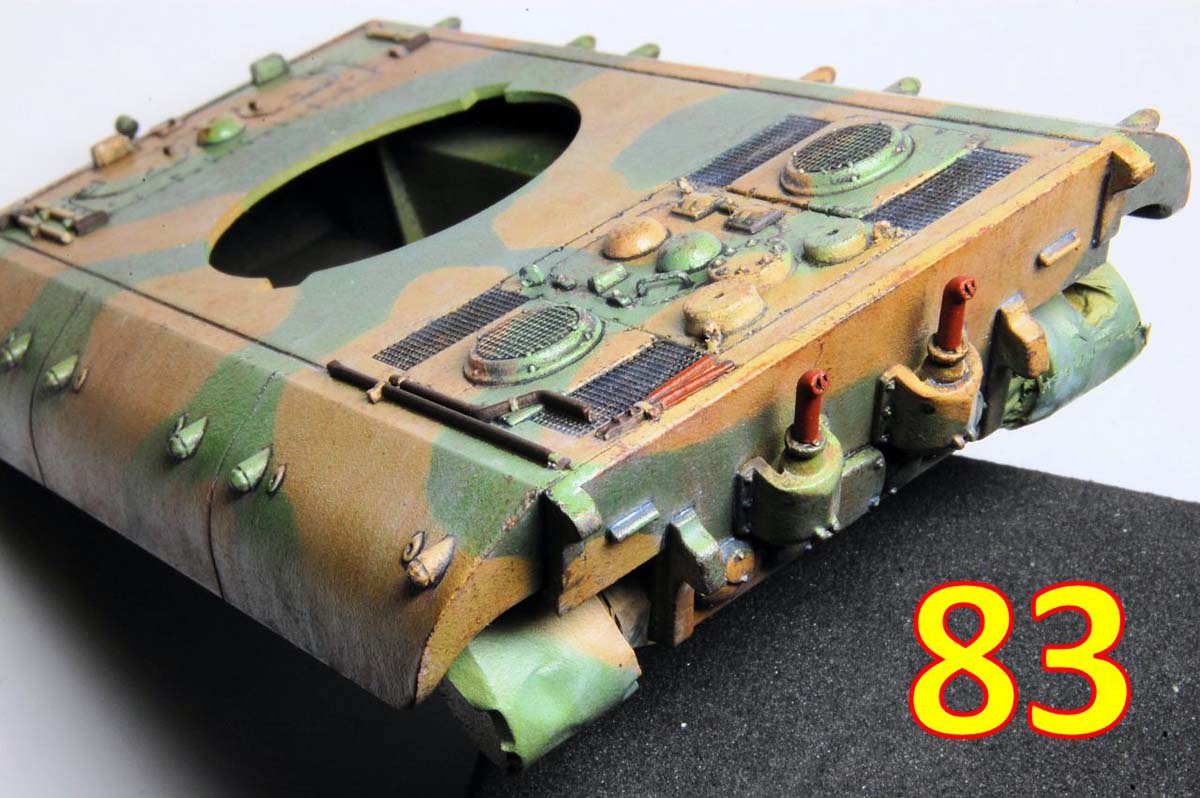
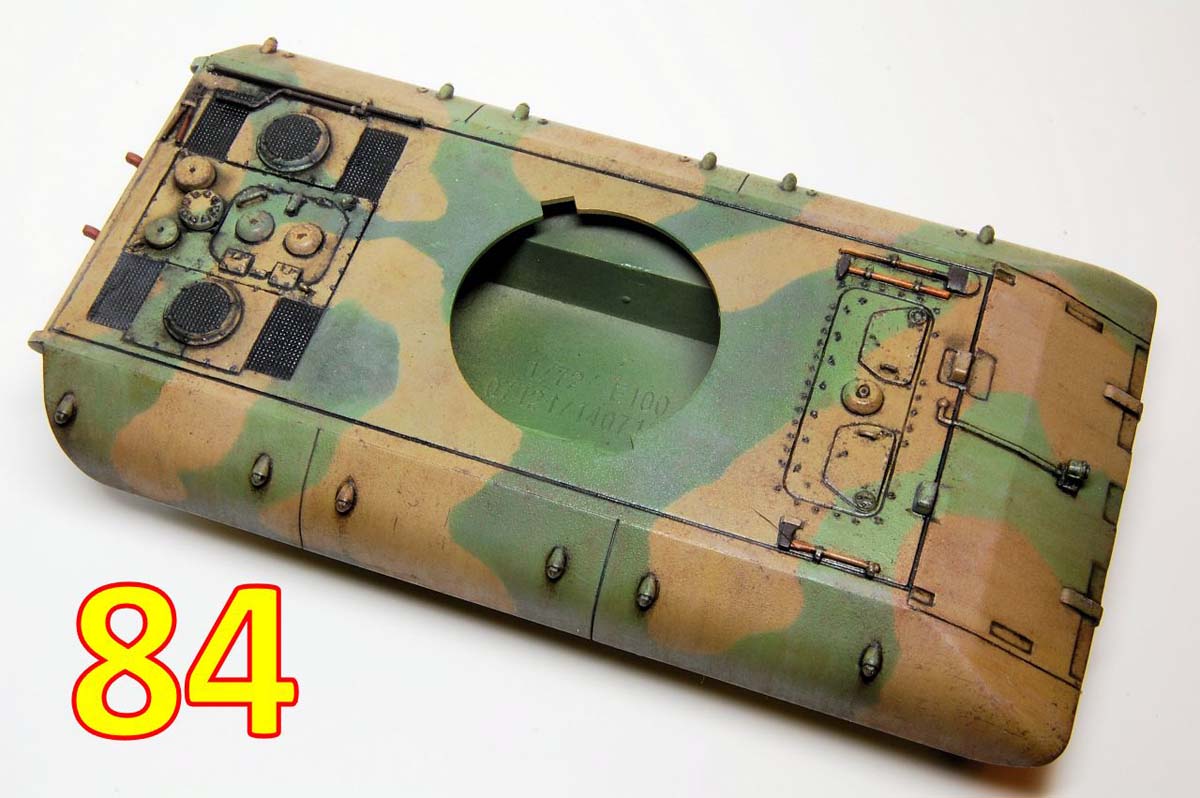
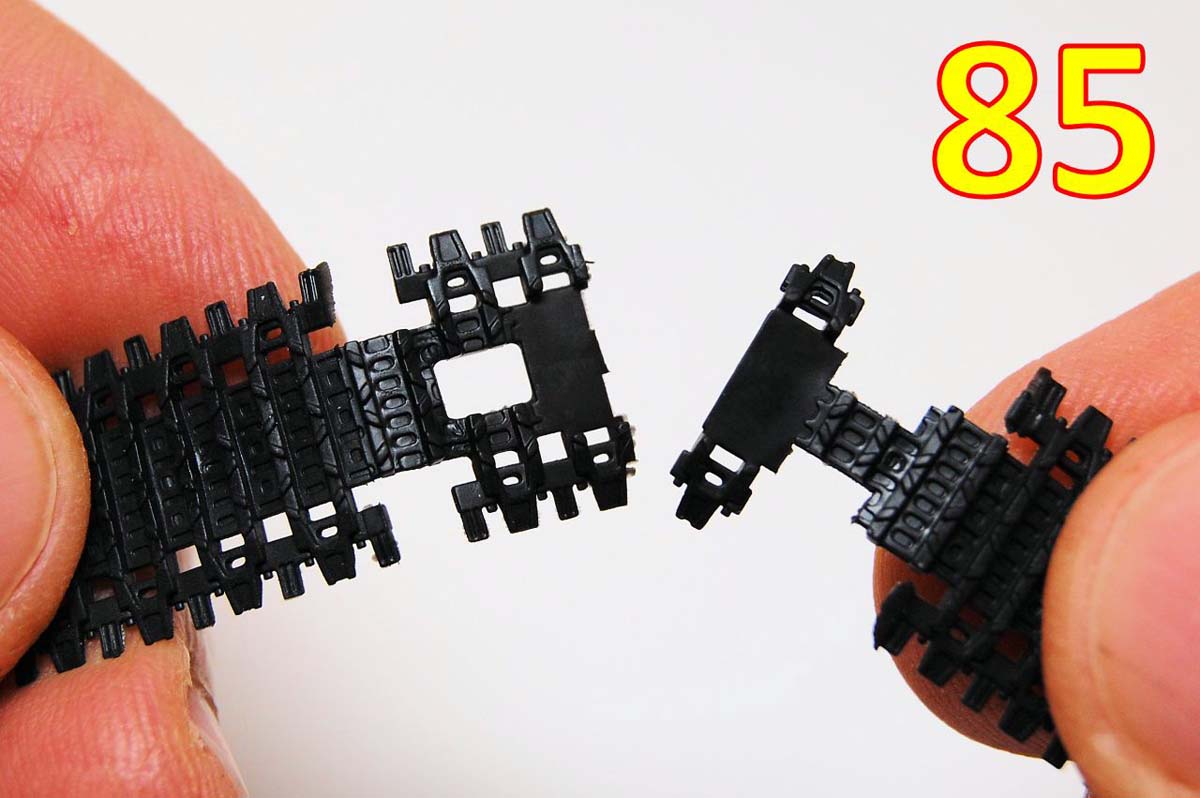
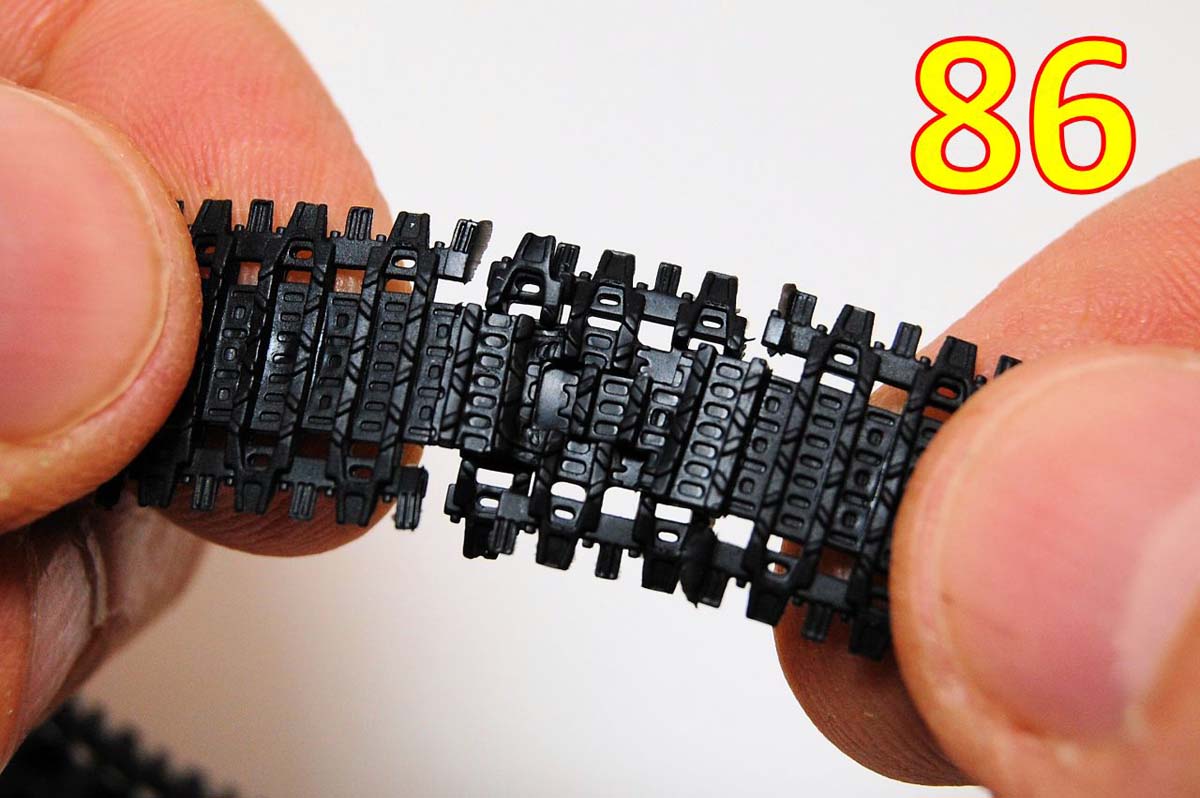
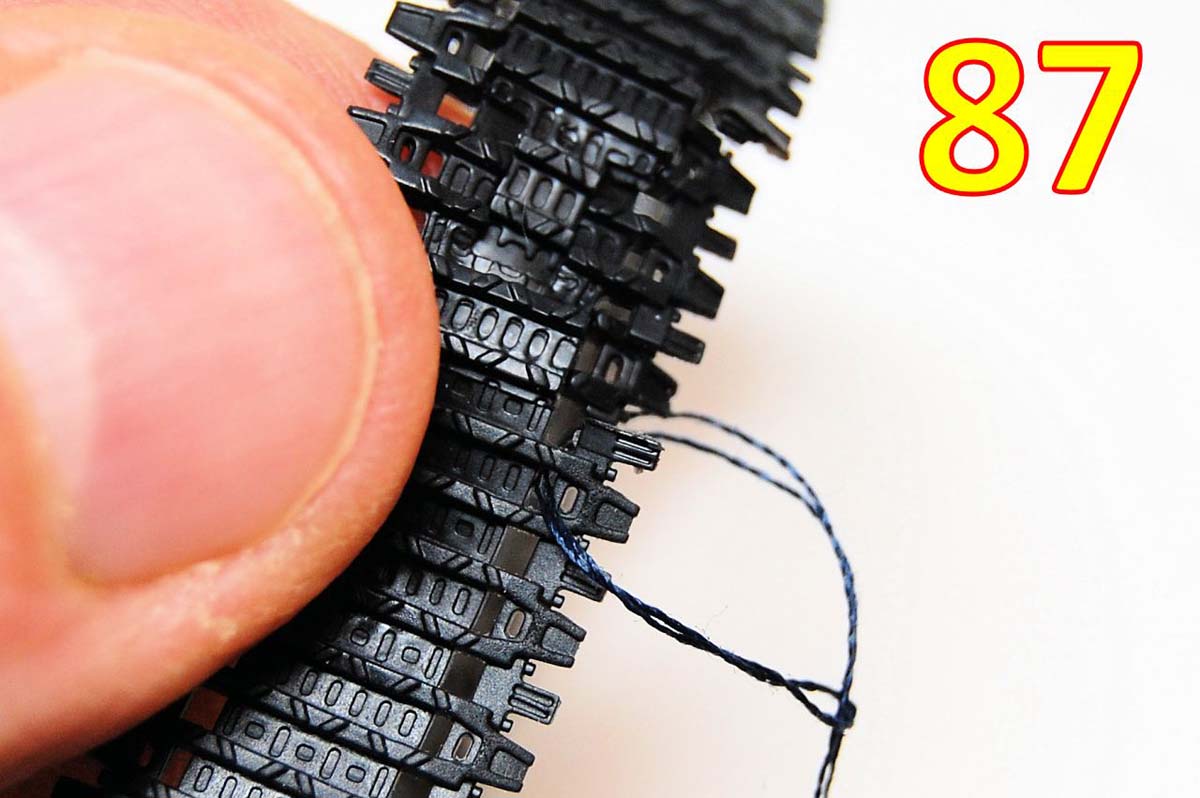
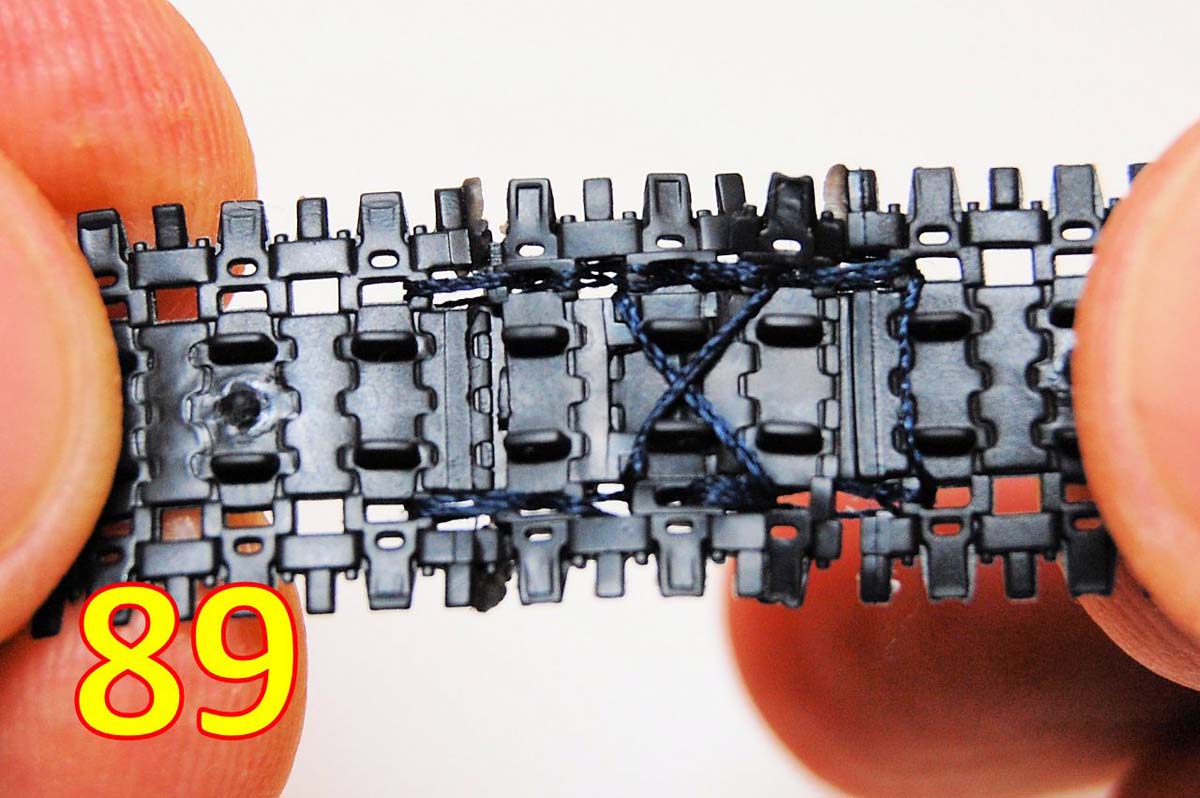
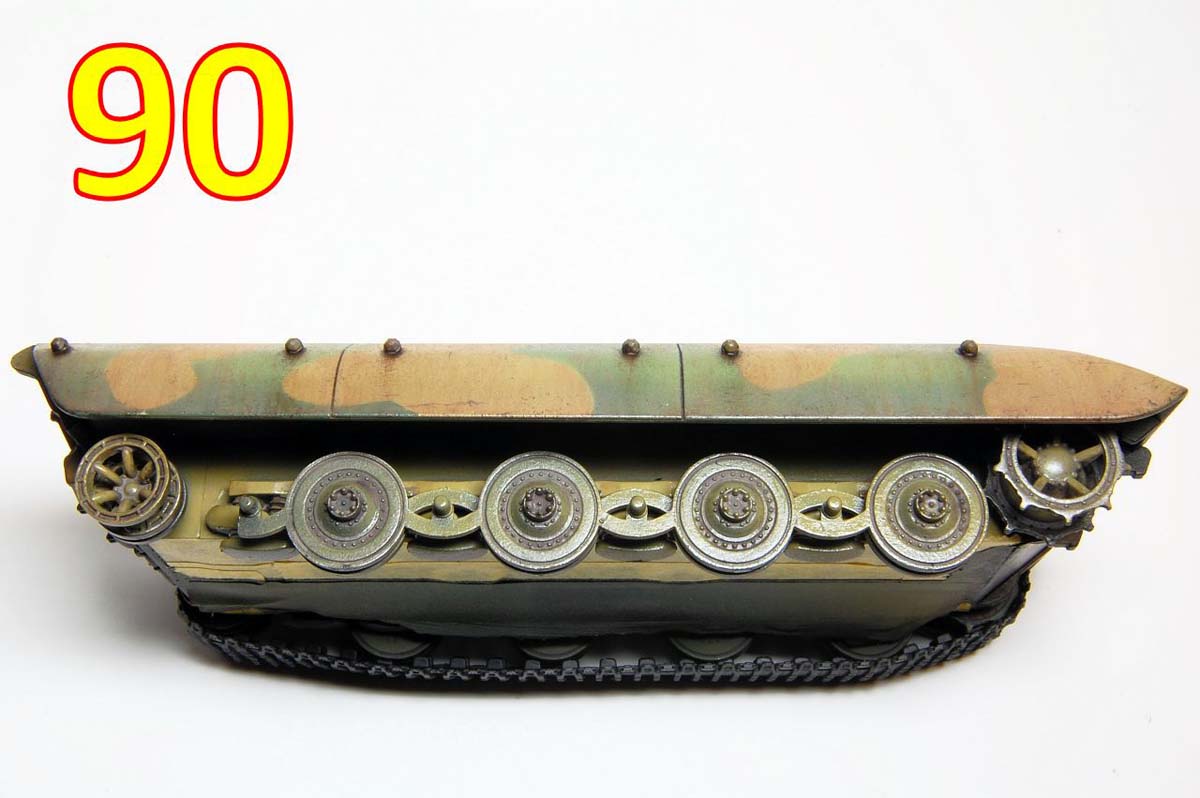
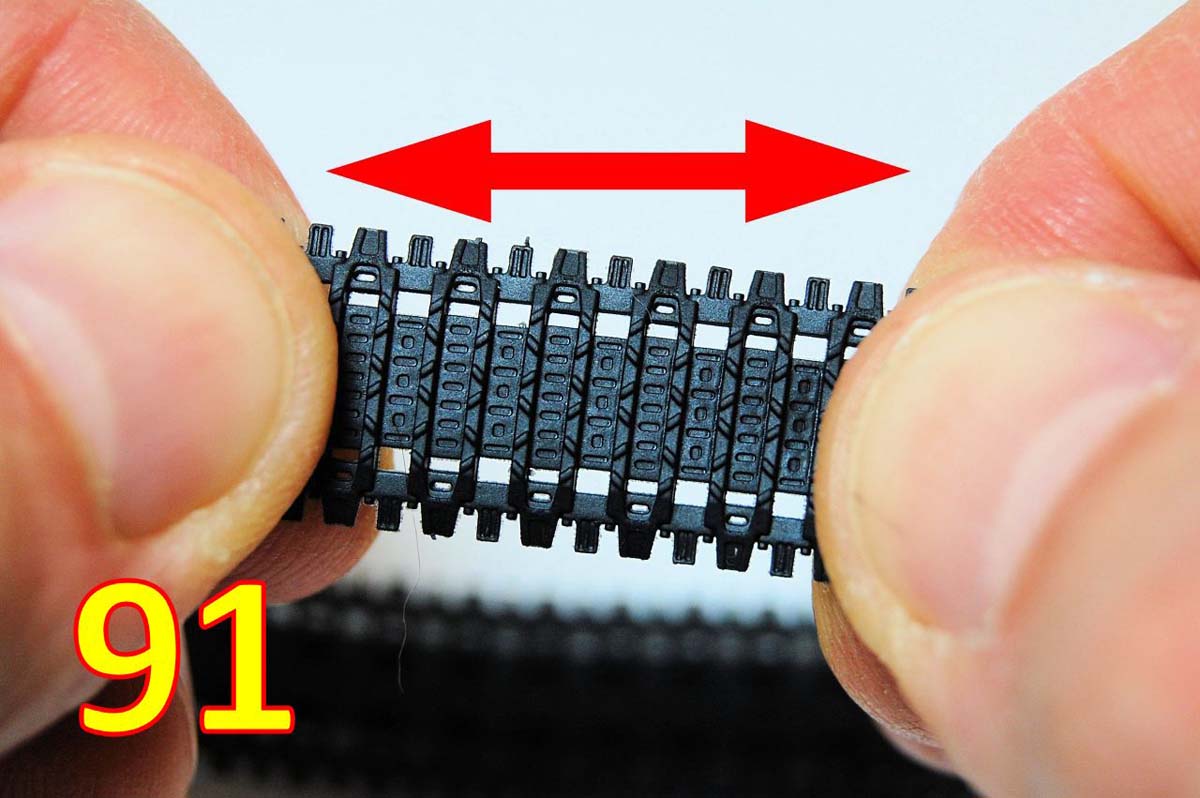
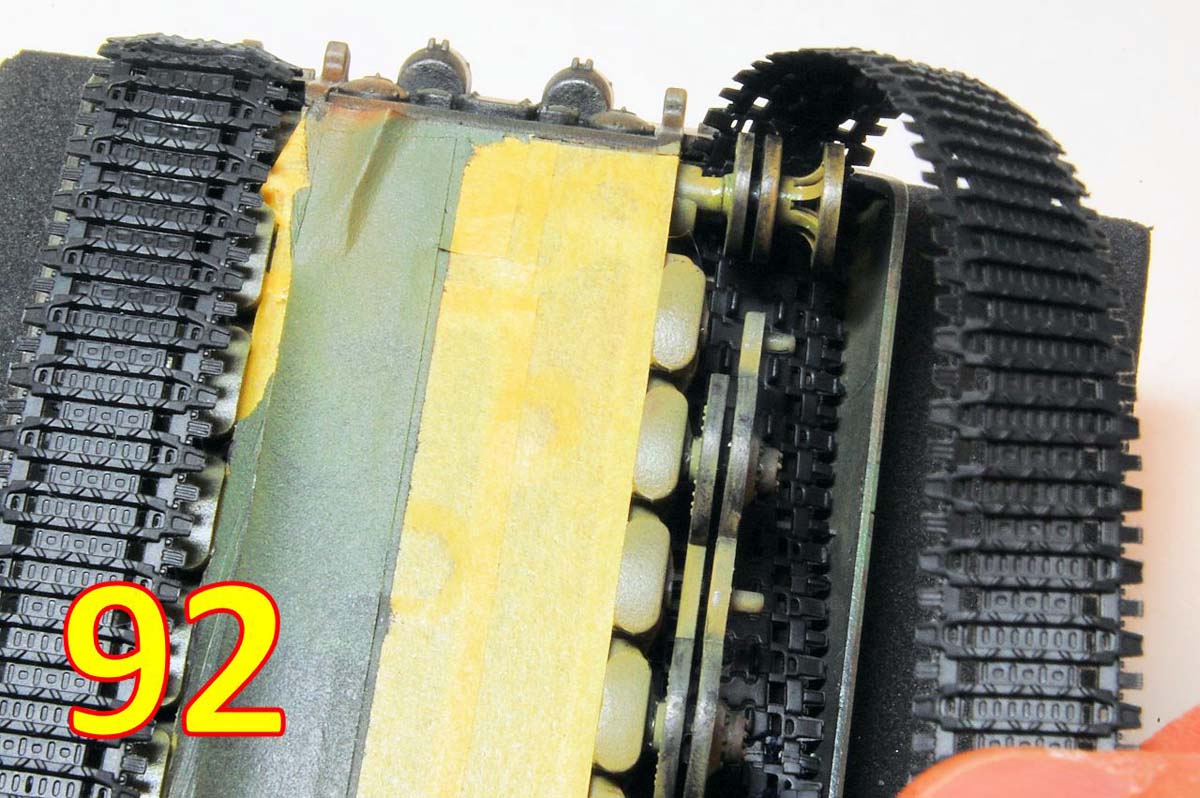
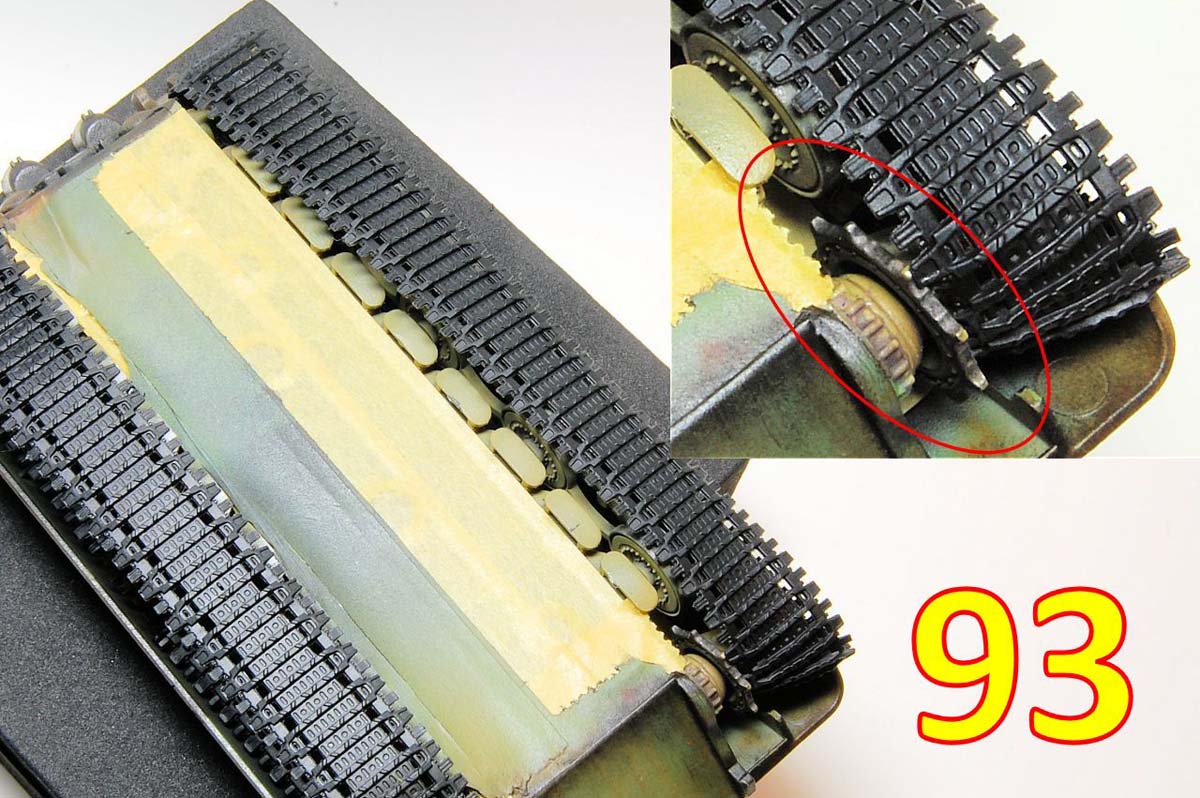
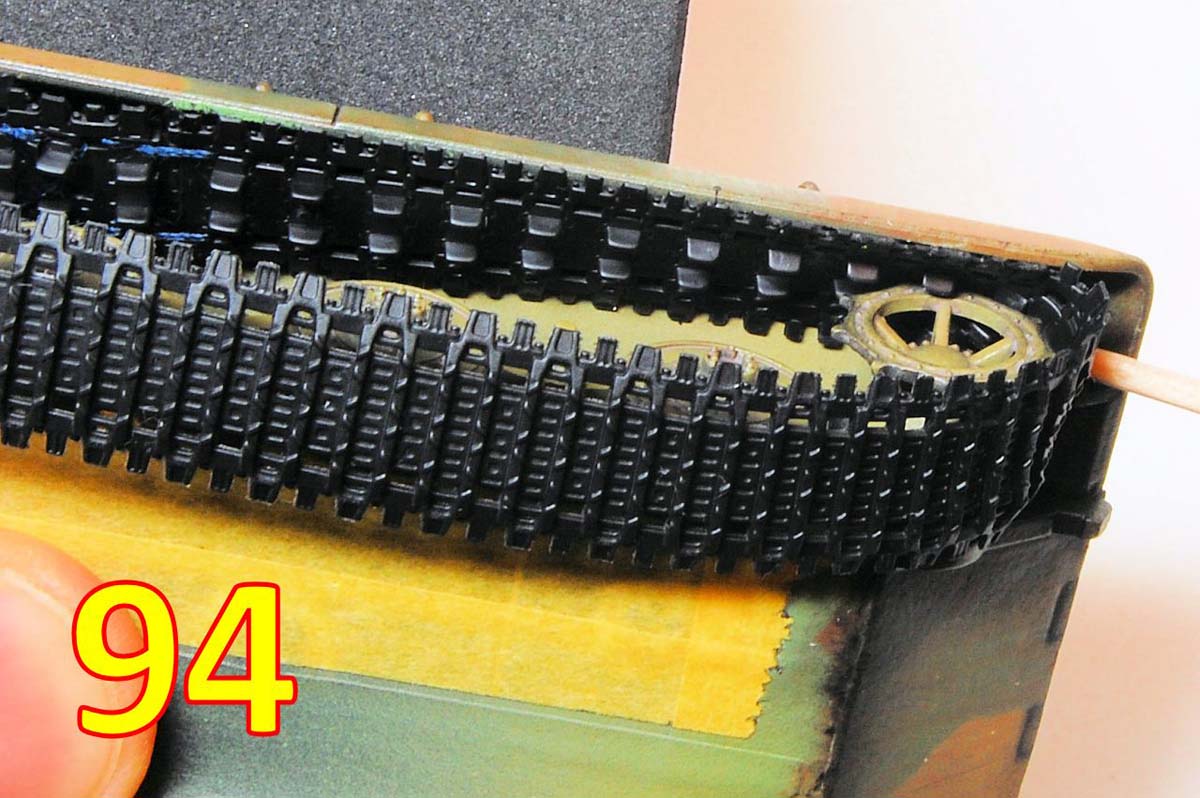
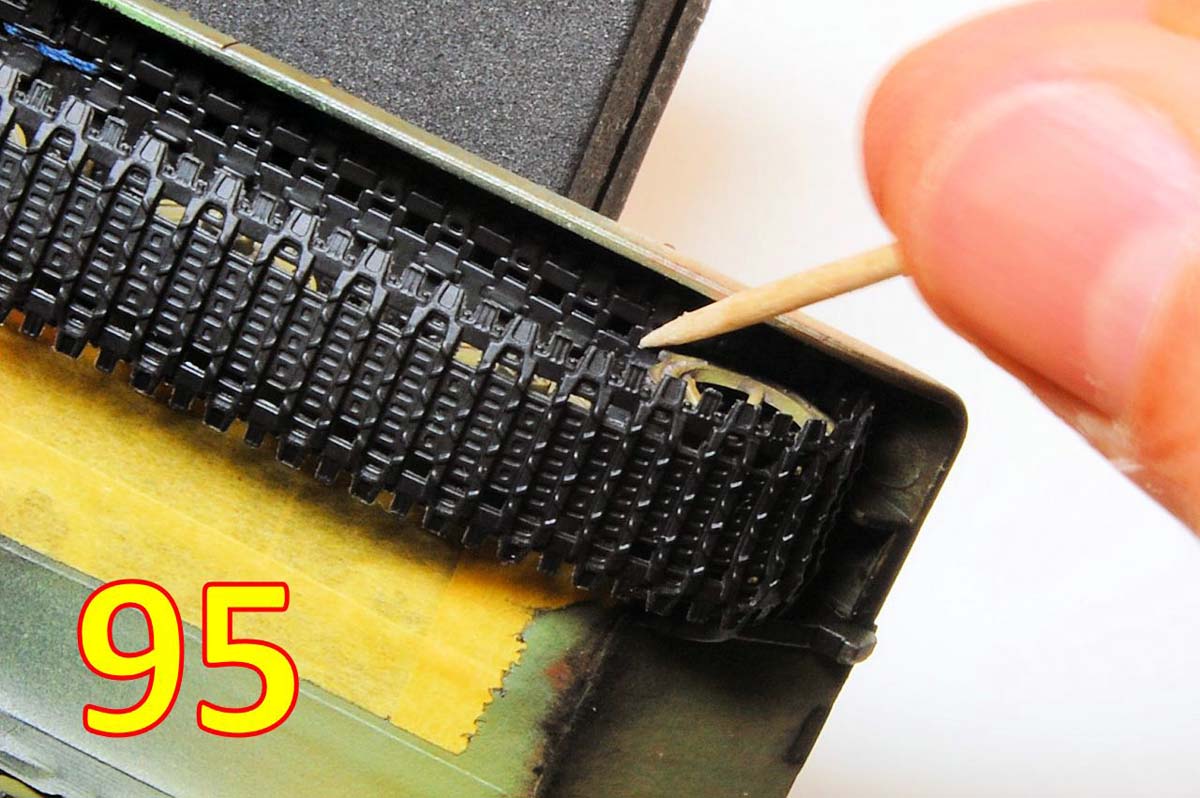
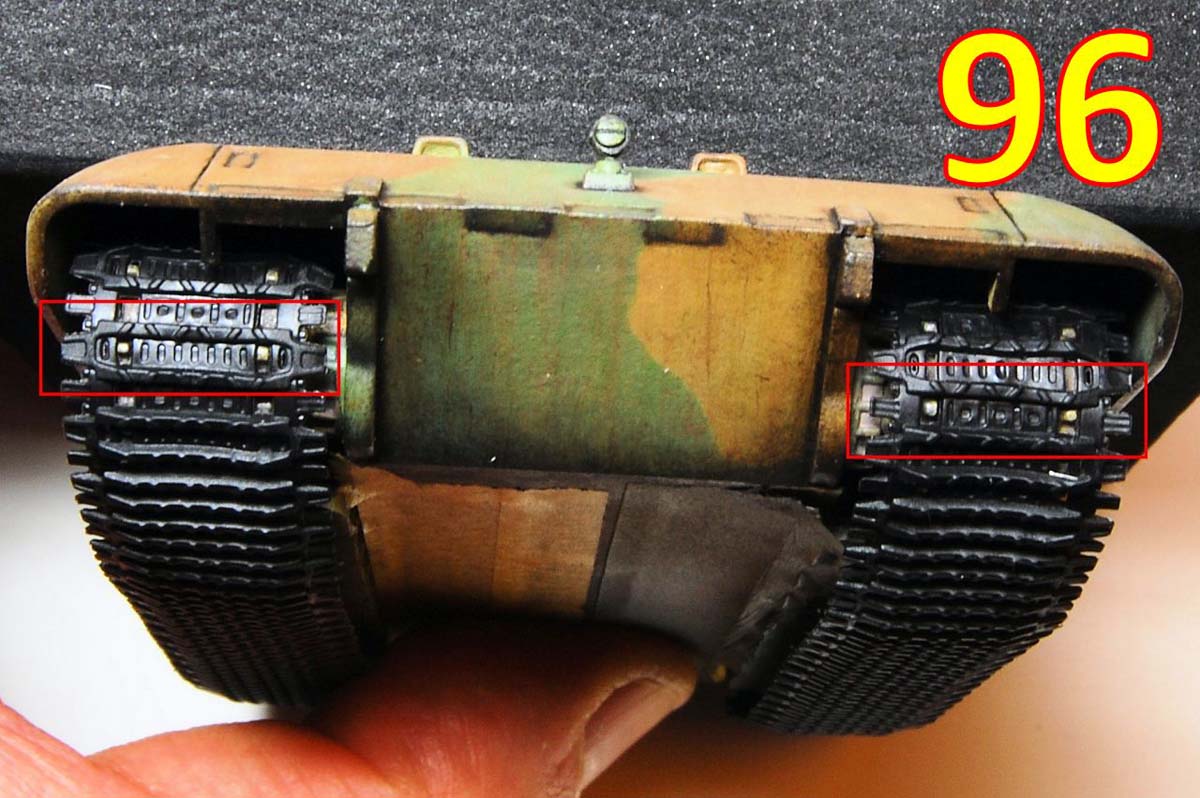
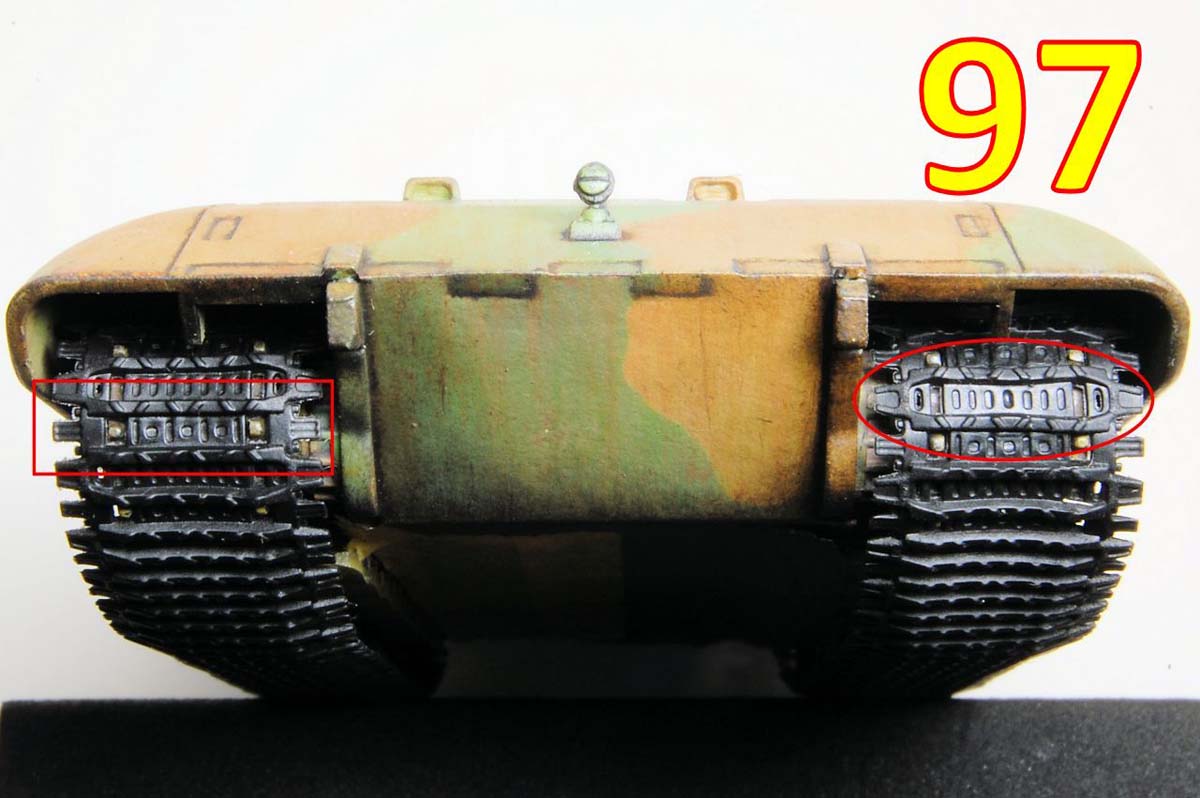
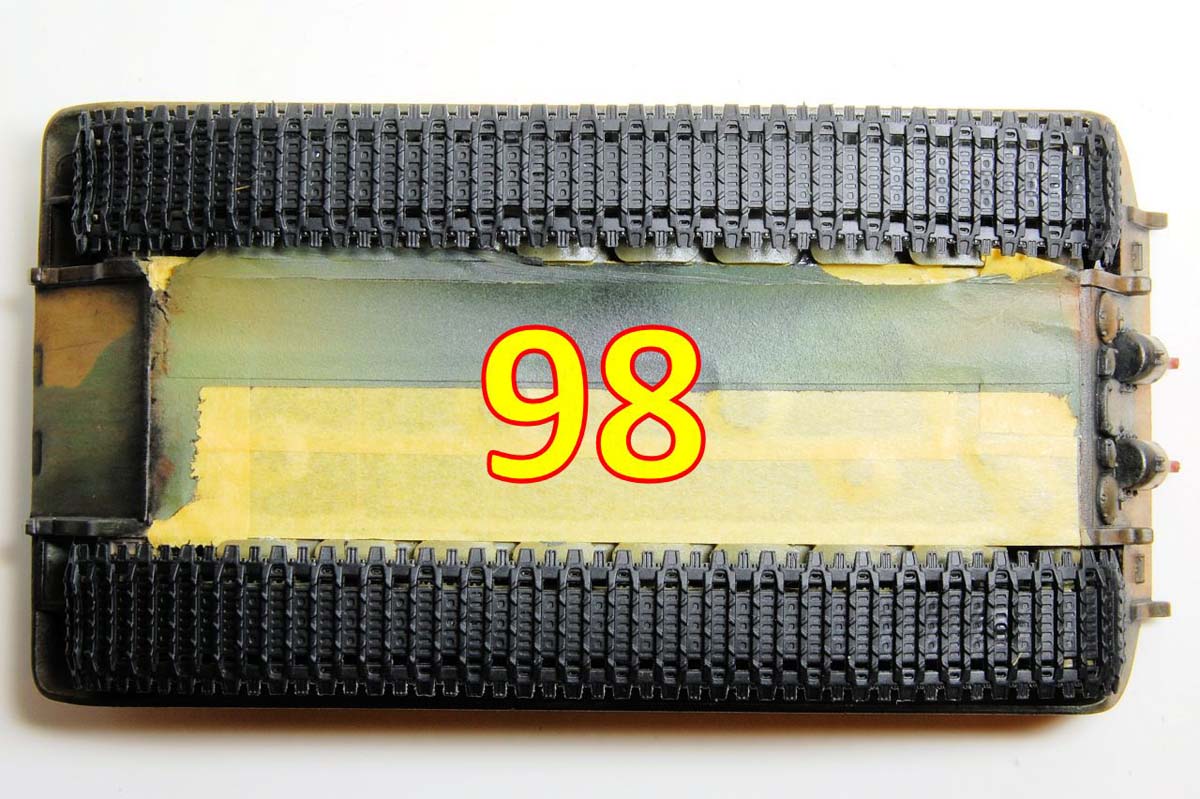
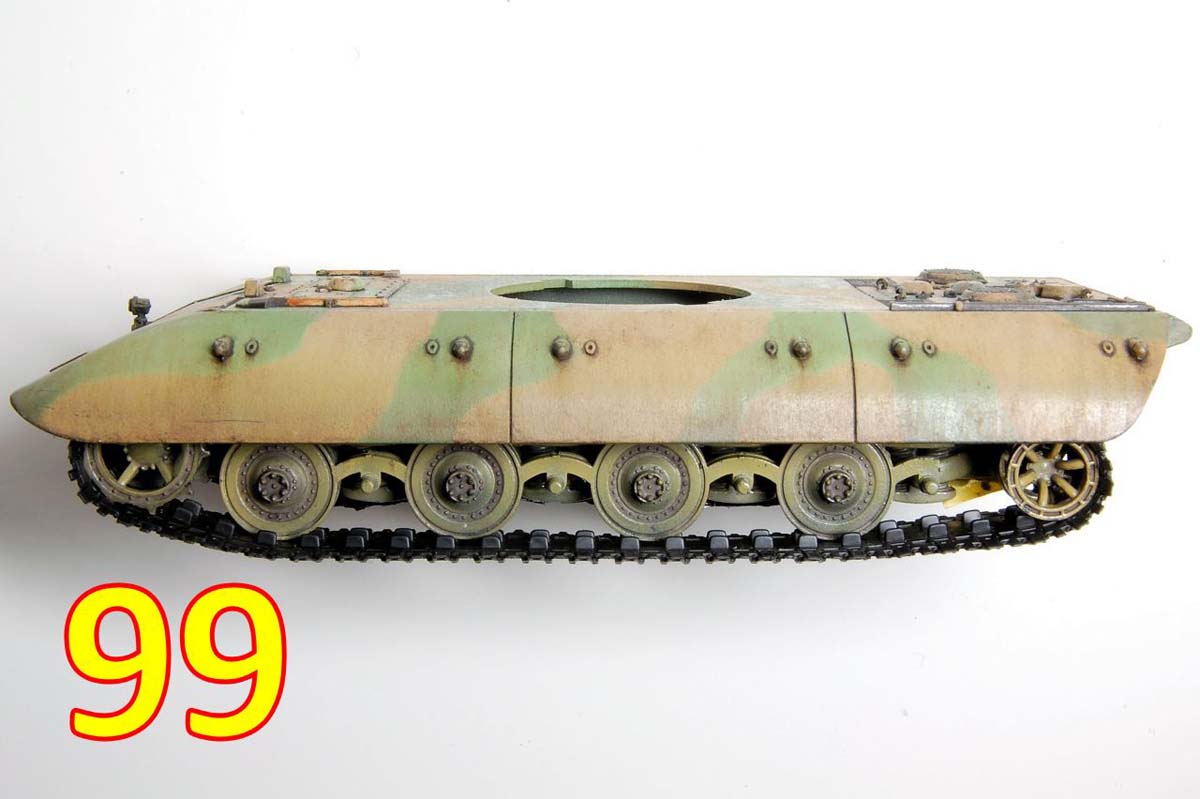
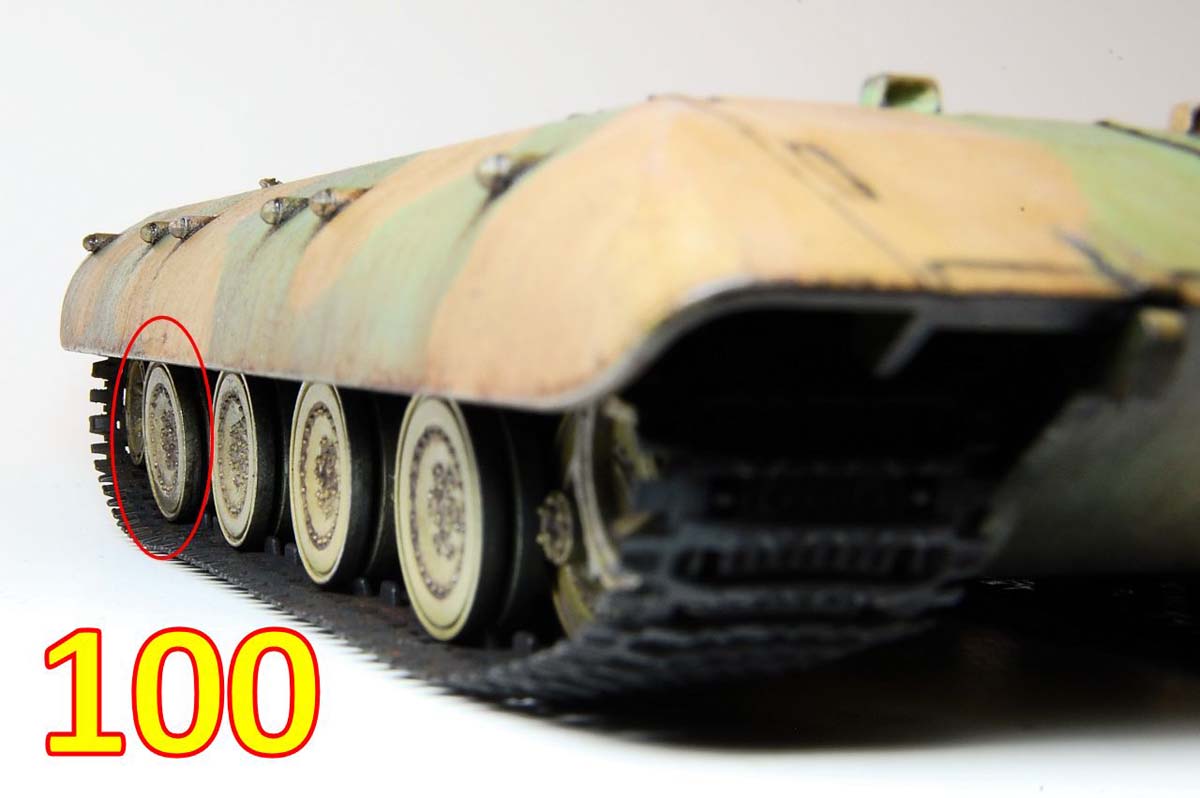
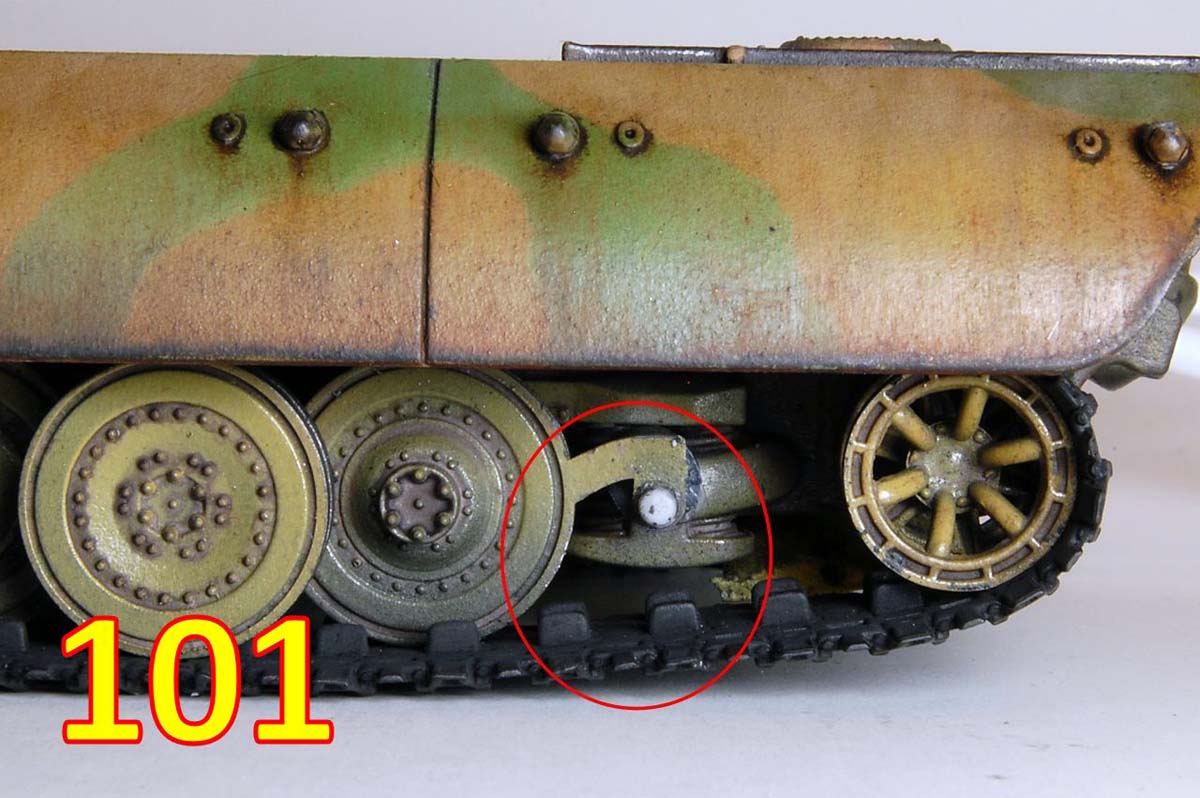
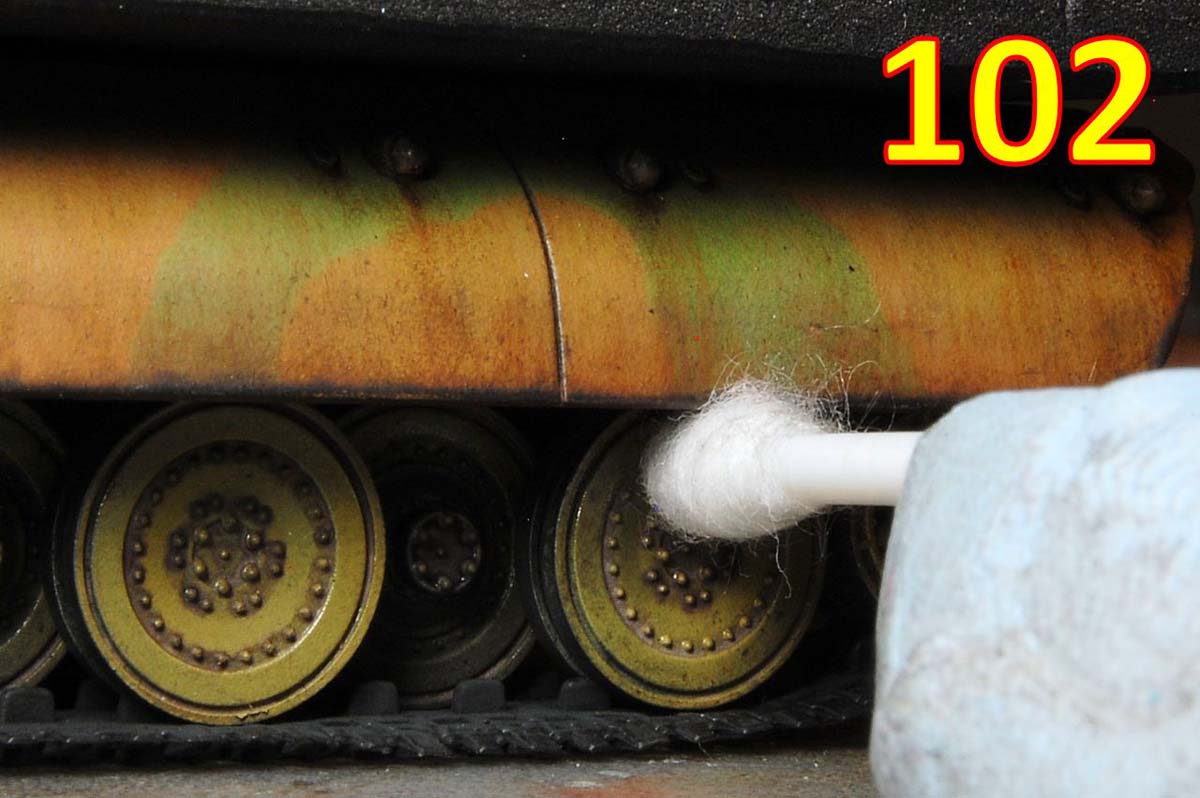
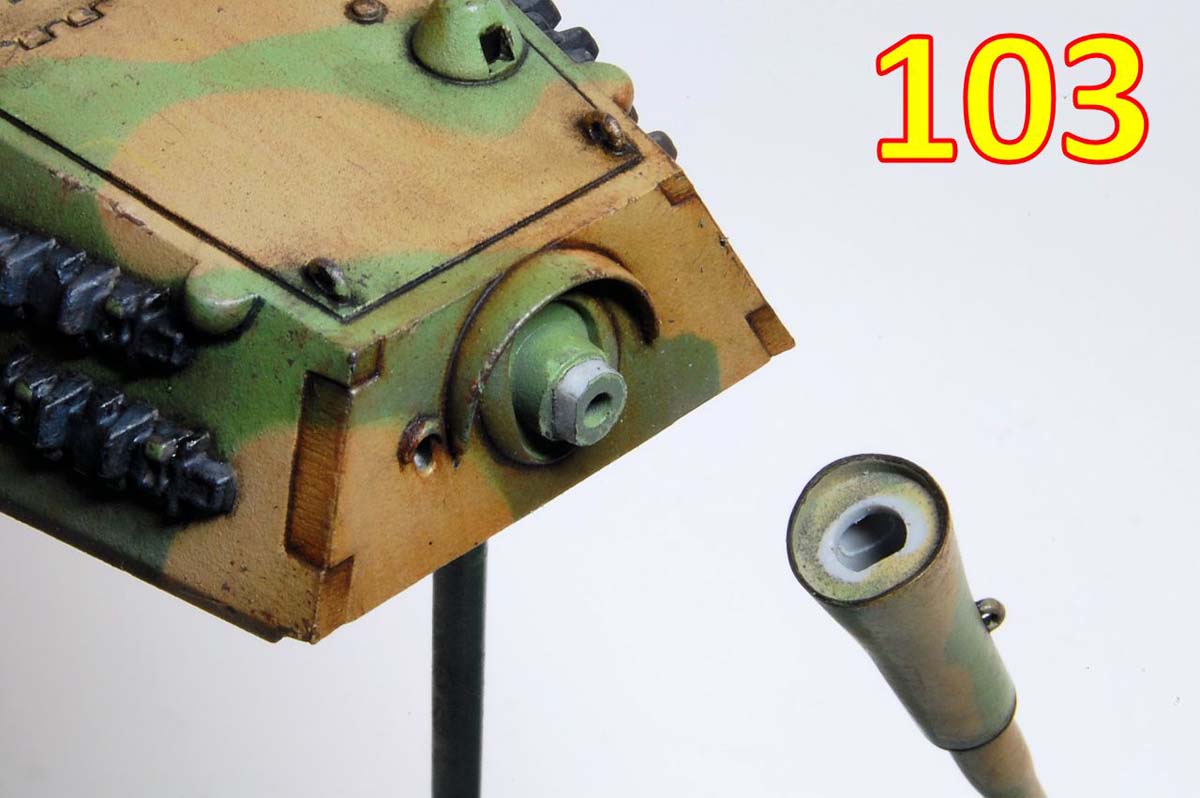
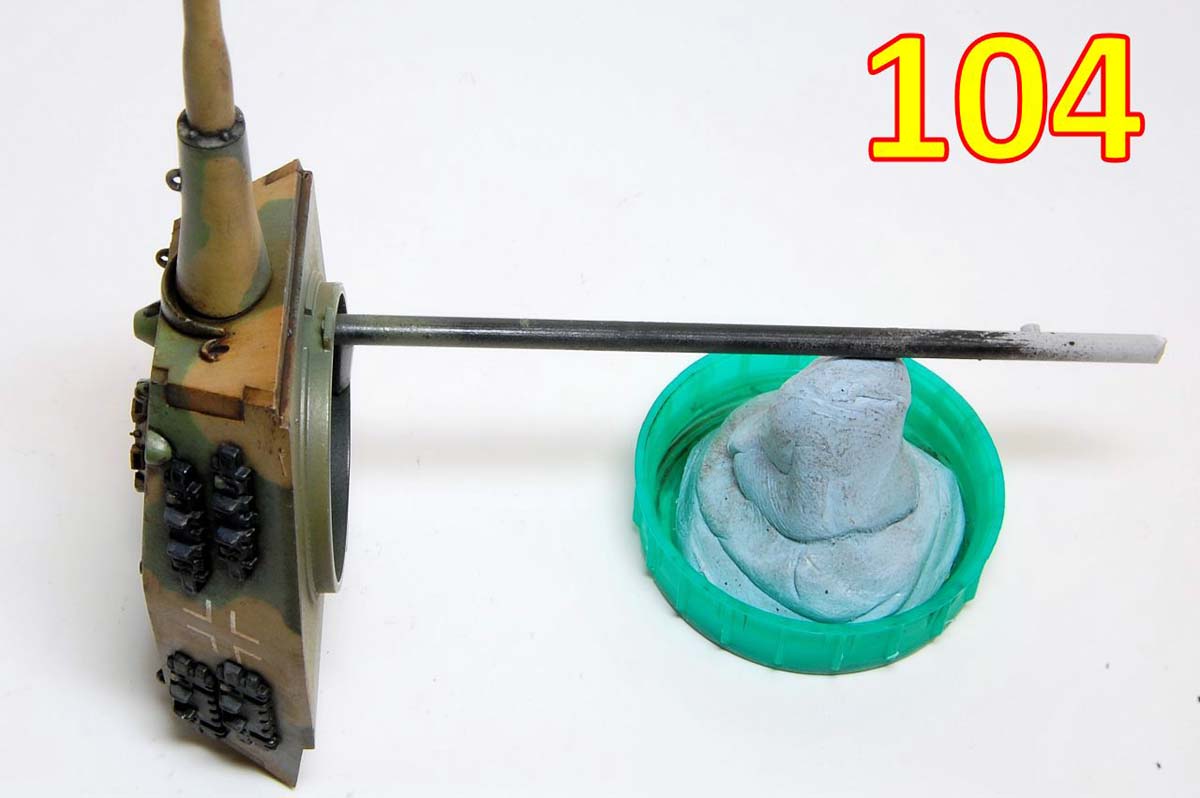
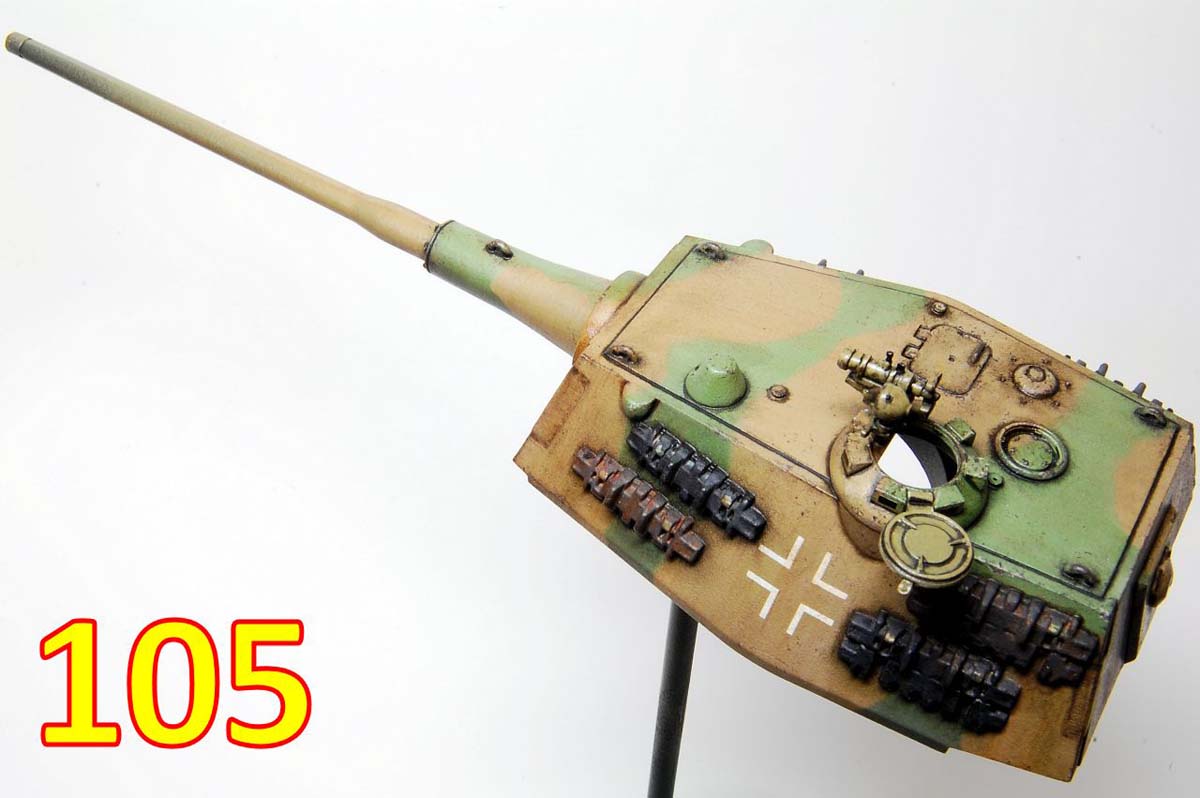
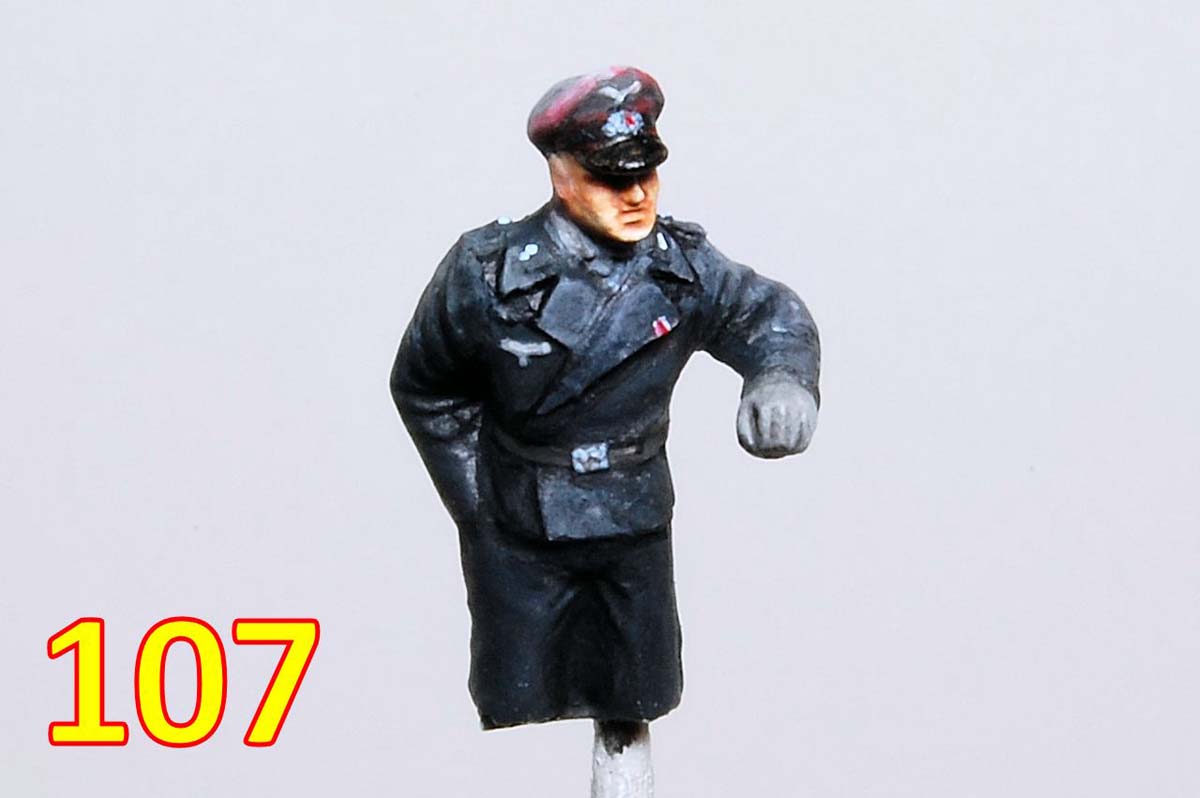
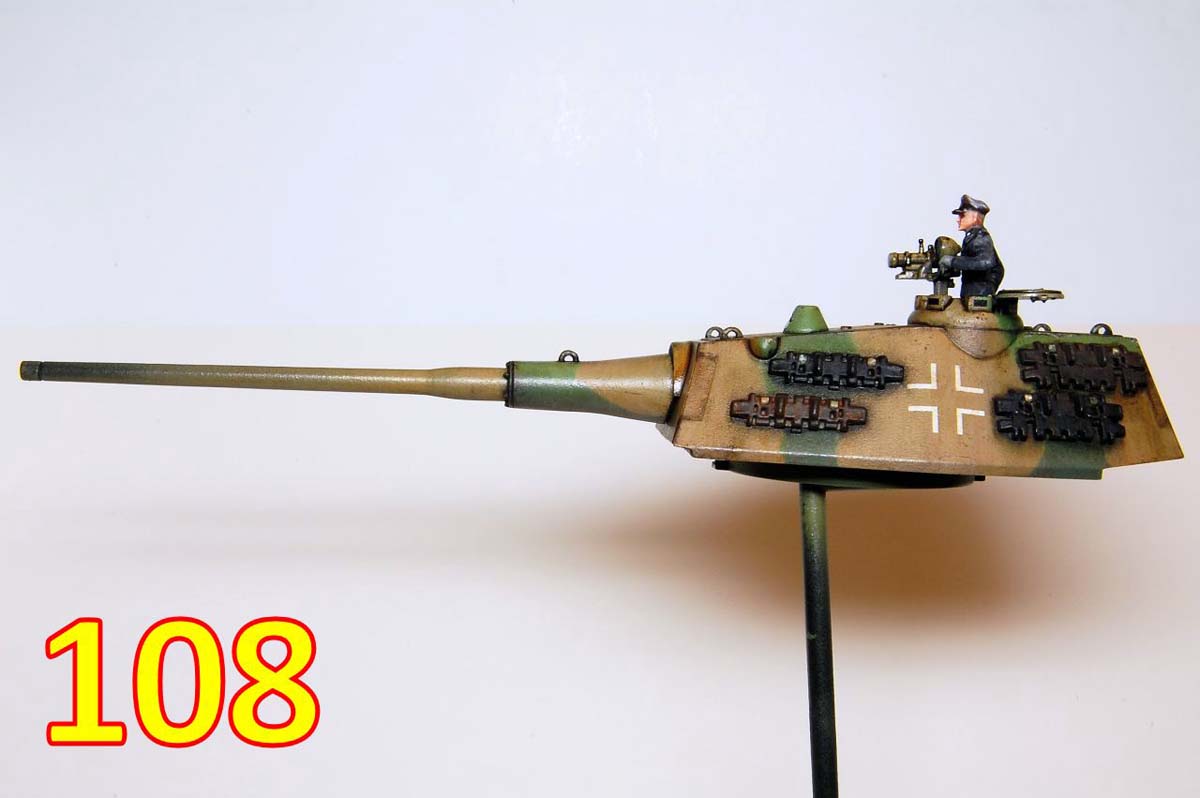
So with things back on track (as it were) the hull and turret were sprayed with shades of dark yellow, using Tamiya paints, the end of the gun being left darker (61-63). After a few hours a blue tack mask was then applied (64, 65), followed by shades of dark(ish) green, using Tamiya and Mr Hobby paints (66, 67). The gun barrel itself was completely masked off, the green only applied to the mantlet (68). The mask removed reveals paler green on top, darkening towards the lower edges (69-71). In photos 72, 73, satin varnish has been applied, then 1/35 scale Archer rub down white crosses, and a start has been made on painting the turret track links with Humbrol Matt 173, being sure to leave the hooks they hang on in the original colour. At first I thought this huge cross was a mistake, but now it seems to go with everything else about this tank being over-sized. The first pin wash / outlining was then carried out (74-76) and most of the track links were over painted with a very thin coat of Humbrol satin black (75); I decided not to go the all rusty route as it seems they would have been factory painted in some very dark colour; one link on the left side has been made to look like it might have been used then replaced. Chips and scratches were added, mostly with Vallejo acrylics (77-82), followed by the start of some detail painting, so exhausts and tools, as well as various streaks and stains using enamel washes (83, 84). Lets look at the tracks in more detail, making sure things dont go wrong this time. The unpainted track is joined (85, 86) then a double thread is looped in (87) and the track stitched together with several runs back and forth (88) with a final cross over to make sure it is as secure and straight as can be (89). So having fitted one side with some trepidation, expecting any second that the track would snap, or one of the end wheels break, I remembered I was meant to be photographing it, so photo 90 shows the state just before the right hand track is fitted. Photo 91 shows the all-important gentle stretching to make the sure the track will not be too tight. Start by squeezing the track under the idler (92) and the full length of the road wheels, then over the outer row of sprocket teeth. The ridge between the track guard and the side skirts, as well as the double row of guide horns, prevent it from easily going over the entire sprocket in one go (93). Its then a question of teasing and bending the track further in (94) until the guide horns go inside and the teeth engage with the track (95). At first the teeth went in between the drive links (on left, 96) so the track had be jumped around to the correct holes with a cocktail stick (on left, 97). The tightness of the right track distorts the links so that they curve a little from the front (on right, 97) but otherwise they sit nice and straight (98, 99). Adding the outer wheels is straightforward apart from the last one next to the idler. You can see how the track curves up from the last inside wheel to the idler (100) so that when the outside wheel is added, it is pushed a little out of line (ringed, 101). Its made worse because the wheel attaches to a curved arm thats only supported on one side (ringed, 101). In the photo you can just see where a slice of black sprue has been glued between the mounting arm and the suspension unit behind it; this was left to set overnight to provide an solid, unbending mounting for the problem wheel. While the cement set, the tank was weighted down, then a cotton bud mounted in blue tack was braced against the top of the wheel in order to keep it in line (102). For the purpose of this review and due to laziness, I decided against painting the tracks, instead matting them down with a mixture of black and dark grey pigments, dirtying them up a little with various brown pigments, then using graphite on the treads and guides, as well as on the steel road wheel rims. On to final construction of the turret, the gun was mounted and kept perfectly vertical until set (103, 104), followed by the IR gear and the commanders hatch (105, 106). In these photos you can also see my solution to the missing cupola periscopes: black rectangles cut from a sheet of striped decals; as with the hull periscopes, it would have been easier to mask them with tape at the black primer stage. An open hatch with no interior detail is asking for a figure, and this tank also needs something to show just how huge it is, so here is a CMK resin figure body with a Caesar head (107), and fortunately he has enough body to stand high in the hatch so that his hand can be steadying himself on the handle of the IR gear as he gets a good look over the top (108). I think he looks OK anyway, his arm just needed a tiny adjustment under a hairdryer to get the hand in the right place.Conclusion
This is a simple, well moulded kit that could be built OOB in an evening, but I managed to draw it out with some of the changes, and especially with the trials over the tracks, and I was more than happy to see the turret in place on the completed hull for the first time. The only modification thats probably a necessity is strengthening the idler axle enough to take the tracks. Trumpeter may have popped this one out in anticipation of the Modelcollect kit; while of course Trumpeters is much simpler, with its 59 parts compared to Modelcollects 240+ plastic and metal parts (including real suspension springs), this simplicity will undoubtedly appeal to some modellers, and I definitely enjoyed making and, especially, painting it. I even like the moulded on spare track links.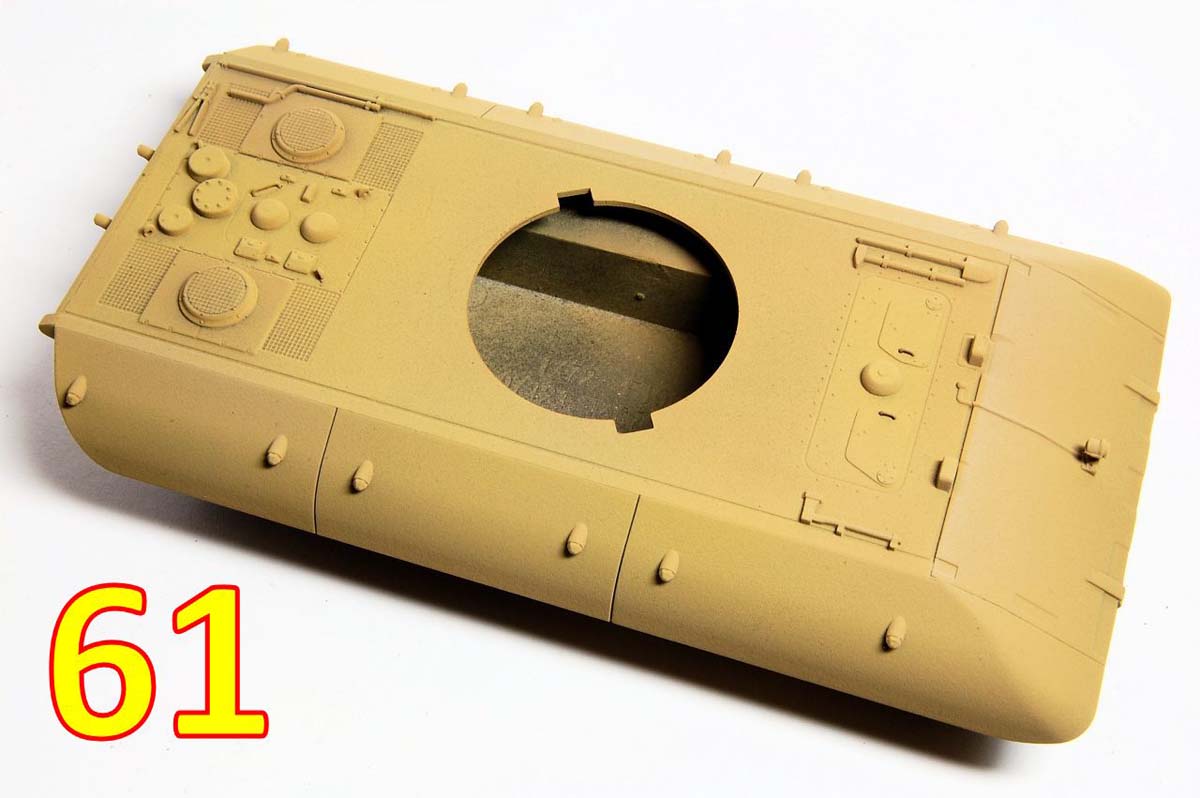


About the Author

FROM: ENGLAND - SOUTH EAST, UNITED KINGDOM
Earliest model memory is a Super Sabre my grandmother bought for me around 1972. Have always dabbled in painting and making things, and rediscovered doing that with plastic in 2008. Vowed then to complete the 30 year old stash, and have made some progress. Hobby goes hand in hand with BBC Radio 3...
Comments

This isn't a Paper Panzer, Trumpeter delibrately changed the shape of the turret in this kit to make it closer to that on King Tiger, which the Germans never planned to do
OCT 12, 2017 - 07:46 PM

Tim... Internetiquette supertip: Never comment without reading the article.
The turret was designed by Mike Rinaldi, Trumpeter copied his kitbashed / scratched turreted E-100 model. Seriously, please read at least the first page of the feature which explains it, otherwise you're just asking for Mike himself to come back on here (possibly with a big exasperated sigh as he has) to explain it "one more time..."
By the way, what did you (and Patrick) think of the feature apart from that?
OCT 12, 2017 - 08:18 PM
Matthew,
While "Paper Panzers" are not in the slightest an area of my interest, your feature article rather captured my interest and especially your build and finishing explanations and accompanying images. Although an overall simple vehicle as far as its "lines" are concerned your finishing of it was superb and brings this otherwise "plain shaped" subject to life. I must particularly comment on the marvellous paint job you achieved on the vehicles' figure.
The size of this model is also quite impressive especially when you compare it to a 1/72 Abrams that measures out at 110 X 52 mm. The article appears quite concise and informative and I for one appreciate the effort that you must have put in to complete it. Seems to me like it might possess a winning combination of points to win notice in a model show or competition.
Cheers,
Jan
OCT 12, 2017 - 09:16 PM
Whatever you do, don't mention "Paper Panzers" - I mentioned it once but I think I got away with it...
So I used the terms '46 and PPs, partly I wasn't sure if Panzer'46 or Panzerwaffe46 was copyright, but now I think not. Anyway, I get the distinction Mike made above, although I guess this model is a mix of both.
Jan, thanks for the compliments, particularly on the figure, who doesn't look too bad when viewed at real size, despite the fact that I think I accidentally removed most of one his ears while cleaning up the mould line on the polythene Caesar head; slightly ironic as one of the things I didn't like about the original CMK head was that the head was tiny, but the ears a bit too prominent - FA Cup syndrome.
Thanks too to Mike R for the positive feedback.
OCT 12, 2017 - 10:35 PM

You've got your facts and intentions confused. Paper Panzers is an actual term referring to proposed armor concepts/designs on the drawing board during the war. It's been in use for years, long before video games reinvented it's definition. They are a collective finite groups of designs. We see them in the modern era as redrawn by Hilary Doyle in the well known Panzer Tracts books.
Panzer 46 (and Luft 46) is a term(s) used to describe the what-if fantasy collective of the hypothetical ideas and vehicle concepts -- loosely based on what happened regarding vehicle design and production during the war. (There are also Allied designs, as such too). That's what this model is, it's fictional what-if, loosely based on a Paper Panzer, but by definition NOT one of them. Panzer 46 is more appropriate term for this group of vehicles.
Politics have nothing to do with this terminology, that's not what any of this is about.[/quote]
+1
OCT 13, 2017 - 03:13 AM

Thanks for sharing Matt. Hey, I see that you've used blue tack -- I remember reading something about using toothpaste as mask
Seriously, I commend the effort you put on this very detailed build feature, especially the finished product. Good to see as well that the photos are now sorted in ascending order.
Having read the exchanges on terminologies got me curious as to the origins of the term "paper panzers". Anyways I guess that may be best for separate thread.
Cheers,
Tat
OCT 13, 2017 - 04:23 AM
Thanks Tat. I have used toothpaste before, but this camouflage is quite big and simple so blue tack seemed easier, although it did cause the breakage of one of the hooks on the engine deck, ringed in photo 69, which had to be replaced with wire and repainted.
As Mike said, Paper Panzers goes back at least to the two Panzer Tracts books on the subject that used that term as part of the title, published in 2002, I think. I don't know if there is a record of it being used much before that.
OCT 13, 2017 - 01:48 PM

"Paper Panzer." "Panzer 46." Politics? (Yyyyaaaawwwwnn.) Matthew, wonderful feature building this little-big Paper Panzer 46. I like what you wrote, "... something started to happen as the parts came off the sprue, and it was that thing that we all look for when building models: enjoyment." Your build with the weathering really does the kit justice. Thanks for taking up the challenge.
OCT 15, 2017 - 11:59 PM

Of course I know Michael built the model that Trumpeter based the turret for this kit on, you were still calling it a Paper Panzer when it's a invented design that was never even on paper/blueprints.
OCT 31, 2017 - 12:11 AM
Copyright ©2021 by Matthew Lenton. Images and/or videos also by copyright holder unless otherwise noted. The views and opinions expressed herein are solely the views and opinions of the authors and/or contributors to this Web site and do not necessarily represent the views and/or opinions of Armorama, KitMaker Network, or Silver Star Enterrpises. All rights reserved. Originally published on: 2017-10-10 14:26:24. Unique Reads: 16120

WEB HOSTING BY


Copyright ©2021 Armorama and Kitmaker Network, a subsidiary of Silver Star Enterprises
All Rights Reserved. Please read our Conditions of Use and Privacy Policy.
All Rights Reserved. Please read our Conditions of Use and Privacy Policy.