

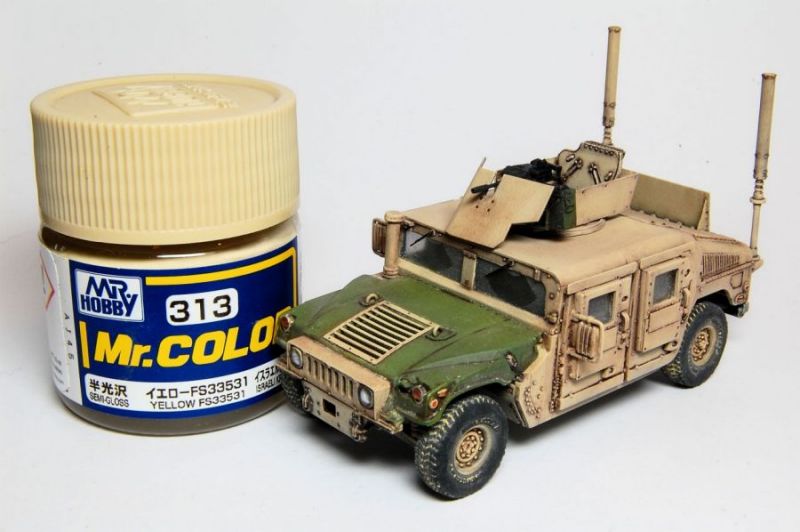
1⁄72M1114 FRAG 5 w/GPK Turret
11
Comments
Construction part 3
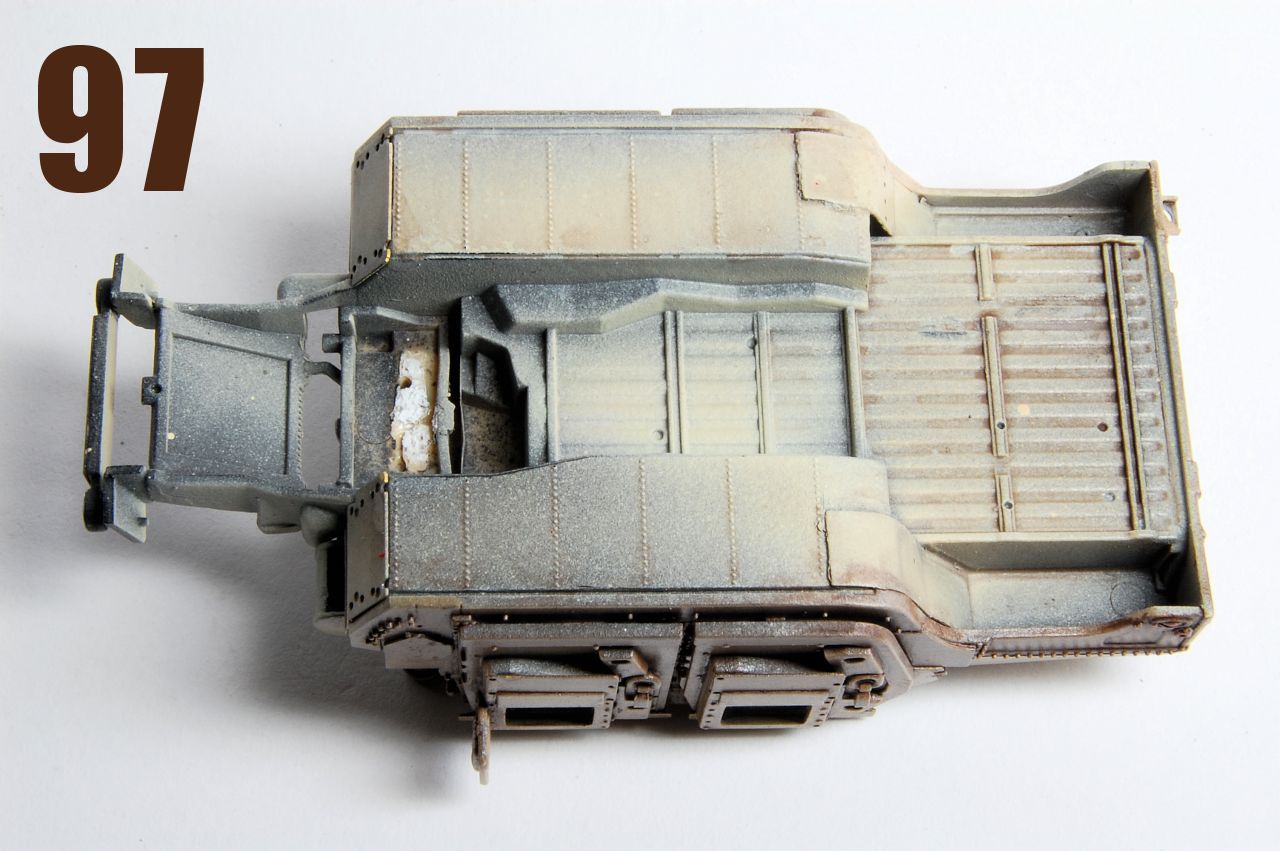
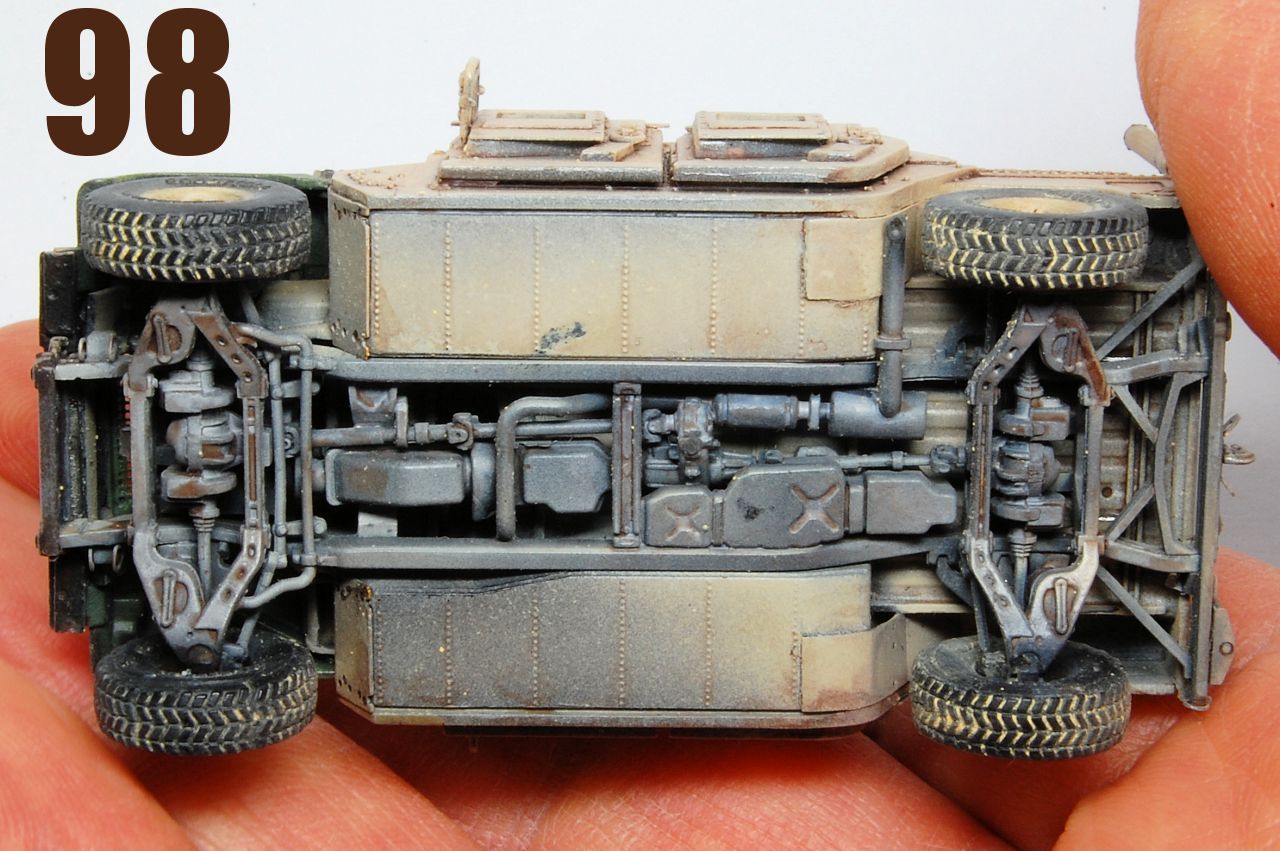
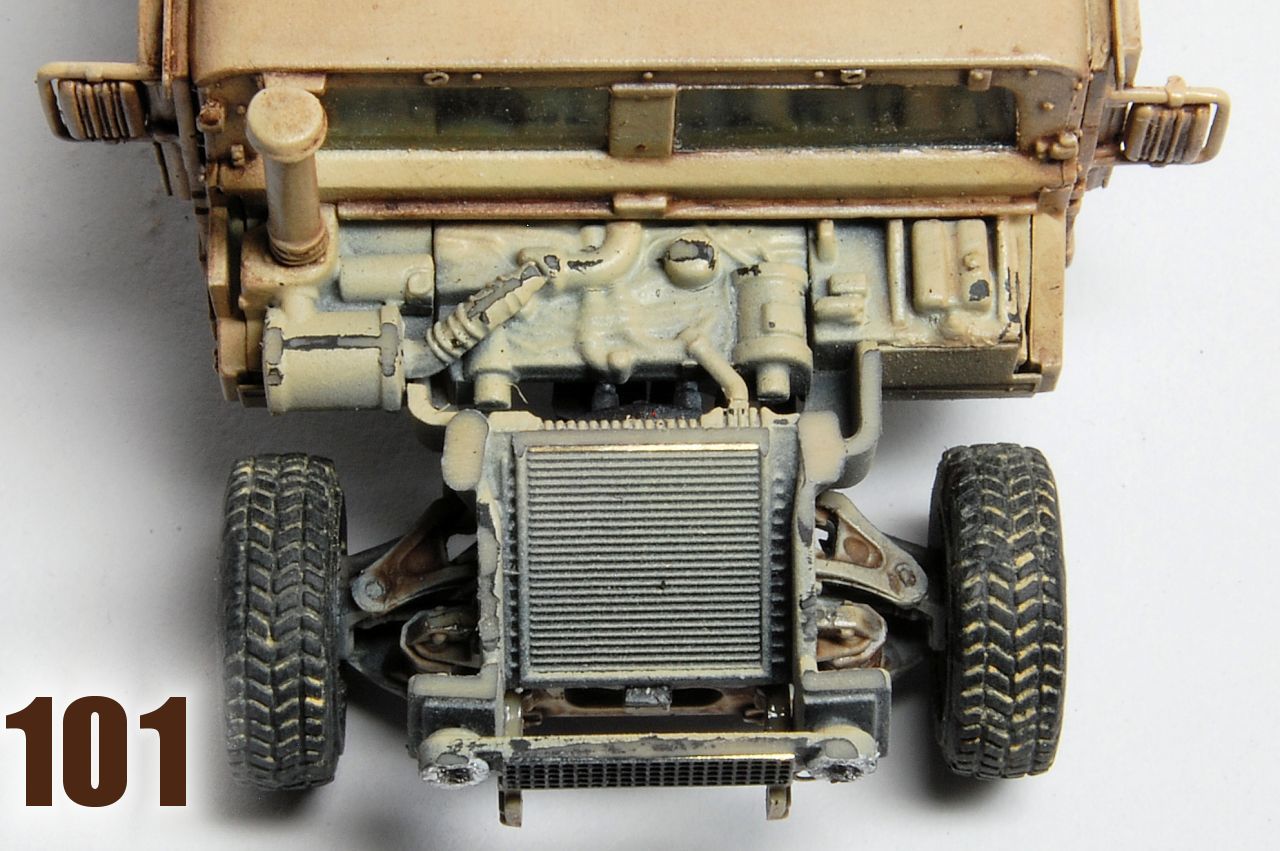
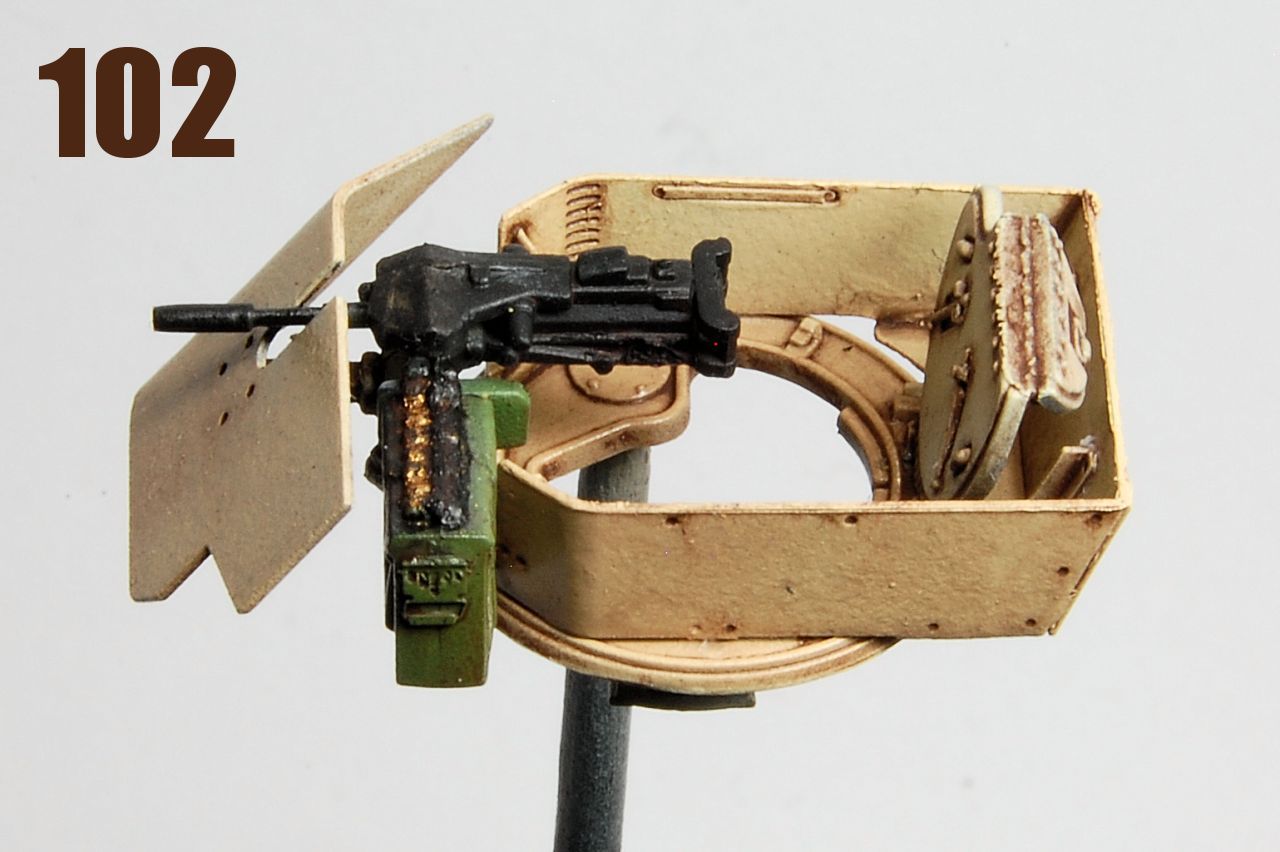
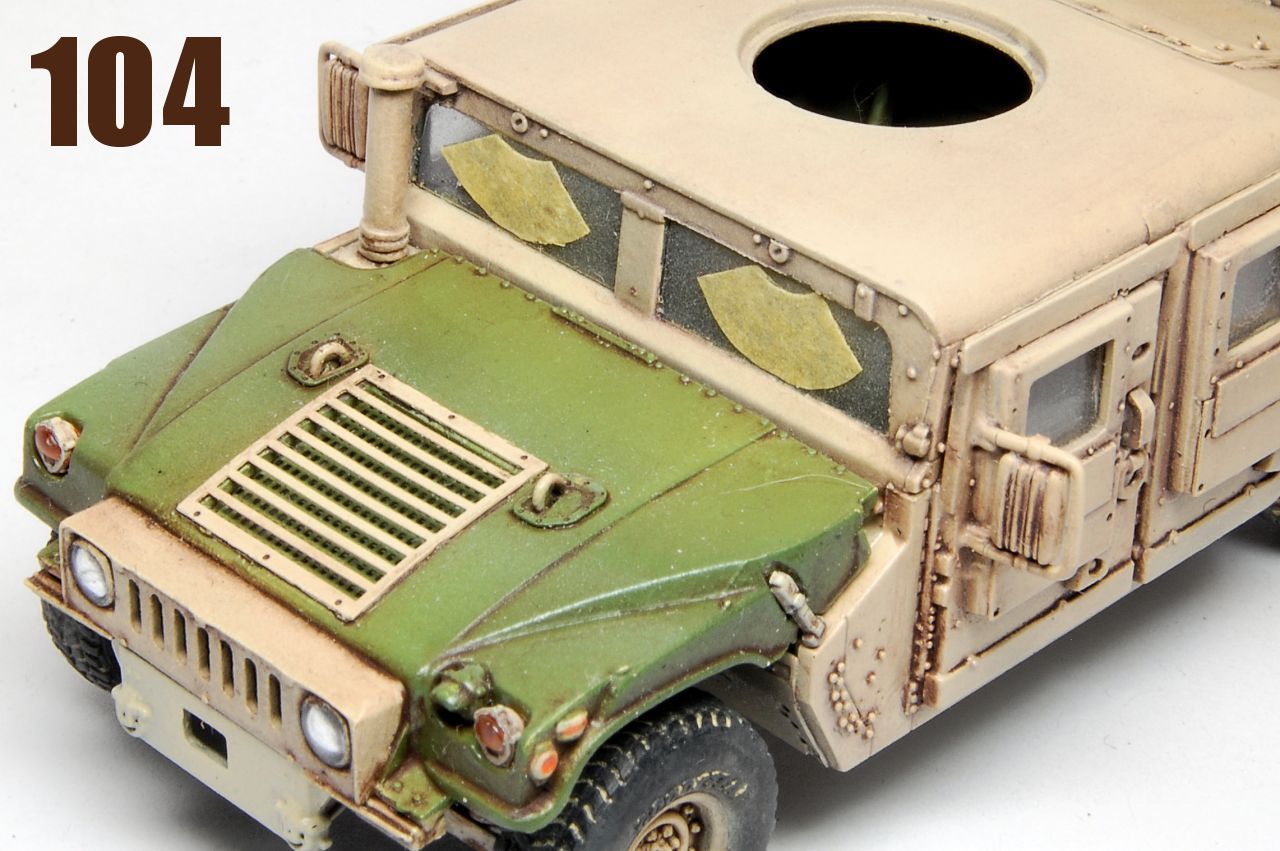
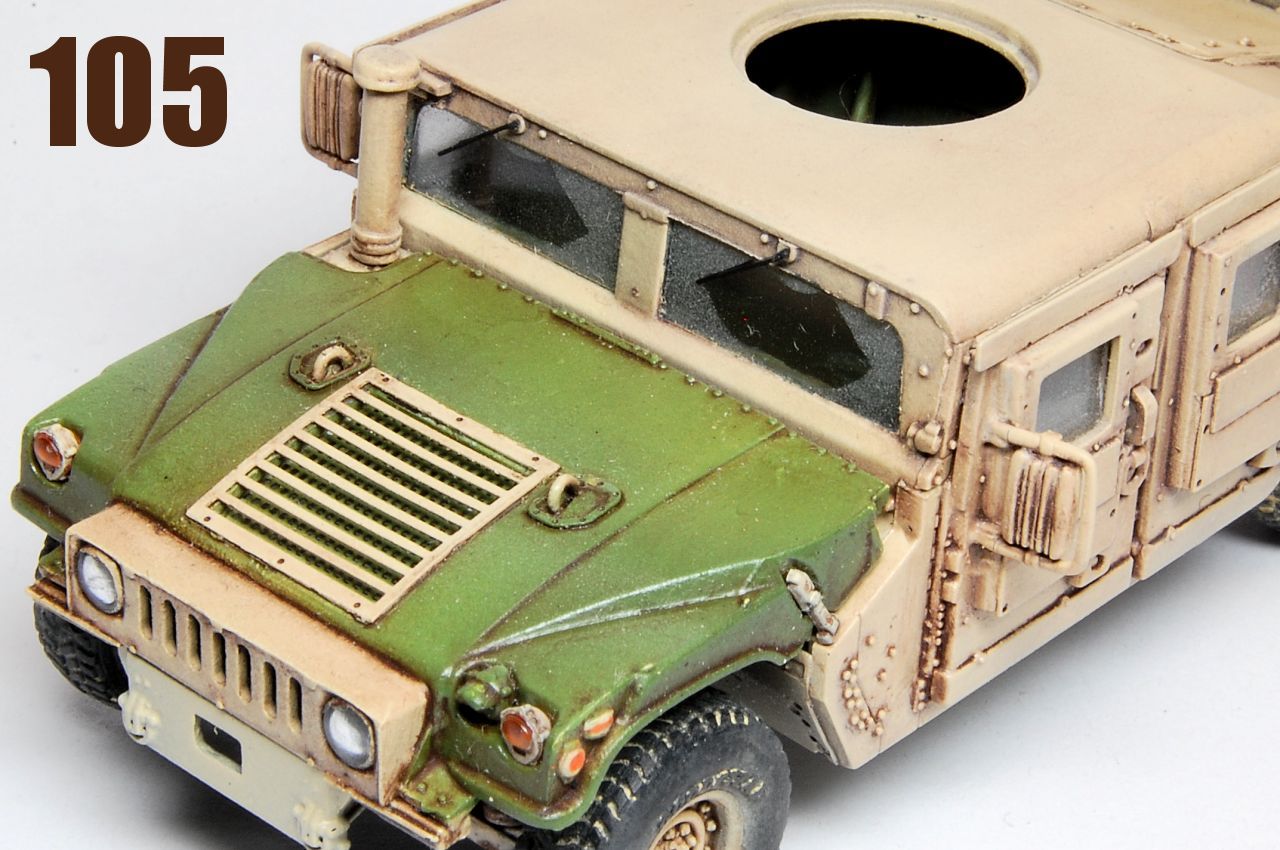
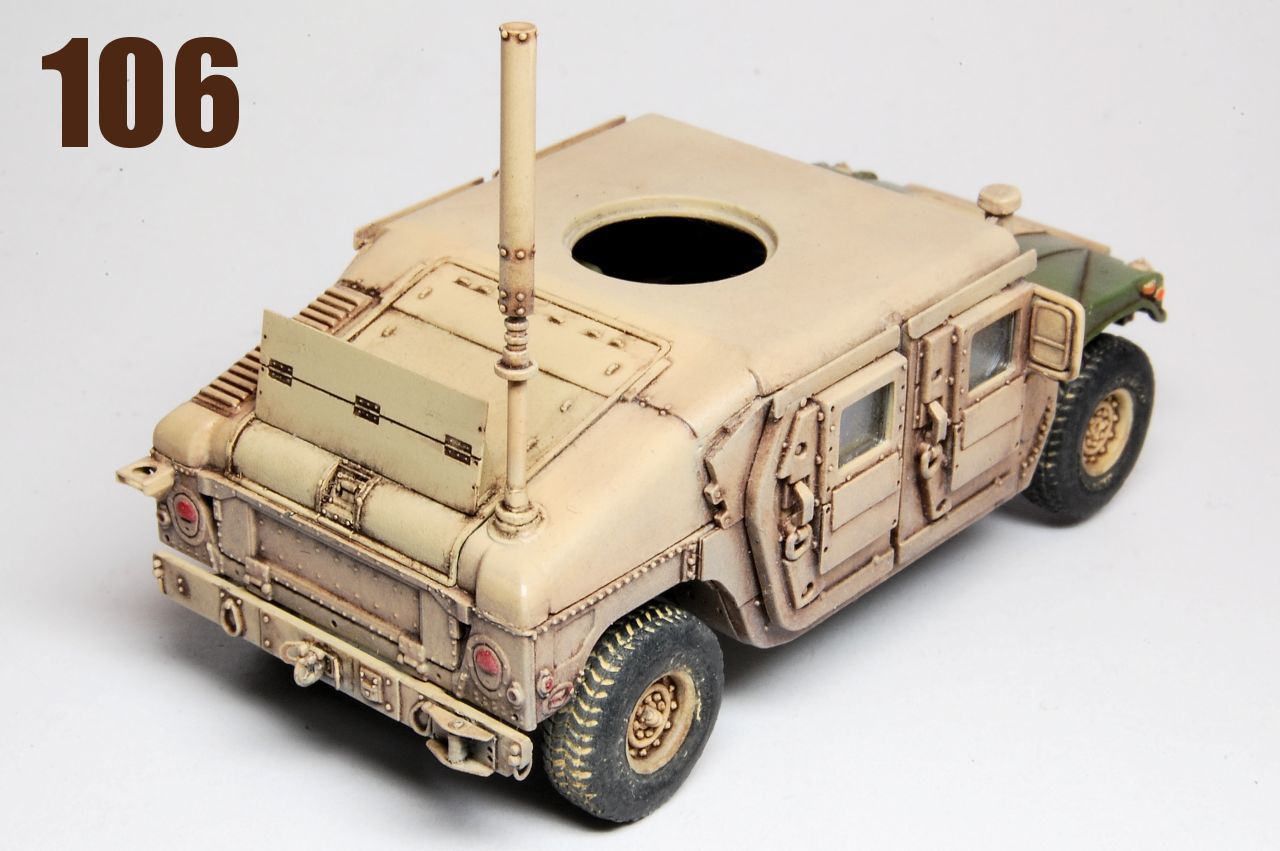
Not having felt too optimistic about this build at some moments, I cheered up a little after getting the hood together; with the top louvre back on, the side lights in place, the masking all removed, and a dark wash added, I thought it looked OK (94). The orange side lights worked out better than I had imagined. Notice I missed a moulding line just in front of the groove where the closing strap will go in, showing up clearly in this light. Pigments were worked into the tyre treads and the chassis (95, 96) and the underside (97) received the same wash (AK Winter Streaking Grime with a little black enamel) in preparation for them being joined. The chassis fits into the upper body tightly, so there is no danger of misaligning it sideways, but the exact contact points are not that obvious, so there is a need correctly line it up longways. In fact the exhaust pipe sits almost exactly against the wheel arch (98). Clearly I have departed from the assembly sequence in the instructions which show the chassis and body joined even before the sides of the body go on. Flipping it back over, I paid attention to making sure all four wheels made contact with the ground, and I had twisted the chassis a little under a hairdryer before attaching it, to get it flat, and then after assembly some weight was applied while the cement set overnight. Eventually all four wheels were persuaded to sit flat (99, 100). The rear hatch plate attached earlier has been removed, and the interior reflectors for the headlamps have been painted white. Test fitting the hood wasnt too easy, and this is partly caused by me adding the headlamp component to the hood rather than the chassis, in that the headlamp reflectors have to fit inside the transparent component. As is the case generally with this kit, tolerances are very tight, so parts that fit exactly as bare plastic become harder to fit under a coat of paint. I was also unclear about the attachment point, so where to apply cement, and as a result removed quite a lot of paint for cementing purposes (101), and my wire lifting rings had to be trimmed very short on the inside so as not to interfere. I think the correct point for cement to be applied is actually the top right and left vertical edges of the engine compartment detail. Final painting and assembly of the turret is shown in photos (102) and (103), also visible is the mess I made of painting the grenade belt feed made to look worse by this big photo. I managed to make sure the armour was straight on the turret ring, with the mounting brackets providing definite attachment and gluing points. Before the windshield wipers were fitted, their pattern on the window was worked out and cut from masking tape (no pattern for this is included in the instructions, something that would be nice in future ), then a light misting of the body colour was applied (104), the tape removed and the wipers glued in place (105). The rear hatch plate was put back on top of the paint work, and then the two CREW masts were fitted to the rear (106). If you wanted to use just one of these, but fit a normal radio antenna on the other side, the part for that is in the box, so this is really optional. All that remained was for the turret to be added and then a few final touches, the rubber section of the bonnet strap being painted black, and the mirror surfaces were lazily blocked in with normal pencil graphite.Conclusion
This is a very nicely detailed kit, with excellent moulding quality and plastic components that fit together very well. As observed earlier, and in my review of T-Models first M1114 kit, the tolerances are such that parts align exactly, which is good of course, but it does mean that sometimes parts fit together very tightly, requiring precise assembly. As an example, the applique armour plates behind the rear door appear at first to be very easy to fit, but it took quite a while to work out exactly how to fit the front under the door edge and align the rear correctly with the bodywork, and then where to apply cement. I am not the biggest fan of PE parts, though it wasnt the smaller parts that caused me difficulty, having no trouble with the windshield wipers for example, but rather that vertical plate on the rear cargo door; in fact the comparison with the wipers is instructive, as they have a very definite and precise means of attachment, a small angled slot, while the plate was quite hard to locate and glue in place. The helpful instructions and excellent details, with the enhancements added to this kit over and above their first, shows thoughtfulness and care being taken on the part of the designers to provide the best quality kit they can. Probably the only thing that could be said to be missing still is some decals. Whether the configuration represented by this particular kit is authentic may be a matter of debate, but I think it builds up into a very nice looking model, although I have no doubt that others will make a better job of it than me. Its not an easy kit to build due to the amount of detail, the PE, and the relatively complicated sequence of construction and painting that is necessary, so it will take a while to complete, but not too long, for its still only a small model. Looking forward to more releases from T-Model then, particularly on the basis that I know they are intent on improvement and have a strong desire to design and create the best kits they are able to. No pressure then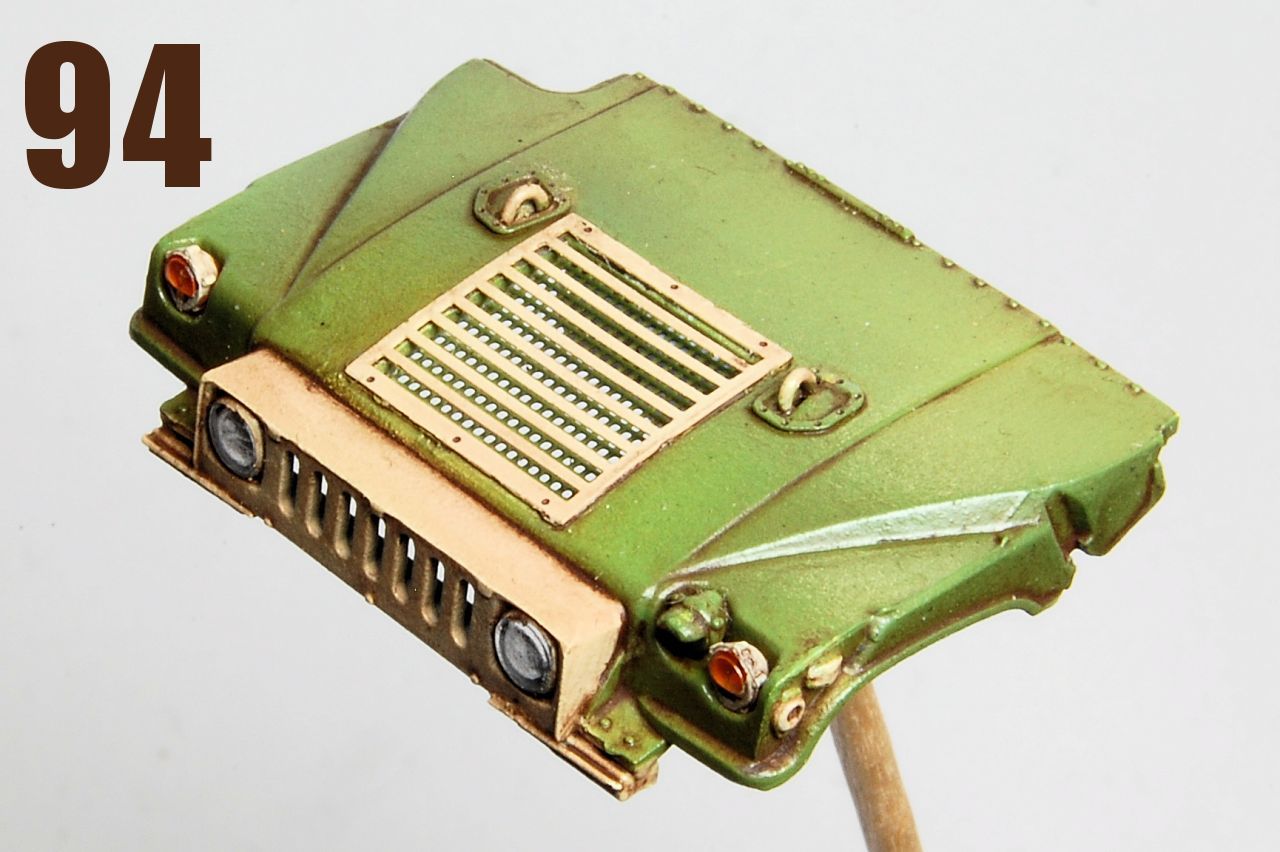


About the Author

FROM: ENGLAND - SOUTH EAST, UNITED KINGDOM
Earliest model memory is a Super Sabre my grandmother bought for me around 1972. Have always dabbled in painting and making things, and rediscovered doing that with plastic in 2008. Vowed then to complete the 30 year old stash, and have made some progress. Hobby goes hand in hand with BBC Radio 3...
Comments


The model looks great, thanks for the very thorough build review Matthew.
I like the braille scale Humvees from T-Molds, and with all the reviews I have found on-line, it seems the kits are mastered well. My only gripe is with the interior, which looks pretty basic, and the tires. I did notice an aftermarket set of resin tires which should help, but as far as I know there is no aftermarket update for the interior. I do wonder how much of the interior is visible on such a tiny model though...
Mario
MAR 25, 2018 - 02:53 AM

There should be an extendable platform for the gunner between the seats. And there should be a small shelf on the center dashboard holding a radio set and computer screen and keyboard.
MAR 25, 2018 - 04:25 AM

Yes, I agree about the interior details being basic, and my comment about decals being the only thing missing should have included these points (I had them in mind... then they slipped away again) I think the gunner step is the most obvious because it would be visible directly underneath the turret ring if the hatch is open. It would probably be quite easy to scratch as I think it is basically a box with a ridged top surface, like the floor, but it would have been good if it had been added to the additional sprue with the CREW antennae.
In answer to Mario's question about what is visible through the windows when all the doors are shut - not a lot, other what can be seen through the turret hatch, which is not much at all. It's a different story if you wanted to have any of the doors open. The interior door details are quite good, but as you correctly point out, the rest is quite simple. The comms / data gear that should be in the front would also have been a nice addition to the new sprue. The seats themselves are also a little basic. With all the doors shut however, it's not a big issue.
Regarding the wheels, for me they are only a problem from the point of view of buildability, but I think T-Model have pretty much acknowledged this, and even themselves posted a link to an aftermarket set of resin wheels by ScissorHandz, although I'm not sure of their availability outside of Asia.
MAR 25, 2018 - 06:40 PM
@Matthew; I'm struggling through my M1114 - If you had suggested "over-engineering" I would not disagree. I notice you did not use the concerntina-fold PE piece on the rear hood (bonnet). I found that piece impossible so I made one out of styrene strip- then discovered it is an optional part. On further M1114's I'll just discard it altogether. Don't particularly like the clear grill just for the sake of two molded-in headlight lenses. Would have preferred a solid-color grill with holes for separate clear lenses. Complicates painting with extra masking.
Still, I would take this one over Revell's any day.
MAR 26, 2018 - 04:13 AM
Perhaps an aftermarket company would tackle the lack of interior details. I tried to find more about Scissor Handz, but no luck... hopefully some of the international on-line vendors would pick up their line.
Anyway, back to the subject... I really like the Termin Molds model, it looks really good and your version did it justice. I don't usually do 1/72, but the Humvee is a very interesting subject for me and I might just take my chance with the braille scale. I wonder if the company is considering making more Humvee versions; GMV and other Special Ops versions comes to mind.
Mario
MAR 26, 2018 - 12:30 PM

Biggles, I felt that the PE enhancements, while they improve the look of the kit, do take it to another level of fiddliness, and as I recall from when building the first kit, there are a few other stressful moments, such as the steering wheel, which seemed more complicated than necessary, and certainly that is true of the wheels.
That concertina piece, the Combat Identification Panel - yes, in the text I said that the same thing happened to me, I have literally no idea how to use that piece, without a special former perhaps, but note that there is a plastic one on the accessories sprue, but it is framed, so I think it's to be hung on a door. Apparently these devices have a thermal signature that is different from the vehicle, I think the ridging is to keep them cool; it is supposed to make the vehicle recognisable to any pilots considering destroying them. Definitely optional, they seem to just tie or hang in place, I think they were used at the start of the Iraq war.
Also agree, clear headlamp unit makes it tricky to paint, as I pointed out, the instructions don't take account of the need to paint what is behind it, but then most kit instructions don't, I guess. I didn't get it masked 100% accurately, but found that a blob of masking fluid was a lot easier than trying to cut a circle of tape that small.
Hope this feature proves of some help however, and looking forward to seeing yours done. Don't forget those joins on the rear side to upper panel.
Mario, I think T-Model is planning even more variants, going by the fact that on the new sprue K there is a so far unused turret ring (8), and rear tail plate (3), and then you have already seen the CROWS II device they have designed, I wonder if that will go with the turret, and I am guessing there may also be an OGPK variant.
Thanks for the comps, Alex, Dave and Peter, it is appreciated.
MAR 26, 2018 - 07:06 PM

Your right on saying there is different configurations of the 1114. From what Ive seen is that it is crew dependent and they decided what they wanted to add to there own 1114. Not one was exactly the same. One had either the duke and the worlock or one had both or didnt have either and had the bullet directional indicator.
APR 28, 2018 - 03:25 AM
Copyright ©2021 by Matthew Lenton. Images and/or videos also by copyright holder unless otherwise noted. The views and opinions expressed herein are solely the views and opinions of the authors and/or contributors to this Web site and do not necessarily represent the views and/or opinions of Armorama, KitMaker Network, or Silver Star Enterrpises. All rights reserved. Originally published on: 2018-03-25 09:53:30. Unique Reads: 25647

WEB HOSTING BY


Copyright ©2021 Armorama and Kitmaker Network, a subsidiary of Silver Star Enterprises
All Rights Reserved. Please read our Conditions of Use and Privacy Policy.
All Rights Reserved. Please read our Conditions of Use and Privacy Policy.