

1⁄35Against The Clock!
19
Comments
Wheels
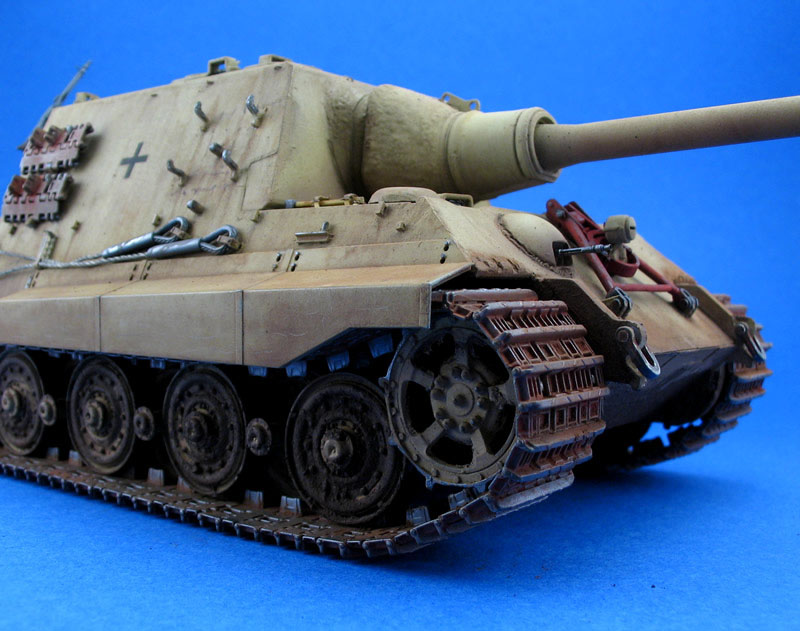
The road wheels have two opposing injection points and a mould seam on the rim which normally I would hours sanding off. I realised that if I placed the wheel with the injection points covered top and bottom by track, I could eliminate this process for 90% of the road wheels. Thus only the front two sets on each side were sanded, and then the wheel sets glued together time spent: 22 minutesHull
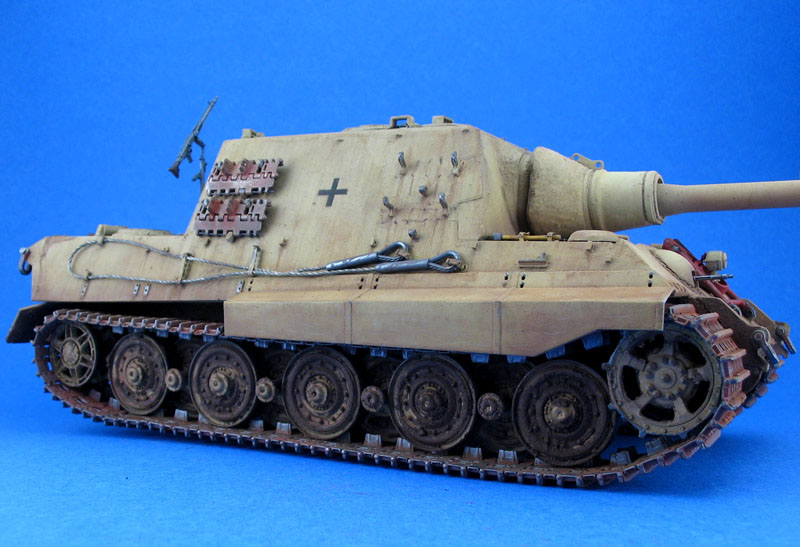
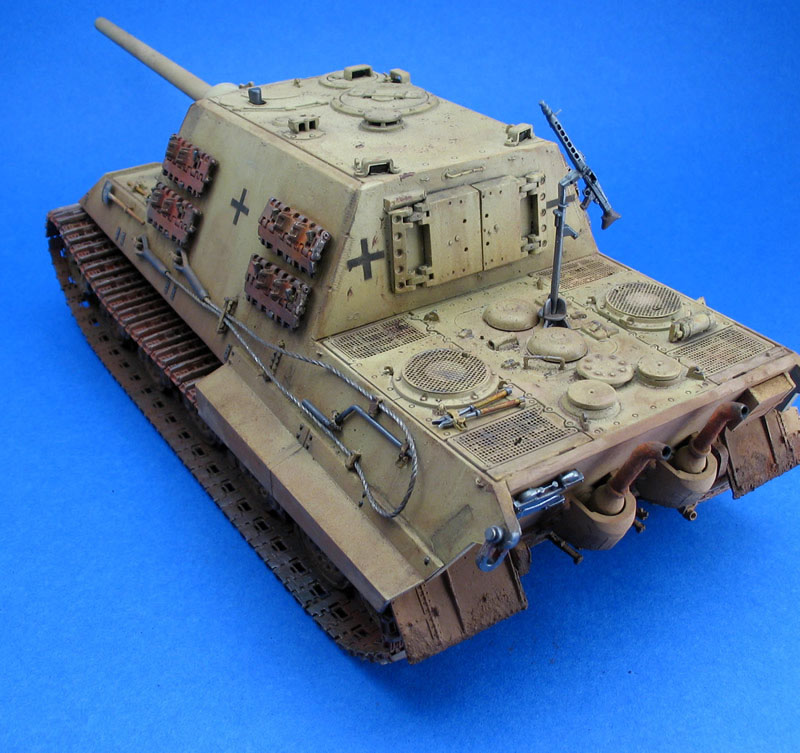
To my surprise, this was one of the quickest parts of the build relative to its size and complexity. The interior and the gun mount took minutes (unpainted as they are invisible). I do wish that both Tamiya and Dragon would change the injection point for the torsion bars its very difficult to sand them without removing detail. Having the injection point on the inside end of the part would be great (and invisible). The fit of the front and rear upper hull panels was good, requiring little or no filling. All hatches were fixed in the closed position, and a weld seam was added to the MG housing, and small amounts of putty filling mounting points on lifting hooks. I did have to replace several of the grab handles with brass, as removing them from the sprue destroyed about half, (the injection point is way too thick). Time taken: 98 minutesIndividual items such as the MG42, periscopes, pioneer tools etc.
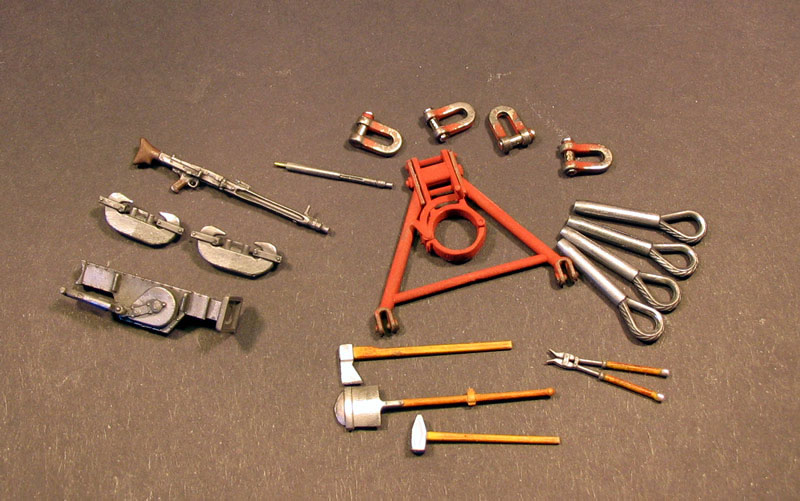
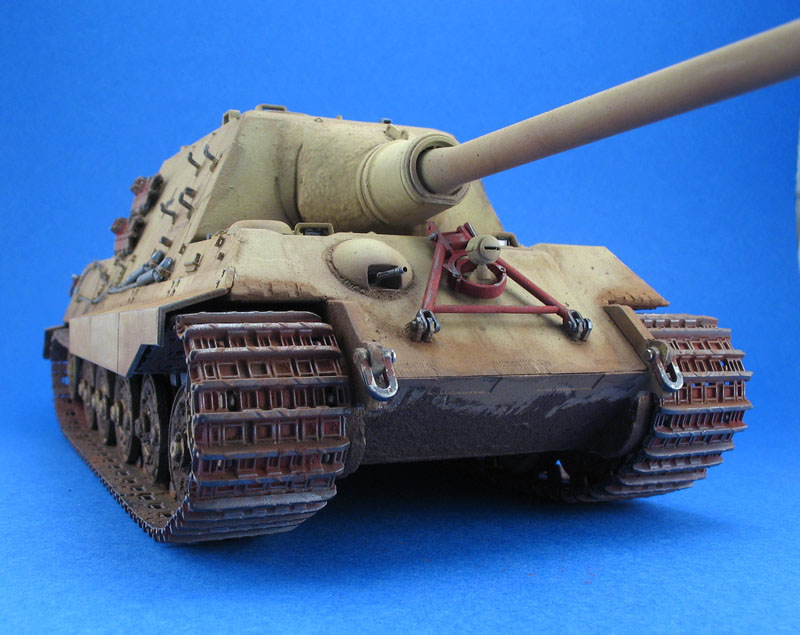
These are all the bits that normally get attached after the model has been painted. All of the larger steel items were given a coating of red primer, then painted with MrMetal (iron) and polished. Where required a thin black wash was applied to certain items such as the MG42. Periscopes were painted silver and flat black where required. A ModelPoint brass MG barrel, and spare Eduard cleaning rod clamps replaced kit parts. The spare tracks are previously built and weathered Friuls from the spares box. Time taken 83 minutes.Tracks
I have detailed a quick way to make these tracks elsewhere in the forums. Pin marks were removed from all visible points on the external sides of the links. I did spray them with MrMetal (iron) and polish certain raised areas BEFORE I set their position on the wheels, as I felt they might be too fragile afterwards to apply polishing pressure. Each side was made in four main sections: bottom, top (curving up to the top of the drive sprocket), and two curved areas glued around the sprocket and idler. The sprocket and idlers were never glued into place (even on the finished tank) as this allows for the fitting of individual links to join the main sections. Pigment (Iron oxide pottery glaze - £1.50 for 500g) was applied to all main track sections before gluing them into place. This was then toned by Migs European Dust (*Note: Weathering in the form of mud was applied to the inside of the sponsons and areas of the already painted lower hull before the tracks were glued on). Once the whole track was in place, pigment was applied to those links still needing it. Time taken: 255 mins.Painting
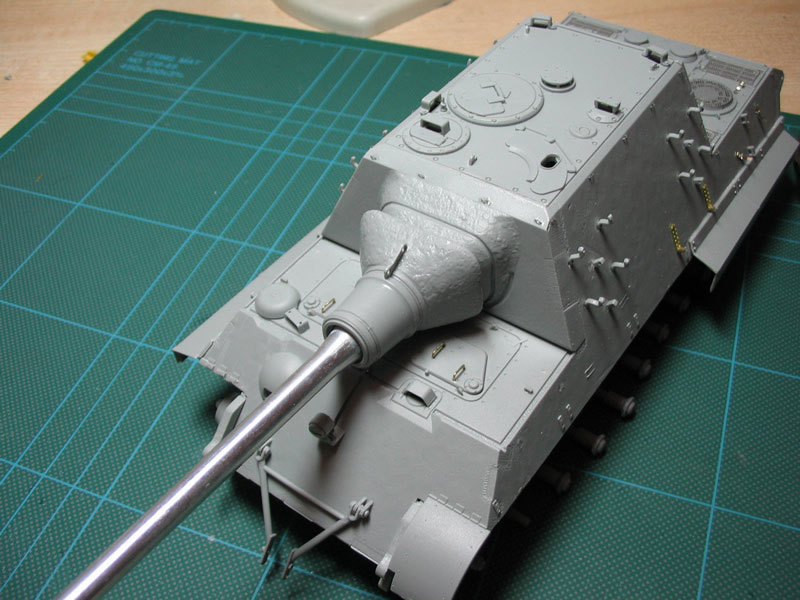
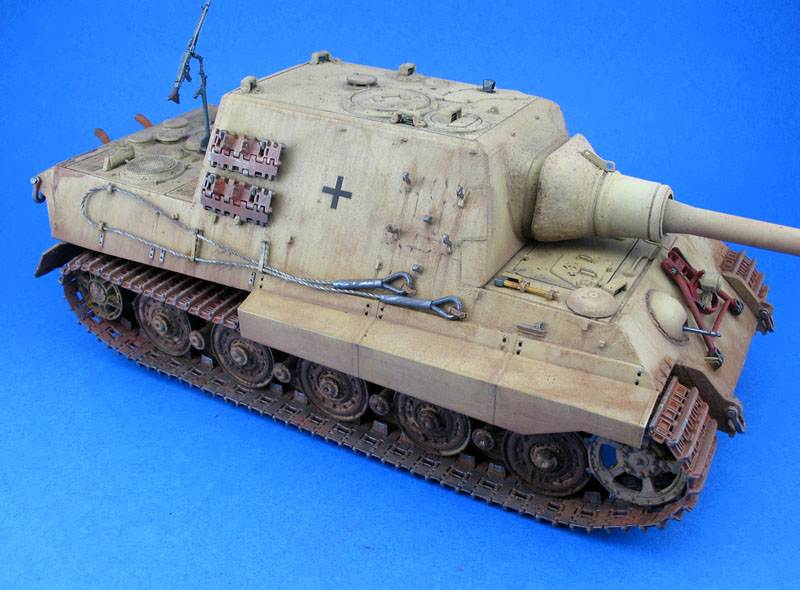
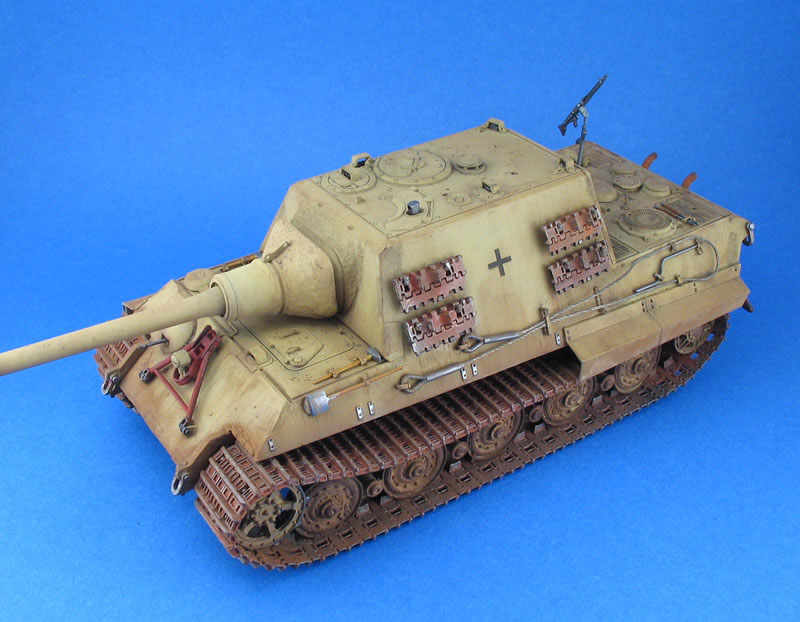
I was not worried about the historical accuracy of this vehicle, but wanted to see what I could do to a single colour scheme to make it interesting. As far as I know the only vehicles in this scheme were training vehicles. The markings depict those of a vehicle hastily prepared for combat, with the unit makings painted over and only badly applied Balkenkruz showing. Primer used is Photoetch Primer (Grey) as I find this has the finest finish. The upper and lower hulls were painted with Lifecolors Dunkelgelb (see review). Using the other colours in the Lifecolor German WW2 Armour set, I added subtle highlights, lowlights, patches and squiggles to break up the original base colour. Lower areas of the upper hull were given graduated darker shades to represent a build up of dirt/dust. Balkenkruz were sprayed on via a stencil. The whole lot was then flat coated with future. Time taken: 97 minutes.Weathering
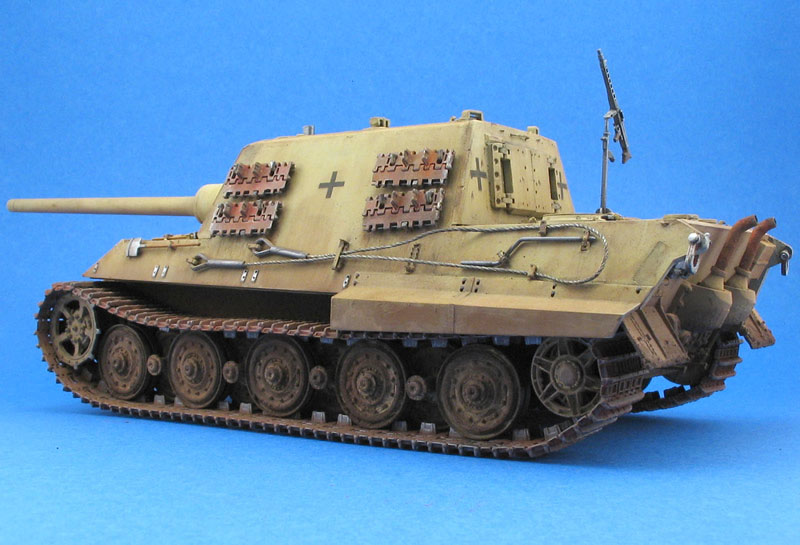
Here I made a major decision I would not use a pin wash on joins, seams, crevices etc as I am still not confident of doing this without ruining the model. Instead I wanted a vehicle that been very dusty and seen a lot of rain, thus filling these areas with dust and dirt. This was done with a wash of Migs European Dust pigment and water. Varying strengths of wash were applied simply by picking up more or less pigment with the water. In this way I was able to build up streaks, pools and runoffs to get the desired effect. Mud was made from Vallejo Sandy Paste with the same pigment added. This stuff is amazing a gritty paste that can be shaped, stippled, applied in any form you wish, dries in 30min to a concrete hard finish, and takes all paints and pigments, either mixed or afterwards. Time spent: 165 mins.Photography/Editing
For me this is just as important as the build itself, bad photography means you cannot get accurate criticism of the finished item, so I always try to do the best I can. Done with a CanonA85, photocube and 3x150w lamps. Editing done with Fireworks. Time spent 56 mins. Total build time: 15 hours 40 minutesConclusion
Without spending tons of money its possible to make a great build using a basic kit and some odds and ends from the spares box. Not worrying about accuracy and research was really liberating, because I just did not care if the lower bolt on the thingamajig was 5/8ths to left etc all that was important was the end result looking good.Throughout the build I had a great sense of fun because I knew I would get a result in a short space of time. I will leave it to my peers to judge how good it is. I also learned some very valuable lessons which I will use in future builds: Planning is everything you can never do enough! Magic tracks are cool but Friuls rock half the time and a tenth of the hassle. Spending more time on painting and weathering pays dividends. Having fun whilst building is very important I will certainly be building this way again!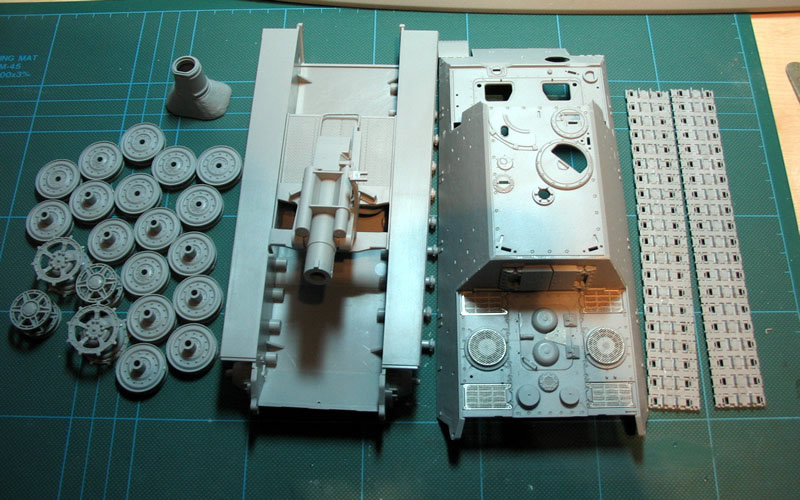


About the Author


FROM: ENGLAND - EAST MIDLANDS, UNITED KINGDOM
Spent time in specialised sales to militay, non-destructive testing, risk engineering, engineering underwriting surveys on mines and mineral processing plants. Modelling from Airfix days, I took a 25yr break and came back to the hobby 18month ago. Currently working on a Sturmtiger with fully detaile...
Comments

Doh! Well spotted on the handle - I'll fix that. Not sure about the barrel though. The new metal barrel in the premium kit is supposed to have been corrected
MAY 28, 2006 - 11:42 AM

Doh! Well spotted on the handle - I'll fix that. Not sure about the barrel though. The new metal barrel in the premium kit is supposed to have been corrected[/quote]
Hi Brian,
There is actually nothing wrong with the barrel length per se -- it just lacks 3-4 mm in the tapered area. BTW, its the same length as the platic barrel with other Jagdtigers.
The problem with DML is that they measured the barrel in a recoiled position...meaning its is 3-4mm in the saukof. It could be corrected w/out actually damaging the kit...see here if you are interested...
Jagdtiger barrel
Considering that you've got a very beautiful build, I think the barrel lenght would not matter anymore...can just be used as reference incase you want to build another Jagdtiger in the future...
Cheers
MAY 29, 2006 - 07:46 AM

Brian your build is Beautiful and in the end does it really mater if the barrell is 3-4mm too short?
You enjoyed it and turned out a great kit.
NUFF SAID & ALL THAT REALLY MATTERS.
MAY 29, 2006 - 07:57 AM
Hi Arvin
I went with FRank De Sistos and Terry Ashleys reviews of this kit where they say that the barrel length has been corrected. I just assumed he was right and did not measure it myself. Perhaps dragon have changed the mounting for the barrel so that it extends a bit further? It does seem odd that Dragon did not correct it for this kit. But you are right, it does not really matter to me as I'm happy with the final build, and this was not a research based project. Next time I will be more careful
Brian
MAY 29, 2006 - 12:28 PM

Nice job! Fast too! I have a question, is the Gunze Iron the Burnt Iron H76? Did you undercoat this besides the red oxide?
Cheers
MAY 29, 2006 - 10:30 PM
Thanks John - appreciate the praise. The Mr Hobby Metal colours are a range of 9 metallic paints that can be polished after application. They are not Gunze colours but a separate range made by Gunze - hope this helps
MAY 29, 2006 - 11:04 PM

Thanks Brian. Is the system similar to the Alcad polishable paints? IE you have to base coat them in gloss black to work?
MAY 30, 2006 - 04:50 PM
Nope:
Shake bottle
Apply paint
Poilsh after 2 min - varying the pressure and amount of time that you polish will vary the intensity of the metallic look
Job done
The nice thing about the Iron colour is that you can make it look like various metal types, from gunmetal to steel, depending on how you polish it.
MAY 30, 2006 - 06:46 PM

Copyright ©2021 by Brian Balkwill. Images and/or videos also by copyright holder unless otherwise noted. The views and opinions expressed herein are solely the views and opinions of the authors and/or contributors to this Web site and do not necessarily represent the views and/or opinions of Armorama, KitMaker Network, or Silver Star Enterrpises. All rights reserved. Originally published on: 2006-05-27 00:00:00. Unique Reads: 11526

WEB HOSTING BY


Copyright ©2021 Armorama and Kitmaker Network, a subsidiary of Silver Star Enterprises
All Rights Reserved. Please read our Conditions of Use and Privacy Policy.
All Rights Reserved. Please read our Conditions of Use and Privacy Policy.