_GOTOBOTTOM
Armor/AFV: R/C Armor
Discuss all Remote Control Armor related topics here.
Hosted by Darren Baker
Hello and a question
Calamity_Jane
Joined: June 17, 2007
KitMaker: 30 posts
Armorama: 28 posts
Posted: Sunday, June 17, 2007 - 06:08 AM UTC
Hello all,
I will take this opportunity to say Hi. I have been modelling in large scale RC for several years and covered kit and full scratch building of yachts, warships and terrestrials.
We used to give 'shows' at a park near London, England, with the boats and armour, this being the Tamiya range and included the Tigers I and II and the Leopard. There is also a Knight Hauler and box semi-trailer.
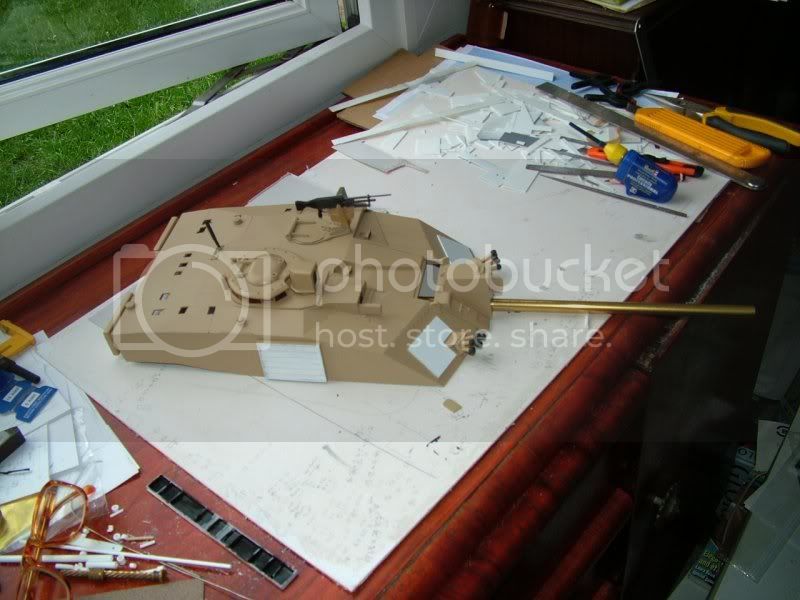
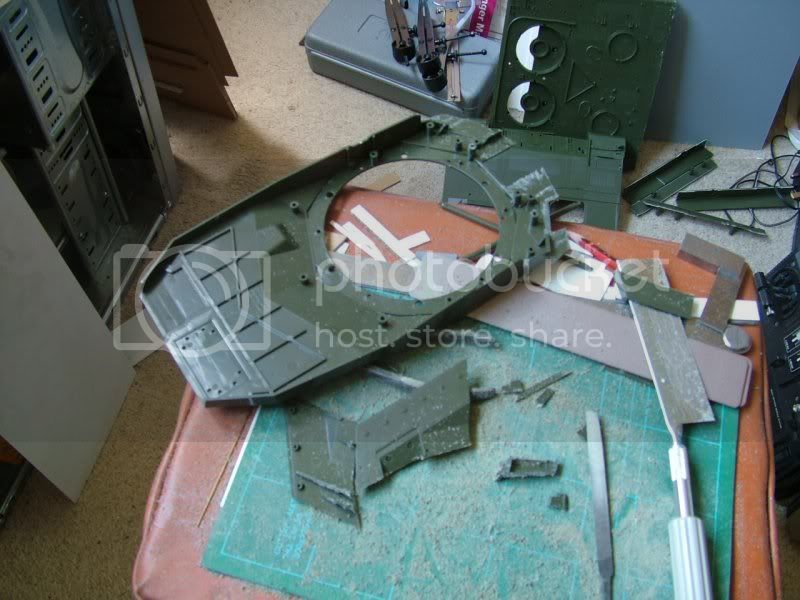
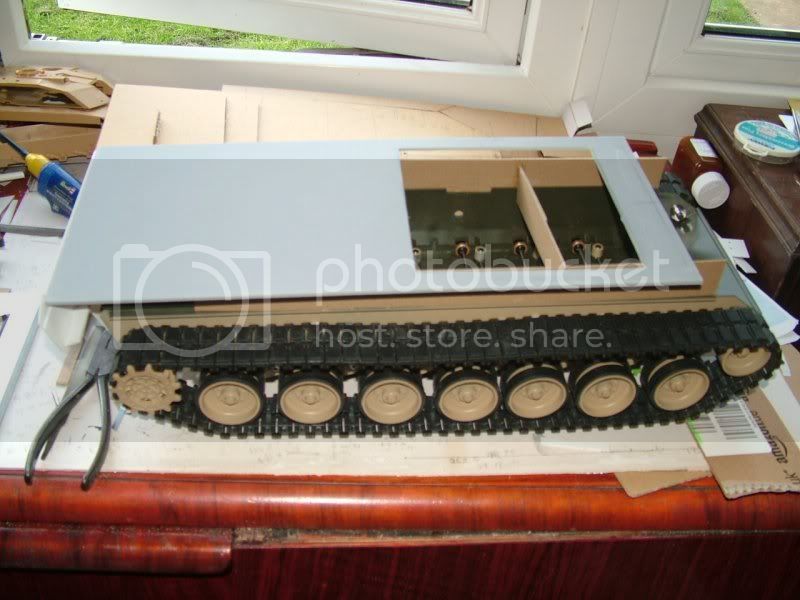
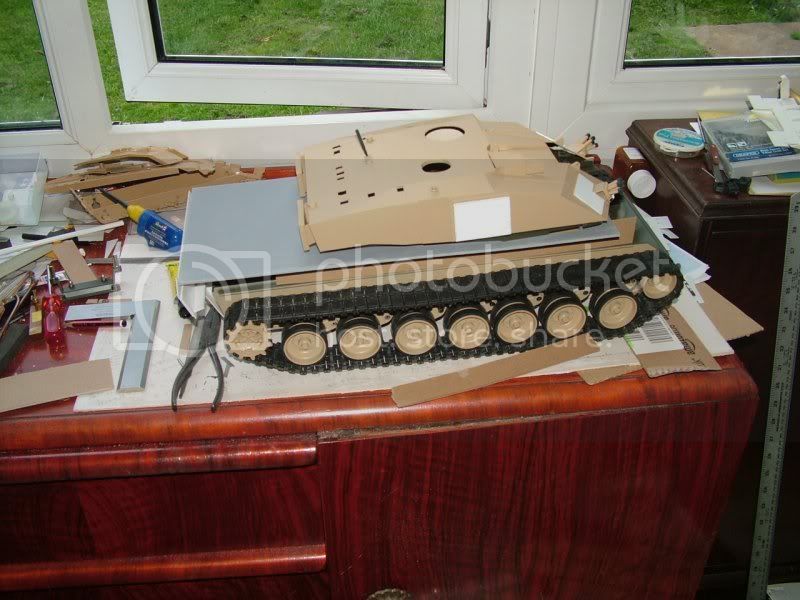
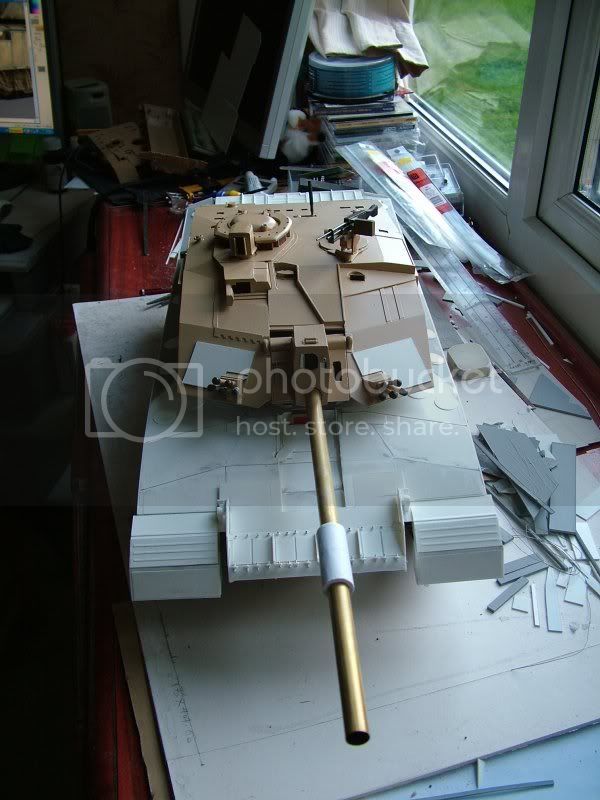
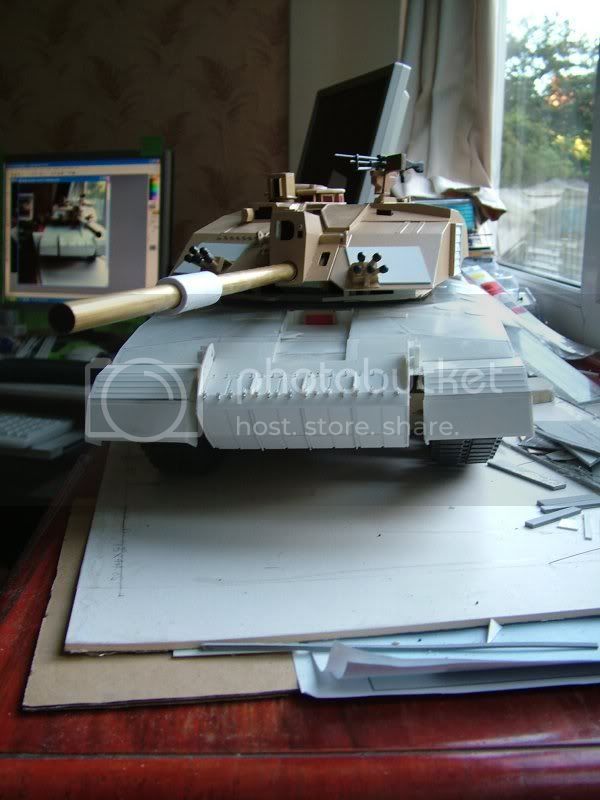
At present I am trying to scratch build a Challenger II, the British MBT and have now almost completed the turret.
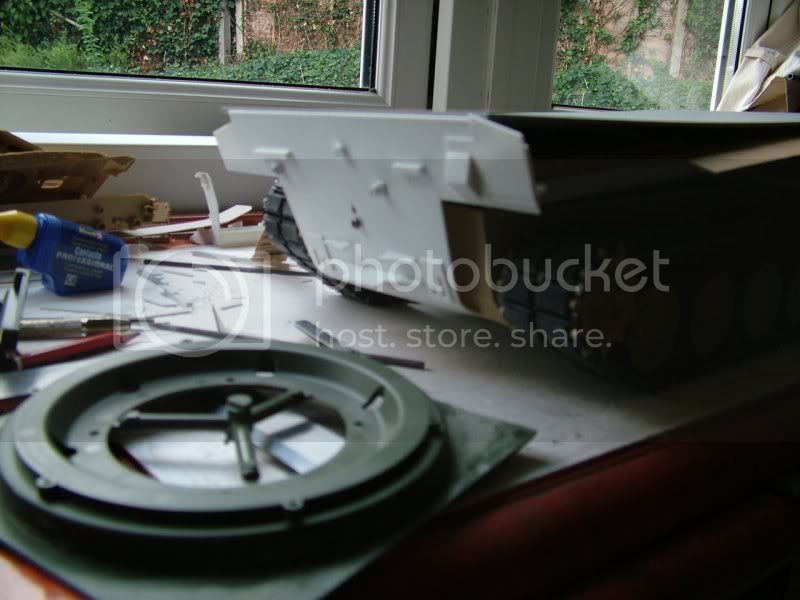
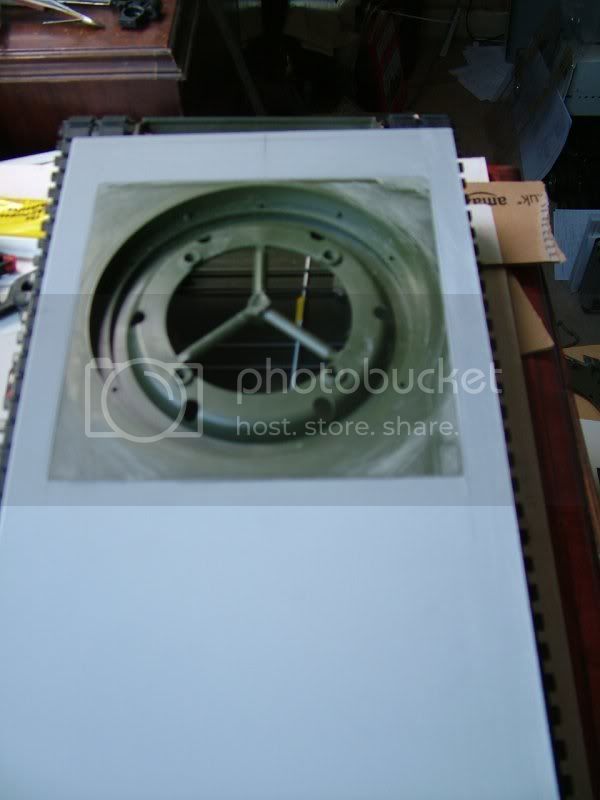
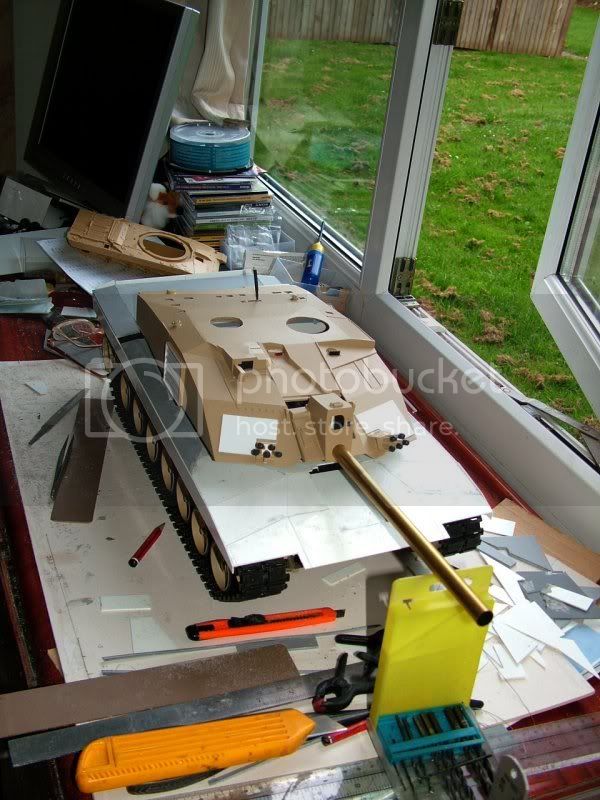
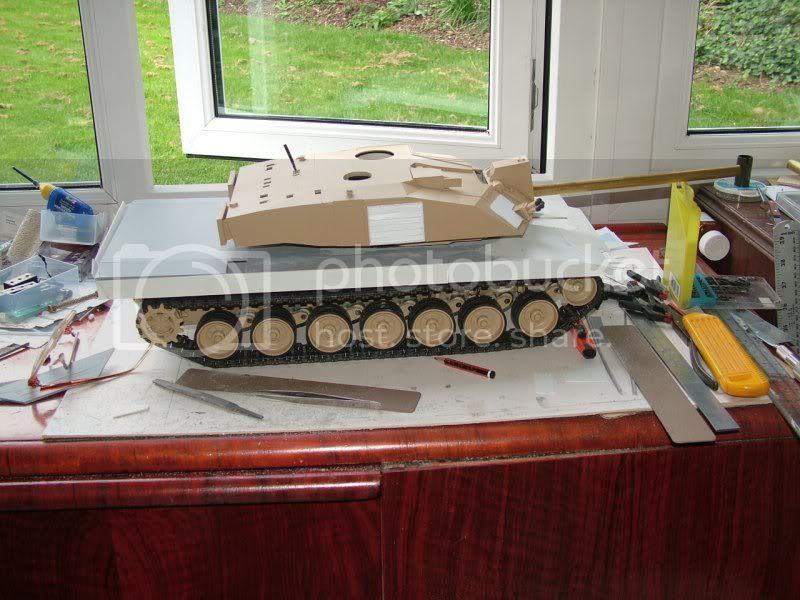
Here are 3 shots of the model....


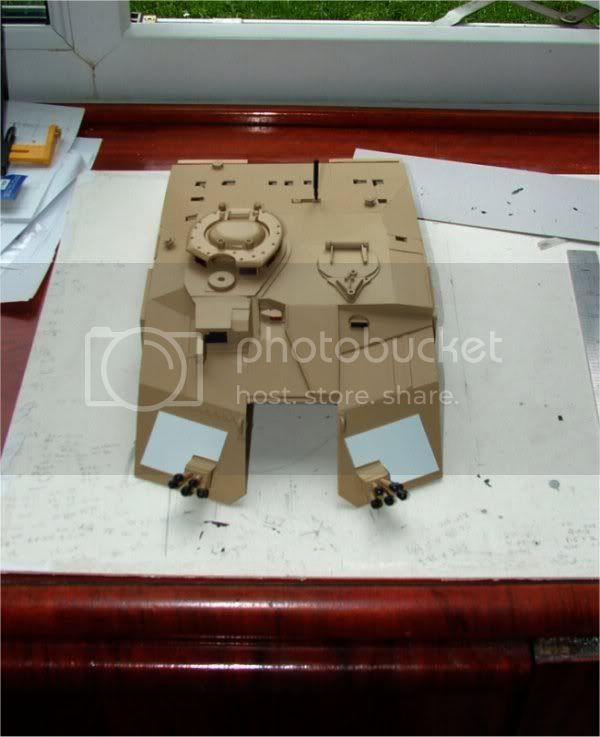
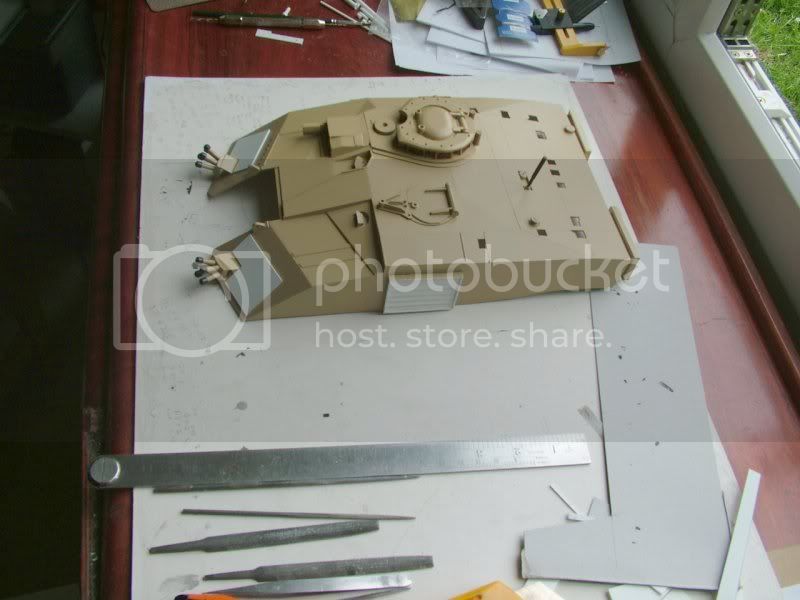
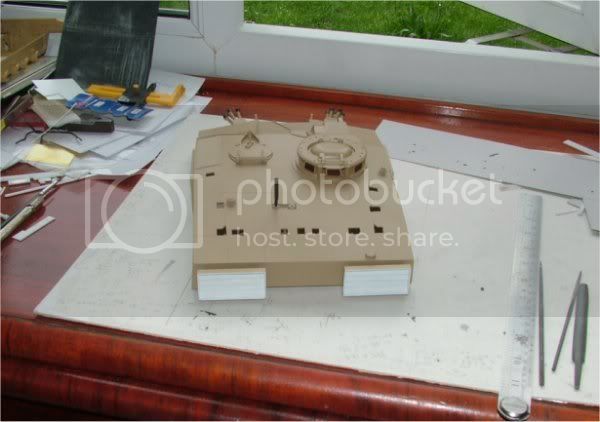
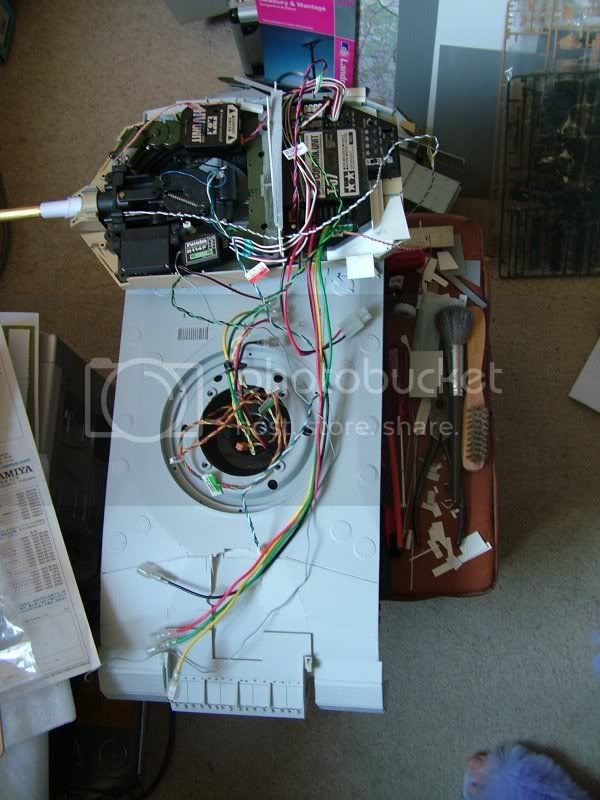
You will notice from the stern shot that there are quite a lot of 'holes'. As I have been scaling up a Tamiya Challenger II in 1/35 I copied all these onto the 1/16 model, but, and here is my question, as these vehicles are, I assume. biologically sealed when shut down, these are obviously not going to be just holes. What is underneath/inside?

Many thanks for letting me join your foum. I am on quite a few but this is the first that has offered a large scale RC section, so this is a bonus.

Me? I am retired, spent 12 years in the WRNS, live near Heathrow airport, London, England.

Calamity Jane aka Angela
Drader
Visit this Community
Wales, United Kingdom
Joined: July 20, 2004
KitMaker: 3,791 posts
Armorama: 2,798 posts
Posted: Sunday, June 17, 2007 - 07:51 PM UTC
Hello Angela

Have a look at the pictures on Prime Portal, like this one


to see what's in the holes. The 'holes' are actually outside the turret shell and are part of the fittings for the external stowage bins (I think)

Looking forward to seeing more of your model

David
Calamity_Jane
Joined: June 17, 2007
KitMaker: 30 posts
Armorama: 28 posts
Posted: Sunday, June 17, 2007 - 09:40 PM UTC
Hi David,
Thanks for your reply. The piccy isn't showing...??? not for me anyway.

I'll Google search for that site very soon.

Cheers.

Calamity Jane

EDIT :- Came out and returned and that picture shows now.... odd! I can see what is happening now. As I am working from a Tamiya 1/35 plastic model and scaling up I wasn't aware that there are external plates over an inner shell, which is what it looks like. I will need to put something under those holes, a piece of plasticard painted black with a slight gap away from the top to make it look better. Don't think I can do the hook eyes though....

Cheers.

Calam.
Drader
Visit this Community
Wales, United Kingdom
Joined: July 20, 2004
KitMaker: 3,791 posts
Armorama: 2,798 posts
Posted: Sunday, June 17, 2007 - 09:43 PM UTC

Quoted Text

Hi David,
Thanks for your reply. The piccy isn't showing...??? not for me anyway.

I'll Google search for that site very soon.

Cheers.

Calamity Jane


This should save you some time

http://www.primeportal.net/tanks/challenger2.htm

David
Grumpyoldman
Staff MemberConsigliere
KITMAKER NETWORK
Visit this Community
Florida, United States
Joined: October 17, 2003
KitMaker: 15,338 posts
Armorama: 7,297 posts
Posted: Sunday, June 17, 2007 - 11:25 PM UTC
Welcome Aboard Angela,
Looking forward to seeing this project when it's done.
Hope you continue to post progress photos.
Calamity_Jane
Joined: June 17, 2007
KitMaker: 30 posts
Armorama: 28 posts
Posted: Monday, June 18, 2007 - 03:16 AM UTC
David,
That's brilliant, I have put it on my Favourites list...

Many thanks.
Calamity_Jane
Joined: June 17, 2007
KitMaker: 30 posts
Armorama: 28 posts
Posted: Monday, June 18, 2007 - 03:18 AM UTC
Hi Dave (grumpyoldman),

Thanks for thee welcome, appreciated.

I notice your 'rank' is a naval one.... I was a Second Officer WRNS for 12 years, so love the navy.

I could not find a way of uploading my avatar picture on this forum....

Calam
Grumpyoldman
Staff MemberConsigliere
KITMAKER NETWORK
Visit this Community
Florida, United States
Joined: October 17, 2003
KitMaker: 15,338 posts
Armorama: 7,297 posts
Posted: Monday, June 18, 2007 - 09:33 AM UTC
I was also in the Navy, I believe in the RN, I would have had the rating of stoker.

No uploading personal avatars, but Miss Piggy is fine as she was one of my favorites in my wayward youth.
Calamity_Jane
Joined: June 17, 2007
KitMaker: 30 posts
Armorama: 28 posts
Posted: Tuesday, June 19, 2007 - 09:57 PM UTC
Almost there.......


Well, the turret anyway!

Calam.
Calamity_Jane
Joined: June 17, 2007
KitMaker: 30 posts
Armorama: 28 posts
Posted: Wednesday, June 20, 2007 - 02:06 AM UTC
I have bitten the bullet and ordered the Leopard kit for the Challenger innards.
Having checked the turret rings go in exactly the same place in the hull (talk about luck!) and the turret base angles up the same as well (lucky twice!). The gun elevation point is about right too, give or take a millimetre here and there.....
So fingers, eyes and legs crossed it works out okay.

Calamity
NebLWeffah
Visit this Community
Alberta, Canada
Joined: October 13, 2004
KitMaker: 1,683 posts
Armorama: 1,248 posts
Posted: Wednesday, June 20, 2007 - 02:36 AM UTC
Hi Angela - welcome to Armorama and it's a pleasure to see your project so far. Please post some pics as you build it so we can all see your progress.

Again, welcome....

Bob
Calamity_Jane
Joined: June 17, 2007
KitMaker: 30 posts
Armorama: 28 posts
Posted: Wednesday, June 20, 2007 - 02:49 AM UTC
Hi 2 and a half Bob,

(Reference the the RN slang for a Lieutenant Commnader).

Certainly will, no probs.... I am working out the best way to make all those grills at the stern of the main deck.... possibly on paper card patterns of some sort. Plenty of slats!
Can't do much until the Leopard kit arrives when I can work out how the main deck will sit on the chassis.

Calamity
Calamity_Jane
Joined: June 17, 2007
KitMaker: 30 posts
Armorama: 28 posts
Posted: Thursday, July 12, 2007 - 07:12 AM UTC
Here are a few shots of progress. I finally plucked up the courage to chop the £600 model about, but I think it's working out okay. It's about 10mm over-length, but I'll live with that.

The new rear end bolted in place


inside the chassis


The hacked out Leopard turret base sitting in my main deck base


What, ruining a perfectly good kit!


Testing the deck height


Turret sitting on the cut-about Leopard turret base


Still,plenty to do yet.

Calamity Jane aka Angela
Grumpyoldman
Staff MemberConsigliere
KITMAKER NETWORK
Visit this Community
Florida, United States
Joined: October 17, 2003
KitMaker: 15,338 posts
Armorama: 7,297 posts
Posted: Thursday, July 12, 2007 - 07:57 AM UTC
Shaping up nicely.
And----- you can now upload your own Avatar.
Calamity_Jane
Joined: June 17, 2007
KitMaker: 30 posts
Armorama: 28 posts
Posted: Friday, July 13, 2007 - 08:28 PM UTC
Hi Grumpyoldman,

Thanks.... yep, it's starting to look more like a dust cart - ooops, I mean tank now.
The main deck is now on and supported - took me a whole day to work that out and several false starts. But it causes the Tamiya sound bow to lift the deck when that's in. It looks like some more surgery on that too and I have a sneaky feeling it will chance the sound balance.
The turret rotation ring is also sitting correctly now and the turret does swing. It's tight on clearance above the engine vents, but then most MBT's are, so that's okay.
Today I am starting the front armour panels, soooo many angles you'd never believe, so they will take a while to sort out. They will be worked out on a cardboard pattern first.
Once this is done and the Leopard rotation ring base is set in stone to my deck (God knows how, but I'll sort something out!) I will be able to look at more detailing.
The gun barrel is going to be a problem, all those flutes will take some doing.... and I haven't actually mounted that in the Tamiya mechanism yet. That will mean chopping part off the bottom of the 2 stands to lower it enough - and I just hope it won't foul anything inside the turret when on high elevation.
I had thought about using the Leopard gun because the Army are testing that weapon right at this time in the Challenger II, but until it's accepted then I suppose the rifled L55 will be the way to go.

I'll keep you posted.

Calamity
Calamity_Jane
Joined: June 17, 2007
KitMaker: 30 posts
Armorama: 28 posts
Posted: Monday, July 16, 2007 - 07:09 AM UTC
A few more shots....

The hacked about Tamiya Leopard turret base,


A front angled shot,


and one from the side,


Cannot get the gun any lower else the inner end of the gun unit hits the turret ring when the gun elevates. There is a gap beneath the turret outer shell and the Tamiya inner base because I am also unable to lower it due to the gun position and two swivels.... so compromises have to be made.
Still plenty to do and I have to admit that I will be glad to get past this heavy duty structural part....

Calamity
Calamity_Jane
Joined: June 17, 2007
KitMaker: 30 posts
Armorama: 28 posts
Posted: Tuesday, July 24, 2007 - 07:19 AM UTC
Hot news....

Chally from high,


and low


Calamity
Calamity_Jane
Joined: June 17, 2007
KitMaker: 30 posts
Armorama: 28 posts
Posted: Friday, August 03, 2007 - 06:44 AM UTC
An update....

Got the electronics in and they worked first time...... woweeee.

Snag is the Futaba Skysport's stick don't work as they should, for instance the drive/turn are on the right and pushing the stick forward gets tracks going in opposite directions, so it's turning. The left stick works the turret rotation and gun elevation - which is wrong again. Guns fore though and the recoil works even though I hacked the Leopard's turret base about.

Strange, because I went through the setting up process before connecting all the other wires...

So I will simply get another Futaba SS and set it up speciafficaly for this MTB by moving the inputs inside, problems solved. None in at my local, not until Monday anyway, earliest, due to the postal strike.

Anyway, I have plenty to do, altering the rear plate into 2 parts so the lights can be fixed to the deck. I had hoped to replace that awful fibre optics stuff with bulbs but the ones I have dim the light unit's back bulbs. So changing the rear will allow me to setup the FO below the deck and they'll all be integral. Using parts of the kit and scratch building other bits for the rear light clusters.

Have chopped the Leopard's front headlights about to resemble the Chally's, just a matter of mounting them over the front mudguards. Yes, I know, they were between the guards on most, but with reactive armour some were moved out, I have pictures....

Then I have to make the grab handles, lots of 'em.... need some brass rod for that and they seel that at the Skysport shop... then knock up a pattern.

So once I have this done the deck can go on.... and them some more piccies for you.

All louvres are done too, what a job that was....

Calam.
Calamity_Jane
Joined: June 17, 2007
KitMaker: 30 posts
Armorama: 28 posts
Posted: Sunday, August 05, 2007 - 08:38 PM UTC
A couple more pix.....

The wiring to date, looks like a bird's nest...


and the side armour parts awaiting completion and some grab handles along the top of the outer sections, the heavier parts. Getting the brass rod for that today - I hope....


Calaimity
Calamity_Jane
Joined: June 17, 2007
KitMaker: 30 posts
Armorama: 28 posts
Posted: Saturday, August 18, 2007 - 09:43 PM UTC
Another question........

Has anybody had these problems with a Tamiya DMD :-

not setting up on several TX sets causing stick functions on wrong sticks

Motor cables connected properly but controls not working, just a whirring noise

I have experienced all these when trying to get the DMD to run. The only way round the problem (after buying a Skysport 4 and not being able to use it, grrrrr) was to buy a Futaba F14. This radio has plug-in stick wiring so stick controls can be changed within the radio TX. This sorted all mut the motor problem. The wire connection were correct, so my only option was to experiment and this eventually found a setup that worked the tank.

I have a sneaking suspicion the DMD is faulty, hence my question.

Calamity
 _GOTOTOP