


 . I am building the kit OOTB for the most part, with just a couple of small modifications to more accurately depict the Spanish Centauro, or just to personalize it a little. Hopefully this will give anyone interested an idea of how the kit goes together. This blog thing is new for me as well, I'm not used to taking pics along the way. If I don't touch on something you would like to know more about please ask and I'll try my best to answer any questions.
I actually began work on the lower hull while writing the review, and as I mentioned in the review I glued the lower and upper hull together very early on (the instructions wouldn't have you do it 'til step 16). Basically I glued the hull parts in step 1. This makes adding the suspension, fitting the rear hull plate, and adding all the small details on the upper hull much easier. Be sure if you go this route to open up all the holes from the inside you are supposed to before gluing the parts together. Everything went together very well, the only problem area is the rear hull plate. The fit is a little awkward, and I had to file away a little of the inside hull walls to get a better fit. It's still not perfect as I had to use just a little filler on the right rear, but unless you are looking for it the filler is pretty hard to detect with the naked eye.
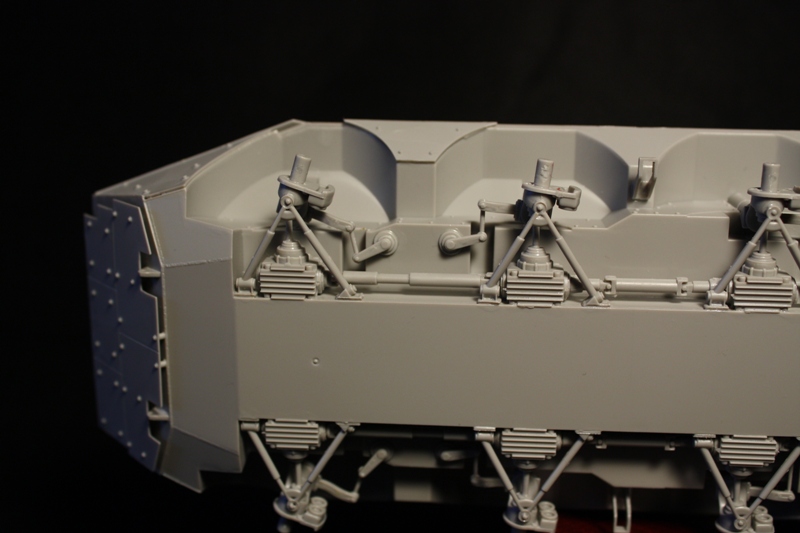
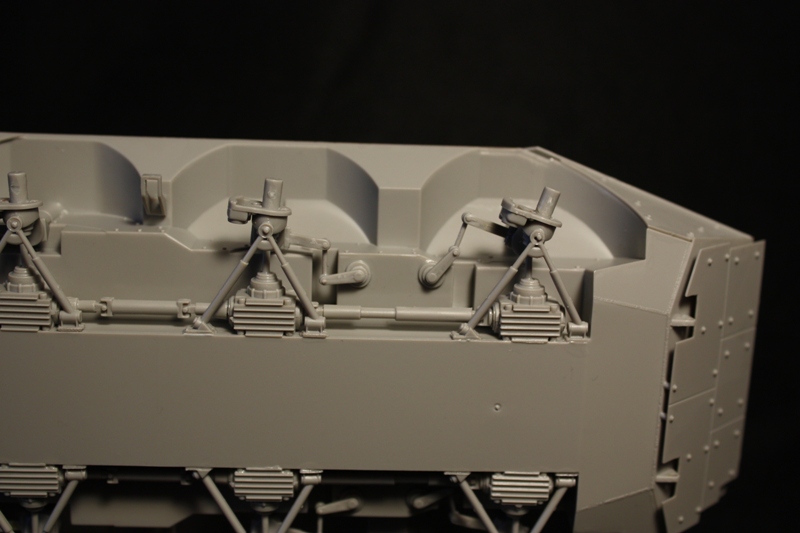
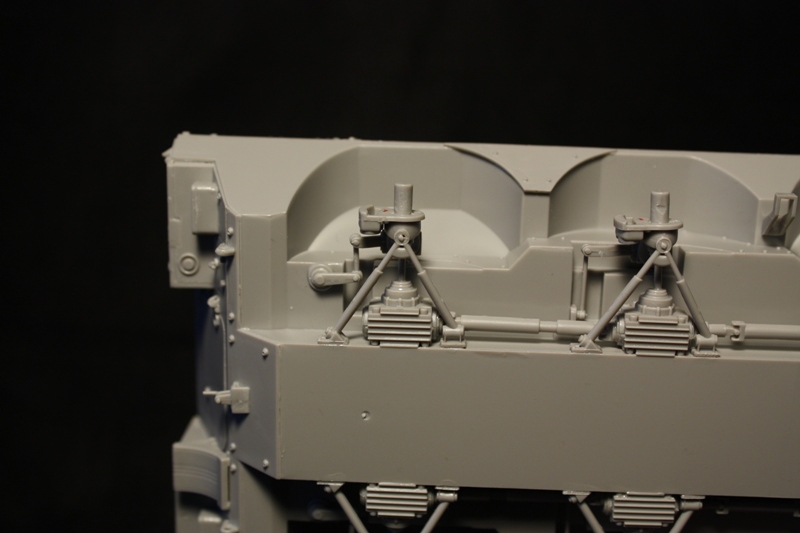
I decided to add a little "life" to the kit by having my Centauro making a turn. At low speeds the driver can also engage the rear axle if needed to make a sharper turn, but I chose to just go with the front two. This is really quite easy to do, all that is needed is to drill out the half circle holes that the wheel supports (parts A27 & A45) fit in, just enough to turn them the required distance. All the connecting rods stay the same length so you will also need to reposition parts A12 & A13. (thanks to Brian Murdoch for the help in this area) Whether you choose to build the kit without repositioning the wheels or not I would suggest you add the wishbone struts (parts A41 & A42) at the same time as the wheel supports. It makes getting them in the correct position much easier. Also as mentioned in the review when building the wheel supports build three of each as the instructions tell you and one of each with the brake calipers (A43) reversed (turned 180 degrees), this way all the brake calipers will face the same way. I didn't measure the wheels when positioning them, I just eyeballed the supports so they may be off just a little, but they look good to me. I said this in the review but it bears repeating, many of the parts for the suspension are very similiar but they only go in one place or on one side, be sure you follow the instructions closely here. Anyway on to the first set of pics.
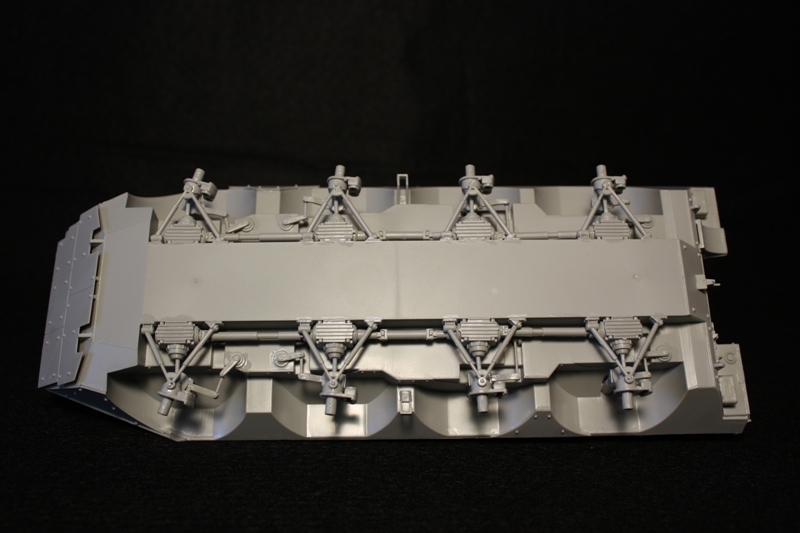
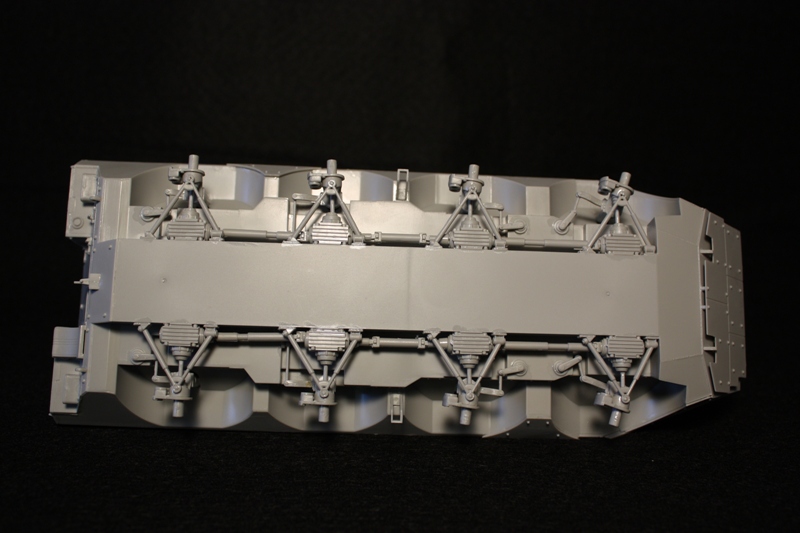
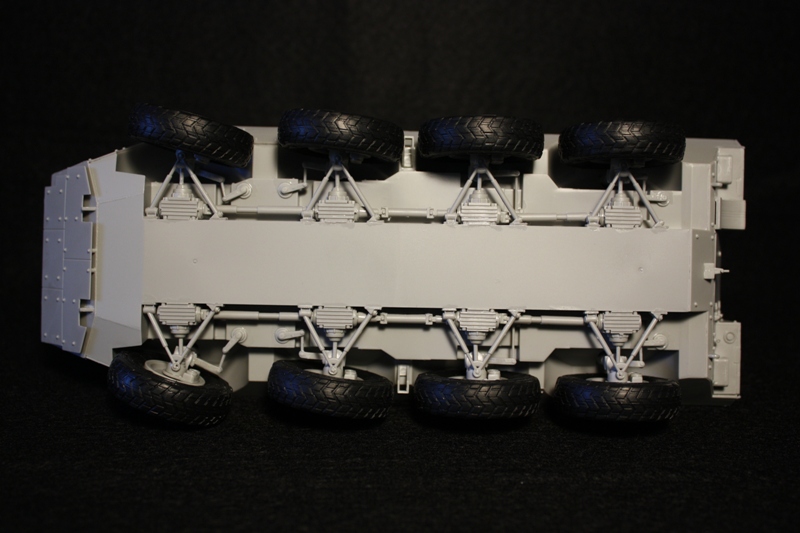
A couple of overall shots of the lower hull:
Some close-ups of the mods I made to the front suspension:
rear close-up:
With the tires on:
More to follow shortly.
Mike


