_GOTOBOTTOM
Armor/AFV: Allied - WWII
Armor and ground forces of the Allied forces during World War II.
Hosted by Darren Baker
Building Tamiya's M8 HMC
Tarok
Visit this Community
Victoria, Australia
Joined: July 28, 2004
KitMaker: 10,889 posts
Armorama: 3,245 posts
Posted: Monday, January 12, 2009 - 11:17 AM UTC
I have always liked the stubby look of the M8 Howitzer Motor Carriage (HMC). Well ever since a friend sent me the 1980's era Tamiya 1/35 scale kit of the vehicle. I must confess prior to that, I suppose mostly to my extremely limited vehicle knowledge, I had never heard of this self-propelled artillery piece. Even more so since my WWII focus is normally that of Germany.

Looking for an easy Christmas holiday build, I decided to pull this kit out and give it a go. And so, I started the build with what I call the 'project initiation phase'. This is a pre-build period during which I look for reviews, blogs and build articles of the kit, and even just photos of the completed model. I do not restrict myself to only the aforementioned articles about the kit, but also look for similar articles about other kits of the vehicle, and maybe even different variants of the vehicle. During this phase I also conduct some minor research on the real vehicle. At the end of this phase I decide, based on the amount of effort required to put the kit together to a level which I find acceptable (I do not consider myself a 'rivet counter', unless we are talking figures, so I am generally not bothered if a hull is 1mm out or the kit not 100% accurate, but I do like the kit to look good and be reasonably accurate), and if I still want to go ahead and build the kit. I quite obviously decided to go ahead with this project.

During my preliminary research phase I came across a great article about building the kit on PMMS by Terry Ashley. This article would later become one of my main references in building the kit. In reading Terry's article I noted that Eduard had released a photo-etch (PE) set for this kit and also that the tracks were particularly dreadful, but that AFV Club had released an excellent track set which would work for the kit.

Now something I also like to do with each model is to set some personal goals. These goals might be something small like trying a new painting technique or something large, such as in this case. It has been a few years since I tried using PE, so I was really keen to try it again. Unfortunately Eduard has discontinued the PE set Terry used during his build. They have, however, released two new kits to replace it. An exterior and an interior kit. What the heck I though, in for a penny, in for a pound. And so promptly ordered both kits from LuckyModel. Something else I wanted to try was individual link tracks, and so was pleased to find the AFV Club track set at one of my local hobby stores.

Unfortunately the PE sets did not arrive until the first week of January, a few days prior to my vacation ending and thus the delay in the build actually beginning. So much for a Christmas holiday build! LOL! That said, my thanks to the staff at LuckyModel for kindly splitting my order and sending the PE sets ahead of the other items on the order.


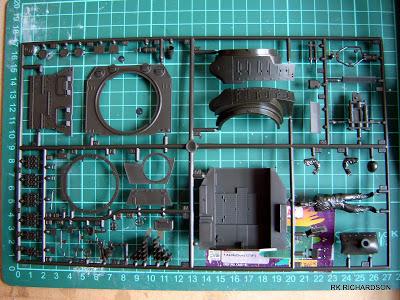
Above are the kits to be used in this build: Tamiya 35110 1/35 M8 Howitzer Motor Carriage; AFV Club T16 Track; Eduard 35509 M8 HMC Exterior Kit; Eduard 35530 M8 HMC Interior Kit.

My approach to this build

Perhaps a quick word on my approach to this build is in order. While I have been modelling for years, I have not built an AFV in about 3 years. I do by no means consider myself an accomplished modeller, especially not an accomplished AFV modeller. And so this step-by-step (SBS) article will be written very much from a beginner point of view for beginners. I will mostly be following the kit instructions, deviating from them occasionally where my (sometimes misguided) logic tells me otherwise. The chapters of this build will follow those of the kit instruction sheet, so some instalments may be larger than others.

I unashamedly confess that I do not now what many of the technical terms are for parts of the vehicle, and apologise in advance if I do not call something by the correct term.

I should also add that I assemble models in sub-assemblies prior to painting. I find this method works best for me. The techniques I use here are techniques I have read both online on various modelling websites and in various modelling magazines, as well as techniques shared by good friends. I use these not necessarily because they are the best or right way to do something, but rather because they are the ways that I find easiest given my level of experience and yield results which I find acceptable.
TacFireGuru
Visit this Community
Colorado, United States
Joined: December 25, 2004
KitMaker: 3,770 posts
Armorama: 2,263 posts
Posted: Monday, January 12, 2009 - 12:02 PM UTC
Rudi,

Looking forward to this build. I have one too and am debating about the tracks and PE. Again, this should be a beneficial pleasure to watch. Thanks!

Mike
Tarok
Visit this Community
Victoria, Australia
Joined: July 28, 2004
KitMaker: 10,889 posts
Armorama: 3,245 posts
Posted: Monday, January 12, 2009 - 12:18 PM UTC
Thanks Mike. Good to have you aboard.

I should warn everyone though that I do build extremely slowly and am a frequent non-finisher
TankCarl
Visit this Community
Rhode Island, United States
Joined: May 10, 2002
KitMaker: 3,581 posts
Armorama: 2,782 posts
Posted: Monday, January 12, 2009 - 12:47 PM UTC
Those tracks will really make a diffference.Any chance of you attempting a Dora next?
Tarok
Visit this Community
Victoria, Australia
Joined: July 28, 2004
KitMaker: 10,889 posts
Armorama: 3,245 posts
Posted: Monday, January 12, 2009 - 01:11 PM UTC

Quoted Text

Any chance of you attempting a Dora next?


Who is Dora?

LOL! Baby steps Carl, I haven't built an AFV in a while
biffa
Visit this Community
Tennessee, United States
Joined: September 07, 2005
KitMaker: 881 posts
Armorama: 826 posts
Posted: Monday, January 12, 2009 - 01:54 PM UTC
Hi Rudi, i built this one last year using one of the same PE sets also AFV tracks only i used the later style ones, i tried a few fixes to try help the old kit along and really enjoyed it im not sure if its any help but heres links to the build and finished model, GL with the project.

Ron.
https://armorama.kitmaker.net/forums/119739#986186


https://armorama.kitmaker.net/forums/120538#992813


Tarok
Visit this Community
Victoria, Australia
Joined: July 28, 2004
KitMaker: 10,889 posts
Armorama: 3,245 posts
Posted: Monday, January 12, 2009 - 02:18 PM UTC

Quoted Text

Hi Rudi, i built this one last year using one of the same PE sets also AFV tracks only i used the later style ones, i tried a few fixes to try help the old kit along and really enjoyed it im not sure if its any help but heres links to the build and finished model, GL with the project.

Ron


Hey Ron,

Thanks for those links, especially your WIP link. I remember reading your build and you've answered many of the questions I had regarding this build

Rudi
BigfootV
Visit this Community
Colorado, United States
Joined: December 24, 2005
KitMaker: 1,624 posts
Armorama: 994 posts
Posted: Monday, January 12, 2009 - 04:36 PM UTC
Rudi,

I build this kit some years back and find that the mating of the upper and lower hull left a gap just under front plate and transmission housing. It's an odd overhang. Probably left over from the hedgerow cutter for the M5A1 kit. Tamiya shared the M5A1 hull with the M8 kit. Easier production I guess, but you knew that.

The second thing I found odd was the .50 mount, it looked oversized, and the .50 itself could stand to be replaced with a better AM. The interior needs some work, a few add-ons, nothing major.

Anyways, Just a heads up. Good little kit overall. Fun build.
c5flies
Visit this Community
California, United States
Joined: October 21, 2007
KitMaker: 3,684 posts
Armorama: 2,938 posts
Posted: Monday, January 12, 2009 - 05:44 PM UTC
Looks like a great set of stuff there, Rudi, should turn into an enjoyable build.
newfish
Visit this Community
England - West Midlands, United Kingdom
Joined: June 23, 2008
KitMaker: 2,329 posts
Armorama: 2,110 posts
Posted: Monday, January 12, 2009 - 08:20 PM UTC
rudi you should call it a new year build now

dora is a big artillery gun that went on riails its huge the germans used it during the war

im on aboard i want to see what this kits like i wouldnt mind this kit myself


Jamesite
Visit this Community
United Kingdom
Joined: December 05, 2006
KitMaker: 2,208 posts
Armorama: 2,152 posts
Posted: Tuesday, January 13, 2009 - 12:45 AM UTC
Hey Rudi,

Great to see you starting this build as I did exactly the same thing this holiday and bought the kit, then read about it and ordered the original Eduard set (Hannants in the UK still had it in stock alongside the 2 newer sets), and the AFV Club T36-E6 tracks.

Terry Ashleys build is very useful, and i'd also recommend the review on the US army models page:

M8 review

In doing my research I have put together a list of fixes for the kit in a word doc. and would be happy to send it to you if you're interested. drop me a PM if so.

So far i've tackled a good part of the kit and woul make a couple of suggestions:

1. I'd suggest replacing the 'fancy' sprockets with a set from a sherman, I used Tamiya M4A3 sprockets and they fit the AFV Club track pitch, but require a little modification to get the right track width on the stuart hubs. Eduard include a thin plate to fix this but its a little instubstantial and the bolt detail is far too flat.

2. The internal ammo stowage is incorrect. the right side is ok but the left is wrong as it should be a 5x4 rectangular stack (and cased in tubes). I've just received Verlinden's 'super value' sherman ammo set in the post to rectify this, as i'll re-build the ammo stowage.

3. As you know there is no drivers interior section. You could steal the forward part of the interior from an academy stuart kit or have a go at scratching the basics. I've stolen some seats from a jeep i'll whack in, there should also be a 3x2 stack of ammo between the two seats (Verlinden to the rescue again).

4. When making 'sponson fillers' don't glue them to the upper hull before fixing as you won't get the interior 'drop-in' to fit otherwise. I think i'll fit mine from the outside when the hull halves are glued together.

Those are my main tips for starters, i'll be happy to add more if I find any. Otherwise following the PMMS and US army models builds and the Eduard sets you can't really go wrong!

Good luck,

James
PantherF
Visit this Community
Indiana, United States
Joined: June 10, 2005
KitMaker: 6,188 posts
Armorama: 5,960 posts
Posted: Tuesday, January 13, 2009 - 01:54 AM UTC
That's cool, pimping out an old Tamiya kit. That is a lot of PE there Rudi.
Tarok
Visit this Community
Victoria, Australia
Joined: July 28, 2004
KitMaker: 10,889 posts
Armorama: 3,245 posts
Posted: Tuesday, January 13, 2009 - 01:31 PM UTC
Hi all,

Thanks for all the support - and the build hasn't even started in earnest yet

Brian: Thanks for the heads up

James B: Thanks - time will tell, but so far so good

James C: LOL! I was kidding buddy, of course I know what (not who ) Dora and the other 80 cm K (E) and Krupp K5 were. Of course don't forget a Dora is also a Fw 190 D

James McF: Thanks mate. Particularly for the detailed reply. I really appreciate the assistance and advice, but I think I might continue one the reasonably accurate course I'm more or less on
I had read Tim's review of the kit as well, but have you seen Michael Bedard has got a great blog on building the TMD M8 HMC, which definitely seems to be the most accurate one available at the moment. If I ever build another M8 that'll be the one I go for. Here's the link: M8 HMC by Michael Bedard
Once again thanks for all the great advice - good to have you along on this slow boat to China

Jeff: Thanks mate - these old Tamiya kit's are terrific for this kind of thing

Thanks again all for the support

Rudi
Plasticbattle
#003
Visit this Community
Donegal, Ireland
Joined: May 14, 2002
KitMaker: 9,763 posts
Armorama: 7,444 posts
Posted: Tuesday, January 13, 2009 - 02:01 PM UTC
Hi Rudi ... good to see the change of location has brought some armor into the mix!! This blog is missing something though .... thats right .... in progress pics.
Looking forward to the build
Tarok
Visit this Community
Victoria, Australia
Joined: July 28, 2004
KitMaker: 10,889 posts
Armorama: 3,245 posts
Posted: Tuesday, January 13, 2009 - 02:05 PM UTC

Quoted Text

This blog is missing something though .... thats right .... in progress pics.


LOL Frank, that's what I was thinking - all these replies (and fantastic words of support) and I haven't even posted pics yet!
Tarok
Visit this Community
Victoria, Australia
Joined: July 28, 2004
KitMaker: 10,889 posts
Armorama: 3,245 posts
Posted: Tuesday, January 13, 2009 - 05:54 PM UTC
M8 HMC: PREPARATION

Before we get into the actual building of this kit, I would like to take a further small deviation from the path. I would like to take a few moments to discuss my preparation phase, a phase I consider as important as the build itself, show you a few of the tools I will be using as well as my building environment.

Preparing for the build

As I mentioned above, I consider the preparation phase of a build as import as the build itself. During this time, I normally do a bit more research than I did during the preliminary research phase. I spend a bit more time reading and analysing the reviews and articles I had read earlier, and going through my mind what I am about to do.

One of the first things I do is scan and print (and often enlarge) the instructions provided with the kit. I then use these print-outs and make notes on them. Typically I will note ideas I may have, comments or tips I had read online, or 'danger areas' I need to look out for. When using PE I normally try find the instructions online and will save a copy locally and print them out. Here again I will make notes. What I also do, using a bright textliner pen (or highlighter), is highlight all the pieces on the copied kit instruction sheet which will be replaced or affected by PE. Essentially I create a connection for myself between the two documents.


Above you will see an example of the various instruction sheets with my notes and highlighted parts.

Having now familiarised myself with the instructions, and having a good idea of the flow of this project, the next part of my preparation phase is to check that I have everything I require to build the kit. Now granted I may not have everything at the time and may need to wait for it, so this may delay the build, but better to know up front what is required than to get halfway through and experience a delay. If I know what is required when, I can plan for it.

Part of my checking stage is to actually check the kit contents. Being familiar with the instructions helps, but one can normally tell from the sprues if a part is missing. Fortunately many modern kit manufacturers give you a silhouette type impression of the sprues at the back of the instruction sheets, so you could also use that to check if all the sprues and parts are present and accounted for. At this stage I normally photograph the sprues. This is more for my own record keeping than anything else.


Above are is the contents of the Tamiya M8 HMC kit: Sprue A; Sprue B; Sprue C; Upper and Lower Hulls; Rubber band tracks; and decals.


Above are the two Eduard photo-etch sets: M8 HMC Exterior Set; and M8 HMC Interior Set.

A Few Tools

Every modeller has a few preferred tools which they use. While the No. 11 modelling knife (or similar craft knife) and sandpaper at least are probably considered essential to any modelling project, here are a few of the tools I will be using during this build. I must stress though to beginners, by no means do I consider all these tools essential - these are merely a few of the tools I have collected over years and make my modelling a bit easier.


Clockwise from the top left: Pencil (I constantly take notes in a notebook and on the instructions); sanding stick with medium grit sandpaper (I also have a few other grades of sandpaper, the finer grades are mostly the ones I use); a small spring clamp (for holding parts while the glue dries); pin vice drill and drill bit (very useful if you need to insert pins in figure arms and legs); sprue cutters (the name says it all, but these are from Gamesworkshop and really comfortable to use - but you can get not branded sidecutters for much cheaper); chisel blade (used to chisel details away, cut through thicker resin, and cut PE from the frame); and No 11 hobby knife (used for near everything modelling related - but a craft knife works just as well).


The last few tools, L-R: Reverse-action tweezers (used for handing fine parts); vernier calipers (used to measure things like bolt heads and circumferences of rings and circles - and just because I like measuring things); long nose pliers (again for handling fine parts, but also for bending PE); and lastly but not least underneath is my cutting mat (prevents me from cutting through to my modelling table or board).


Above are two of the glues I will be using, as well as the filler putty. The general purpose glue for all the plastic I will be using is Tamiya's Extra Thin Cement, a liquid poly glue which is applied using a small brush. The Super Glue, or Cynoacrylite (CA) glue, will be used when I need a quick setting glue or need to glue parts of different materials together (like PE to plastic). This can be bought from any supermarket. The putty I use is Tamiya's Basic Type Putty in a squeeze tube. This will be used to fill small gaps and holes.

My Building Environment

Now you might be wondering why I am letting you look in on my building environment. The purpose of this is to demonstrate that you do not need a special room to build models in - yes, it certainly is nice, and I do wish I had my own room, but it is not a necessity. I currently live in a smallish apartment with my wife, and so space is somewhat limited. All my modelling takes place in our lounge. And it being our lounge means that my area need to be neat, and the ability for either one of us to move my stuff quickly, effortlessly and safely if we have guests. And with that in mind, I bought a Citadel work tray a few years ago (when we were in our first apartment).


This is my nook. The desktop was previously installed in corner, and during the day with the blinds raised has a great view of the local botanical gardens. My modelling tray fits on it easily, and I have space to either side while I work. You will note to the left of the table my instructions on a book stand (normally for recipe books) with the PE instructions underneath and the area of current focus visible. I have a short fluorescent desktop light for working at night. The notebook speaks for itself. The kit and toolbox and stored neatly on the floor in the corner. To my left is the TV, so that I can keep my wife company while she watches TV or plays her Nintendo Wii.


The last bit of my environment, although perhaps this could be seen as a tool, are the plastic tubs I use. These tubs originally held salad from the local supermarket, but now make great containers for holding model bits. When I build the various sub-assemblies, I keep the parts and built sub-assemblies in their own tub (so I may have a few different tubs) with a bit of masking tap containing the name of the sub-assembly across the lid.

Now that we have this background, we are ready to start the build.
Jamesite
Visit this Community
United Kingdom
Joined: December 05, 2006
KitMaker: 2,208 posts
Armorama: 2,152 posts
Posted: Tuesday, January 13, 2009 - 11:26 PM UTC
Wow Rudi!
That has to be the most detailled description of model prep i've ever seen online. However, I approach builds in a very similar way so its good to see you making the effort to explain your preperations.

Looking forward to seeing some things being glued together now!

Do you have a link to Michael Bedard's blog? The Tiger models kit is really detailled and so it would be great to see someone putting one together.

Keep us posted,

James
Jamesite
Visit this Community
United Kingdom
Joined: December 05, 2006
KitMaker: 2,208 posts
Armorama: 2,152 posts
Posted: Tuesday, January 13, 2009 - 11:29 PM UTC
For those who are interested, here is my list of kit fixes, its personalised for my build, but may be of use for anyone else attempting to give this old kit an overhaul.

James

M8 HMC kit mods

Upper Hull

- Remove the moulded on skirt detail on top of the fenders and slightly round the corners.
- Remove the locating lugs along the underside of the hull sides for the skirts.
- Thin down the guard overhang on the rear corners.
- Add texture to hull steel plates.
- Add 3 weld seams along hull side.
- Add 6 bold heads to rear hull sides.
- Replace periscopes with Verlinden and reposition.
- Add aerial base to Eduard bracket.
- Replace grab handles with wire.
- Add chains and handles to fuel filler caps.

Lower Hull

- Fill roadwheel holes with plates from PE.
- Replace drive sprockets with solid Sherman versions or modify kit ones with Eduard parts if pitch isn’t right for AFV club tracks.
- Re-build rear bogey housing to include raised area with Eduard disk.
- smooth out transmission housing and add bolt detail at the edges.

Lower Interior

- Rebuild ammo stowage in corners and on sponsons.
- Add rear sponsons next to engine bay.
- Add upper engine firewall from card/Eduard part.
- Add drivers visor support.
- detail front area or blacken out depending on what is visible.

Turret

- Remove/fill grouser stowage detail on outside.
- Scratch extra detail from newer Eduard set.
- Add Mr Surfacer to cast areas.
- Add the extra square tarpaulin eyelets to front.
- Replace lifting eyes with wire.
- Close off gap under mantlet with guard from card
- Detail turret traverse and gun sight mechanism.
- Detail breech.
- Add support posts for .50 cal ‘roof’.
- Replace/detail .50 cal.

wbill76
Visit this Community
Texas, United States
Joined: May 02, 2006
KitMaker: 5,425 posts
Armorama: 4,659 posts
Posted: Wednesday, January 14, 2009 - 07:36 AM UTC
This ought to be a fun project Rudi, looking forward to the progress and enjoyed the "introduction" to your work area and tools.
SIRNEIL
Visit this Community
England - South East, United Kingdom
Joined: July 30, 2007
KitMaker: 658 posts
Armorama: 599 posts
Posted: Wednesday, January 14, 2009 - 08:37 AM UTC
hi rudy

you'v got my interest with your m8 and i also like the way that you hold the instructions at an angle so it makes them easier to read
neil.........
newfish
Visit this Community
England - West Midlands, United Kingdom
Joined: June 23, 2008
KitMaker: 2,329 posts
Armorama: 2,110 posts
Posted: Wednesday, January 14, 2009 - 08:55 AM UTC
great little place you have their rudi

ahh the ninetendo wii i have one of those even though im tempted to sell it for more kits

im going to follow this with intereast because ive looked at this and im sure i have some photos of this afv so i think this may be a future project !


Tarok
Visit this Community
Victoria, Australia
Joined: July 28, 2004
KitMaker: 10,889 posts
Armorama: 3,245 posts
Posted: Wednesday, January 14, 2009 - 10:37 AM UTC
Hi James McF,

Thanks for the comments.

I realised as I was writing the Prep chapter that it is rather long, and certainly not the most exciting of chapters to this tale , but as this little Blog is essentially aimed at beginners or infrequent armour modellers such as myself, I thought it might help answer a few unasked questions and help demystify the pre-build stage. I think it may also give context to why I am doing things certain ways

If you see my first reply to you, I've linked it there hehe. It's a really good Blog, and I'm confident you'll enjoy it as much as I have. He's been working on it for more than a few months now, and it's still not done Just one of the things I like about it (the blog) is that he does do some comparisons to the Tamiya M8 HMC, as well as some of the M5 hulls that are available. Even if you're just building the little old Tamiya M8, like me, there's value to be had there. I highly recommend the read.

Thanks for posting that list of fixes. It's actually not as bad as I thought it was, and might very well attempt a few

Just a question on the road wheels though. You mentioned using the Eduard PE set to close off the road wheels, however the Eduard M8 HMC Exterior kit doesn't contain these plates, only plates for the Idler Gear. Also, by doing that, wouldn't that convert the open wheels to welded closed wheels (is that what they're called?)? Did the M8 HMC use these welded wheels? I've only seen pictures of them using the open spoke wheel, the closed cast wheel, or a combination of these 2 types.

Thanks again for the support and all that great advice. This is all new ground to me

Rudi
Tarok
Visit this Community
Victoria, Australia
Joined: July 28, 2004
KitMaker: 10,889 posts
Armorama: 3,245 posts
Posted: Wednesday, January 14, 2009 - 10:43 AM UTC
Hi guys,

Thanks for the comments.

Bill: Great to have you aboard. Glad you enjoyed the intro's, hereafter is where it starts getting scary

Neil: Thanks for your support. It really does make reading and following the instructions much easier not having to shift one's position too much

James C: Cheers mate. The Wii also makes for a great activity while taking regular modelling breaks
newfish
Visit this Community
England - West Midlands, United Kingdom
Joined: June 23, 2008
KitMaker: 2,329 posts
Armorama: 2,110 posts
Posted: Wednesday, January 14, 2009 - 10:51 AM UTC
its an intereasting console you certainly cant get fatter from playing
that machine lol

anymore progress to the little grasshopper then mate?

tankmodeler
#417
Visit this Community
Ontario, Canada
Joined: March 01, 2004
KitMaker: 3,123 posts
Armorama: 2,539 posts
Posted: Wednesday, January 14, 2009 - 04:26 PM UTC

Quoted Text


Thanks for posting that list of fixes. It's actually not as bad as I thought it was, and might very well attempt a few


Well, what hasn't been said (I don't think, I haven't read every suggestion) is that the entire Tamiya M8 Hull is significantly off in the engine compartment area. It's not tall enough or long enough. The rear hull face is off and there needs to be some sort of attempt at the rear venting grilles. I think the Eduard set has something to address that, but the rest is on your own head, unfortunately.

When using the AFV tracks be aware that the end connector guide teeth will sit on the return roller support if allowed to such that the track doesn't sit on the roller, but rides above it. You have to either make sure that the teeth are on either side of the support or, failing that, trim the interfering tooth shorter so that the track sits on the roller.

There needs to be a quite different interior for the M8 than there is in the Academy wich is nominally an M3A1 and doesn't even do that properly. Verlinden makes an M8 interios set and, if you can find one, Yanks Miniatures made a set for the hull interior. The transmission & seats of the M8 are very different than those in the M3 series. The driver's brake levers came down from the front face of the hull as opposed to up from the floor as in the M3s. There are actually three support that hold the roof of the hull and support the turret and they are visible if you open up the drivers' hatches. You might want to use the AFV (or other AM vendors) solid stamped steel road wheels as oppoed to the rather too-thin Tamiya wheels.

Just a few more corrections, if you are in the mood...

:)

Paul
 _GOTOTOP