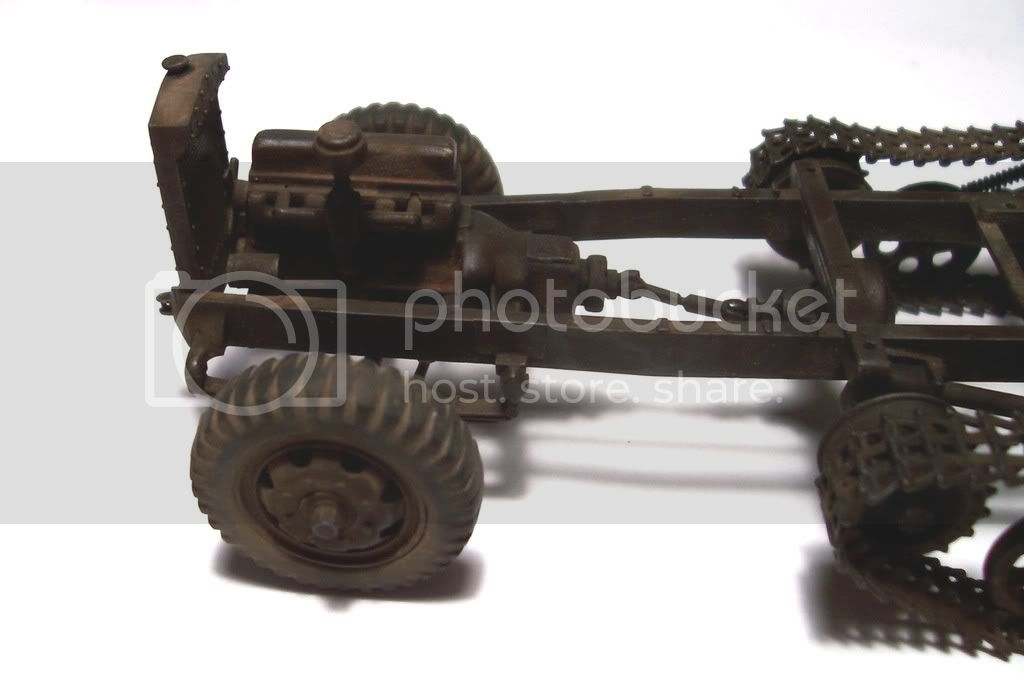
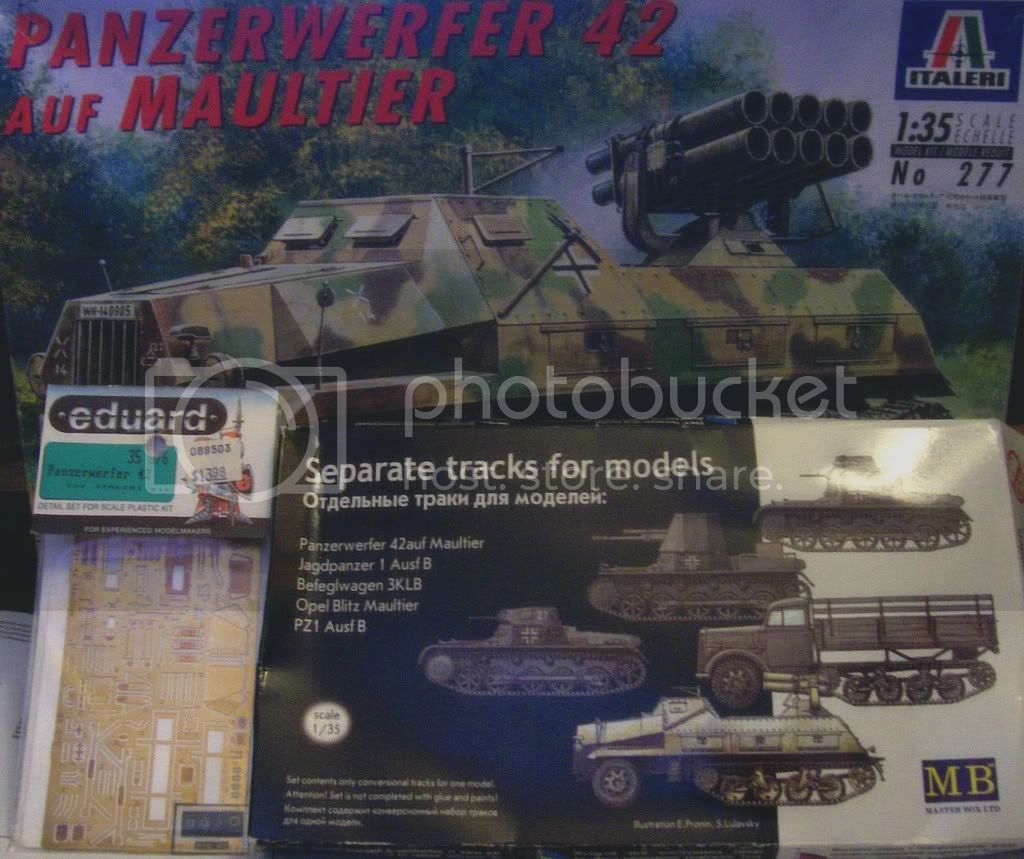
Next on the chopping block is the italeri panzerwerfer 42 auf maultier kit #277, i will be replacing the kit tracks with a set from Master Box and adding an Eduard PE set also i may end up replacing the front wheels if i cannot get the kit rubber tires to look ok.
The boxart and extra's.
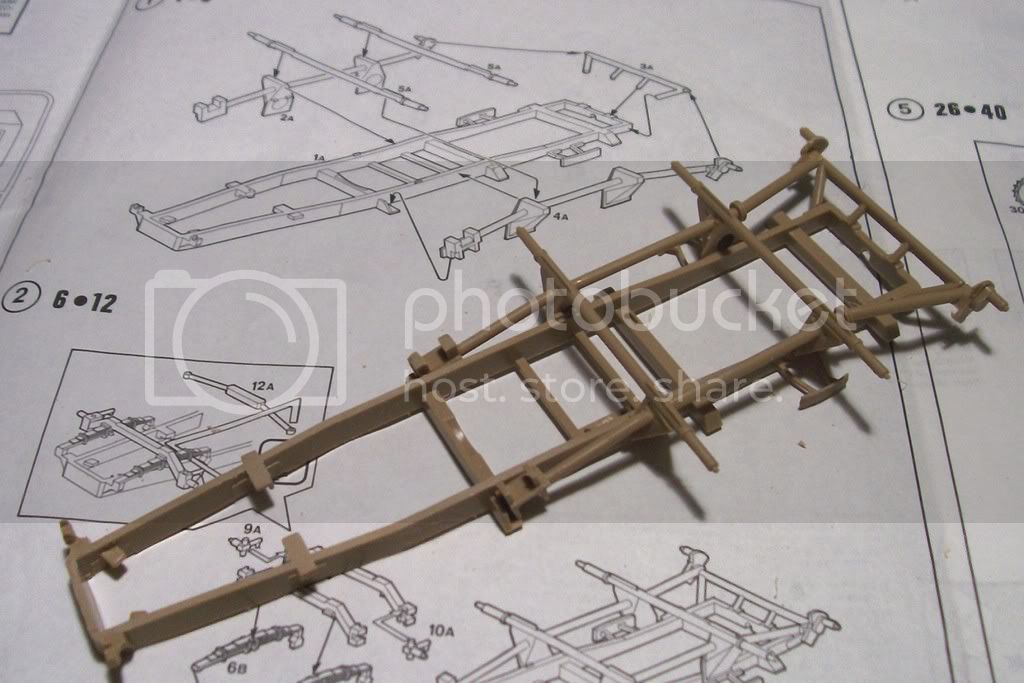
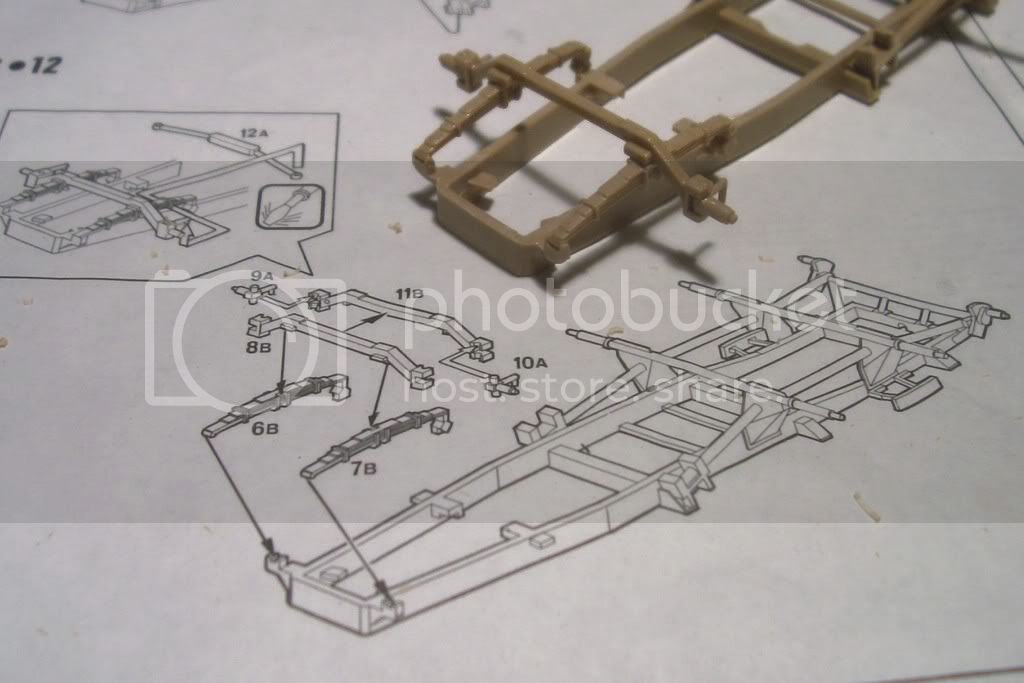
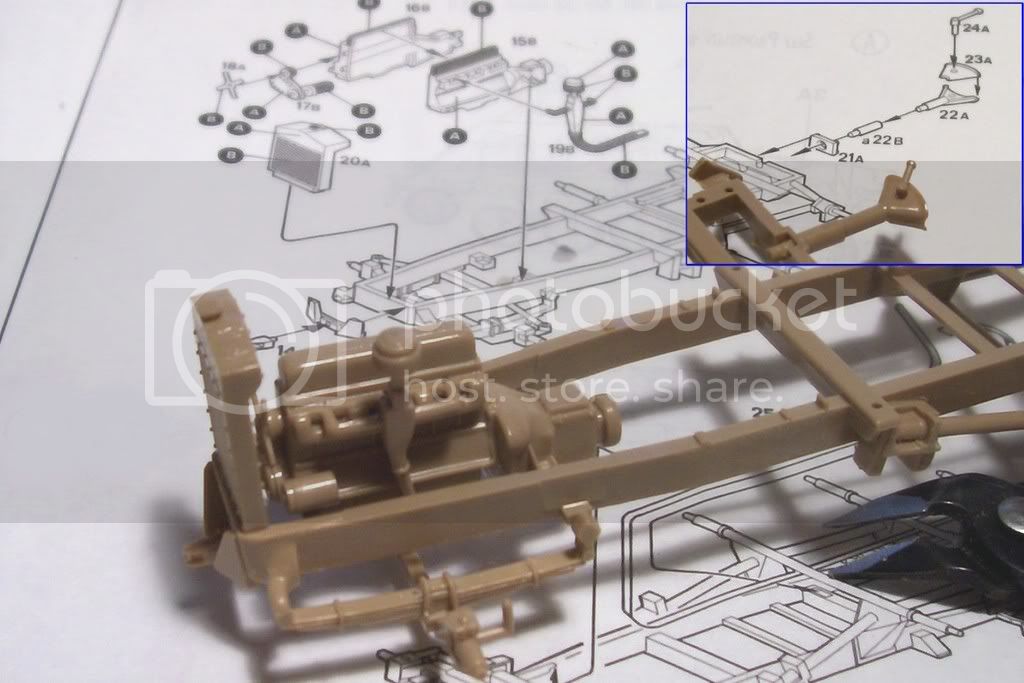
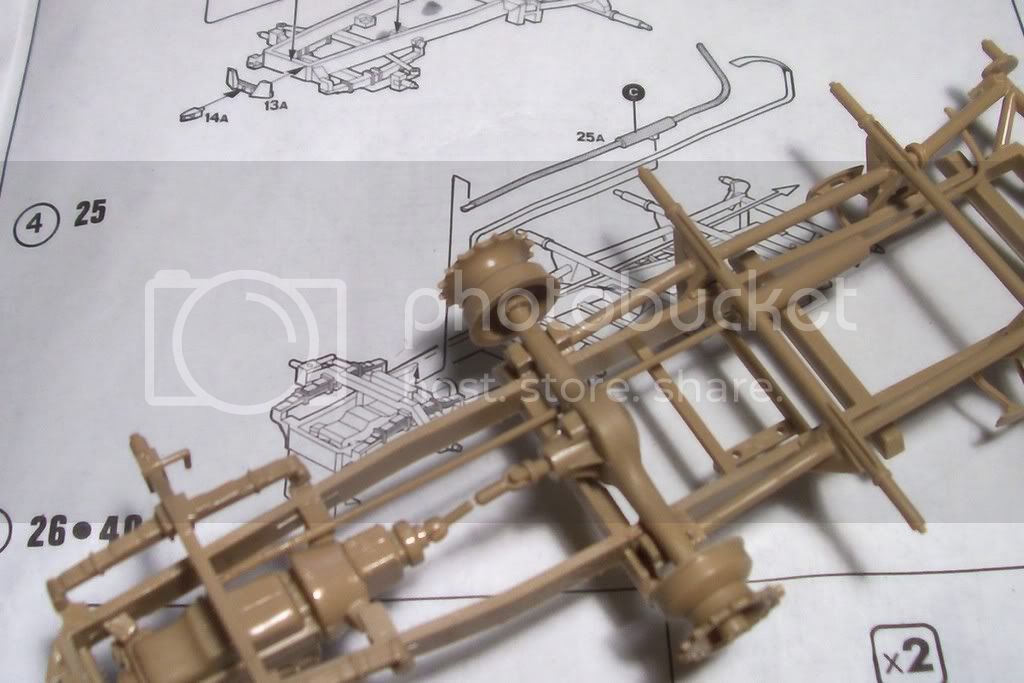
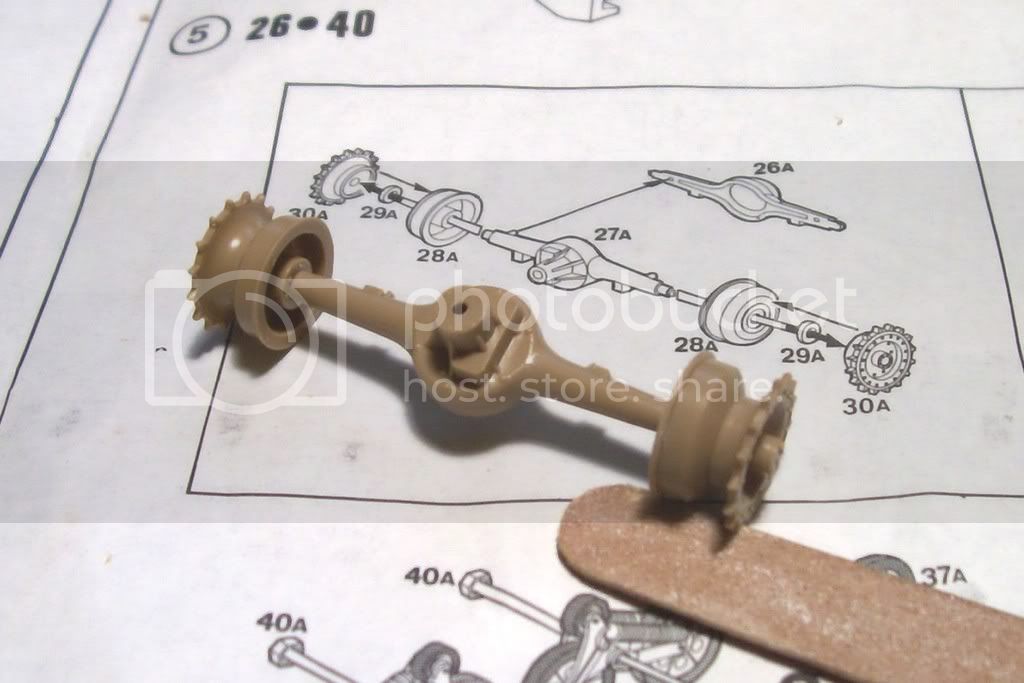
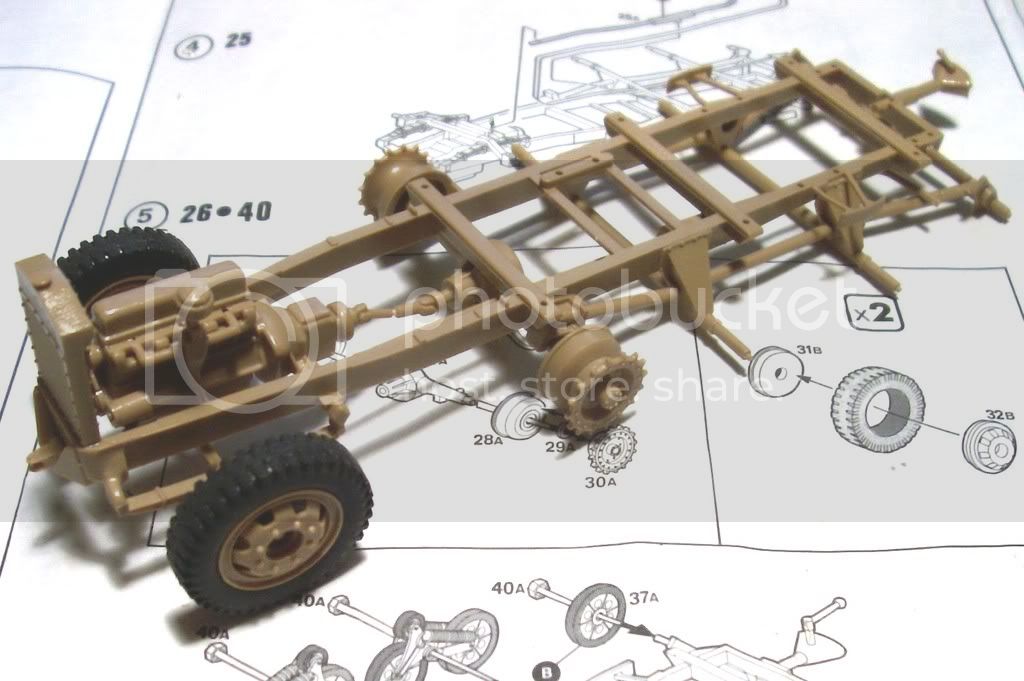
Steps 1 through 5 consist of the frame, engine/drive train and running gear.
Step 1.
Step 2.
Step 3.
Step 4. (easy one just the exhaust)
Step 5a
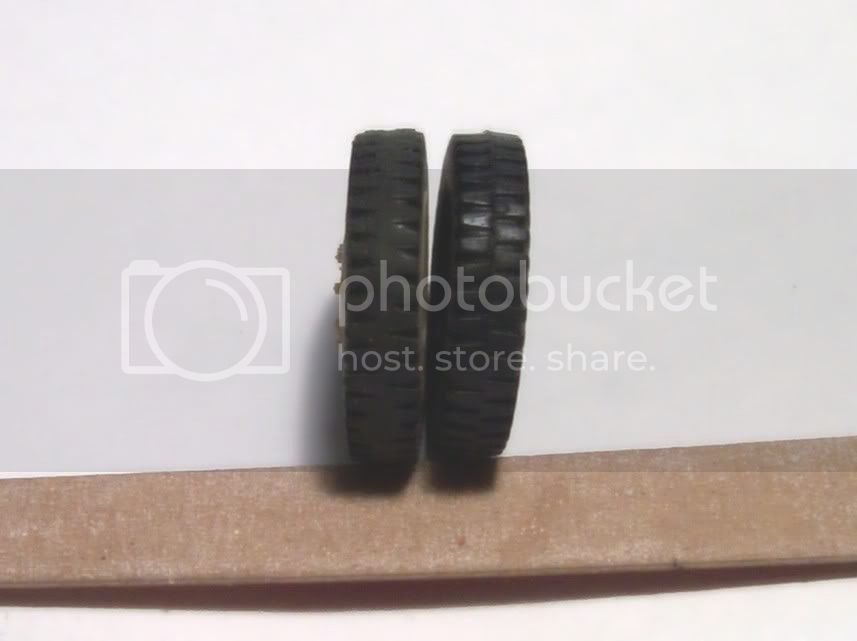
Step 5b i worked on the tires removing the seam with my soldering iron as sanding is useless they may look ok after painting and weathering we shall see.
And this is where it is at right now all that remains is the running gear and tracks to complete the first 5 steps, so far everything as gone together very well with just a little cleanup of mold lines and knockout marks.
Ron.
Hosted by Darren Baker
Italeri's Panzerwerfer 42 auf Maultier
biffa
Tennessee, United States
Joined: September 07, 2005
KitMaker: 881 posts
Armorama: 826 posts
Joined: September 07, 2005
KitMaker: 881 posts
Armorama: 826 posts
Posted: Wednesday, February 04, 2009 - 01:47 PM UTC
TacFireGuru
Colorado, United States
Joined: December 25, 2004
KitMaker: 3,770 posts
Armorama: 2,263 posts
Joined: December 25, 2004
KitMaker: 3,770 posts
Armorama: 2,263 posts
Posted: Wednesday, February 04, 2009 - 02:50 PM UTC
Ron,
Glad you're doing this one. The Maultier's, much like the RSO's, have got to be some of the ugliest German vehicles. Probably the reason I like them so. I have always been intrigued by the Panzerwerfer so this will be a joy.
The tires are looking pretty good to me; I'd imagine that with some dust/dirt, they'll work well. I did at one time hook up rubber tires/plastic rims to an 18v drill and on, I believe, the middle speed took a piece of 120 grit (?) to them....cleaned the seam and allowed me to "wear down" the tread some...worn look?
Anyhow, subscribed to.....lookin' forward to continued progress.
Mike
Tanker9
California, United States
Joined: January 31, 2009
KitMaker: 165 posts
Armorama: 141 posts
Joined: January 31, 2009
KitMaker: 165 posts
Armorama: 141 posts
Posted: Wednesday, February 04, 2009 - 04:08 PM UTC
I agree with Mike, ugly but interesting. I've always wanted to build a Maultier. I will be watching with interest.
thebear
Quebec, Canada
Joined: November 15, 2002
KitMaker: 3,960 posts
Armorama: 3,579 posts
Joined: November 15, 2002
KitMaker: 3,960 posts
Armorama: 3,579 posts
Posted: Wednesday, February 04, 2009 - 07:12 PM UTC
Hi Ron ...Just thought you might like to know that the tires Italeri used on this kit are wrong ..they copied a restored vehicle that had allied tires on it ...But there are a lot of replacement sets out there .
Rick
Rick
alanmac
United Kingdom
Joined: February 25, 2007
KitMaker: 3,033 posts
Armorama: 2,953 posts
Joined: February 25, 2007
KitMaker: 3,033 posts
Armorama: 2,953 posts
Posted: Wednesday, February 04, 2009 - 09:54 PM UTC
Hi Ron
I'll be following this one to see you work your usual magic. I have this kit, it's one of my favourites but as you know fairly basic. Having said that it can look good with some additional work.
The wheels are best ditched. Not only for accuracy but also the dreaded vinyl eating the plastic over time issue.
As it's based on an Opel chassis any of the replacement wheels for the Blitz would suit.
If you want to go to town on it Verlinden and Royal Models made some detailing sets over and above just the PE you get from Eduard. Problem is they may be hard to find as the kit itself is OOP for some time.
I want to get the Masterbox tracks as the kit's own are really bad, and getting Fruil or MK ones are something I don't think is necessary, so I'll be interested to see your experience with them.
I understand the road wheels are not correct within the rear drive arrangement and again replacements are available but watch if you go that route, the Royal model ones are too wide, made to fit the original kits vinyl track. I saw a build where a guy flagged this issue up here.
Maultier build
I don't know what the issue is with accuracy on the wheels though.
Looking forward to updates.
All the best
Alan
alanmac
United Kingdom
Joined: February 25, 2007
KitMaker: 3,033 posts
Armorama: 2,953 posts
Joined: February 25, 2007
KitMaker: 3,033 posts
Armorama: 2,953 posts
Posted: Wednesday, February 04, 2009 - 10:06 PM UTC
Hi
Just another quick point. Note the drive sprocket fits in the centre of the track not to one edge as pointed out in the linked thread.
Alan
Just another quick point. Note the drive sprocket fits in the centre of the track not to one edge as pointed out in the linked thread.
Alan
biffa
Tennessee, United States
Joined: September 07, 2005
KitMaker: 881 posts
Armorama: 826 posts
Joined: September 07, 2005
KitMaker: 881 posts
Armorama: 826 posts
Posted: Thursday, February 05, 2009 - 09:22 AM UTC
Thanks guys im glad to see there is some interest in this vehicle i always thought it was kinda cool in that ugly awkward sort of way.
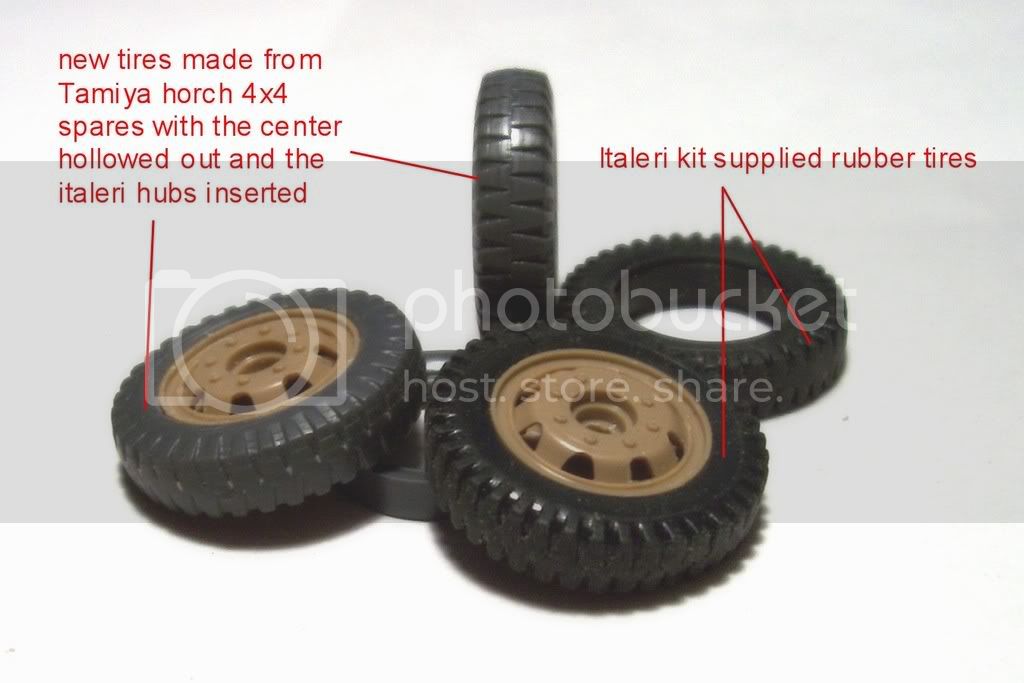
Thanks Rick and Alan for the heads up on the front wheels i kinda suspected as much but needed a shove so to speak, i dont want to spend $20 on a replacement set so i am going to use a set out of the Tamiya Horch 4x4 and replace the hubs with the italeri ones from what i have seen i think they should be a little better?
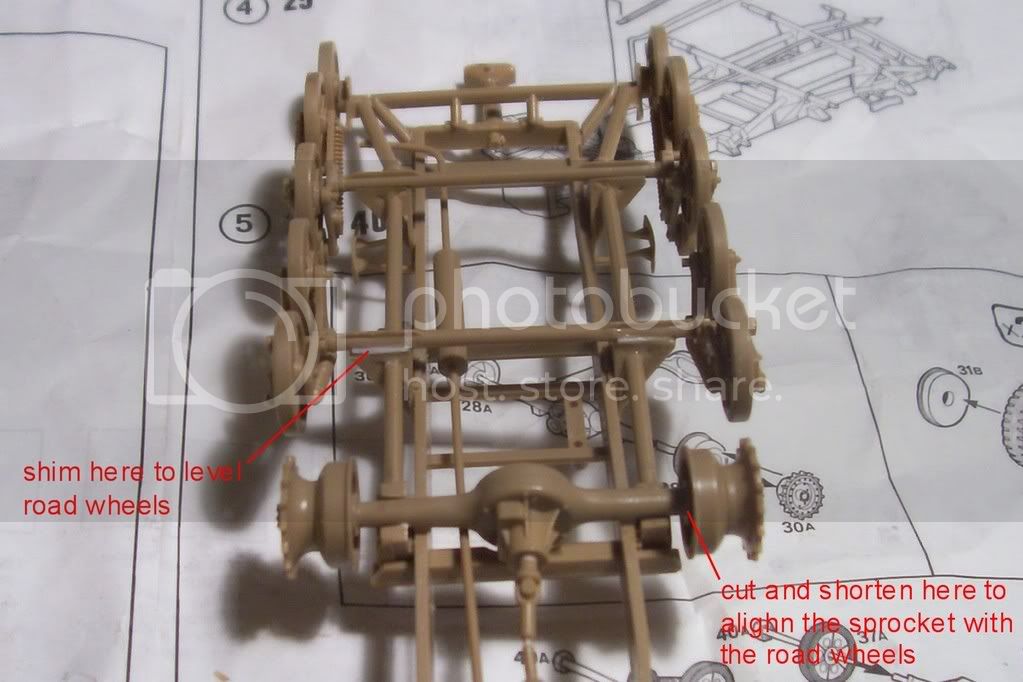
Alan i lurk over at PA heh and checked out that build, the road wheels he used are most common but from searching the web i found many pics of maultiers with a several types of road wheels some even resemble the italeri kit ones so i am just going to suck that one up and go with these, i also caught the drive sprocket issue and had to shorten the shaft in order to get the sprockets to line up correctly, that was a close one there.
The Master Box tracks are very fragile and difficult to use and like most replacements for this vehicle the wheels are too wide and need thinning down to get to fit but after some fiddling around i got one side on and i think they will look ok i will post a couple of shots of the wheels and tracks later.
Thanks again guys.
Ron.
Eaglewatch
United Kingdom
Joined: December 19, 2008
KitMaker: 560 posts
Armorama: 352 posts
Joined: December 19, 2008
KitMaker: 560 posts
Armorama: 352 posts
Posted: Thursday, February 05, 2009 - 09:34 AM UTC
Looking good so far Ron i've got the Revell re-box of Italeri's Opel Maulitier truck and after seeing the work your doing to the Panzerwerfer 42 i might just dig it out of the stash and have a go keep up the good work i too look forward to seeing more pics of your progress
biffa
Tennessee, United States
Joined: September 07, 2005
KitMaker: 881 posts
Armorama: 826 posts
Joined: September 07, 2005
KitMaker: 881 posts
Armorama: 826 posts
Posted: Thursday, February 05, 2009 - 10:36 AM UTC
Thanks Lyndon i appreciate you tagging along
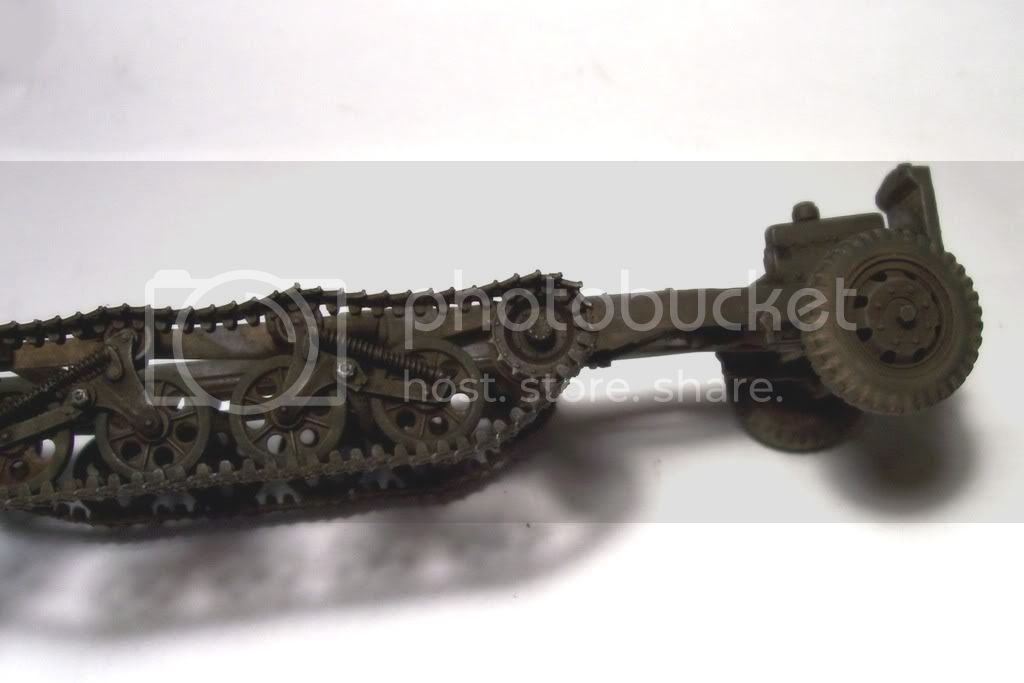
Here are the pics of the wheels i decided to go with, while still not perfect i can live with them now.
A couple of issues cropped up when i attached the wheels, the front road wheels were floating so i had to remove the axles and shim them a tad also the drive sprockets when fitted were too far out so i shortened the shafts and reattached them in line with the road wheels.
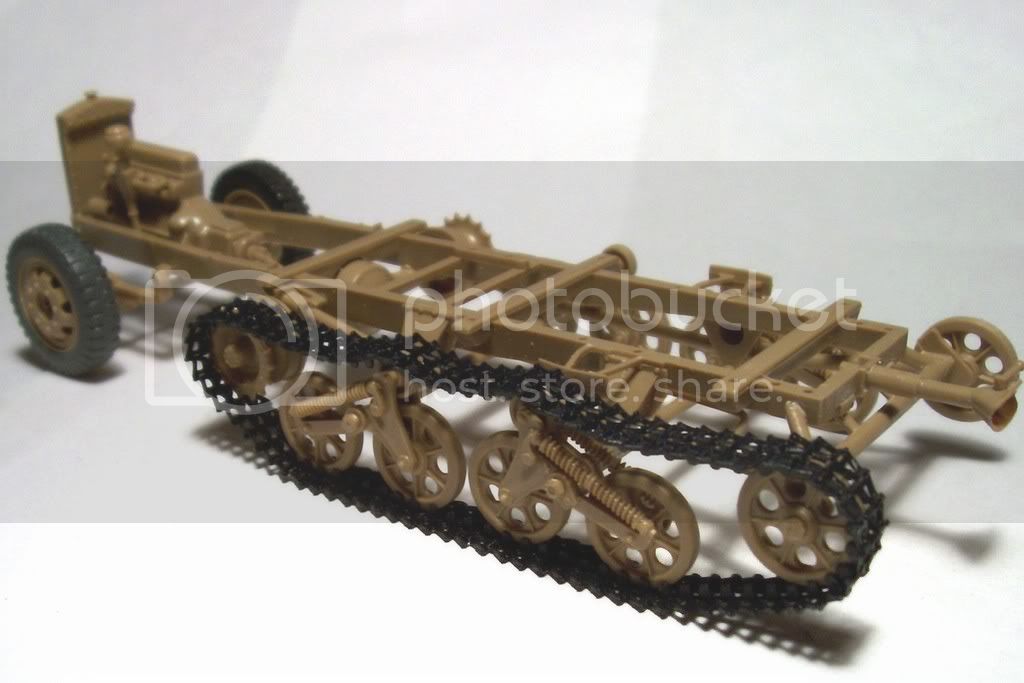
And here is a pics of this side done with the tracks and wheel on now for the other side
Ron.
alanmac
United Kingdom
Joined: February 25, 2007
KitMaker: 3,033 posts
Armorama: 2,953 posts
Joined: February 25, 2007
KitMaker: 3,033 posts
Armorama: 2,953 posts
Posted: Thursday, February 05, 2009 - 10:51 AM UTC
Hi ron
nice job on the rear drive. How did you do the track. Thin glue, wait a while then drape round wheels ?
Despite a few sink marks and some fit issues which to be fair even kits brought out today can have, I think the old girl scrubs up quiet nice with a bit of TLC. You are certainly making a good job of it.
I tried for the detail set for this today from Royal Model, unavailable from stock but could be purchased at a price beyond my wallet, or what I'm prepared to spend on this kit at least. I think I'll take your more measured approach and hope it turns out as good as yours is.
I've the straight truck version of this with a flak on the back and this one. Despite their faults, and they are not that bad really I think over the years Italeri have brought out some nice and varied vehicles for the AFV fans.
Look forward to the next instalment. Keep up the good work.
Alan
biffa
Tennessee, United States
Joined: September 07, 2005
KitMaker: 881 posts
Armorama: 826 posts
Joined: September 07, 2005
KitMaker: 881 posts
Armorama: 826 posts
Posted: Thursday, February 05, 2009 - 05:10 PM UTC
Hi Alan, yes thats exactly the way the tracks were put on these were so fragile i decided to glue them on solid and paint it all together which should be easy right now.
I picked up the kit and the eduard PE set on ebay which is where i get most of my stuff i just cant afford retail prices unless i find a good sale luckily over the last few years i have managed to acumulate a good sized stash this way, unfortunatly i am stuck with a lot of older kits heh but i dont mind i build them anyway Italeri kits have always been one of my favourites to be honest they are usually good fits and detail without thousands of parts only the tracks bother me, the sinkholes and cleanup etc i can live with.
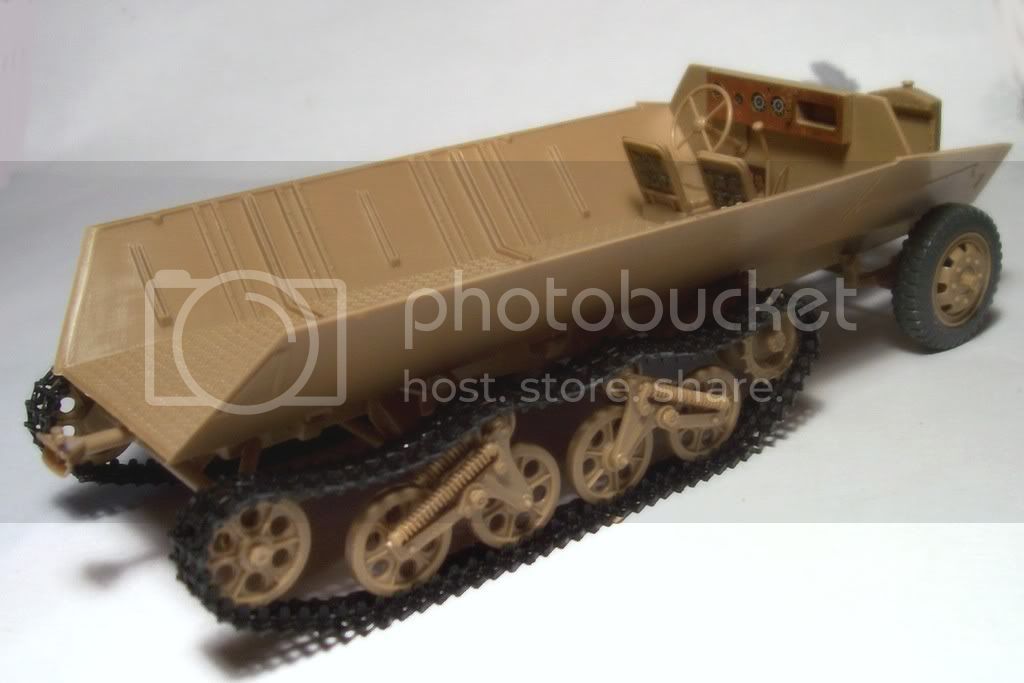
Last update for the day,, i finished the tracks and wheels and except for a little cleanup this section will be painted while i work on the interior.
Step 5 finished and work begins on the interior.
Step 6a a start on the drivers compartment
Ron.
TAFFY3
New York, United States
Joined: January 21, 2008
KitMaker: 2,531 posts
Armorama: 859 posts
Joined: January 21, 2008
KitMaker: 2,531 posts
Armorama: 859 posts
Posted: Friday, February 06, 2009 - 02:54 AM UTC
Hey Ron, be careful with those "rubber" tires they have been known to melt the wheel rims. Something about the composition of the vinyl they use. I have a friend who had that happen to his model.
Al ---Oops, I posted this before I read further on that you had replaced the Italeri tires. Al
alanmac
United Kingdom
Joined: February 25, 2007
KitMaker: 3,033 posts
Armorama: 2,953 posts
Joined: February 25, 2007
KitMaker: 3,033 posts
Armorama: 2,953 posts
Posted: Friday, February 06, 2009 - 03:05 AM UTC
By the way Ron have you seen this insane build of the vehicle on planet armor ?
http://www.planetarmor.com/forums/showthread.php?t=5582
The guy's done some amazing stuff.
Alan
http://www.planetarmor.com/forums/showthread.php?t=5582
The guy's done some amazing stuff.
Alan
biffa
Tennessee, United States
Joined: September 07, 2005
KitMaker: 881 posts
Armorama: 826 posts
Joined: September 07, 2005
KitMaker: 881 posts
Armorama: 826 posts
Posted: Saturday, February 07, 2009 - 02:07 PM UTC
Hi Taffy thanks for the heads up anywaysthats always appreciated.
Hi Alan, that guys work always blows me away i actually used his interior layout for reference his work shames me heh the launcher he built for this is just something else.
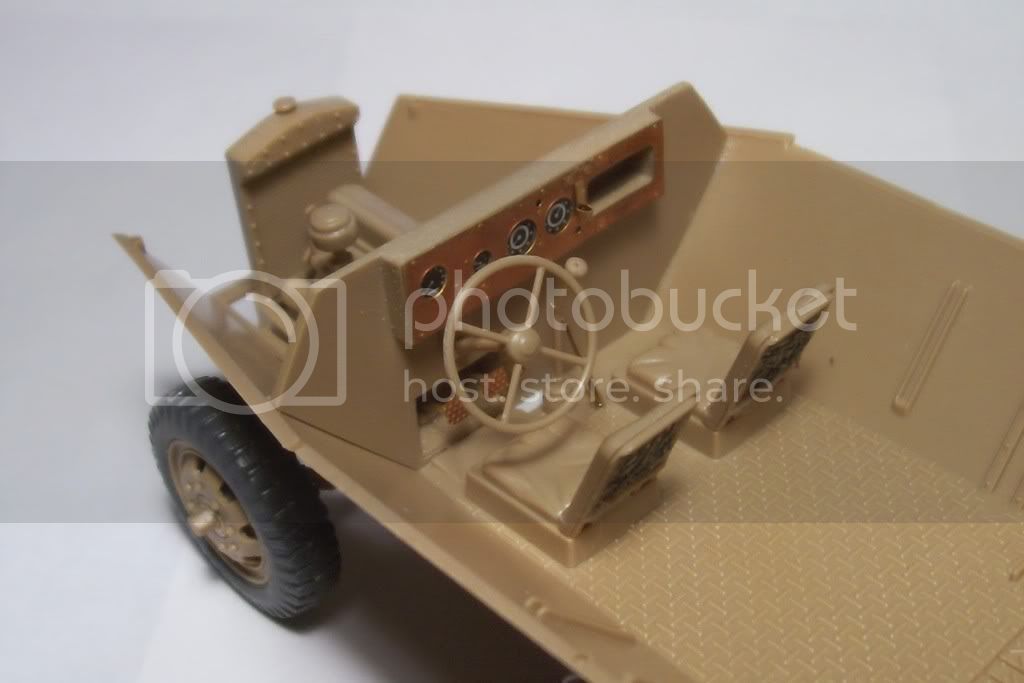
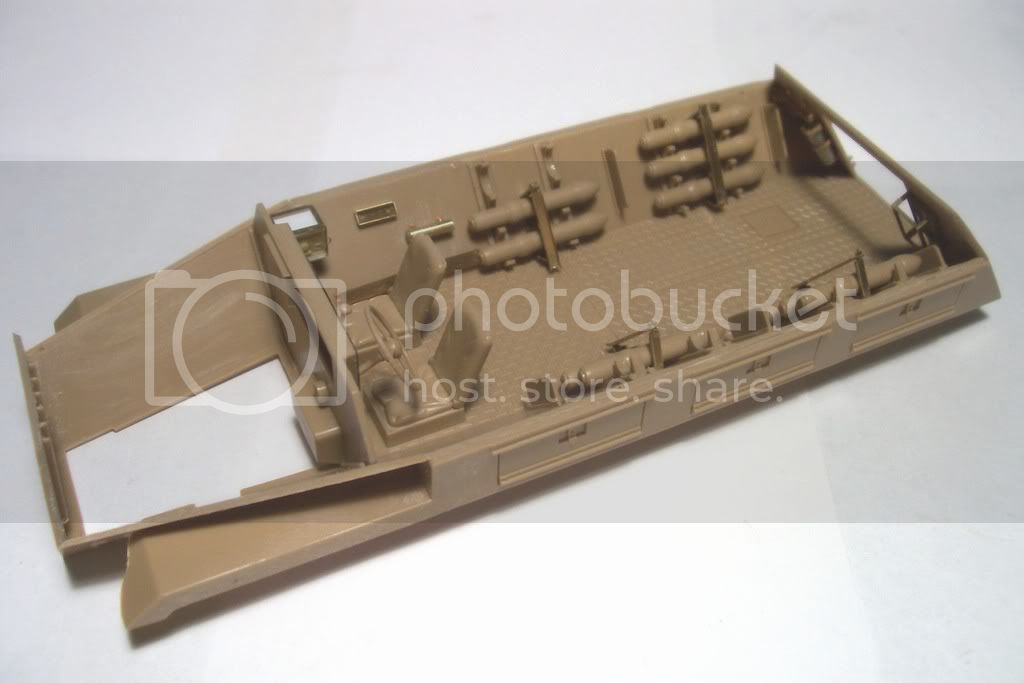
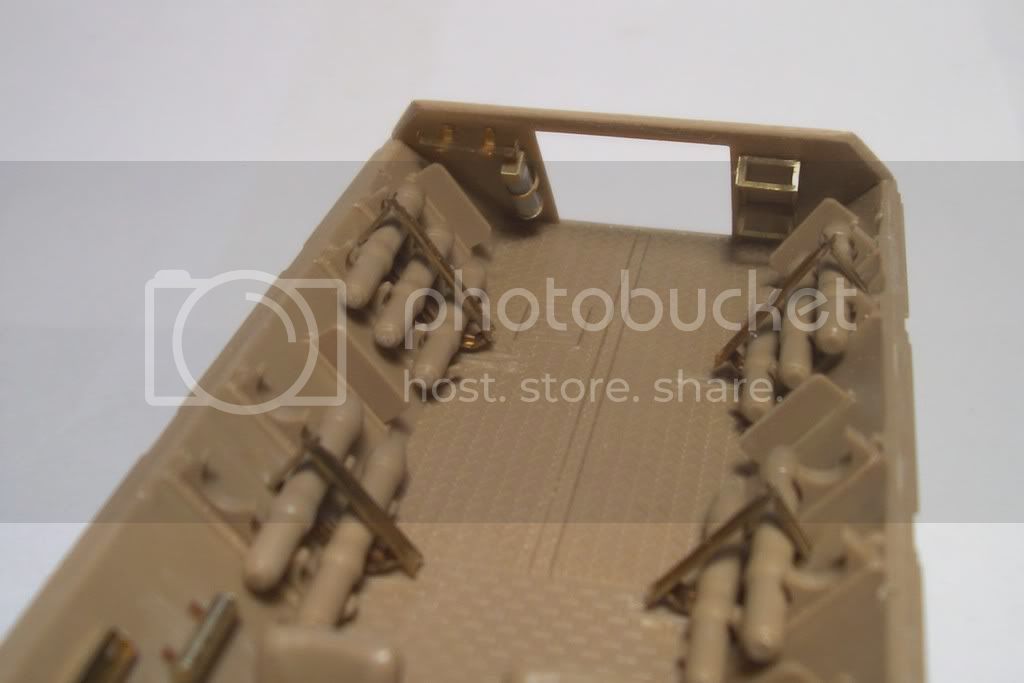
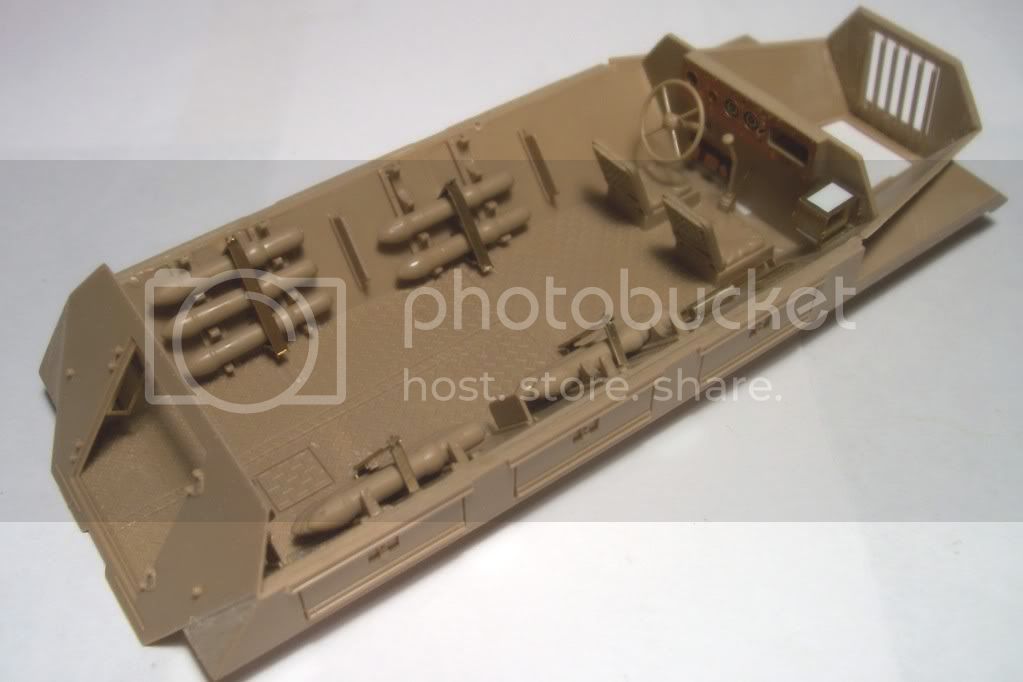
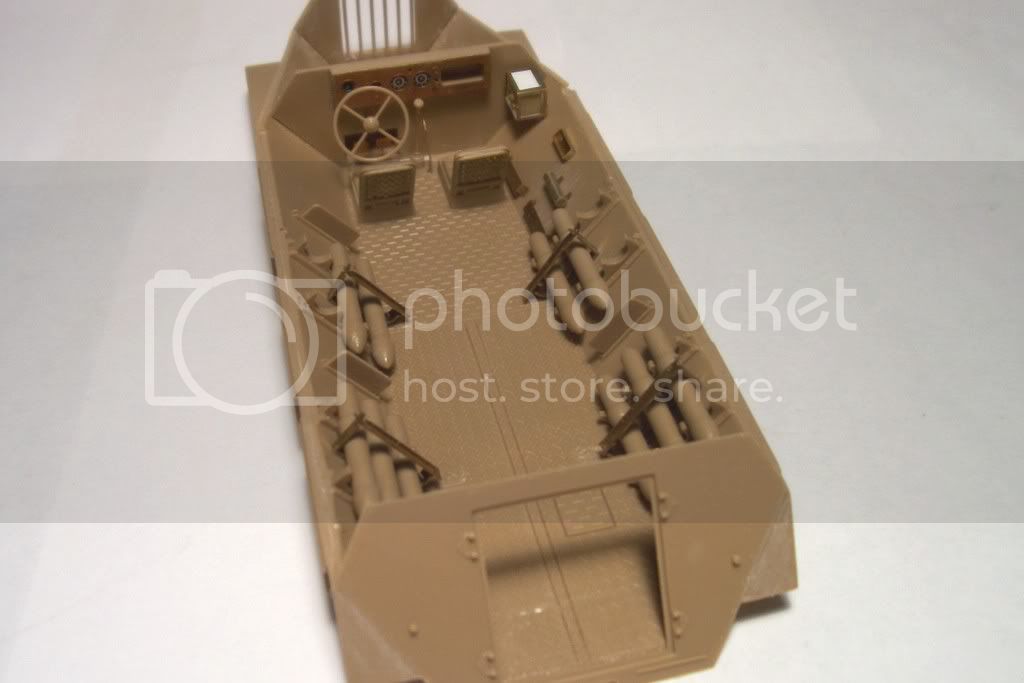
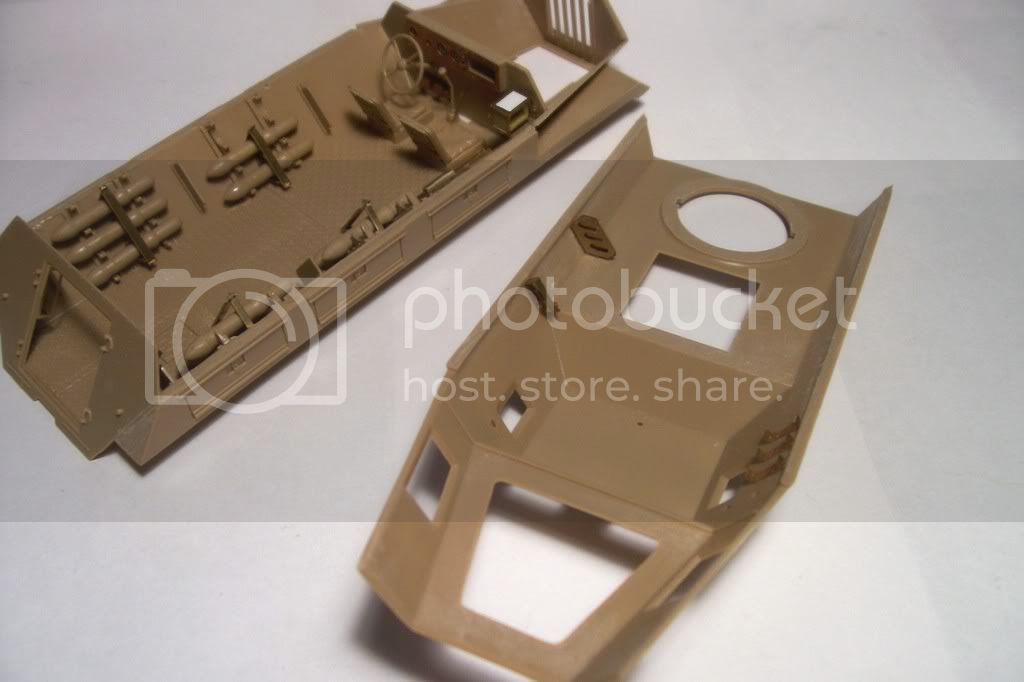
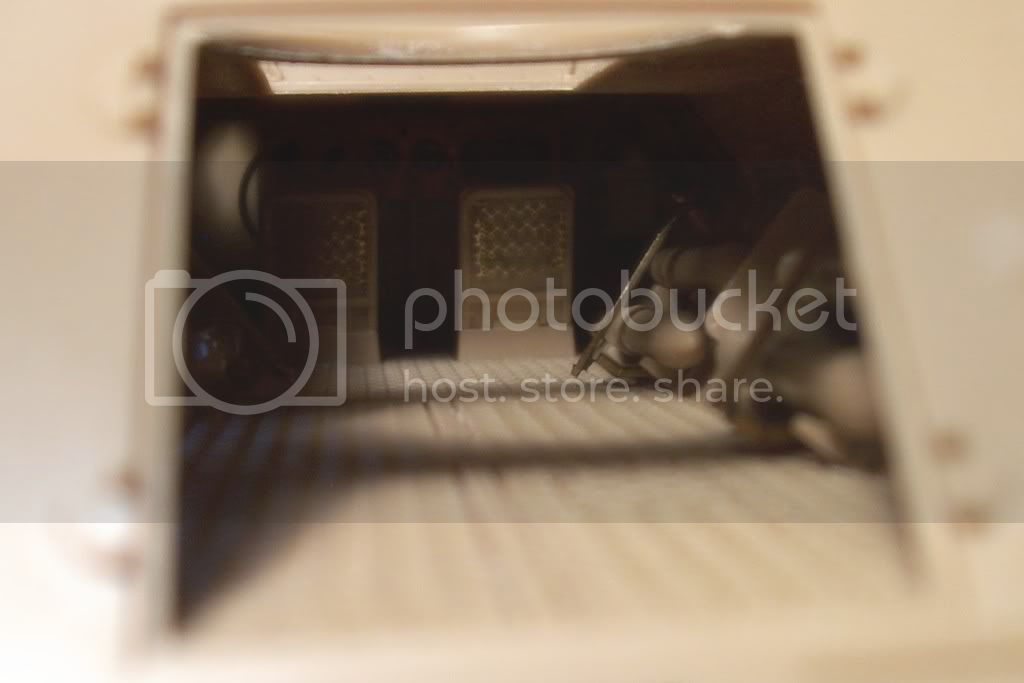
I got some good hours in today and knocked out the interior i also fitted the fenders/stowage boxes and front and rear plates because i didnt want to wait and find they needed a lot of work after i had all that other stuff on as it turns out they did require some sanding and reshaping etc but nothing too critical, i removed all the locator pins and now the top and bottom mate well and will require minimal work to put together. the kit doesnt supply hardly any thing for the interior so along with the eduard set i added a radio from the spares box (which is incorrect but from what can be seen of it it will work) also the seat springs came from a dragon 3in1 251 i may add some personal gear after it has been painted.
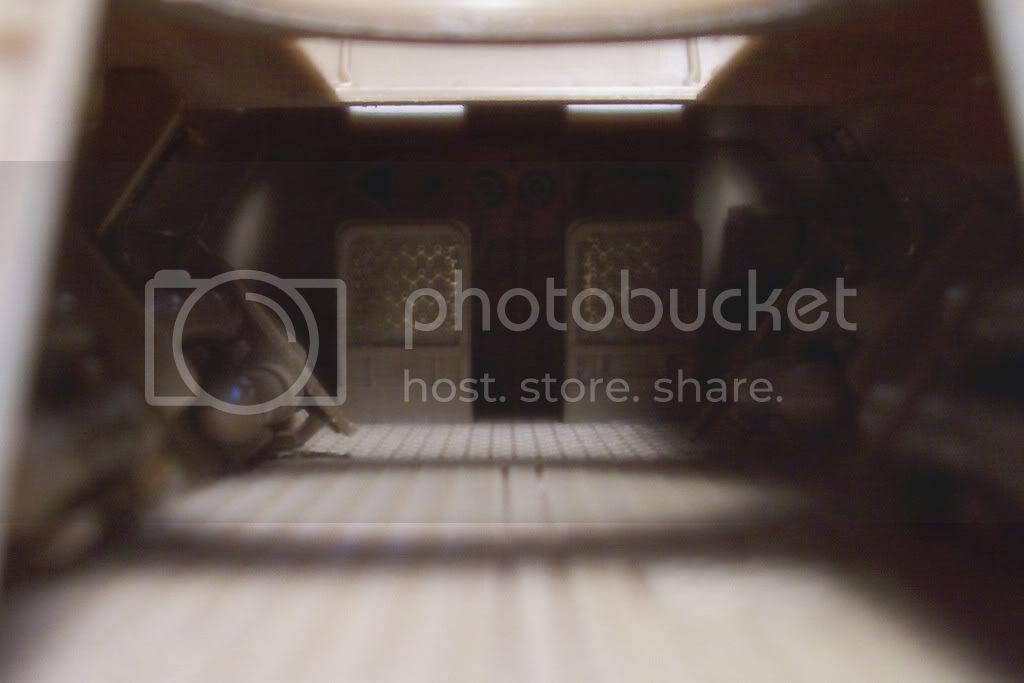
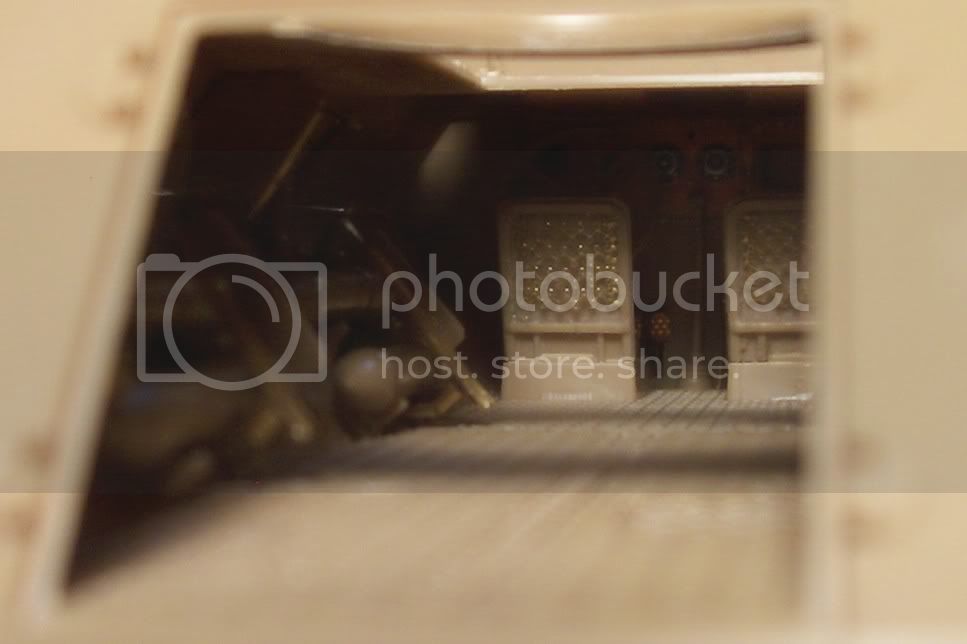
And some bad pics of what can be seen through the back doors to give a rough idea.
Ron.
Sturmgiest
Scotland, United Kingdom
Joined: November 02, 2007
KitMaker: 109 posts
Armorama: 93 posts
Joined: November 02, 2007
KitMaker: 109 posts
Armorama: 93 posts
Posted: Tuesday, February 10, 2009 - 05:48 AM UTC
Hi Ron,excellent build so far with the detailing.Really like this vehicle but the base kit scares me off However you are doing a great job and I look forward to more.
Cheers
Deano
Cheers
Deano
wbill76
Texas, United States
Joined: May 02, 2006
KitMaker: 5,425 posts
Armorama: 4,659 posts
Joined: May 02, 2006
KitMaker: 5,425 posts
Armorama: 4,659 posts
Posted: Tuesday, February 10, 2009 - 07:00 AM UTC
Making great progress with this one Ron, looking forward to it getting the "biffa treatment".
spitfire303
Vendee, France
Joined: December 22, 2006
KitMaker: 1,437 posts
Armorama: 1,406 posts
Joined: December 22, 2006
KitMaker: 1,437 posts
Armorama: 1,406 posts
Posted: Tuesday, February 10, 2009 - 09:33 AM UTC
Hi Ron, great to see you posting a blog again. The kit is on my wish list but I just can't find him... I think it's long OOP. Anyway I will be looking closely on that one.
spit
spit
PanzerMike
Hamilton, New Zealand
Joined: May 09, 2007
KitMaker: 298 posts
Armorama: 162 posts
Joined: May 09, 2007
KitMaker: 298 posts
Armorama: 162 posts
Posted: Tuesday, February 10, 2009 - 10:43 AM UTC
Off to a great start in this one Ron. I have one in the stash and only just discovered those MasterBox tracks to replace the hideous kit ones. If i build mine i think ill leave her buttoned up so i dont have to pimp the interior what can i say im lazy lol
biffa
Tennessee, United States
Joined: September 07, 2005
KitMaker: 881 posts
Armorama: 826 posts
Joined: September 07, 2005
KitMaker: 881 posts
Armorama: 826 posts
Posted: Tuesday, February 10, 2009 - 05:50 PM UTC
Hi Dean i appreciate the interest, so far the kit is a good base and good fit etc but it is quite lacking for an OOB i think, not to say that it couldnt be painted up to look good though
Thanks Bill appreciate the support and encouragment
Hi Pawel im not sure this one comes in the king tiger variant lol thanks for the kind words what are you working on now? the last two i saw of yours were both kt's i think and fantastic ones at that
Mike leaving her buttoned up isnt that bad of an idea heh if the eduard set wasnt mostly interior i would have done that myself but i had it so i decided to use it heh thanks for checking it out
Last update for the build part of this one,,,
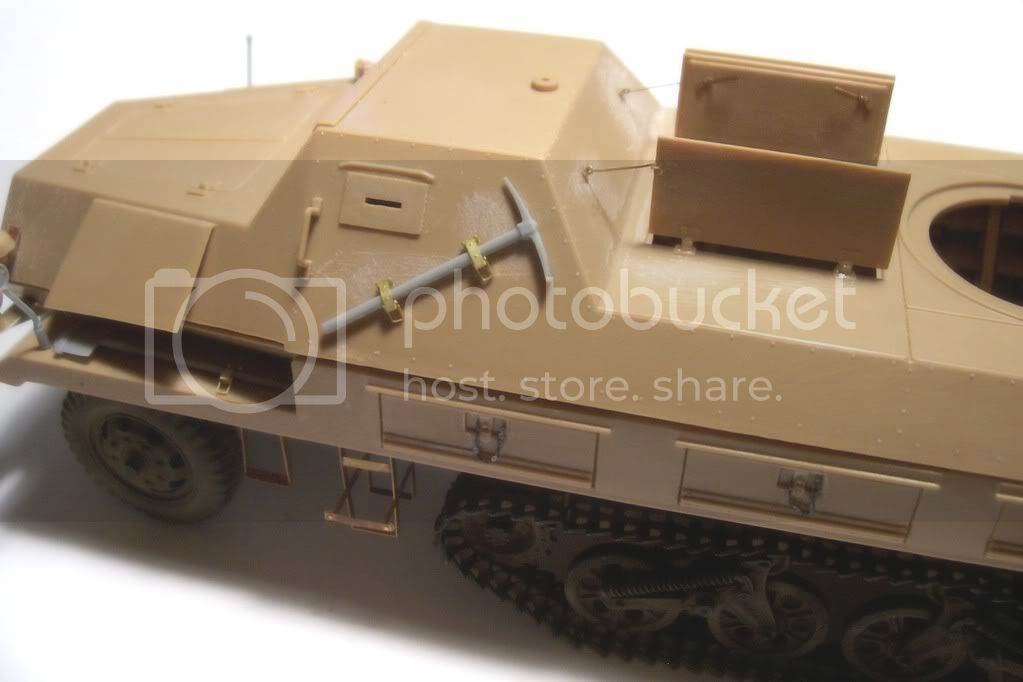
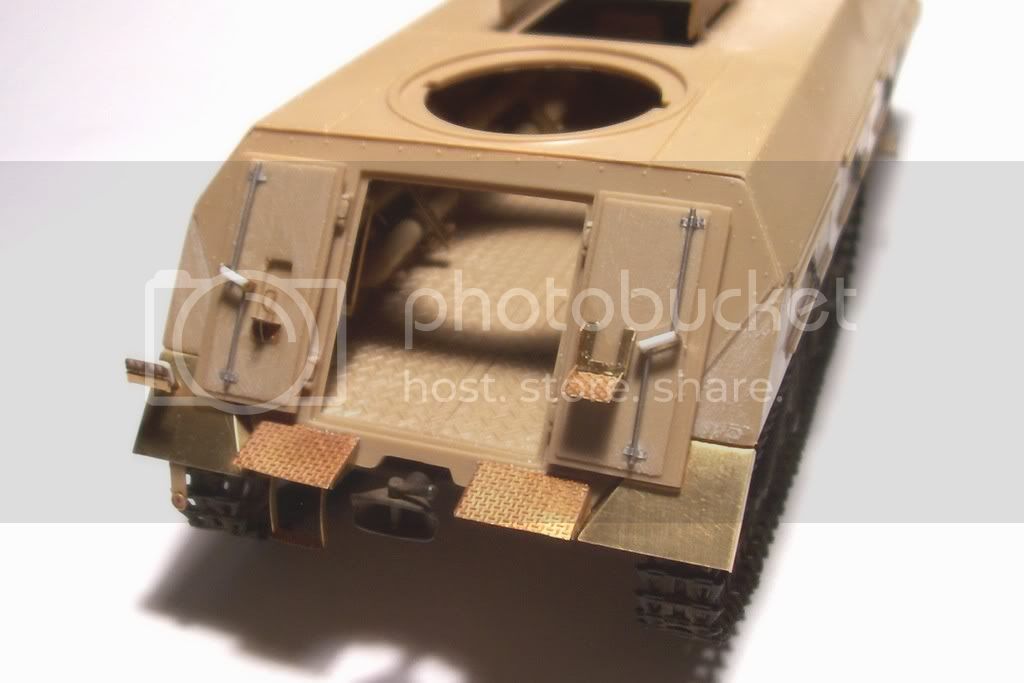
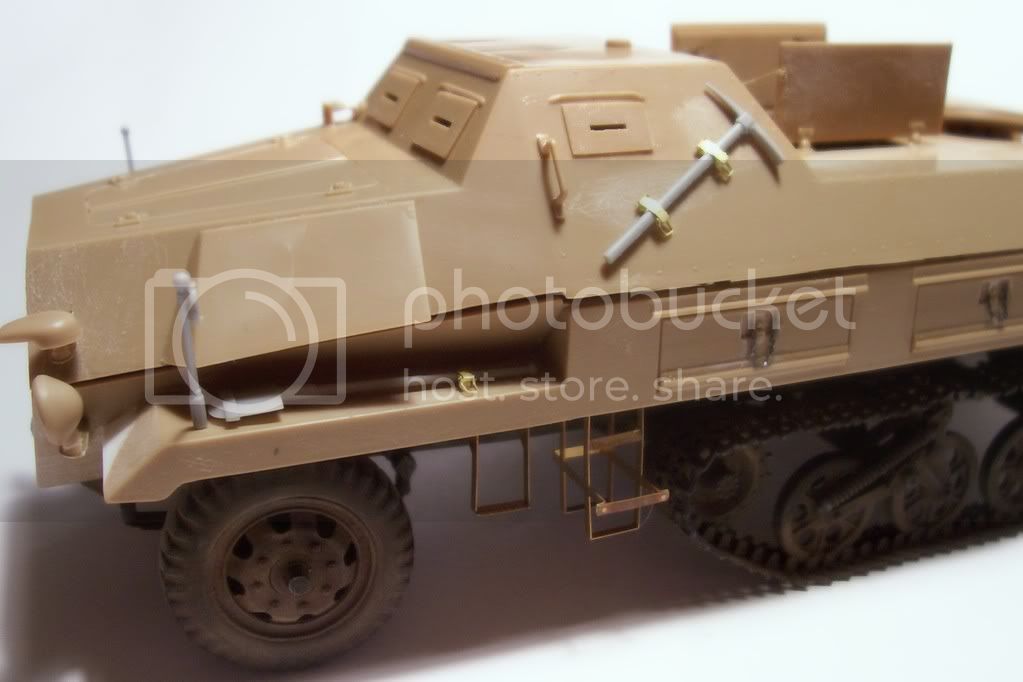
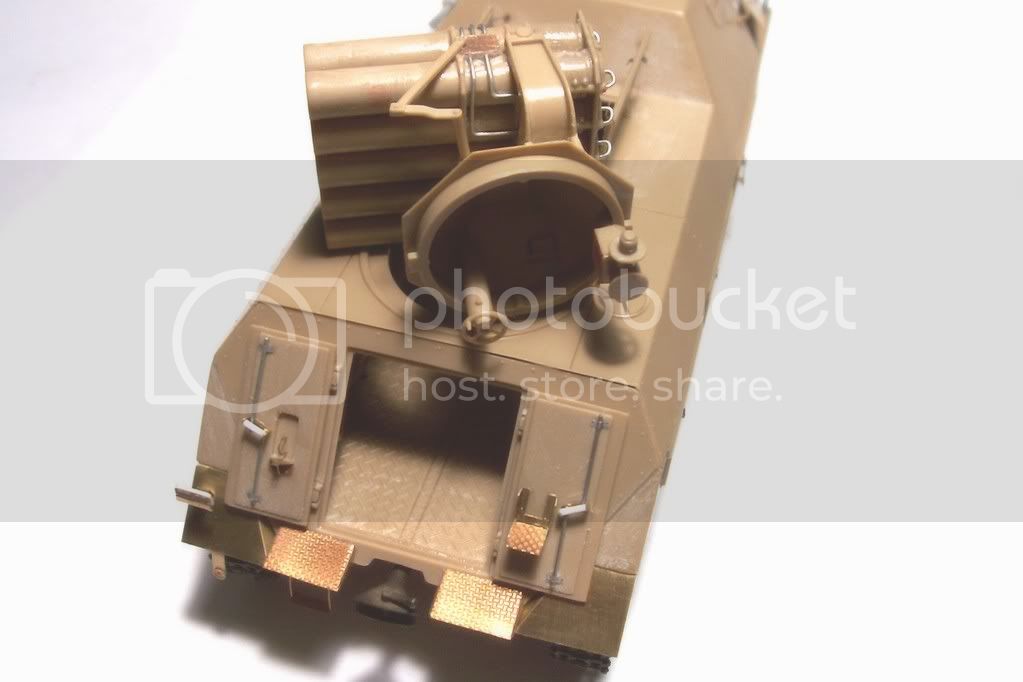
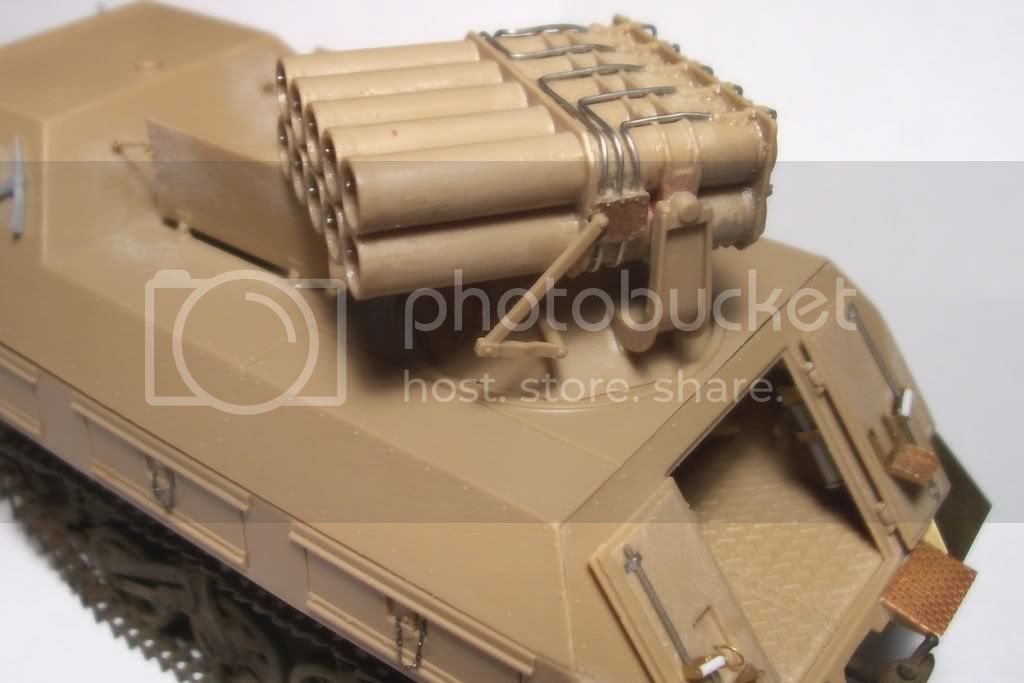
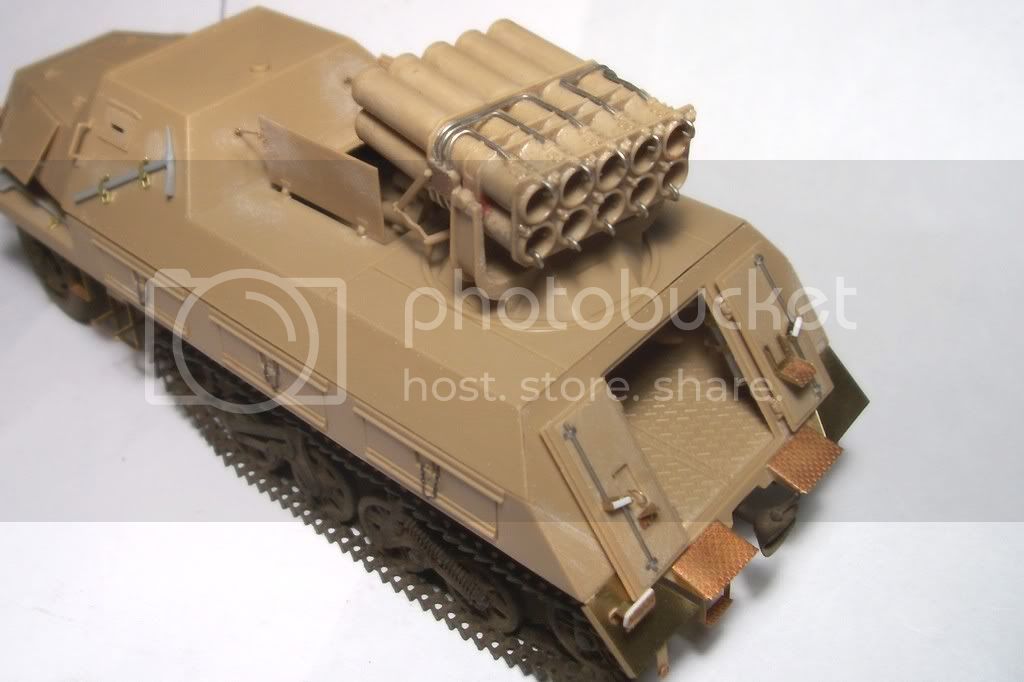
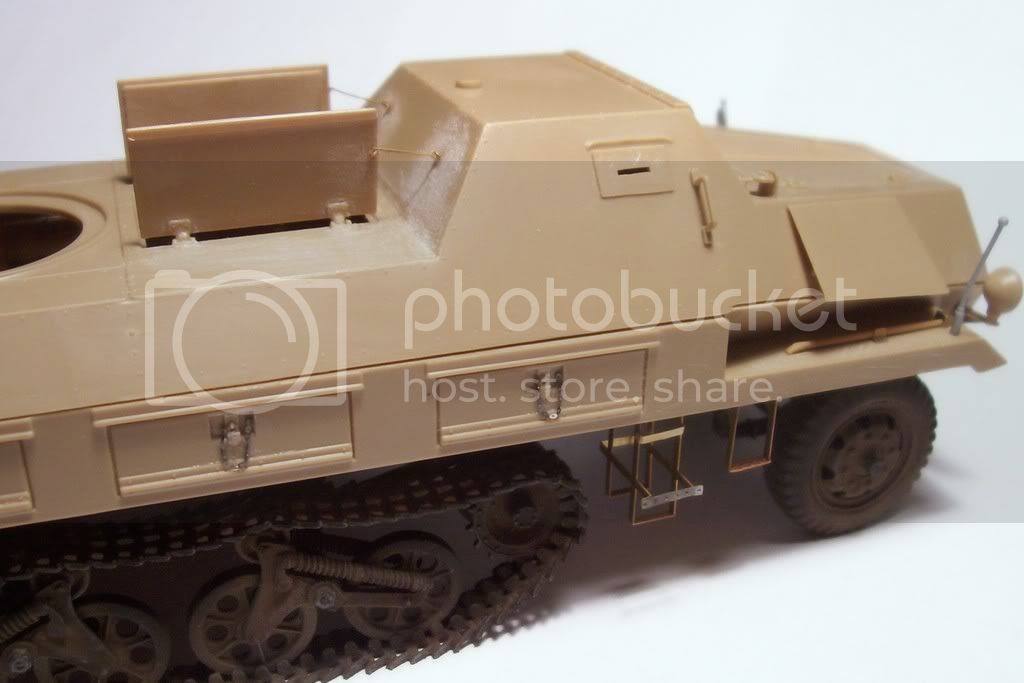
For the rest of the build almost everything was replaced or redone the trickiest was the launcher and im still not sure about it but we will see i guess, the detail on it was quite bad and most of it was removed with difficulty also the fit wasnt good and need much sanding etc i replaced the tools with spares and the clasps were from the griffon set, width indicaters were from a dragon set left over and the PE that wasnt with the eduard set i scrounged from the spares bin also the left front fender was short shotted and i used plastic card to fix it, on with the pics.
The inside roof
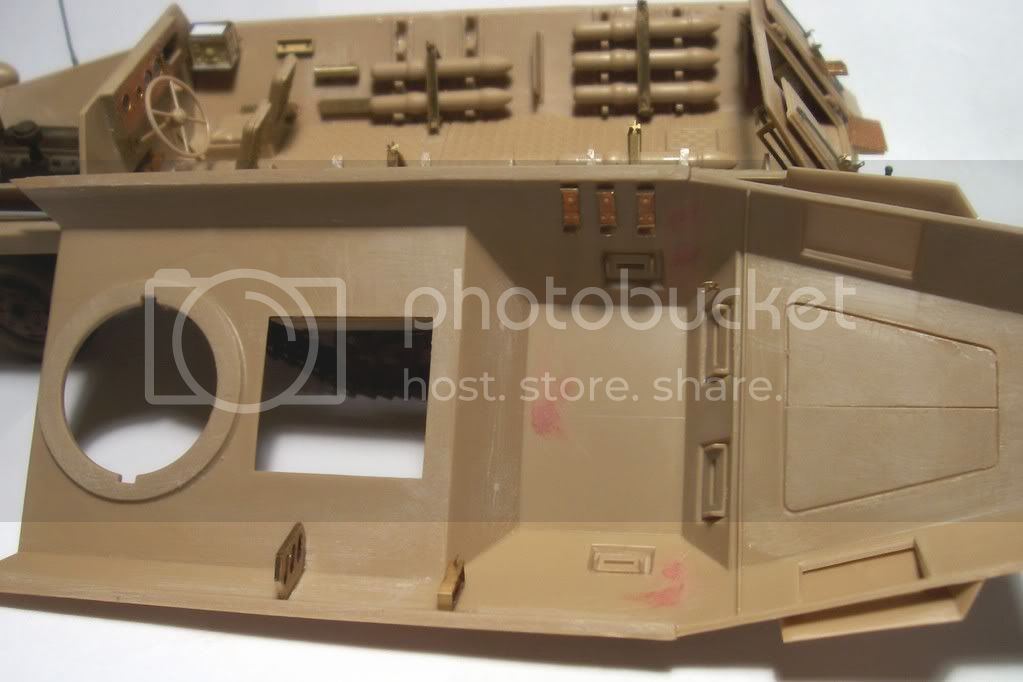
Rear doors redone with pe and scratch
fixed fender and replaced tools etc.
The inside part of the launcher
And the launcher itself (the jury is still out on this one)
Everything else
Painting next [:)]
Thanks Bill appreciate the support and encouragment
Hi Pawel im not sure this one comes in the king tiger variant lol thanks for the kind words what are you working on now? the last two i saw of yours were both kt's i think and fantastic ones at that
Mike leaving her buttoned up isnt that bad of an idea heh if the eduard set wasnt mostly interior i would have done that myself but i had it so i decided to use it heh thanks for checking it out
Last update for the build part of this one,,,
For the rest of the build almost everything was replaced or redone the trickiest was the launcher and im still not sure about it but we will see i guess, the detail on it was quite bad and most of it was removed with difficulty also the fit wasnt good and need much sanding etc i replaced the tools with spares and the clasps were from the griffon set, width indicaters were from a dragon set left over and the PE that wasnt with the eduard set i scrounged from the spares bin also the left front fender was short shotted and i used plastic card to fix it, on with the pics.
The inside roof
Rear doors redone with pe and scratch
fixed fender and replaced tools etc.
The inside part of the launcher
And the launcher itself (the jury is still out on this one)
Everything else
Painting next [:)]
biffa
Tennessee, United States
Joined: September 07, 2005
KitMaker: 881 posts
Armorama: 826 posts
Joined: September 07, 2005
KitMaker: 881 posts
Armorama: 826 posts
Posted: Wednesday, February 11, 2009 - 09:34 AM UTC
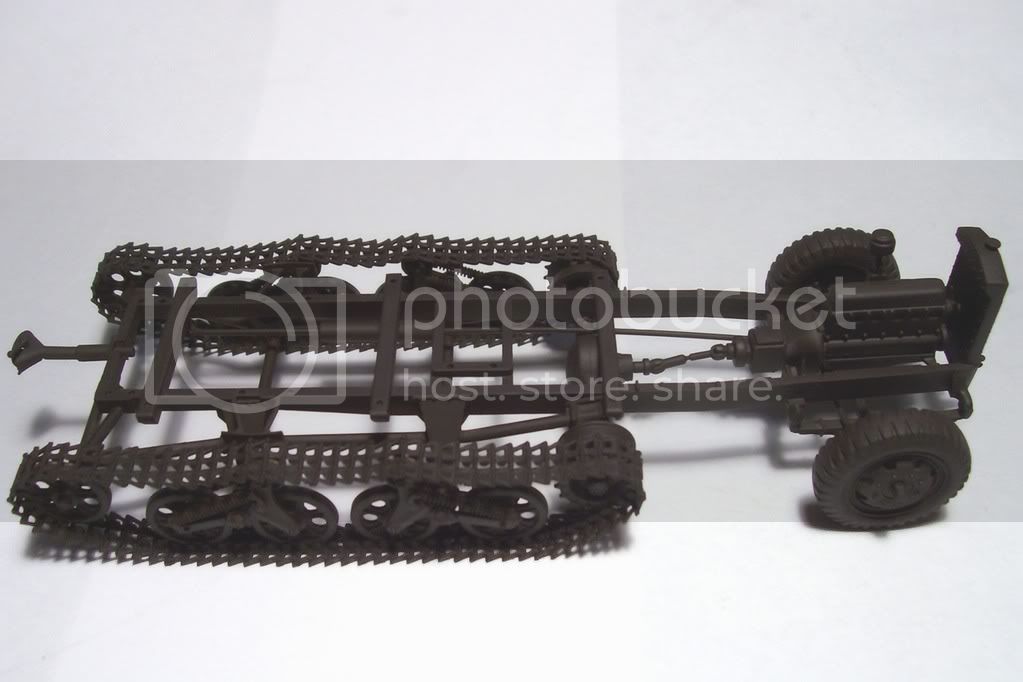
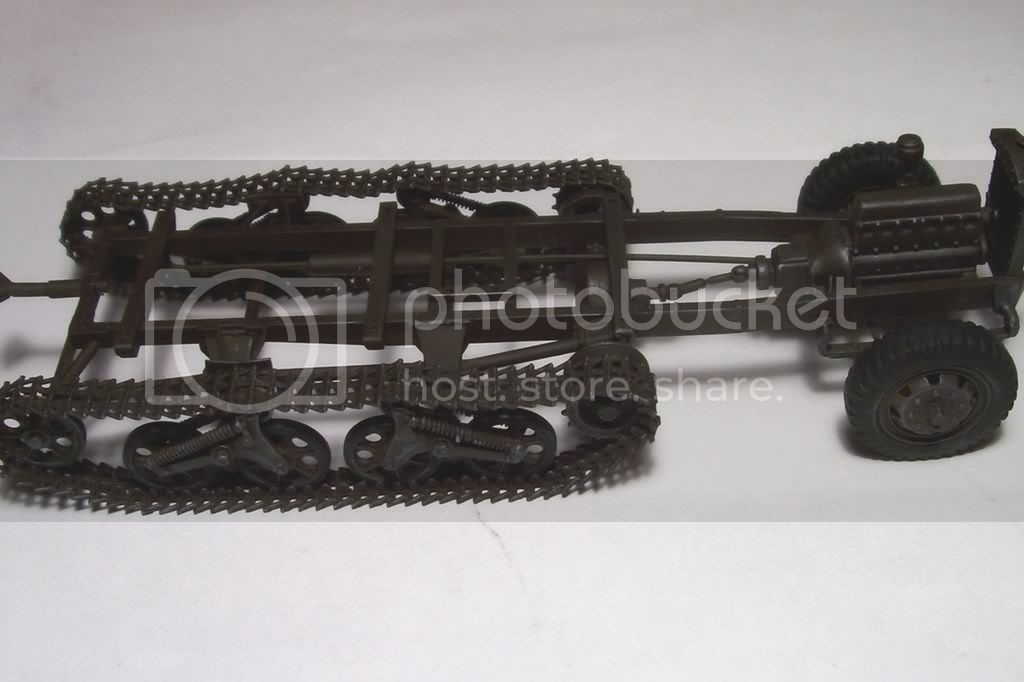
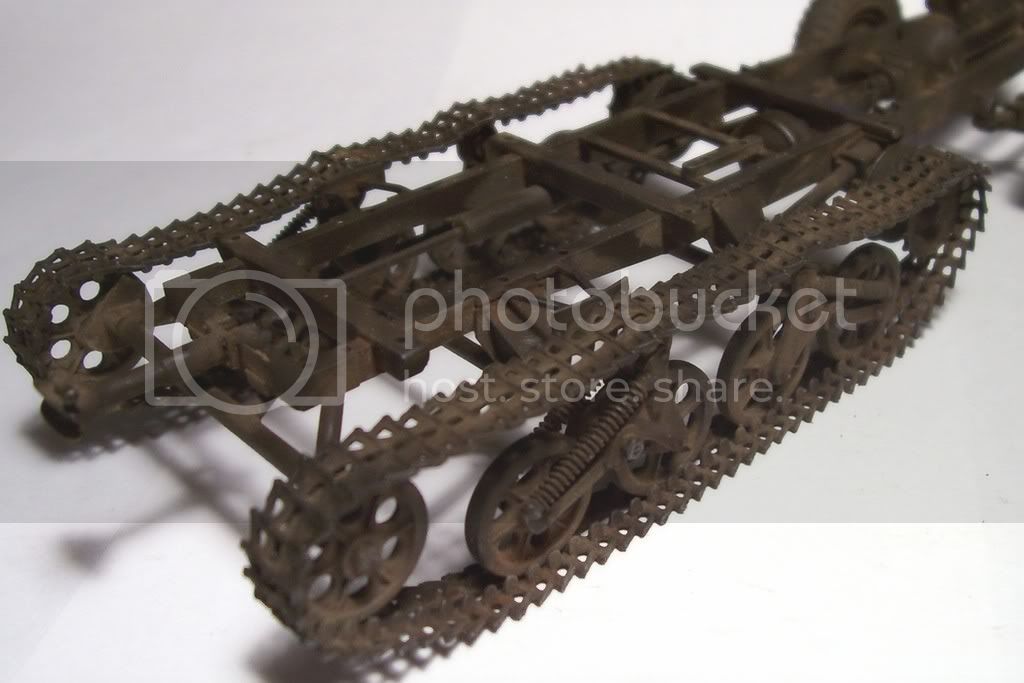
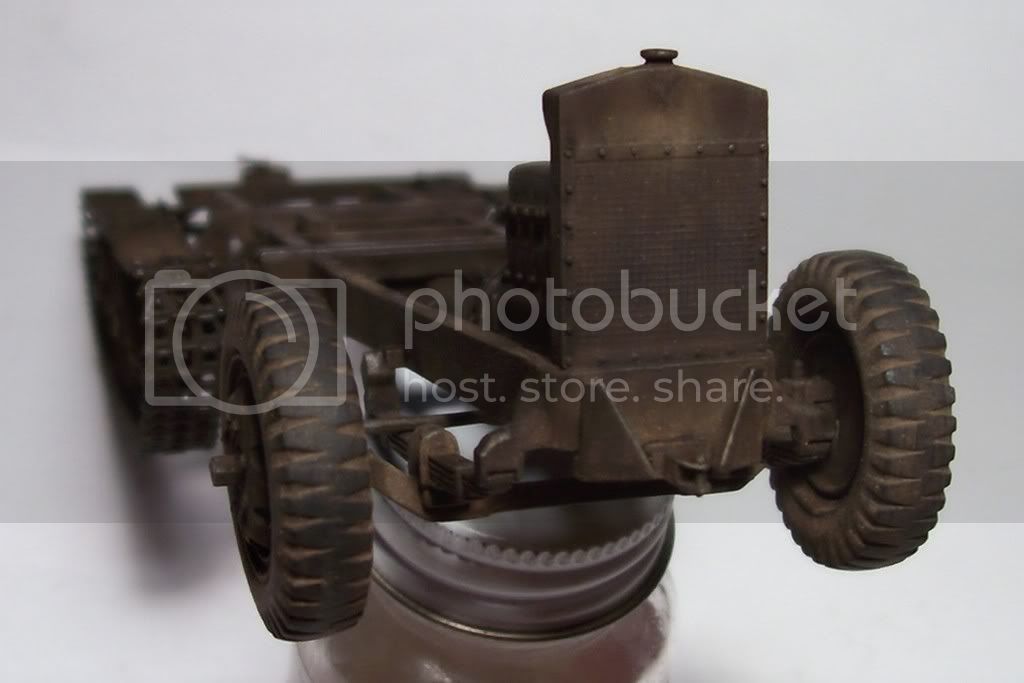
A few paint steps of the main frame and running gear.
base coat of rattle can brown
tires and rubber on wheels painted black then the whole thing dry brushed with shadowed steel
pigments mixed with alchohol and added
several oil washes of van dyke brown then several lamp black ones and this is where it is at i will wait until everything is assembled before blending it to the vehicle.
Ron.
wing_nut
New Jersey, United States
Joined: June 02, 2006
KitMaker: 1,212 posts
Armorama: 674 posts
Joined: June 02, 2006
KitMaker: 1,212 posts
Armorama: 674 posts
Posted: Wednesday, February 11, 2009 - 09:49 AM UTC
Fine work as usual Ron.The door and the launcher look sweet and good work on the tires. That frame sure does look spindly with the body on it. How rugged was this vehicle.
Any oh yeah... it's the 11th. How come your not done with this yet
johnlinford
England - South West, United Kingdom
Joined: October 28, 2006
KitMaker: 203 posts
Armorama: 195 posts
Joined: October 28, 2006
KitMaker: 203 posts
Armorama: 195 posts
Posted: Wednesday, February 11, 2009 - 09:59 AM UTC
looks real good.
spitfire303
Vendee, France
Joined: December 22, 2006
KitMaker: 1,437 posts
Armorama: 1,406 posts
Joined: December 22, 2006
KitMaker: 1,437 posts
Armorama: 1,406 posts
Posted: Wednesday, February 11, 2009 - 10:01 AM UTC
I recognize the master's hand on this one. Already with your last Panzer IV I ask myself why spending a lot of so needed cash if it's possible to turn an old Italeri (don't be offended Mr Italeri) junk into a winning masterpiece. I always liked a lot your pigment and wash work . Just can't achieve this subtle effect you get each time Ron, just if you didn't know what to do one evening ... a short tutorial would be really very wanted Think about it
oh... Ron, there are so many undiscovered Tiger B variations that came into the service at the final days of the war. Tiger B ausf P (panzerwerfer) was one of them I think
what do I do now? Hmm. .. trying to figure out how to make a simple "nothing but earth" base (not so easy as it seemed...)... a Hybrid Tiger II... and just a small secret project to see if I can glue anything else than a Tiger II.
spit
spit
Quoted Text
Hi Pawel im not sure this one comes in the king tiger variant lol thanks for the kind words what are you working on now? the last two i saw of yours were both kt's i think and fantastic ones at that
oh... Ron, there are so many undiscovered Tiger B variations that came into the service at the final days of the war. Tiger B ausf P (panzerwerfer) was one of them I think
what do I do now? Hmm. .. trying to figure out how to make a simple "nothing but earth" base (not so easy as it seemed...)... a Hybrid Tiger II... and just a small secret project to see if I can glue anything else than a Tiger II.
spit
spit
thebear
Quebec, Canada
Joined: November 15, 2002
KitMaker: 3,960 posts
Armorama: 3,579 posts
Joined: November 15, 2002
KitMaker: 3,960 posts
Armorama: 3,579 posts
Posted: Wednesday, February 11, 2009 - 04:45 PM UTC
Hi Ron ...Your launchers looks pretty darn good ...keep up the awesome job
Rick
Rick
Neo
North Carolina, United States
Joined: January 20, 2005
KitMaker: 916 posts
Armorama: 758 posts
Joined: January 20, 2005
KitMaker: 916 posts
Armorama: 758 posts
Posted: Wednesday, February 11, 2009 - 05:08 PM UTC
Ron,
I have this one in the stash so I'm following your post closely...
Your doing a great job - keep it up.
I have this one in the stash so I'm following your post closely...
Your doing a great job - keep it up.