Canada
Joined: December 29, 2008
KitMaker: 316 posts
Armorama: 264 posts
Posted: Thursday, August 13, 2009 - 05:42 AM UTC
Thanks for your kind comments guys! Very appreciated. Stefan, I can't wait to see pics of the painted soldiers.
Keep on building!


P.S. How old did you think I was???!!!
Utah, United States
Joined: May 27, 2003
KitMaker: 1,026 posts
Armorama: 654 posts
Posted: Friday, August 14, 2009 - 01:02 PM UTC
Q,
Based on your postings, the fact that you started a campaign, and the quality of your builds, I took you to be anywhere from 25 - 45.
While touching up an MP-40 sling and helmet straps for a BMW R75 to be entered next week, I went ahead and painted the knight's belts, straps, sword sheath and other leathery bits. If I find time in the next few days I'll get update pics posted.
Keith
Build 'em better than the box art!

#023
Zurich, Switzerland
Joined: March 13, 2009
KitMaker: 2,058 posts
Armorama: 1,656 posts
Posted: Sunday, August 23, 2009 - 04:59 AM UTC
Hi all!
So, seems I'm the first one to get done with this...
Here's the overall view:

The ribbons are those awarded for my grandfathers service in Korea. The Combat Infantryman's Badge is not an original, it's a bit smaller. The plaque states the title and unit my grandfather served in.

A period photo ond the story depicted in the scene as background info (no pun intended...).
And some detail shots:

The guy in the back (with the M2 Carbine) would be my grandfather.

Sorry for the photo quality, the natural light was appearantly not that good. Might have to redo them sometime.
Cheers!
Stef
Too many models - too little time...

#023
Zurich, Switzerland
Joined: March 13, 2009
KitMaker: 2,058 posts
Armorama: 1,656 posts
Posted: Sunday, August 23, 2009 - 05:03 AM UTC
Quoted Text
P.S. How old did you think I was???!!!
Like Keith said, anywhere between 20 and 45... When you said you had problems posting pics I figuerd you were probably older, not younger...

Keep up your good work!
Cheers!
Too many models - too little time...
Canada
Joined: December 29, 2008
KitMaker: 316 posts
Armorama: 264 posts
Posted: Tuesday, August 25, 2009 - 12:18 PM UTC
Stefan. WOW!!! Great diorama, the figures look great, as does the base. I will give feedback later as I am in California with my grandparents on vacation. It is also quite hard to type on an iPod.
Later
Utah, United States
Joined: May 27, 2003
KitMaker: 1,026 posts
Armorama: 654 posts
Posted: Tuesday, August 25, 2009 - 01:33 PM UTC
Yes Stefan, that does look great! The figures, base, ribbons, story boards all come together and work wonderfully. You've done your grandpa proud!
Build 'em better than the box art!
Utah, United States
Joined: May 27, 2003
KitMaker: 1,026 posts
Armorama: 654 posts
Posted: Tuesday, August 25, 2009 - 01:36 PM UTC
Painted the breeches and leather. I'll try to get to the weathering on the straps and gloves soon. And the chain mail while I'm at it. And his face. (I hate doing faces)
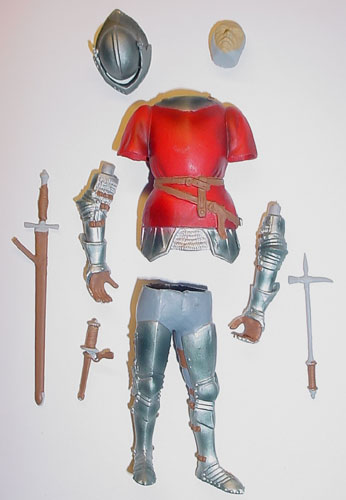
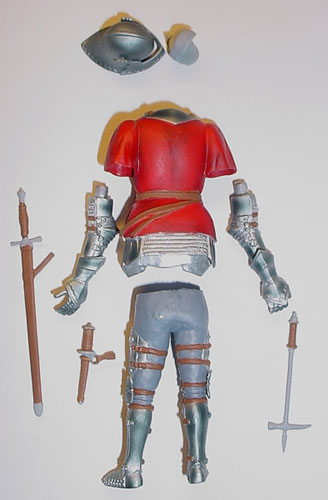
Build 'em better than the box art!

#023
Zurich, Switzerland
Joined: March 13, 2009
KitMaker: 2,058 posts
Armorama: 1,656 posts
Posted: Sunday, August 30, 2009 - 02:02 AM UTC
Hi all, thanks for the comments. Decides to make some new pictures, so here goes:


Looking forward to some more entries here! Keith, nice knight. Will you paint the family crest by hand?
Cheers
Stef
Too many models - too little time...
Utah, United States
Joined: May 27, 2003
KitMaker: 1,026 posts
Armorama: 654 posts
Posted: Monday, August 31, 2009 - 11:20 PM UTC
Stef,
I plan on hand painting the crest on his tunic and shield, after I build his shield. I'm not happy with the one supplied with the kit.
Update--Leather weathering done and a burnt umber wash applied to the armor plates and chainmail. The wash helped tone down the brightness of the armor and IMHO it looks more like steel now.
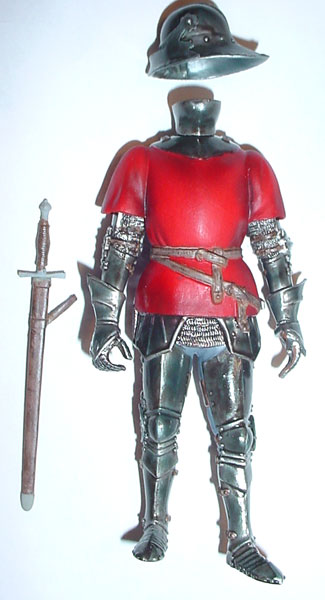
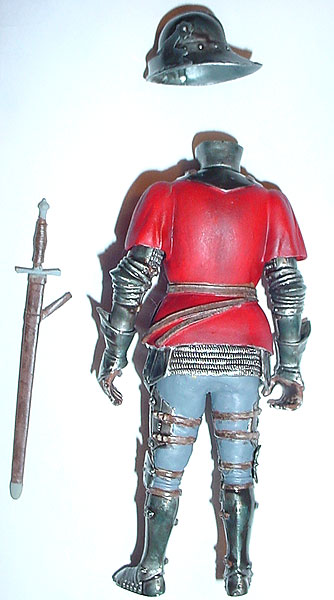
Build 'em better than the box art!
Utah, United States
Joined: May 27, 2003
KitMaker: 1,026 posts
Armorama: 654 posts
Posted: Sunday, September 06, 2009 - 04:58 AM UTC
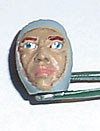
I think I finished the face. They have always been my weak(est) spot. Should I leave it as is? Is there anything I could do to improve it? Or make a blank, cloth shroud to cover it like a mannequin-type display in a museum? (He will be standing on a display base).
A piece of coffee filter paper molded over the head with white glue and painted black?
Build 'em better than the box art!

#023
Zurich, Switzerland
Joined: March 13, 2009
KitMaker: 2,058 posts
Armorama: 1,656 posts
Posted: Sunday, September 06, 2009 - 05:31 AM UTC
Keith
What kind of colors are you using? You should try getting some more shades of skin color on it. Right now it's too pink I think. Then, depending on the type of colors you're using you should blend them to get an even flow from one color to another. Not easy to explain in a few words... Check out this feature here on Armorama:
https://armorama.kitmaker.net//features/2274 I wouldn't make a mannequin out of it...
HTH!
Cheers!
Too many models - too little time...
Utah, United States
Joined: May 27, 2003
KitMaker: 1,026 posts
Armorama: 654 posts
Posted: Sunday, September 06, 2009 - 05:56 AM UTC
Quoted Text
Keith
What kind of colors are you using? You should try getting some more shades of skin color on it. Right now it's too pink I think. Then, depending on the type of colors you're using you should blend them to get an even flow from one color to another. Not easy to explain in a few words... Check out this feature here on Armorama:
https://armorama.kitmaker.net//features/2274
I wouldn't make a mannequin out of it...
HTH!
Cheers!
Stefan,
Thanks for looking and for the advise! The paints used were Tamiya and Modelmaster. You can't tell by the pic (flash wash-out), but there is a flesh tone base coat, a darker brown/tan wash, and a light tan drybrush over his brow, cheeks and nose. I just don't know how to get them too blend together. Besides the face his lips look too pink also. I will check out that link and try some of the techniques.
I also think the eyes look too big, but there is no way I can paint anything smaller. I had to use a sharpened toothpick to dab on the white highlight above each pupil.
Keith
Build 'em better than the box art!
Utah, United States
Joined: May 27, 2003
KitMaker: 1,026 posts
Armorama: 654 posts
Posted: Friday, September 11, 2009 - 01:26 PM UTC
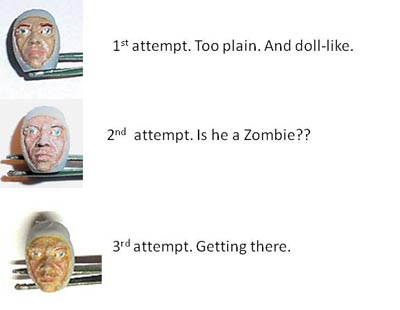
Okay, I tried some of the techniques spelled out in the link and here are my results.
In no way am I saying the instructions don't work. I just need more practice.
Build 'em better than the box art!
Utah, United States
Joined: May 27, 2003
KitMaker: 1,026 posts
Armorama: 654 posts
Posted: Friday, September 11, 2009 - 02:38 PM UTC
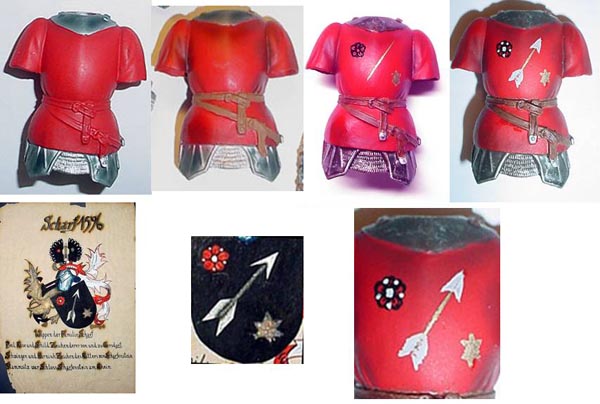
Painted the crest on the tunic. Needs a little touch up, but I'm pleased with it. Sorta has a medieval embroidered look. What do ya think?
Build 'em better than the box art!
Canada
Joined: December 29, 2008
KitMaker: 316 posts
Armorama: 264 posts
Posted: Monday, September 14, 2009 - 11:45 AM UTC
Nice, I like it! If you have noticed that I haven't been posting much it was because I have been busy lately. You will hear from me more now!
M4A2Sherman

Utah, United States
Joined: May 27, 2003
KitMaker: 1,026 posts
Armorama: 654 posts
Posted: Wednesday, September 16, 2009 - 06:42 AM UTC
Q (and anyone else who is following along),
Here's an update. He is not completely finished yet. Displayable, but not done.
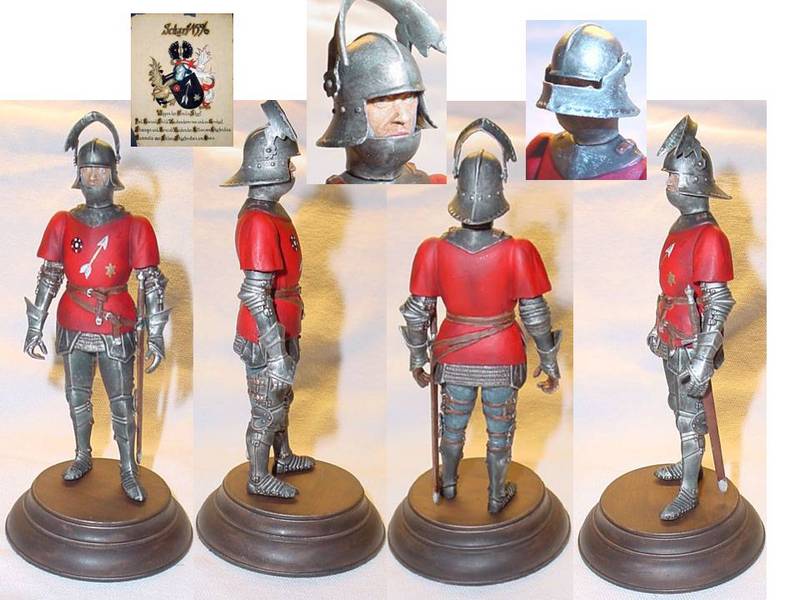
I still plan on adding a shield. Here is a concept shot.
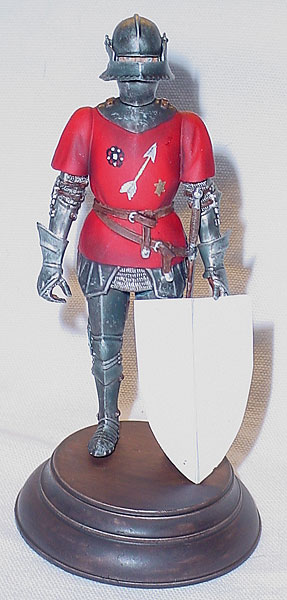
The shield may be a bit oversized, but this way it is tall enough to be held by his hand.
Build 'em better than the box art!

#023
Zurich, Switzerland
Joined: March 13, 2009
KitMaker: 2,058 posts
Armorama: 1,656 posts
Posted: Saturday, September 26, 2009 - 03:56 AM UTC
Keith, looks great, vast improvement over the first try, if I may say so! The metal effect looks greast too! As for the shield, it can never be big enough if it's pupose is self protection...

Cheers!
Stef
Too many models - too little time...
Canada
Joined: December 29, 2008
KitMaker: 316 posts
Armorama: 264 posts
Posted: Saturday, September 26, 2009 - 04:15 PM UTC
Really nice knight you have going on here. I am currently working on grandpa himself.
Utah, United States
Joined: May 27, 2003
KitMaker: 1,026 posts
Armorama: 654 posts
Posted: Thursday, October 01, 2009 - 03:59 AM UTC
Knight Update:
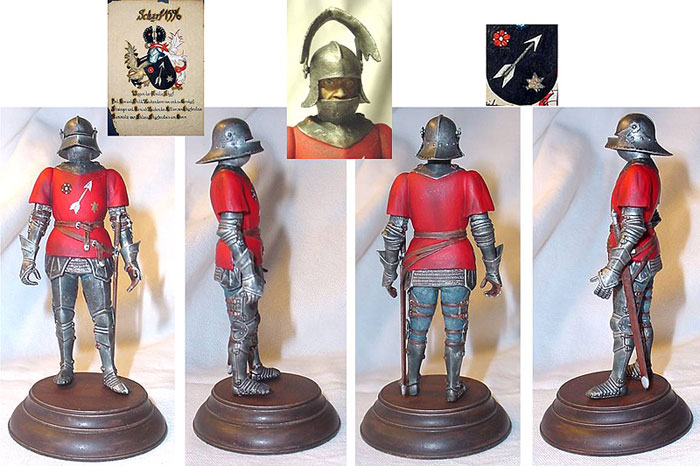
I did some surgery and got rid of the 'Giraffe neck' look by reshaping the chin piece and taking a few millimeters off his head. Now he better resembles photos of the real armor and authentic drawings from that period.
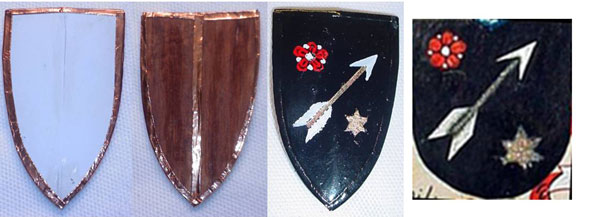
Work on the shield goes on. It's almost finished. On the left is the bare plastic and metal taped edges on the front, then the wood on the obverse, the front painted, and then a close-up from the family crest.
Build 'em better than the box art!
Utah, United States
Joined: May 27, 2003
KitMaker: 1,026 posts
Armorama: 654 posts
Posted: Wednesday, October 07, 2009 - 11:20 PM UTC
My ancestral knight is done. Here he is in all his glory....
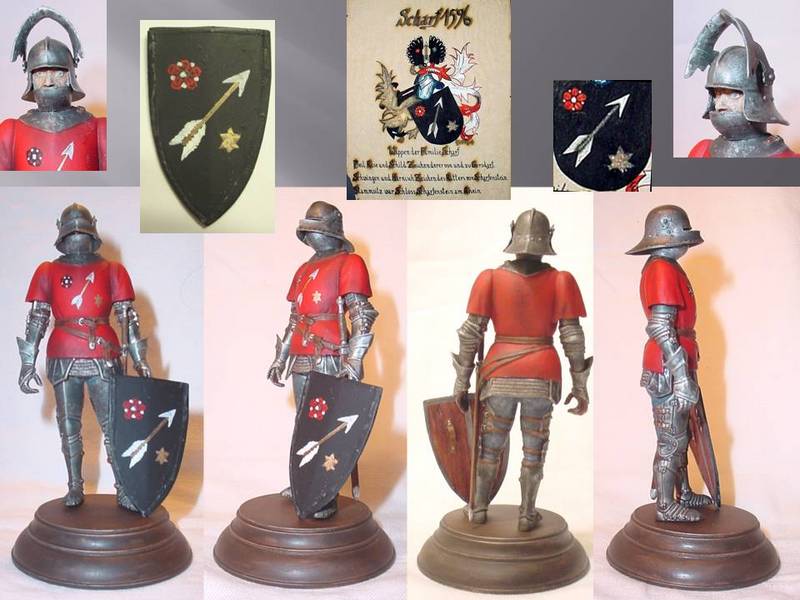
And with the family crest:
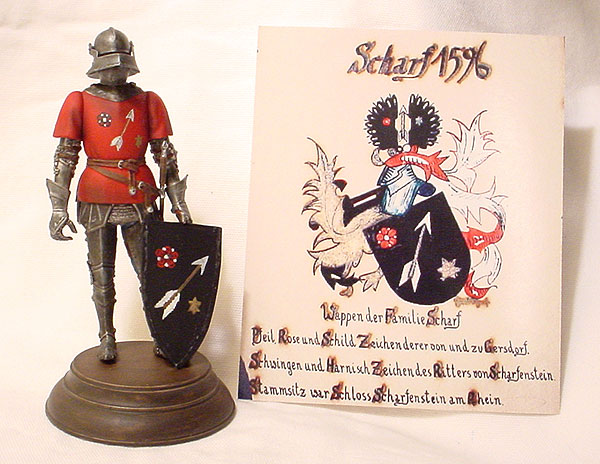
Thanks Q for starting this campaign. I had a good time and it motivated me to get to this kit and get it finished.
Keith
Build 'em better than the box art!

#023
Zurich, Switzerland
Joined: March 13, 2009
KitMaker: 2,058 posts
Armorama: 1,656 posts
Posted: Thursday, October 08, 2009 - 07:40 PM UTC
Keith
Good work on that knight, I like it a lot! So you're second, wonder where all the other participant's projects are!?


Not much more than 20 days left...
Cheerio!
Too many models - too little time...
Utah, United States
Joined: May 27, 2003
KitMaker: 1,026 posts
Armorama: 654 posts
Posted: Friday, October 09, 2009 - 06:16 AM UTC
Quoted Text
Keith
Good work on that knight, I like it a lot! So you're second, wonder where all the other participant's projects are!? 
 Not much more than 20 days left...
Cheerio!
Thanks Stefan,
Hmm, I didn't realize that we were the only ones done. And time is running out. Yeah, where is everybody? It's like a ghost town with tumbleweeds blowing through...
Keith
Build 'em better than the box art!
Canada
Joined: December 29, 2008
KitMaker: 316 posts
Armorama: 264 posts
Posted: Sunday, October 11, 2009 - 08:10 AM UTC
Hi all,
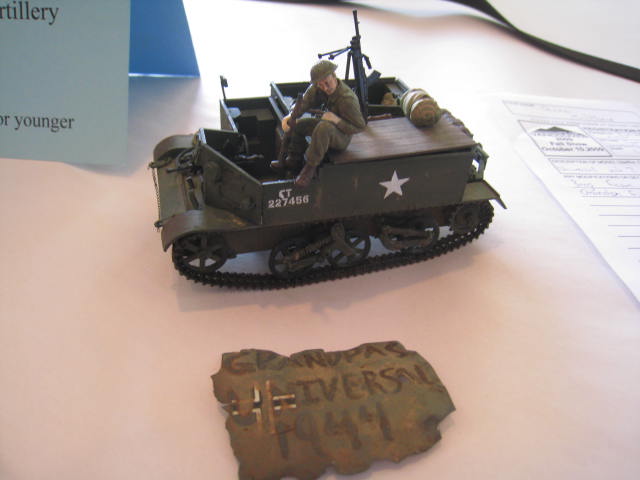
I have just finished grandpas universal mk2! Unfortanetely, I had to leave them at the show and have a friend get them. (My dad couldn't drive me back because of an eye injury), so the pictures won't be the best yet.
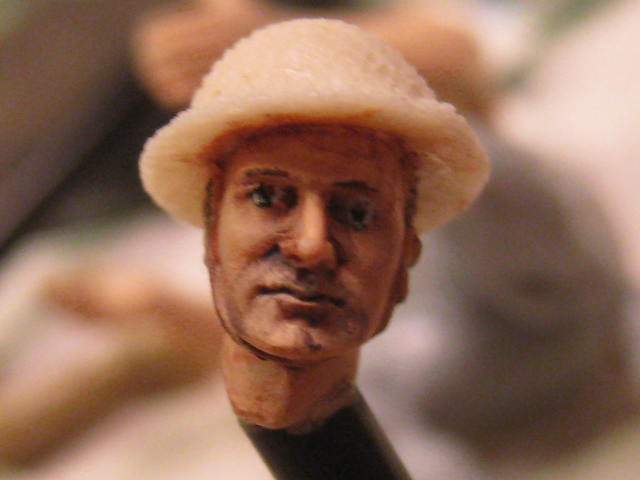
Here is grandpas face:
I will have more pics up later!
M4a2sherman.
P.S. DEADLINE IS CLOSE FOR THOSE WHO ARE NOT DONE!
Utah, United States
Joined: May 27, 2003
KitMaker: 1,026 posts
Armorama: 654 posts
Posted: Tuesday, October 13, 2009 - 08:10 AM UTC
M4A2Sherman,
Wow! Looks good. Can't wait for the better shots.
Again, the workmanship on the face belies your young age. I wish my knight came out half that good. Did you use oils? I gotta get me some.
How did the model do at the show? Bring back any awards?
-Keith
Build 'em better than the box art!
Canada
Joined: December 29, 2008
KitMaker: 316 posts
Armorama: 264 posts
Posted: Tuesday, October 13, 2009 - 11:53 AM UTC
Well, I got first becasue no one else was in the category. (Wish i had some competition)
Actually, I did not use oils, my mom gave me the "YOU HAVE TO CLEAN THEM UP WITH TURPENTINE AND IT MAKES A MESS AND IS BAD FOR YOUR HEALTH!" lecture. I used tamiya and vallejo acrylics.
Here are the steps:
1) Base with Vallejo flesh
2)Make a red-brown wash (roughly 1:1) and spread over face.
3)Use dark brown for shadows
4) Make highlights using flesh and a little yellow, red if needed.
5)Paint eyes and lips. For lips use a mixture of flesh and red and possibly pink. Keep it subtle, painting only the bottom lip and leaving the upper in shadow.
6)If you want, use a dark grey wash for a 5 o'clock shadow.
May I recommend you get the book "making armor dioramas" by Lynn Kessler kalmbach publishing, this is wear I got the technique from.
Try it out!


 Not much more than 20 days left...


Not much more than 20 days left...


