Greetings Frank
My sincere thanks for your comments and correction. As we know Museums can be in error too. I really like the image as well. The water piping appears to be copper instead of brass. And there is a siren horn under the hood as well. Look at the center of the fire wall to see its bell / cone.
By the way moving the fuel cell back slightly has aleviated the exhaust location problem. Though you still should remove the pipe aft of the muffler and reattach it after the forward assembly is in place. This bit worked out well.
Hosted by Darren Baker
Roden 1/35 RR armoured car

JackFlash

Joined: January 25, 2004
KitMaker: 11,669 posts
Armorama: 256 posts

Posted: Tuesday, July 21, 2009 - 12:16 PM UTC

JackFlash

Joined: January 25, 2004
KitMaker: 11,669 posts
Armorama: 256 posts

Posted: Tuesday, July 21, 2009 - 12:24 PM UTC
Now on to the colour.
The blue grey of ARR 2 is accurate? What was the Irish standard and what was ther British standard?
The blue grey of ARR 2 is accurate? What was the Irish standard and what was ther British standard?

JackFlash

Joined: January 25, 2004
KitMaker: 11,669 posts
Armorama: 256 posts

Posted: Tuesday, July 21, 2009 - 12:36 PM UTC
Quoted Text
Greetings All; Since the instrument panel is void of any detail I am left to extrapalate its contents. Turn of the century machinery did only have the needed gauges for the experienced driver to read and know what he needed to know. These were often just;
1, Water temp readout.
2. oil pulsator.
3. tachometer / rev counter.
4. starter magnetos.
From the reverse side of the forward firewall, it look as if the water temp gauge was centrally located. Anyting lse is a total blind stab. Maybe I can ask the museums to offer a bit of help.
http://www.tankmuseum.org/
http://www.esatclear.ie/~curragh/sliabh_na_mban.htm
Here is the prompt response from the tank museum.
". . .Stephen
Such photos as we have of the interior of our Rolls do not show the dashboard very well. Such instruments as there are tend to be clustered around the steering wheel, which hides them from view. We would have to get our photographer to go inside the car and try to get an angle that shows them all. Unfortunately he is away for the next two weeks so it would be impossible to do anything before then, and there would be costs involved.
DavidF
David Fletcher
Historian
The Tank Museum
Bovington, Dorset, UK
BH20 6JG. . ."
Posted: Thursday, July 23, 2009 - 11:41 AM UTC
Stephen, thanks for this build log - I've just started the same kit and it's been very useful so far.
I may have missed it but what was your reason for moving the fuel cell?
And as for the dash photos, let me see if I can come up with anything as I live quite close to Bovington and I need to make a trip to get more detail...
If it helps, here's a pic of a 1924 Silver Ghost with dashboard quite visible:


JackFlash

Joined: January 25, 2004
KitMaker: 11,669 posts
Armorama: 256 posts

Posted: Thursday, July 23, 2009 - 04:47 PM UTC
Quoted Text
Stephen, thanks for this build log - I've just started the same kit and it's been very useful so far. I may have missed it but what was your reason for moving the fuel cell?. . ."
Greetings Ken;
The reason for moving the fuel cell was that it bound up the exhaust and made it impossible to mount. I opened up the cell indentions and moved the tank back about 1/8 of an inch. With the cell mounted you still need to clip off the exhaust pipe as it exists the muffler. Then reattach it separately after the forward assembly ( header exhaust pipes, main pipe and muffler) is in place.
As it happens the tank museum has hooked me up with a fellow modeler, Stuart Wheeler. He kindly forwarded me a proof sheet of some very useful images. The instrument panel is richly stained wood. Similar to the types seen on the wood paneling of the Sopwith Camels. This is a red brown and I was pretty right on with the types of instrument gauges that were employed. More later.
Posted: Friday, July 24, 2009 - 02:09 AM UTC
Ah, I see now (having just reached stage 16) 
I can see what David Fletcher means about the clustered dials from the pic on this page: http://www.rrab.com/nov00.htm
You mentioned about the Queen possibly crawling into the back of the Bovington AC when she used it on a visit.
I can vouch that she did indeed use it, but stood in the open back alongside the Regimental Colonel Commandant. I was there on the day in May 1997 when she came to open the refurbished museum and visit the troops.


JackFlash

Joined: January 25, 2004
KitMaker: 11,669 posts
Armorama: 256 posts

Posted: Sunday, July 26, 2009 - 07:19 AM UTC
Am glad you mentioned this concerning the Queen. Even as a far flung cousin of the empire I knew in my heart the dear lady would not crawl anywhere for any reason. Would not be dignified. I was thinking about doing a diorama with the Miniart Country farm setting or one of the single building jobs.. I just wish there were some 1/35 scale figures Irish uniforms of the period. Maybe I'll have to settle for British items from Tamiya? Anyone know where I could find a Crossley?


Posted: Monday, July 27, 2009 - 04:36 AM UTC
Well, having now finished one Roden kit I can't see me attempting another one anytime soon. Far too many poor fit issues for my liking. And like Stephen said, the tyres really do need reworking. 


JackFlash

Joined: January 25, 2004
KitMaker: 11,669 posts
Armorama: 256 posts

Posted: Wednesday, July 29, 2009 - 08:34 AM UTC
Here are some recent comments by modeler Stuart Wheeler attached to the tank museum.
As a bit of incentive for Kitmaker members the proof sheet can be had by sending me a PM with your e-mail. Now it is not the whole story on details but it helps. As Stuart says if you want higher res. images you will have to contact the tank museum and mention this thread.
Quoted Text
"Stephen,
Please find attached a proof sheet showing the images of the dials, stowage, dimensions and chassis diagram.
The dials read as follows:
Speedometer , Fuel, Oil, Thermometer, Amperes
The images are good enough to provide details of the dials but if you require higher details of the dials that will me to take another set as the Thermometer and Ampere dials are not that clear.
Our RR AC would not appear to have any fittings – (claps, brackets etc.) for Lee Enfield rifles which the stowage diagram confirm.
We can supply you with scans of the images (at £5.00 each) and I can supply all the drawings as jpgs for an additional £5.00. Please let me know if you are interested in the images or drawings and I will provide you with payment details.
Best regards Stuart Wheeler"
As a bit of incentive for Kitmaker members the proof sheet can be had by sending me a PM with your e-mail. Now it is not the whole story on details but it helps. As Stuart says if you want higher res. images you will have to contact the tank museum and mention this thread.

JackFlash

Joined: January 25, 2004
KitMaker: 11,669 posts
Armorama: 256 posts

Posted: Wednesday, July 29, 2009 - 08:38 AM UTC
Here is another comment bt Stuart in response to my thanks for his help.
Quoted Text
"Stephen,
No problem, glad to hear that the images were okay. They’re not easy to take without extra lighting or opening up more hatches.
I actually have both Roden RR AC and the 1:32 Scale Link RR AC. I started the Scale Link car about 18 months ago but have decided to hang on for a bit as I want to improve my soldering skills rather than use epoxy. I have the Roden kit on my to do list and any research work on the vehicle will be helpful for my own build. Feel free to get in touch.
Best regards Stuart"

JackFlash

Joined: January 25, 2004
KitMaker: 11,669 posts
Armorama: 256 posts

Posted: Wednesday, July 29, 2009 - 08:45 AM UTC
Quoted Text
Well, having now finished one Roden kit I can't see me attempting another one anytime soon. Far too many poor fit issues for my liking. And like Stephen said, the tyres really do need reworking.
Interesting that you should comment on that. It seems Squadron has just issued New wheels for the British Armoured car 1920 Pattern Mk.1. The package seems to be 8 wheels with tires molded / mounted in place. Item # TX0137 $10.76 USD. See their August 2009 free flyer on the outside rear cover lower right section of the page.

JackFlash

Joined: January 25, 2004
KitMaker: 11,669 posts
Armorama: 256 posts

Posted: Thursday, July 30, 2009 - 06:16 AM UTC
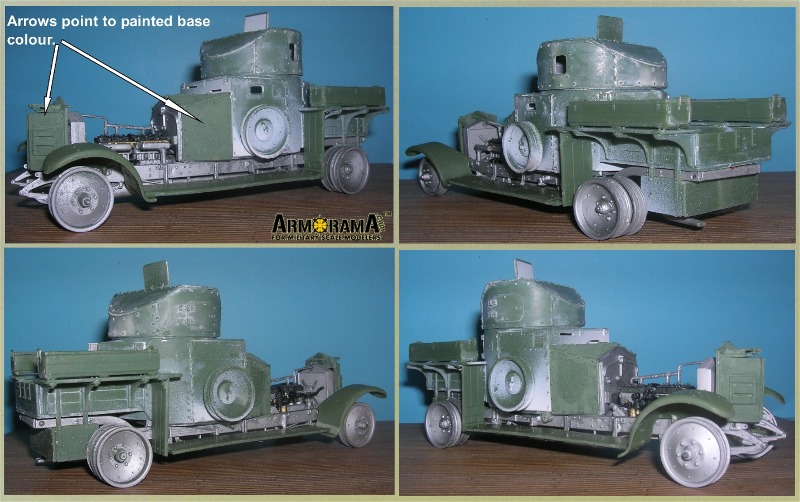
Here is a bit more and the dry fit of the rear assembly.
I note from the image on page 1 that there is a siren under the bonnet.
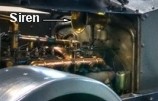

I note from the image on page 1 that there is a siren under the bonnet.


JackFlash

Joined: January 25, 2004
KitMaker: 11,669 posts
Armorama: 256 posts

Posted: Tuesday, August 04, 2009 - 07:47 PM UTC
There are at least four items I did not add here. A choke push button, the radiator armour actuating lever, a snmall gauge that won't be seen when closed and a brass military identity placard.


JackFlash

Joined: January 25, 2004
KitMaker: 11,669 posts
Armorama: 256 posts

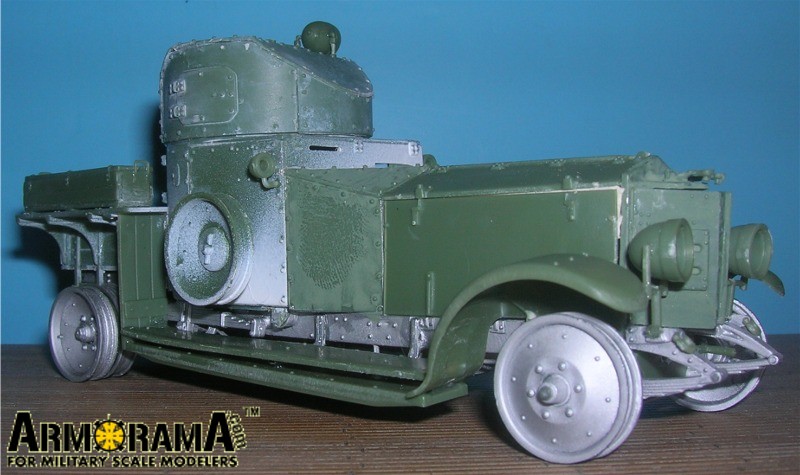
Posted: Tuesday, August 04, 2009 - 07:56 PM UTC
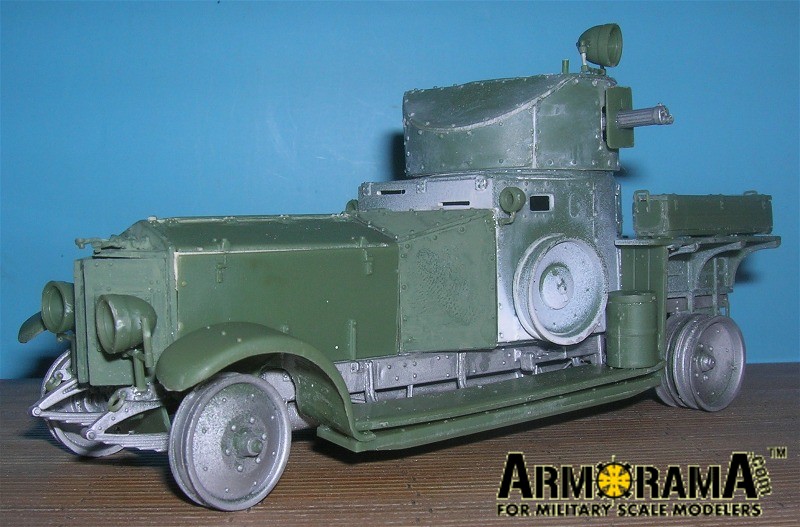
Here it is ready to get the over all paint scheme. Yes that is a thumb print. But it was only a test run.


Gorizont

Joined: November 28, 2007
KitMaker: 1,462 posts
Armorama: 1,289 posts

Posted: Tuesday, August 04, 2009 - 09:22 PM UTC
I hope, the finger-prints can be removed.
Also the kit seems not easy to build, as I see on some parts.
Vehicles like this, are very rare on model-kit forums. Looks good!
greetings...
Soeren
Also the kit seems not easy to build, as I see on some parts.
Vehicles like this, are very rare on model-kit forums. Looks good!
greetings...
Soeren

JackFlash

Joined: January 25, 2004
KitMaker: 11,669 posts
Armorama: 256 posts

Posted: Wednesday, August 05, 2009 - 07:44 AM UTC
Quoted Text
I hope, the finger-prints can be removed.
Also the kit seems not easy to build, as I see on some parts.
Vehicles like this, are very rare on model-kit forums. Looks good!
greetings...
Soeren
No worries there. I just have to settle on the scheme and the right colour(s) to lay down.

JackFlash

Joined: January 25, 2004
KitMaker: 11,669 posts
Armorama: 256 posts

Posted: Tuesday, August 11, 2009 - 07:08 PM UTC
Decals next.


JackFlash

Joined: January 25, 2004
KitMaker: 11,669 posts
Armorama: 256 posts

Posted: Tuesday, August 11, 2009 - 07:17 PM UTC
Going for this look. On a cloudy day the colour goes darker. Note on this vehicle the smaller lights were eventually moved to the fender from a higher point on the cab.


Posted: Wednesday, August 12, 2009 - 12:47 AM UTC
The exact vehicle I went for too. 


JackFlash

Joined: January 25, 2004
KitMaker: 11,669 posts
Armorama: 256 posts

Posted: Wednesday, August 12, 2009 - 04:32 AM UTC
Excellent! I hope mine turns out as well as that. What paint company colour did you use for the overall hunter green?
Posted: Wednesday, August 12, 2009 - 08:47 AM UTC
Hi Stephen,
Great prgress.
Ken,
Cracking build.
Al
Great prgress.
Ken,
Cracking build.
Al

Gorizont

Joined: November 28, 2007
KitMaker: 1,462 posts
Armorama: 1,289 posts

Posted: Wednesday, August 12, 2009 - 09:14 AM UTC
Hi Ken, the vehicle looks great! The clean look makes this "oldtimer" perfect, to get shown in a "museum". Did you planned something for it?
Stephen, I think that your model-kit will also be a good looking one!
Soeren
Stephen, I think that your model-kit will also be a good looking one!
Soeren

JackFlash

Joined: January 25, 2004
KitMaker: 11,669 posts
Armorama: 256 posts

Posted: Wednesday, August 12, 2009 - 05:10 PM UTC
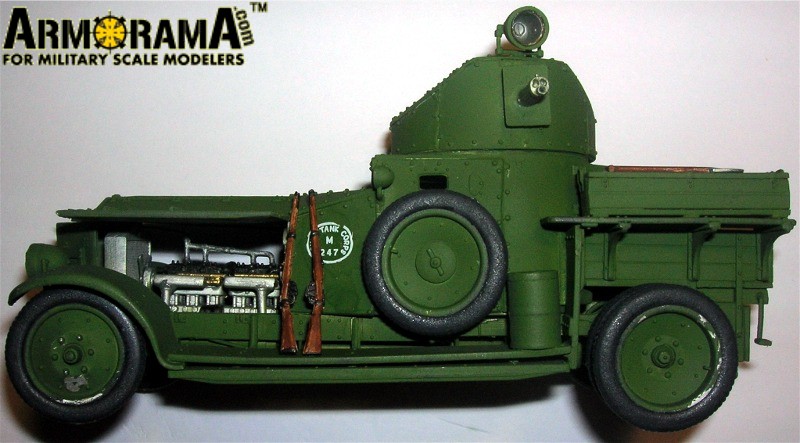
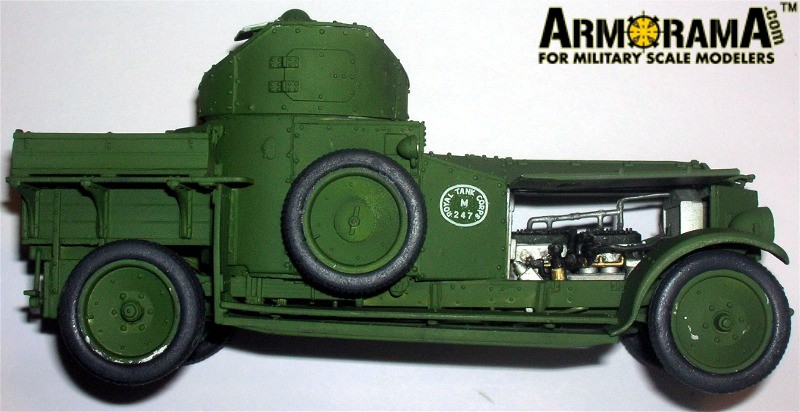
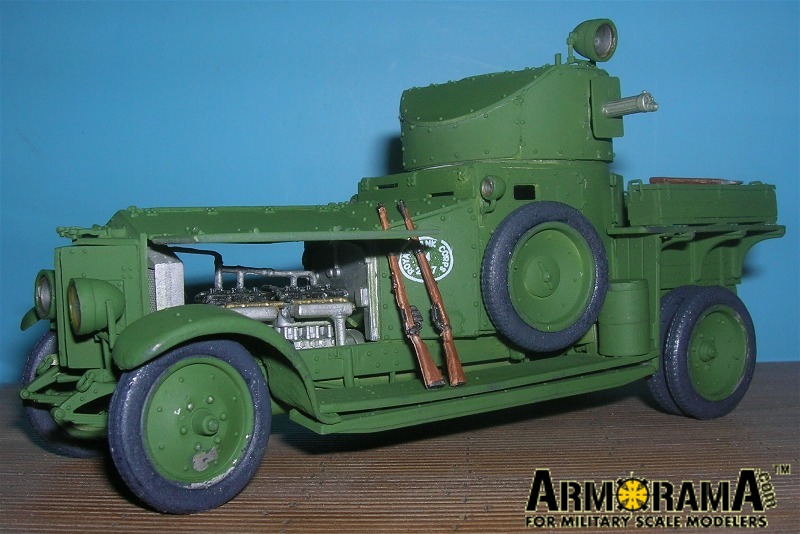
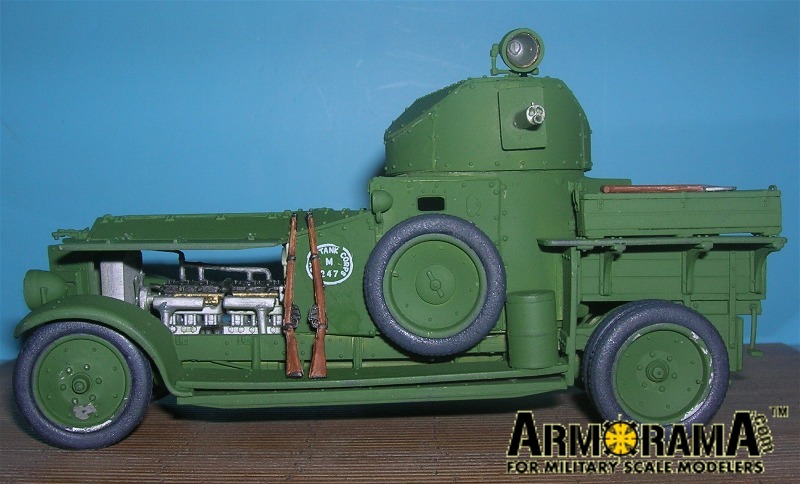
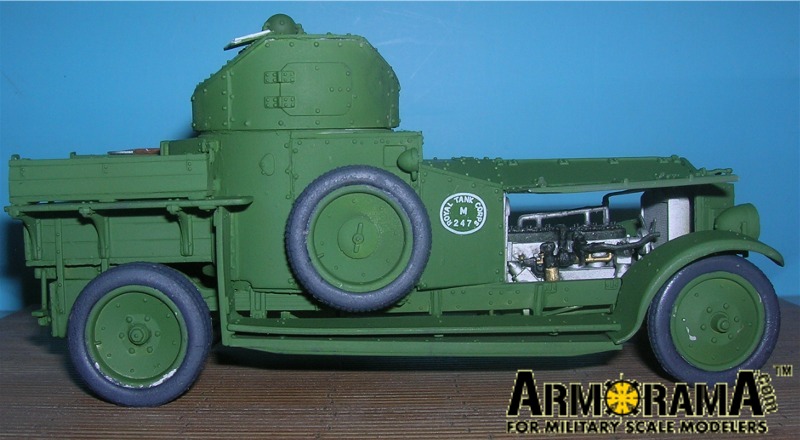
Well here it is. I changed the identity a bit. instead of SV 4996 it is now SV 4999.


JackFlash

Joined: January 25, 2004
KitMaker: 11,669 posts
Armorama: 256 posts

Posted: Wednesday, August 12, 2009 - 05:21 PM UTC
Well gentle early armour fiends uh er friends! Thus is the end of the tale. For me this one is done. It was a a good experience for me and a bit of a stretch of some unused modeling braincells. If I were to spend more time I would thin down the engine bonnet sides for a better scale look when opened. I would consider back dating one to a 1914 config but this is the only one I have. Remember Squadron has resin wheels for these. But I can not vouch for their details. Thanks for letting me make mistakes and finding my own way to fix them. You could have given me a "right go" as it were. So for now I am heading back to the Aeroscale hangar and a 1/48 Roland C.II is demanding some work be done. Model On!

c5flies

Joined: October 21, 2007
KitMaker: 3,684 posts
Armorama: 2,938 posts

Posted: Wednesday, August 12, 2009 - 05:33 PM UTC
Excellent in progress and fantastic finish Stephen! Thanks for sharing this with us and hopefully you'll be back soon with another armor build 

 |


