Roden 1/35 RR armoured car
Colorado, United States
Joined: January 25, 2004
KitMaker: 11,669 posts
Armorama: 256 posts
Posted: Thursday, July 09, 2009 - 05:13 PM UTC
I struggled with the placement of this build for several reasons. But in the end this is the best place for it. So if you will pardon a mainline Wingnut I would like to offer as a change of pace for me the build of Roden's new 1/35 Rolls Royce 1920 Pattern Armoured Car.
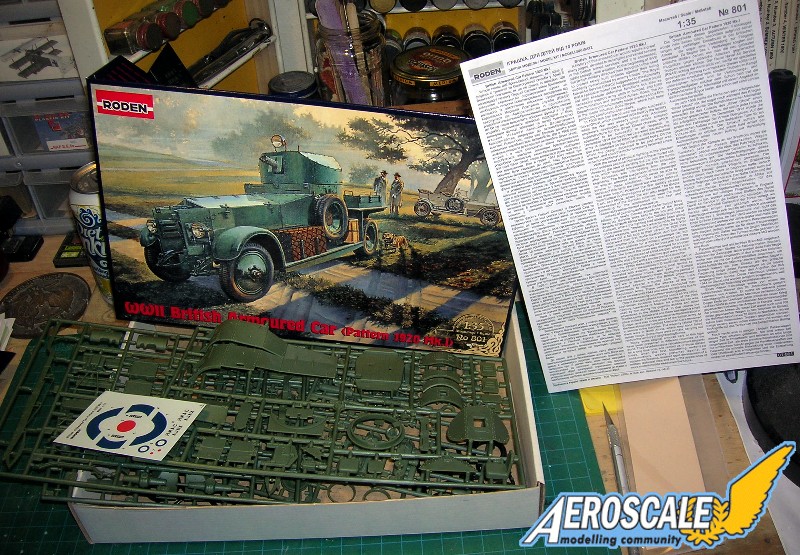
As sure as the machine gun was born it was discovered that airfield protection and convoy escort duties need to be motorized. Better still the company chosen to manufacture this hot box was Rolls Royce. With all the recent surge in 1/32 WWI aviation kits Roden offers a great little incentive to add to the depth of any large scale display.

Here a Camel on its nose and an infantry column passing by with an early British Armoured car raising some dust.
Link to ItemIf you have comments or questions please post them here.
Thanks!
". . .The most important thing is to know why you build and then get the most that you can out of building." via D.D.
Colorado, United States
Joined: January 25, 2004
KitMaker: 11,669 posts
Armorama: 256 posts
Posted: Thursday, July 09, 2009 - 05:21 PM UTC
Here is Squadron's modified version of the Roden box art in their monthly supplament.

The text above the image of the dog says
"Figure and dog not included in the kit."
". . .The most important thing is to know why you build and then get the most that you can out of building." via D.D.
Colorado, United States
Joined: January 25, 2004
KitMaker: 11,669 posts
Armorama: 256 posts
Posted: Thursday, July 09, 2009 - 05:22 PM UTC
For another Kitmaker review see Pat McGrath's contribution
here. ". . .The most important thing is to know why you build and then get the most that you can out of building." via D.D.
Colorado, United States
Joined: January 25, 2004
KitMaker: 11,669 posts
Armorama: 256 posts
Posted: Thursday, July 09, 2009 - 05:23 PM UTC
Here is a bit of fun from the Roden website. Note the Vickers MG is not bored out. If it was a safety cap there should be a small chain hanging from the flash suppressor. Imagine having one of these doing sentry duty on an airfield, in a convoy or passing by a nosed over aircraft.

". . .The most important thing is to know why you build and then get the most that you can out of building." via D.D.
Colorado, United States
Joined: January 25, 2004
KitMaker: 11,669 posts
Armorama: 256 posts
Posted: Thursday, July 09, 2009 - 05:25 PM UTC
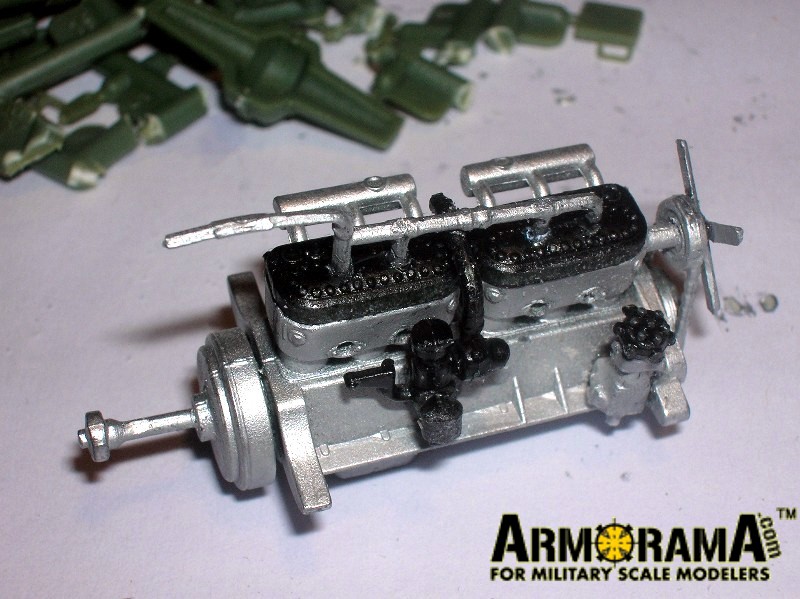
Word of caution on the instructions. Step 1 - 3, Do yourself a favor and unite the basic engine halves before adding the generator, magnetos, carburetor, distributor cap, plumbing, water and oil pumps. There should be a solid foundation first rather than trying to align the engine halves after everything is attached externally. This is a simplification method manufacturer's use to cut down the number of steps and text.
Also as I build this I'll post images and discuss the merits of my methods.
A fellow member of Kitmaker sent this along. From Jaypee;
"Slibh na mban, is what I'd model if I had one of these. The mount of Micheal Collin when he was ambushed. . ."
http://www.esatclear.ie/~curragh/sliabh_na_mban.htm". . .The most important thing is to know why you build and then get the most that you can out of building." via D.D.
Colorado, United States
Joined: January 25, 2004
KitMaker: 11,669 posts
Armorama: 256 posts
Posted: Thursday, July 09, 2009 - 07:59 PM UTC
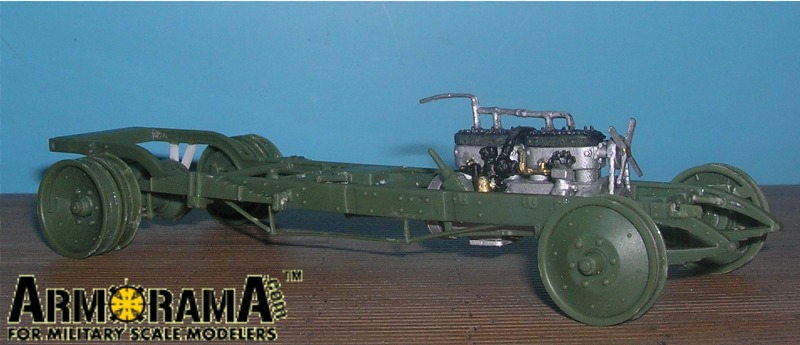
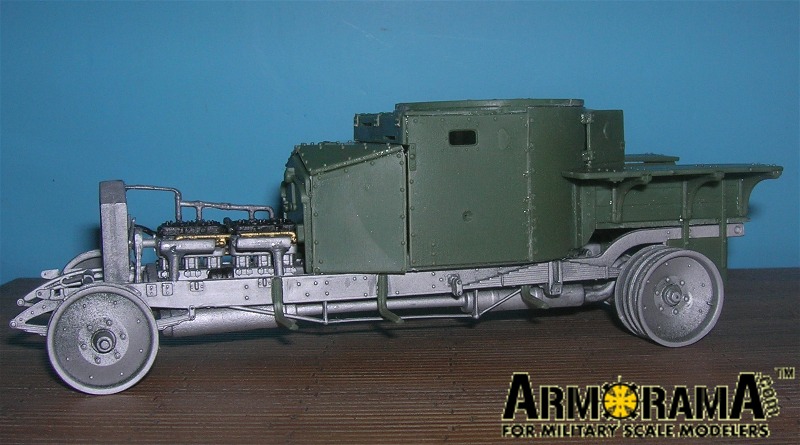
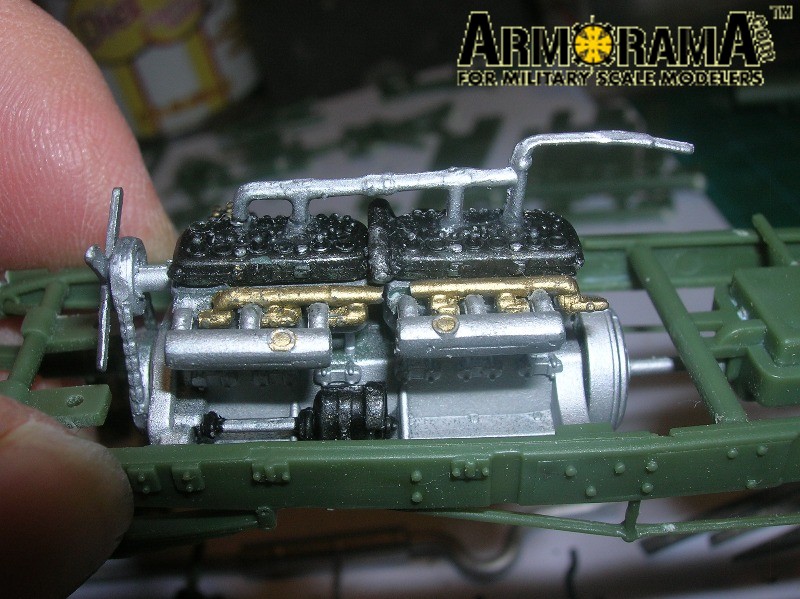
We are all use to over scaled details but in the case of early armour even the real deals seemed to have had what we would consider today oversize nuts and bolts. Please excuse the bright metal sheen this is before a dead flat and a dark wash.
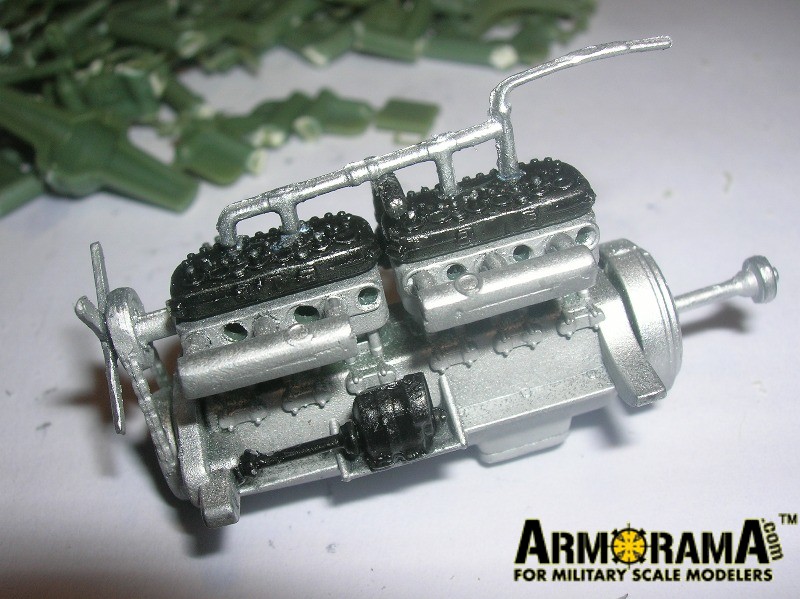
Edit Note here- I accidently put the radiator hoses and exhaust manifold on in reverse. The radiator hose is the silver piping on top of the engine here and should go towards the fan blades / front of the engine and will tie into the radiator.

". . .The most important thing is to know why you build and then get the most that you can out of building." via D.D.
Colorado, United States
Joined: January 25, 2004
KitMaker: 11,669 posts
Armorama: 256 posts
Posted: Thursday, July 09, 2009 - 08:01 PM UTC
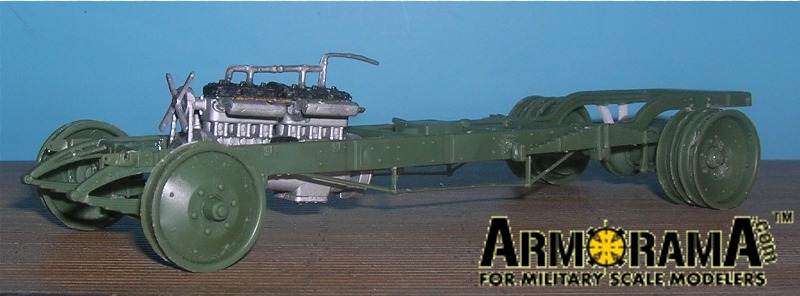
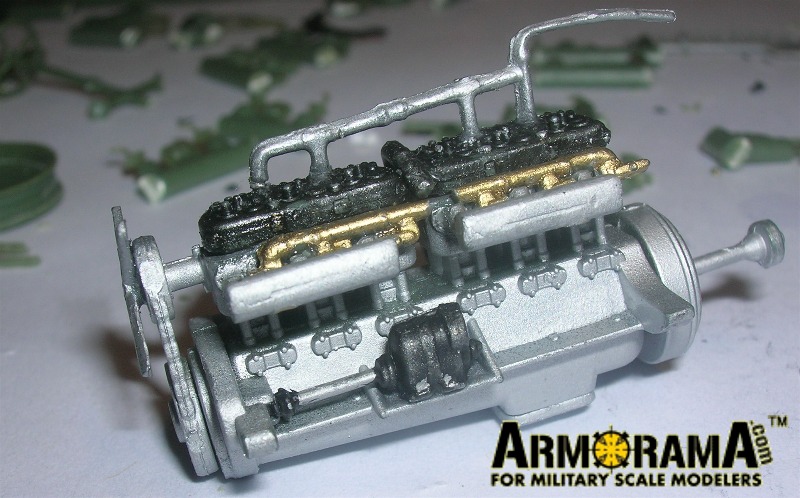
It was about here that I noticed I had put the exhaust headers on in reverse, drat!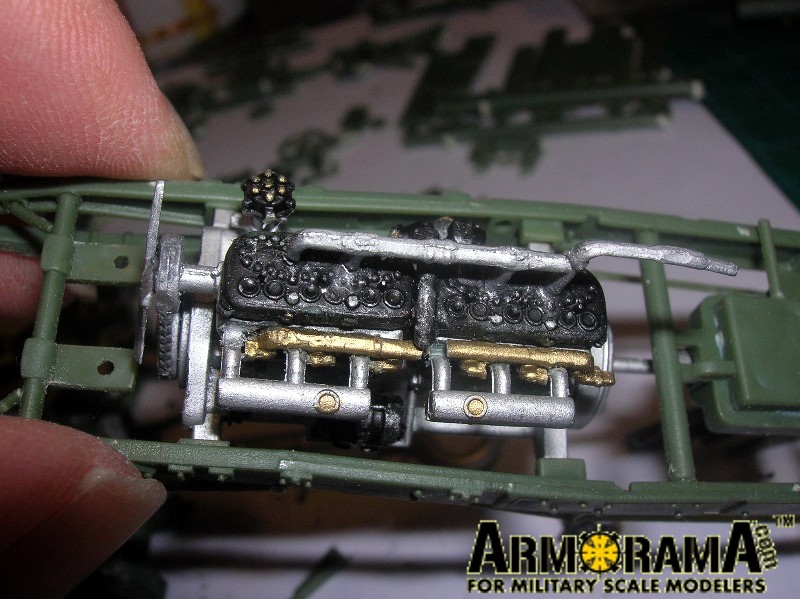
You will notice the brass water llines with the sweat valves it cut in half and trimed at the valve handles / petcocks. The length needs a union for the hose crossing over the head covers. Parts here are given a general base coat with other detailes to be picked out later.
". . .The most important thing is to know why you build and then get the most that you can out of building." via D.D.
Colorado, United States
Joined: January 25, 2004
KitMaker: 11,669 posts
Armorama: 256 posts
Posted: Thursday, July 09, 2009 - 08:05 PM UTC
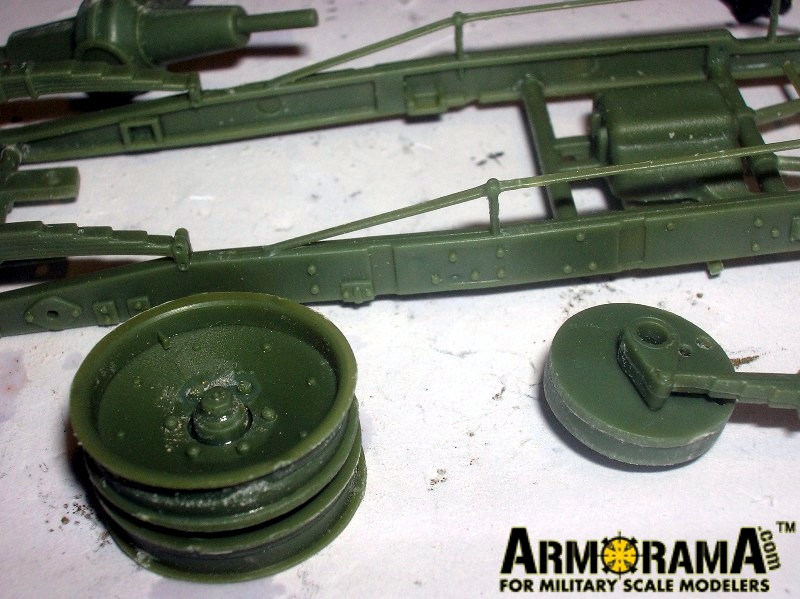
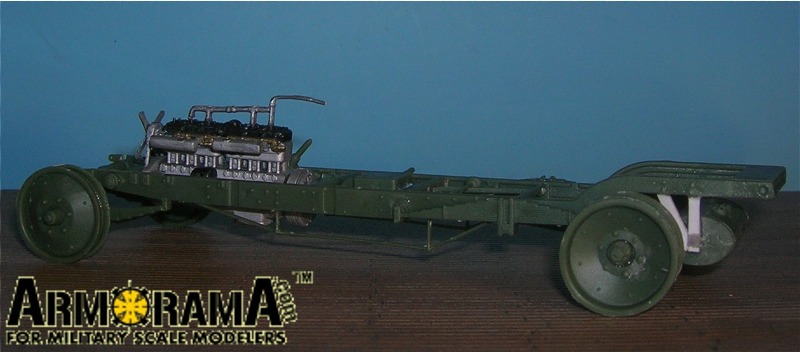
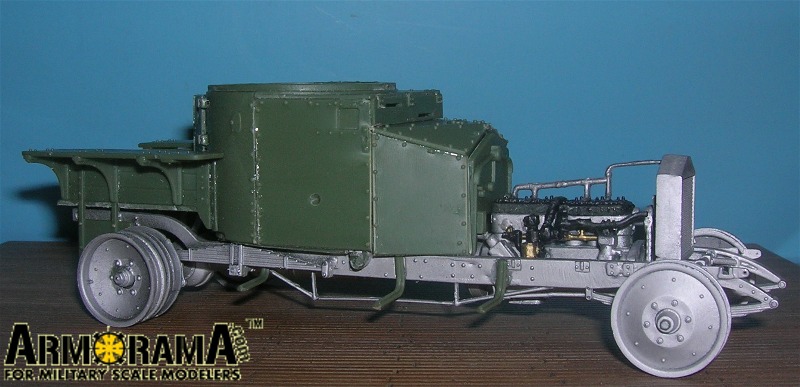
Here some work on mating the chassis and the differential. The main fuel cell is altered by routing out the saddles and removing the cell's cradle attachments from the chassis and I will move it slightly further aft. Note the cradle's former position but the four white dots on the beam just behind the differential. There has been some earlier comments about the kit exhaust not fitting properly I am hoping this will fix that too. .
". . .The most important thing is to know why you build and then get the most that you can out of building." via D.D.
Colorado, United States
Joined: January 25, 2004
KitMaker: 11,669 posts
Armorama: 256 posts
Posted: Friday, July 10, 2009 - 06:10 AM UTC
Step 1 - 5 As noted in Mr. Mcgrath's review, the engine represents the build up of a Rolls Royce six cylinder water-cooled inline of 80hp ( 60Kw) output.. There are no sprue ejector marks on any parts that will be visible when the engine is assembled, The sprue attachment points for the fan blades are placed at stress points and the part will have to be carefully removed from the sprue by cutting the sprue away from the part using a pair of cutting dykes. The fan is surrounded by the sprue in a square shape. Nip the corners then use an Xacto razor kniofe to cut the sprue from the blades by skinning them from the back of the fan blades first. In truth it might be better to scratch build the blades and use the fan hub to hang them on.
The pipes and tubes of the engine do have a small amount of flash on them and the details are softer than I like on these. Being an all plastic kit, the engine is extremely simplified but the above average modeler can refine parts and add much of the simulated plumbing and wire leads seen on in the real engine with brass rod and wire.
As mentioned by Mr. Mcgrath there is no option to show the bonnet / hood open without some scratchbuilding. See step 23. But if you detail this engine to any degree you miss the best part of the kit by keeping it closed up.
The central concern for keeping the chassis square and plumb is the tranipan and framing (5 X2 6 & 11 C) Even at that the chassis rails (1&2 C) as seen in step 16 needs careful attention. The rear frame end (20 C ) fits but mine needed a bit of trimming on the insert tabs to keep it square. These tabs ride within the chassis inner face grooves. Once the chassis is trued up adding the bits and bobs are easy. I left the front end of the frame ( 21 C )unsecured on one side to come back later and add the finished motor.
". . .The most important thing is to know why you build and then get the most that you can out of building." via D.D.
Colorado, United States
Joined: January 25, 2004
KitMaker: 11,669 posts
Armorama: 256 posts
Posted: Friday, July 10, 2009 - 06:23 AM UTC
Step 6 - 8. Axles and wheels need the usual seams erased. There is a small amount of flash on the wheels. The tires come 4 on a sprue. Flush cutting snips help a lot. The vinyl is very soft and cleanup is a bit tedious. You must use a new blade. The tread pattern is close I would like to see an aftermarket set that will offer the WWI spoked versions of the wheels and a backdated turret. But that would involve 5 new turret pieces for step 34.
". . .The most important thing is to know why you build and then get the most that you can out of building." via D.D.
England - East Anglia, United Kingdom
Joined: August 12, 2005
KitMaker: 14,499 posts
Armorama: 11,675 posts
Posted: Friday, July 10, 2009 - 06:41 AM UTC
Hi Stephen,
Thanks for the build article, I'll look forward to seeing this one go together.
Al
'Action this Day'
Winston Spencer Churchill
Colorado, United States
Joined: January 25, 2004
KitMaker: 11,669 posts
Armorama: 256 posts
Posted: Sunday, July 12, 2009 - 07:02 AM UTC
Greetings all I had to go back and flip the headers as I had temporarily installed them for the photos in reverse. Trifocals. . .
". . .The most important thing is to know why you build and then get the most that you can out of building." via D.D.
Colorado, United States
Joined: January 25, 2004
KitMaker: 11,669 posts
Armorama: 256 posts
Posted: Sunday, July 12, 2009 - 07:04 AM UTC
". . .The most important thing is to know why you build and then get the most that you can out of building." via D.D.
Colorado, United States
Joined: January 25, 2004
KitMaker: 11,669 posts
Armorama: 256 posts
Posted: Sunday, July 12, 2009 - 07:14 AM UTC
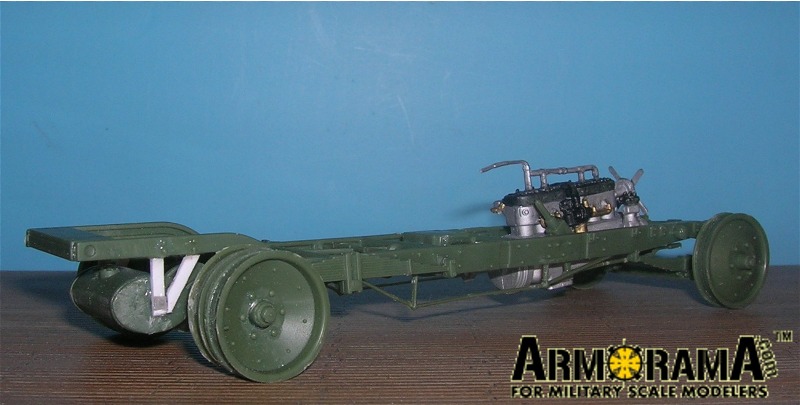
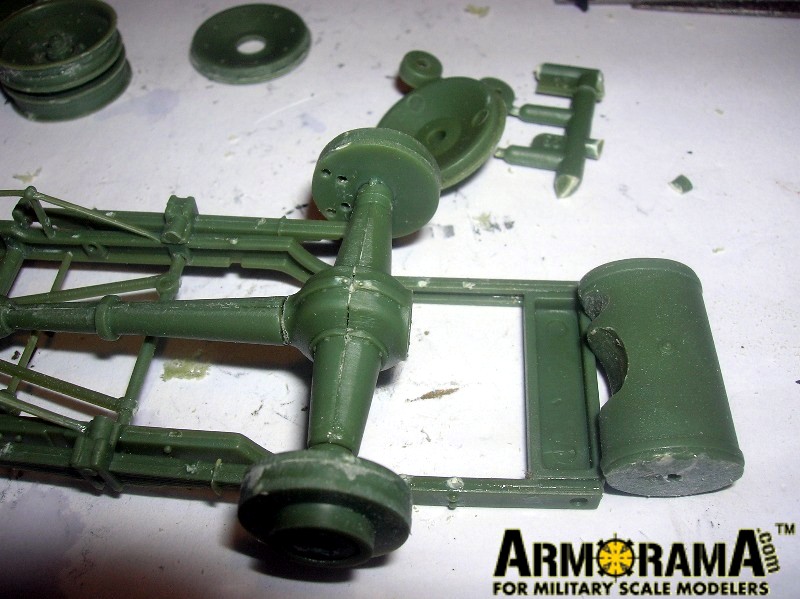
Underside of chassis front end.

I am using Grandtline nut (set 96 ) and square washer heads on some areas.

Underside of radiator with hex nuts
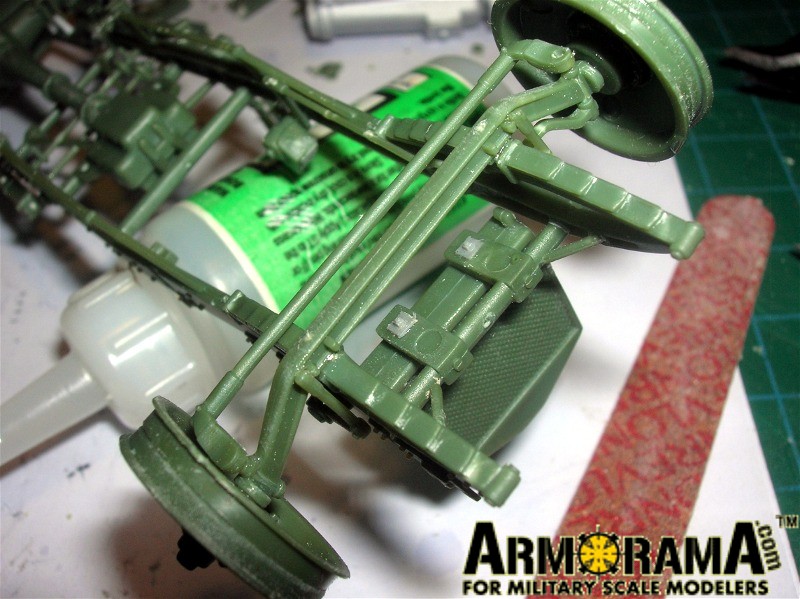
Clutch and brake control assembly.

". . .The most important thing is to know why you build and then get the most that you can out of building." via D.D.
England - East Anglia, United Kingdom
Joined: August 12, 2005
KitMaker: 14,499 posts
Armorama: 11,675 posts
Posted: Sunday, July 12, 2009 - 08:28 AM UTC
Hi Stephen,
Good work, the nuts look useful. Do you have a link for there stuff?
Thanks
Al
'Action this Day'
Winston Spencer Churchill
Sachsen, Germany
Joined: November 28, 2007
KitMaker: 1,462 posts
Armorama: 1,289 posts
Posted: Sunday, July 12, 2009 - 08:29 AM UTC
Interesting vehicle! Looks a bit like an armoured pick-up truck or something like that. ;-)
Not comparable with todays vehicles.
I like the box-art drawings.
How is the fit of the parts?
Much to clean, remove or so? I think, Roden´s kits quality is comparable with SKIF, ICM and other "small" companies.
greetings...
Soeren
progress:
- Venera-14-lander on Venus
- Dragon s.10cm K18 at the Atlantic-wall
completed:
- Venera-10 lander on Venus
Colorado, United States
Joined: January 25, 2004
KitMaker: 11,669 posts
Armorama: 256 posts
Posted: Sunday, July 12, 2009 - 08:45 AM UTC
Quoted Text
Hi Stephen, Good work, the nuts look useful. Do you have a link for there stuff?
Thanks Al
Thats an easyone Alan! Just scroll to the bottom of the page and choose the scale.
http://www.grandtline.com/ ". . .The most important thing is to know why you build and then get the most that you can out of building." via D.D.
Colorado, United States
Joined: January 25, 2004
KitMaker: 11,669 posts
Armorama: 256 posts
Posted: Sunday, July 12, 2009 - 08:53 AM UTC
Quoted Text
Interesting vehicle! Looks a bit like an armoured pick-up truck or something like that. ;-)
Not comparable with todays vehicles.
I like the box-art drawings.
How is the fit of the parts?
Much to clean, remove or so? I think, Roden´s kits quality is comparable with SKIF, ICM and other "small" companies.
greetings...
Soeren
Greetings back at cha Soeren!
Roden kits are "tight". My main experience is with their excellent WWI aviation kits in 1/48. As I have shown the bare plastic here at the beginning you can see there are minor gaps at some part unions. Minor flash in this kits case. I always open locator holes for an easier fit. With the exception of the fuel cell cradle I am not running into any surprises. Just read the chassis build steps carefully.
The description of an armoured pickup truck is somewhat valid. The chassis is a Rolls Royce copy of a Ford truck version from about 1919, suitably beefed up.
". . .The most important thing is to know why you build and then get the most that you can out of building." via D.D.
Colorado, United States
Joined: January 25, 2004
KitMaker: 11,669 posts
Armorama: 256 posts
Posted: Sunday, July 12, 2009 - 07:30 PM UTC
Egads! I have the radiator hose on backwards. Ok I can fix that.
". . .The most important thing is to know why you build and then get the most that you can out of building." via D.D.
Colorado, United States
Joined: January 25, 2004
KitMaker: 11,669 posts
Armorama: 256 posts
Posted: Friday, July 17, 2009 - 04:48 PM UTC
As a general observation I am finding minor bits of flash on the chassis parts but none on any other sprue.
". . .The most important thing is to know why you build and then get the most that you can out of building." via D.D.
England - East Anglia, United Kingdom
Joined: August 12, 2005
KitMaker: 14,499 posts
Armorama: 11,675 posts
Posted: Friday, July 17, 2009 - 06:59 PM UTC
Hi Stephen,
Thanks for the link.
Al
'Action this Day'
Winston Spencer Churchill
Colorado, United States
Joined: January 25, 2004
KitMaker: 11,669 posts
Armorama: 256 posts
Posted: Monday, July 20, 2009 - 09:40 AM UTC
". . .The most important thing is to know why you build and then get the most that you can out of building." via D.D.
Colorado, United States
Joined: January 25, 2004
KitMaker: 11,669 posts
Armorama: 256 posts
Posted: Monday, July 20, 2009 - 09:43 AM UTC
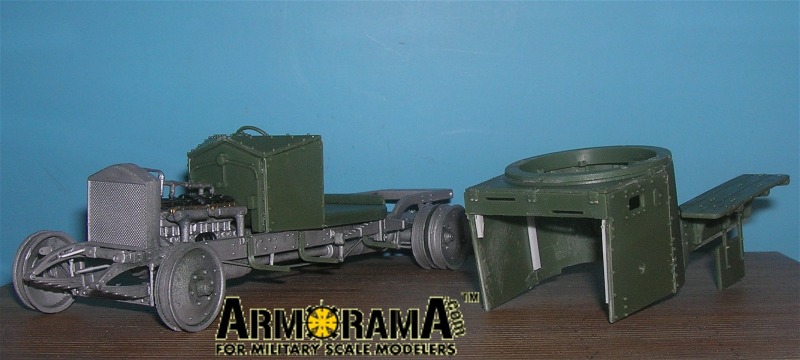
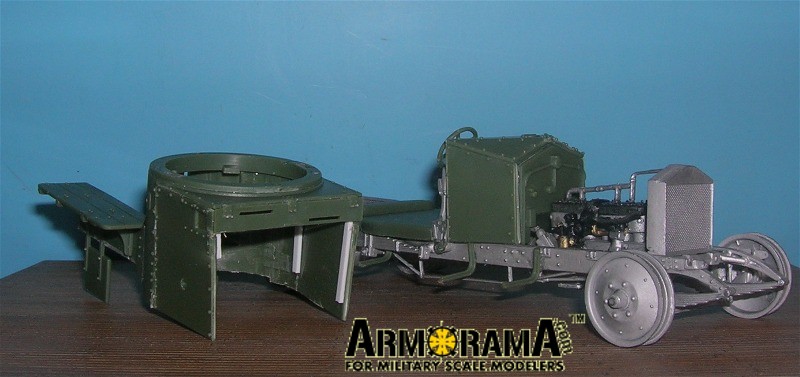
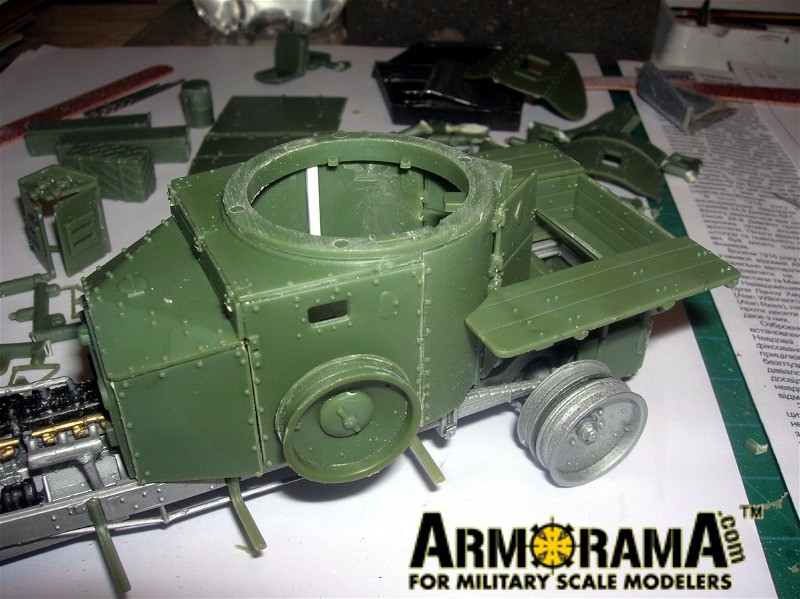
Continuing the rear body assembly and doing a bit of dry fitting.
Note the main hatch access to the cabin.
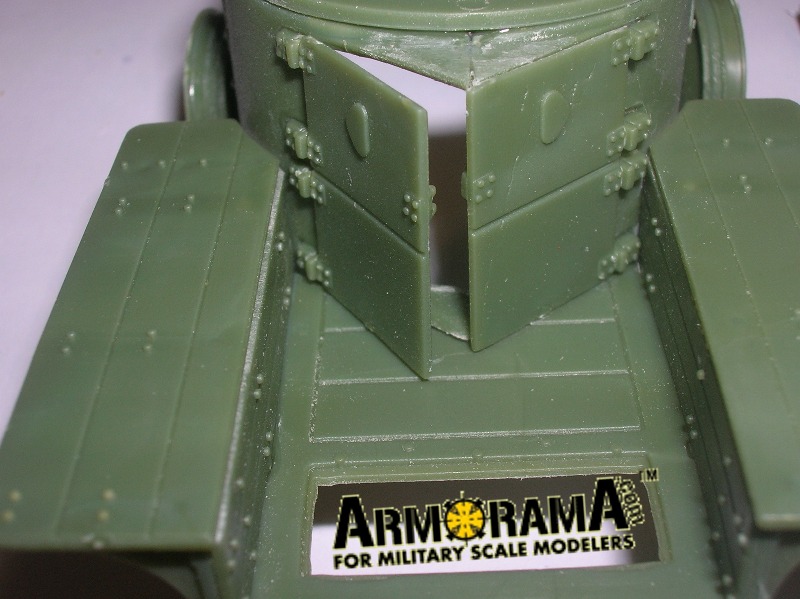
I remember reading the the Queen Elizabeth II was given one of these as an internal transport on her visit to the British Museum grounds for AFV. Surely she did not crawl into the cabin?
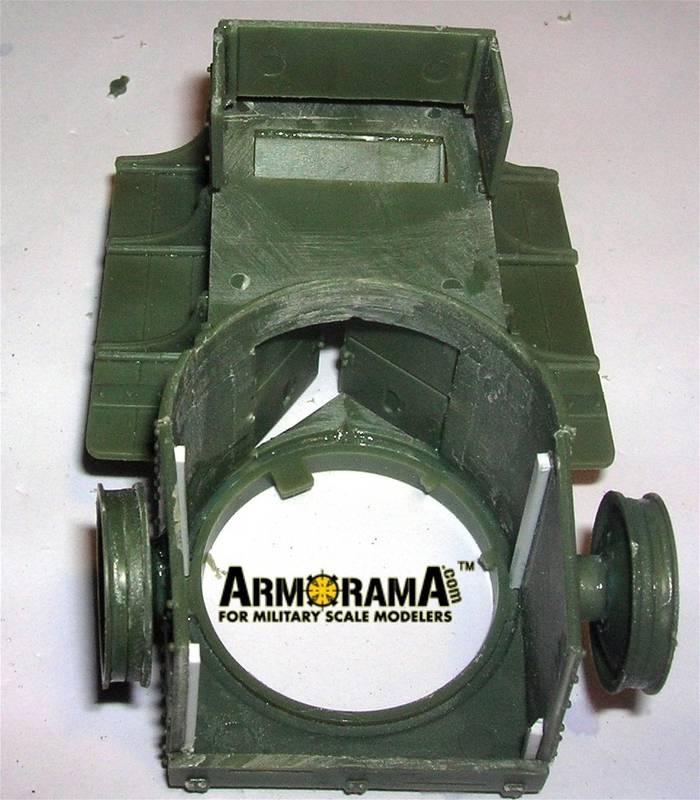
The under aspect of the rear body assembly shows how much area there is to scratchbuild and gizmologize.
". . .The most important thing is to know why you build and then get the most that you can out of building." via D.D.
Colorado, United States
Joined: January 25, 2004
KitMaker: 11,669 posts
Armorama: 256 posts
Posted: Monday, July 20, 2009 - 10:07 AM UTC
Greetings All;
Since the instrument panel is void of any detail I am left to extrapalate its contents. Turn of the century machinery did only have the needed gauges for the experienced driver to read and know what he needed to know. These were often just;
1, Water temp readout.
2. oil pulsator.
3. tachometer / rev counter.
4. starter magnetos.
From the reverse side of the forward firewall, it look as if the water temp gauge was centrally located. Anyting else is a total blind stab. Maybe I can ask the museums to offer a bit of help.
http://www.tankmuseum.org/http://www.esatclear.ie/~curragh/sliabh_na_mban.htm". . .The most important thing is to know why you build and then get the most that you can out of building." via D.D.

#003
Donegal, Ireland
Joined: May 14, 2002
KitMaker: 9,763 posts
Armorama: 7,444 posts
Posted: Monday, July 20, 2009 - 03:34 PM UTC
Hi Stephen. Great blog so far. Im enjoying your blog ... I want to build this one day as well.
Quoted Text
Slibh na mban, is what I'd model if I had one of these. The mount of Micheal Collin when he was ambushed. . ."
This was not the mount of Michael Collins .... it was part of the convoy that Michael Collins was travelling in. He travelled in a Leyland Thomas touring car. There was also a converted Crossley tender, with 12 soldiers.
A little inspiration ...


IPMS Stockholm
"The problem with common sense, is that it is not that common"