

that flak gun looks awesome, Bill! I've been following along and this is a fantastic thread. Great job so far.
Terry
Hosted by Darren Baker
Dueling Build Log: DML & Trumpeter Sd.Kfz.7/1

cheswickthecat

Joined: October 13, 2007
KitMaker: 212 posts
Armorama: 208 posts

Posted: Friday, March 12, 2010 - 12:25 PM UTC
bill_c
Joined: January 09, 2008
KitMaker: 10,553 posts
Armorama: 8,109 posts
Posted: Saturday, March 13, 2010 - 05:53 AM UTC
Thanks, Terry, I'm doing this all for you.

H_Ackermans

Joined: July 11, 2006
KitMaker: 2,229 posts
Armorama: 2,221 posts

Posted: Sunday, March 14, 2010 - 04:47 AM UTC
The gunshields, are they still movable like on the old Tamiya Flakvierling?? The PE shields I mean.
And about those mesh sides, do you know that technique where from liquid resin (I think) 3 dimensional shapes can be "printed" layer by layer. It uses a laser that heats points in the resin, rendering them solid.
Now that would be a good technique to get those sides done, if any AM producer would consider it.
bill_c
Joined: January 09, 2008
KitMaker: 10,553 posts
Armorama: 8,109 posts
Posted: Sunday, March 14, 2010 - 08:50 AM UTC
Quoted Text
The gunshields, are they still movable like on the old Tamiya Flakvierling?? The PE shields I mean.
Yes. In fact, you can either use the kit pivot as I did or follow the instructions for making one with brass and plastic rounds included in the upgrade. The various hinged shields (e.g., the one covering the spent ammo collection box) all are hinged in actuality, though I suck at making workable hinges, LOL!
Quoted Text
And about those mesh sides, do you know that technique where from liquid resin (I think) 3 dimensional shapes can be "printed" layer by layer. It uses a laser that heats points in the resin, rendering them solid.
Now that would be a good technique to get those sides done, if any AM producer would consider it.
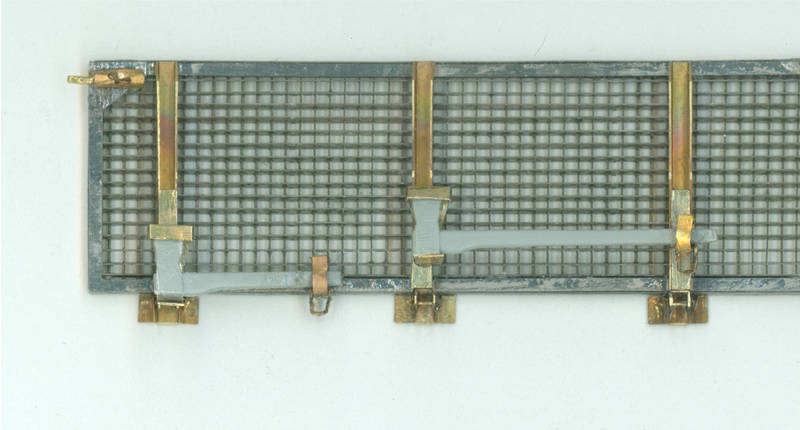
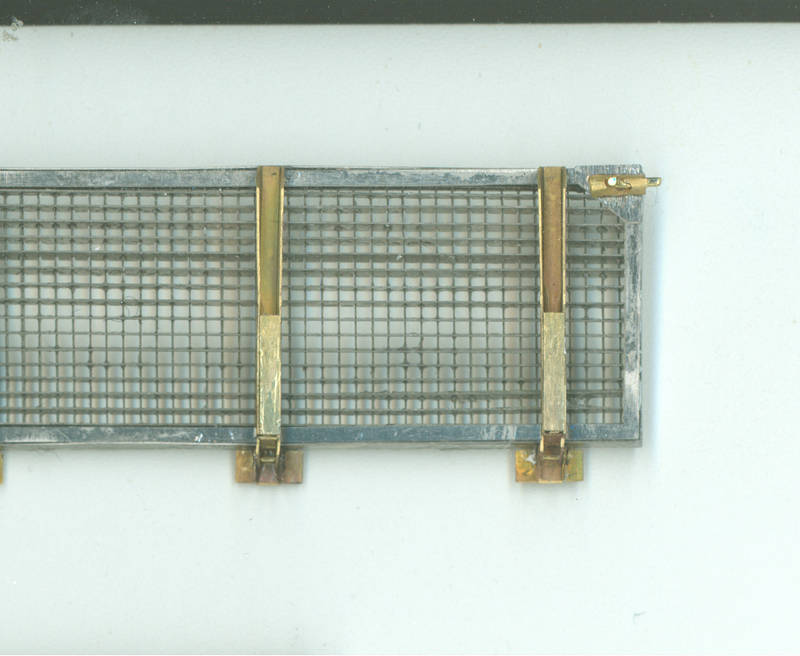
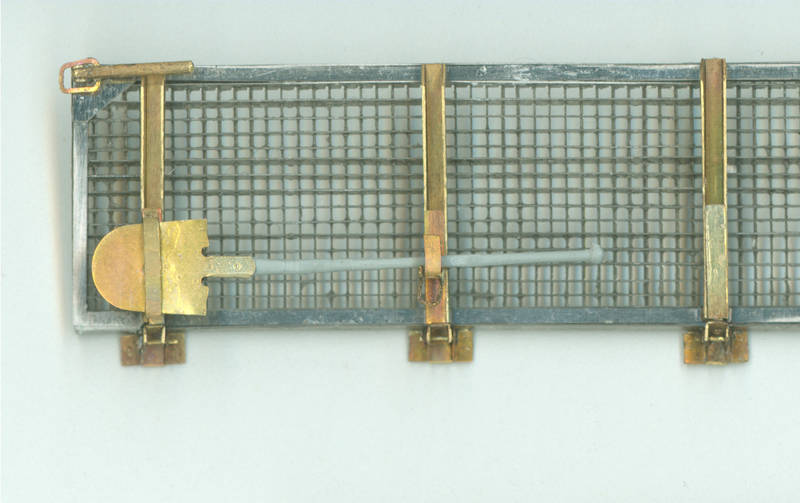
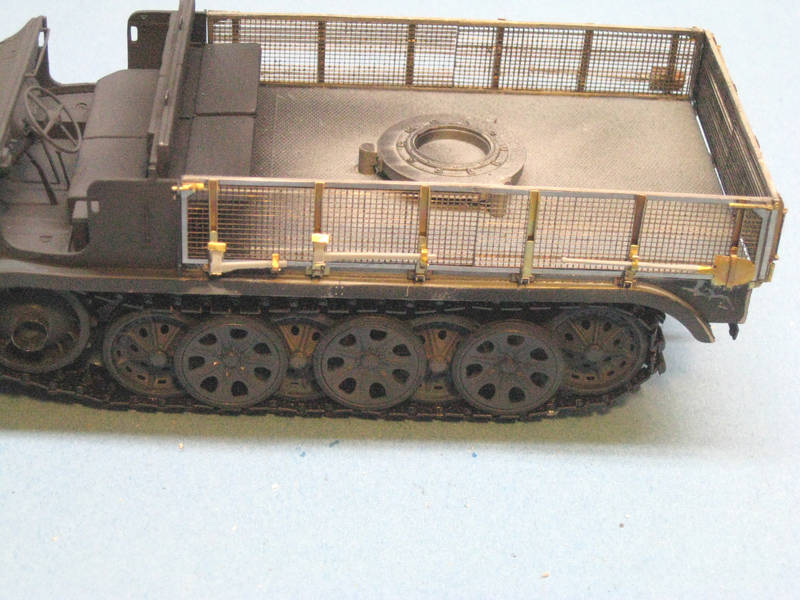
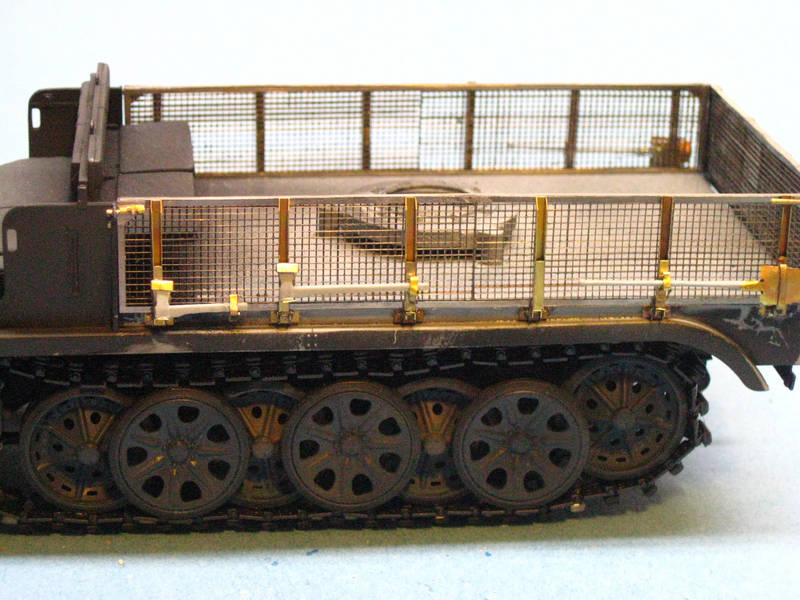
The second side panel and the rear one have gone much faster since switching to a high-glazed kitchen tile (black for contrast). I have much less gunk and contamination, but it's still a mind-numbing process to cut off the steel slats, file them down at multiple points (ends and along the edges), then glue them in.
The real weak point in my opinion is the frame: it is VERY hard to square-up, and would be better if it were extruded or otherwise shipped formed. The slats when dropped in don't fully hold up the top surface, either, so getting it to look right is more of a struggle than it should be.
But for the accuracy fantatic, it's an amazing improvement over styrene or even PE mesh.
bill_c
Joined: January 09, 2008
KitMaker: 10,553 posts
Armorama: 8,109 posts
Posted: Thursday, March 25, 2010 - 07:51 AM UTC
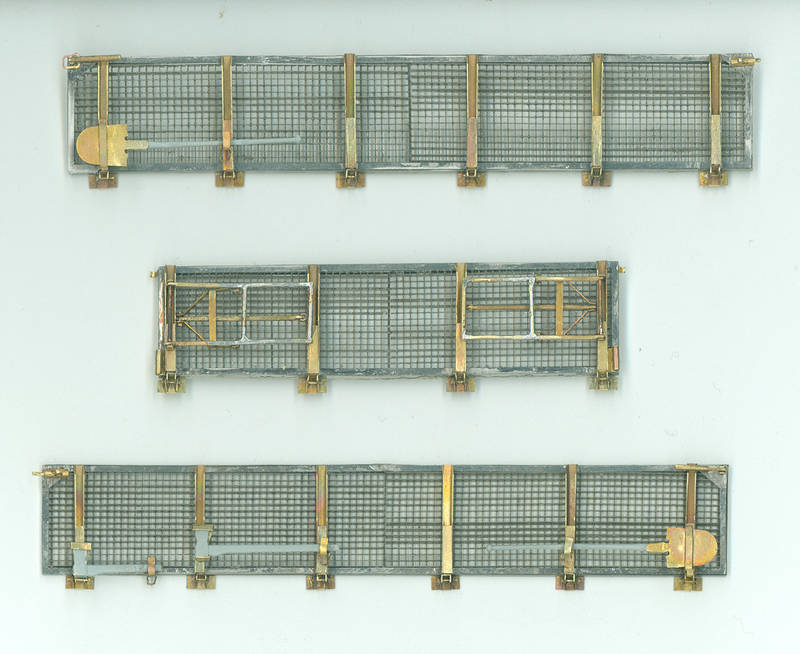
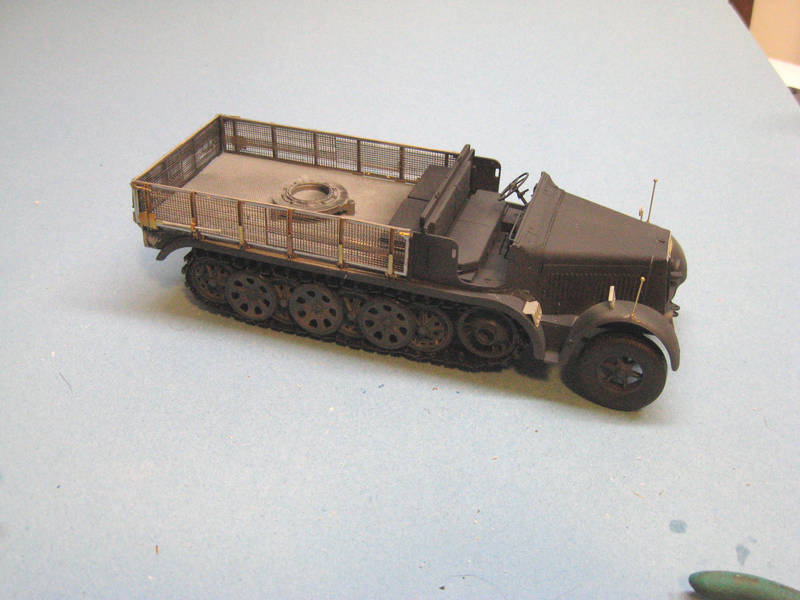
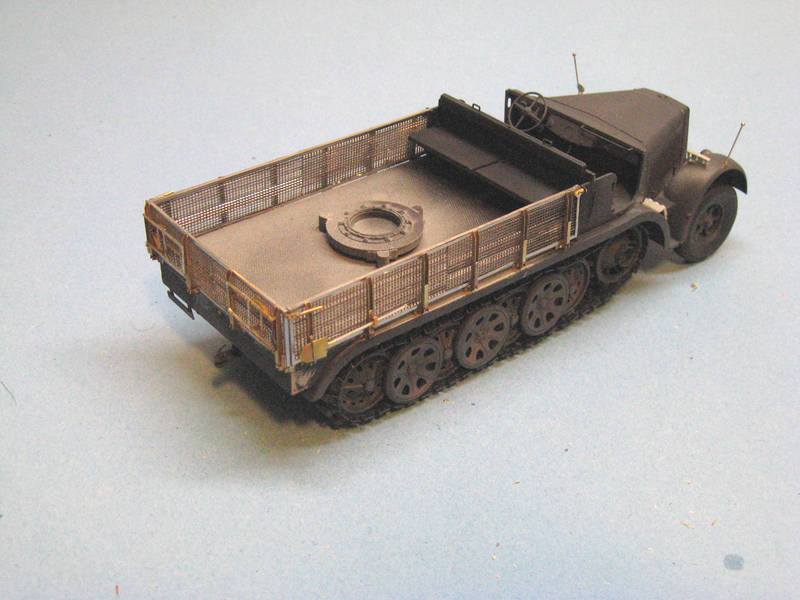
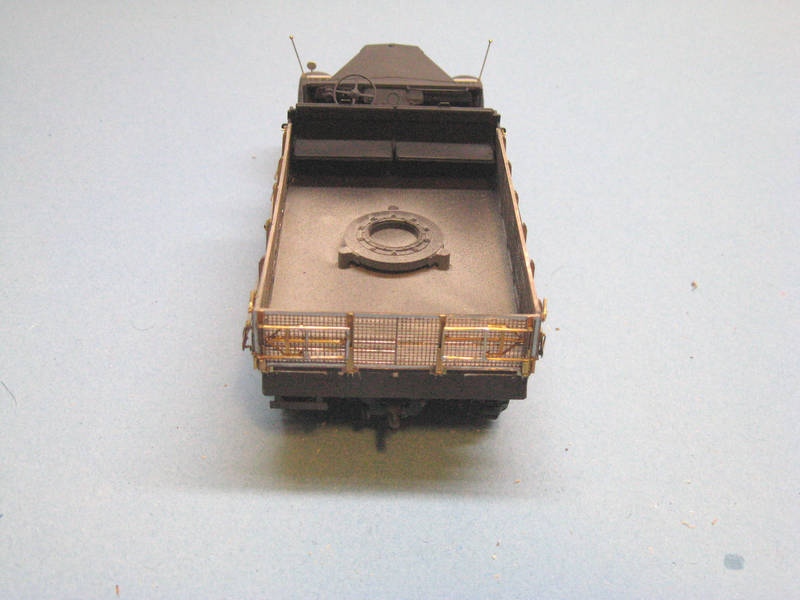
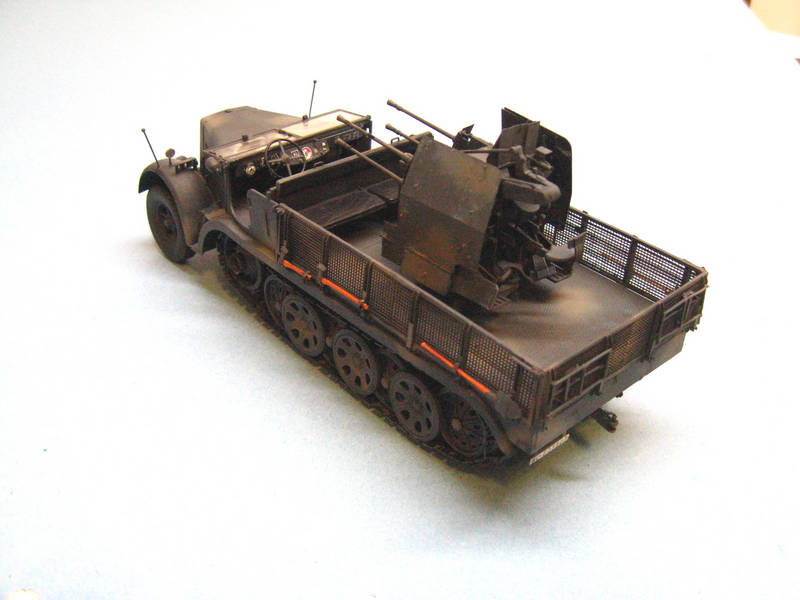
Here is the mesh mostly finished (a few lugs still to go):

martyncrowther

Joined: September 12, 2007
KitMaker: 1,548 posts
Armorama: 1,407 posts

Posted: Thursday, March 25, 2010 - 10:58 AM UTC
Hi Bill really nice work here! 
bill_c
Joined: January 09, 2008
KitMaker: 10,553 posts
Armorama: 8,109 posts
Posted: Thursday, March 25, 2010 - 12:05 PM UTC
Thanks, Martyn!
bill_c
Joined: January 09, 2008
KitMaker: 10,553 posts
Armorama: 8,109 posts
Posted: Friday, March 26, 2010 - 11:27 AM UTC
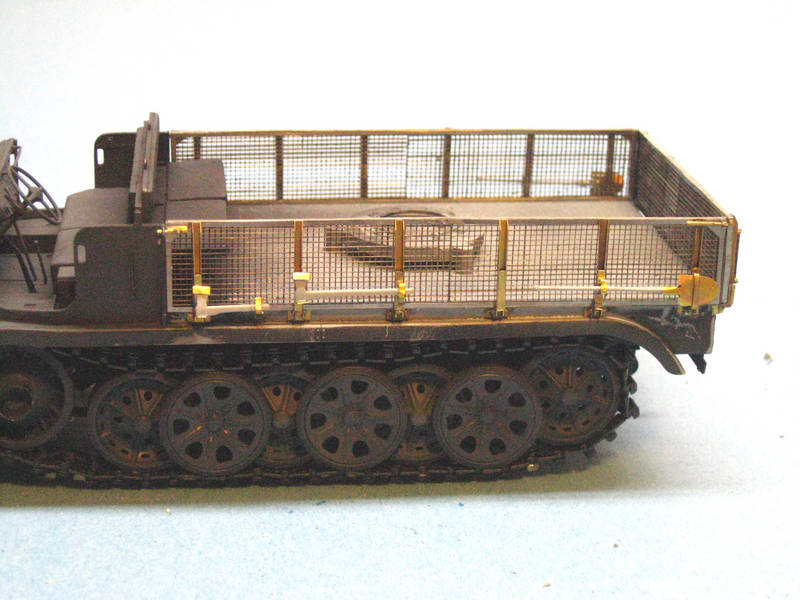
Here are the mesh sides mounted on the vehicle. Next is painting. This thing might actually be done in time for MosquitoCon.

martyncrowther
Joined: September 12, 2007
KitMaker: 1,548 posts
Armorama: 1,407 posts
Posted: Friday, March 26, 2010 - 01:42 PM UTC
Nice work Bill! Going at some speed as well, finding it hard to keep up! 

zerstorer

Joined: February 09, 2004
KitMaker: 26 posts
Armorama: 25 posts
Posted: Friday, March 26, 2010 - 01:46 PM UTC
Man, the mesh looks so real !! I hate my stupid brass mesh 
Darío
Darío
bill_c
Joined: January 09, 2008
KitMaker: 10,553 posts
Armorama: 8,109 posts
Posted: Saturday, March 27, 2010 - 07:29 AM UTC
Patience, Martyn, it's not a race, LOL!
Dario, it is amazing stuff. I will have the DML version finished in a day or two. The Trumpeter gun requires more work than the DML because I'm using the full Griffon upgrade.
Dario, it is amazing stuff. I will have the DML version finished in a day or two. The Trumpeter gun requires more work than the DML because I'm using the full Griffon upgrade.

wbill76
Joined: May 02, 2006
KitMaker: 5,425 posts
Armorama: 4,659 posts
Posted: Saturday, March 27, 2010 - 04:13 PM UTC
Making some great progress on this one Bill, the time and effort with the mesh panels is really paying off...not sure what it's done for your sanity though! 

bravo2zero

Joined: March 01, 2010
KitMaker: 16 posts
Armorama: 10 posts
Posted: Saturday, March 27, 2010 - 08:47 PM UTC
I've the trumpeter kit which has yet to be opened since it's been delivered to me in January as this is the 1st time i have a kit with PE parts. I've done the Tamiya kit a few years back but the result is not as good as it seems as I was just trying out afv scale modelling but looking into the work you've made here, it will served as a guideline for me when i'm starting to do mine. My compliments to you, Bill for your effort from start till end of the work in progress. Faisal.
bill_c
Joined: January 09, 2008
KitMaker: 10,553 posts
Armorama: 8,109 posts
Posted: Sunday, March 28, 2010 - 04:42 PM UTC
Bill Plunk wrote:
|:(
Thanks, Bill. It has been a tough slog, but the results are pleasing. Appreciate your support!
Faisal wrote:
Thanks, Faisal. I shall take up the Trumpeter kit shortly, but may allow myself a short break for a BF-109 to clear my head, LOL! 
Quoted Text
Making some great progress on this one Bill, the time and effort with the mesh panels is really paying off...not sure what it's done for your sanity though!
|:(
Thanks, Bill. It has been a tough slog, but the results are pleasing. Appreciate your support!
Faisal wrote:
Quoted Text
...looking into the work you've made here, it will served as a guideline for me when i'm starting to do mine. My compliments to you, Bill for your effort from start till end of the work in progress. Faisal.
Thanks, Faisal. I shall take up the Trumpeter kit shortly, but may allow myself a short break for a BF-109 to clear my head, LOL!
bill_c
Joined: January 09, 2008
KitMaker: 10,553 posts
Armorama: 8,109 posts
Posted: Tuesday, March 30, 2010 - 11:41 AM UTC
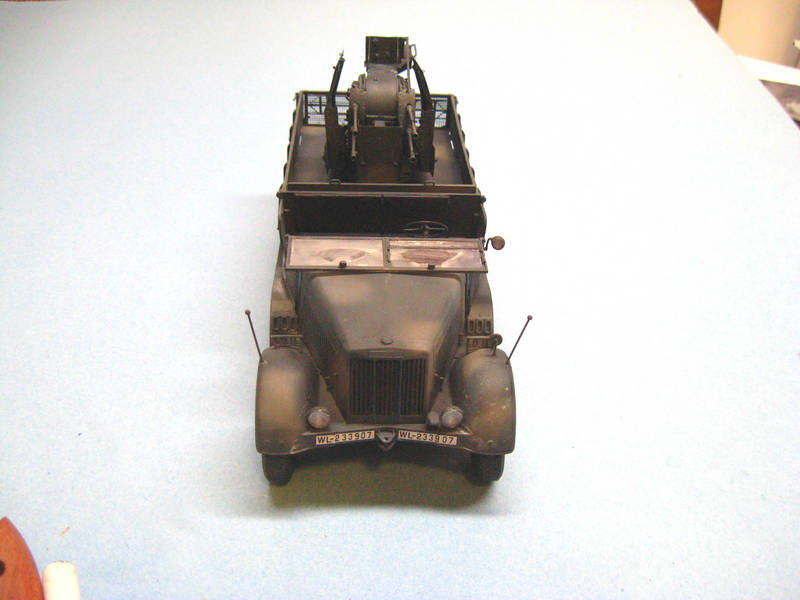
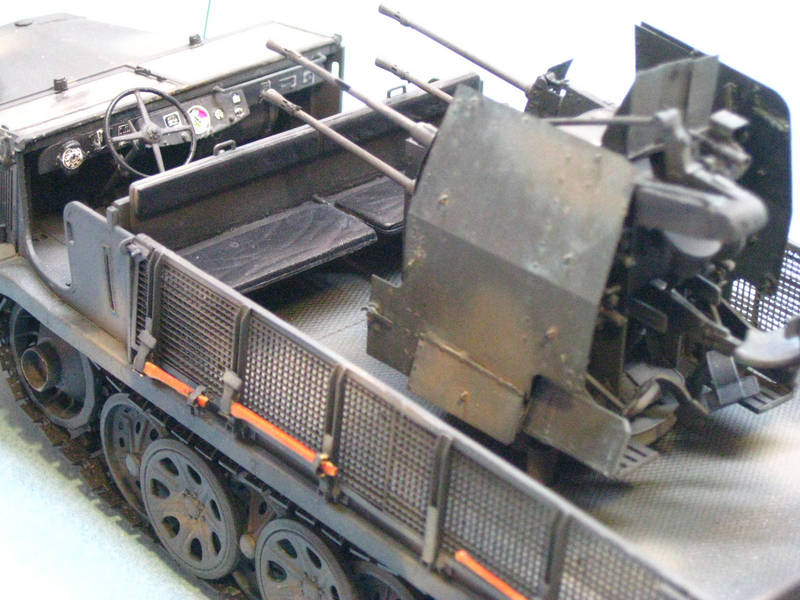
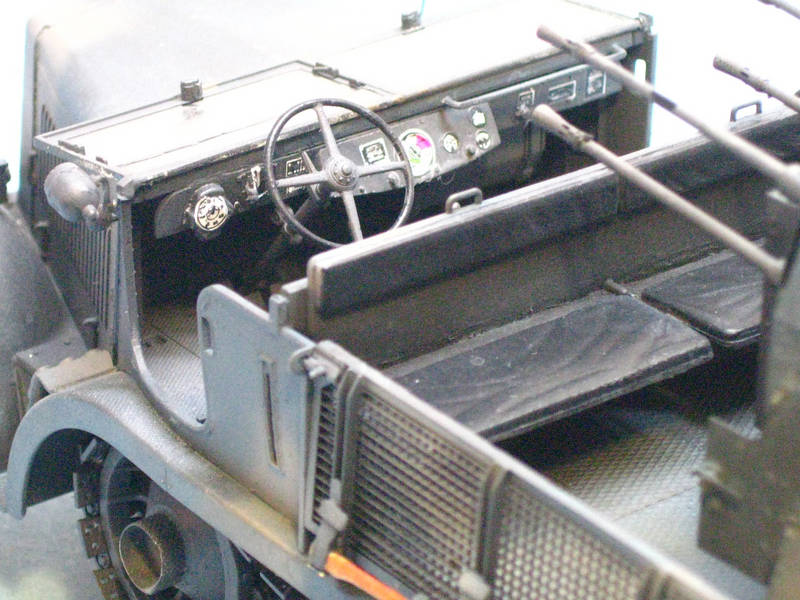
Well, the DML kit is now finished except for final weathering. The two-tone color scheme is France, 1940, a Luftwaffe unit.
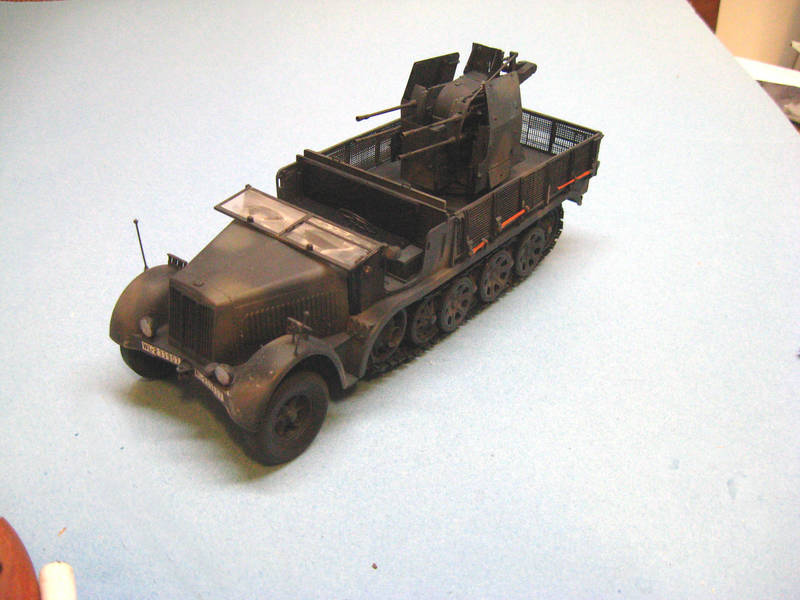
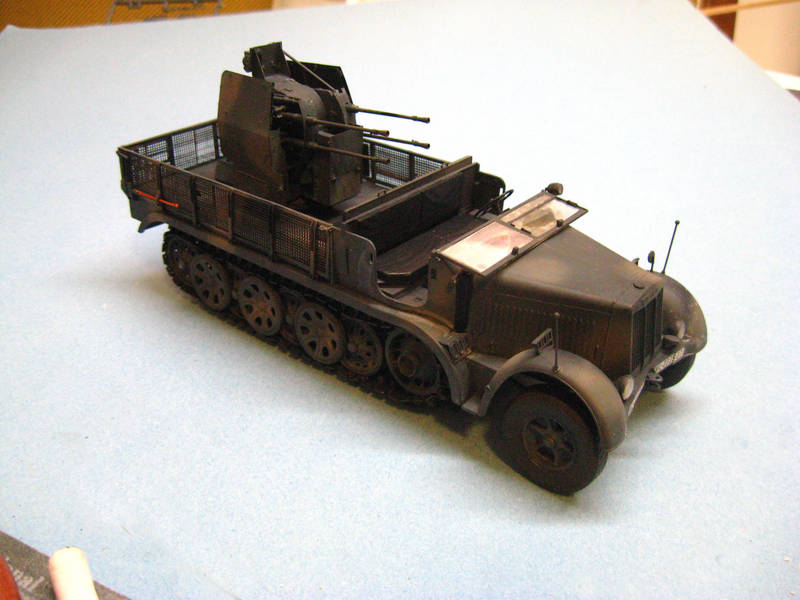

Some final observations about the DML kit:
1.) The lack of decals for the dashboard instruments is simply not what I expect from a world-class manufacturer. It cheapens the kit and wouldn't cost much to include. These are cribbed from the Trumpeter Sd.Kfz.7/1 Late War closed, armored cab kit. Also missing are the white markings for the mud guards that were common on EW German halftracks.
2.) The mounting points for the windshield simply broke off early in assembly. Pay careful attention when building the kit, as I had to scratch these.
3.) The AM mesh SIMPLY MAKES THE KIT. Nothing compares. It was definitely worth all the work.
4.) The gun would look reasonably well without the PE upgrade, but again, it comes alive this way. Can't imagine the barrels using the styrene from the kit.
5.) The license plates come as prefixes (WH, WL and broken-up SS runes), a dash and numbers. I about #$%@ myself when I saw that, but they went on very well.
6.) I wouldn't build another Sd.Kfz.7 (or for that matter, any "box chassis" German vehicle) without the Quickwheel masks. Well worth the money.
7.) The "driver knows" feelers on the front are Voyager brass.
8.) The kit only supplies two rifles for mounting on the mud guard brackets. They're both Gen 2 two-piece ones with separate bolt assemblies, but come on! Only 2???
Give me a little time and I'll finish the Trumpeter kit (about half-way through the gun PE upgrade).

rdwing64
Joined: June 24, 2007
KitMaker: 45 posts
Armorama: 42 posts
Posted: Tuesday, March 30, 2010 - 04:33 PM UTC
uuuuhhhhh,WOW,uuuuuhhhh! COOL!

CMOT


Joined: May 14, 2006
KitMaker: 10,954 posts
Armorama: 8,571 posts

Posted: Tuesday, March 30, 2010 - 05:27 PM UTC
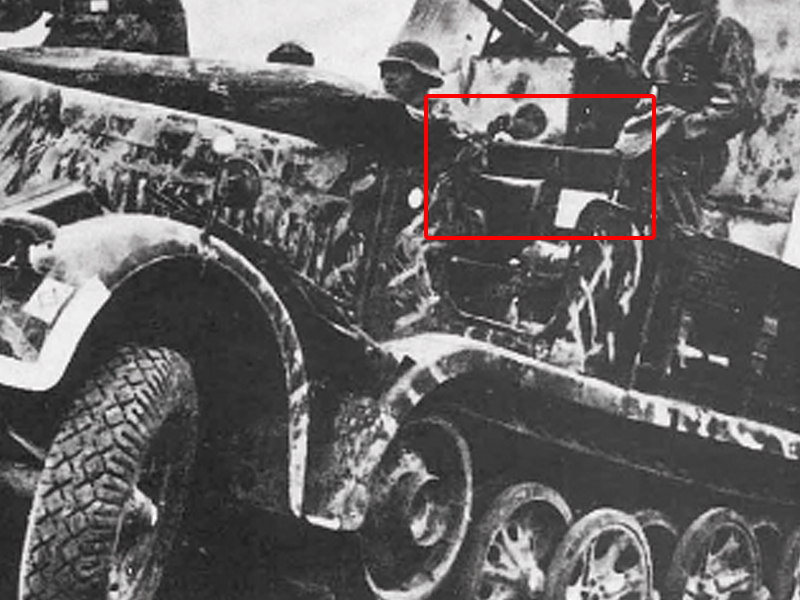
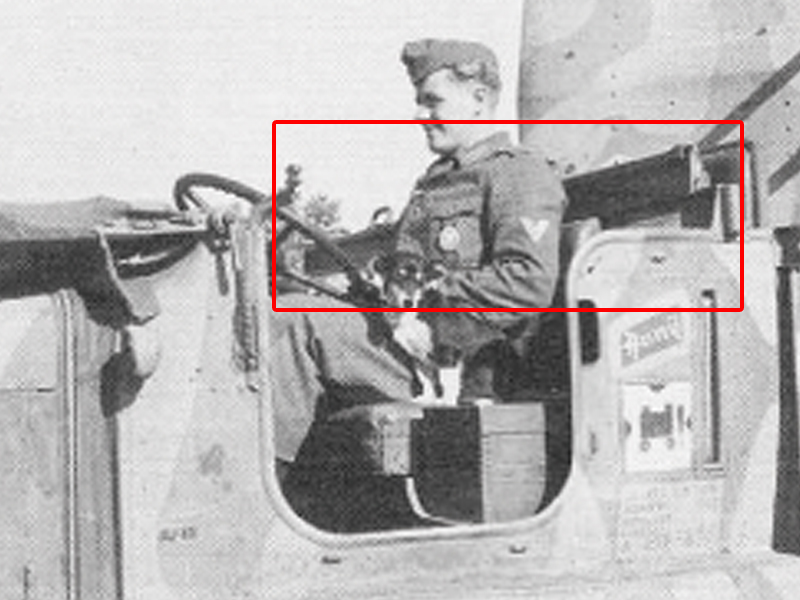
Bill these two pictures may help you with the backrest question.
bill_c
Joined: January 09, 2008
KitMaker: 10,553 posts
Armorama: 8,109 posts
Posted: Wednesday, March 31, 2010 - 04:06 AM UTC
Thanks, Darren, those photos are appreciated! 
Thanks, John, glad you're enjoying it!
Thanks, John, glad you're enjoying it!
 |

WEB HOSTING BY


Copyright ©2021 Armorama and Kitmaker Network, a subsidiary of Silver Star Enterprises
All Rights Reserved. Please read our Conditions of Use and Privacy Policy.
All Rights Reserved. Please read our Conditions of Use and Privacy Policy.