_GOTOBOTTOM
Яusso-Soviэt Forum
Russian or Soviet vehicles/armor modeling forum.
Trumpeter BTR-80
tread_geek
Visit this Community
Ontario, Canada
Joined: March 23, 2008
KitMaker: 2,847 posts
Armorama: 2,667 posts
Posted: Thursday, February 11, 2010 - 06:30 AM UTC
It's been a while but here are some update pictures to the BTR build. The wheels are affixed, and not without a few issues. When I press fit the wheels on their axles I found that the second and fourth wheel on the right (commanders) side did not touch the ground. I've built two other eight wheeled vehicles and this is the first time I ran into this problem. The height of this discrepancy was minimal but noticeable under macro photography. My solution was to file and cut down the top part of each axle pin to allow the wheel and hub to drop the required amount. The interesting thing is that when placed on a flat surface the suspension arms showed no variations. My guess is that there may have been discrepancies in either the hole locations in the hubs or the wheel diameter.

In the photos I have used a combination of pre and post shading along with various highlighting techniques and colours to achieve the results you see. I kept the weathering to an minimal and in keeping with numerous photos and videos that I have seen of the BTR-80. I must apologize for the pictures as they are the result of further experimentation with my new flash/lighting equipment. I will attempt to improve on my photography and post better pictures at a future date.

Any comments or questions are welcome.

Cheers,
Jan


Gorizont
Visit this Community
Sachsen, Germany
Joined: November 28, 2007
KitMaker: 1,462 posts
Armorama: 1,289 posts
Posted: Thursday, February 11, 2010 - 06:46 AM UTC
Nice little machine!
The result looks very good to me.
Time for a dio.

greetings...
Soeren
spaarndammer
Visit this Community
Noord-Holland, Netherlands
Joined: January 28, 2007
KitMaker: 1,945 posts
Armorama: 282 posts
Posted: Thursday, February 11, 2010 - 10:23 AM UTC
Hi Jan,

too bad the camo couldn't be painted, but this also looks really nice. Great job on your BTR and thanks for posting the picture with tack, really helpful.


Jelger
Braille
#135
Visit this Community
California, United States
Joined: August 05, 2007
KitMaker: 1,501 posts
Armorama: 1,485 posts
Posted: Friday, February 12, 2010 - 09:53 AM UTC
Jan,

You've done an outstanding job with the kit, review and build log. My hats off to you for taking the time in putting in that extra effort. Your off to a great start! I would also like to thank all those that contributed with some very useful links, drawings and reference information.

I like how you've colored the periscope lenses rear lights and tools. I agree with you about the Model Master Acrylic Russian Green being to dark right out of the bottle. The color you achieved when adding some tan looks better. I have yet to try painting a camouflage pattern with an air brush in this scale but admire you for your attempt. Super job on the hand holds and nice recovery from the airborne drop without chute test.

Thanks for sharing and posting. Keep at it with the photos too.

-Eddy
sabredog
Visit this Community
Western Australia, Australia
Joined: July 22, 2007
KitMaker: 607 posts
Armorama: 599 posts
Posted: Friday, February 12, 2010 - 06:55 PM UTC
Turned out pretty well Jan. With regards to the grab rails, the curved one behind the turret broke for me, took a bit of work to fix but all was good in the end.

Cheers

Mike
tread_geek
Visit this Community
Ontario, Canada
Joined: March 23, 2008
KitMaker: 2,847 posts
Armorama: 2,667 posts
Posted: Saturday, February 13, 2010 - 06:42 AM UTC
Thanks for the kind words guys. Now I'll have to see about putting all these pieces together for a Build article.

@ Soren - I have the base that show in some pictures but my dio/vignette skills are rather lacking at the moment. I tried with my Light Guns build but realized that I have a lot to learn. I may try something in the near future to really set off the BTR.

@Jelger - I am still waiting on the new compressor and will also be looking to find another BTR-80 to build with camo.

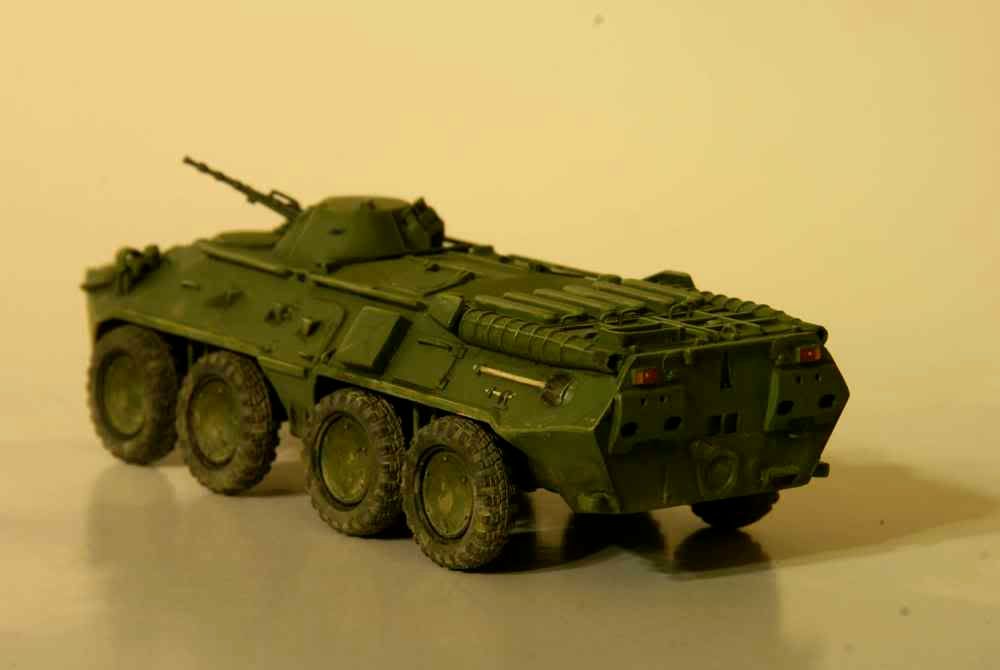
@Michael - The turret rear grab rail also broke on my build and so did the front right one. They came off the sprue fine but while handling them they split almost dead centre. Might have been a flaw during moulding.

@Eddy - You are absolutely correct that I offer my sincere thanks to the individuals that have assisted in this build. Their material was crucial in getting things to the point where they are. I've also looked at so many BTR-80 pictures on the 'Net that I both dream about them and at times feel that I've been around the real things.

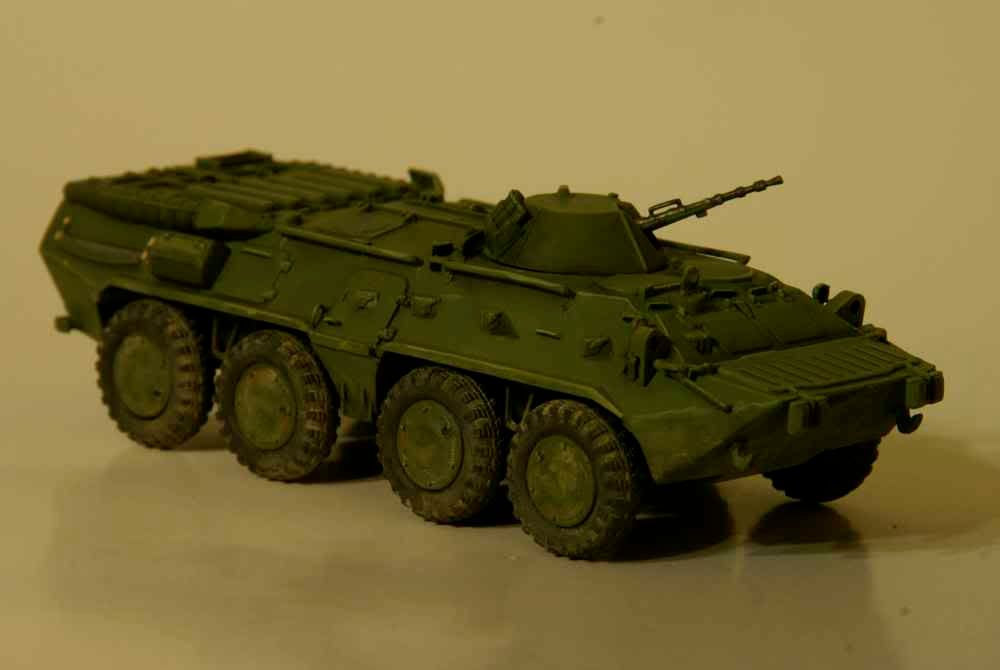
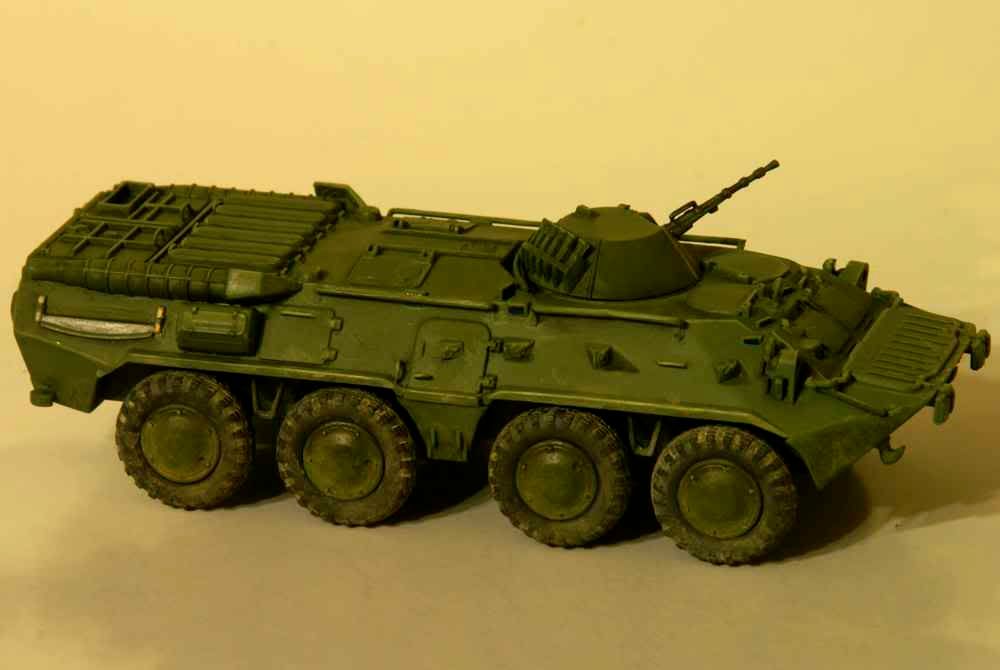
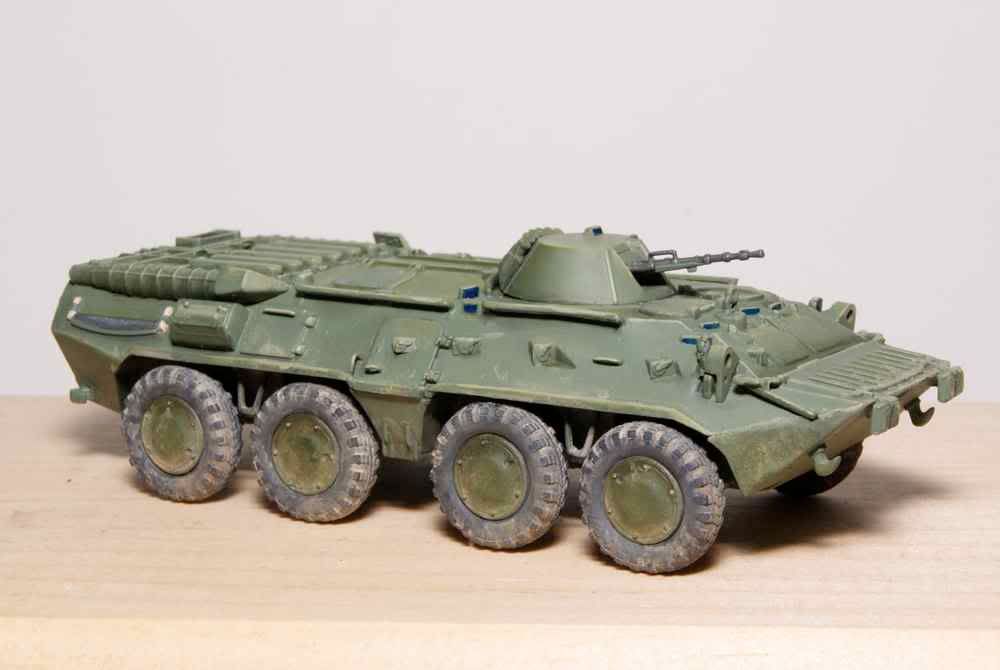
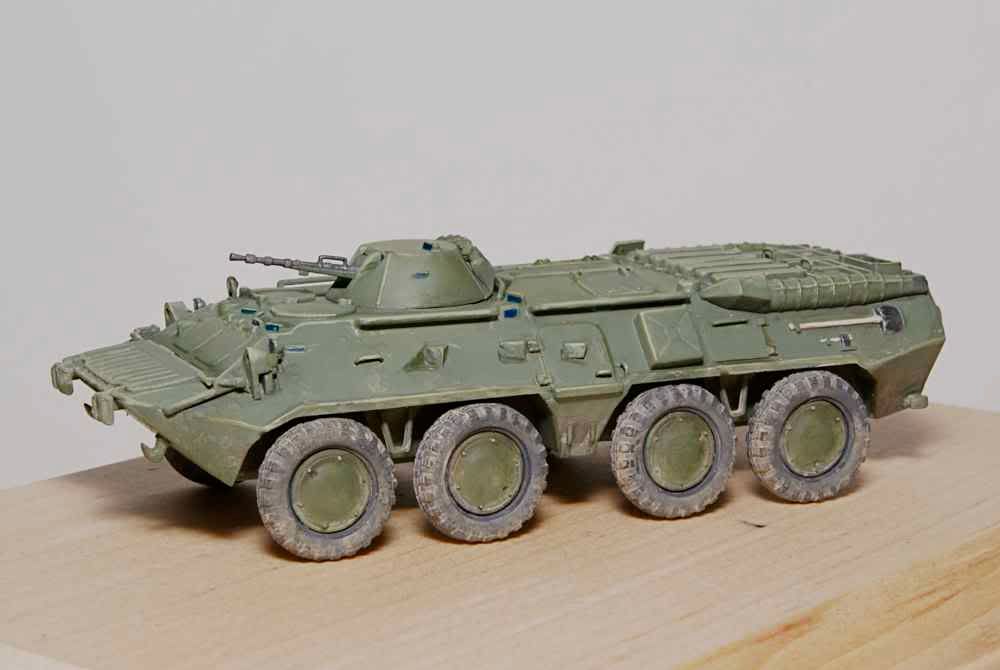
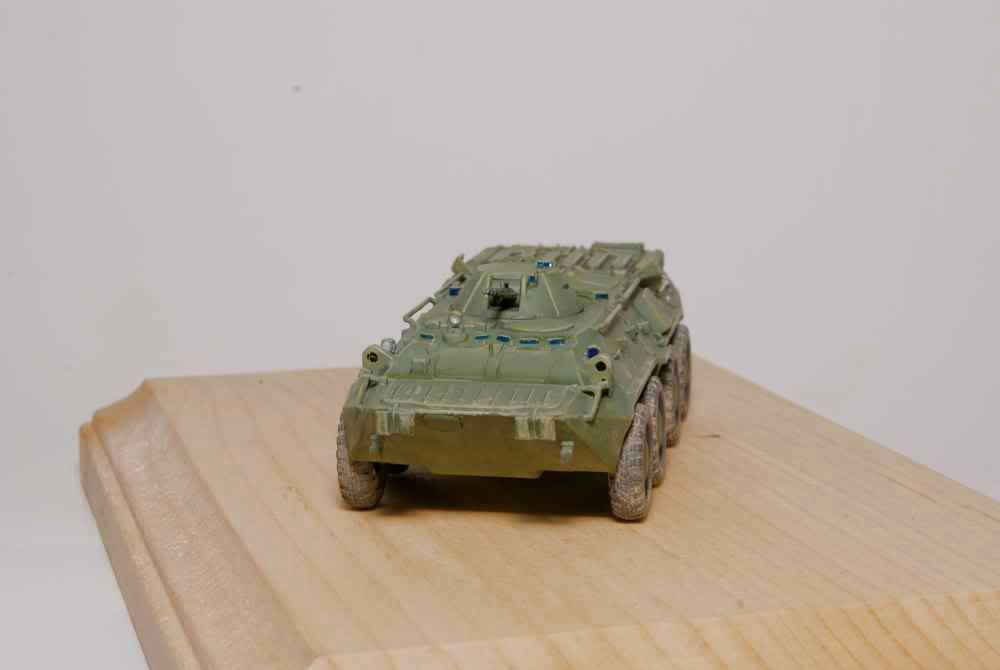
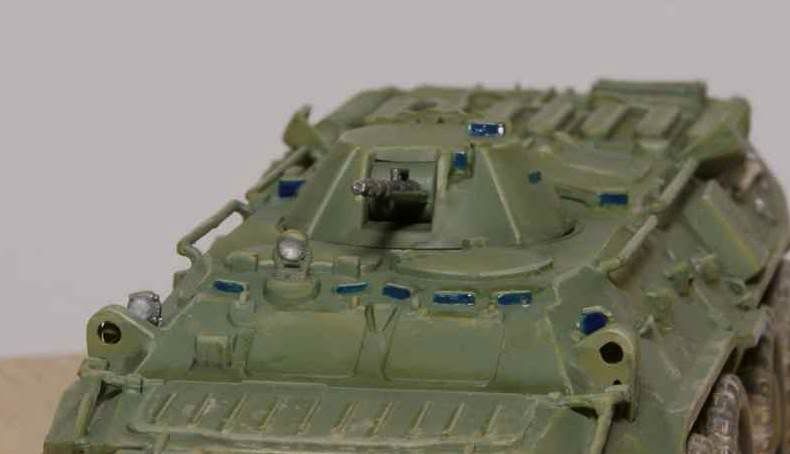
One of the greatest aids, or banes, of the building process is the digital camera that is totally unforgiving. I'll check and recheck pictures at each build stage with pictures as they see things my visor seems to miss. The periscopes lenses were first painted a metallic silver/gunmetal and when thoroughly dry I painted over them with Tamiya X23 Clear Blue leaving streaks of the silvery colour to show through for contrast. I tried to hollow out the main gun with the finest drill I had but I couldn't get as deep as I would have liked. Also, the searchlight above the commanders station had a sink hole in the centre of it. I got a small drill and enlarged the sink hole, painted the reflector area inside silver and then filled it in with Testors' Window Maker. Here's a super blow-up.


As for the pictures, I think that I am starting to get the hang of the new photo equipment. I'll definitely use a similar process for future pictures but experiment with exposure modification. The last photos were taken with a +1 exposure modifier so I'll see what lowering that will do.

Thanks again,
Jan
weathering_one
Visit this Community
Ontario, Canada
Joined: April 04, 2009
KitMaker: 458 posts
Armorama: 456 posts
Posted: Saturday, February 20, 2010 - 09:12 AM UTC
I don't think that I'd have the patience, let alone skill, to attempt what you have done with this kit. I know that others have mentioned how fantastic a job you did on the periscopes but I am totally blown away by those tail lights. They actually look like the machine is running and someone is pressing on the brake pedal. Very impressive considering the scale and thanks for sharing the experience.

Regards,
AJ
tread_geek
Visit this Community
Ontario, Canada
Joined: March 23, 2008
KitMaker: 2,847 posts
Armorama: 2,667 posts
Posted: Thursday, March 04, 2010 - 05:30 AM UTC

Quoted Text

I don't think that I'd have the patience, let alone skill, to attempt what you have done with this kit. I know that others have mentioned how fantastic a job you did on the periscopes but I am totally blown away by those tail lights. They actually look like the machine is running and someone is pressing on the brake pedal. Very impressive considering the scale and thanks for sharing the experience.


Sorry I took so long to acknowledge your comments and thanks for the compliments, AJ. The tail lights were done somewhat similar to the periscopes with the base of the lenses first painted with a metallic silver. The actual colouring was done with Delta Ceramcoat acrylics using numerous colours mixed to match the colours of the real things in photos that I've seen. Especially the superb photos that Dmitriy_Dregval provided. Thanks again Dmitriy.

I've been experimenting with my camera and lighting and managed what I hope are better pictures. Here's the new shots:


I've been busy running a campaign so I haven't had a lot of time to work or think about this build. I'm still not 100% happy that this is the total final end of the build so don't be surprised if I add to this thread now and then. (Hint, hint )

Cheers,
Jan
Gorizont
Visit this Community
Sachsen, Germany
Joined: November 28, 2007
KitMaker: 1,462 posts
Armorama: 1,289 posts
Posted: Thursday, March 04, 2010 - 11:07 AM UTC
The finished vehicle looks good so far!
The "smooth" weathering has a nice touch and the detail-paint is excellent.
Will it receive some numbers (on the hull)?

greetings...
Soeren
tread_geek
Visit this Community
Ontario, Canada
Joined: March 23, 2008
KitMaker: 2,847 posts
Armorama: 2,667 posts
Posted: Friday, March 05, 2010 - 08:21 AM UTC

Quoted Text

The finished vehicle looks good so far!
The "smooth" weathering has a nice touch and the detail-paint is excellent.


Soeren, thank you very much for the kind words and for the support you have given me during this build. I wanted the vehicle to look used in a similar way to many pictures I have seen but not to the point of excess.


Quoted Text


Will it receive some numbers (on the hull)?


I am still unsure of what markings I will use. I have seen enough BTR-80 without any markings at all but at present I am undecided. I believe that you suggested a diorama or vignette earlier in the build. I am not saying that that will be my direction...BUT...look what I found in a spare parts box!


While waiting for part of another build to dry I threw on some paint on these ESCI Spetsnaz figures to see if there was any potential. As I stated before, my recent attempts at dioramas have not resulted in success. Also, this is my first attempt at painting figures in a long, long time. And even then they were not very good. These figures are supposed to be wearing camouflage uniforms so this is only a first crude step.

Again, thanks for your support. We'll see where all this leads.

Cheers,
Jan
arkhunter
Visit this Community
Illinois, United States
Joined: June 11, 2006
KitMaker: 116 posts
Armorama: 95 posts
Posted: Saturday, March 06, 2010 - 12:24 PM UTC
Good luck with your figures. Hopefully they'll turn out as well as your BTR did. I will definitely be referencing your build when I finally come around to doing trump's BTR...

Take care,
Austin
Petition2God
Visit this Community
Colorado, United States
Joined: February 06, 2002
KitMaker: 1,526 posts
Armorama: 1,294 posts
Posted: Saturday, March 06, 2010 - 06:46 PM UTC
Looking great! Can't wait to see the dio.
 _GOTOTOP