Gary, the bottom ones are great--red sight ring! thanks for the bail-out!
Guys, some awesome looking models and its great to see something of yours James! I actully have that kit mostly completed as well (IPMS review)..just got some paint to do.
well...yeah..deadlines...looks like I wont even finish one for my own campaign idea! did finish lots of models..just not any SPAAG
Andy
Campaigns
Where Armorama group builds can be discussed, organized, and updates posted.
Where Armorama group builds can be discussed, organized, and updates posted.
Hosted by Darren Baker, Richard S.
Targets Shoot Back: Self-propelled flak/ AA
skyhawk

Joined: June 03, 2003
KitMaker: 1,095 posts
Armorama: 743 posts

Posted: Monday, April 25, 2011 - 03:57 AM UTC
eoinryan

Joined: April 30, 2010
KitMaker: 232 posts
Armorama: 134 posts

Posted: Monday, April 25, 2011 - 03:59 AM UTC
Hi folks,
@ Gary: Great work on the Campaign Ribbon. I prefer the second from bottom ribbon. I think that the red sight on blue background makes the Mig-29 silhouette stand out better!
@ Rob- excellent work on the Opel Blitz. Love the weathering. What technique did you use. Is that a coat of German field grey under the desert sand and then chipped away?
@ Jeremy- The Gepard kit is great- It fitted together like lego. There was a bit of flash and some injector pins in a few akward places, but the kit is 30 years old! Tamiya quality shines through. If you do build it, once you have the flash sorted and pin holes filled and filed, it builds fairly quickly. When you are building the hull, paint the grill first then attach the engine piece, then mask it. I kept the grill to the end and ended up spraying the upper and lower hulls separately....
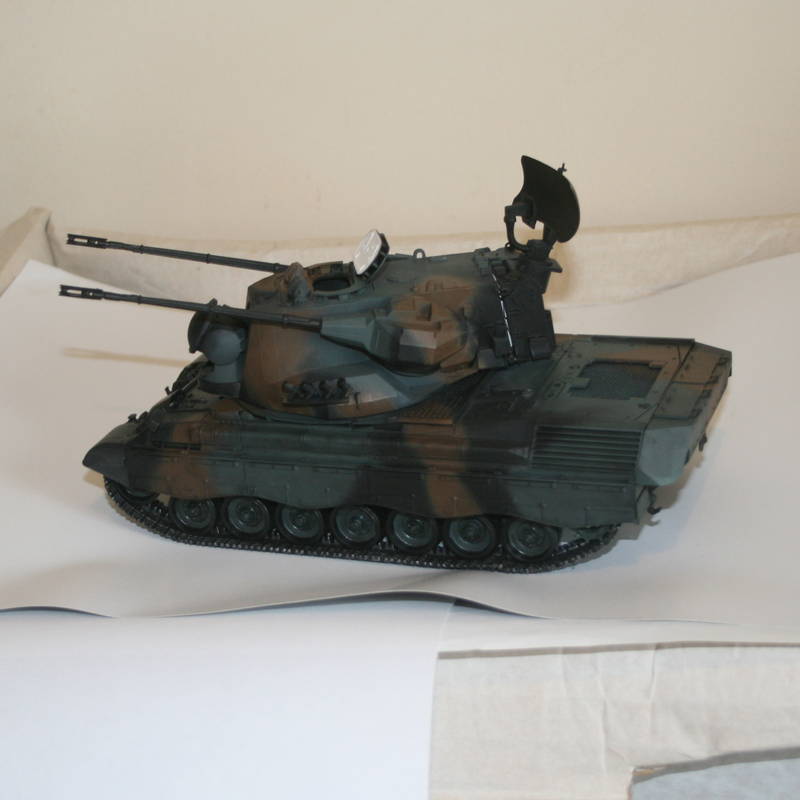
Anywho, here's some progress pics. I'm getting there with the model, pity about my (lack of) photography skills!
Tracks and skirts attached:
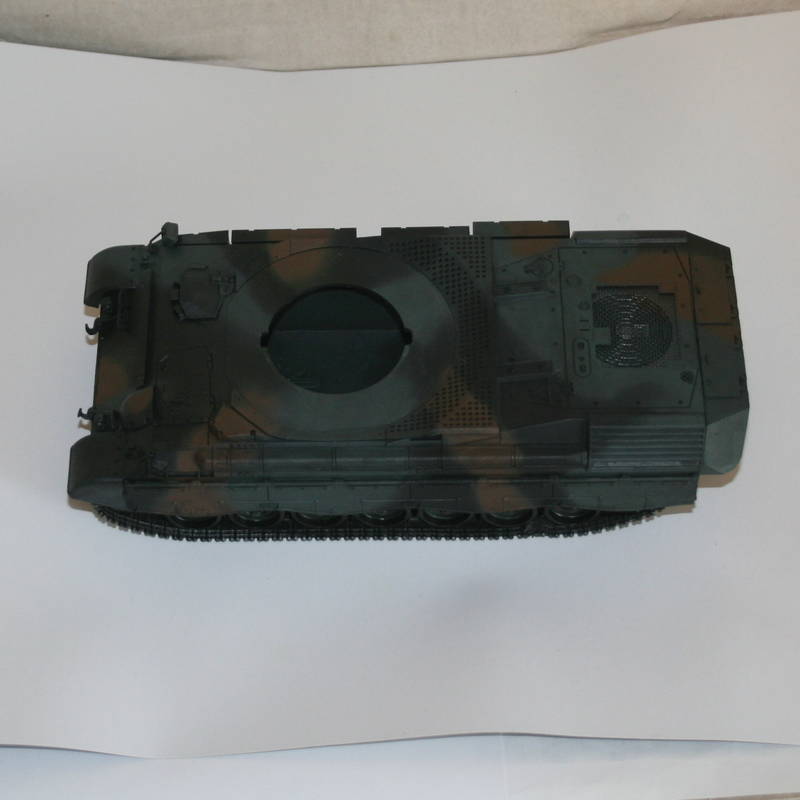
Turret and hull joined! It's starting to look like a nasty piece of work now...
Radar workings exposed:
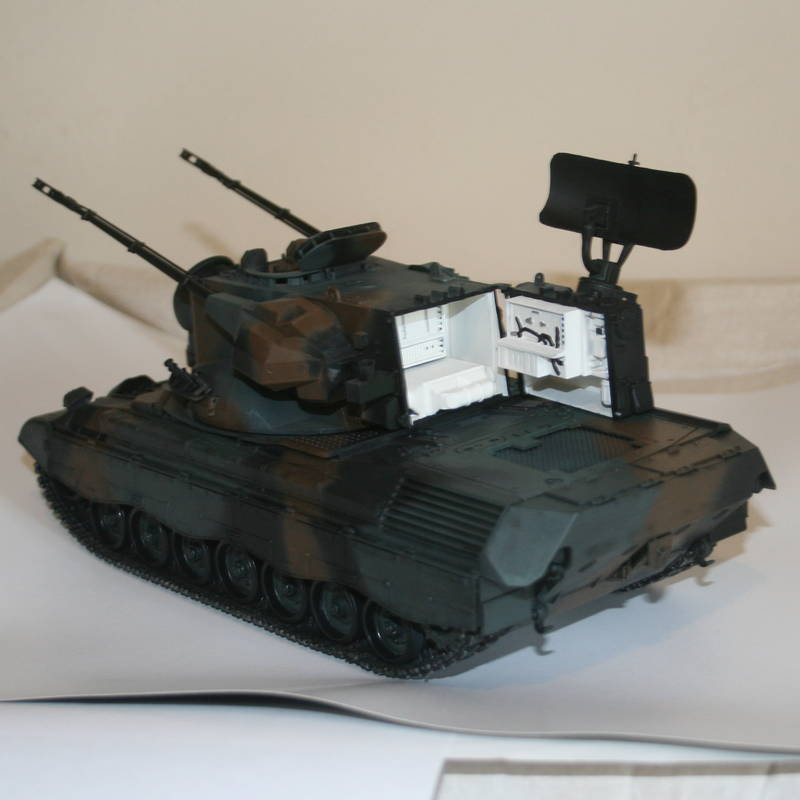
The interior stuff needs a bit of tidying up and a wash or two.
After that it's a wash for the upper hull, apply decals and aerials then mud!
Later,
Eoin
@ Gary: Great work on the Campaign Ribbon. I prefer the second from bottom ribbon. I think that the red sight on blue background makes the Mig-29 silhouette stand out better!
@ Rob- excellent work on the Opel Blitz. Love the weathering. What technique did you use. Is that a coat of German field grey under the desert sand and then chipped away?
@ Jeremy- The Gepard kit is great- It fitted together like lego. There was a bit of flash and some injector pins in a few akward places, but the kit is 30 years old! Tamiya quality shines through. If you do build it, once you have the flash sorted and pin holes filled and filed, it builds fairly quickly. When you are building the hull, paint the grill first then attach the engine piece, then mask it. I kept the grill to the end and ended up spraying the upper and lower hulls separately....
Anywho, here's some progress pics. I'm getting there with the model, pity about my (lack of) photography skills!
Tracks and skirts attached:

Turret and hull joined! It's starting to look like a nasty piece of work now...

Radar workings exposed:

The interior stuff needs a bit of tidying up and a wash or two.
After that it's a wash for the upper hull, apply decals and aerials then mud!
Later,
Eoin
zontar

Joined: August 27, 2006
KitMaker: 1,646 posts
Armorama: 1,557 posts

Posted: Monday, April 25, 2011 - 09:37 AM UTC
Eoin: very nice paint job. I look forward to the weathering.
Happy Modelling, -zon
Happy Modelling, -zon

T34

Joined: April 27, 2006
KitMaker: 79 posts
Armorama: 60 posts

Posted: Monday, April 25, 2011 - 07:28 PM UTC
Quoted Text
Hi folks,
@ Rob- excellent work on the Opel Blitz. Love the weathering. What technique did you use. Is that a coat of German field grey under the desert sand and then chipped away?
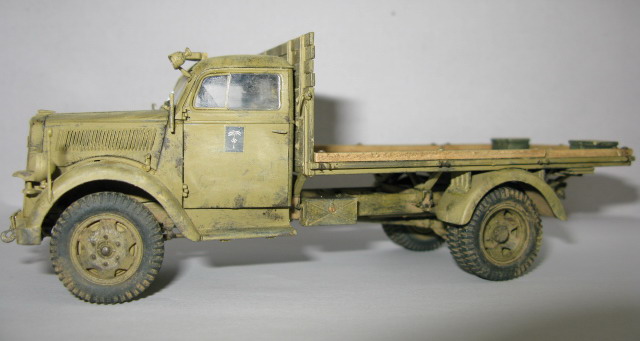
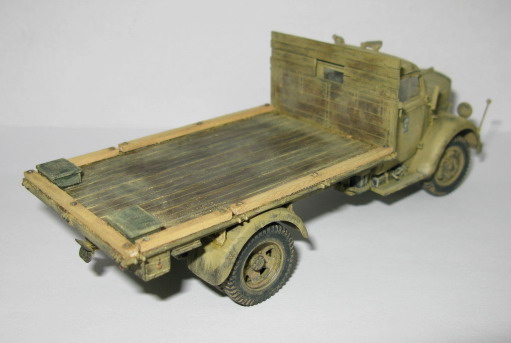
The base colour is dark yellow. I then wheatered it with german grey. I thin down the paint about 50/50 and then use the drybrush technique (on the german grey). The chips are made of german grey and red brown. They are put on with a very small brush.

vonHengest

Joined: June 29, 2010
KitMaker: 5,854 posts
Armorama: 4,817 posts

Posted: Monday, April 25, 2011 - 07:46 PM UTC
Zon: Great, glad to hear it's working out for you! And thanks for the suggestion, I'll check my lhs and see if they have one in stock 
Rob: They look pretty convincing
Eoin: Doesn't sound bad at all, and thanks for the tips! I have one of these in the stash and may build it if I can't find another suitable alternative.

Rob: They look pretty convincing

Eoin: Doesn't sound bad at all, and thanks for the tips! I have one of these in the stash and may build it if I can't find another suitable alternative.
mmeier

Joined: October 22, 2008
KitMaker: 1,280 posts
Armorama: 1,015 posts

Posted: Tuesday, April 26, 2011 - 12:05 AM UTC
eoinryan: Great looking kitty you have there.
With that done I now call open the great "Do german Gepards have skirts" debate
With that done I now call open the great "Do german Gepards have skirts" debate


eoinryan

Joined: April 30, 2010
KitMaker: 232 posts
Armorama: 134 posts

Posted: Tuesday, April 26, 2011 - 01:34 AM UTC
Hi MBR,
Aha- the auld 'Do German Gepards have skirts debate?' Mmm... short answer is I don't know, but given the fact that the Gepards are well over 40 years old, when they first rolled off the factory floors they had skirts.
I'm sure that well over forty years of field engineering led to a lot of tinkering and lot of skirts could have been removed. Whether this was down to personal crew or unit preference, I don't know, but I'd imagine that they'd be a damn sight easier to clean and maintain/repair sans skirts. If anyone could add to the debate, please do.
I've seen photo's of other AFVs where the majority of the skirting was removed, but a panel or two was kept on to aid the crews mount their vehicles!?! Did this happen to the Gepard as well?
Eoin
mmeier

Joined: October 22, 2008
KitMaker: 1,280 posts
Armorama: 1,015 posts

Posted: Tuesday, April 26, 2011 - 01:30 PM UTC
The majority of pictures I have seen show them without skirts. With the Leopard I (the base tank) it is the other way round, most pictures either are "pre skirt" or show the tank with full skirts (The Leo I needs them more than the Leo II)
OTOH there are pictures like this one showing one in three tone WITH skirt.so at least some have it. They are surely "in stock" from the Leo I.
All pictures from Leo I and Gepard I have always show either full skirts or none. The "partial" skirts are mostly a Leopard II thing. The Leo II has changed the type of skirt a few times post cold war so this might be the reason. During the late 1980s all Leo 2 I saw (PzBtl 201 and 204 units) had always the complete set of 4st gen skirts.
So my take for the Gepard is "most have not, some have" and if in doubt "yours is one of the latter".
zontar

Joined: August 27, 2006
KitMaker: 1,646 posts
Armorama: 1,557 posts

Posted: Wednesday, April 27, 2011 - 04:14 PM UTC
Small update: starting to get toward the end...


Happy Modelling, -zon


Happy Modelling, -zon


vonHengest

Joined: June 29, 2010
KitMaker: 5,854 posts
Armorama: 4,817 posts

Posted: Wednesday, April 27, 2011 - 05:35 PM UTC
How have you liked building that kit Zon? I may pick one up someday as I really like how it's turning out.
zontar

Joined: August 27, 2006
KitMaker: 1,646 posts
Armorama: 1,557 posts

Posted: Thursday, April 28, 2011 - 06:59 AM UTC
Jeremy: overall I like it pretty well. there are some fit issues in that some slots are oversized for the tab, so there's some daylight peeking through (mostly on the front). My top hull was pulled out of the mold too early and is slightly warped. Hopefully I will be able to straighten it out when I mate the pieces for real.
The ducts are also a problem beyond the issue we already solved: They are still very stiff, making it next to impossible for me to pose the missiles in the up position. I probably should have heated them even more to get them more bendable. Fortunately this is not a problem for me, as I intend to pose them in travel mode, but if you intend to have them angled up, I'd suggest attaching them in that position.
The fins on the missiles were a tad tricky in that the hole for the tab was not deep enough, causing the fins to be way off the missile, so I sanded them down, then there wasn't much gluing surface, so they are extremely delicate.
The turret is also tightly fit into it's hole and they put bumps like a ratchent inside the turret ring, so it doesn't pivot very easily.
Lastly is the tracks. Most sort of "snap" into position, but many do not and I wasn't careful enough with my first run, so I ended up out of position at the end and had to go back and coax them a little more.
Many small pieces, but over all an enjoyable build.
HTH.
Happy Modelling, -zon


vonHengest

Joined: June 29, 2010
KitMaker: 5,854 posts
Armorama: 4,817 posts

Posted: Thursday, April 28, 2011 - 08:25 AM UTC
Thanks for taking the time to answer my question in detail Zon. I think I may want to build one even more now so that I can take on the challenge of those odd vinyl hoses 
Cheers
Jeremy H

Cheers
Jeremy H

mecanix

Joined: March 03, 2003
KitMaker: 201 posts
Armorama: 189 posts

Posted: Friday, April 29, 2011 - 11:17 AM UTC
I realised last week that this campaign had only three months left to run and the only thing I had done on my M19 GMC, thus far, was some basic cutting work and prep. So I will be pushing on with this.
According to Hunnicutt the M19 is about 30" longer than a basic M24 so that means a chassis plug is required.

A new lower front plate is fitted to give the characteristic lip where it meets the glacis plate

The rear of the hull is squared off and a new double door plate fitted. As you can see the hull is heavily braced to keep it square and true.

These are the new radiator-cover and engine grill.

The front plate needs the hull machine gun position cut away and filled, similarly the turret ring.

Just tacked together the hull outline starts to roughly appear

Next is the re-arranged suspension.Luckily I had done several M24 based projects over the years and have a good supply of extra parts.
However I had forgotten the "soapy" type of plastic used in these kits.Hard to cut and damned difficult to sand. Still its the only one around.
regards
According to Hunnicutt the M19 is about 30" longer than a basic M24 so that means a chassis plug is required.

A new lower front plate is fitted to give the characteristic lip where it meets the glacis plate

The rear of the hull is squared off and a new double door plate fitted. As you can see the hull is heavily braced to keep it square and true.

These are the new radiator-cover and engine grill.

The front plate needs the hull machine gun position cut away and filled, similarly the turret ring.

Just tacked together the hull outline starts to roughly appear

Next is the re-arranged suspension.Luckily I had done several M24 based projects over the years and have a good supply of extra parts.
However I had forgotten the "soapy" type of plastic used in these kits.Hard to cut and damned difficult to sand. Still its the only one around.
regards

eoinryan

Joined: April 30, 2010
KitMaker: 232 posts
Armorama: 134 posts

Posted: Monday, May 02, 2011 - 02:05 AM UTC
Hey folks,
@ MBR: some Gepards do have skirts and some don't I guess. When I did looke at Gepard images on the www most Gepards in operational shots didn't have the skirts, but most of the Gepards in display shots did... interesting.
@ Zon- great work on the pre-shading- it gives your kit a lot of depth. Good look with the rest of the paint job!
Eoin

c5flies

Joined: October 21, 2007
KitMaker: 3,684 posts
Armorama: 2,938 posts

Posted: Tuesday, May 03, 2011 - 03:28 PM UTC
Lots of excellent and inspiring work from you guys, I've spent some quality time enjoying the eye candy whilst shirking my staff duties 
I still have a long ways to go, but this is the furthest I've got in an armor build for waaaay too long and I have confidence I'll actually get it done. Still have some construction to finish, but started the weathering on the lower chassis so I can start the tracks. Yup, she's a Dirty Girl. Pinwash and filter topside and I placed the gun in just to get an idea of what she's going to look like.


I still have a long ways to go, but this is the furthest I've got in an armor build for waaaay too long and I have confidence I'll actually get it done. Still have some construction to finish, but started the weathering on the lower chassis so I can start the tracks. Yup, she's a Dirty Girl. Pinwash and filter topside and I placed the gun in just to get an idea of what she's going to look like.


zontar

Joined: August 27, 2006
KitMaker: 1,646 posts
Armorama: 1,557 posts

Posted: Tuesday, May 03, 2011 - 03:39 PM UTC
Mecanix: some good looking scratching there.
Eion: Thanks for the comments. Just hoping now I can keep from messing it up...
James: I like the mud. Well done and not too much.
Happy Modelling, -zon
Eion: Thanks for the comments. Just hoping now I can keep from messing it up...

James: I like the mud. Well done and not too much.
Happy Modelling, -zon

Nito74

Joined: March 04, 2008
KitMaker: 5,386 posts
Armorama: 4,727 posts

Posted: Tuesday, May 03, 2011 - 03:58 PM UTC
Still working on my Mobelwagen.
hull & deck are done, working on the flak gun.
pics soon
hull & deck are done, working on the flak gun.
pics soon

eoinryan

Joined: April 30, 2010
KitMaker: 232 posts
Armorama: 134 posts

Posted: Saturday, May 07, 2011 - 05:01 AM UTC
Hey folks,
James- that mud looks great, especially under the wheel arches.
I'm applying a bit of mud myself, but how much mud is too much?
When I catch myself asking myself 'is that a bit too much?' it probably is. D'oh!
Pics to follow after I've licked my wounds...
Later,
Eoin
James- that mud looks great, especially under the wheel arches.
I'm applying a bit of mud myself, but how much mud is too much?
When I catch myself asking myself 'is that a bit too much?' it probably is. D'oh!
Pics to follow after I've licked my wounds...
Later,
Eoin
T34

Joined: April 27, 2006
KitMaker: 79 posts
Armorama: 60 posts

Posted: Sunday, May 08, 2011 - 09:59 PM UTC
I want to introduce my latest build.
It is also an Opel Blitz with a Flak 38. This build will be the Dragon/Cyberhobby kit, with a little schratchwork. Hopefully it will be ready by the end of the campaign. I'll post some WIP pics later.
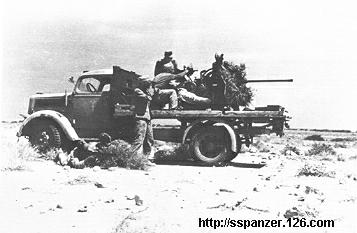
It is also an Opel Blitz with a Flak 38. This build will be the Dragon/Cyberhobby kit, with a little schratchwork. Hopefully it will be ready by the end of the campaign. I'll post some WIP pics later.

T34

Joined: April 27, 2006
KitMaker: 79 posts
Armorama: 60 posts

Posted: Monday, May 09, 2011 - 04:21 AM UTC
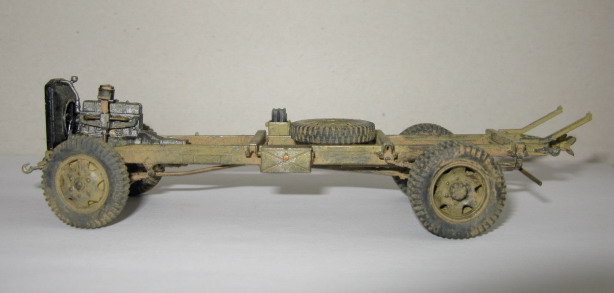
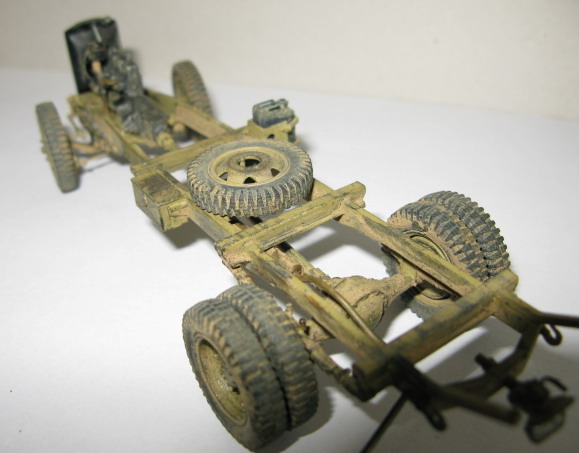
Quick update:
the chassis
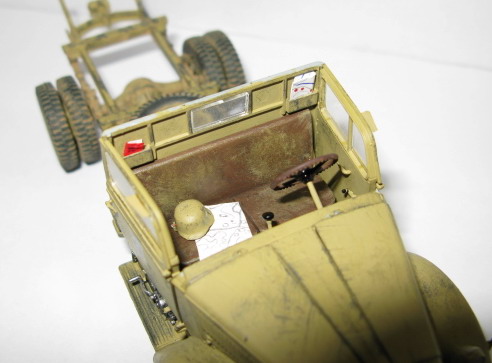
the interior of the cabin
That's all folks... so far
the chassis


the interior of the cabin

That's all folks... so far
T34

Joined: April 27, 2006
KitMaker: 79 posts
Armorama: 60 posts

Posted: Thursday, May 12, 2011 - 09:27 PM UTC
The truck is finished. On to the Flak.


mmeier

Joined: October 22, 2008
KitMaker: 1,280 posts
Armorama: 1,015 posts

Posted: Thursday, May 12, 2011 - 10:42 PM UTC
Does anyone know a good way to produce 40+ "footman's loops" in 1/35. I have the Eduard set for my Duster and need a way to bend them.
And a way to do a concave disk would be nice. The spare barrels are protected by one each at the front. Round/flat I could do with evergreen but those are concave and to big to "just do round"
And a way to do a concave disk would be nice. The spare barrels are protected by one each at the front. Round/flat I could do with evergreen but those are concave and to big to "just do round"
Posted: Friday, May 13, 2011 - 02:05 AM UTC
Nice looking SWS, James. I like the weathering so far. Stick to it and you will produce a great model. 
Nice progress, Rob. Excellent looking Opel so far. Great desert "weather beaten" look.
Looking forward to see more.

Nice progress, Rob. Excellent looking Opel so far. Great desert "weather beaten" look.
Looking forward to see more.

T34

Joined: April 27, 2006
KitMaker: 79 posts
Armorama: 60 posts

Posted: Saturday, May 14, 2011 - 12:59 AM UTC
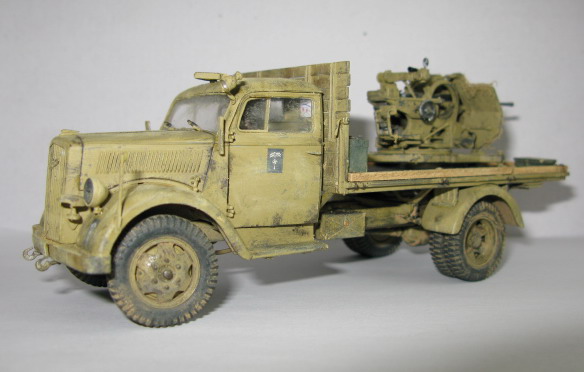
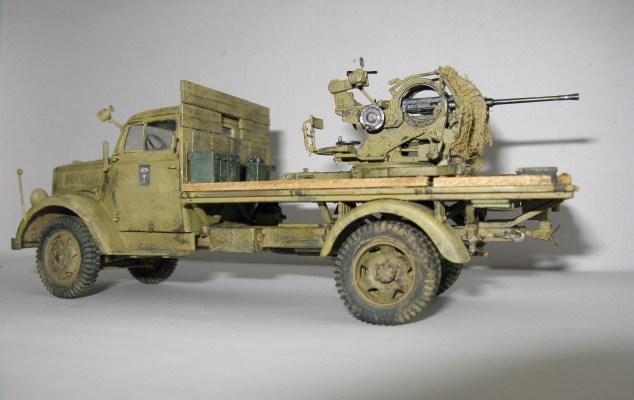
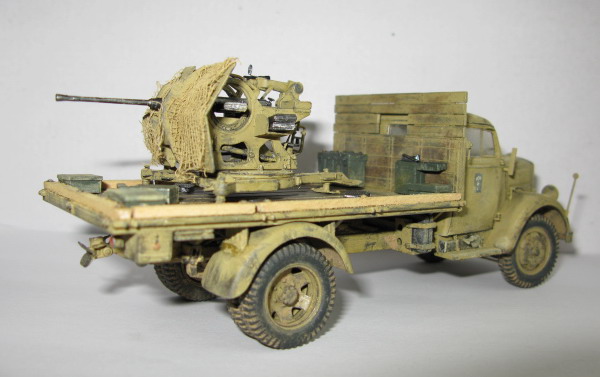
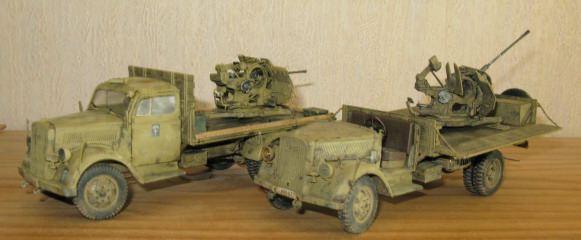
It is finished!
There should be some empty cartridges on the deck, but they are still on order. Because I had no bushes to put on the gun shileld, I replaced these with a camouflage net. The rest was build as much i could as on the picture of the original.
Both of the Opels
There should be some empty cartridges on the deck, but they are still on order. Because I had no bushes to put on the gun shileld, I replaced these with a camouflage net. The rest was build as much i could as on the picture of the original.


Both of the Opels

Posted: Sunday, May 15, 2011 - 03:41 PM UTC
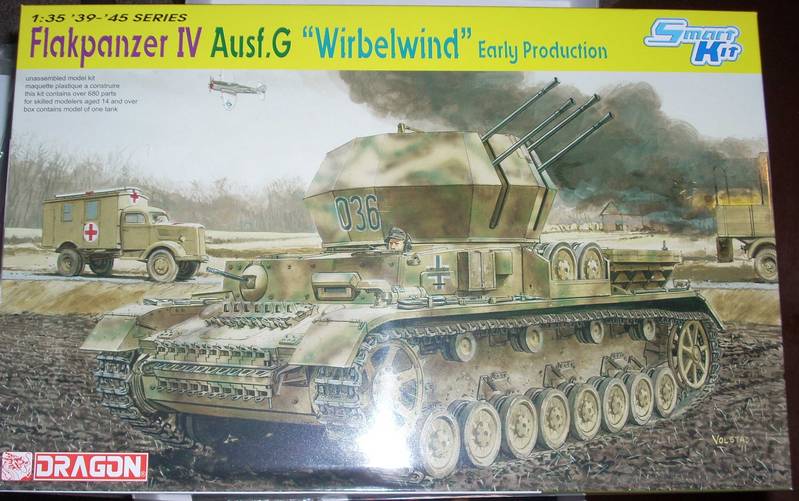
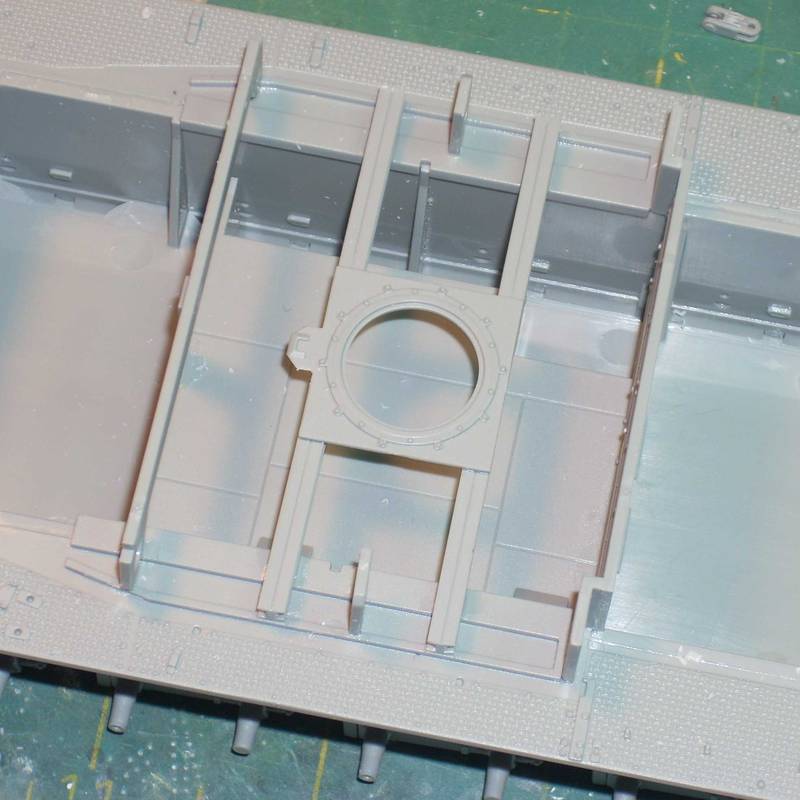
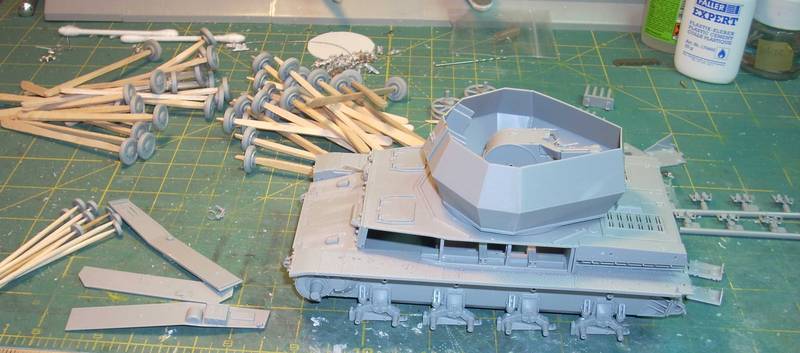
Here are the starting photos of the dragon 6342 Wirbelwind AA SP Gun
Box Top
Gun Base
In Progress 01
Tom
Box Top

Gun Base

In Progress 01

Tom
 |


