Maki
 Senior Editor
Croatia Hrvatska
Joined: February 13, 2002
KitMaker: 5,579 posts
Armorama: 2,988 posts
Posted: Friday, April 08, 2011 - 09:21 PM UTC
It has been a while since I posted updates to this one. Anyway, here it is...
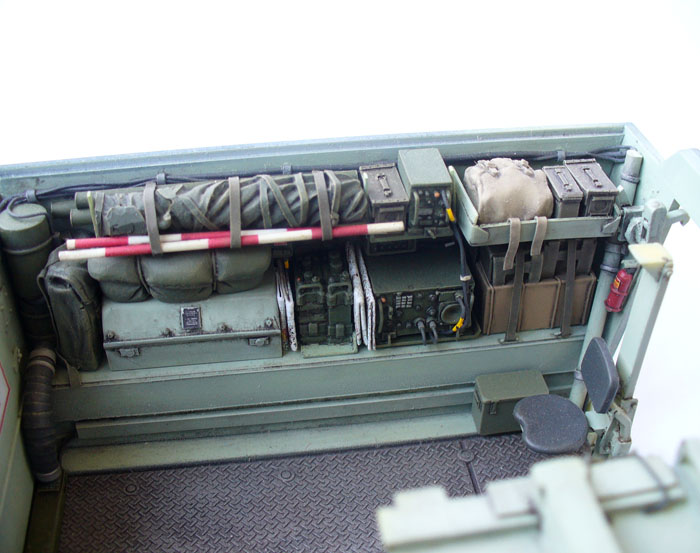
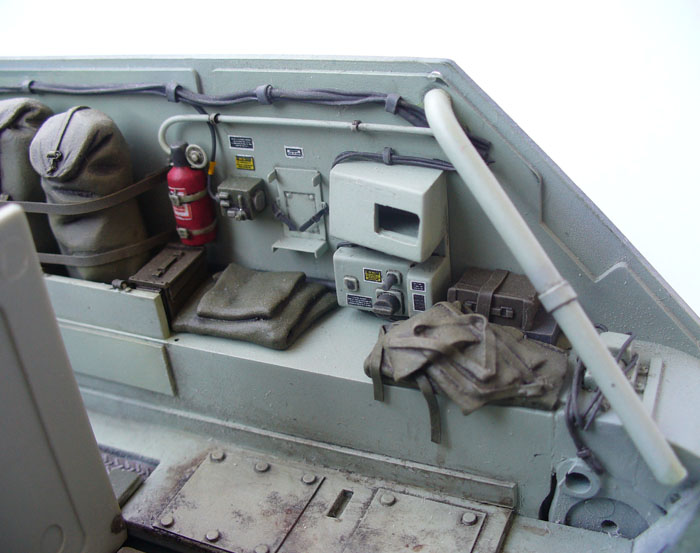
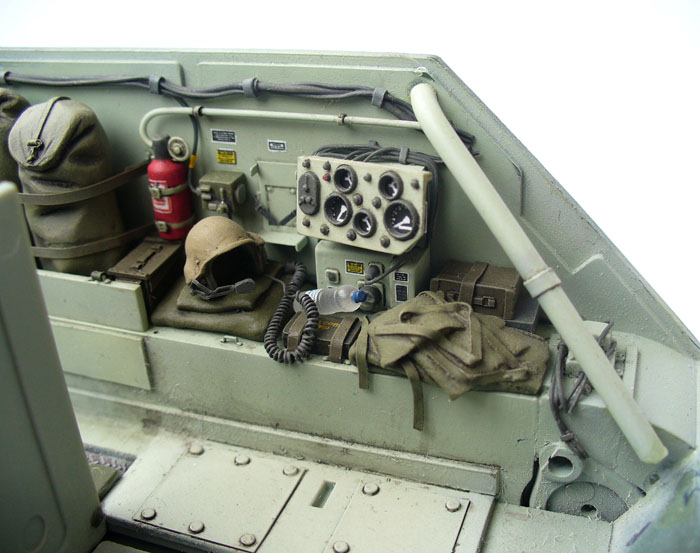
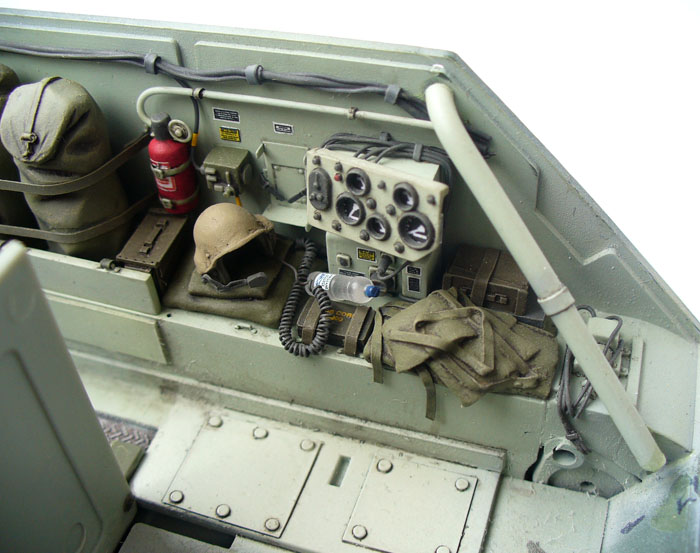
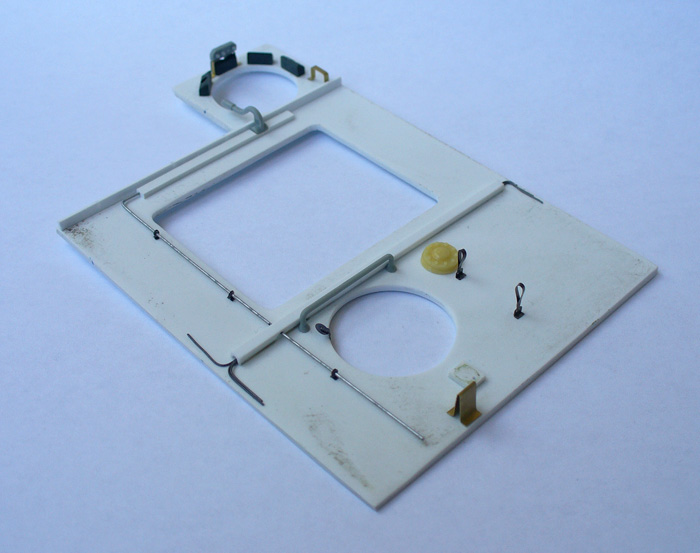
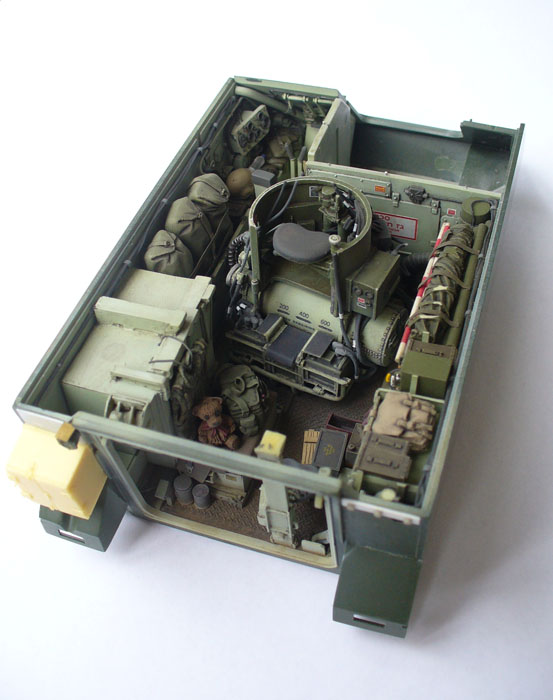
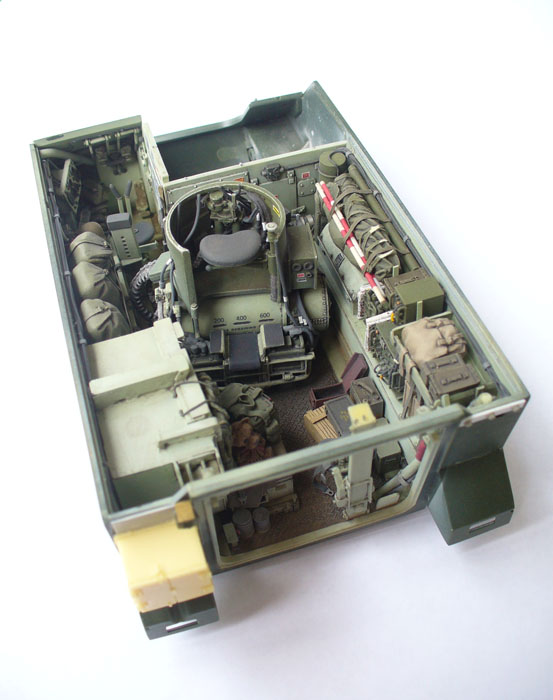
The right hand side is finished. Still some minor things to add:
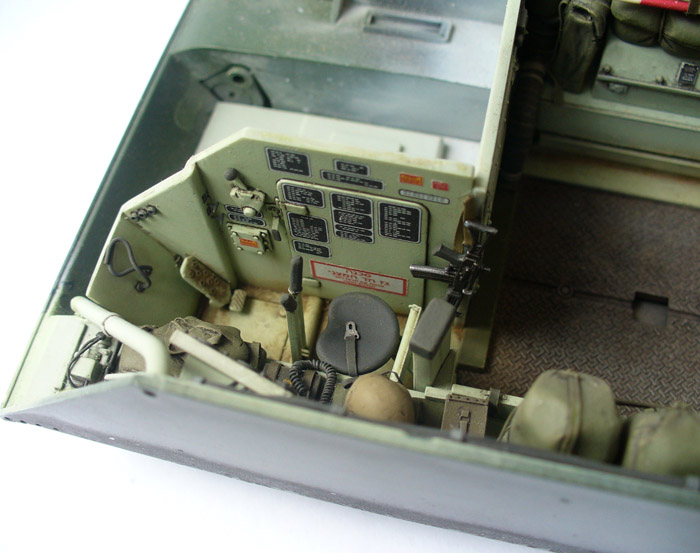
And the drivers compartment in progress. Wiring, bilge pump and some small details:
Mario
Maki
Senior Editor Croatia Hrvatska
Joined: February 13, 2002
KitMaker: 5,579 posts
Armorama: 2,988 posts
Posted: Friday, April 22, 2011 - 06:16 AM UTC
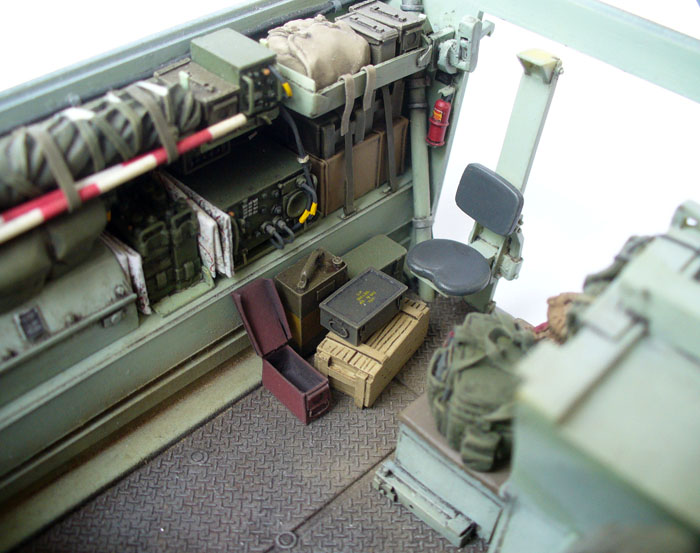
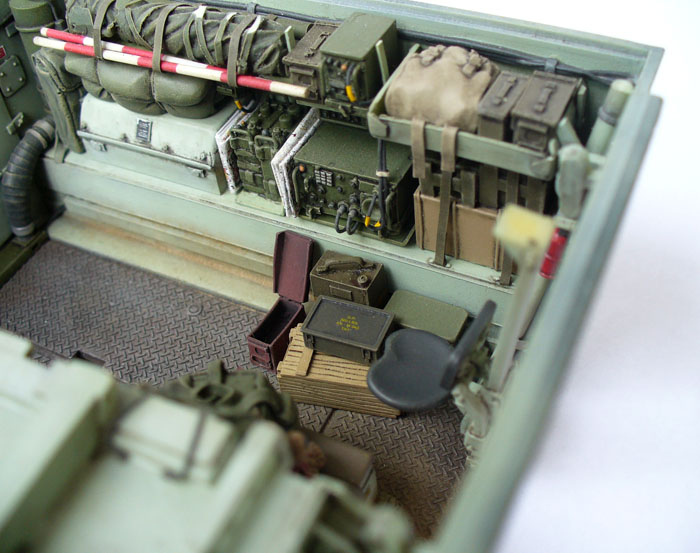
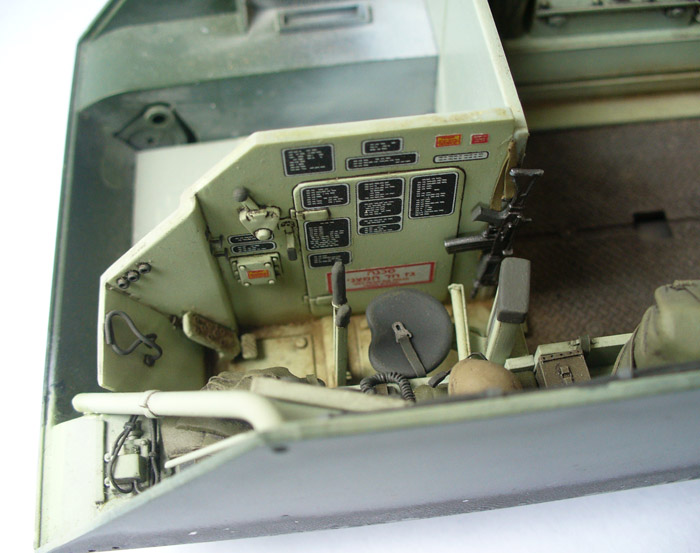
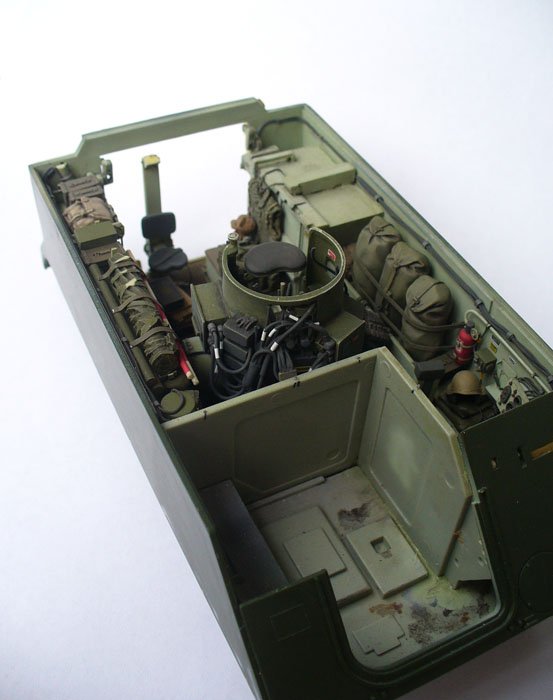
Just a quick update on the drivers compartment. I did some weathering on the floor, unfortunately not as visible on the photos as the camera keeps zooming to different parts of the vehicle:
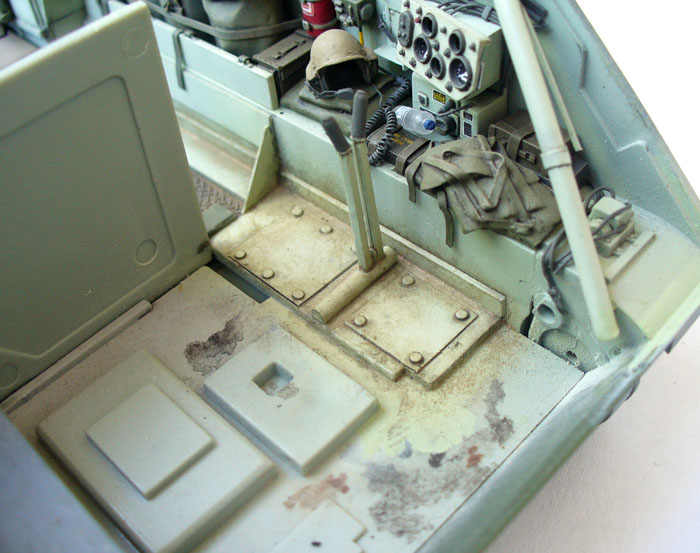
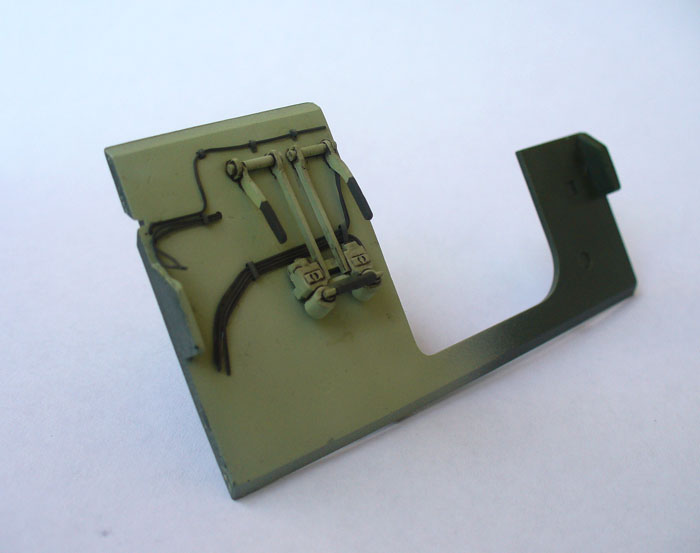
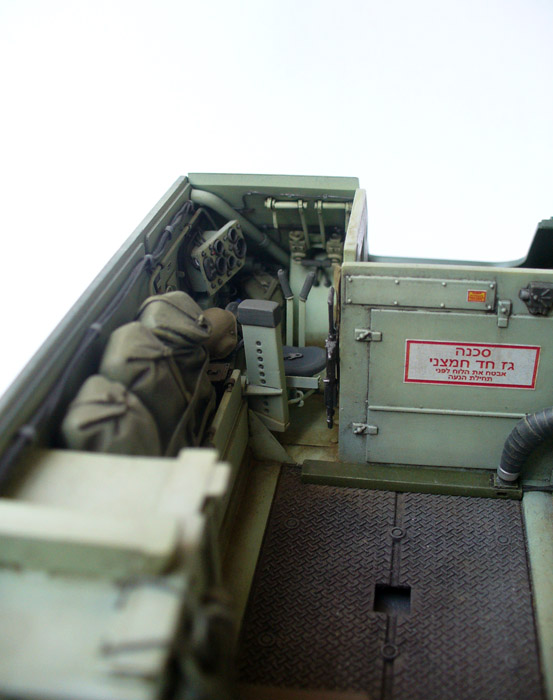
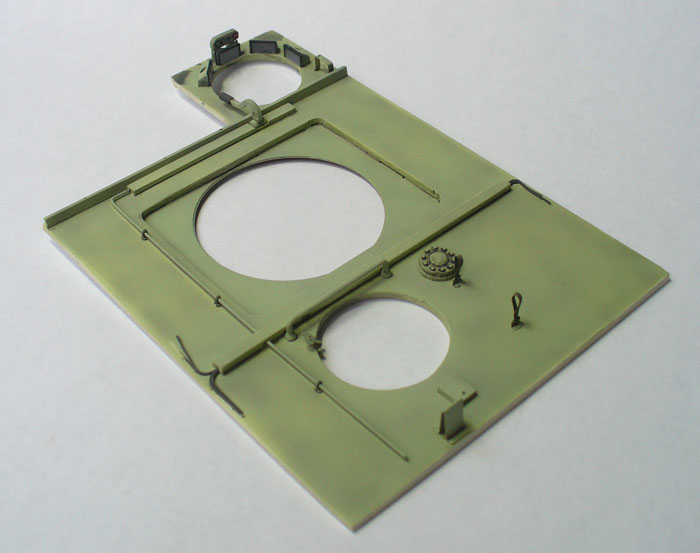
Here is the plate toward the engine compartment, some extra bits and pieces added, but with wiring still missing:
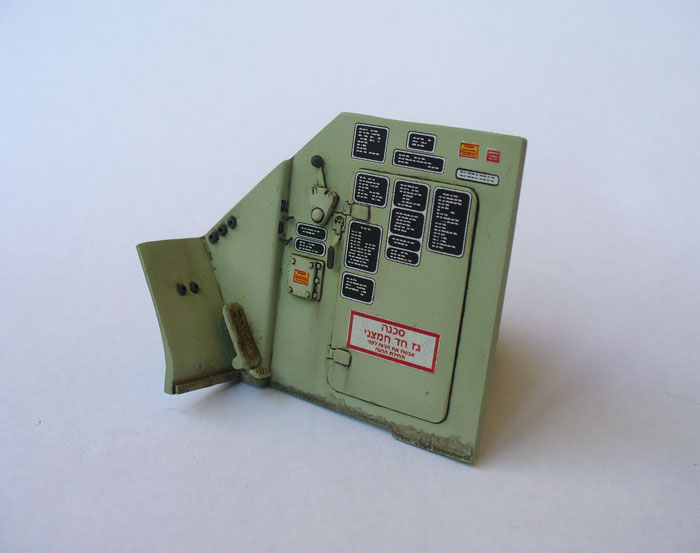
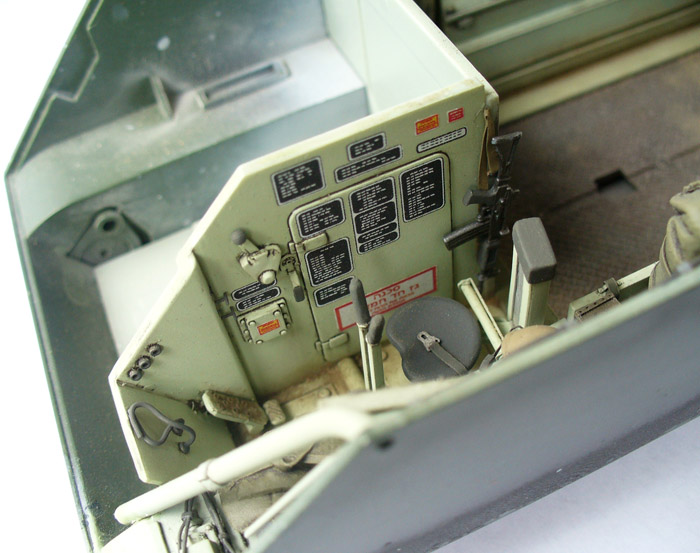
And the front plate with scratchbuilt levers and with wires added:
I was thinking of finally closing up the front part of the vehicle, but the drivers seat keeps bugging me so I decided to alter some details there... Hopefully, I'll have some progress to show soon.
Mario
Texas, United States
Joined: March 05, 2003
KitMaker: 2,092 posts
Armorama: 1,607 posts
Posted: Friday, April 22, 2011 - 06:51 AM UTC
Fantastic details. A good level of grime to the driver's hole.
You might want to either silver the bolts on the floor plates or at least the edges. A lot of wear and tear from squeezing back to the back without going outside.
Paul
Arkansas, United States
Joined: June 29, 2009
KitMaker: 11,610 posts
Armorama: 7,843 posts
Posted: Friday, April 22, 2011 - 09:20 AM UTC
Your first afv in how many years? You have sold me. I must have one. Already tracked down most of the am to convert a Italeri M113. Will be following closely.
Ideals are peaceful. History is violent.
Maki
Senior Editor Croatia Hrvatska
Joined: February 13, 2002
KitMaker: 5,579 posts
Armorama: 2,988 posts
Posted: Saturday, April 23, 2011 - 12:37 AM UTC
Thanks guys. Paul, I was thinking of adding some graphite on some edges of interior parts... I think one of my friends has that graphite pen people usually use for such purposes.
Mario
Arkansas, United States
Joined: June 29, 2009
KitMaker: 11,610 posts
Armorama: 7,843 posts
Posted: Saturday, April 23, 2011 - 01:07 AM UTC
Maki, any soft lead pencil will do the trick. I find wooden ones seem to work better than mechanical, but both will do the trick.
Ideals are peaceful. History is violent.
Maki
Senior Editor Croatia Hrvatska
Joined: February 13, 2002
KitMaker: 5,579 posts
Armorama: 2,988 posts
Posted: Friday, April 29, 2011 - 06:11 AM UTC
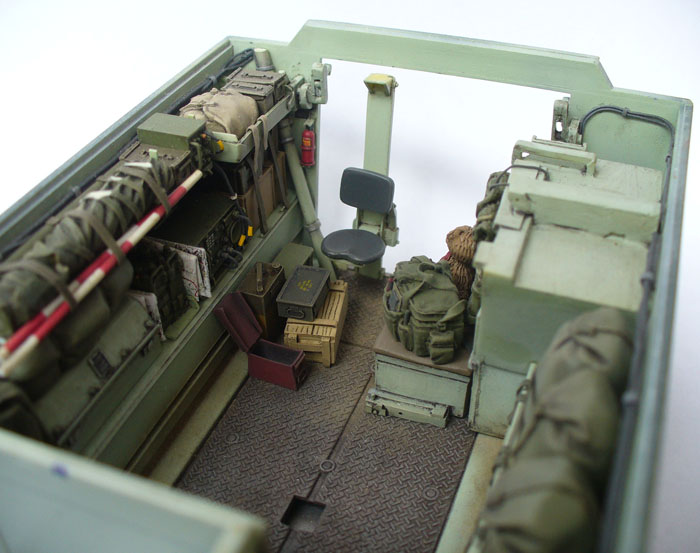
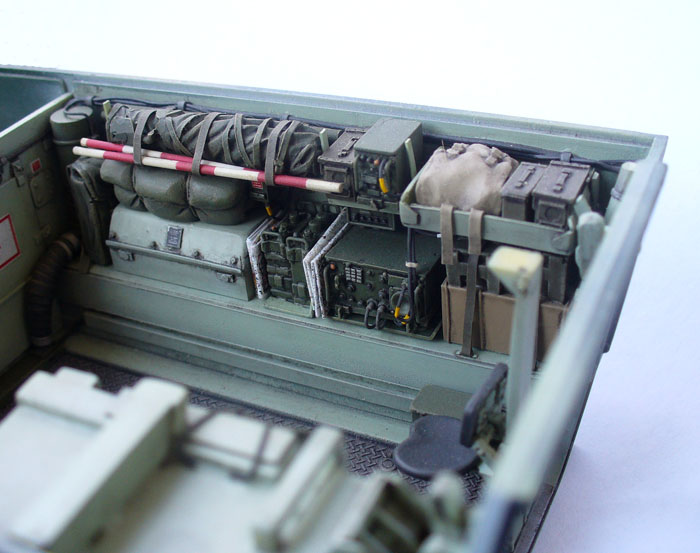
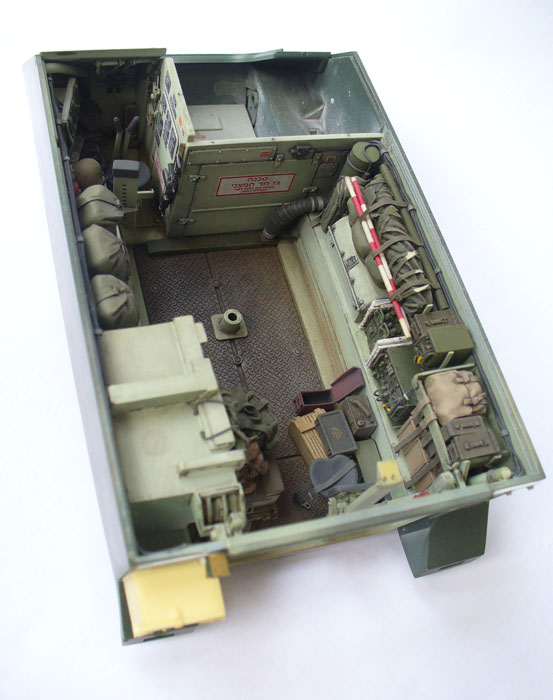
OK, here's an update... The drivers chair was a bit revamped as I wasn't satisfied with the last version. Side engine panel added:
And the front panel added:
Cheers,
Mario
Maki
Senior Editor Croatia Hrvatska
Joined: February 13, 2002
KitMaker: 5,579 posts
Armorama: 2,988 posts
Posted: Friday, May 20, 2011 - 05:49 AM UTC
Virginia, United States
Joined: February 05, 2002
KitMaker: 6,149 posts
Armorama: 4,573 posts
Posted: Friday, May 20, 2011 - 08:05 AM UTC
Maki-- outstanding workmanship. Your attention to detail is superb. Great job!
DJ
DJ Judge
COL (R), USA
"Tanker Boots do not a Tanker Make."
Colorado, United States
Joined: January 20, 2005
KitMaker: 7,219 posts
Armorama: 6,097 posts
Posted: Friday, May 20, 2011 - 08:53 AM UTC
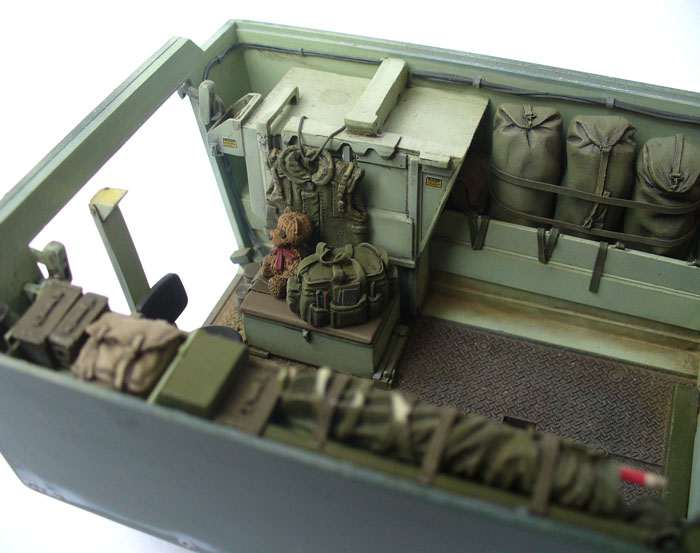
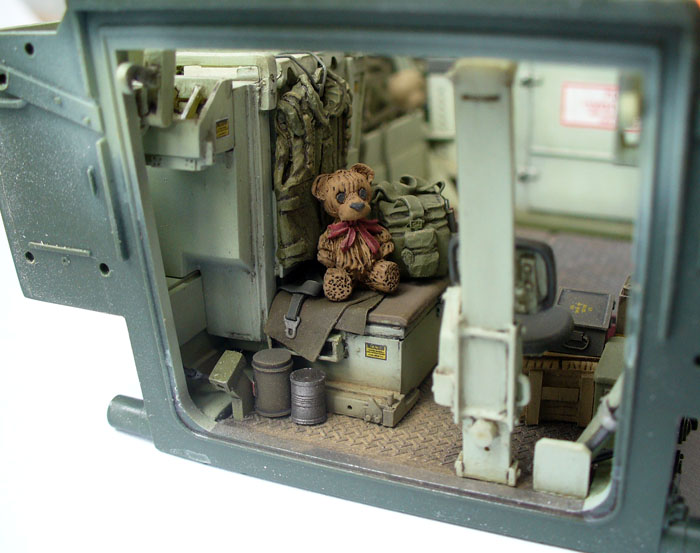
That stuffed bear looks a damned sight better than the pig that comes in the Def Models HMMWV stowage set. Nice.
A strong man stands up for himself; A stronger man stands up for others.
Admit nothing. Deny everything. Make counter-accusations.
He is not Khan who calls himself Khan. Afghan proverb
Busan, Korea / 대한민국
Joined: May 22, 2008
KitMaker: 40 posts
Armorama: 39 posts
Posted: Friday, May 20, 2011 - 09:34 AM UTC
Hi Mario,
This is a very detailed and nice build definitely.
I like the Teddy bear

Sincerely,
Seung-il
Lisboa, Portugal
Joined: March 04, 2008
KitMaker: 5,386 posts
Armorama: 4,727 posts
Posted: Friday, May 20, 2011 - 03:04 PM UTC
Teddy bear ? how about a Victoria's Secret bullet proof Vest?
Just kidding, great work Mario, great work on the interior, can't wait to see the end of this build !!
Active Builds: 0
Active Campaigns: 0
Hawaii, United States
Joined: August 27, 2006
KitMaker: 1,646 posts
Armorama: 1,557 posts
Posted: Friday, May 20, 2011 - 04:30 PM UTC
"Certainty of death.
Small chance of sucess.
What are we waiting for?"
-Gimli, Return of the King.
Texas, United States
Joined: June 29, 2010
KitMaker: 5,854 posts
Armorama: 4,817 posts
Posted: Friday, May 20, 2011 - 04:55 PM UTC
Seeing all of the parts put together for the interior is impressive Mario

Maki
Senior Editor Croatia Hrvatska
Joined: February 13, 2002
KitMaker: 5,579 posts
Armorama: 2,988 posts
Posted: Saturday, May 28, 2011 - 10:41 PM UTC
I've been working on a roof... Since the HobbyFan conversion set roof is way too small, Verliden's too thin and too wide, I decided to do one from styrene myself.
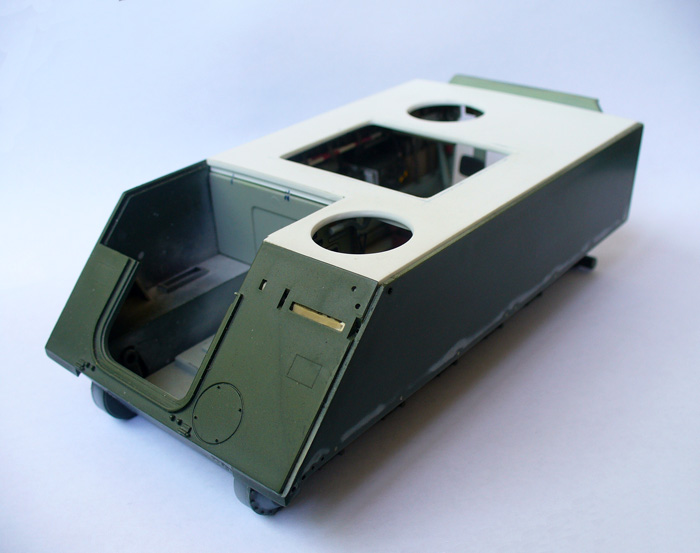
The roof interior has been built from various bits and pieces: some wires, PE and brass are added, etc...
Hope to get some paint on this soon so I can finally close up the thing and start working on the exterior.
Mario
Arkansas, United States
Joined: June 29, 2009
KitMaker: 11,610 posts
Armorama: 7,843 posts
Posted: Sunday, May 29, 2011 - 12:18 AM UTC
For "girly items" you may want to add a box of tampons.

Ideals are peaceful. History is violent.
Maki
Senior Editor Croatia Hrvatska
Joined: February 13, 2002
KitMaker: 5,579 posts
Armorama: 2,988 posts
Posted: Friday, October 21, 2011 - 07:15 AM UTC
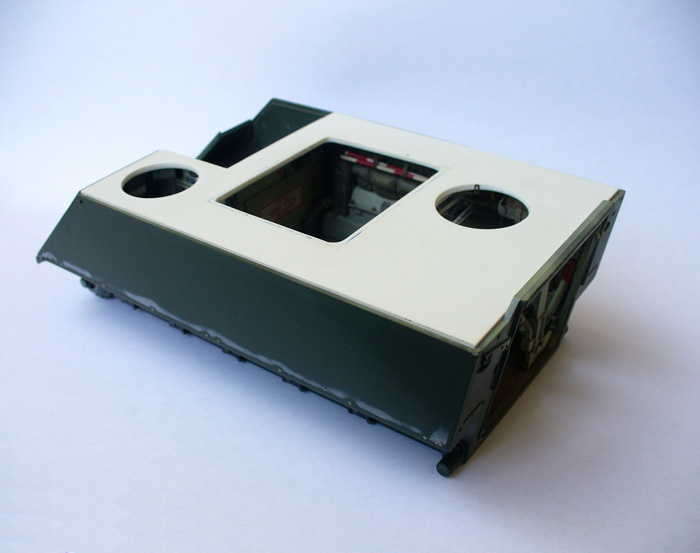
Here's some update after quite a lot of time... I lost interes in this build and kept silent for almost 3 months. Finally I started with it again. I think the interior is finished; the roof:
I added transparent parts for the periscopes, but they are not quite visible in this picture. Now for the interior:
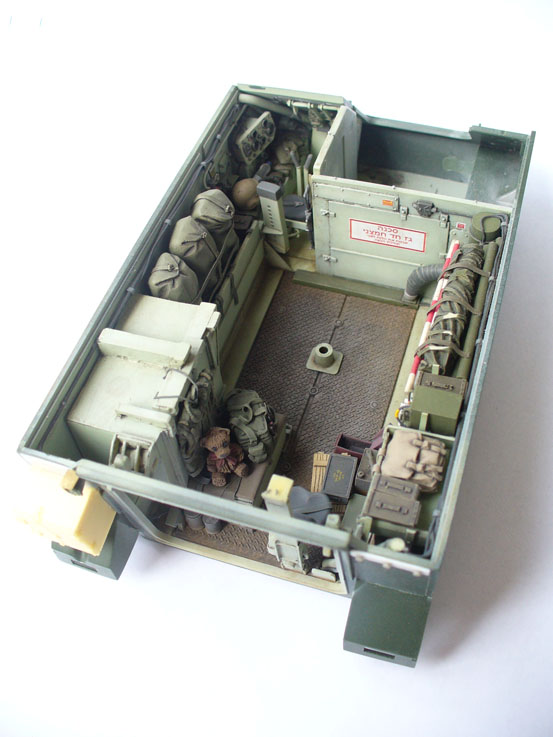
and with turret interior installed:

The bad thing is that I didn't manage to make the turret removable. After installing the roof most of the interior details will be lost... Oh well, at least I got the pictures of the build.
Now I can't wait to start with the exterior details!
Mario
Correze, France
Joined: June 10, 2004
KitMaker: 5,329 posts
Armorama: 5,204 posts
Posted: Friday, October 21, 2011 - 09:38 AM UTC
Stunning job Mario !
Don't glue the roof so you can remove it to see this brilliant interior.
Olivier
Visit my site Click the banner
"La reine des batailles, j'ai nommé l'infanterie"
Napoléon
Maki
Senior Editor Croatia Hrvatska
Joined: February 13, 2002
KitMaker: 5,579 posts
Armorama: 2,988 posts
Posted: Friday, October 21, 2011 - 10:19 PM UTC
Quoted Text
Stunning job Mario !
Don't glue the roof so you can remove it to see this brilliant interior.
Thanks Olivier. As for the roof, I was thinking of not gluing the roof plate where the turret attaches; this way the turret would be removable and I could display it separately. However, I found out I can not take the turret out through the opening... it is a very very tight fit.
Mario
Maki
Senior Editor Croatia Hrvatska
Joined: February 13, 2002
KitMaker: 5,579 posts
Armorama: 2,988 posts
Posted: Thursday, December 29, 2011 - 09:38 PM UTC
It has been a while since my last update... So, here's what I've been up to lately.
First, a final touch before closing down the interior: a wiring from comander's radio set.
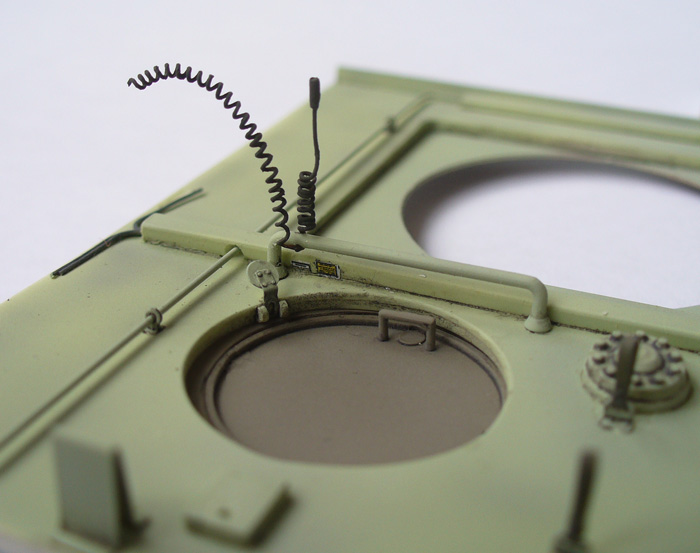
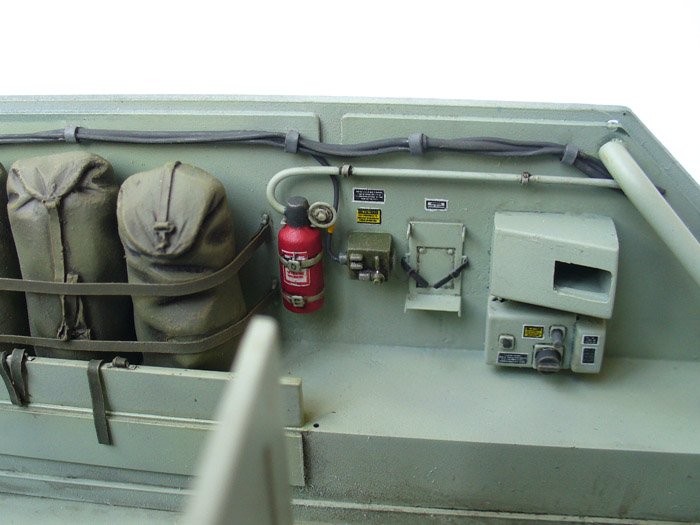
I must admit I was a bit sad to close down the interior after so much work put into it. Some of the interior is going to be visible through the back ramp and drivers hatch though... Anyway, I started working on the exterior: added bolts to the side skirt openings, some tie-downs, most of the sand bags from Legend set and some details on the back.
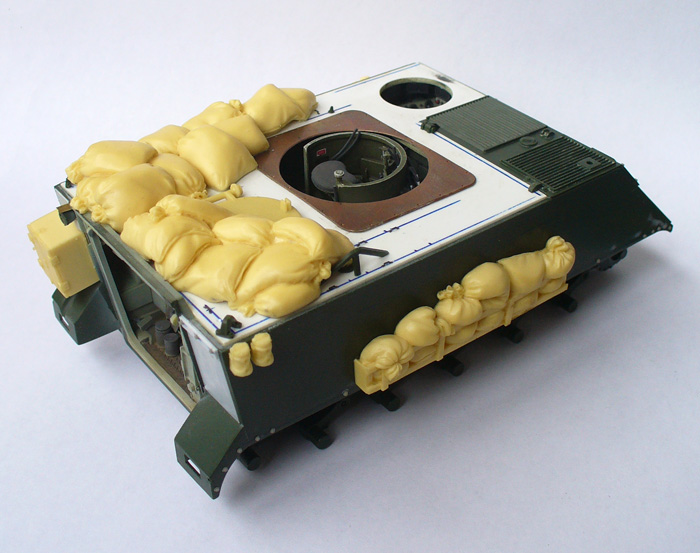

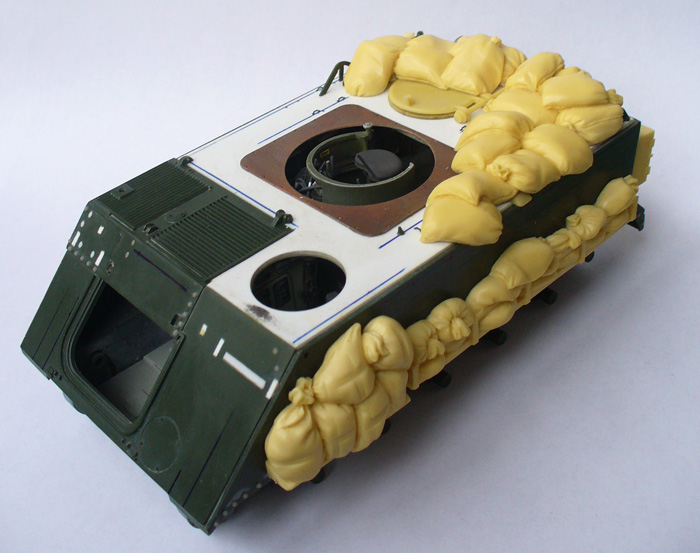
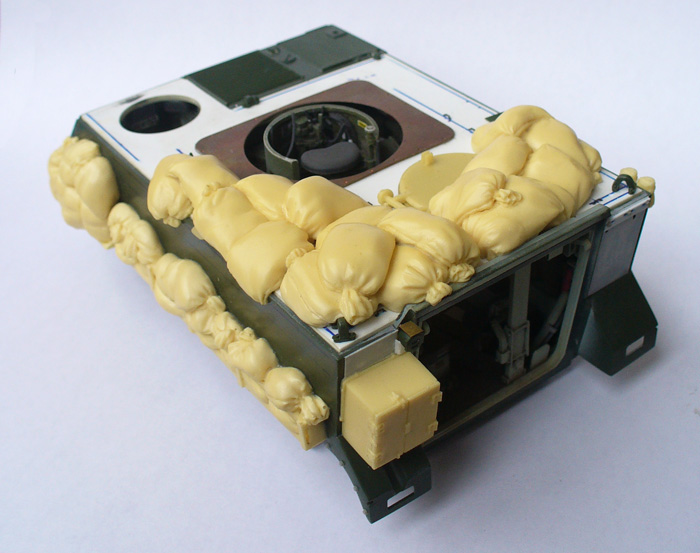
Some details:
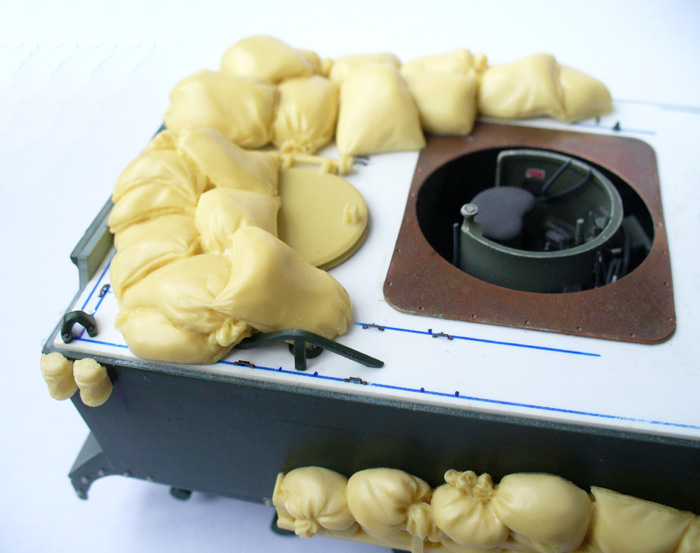
There is much more, but I haven't been able to take some decent photos of the current state of affairs. So stay tuned! :wink:
Mario
Correze, France
Joined: June 10, 2004
KitMaker: 5,329 posts
Armorama: 5,204 posts
Posted: Friday, December 30, 2011 - 04:32 AM UTC
For sure I stay tuned Mario !

Happy New Year to you !
Olivier
Visit my site Click the banner
"La reine des batailles, j'ai nommé l'infanterie"
Napoléon
Croatia Hrvatska
Joined: April 15, 2010
KitMaker: 18 posts
Armorama: 16 posts
Posted: Friday, December 30, 2011 - 06:31 AM UTC
Great work so far
I hope that this great interior will still be visible, after all, the rear hatch is quite big... those sandbags look great...
Kuwait / لعربية
Joined: February 09, 2009
KitMaker: 467 posts
Armorama: 392 posts
Posted: Friday, December 30, 2011 - 09:49 AM UTC
what a stunning build ! I love it Mario! fantastic subject and extreme detailing - but yes I was also sad to see it covered up - a small interior light would be perfect for this hyper detailed interior !
cheers
Mark
http://krasnyaarme.blogspot.com/
"In the Soviet army it takes more courage to retreat than advance"
Joseph Stalin
Maki
Senior Editor Croatia Hrvatska
Joined: February 13, 2002
KitMaker: 5,579 posts
Armorama: 2,988 posts
Posted: Friday, December 30, 2011 - 08:59 PM UTC
Thanks guys, I'm glad you are following the build. Thanks for the compliments, I hope I will manage to hold your interest throughout the exterior build as well...
Mark, unfortunatelly the idea for the interior light came too late. I was hoping the turret would be removable to display the full interior, and didn't think of the small LED light until it was too late to install one. Oh well.
Thanks for the support,
Mario
England - North West, United Kingdom
Joined: September 27, 2011
KitMaker: 136 posts
Armorama: 74 posts
Posted: Saturday, December 31, 2011 - 12:31 AM UTC
mario,
have you thaught about putting some crew weapons in? assualt rifles and such? have u thaught about crewing this excellent creation? really well modelled tho. keep it up