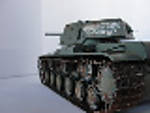
Here are some more comments and progress shots:
I went back to complete steps 10, 13, and 14, which cover the fender assemblies and the tow cables.
- The instructions show a mix of solid and skeletal reinforcing brackets. Per 4bogreen.com, this matches many photos of late Model 1941 vehicles, so I simply followed the instructions here. My only gripe is that most of the brackets don't join neatly to the side of the hull once the fenders are installed. The fenders have tabs to help you line them up against the hull, so I'm pretty sure this isn't just sloppy assembly work on my part. If Trumpeter had just made the brackets a touch longer this would be a non-issue as the modeller could simply sand down any excess. Ironically, Trumpeter provided plenty of excess brackets in the box … plenty of too small brackets.
- I used a razor saw to hack off the front portion of the left fender and then used a chisel to thin the remaining fender at the front and rear where I wanted to bend it. The missing portion may or may not be realistic, but I thought it was a good way to show off the tracks on this beast. I went easier on the right fender primarily because I had become aware of the fit issue with the first fender / brackets and wanted to get the best fit possible.
- Next up was the applique armor that attaches to the side of the hull beneath the turret. I missed the instructions in step 0 to pre-drill these holes, so I shaved the mating pins off and glued the parts on flat. No visual difference as far as I can tell.
- The spare links that go on the rear engine deck needed to be cleaned up. Per 4bogreen.com, the tracks show four attachment brackets but should only have three. The front outermost brackets need to be shaved off, so I did that.
- The tow cables were easy enough, but one of the attachment hooks broke when I tried to clean it up. My fault for being clumsy, but damn Trumpeter, try helping us out with smaller attachment points on the fine parts. I managed to fix the attachment hook, but given the damage to the fender on the left side decided to leave the tow cable off. If something sheared off the entire left front fender, then it's probably not a stretch to think that a tow cable might have gone missing somewhere along the way.
So that's about it for construction. Next steps will be to clean up the seams and gaps and to apply some Mr. Surfacer to the turret. Then it's prime time.
Here's where the model stands now. The tracks aren't fixed and the spare links and chain are just tossed on for effect.
Hosted by Jacques Duquette
KV-1 Model 1941
BillGorm
New Jersey, United States
Joined: November 02, 2009
KitMaker: 609 posts
Armorama: 433 posts
Joined: November 02, 2009
KitMaker: 609 posts
Armorama: 433 posts
Posted: Friday, July 30, 2010 - 03:56 AM UTC
bmikk1
Utah, United States
Joined: February 15, 2008
KitMaker: 199 posts
Armorama: 136 posts
Joined: February 15, 2008
KitMaker: 199 posts
Armorama: 136 posts
Posted: Friday, July 30, 2010 - 11:53 AM UTC
Looks fantastic so far Bill, what color scheme are you going for, the white/green on the box or an all green beast? Keep it up man!
BillGorm
New Jersey, United States
Joined: November 02, 2009
KitMaker: 609 posts
Armorama: 433 posts
Joined: November 02, 2009
KitMaker: 609 posts
Armorama: 433 posts
Posted: Friday, July 30, 2010 - 11:57 PM UTC
Hi Brandon - The box art is what drew me to this kit in the first place, but I'm not sure I want to tackle an overall white wash yet. I'm going to stick to my original plan and follow Mike Rinaldi's SBS. He originally finished his model in green, then went back and added a heavily degraded white wash.
MrNeil
New Jersey, United States
Joined: November 01, 2005
KitMaker: 266 posts
Armorama: 262 posts
Joined: November 01, 2005
KitMaker: 266 posts
Armorama: 262 posts
Posted: Saturday, July 31, 2010 - 02:07 AM UTC
Hi Bill...really nice looking build.
One point...and I'm being really pedantic here...is that where you have the left-hand fender section torn off, you've got the bolted strip still on the section that remains. This strip was actually a flange that was part of the bracket. If the bracket was torn off as you depict, the flange would almost certainly go with it, leaving the remaining fender section with bolt holes and, probably, a very torn up front end.
Cheers,
Neil
vonHengest
Texas, United States
Joined: June 29, 2010
KitMaker: 5,854 posts
Armorama: 4,817 posts
Joined: June 29, 2010
KitMaker: 5,854 posts
Armorama: 4,817 posts
Posted: Saturday, July 31, 2010 - 03:23 AM UTC
Bill: Neil is probably right about the brackets for the fenders, the whole bracket assembly should have just ripped completely off if it went with the fender as the bolts would have been the weak points so to speak.
I'm really liking your build. I don't know if your a campaign man, but if you are we would love to have you in the Killer KVs campaign
BillGorm
New Jersey, United States
Joined: November 02, 2009
KitMaker: 609 posts
Armorama: 433 posts
Joined: November 02, 2009
KitMaker: 609 posts
Armorama: 433 posts
Posted: Saturday, July 31, 2010 - 03:27 AM UTC
Hi Neil - Thank you for pointing that out. I didn't think it all the way through before busting out the razor saw, but what you said makes perfect sense. I think it's going to be Monday or Tuesday before Mr. Surfacer and Mr. Dissolved Putty arrive, so I'll see if I can correct the fender. It's either that or go back to practicing with PE and taking bets on where all the little parts are going to land.
BillGorm
New Jersey, United States
Joined: November 02, 2009
KitMaker: 609 posts
Armorama: 433 posts
Joined: November 02, 2009
KitMaker: 609 posts
Armorama: 433 posts
Posted: Saturday, August 07, 2010 - 10:31 AM UTC
Just a quick update. The model and tracks have been assembled for a while now, but I wanted to address a couple things before moving on to priming and painting. First, as Neil pointed out in an earlier post, the left front fender didn't look realistic, given how I had shown it torn off, so I gave that another go. Still might not be perfect, but it's definitely better than it was. Second the hull and turret had a number of gaps and seams that needed to be cleaned up. I hadn't used Mr. Dissolved Putty or Mr. Surfacer before, so I thought this would be a good time to see how they work.
Here's the model with the Friuls on. After washing them and soaking them in vinegar, I gave them a quick (2-3 minute) rinse in Blacken-It. There are still some spots where the Blacken-It didn't penetrate so I might give them another quick rinse. The T-34 turret is from a Dragon kit I'd rather forget and will serve as a stunt double since I haven't used Vallejo paints before.
Here's a close-up of the turret texture post-Mr. Surfacer:
Here's a close-up of the corrected fender:
And a couple low level shots of the tracks:
Comments welcome ... if you see anything I can correct now, please let me know! Otherwise, next step is a final review of Mike Rinaldi's SBS and painting.
MrNeil
New Jersey, United States
Joined: November 01, 2005
KitMaker: 266 posts
Armorama: 262 posts
Joined: November 01, 2005
KitMaker: 266 posts
Armorama: 262 posts
Posted: Saturday, August 07, 2010 - 05:25 PM UTC
Hi Bill...nice job on the fender. My only suggestion would be to thin the underside of the torn fender a little, since the real thing was made of 1/16" sheet steel and would appear quite thin in 1/35 scale.
One thing I noticed in that same picture is that I think you've attached the coaming for the hull hatch (part F15) upside down. The hatch cover should sit flush with the hull top and not be raised up as it seems to be in the picture. Part F15 should also be faired into the hull top...there was no join line there.
You should also fill the circular seam around the two periscope covers on the turret roof. On the real vehicle, the six bolt holes are in the main turret roof plate...there was no separate 'collar' around the periscopes.
One final thing...fill the central socket in the turret roof hatch. KV-1 hatches did not have the socket, though KV-2 hatches did.
Cheers,
Neil
vonHengest
Texas, United States
Joined: June 29, 2010
KitMaker: 5,854 posts
Armorama: 4,817 posts
Joined: June 29, 2010
KitMaker: 5,854 posts
Armorama: 4,817 posts
Posted: Saturday, August 07, 2010 - 05:53 PM UTC
Wow Neil, you're all over these beasts! Your insights here will help me in my future build as well.
Bill: Just fyi, 1/16" sheet metal should be the same as 16 guage sheet metal which is the thickness used for body panels on many older automobiles and trucks.
BillGorm
New Jersey, United States
Joined: November 02, 2009
KitMaker: 609 posts
Armorama: 433 posts
Joined: November 02, 2009
KitMaker: 609 posts
Armorama: 433 posts
Posted: Sunday, August 08, 2010 - 12:29 AM UTC
Neil & Jeremy - Thanks for the comments and suggestions. I noted in one of my previous posts that I needed to fill in the socket on the roof hatch ... then forgot to do it. Good catch. I will also fill in the seam around the periscope covers.
The fender I will probably leave as it is. I thinned the plastic quite a bit, but maybe not to the equivalent of 1/16". Still, good to note going forward (and for others building KV-1's to note). One question on that same photo, though. There is a seam visible running from top to bottom on the turret ... is that a casting mark or should I remove it?
I went back and looked at the instructions and the hull hatch is definitely on upside down. I don't trust my ability to correct that, but before I give up ... how would you correct that? Use a keyhole saw to cut out the hatch from the coaming and the coaming from the hull?
And a general question. How were things like tarps attached to the fenders? I see attachment points on the back engine deck, but I'm not clear on how something would have been tied down. Any clear photos would be appreciated
MrNeil
New Jersey, United States
Joined: November 01, 2005
KitMaker: 266 posts
Armorama: 262 posts
Joined: November 01, 2005
KitMaker: 266 posts
Armorama: 262 posts
Posted: Sunday, August 08, 2010 - 04:19 AM UTC
Hi Bill and Jeremy,
Jeremy, four years of research has me knowing all sorts of weird things about KVs
Bill, no argument about leaving the fender. The thickness is probably only going to be noticed in a closeup photo like the one you posted.
The vertical seam on the front corner of the turret should go. The turret shell doesn't have a casting seam there. A little sanding should fix it.
Hopefully, if you haven't used too much glue attaching the coaming, you can get your fingers inside the hull through the turret ring and pop it off, then do the same with the hatch cover, sand the joints and reattach them. If you've attached them REALLY securely though, a keyhole saw might be your only option.
Items such as the tarp and the tool box on the left-hand fender were secured with leather straps attached to metal tie-down loops. For the tarp there were two pairs of loops...the inner loop of each pair was welded to the very top edge of the hull side and the outer loop was attached to the upper surface of the fender itself. Unfortunately the only good photos I have are of the Bovington vehicle and the Tank Museum folks don't like their photos being published on the web. E-mail me (mrneil1964 at yahoo) and I can send you a couple pics.
Cheers,
Neil
bmikk1
Utah, United States
Joined: February 15, 2008
KitMaker: 199 posts
Armorama: 136 posts
Joined: February 15, 2008
KitMaker: 199 posts
Armorama: 136 posts
Posted: Sunday, August 08, 2010 - 11:32 AM UTC
Bill, love those Fruil's...they add a nice level of realism with the sag. Can't wait to see this thing with a coat of paint.
pgb3476
Texas, United States
Joined: March 11, 2007
KitMaker: 977 posts
Armorama: 976 posts
Joined: March 11, 2007
KitMaker: 977 posts
Armorama: 976 posts
Posted: Monday, August 09, 2010 - 02:58 AM UTC
This question is for everyboy. While the build looks great, I'm thinkin the cast turret needs more texture....casting texture from Russian tanks from this period seems to be alot more aggressive/prominate.......During this period the Russki's werre trying to get as many talks to the front as possible and making cuts in QA whenever possible.
MrNeil
New Jersey, United States
Joined: November 01, 2005
KitMaker: 266 posts
Armorama: 262 posts
Joined: November 01, 2005
KitMaker: 266 posts
Armorama: 262 posts
Posted: Monday, August 09, 2010 - 03:11 PM UTC
Greg...not necessarily so. I've been very up close and personal with the Aberdeen and Bovington KV-1s, both of which have cast turrets, and the quality of the casting is surprisingly good....much better than the post-war T-34/85 at the Patton Museum for example.
Cheers,
Neil
Cheers,
Neil
vonHengest
Texas, United States
Joined: June 29, 2010
KitMaker: 5,854 posts
Armorama: 4,817 posts
Joined: June 29, 2010
KitMaker: 5,854 posts
Armorama: 4,817 posts
Posted: Monday, August 09, 2010 - 03:22 PM UTC
Neil: What better place to put such weird knowledge to use than the forums here?
Greg: I used to think the same thing as well, however what I am finding is that this is more of a common misconception than a truth. But that is based on the research of guys like Neil here more than my own personal knowledge of Russian WWII armor.
pgb3476
Texas, United States
Joined: March 11, 2007
KitMaker: 977 posts
Armorama: 976 posts
Joined: March 11, 2007
KitMaker: 977 posts
Armorama: 976 posts
Posted: Tuesday, August 10, 2010 - 07:44 AM UTC
I've seen the Aberdeen KV and I've got your book Niel....I just disagree and think the kit is too smooth and needs a little more texture.
"I rant, therefore I am".
MrNeil
New Jersey, United States
Joined: November 01, 2005
KitMaker: 266 posts
Armorama: 262 posts
Joined: November 01, 2005
KitMaker: 266 posts
Armorama: 262 posts
Posted: Tuesday, August 10, 2010 - 03:19 PM UTC
Greg...with regard to the kit built out of the box...no argument, it definitely needs more texture. I think Bill's Mr Surfacer treatement brings it into the realm of accpetability however...just this old Aussie's opinion. We'll argue it over a beer sometime
Neil
Neil
pgb3476
Texas, United States
Joined: March 11, 2007
KitMaker: 977 posts
Armorama: 976 posts
Joined: March 11, 2007
KitMaker: 977 posts
Armorama: 976 posts
Posted: Wednesday, August 11, 2010 - 10:00 AM UTC
No worries....and I would enjoy that discussion whether there's beer or not.
pseudorealityx
Georgia, United States
Joined: January 31, 2010
KitMaker: 2,191 posts
Armorama: 1,814 posts
Joined: January 31, 2010
KitMaker: 2,191 posts
Armorama: 1,814 posts
Posted: Wednesday, August 11, 2010 - 10:11 AM UTC
Quoted Text
I went back and looked at the instructions and the hull hatch is definitely on upside down. I don't trust my ability to correct that, but before I give up ... how would you correct that? Use a keyhole saw to cut out the hatch from the coaming and the coaming from the hull?
Not sure if you're attempted this yet, but I've found putting some more liquid cement (Tamiya's extra thin works great for this) around the edge will soften up the joint enough to make it easier to pop off with some pressure from your finger underneath.
TankCarl
Rhode Island, United States
Joined: May 10, 2002
KitMaker: 3,581 posts
Armorama: 2,782 posts
Joined: May 10, 2002
KitMaker: 3,581 posts
Armorama: 2,782 posts
Posted: Wednesday, August 11, 2010 - 12:30 PM UTC
I bought all of these, as soon as they were released. They all build up very well.
I went OOB on mine :
BillGorm
New Jersey, United States
Joined: November 02, 2009
KitMaker: 609 posts
Armorama: 433 posts
Joined: November 02, 2009
KitMaker: 609 posts
Armorama: 433 posts
Posted: Saturday, August 14, 2010 - 02:11 AM UTC
Just a quick update before I head to the zoo with the wife and munchkins:
Turret - I filled in the divot in the middle of the commander's hatch and faired the periscopes mounts into the turret roof. Neil, I don't know if that last bit is in your recipe on 4bogreen.com, but thanks for pointing it out. I also eliminated the faint vertical seams which were at 10 o'clock and 2 o'clock and gave the entire turret another coating of Mr. Surfacer 500 to highlight its cast texture.
Hull - I left the driver's hatch alone because I couldn't pop it out from the inside (even after adding a bit of thin cement to loosen it). It's wrong, but I can live with it. Most of the work I have done has been on the left fender, where Neil was kind enough to provide close-up photos and drawings of a) the tie-downs that were on the left front fender and b) the wooden blocks and tie-downs that secured the tool box to the left rear fender. Trumpeter appears to have missed both items, although this might explain why the tool box didn't mate cleanly to the fender the first time I glued it. Perhaps Trumpeter missed the wooden blocks and tie downs, but recognized the tool box shouldn't sit flush on the fender? Anyway, I did my best to model this according to Neil's scale drawings, but as I noted at the top of this build log I consider myself a novice, not an accomplished scratch builder.
Neil, Jeremy, Brandon, and Greg - Thank you for the ongoing support and comments.
Jesse - Thanks for the tip on using liquid cement to loosen a previously glued part. It didn't work this time, but good to know going forward.
Carl - Very nice KV-1. I particularly like the discoloration at the base of the turret. That green / white / yellow combination is going to be hard to walk away from if I do decide to follow Mike Rinaldi's build to the letter.
And some photos:
The turret:
Two shots of the tie-downs and tool box:
And a photo of the tracks, which go another 2-3 minute bath in Blacken-It to get a medium brown color:
As always, comments welcome!
vonHengest
Texas, United States
Joined: June 29, 2010
KitMaker: 5,854 posts
Armorama: 4,817 posts
Joined: June 29, 2010
KitMaker: 5,854 posts
Armorama: 4,817 posts
Posted: Saturday, August 14, 2010 - 05:50 AM UTC
Bill: The tracks are looking good, are you planning on doing any further detailing on them?
I am going to run my first set if Friuls through a product called Black 4 Track. It's supposed to be non-corrosive to the metals. If you want, I can set up the idler/tensioner wheels on my Jagdtiger and finish running out the length of track I need so that I can soak them in this product and see how they turn out. Just let me know and I'll get to it.
BillGorm
New Jersey, United States
Joined: November 02, 2009
KitMaker: 609 posts
Armorama: 433 posts
Joined: November 02, 2009
KitMaker: 609 posts
Armorama: 433 posts
Posted: Saturday, August 14, 2010 - 10:19 AM UTC
Jeremy - I'd be very interested to see how your tracks look after Black 4 Track, so if you feel like doing it, feel free to post a comparison shot here. I've heard good things about Black 4 Track, but my understanding is that it works very quickly ... so quickly that it's difficult to control the coloration the way you can with Blacken-It. On the other hand, I had difficulty finding Blacken-It this time around, so the ability to reuse Black 4 Track is a big plus. As for weathering the tracks from here, I'm sure I'll give them a wash or two before I apply pigments. Remember, I'm going to try to follow Mike Rinaldi's build, so I'll have to see what he did.
vonHengest
Texas, United States
Joined: June 29, 2010
KitMaker: 5,854 posts
Armorama: 4,817 posts
Joined: June 29, 2010
KitMaker: 5,854 posts
Armorama: 4,817 posts
Posted: Saturday, August 14, 2010 - 10:57 AM UTC
Sure thing then Bill, I'll get back to the Jagdtiger momentarily sometime over the next few days. I'll post pics here an back in my thread.
I forgot about 4BO Green and Michael Rinaldi. I need to take some time to sit down and read through them to help prepare me for my KV builds.
Looking forward to the next update
I forgot about 4BO Green and Michael Rinaldi. I need to take some time to sit down and read through them to help prepare me for my KV builds.
Looking forward to the next update
BillGorm
New Jersey, United States
Joined: November 02, 2009
KitMaker: 609 posts
Armorama: 433 posts
Joined: November 02, 2009
KitMaker: 609 posts
Armorama: 433 posts
Posted: Sunday, August 15, 2010 - 02:55 PM UTC
I decided to fire up the airbrush and test the base color on the T-34 turret I'm using as a stunt double. Per Mike Rinaldi's SBS, I mixed Vallejo Model Air Russian Green, Pale Green, Yellow, and Gloss Varnish in a 50-20-20-10 ratio. No problem ... then the airbrush went haywire ...
In a nutshell, I could only get a tiny stream of paint to come out with the trigger completely depressed / pulled back. Eventually, nothing came out.
So, a couple questions for the gray beards:
1) Are Vallejo Model Air paints prone to clogging like this? I normally use Tamiya and don't encounter clogs / dried paint so quickly.
2) What's the easiest way to give the airbrush (my first - a Paasche VLS) a thorough cleaning? Tear it apart, soak the parts in window cleaner, and then rinse them completely in distilled water?
Thanks for any input / advice.