Campaigns
Where Armorama group builds can be discussed, organized, and updates posted.
Braille Battlefield
tread_geek
Visit this Community
Ontario, Canada
Joined: March 23, 2008
KitMaker: 2,847 posts
Armorama: 2,667 posts
Posted: Thursday, November 11, 2010 - 04:19 AM UTC
Matthew - Your Western Front camo cakes appear to look like custard tarts. If that is the case you better be prepared to fend off Lionel Hardcastle ( Geoffrey Palmer) from "As time Goes By."

Cheers,
Jand
Krowa_
Visit this Community
Województwo Gdanskie, Poland
Joined: August 05, 2010
KitMaker: 37 posts
Armorama: 20 posts
Posted: Thursday, November 11, 2010 - 09:02 AM UTC
As far as I can see we have some models in progress.
A bit earlier then planned I have decided to start my ZiL-131.

This is my first kit from ICM range and I must tell you it was a nice surprise.
All parts fits very well, plastic is soft and easy to work with. Within 4 hours I have built almost a half ot the kit. Apart from paintig it looks like a typical one-day-built

Enough talking! Time for pics

The boxart:


in-box:


the cab:


the whole chassis (incredibly, all the exhaust pipes fits without cuting and adjusting!):


all 10 wheels (I have no idea why there are 2 extra wheels)


to be continued...
tread_geek
Visit this Community
Ontario, Canada
Joined: March 23, 2008
KitMaker: 2,847 posts
Armorama: 2,667 posts
Posted: Friday, November 12, 2010 - 05:38 AM UTC
Radek Nice start on the Zil. Those Russian trucks are so ugly that I just might have to build one if the local shops ever carry ICM. I recall seeing some of them (or similar) broken down by the side of the road outside Lublin in the later 1970's. Three and a half hours later when returning to our relatives house it was still there.

Round and round we go and where we stop...

After several wasted hours with my Stug it is now been slowly being reassembled. Exhaustive research indicated that the various incarnations of the kit (ESCI, ERTL, Italeri) changed over the different ownership's. Mine was originally designed for the rubber band tracks while the newer lower hull that I received is a combination of two later versions. All are slightly different and the parts aren't interchangeable.

So, after disassembling most of the lower hull/suspension it was time to put Humpty back together again. The bottom plate and the hull sides did not separate cleanly so it was a chore to reattach the pieces. If you look closely you can see the jagged separation lines that I had to deal with.


Next was to reattach the idlers and most of the road wheels.


Finally, to use the link and length tracks I had to remove teeth from the sprocket.


Either the teeth were far too large or the holes in the track far too small. I also read that the second ESCI version provided track sections that were too large. A third release had the instructions show the need to trim the longer lengths.

Cheers,
Jan
weathering_one
Visit this Community
Ontario, Canada
Joined: April 04, 2009
KitMaker: 458 posts
Armorama: 456 posts
Posted: Friday, November 12, 2010 - 08:39 AM UTC
@Jan- I don't know about you but I would have glued some wings to that Stug and seen how well it could fly into a concrete wall. Hope things turn out better for you now.
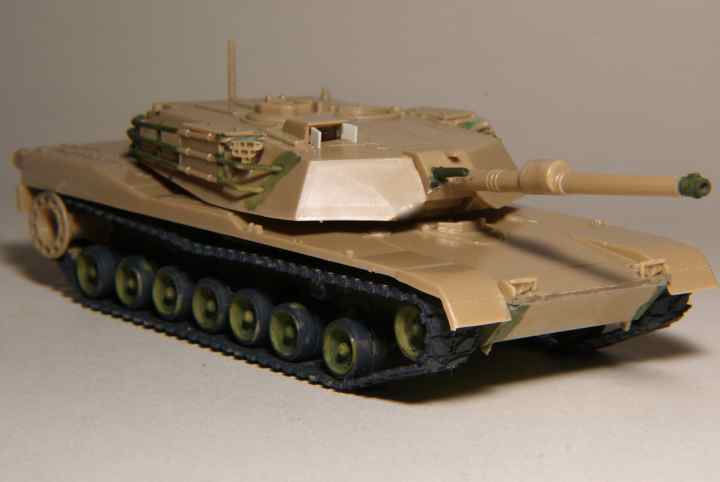
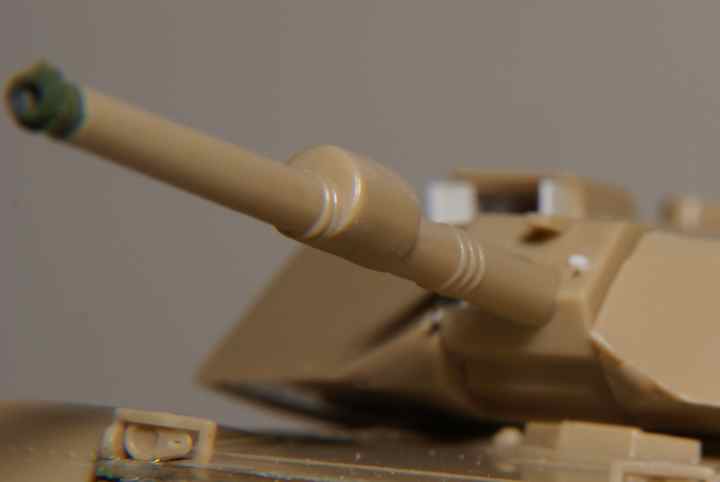
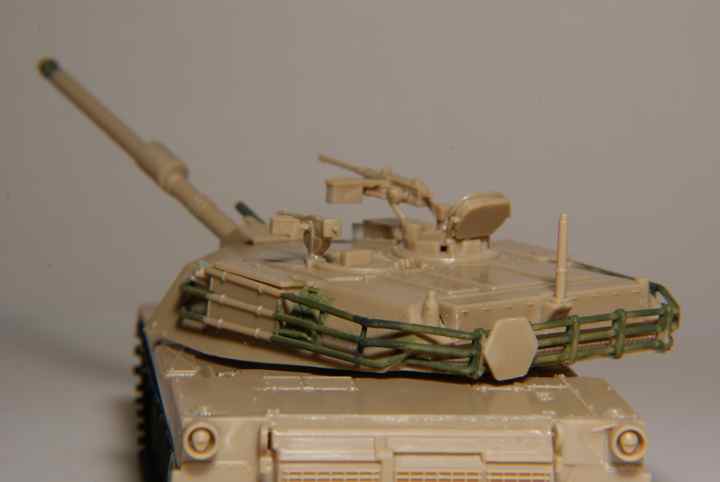
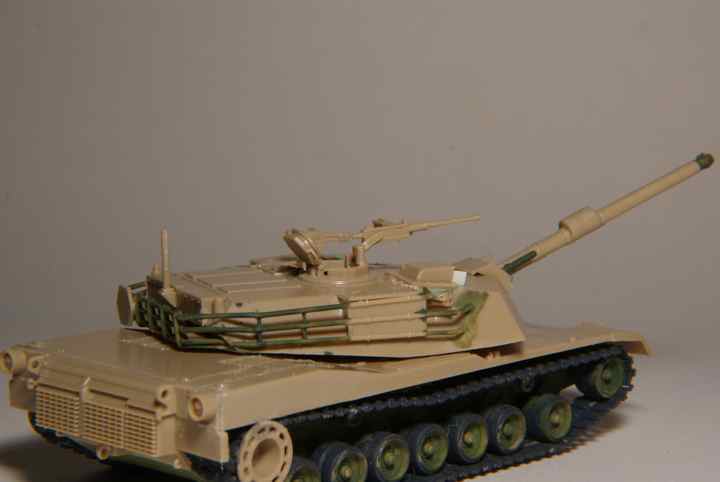
I got a few more little things done on the Abrams. I drilled a small hole in the mantlet opposite the machine gun for an auxiliary sight. Attached the headlights, drivers hatch and made the little doors for the main gunners sight. Also had to fill some sink holes with putty. The worst were on top of the smoke dischargers.


I attached all the towing and lifting hardware on the back and drilled out some solid towing eyes.


A few more parts to go and the fun (painting) part can begin.

Regards,
AJ
eremzet
Visit this Community
Katowice, Poland
Joined: September 10, 2010
KitMaker: 89 posts
Armorama: 87 posts
Posted: Saturday, November 13, 2010 - 06:00 AM UTC
Jan... I don't know what to say... Do you really want to finish this model? If so I'm full of admiration for your preseverance... Especially when we have sooooo muuuuuch better StuG models on market.

I got cold so I have to stay home. I have more time for modelling


weathering_one
Visit this Community
Ontario, Canada
Joined: April 04, 2009
KitMaker: 458 posts
Armorama: 456 posts
Posted: Saturday, November 13, 2010 - 08:33 AM UTC
@Radek- Your build is looking really good. I especially like the figure painting.

Now for my humble offering. Except for the tow cables and the side skirts it's pretty much done. This has to be a record speed build for me. The commanders machine gun was a real pain with all the tiny parts and had to be assembled with tweezers only.


Regards
AJ
eremzet
Visit this Community
Katowice, Poland
Joined: September 10, 2010
KitMaker: 89 posts
Armorama: 87 posts
Posted: Saturday, November 13, 2010 - 08:52 AM UTC
Thanks AJB! I still learning to paint the figurs - this is just my fourth which I finished.

@AJB - This monster looks really good. I have no any idea of modern armour vehicles but I like to watch workbench news - just for entertiment and inspiration

Braille
#135
Visit this Community
California, United States
Joined: August 05, 2007
KitMaker: 1,501 posts
Armorama: 1,485 posts
Posted: Saturday, November 13, 2010 - 01:54 PM UTC
AJ, After seeing your ESCI M1-A1 weathered kit box and kit parts posted here and on the Braille forum I remembered that I had almost finished putting this kit together quite a while ago, but where did I put it? After an exhaustive 3 day search I found the kit in a box together with a Hasegawa Pz IV Ausf F2, both completely assembled and unpainted. I still have the side skirts and tracks for the Abrams but no tracks for the Pz IV, I'll have to see about getting a set of replacement tracks from CMK and some decals for both of these little boogers. Your Abrams is coming along nicely and looking the part with all of those little extra details that you have made. I may have to go back and update my kit before I go and put paint on it. I'll be using your build log as reference.


Matthew, I would appreciate you not posting such tasty treats here like those delicious camouflage cakes causing me to gain several pounds by just merely looking at them, not to mention all of the cavities that I could feel coming on! I even managed to get into a bit of a scuffle with the wife over the last piece of banana cream pie . . . of course she lost! Your Isuzu is well detailed, something that just could not be so easily seen without the paint.

Marek, Nice start on that ZiL - 131 truck.

Jan, You had to go and find a really difficult kit to rebuild didn't you?

Radek, excellent valentine and figure on a great looking base. Your Sahara is really coming along. Great looking figure too!

-Eddy
Firefly74
Visit this Community
Queensland, Australia
Joined: April 15, 2010
KitMaker: 224 posts
Armorama: 205 posts
Posted: Sunday, November 14, 2010 - 12:25 AM UTC
Hi, great looking builds all!
I've shelved the Airfix Vickers VI. After making a start I had a look at my reference photos and realised that the missing rivets were far from the only inaccuracy, some where "unfixable" so I'm ordering a resin kit version which looks like a far better representation of the vehicle.
In the meantime I'll make a start on my second build an Italeri Valentine II i started a few years ago. After a lot of searching I couldn't find the references I was after for a 6th Armoured div. vehicle in Tunisia so i'll be doing a lend lease Russian version.
I'll be using this build to get some experience in making grab handles and other "improvements" (i hope!),something fairly new to this former OOB modeller
Looking forward to seeing everyones progress.
Cheers,
Tim
tread_geek
Visit this Community
Ontario, Canada
Joined: March 23, 2008
KitMaker: 2,847 posts
Armorama: 2,667 posts
Posted: Sunday, November 14, 2010 - 04:45 AM UTC
@AJB Coming along very nicely AJ. You are obviously experiencing some builders OCD in the detailing area. Did you take the Aspirin that I recommended? This build has really progressed quite quickly when compared to the Challenger. I haven't thought about gluing wings to the StuG but exposing it to an IED (firecracker) has crossed my mind. Perhaps a diorama having it mired in a bog and being pulled out by some recovery vehicle.

Radek(and Braille) My choice to finish/repair the StuG was based on it languishing for ages in the cupboard by the workbench. It is one of about half a dozen in a similar state of construction. It also appeared, in my mind, to be the easiest and quickest to complete. Guess I got that one wrong. BTW, your Saharian is looking fantastic and could pass for a much larger scale.

Firefly74 Tim, was the Mk VI really that bad or are you also succumbing to modellers OCD or, pardon the pun, rivet counting! The Valentine choice is interesting and really represents what at least part of this campaign is all about. I did a quick searvh and found an interesting PDF about the markings of the 6th Armoured division. Hope that it might help.

http://www.armouredacorn.com/Reference/BAM/6th%20Armd%20Div.pdf

Today I'll make a stab at putting some tracks on the StuG. If it doesn't work out I'll seriously consider the resurrection of some other forlorn and incomplete kit.

Cheers,
Jan
casualmodeler
Visit this Community
Hame, Finland
Joined: February 04, 2009
KitMaker: 702 posts
Armorama: 665 posts
Posted: Sunday, November 14, 2010 - 06:14 AM UTC
Hi all!
Here´s my progress so far. Kit is assembled and ready for primer next. Road has been rough and many long nights are behind me now. First, couple pics of lows in this kit: mould failures, hair like cracks all over the kit and repairing the missing mould. Then finally all put together.


All white parts selfmade from styrene.


Untill next update.......
eremzet
Visit this Community
Katowice, Poland
Joined: September 10, 2010
KitMaker: 89 posts
Armorama: 87 posts
Posted: Sunday, November 14, 2010 - 07:09 AM UTC
Next step. Chiping looks enormous but in my opinion much better in real. Zoom is braille scale nightmare Later I'll add some more colours to the chipping (rust and steel) and make some fuel and oil leaks.


@Tim - I've just finished the Valnetine Mk. II. If you have any questions on this model don't hestitate to ask.
@Jan - thanks a lot, but wait till the end of the work
@Kimmo - nice start on this model. Looks very interesting for me. Do you plan to make other pieces of the whole train? Maybe Kriegslokomotive too
casualmodeler
Visit this Community
Hame, Finland
Joined: February 04, 2009
KitMaker: 702 posts
Armorama: 665 posts
Posted: Sunday, November 14, 2010 - 07:33 AM UTC
Hi Radek!
..and thanks. Whole train is very attempting idea but it depends on scale model manufactures, mainly UM and their plans. But I´m planning to build half of the train in 1/35 using Trumpeter kits.
Your Saharian looks awesome.
firstcircle
Visit this Community
England - South East, United Kingdom
Joined: November 19, 2008
KitMaker: 2,249 posts
Armorama: 2,007 posts
Posted: Sunday, November 14, 2010 - 10:32 AM UTC
Kimmo, you said the white bits were made by you from styrene, except in the photo it all looks white - or is that just me? I think I have seen that kind of dodgy quality moulding before on a Zvezda kit. Lovely unusual subject though.

Tim, that abandonment of the never seen by me Airfix Vickers tank is a bit disappointing. Are you going to just consign the whole thing the spares box? I think this is the tank with the Carden-Lloyd type suspension? Perhaps you can be enticed to knock up an old-style conversion with it to make something completely different?

On that subject, I have been poring over some almost 40 year old Airfix and Military Modelling magazines, and have come up with something for Jan. I must confess to being slightly confused, are you combining these two kits into one, or are you finishing both of them off?

Anyway, from Airfix Magazine, October 1971, here is some of a Terry Gander article on making an SU76i from the Airfix Stug III kit.


I had to include that wonderfully presented template... how things have changed . . , I found this while looking for the Opel Maultier rocket launcher build (based on two Airfix Bren Carriers) and the Matilda workshop crane, both of which I bought kits for. I must say, the Matilda looks a lot easier than the Maultier.
spacewolfdad
Visit this Community
England - West Midlands, United Kingdom
Joined: May 23, 2010
KitMaker: 642 posts
Armorama: 593 posts
Posted: Sunday, November 14, 2010 - 11:30 AM UTC
Hi Folks,

I have just finished painting the Wespe, just the first coat and camouflage. I will be doing the detail painting and weathering next. I have also begun to finish the Opel Blitz and will be sticking some windows in (there aren't any in the Esci kit) before I paint it.

Here are the photos of the progress so far:

Wespe


Opel Blitz


All the best,

Paul
woltersk
Visit this Community
Utah, United States
Joined: May 27, 2003
KitMaker: 1,026 posts
Armorama: 654 posts
Posted: Sunday, November 14, 2010 - 11:48 AM UTC
How about that...some progress. So far the fit is really good.


There are some amazing builds going on.

Paul--If this thing comes out half as good as your Wespe I'd be elated.
spacewolfdad
Visit this Community
England - West Midlands, United Kingdom
Joined: May 23, 2010
KitMaker: 642 posts
Armorama: 593 posts
Posted: Sunday, November 14, 2010 - 12:22 PM UTC
Hi Kieth,

The Revell Panzer IV stuff is very good, I made their Hummel some time ago and it went together really well. It is the same chassis as your Nashorn, so you should have no worries. As to my Wespe, it is coming along well, but I was a little dissapointed with the camouflage, the airbrush was playing up a bit. Still as they say 'onwards and upwards' , we learn from all our mistakes and failures.

Thanks for the comment, all the best,

Paul
Firefly74
Visit this Community
Queensland, Australia
Joined: April 15, 2010
KitMaker: 224 posts
Armorama: 205 posts
Posted: Sunday, November 14, 2010 - 03:03 PM UTC
Hi all. Lots of progress photos!
Jan: Thanks for the info on 6th armoured,will be very useful when i build my next valentine.My main reason for not doing it this time was that i could not confirm that the 6th were sent to Tunisia with mark II vehicles (i know they had mk III's etc), will have to keep looking. BTW Your patience with that stug is amazing!
Kimmo: that's some terrible moulding there! Your build is looking great!
Radek: Your build is looking great,hard to tell it's Braille Scale! I have being considering buying this kit,now i will! Re: the valentine,there's a large space on top and bottom of the gun mantlet,did you have this problem? I was thinking of putting some plastic card on both sides to fix it? Your valentine dio looks great,like the flags!
Mathew and Jan: The Airfix Vickers VI was actually fitting together really nicely so what i'll do is build it straight OOB alongside the resin kit when it arrives so everyone can compare them.
Paul:Your wespe is looking good! nice camo job.
Kieth:Looking forward to seeing your Nashorn build.
Well that's enough out of me!
Cheers,
Tim
sabredog
Visit this Community
Western Australia, Australia
Joined: July 22, 2007
KitMaker: 607 posts
Armorama: 599 posts
Posted: Sunday, November 14, 2010 - 05:24 PM UTC
Hi everyone!

I have been a tad busy lately as my middle daughter tied the knot with her partner last weekend. It has been a manic month or so getting all the final preparations together.

While my lovely wife was tied up making bouquets and lapel arrangements, I sat with her with a MDF tray and worked on construction only tasks as I could.

So there are two builds on the go. Those being;


Dragon T34-76 Model 1940 (ready for priming)


UM BA-6 (40% assembled)

These will be my entries all things being equal!

Glad to be back online again


eremzet
Visit this Community
Katowice, Poland
Joined: September 10, 2010
KitMaker: 89 posts
Armorama: 87 posts
Posted: Sunday, November 14, 2010 - 08:11 PM UTC
@Keith - The Revell's Nashorn is really good model and I strongly recommend Part's fenders and ammo conteiners for this model. They looks terrific when assembled!!!

@Tim - I had the same problem with my Valentine and I solve it in the same way that you've described
casualmodeler
Visit this Community
Hame, Finland
Joined: February 04, 2009
KitMaker: 702 posts
Armorama: 665 posts
Posted: Sunday, November 14, 2010 - 10:07 PM UTC
Sorry Matthew, my bad. Just realised, that lights made all light grey and white parts look like same colour in photos. Those steps on both sides of the car, beside doors, are one of those selfmade parts. I also added styrene plates onto bumber systems on both ends of car. Sorry, don´t know, what´s the right word for those but if you look pics closely, you´ll see them.
firstcircle
Visit this Community
England - South East, United Kingdom
Joined: November 19, 2008
KitMaker: 2,249 posts
Armorama: 2,007 posts
Posted: Monday, November 15, 2010 - 01:41 AM UTC

Quoted Text

added styrene plates onto bumber systems on both ends of car. Sorry, don´t know, what´s the right word for those but if you look pics closely, you´ll see them.


Kimmo, I think it is a buffer - there may be a more technical term in the world of trains, but i think that will do for us.

Must say I was pleased to hear the Polish for Chinchilla in this forum the other day. . .
Dangeroo
#023
Visit this Community
Zurich, Switzerland
Joined: March 13, 2009
KitMaker: 2,058 posts
Armorama: 1,656 posts
Posted: Monday, November 15, 2010 - 07:40 AM UTC
Whoa! This campaign has really taken off, and I'm nowhere near starting my little kit... Hope to join in the fun sometime in December. Some great projects, looking forward to see more!

Cheers!
Stefan
spacewolfdad
Visit this Community
England - West Midlands, United Kingdom
Joined: May 23, 2010
KitMaker: 642 posts
Armorama: 593 posts
Posted: Monday, November 15, 2010 - 09:46 AM UTC
Hi Folks,

I just want to congratulate all those who are posting stuff in this campaign. I have lost track of who's doing what, there is so much activity. So rather than comment on each individual contributor, I will just say that this is becoming a most pleasurable experience. What is more, this is only the first few weeks and so much is being accomplished, I reckon the gallery at the end will be a magnificent testimony to the Braille Scale community,

Glad that's off my chest, all the best,

Paul
weathering_one
Visit this Community
Ontario, Canada
Joined: April 04, 2009
KitMaker: 458 posts
Armorama: 456 posts
Posted: Tuesday, November 16, 2010 - 06:24 AM UTC
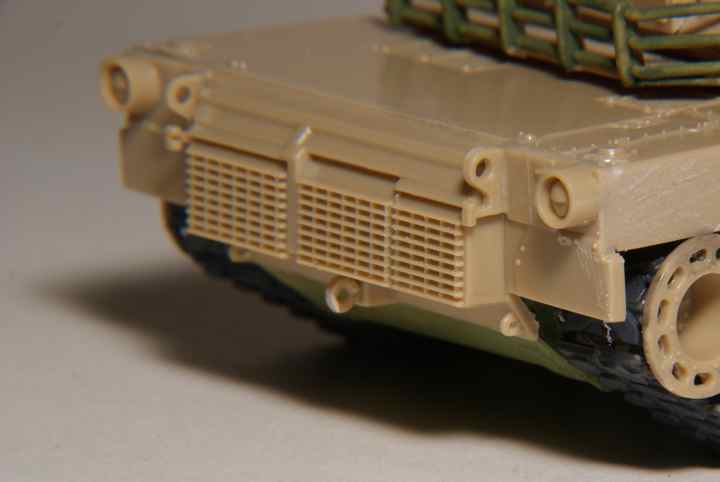
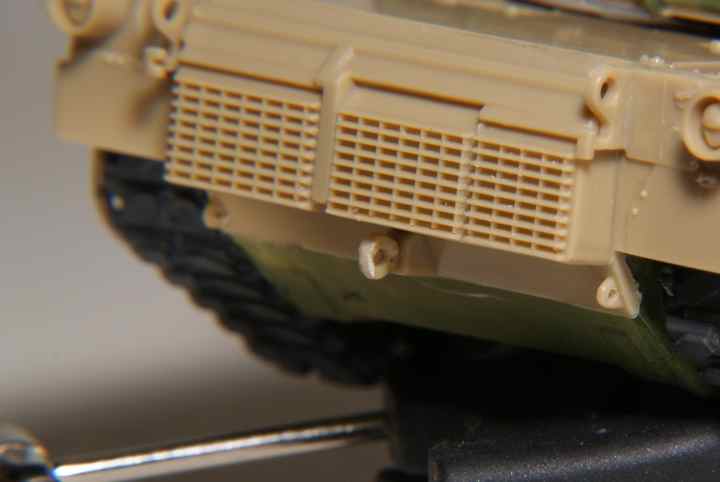
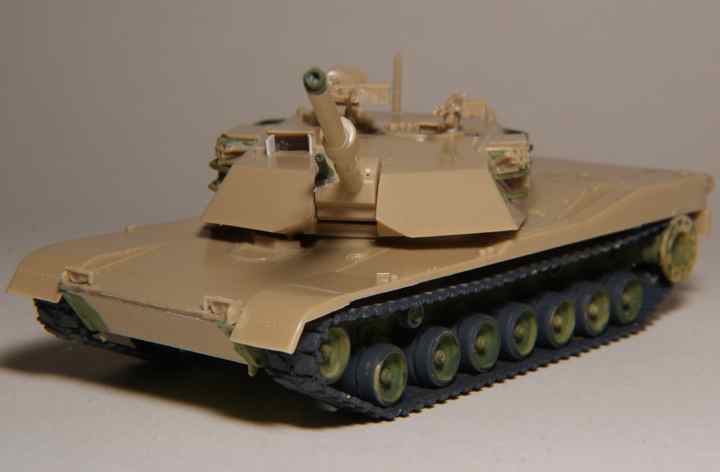
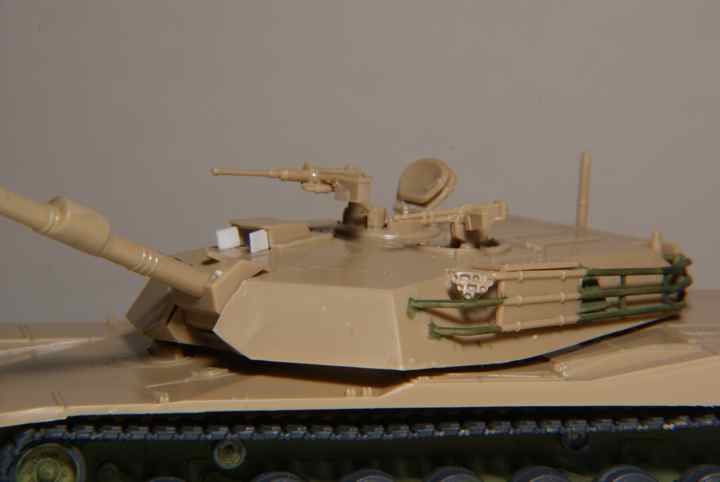
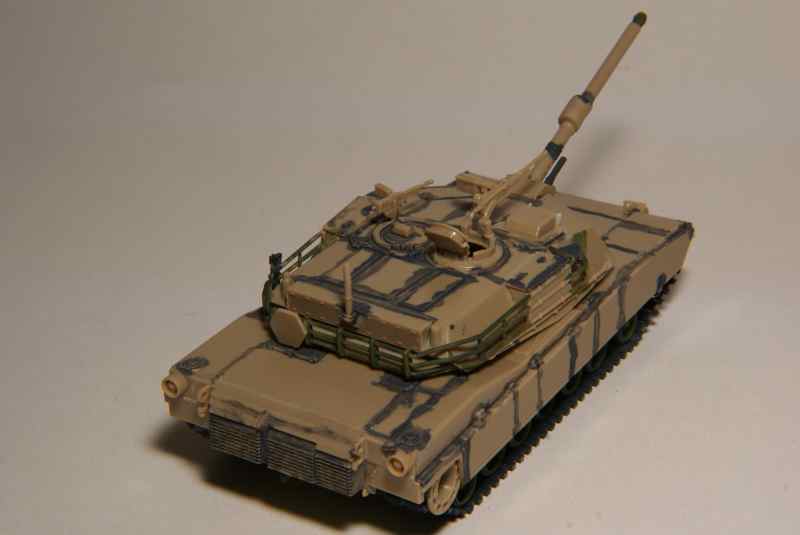
Like everyone else I am amazed at all the action during this campaign in such a short time. My M1A1 is moving along. I attached the final pieces and found that I had one spare track link. After looking at various pictures I found one that had a couple of track links attached to the turret side rack. Well, I attached the one for effect.

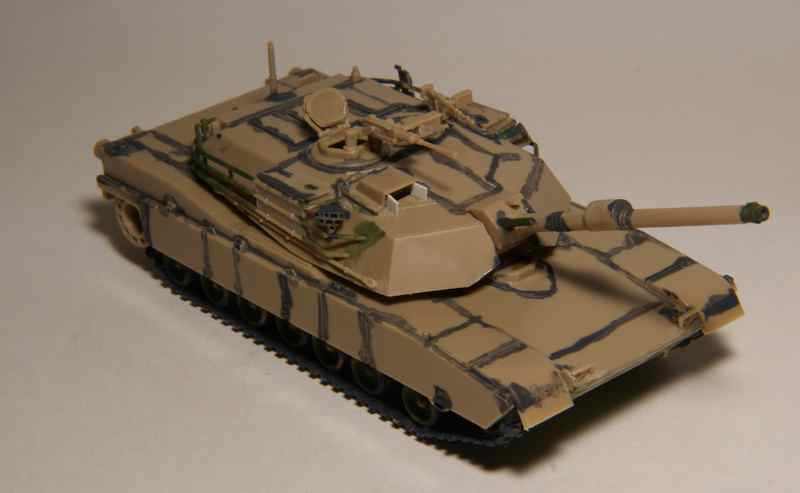
In the 'I am trying something new' department, I looked over a few postings where people talk about pre-shading and such. Since I've already tried a few new things during this build, why not one more. I used a dark grey acrylic to accent certain lines and areas of the tank. I mixed it to a consistency of about 60% thinner to 40% paint. The dark really settled into the little recesses and panel lines but I wonder if I should have thinned it even more. Here's the pictures.


Regards,
AJ