Campaigns
Where Armorama group builds can be discussed, organized, and updates posted.
Braille Battlefield
eremzet
Visit this Community
Katowice, Poland
Joined: September 10, 2010
KitMaker: 89 posts
Armorama: 87 posts
Posted: Friday, November 26, 2010 - 10:07 AM UTC
Hi Guys!

Thank You for Your comments. Nice to hear that You like the model. Tomorrow keep Your fingers crossed

Do You know what I really like in this campaign? There are no Tigers, no Panthers, no StuGs which I really really sick of. Only rare and interesting vehicles: trucks, tankers, armoured cars... This is what I like the most in this tread. I can't wait to see Your models finished.

matthew Your Isuzu looks really good and I like it. As I said before painting is very good. Hope this is not your last word here.

I see our Polish company RPM is pretty popular around the world Nice surprise. In December another Polish company - IBG - is going to issue a series of Polish 508 FIAT cars. They took part in 1939 campaign (btw in Poland we call it "September Campaign" or "Defence War") and Mirage company another Stuarts and M3 Lee/Grant models.

And my next victim is:


spacewolfdad
Visit this Community
England - West Midlands, United Kingdom
Joined: May 23, 2010
KitMaker: 642 posts
Armorama: 593 posts
Posted: Friday, November 26, 2010 - 01:01 PM UTC
@ Radek:

Awesome piece of modelling, if it doesn't get a prize there's no justice in the world.

All the best,

Paul
tread_geek
Visit this Community
Ontario, Canada
Joined: March 23, 2008
KitMaker: 2,847 posts
Armorama: 2,667 posts
Posted: Saturday, November 27, 2010 - 07:45 AM UTC

Quoted Text

As for this thing about completing all of the kit, I am absolutely certain there isn't anything left in the Science Treasury Isuzu box - honestly!


Matthew, Matthew...Matthew!!!! ARE YOU ABSOLUTELY certain that you might be missing a itsy, bitsy, tiny something or other????

________________________________________________

[b]FINALLY[!!!!!/b] Despite Radek's statement about no StuGs, mine has finally seen some serious progress. It took forever and involved several partial disassembles of the suspension components but one side now has tracks. It also took some rather serious cutting, clipping and sanding of the individual track links to get them to fit somewhat respectively. This will be NO prize winner but it WILL get done and at least be a reasonable wargame piece. (fingers crossed)

And here is something a little different. I had forgotten that my DSLR has an HD setting so I decided to try it out. Here's the progress and the HD shot; FWIW.


Now on to Frustration Part 2 and the other track.

Cheers,
Jan
eremzet
Visit this Community
Katowice, Poland
Joined: September 10, 2010
KitMaker: 89 posts
Armorama: 87 posts
Posted: Saturday, November 27, 2010 - 09:11 AM UTC
Jan, don't take my statement personally

But seriously, during such contests, projects or whatever you call it, I'm used to see 90% of WW2 german vehicles of those three types (especially Panthers) and, what is even worse, most of them had the same camouflage and markings from the manufacturers' decals sets. And this starts to be booooooooring.

Once again I must say that I admire you for you "steel will" for this model There is so much work to make it looks right...
tread_geek
Visit this Community
Ontario, Canada
Joined: March 23, 2008
KitMaker: 2,847 posts
Armorama: 2,667 posts
Posted: Saturday, November 27, 2010 - 11:17 AM UTC
Radek, "steel will" or more appropriately delusional insanity? Actually, I found that this kit is perhaps almost 20 years old and has been sitting around gathering dusk and cobwebs. It is a matter of principle that I finish it one way or another. The second set of tracks are about 90% finished and the two separate tracks seem to line up pretty well. I might actually finish them tonight.

Cheers,
Jan
Korpse
Visit this Community
Queensland, Australia
Joined: October 06, 2009
KitMaker: 382 posts
Armorama: 378 posts
Posted: Saturday, November 27, 2010 - 11:36 AM UTC
Hello

checking the most recent posts

@Radek - the Sahariana is first rate ! & the detail you have added to the Opel Flak is way cool, looking forward to seeing it finished.

I kind of agree with you about Tigers and Panthers - they dont much interest me either, they are so popular that I'm sick of seeing them too. (even though I recently made a Tiger, but it was the "one of a kind" command Porsche Tiger I from Pz Abt 653)

@tread_geek - is that the Revell Stug IV ? If you are fixing it up thats great. Its not the best kit Revell has to offer.


Here is some progress on my build. I'm opening the smaller hatches, all the large doors (each side and back of turret) will be closed. I have another Panhard unbuilt, and I'll make a basic interior in it, and open the doors on it, when I get around to building it. Luckily I have some good reference material on these cars.

I mounted the rail wheels, and tried them out on some UMmt track to ensure it sits horizontal and square and that all wheels touch the track.

The track that comes with this kit has the fishplates moulded on, and the rails are too narrow for the wheelbase. At first I thought this was my error, but without carving away the sides of the car there is no way they wheeltrack can be narrowed to fit the supplied track. I have 1/72 track from Hobbyboss, UM & UMmt and the RPM is narrower than all of them by a millimetre or two, so looks like the track is the issue, not the car. No matter, I can modify the RPM track, or just use track from those other manufacturers.

I also made what may be tow rings at front and rear from wire. These are attached to the end of the leaf springs. I could not remove them from the sprue without damaging them, so wire replacements made. Comparing to reference material, the wire rings look more like the real thing anyway (reference is the excellent french publication Track Story Panhard 178)

anyway here are some progress shots.

cheers
Neil


woltersk
Visit this Community
Utah, United States
Joined: May 27, 2003
KitMaker: 1,026 posts
Armorama: 654 posts
Posted: Saturday, November 27, 2010 - 03:33 PM UTC
I hope everyone who celebrates Thanksgiving Day had a good holiday and is having an enjoyable weekend. I know I am.

Here is a bit of progress on the ol' Revell Nashorn:


I'm gonna try the 'put it all together then paint the details late' trick although not sure how that is going to work with an open top vehicle.

There is some fantastic work going on in this campaign. There are things being accomplished I had not thought possible in this scale. The amount of detail is amazing, as are the paint jobs.

Keith
firstcircle
Visit this Community
England - South East, United Kingdom
Joined: November 19, 2008
KitMaker: 2,249 posts
Armorama: 2,007 posts
Posted: Sunday, November 28, 2010 - 11:11 AM UTC

Quoted Text

I'm gonna try the 'put it all together then paint the details late' trick although not sure how that is going to work with an open top vehicle.


Keith, my advice would be to at least paint the fully assembled gun and fully assembled vehicle separately, then unite them. Painting under and around the gun sounds very tricky and I don't think will add any benefit.

Neil, that is a great looking vehicle, very much looking forward to the result.

Jan, well, there may be the odd oil drum left shloshing around in the box. But let's see what happens. . .

I have started the next project; this is a total build, i.e. starting from the beginning, but is also in a sense a completion, and as for completing an entire kit, I'm not sure how that will apply . . .


I was checking out Rolf Harris's book on painting earlier this evening, and to borrow his catchphrase: "Can you tell what it is yet?" (Does anyone outside the UK know who I'm talking about?) Anyway, not too difficult . . . and not a Panther or Tiger.
tread_geek
Visit this Community
Ontario, Canada
Joined: March 23, 2008
KitMaker: 2,847 posts
Armorama: 2,667 posts
Posted: Sunday, November 28, 2010 - 01:06 PM UTC
I agree with Matthew's comment, Keith. Do part of the interior prior to completing the build. Been there and done...

@firstcircle - Could it be some form of Maultier? From what I see in the pictures, this is mostly a scratch-build. In that case I would consider it near a new build. Even if it was previously started it is still a second completion and therefore would qualify you for the award. I'll be most curious to see which version it ends up being.

BTW, the second image made me guess as I did. With the first I leaned toward a 250 or 251 SdKfz.

Cheers,
Jan
eremzet
Visit this Community
Katowice, Poland
Joined: September 10, 2010
KitMaker: 89 posts
Armorama: 87 posts
Posted: Sunday, November 28, 2010 - 09:07 PM UTC
Matthew it looks like Nebelwerfer on armoured Maultier. Great beginning. The main body looks awsome! I wonder how You gonna manage with suspention and tracks.
naimbrain
Visit this Community
United Kingdom
Joined: March 15, 2010
KitMaker: 123 posts
Armorama: 118 posts
Posted: Monday, November 29, 2010 - 12:30 AM UTC
Thanks for the encouragement Jan, it hasn't been an inspiring weekend. My plans to resurrect the Diamond T took a knock because the detached wheel is now AWOL (possibly 'tidied up' or dropped on the floor for VCM fodder) so I'd be looking at casting a replacement which would be a completely new process to me. So the Diamond T goes back into the 'one day' pile.
A further setback occurred when I discovered that in a previous moment of intense dumbness I glued the cab of my Faun SLT 50-3 Elefant/SaAnh.52t shut before painting the interior. Given the good visibility of the interior, leaving it unpainted would totally comromise the whole model, so I'll have to see if I can 'pursuade' it back apart again. Worse case scenarion would be purchase of a new kit to replace the entire cab, which luckily isn't glued to the body yet.

I'm now thinking that my entry could be the Elefant carrying a PzH 2000. The elefant is in subassemblies with probably 15-20 of the smaller more breakable parts left to attach, and the PzH 2000 is in much the same state (plus one full set of link and length track left to attach). Both are unpainted, so I think the real challenge will be masking and spraying the camo finish (any advice on this will be very welcome, I've used blutack masks before, but this may be completely impractical on the more detailed parts of the Elefant, maybe a mix of masking and hand-painting?). If I submit 'part built' photos (including the separate boxes to show they weren't purchased as a single kit) does this sound like an acceptable entry?

Regards
John
weathering_one
Visit this Community
Ontario, Canada
Joined: April 04, 2009
KitMaker: 458 posts
Armorama: 456 posts
Posted: Monday, November 29, 2010 - 07:55 AM UTC
Boy, I'm away for a bit and this place goes wild! Again there is so much action that I find myself at a loss to comment on every build. What I do see is that all look really good.

I didn't waste all my time and actually practiced, practiced and practiced with the airbrush. I hope that these first results justified all the effort (and wasted paint). Actually the paint wasn't that bad as I used inexpensive craft store acrylics. The model is sprayed with Nato black from Tamiya. These pictures were taken just after I sprayed so some areas might still be wet. It's the first time I have tried actual camouflage freehand. I had to cut the pressure way back to only 15 or so psi.


The gallery here was down again and as I've used a lot of room there I had to get another picture host. I hope that I did things right and the pictures show.

Regards,
AJ
woltersk
Visit this Community
Utah, United States
Joined: May 27, 2003
KitMaker: 1,026 posts
Armorama: 654 posts
Posted: Monday, November 29, 2010 - 09:31 AM UTC
Mathew & Jan—Thanks for the painting advise. The gun assembly doesn’t have to be glued down to the chassis does it? My plan was to leave it loose, but the dang thing is so small it may not ‘stick’ like a larger scale one would. Either way I can paint them separately then place them together. My real concern was about painting all the doo-dads, knobs, gun adjusting wheels and levers, rifles on the racks, and all the other little hardware which I’m sure to break off while handling.

AJ—your paint job looks great. The demarcation ‘feather’ edge looks fantastic, especially on a small scale. Did you use any masking or was that ALL freehand? I take it you plan on adding the brown for the NATO 3 color camo scheme? One note: is some paint missing from the ‘leading edge’ of the skirt armor, or is that the lighting? It looks tan. Easy fix if it is.

Keith
eremzet
Visit this Community
Katowice, Poland
Joined: September 10, 2010
KitMaker: 89 posts
Armorama: 87 posts
Posted: Monday, November 29, 2010 - 09:46 AM UTC
Hi!

Well, first a little self-promotion - my Sahariana gets silver medal within 1:72 wheeled vehicles during exhibition in Katowice. I reached the gold one too with my StuG IV early/late hybrid in tracked vehicles in 1:72 scale.

There so much to see in this tread... I start to be out of control who is doing what, but workbenches are great! So much inspiration.
firstcircle
Visit this Community
England - South East, United Kingdom
Joined: November 19, 2008
KitMaker: 2,249 posts
Armorama: 2,007 posts
Posted: Monday, November 29, 2010 - 11:45 AM UTC
Firstly, congratulations to Radek, well done, and well deserved.


Quoted Text

I've used blutack masks before, but this may be completely impractical on the more detailed parts of the Elefant


John, there's only one answer if you ask me, and that's toothpaste Go to the main Armour forum and click to filter on Early Armour, and take a look on my Airfix WW1 Male thread, it is described in there. You can airbrush complex patterns with a hard edge; the spraying is the easy part - applying the toothpaste is the delicate job. Best to use toothpaste that isn't too transparent so you can see what you're doing.

Keith, I think only you will be able to tell when you try to sit the gun in place, but it sounds like you'll be OK painting it if you're planning on keeping it loose.

AJB, the camo looks great... and in some sense this is just your base layer to work on top of.

Mine - a Maultier it is, but hopefully not the Nebelwerfer, I'm going to give the 24-rail 8cm Vielfachwerfer a shot, as it were. Chassis and suspension is from the Airfix Opel Blitz and two Bren Carriers. Three kits may seem a lot, but bear in mind that I bought the Carriers for this very purpose 30 years ago, so they're were only 49pence each - what a canny investment . . .

Removed Blitz wheel arches:

Removed side lockers / fuel tanks from chassis then assembled front suspension elements, also moved forward the rear transmission, shortening the drive shaft. Not too sure how authentic that is. . . but I'm living with innacuracies in a very 1970's way.

The Bren track units: removed the single bogie and replaced with a double from the other set. The tracks aren't the right pattern of course, but anyway. . .

jaypee
Visit this Community
Scotland, United Kingdom
Joined: February 07, 2008
KitMaker: 1,699 posts
Armorama: 168 posts
Posted: Monday, November 29, 2010 - 12:02 PM UTC
Well deserved Radek.

Now I'll try something different. We've seen a QL Portee, we've seen a Bedford Bren.

But we've not seen a Bedford Bren Portee, anti tank half track.

A QL chassis provided by the airfix refuelling kit, and the 6pdr and the bren carrier tracks from the old airfix AT kit.

I've never done any conversion before, but it seems like a nice change from building aircraft OOB. I'm entering into this rather naively so I hope you will all keep me right. I've got the instructions from the Airfix 1/35 portee kit and I'll base the rear of the truck on that. Since it is a wha'if I don't feel the oppression of getting everything correct and I'll concentrate on the execution rather than the accuracy.

So £5 each for the refuelling set and the AT set plus some plastic sheet square rod and some grey matter and we are in business. That probably about the same as 50p 30 years ago 1st circle.

I blame you for planting the seeds of this daft idea, 1st circle.

The Bren set is yet to arrive so I'll see what I can do with that when it gets here I'll build the chassis and flat bed first. Wish me luck

tread_geek
Visit this Community
Ontario, Canada
Joined: March 23, 2008
KitMaker: 2,847 posts
Armorama: 2,667 posts
Posted: Tuesday, November 30, 2010 - 07:07 AM UTC
Congratulations on your win, Radek. If your build got the silver I can't imagine what was necessary to achieve the gold.

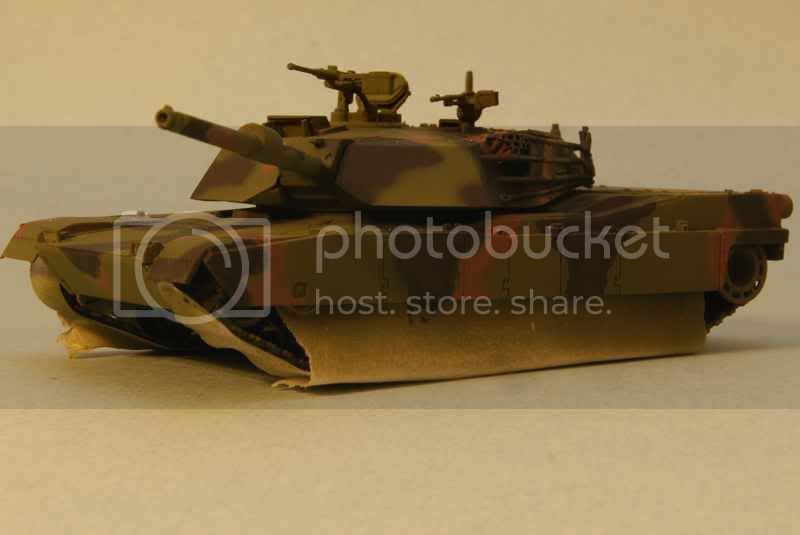
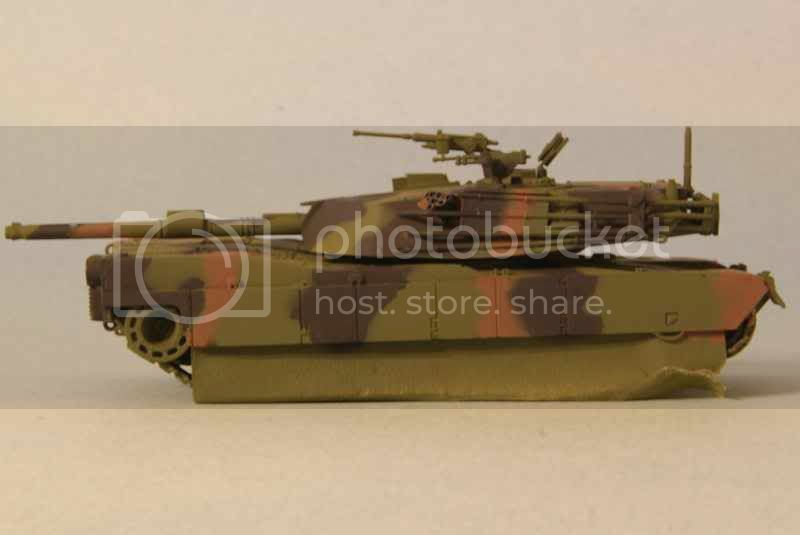
@AJB - That first camo colour really turned out great. I was thinking about trying lower pressure in painting so obviously this supports that direction.

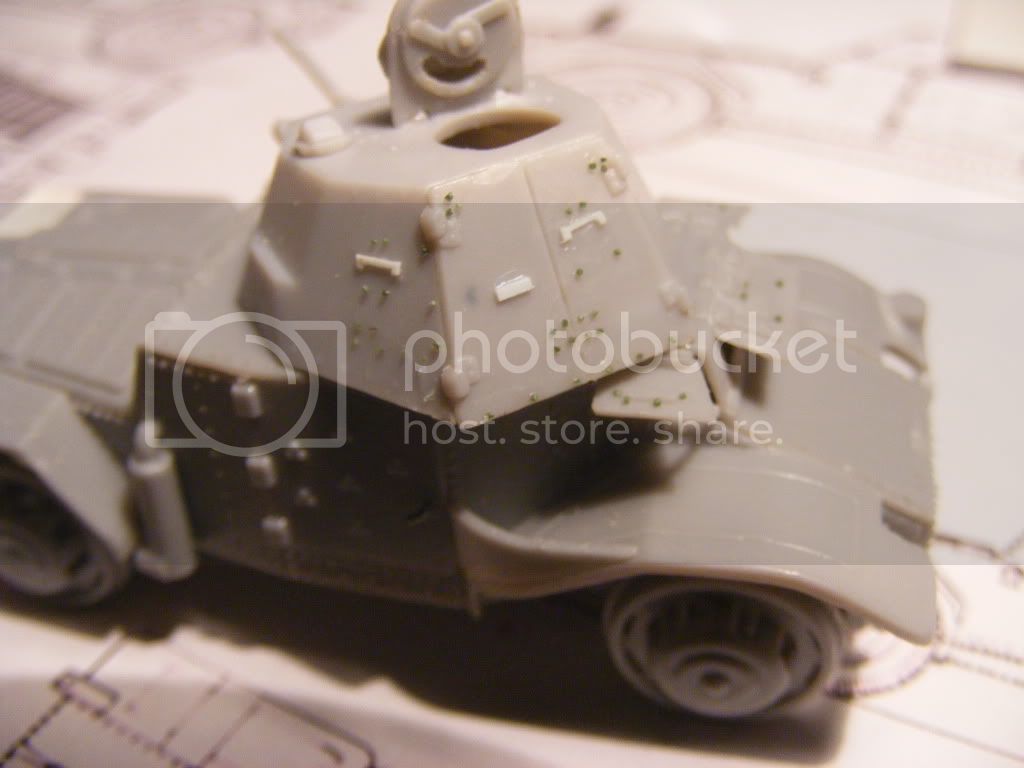
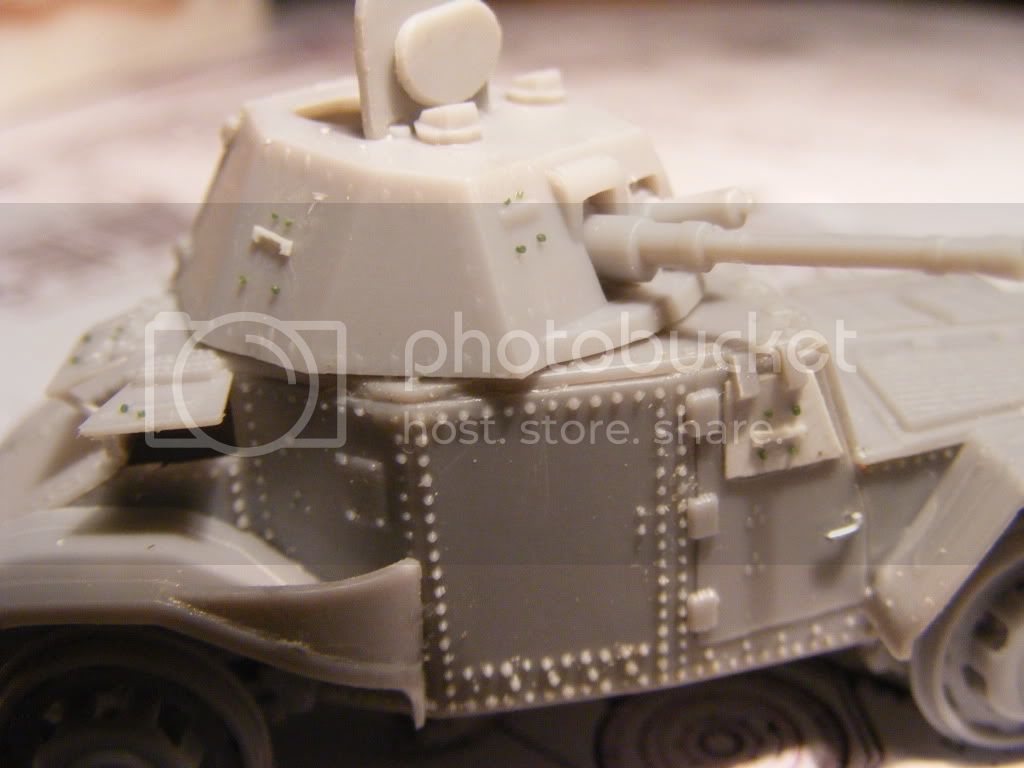
@waltersk - I have found that with these small scale builds it can often be advantageous to paint the smaller detail items separate from the "main bulk" of the vehicle and attach them near the end of the finishing process. The only thing to watch out for is to scrape away a bit of paint from the mating surfaces before gluing.

@firstcircle - YIPPEEE, some of us were right about a Maultier!!!! 
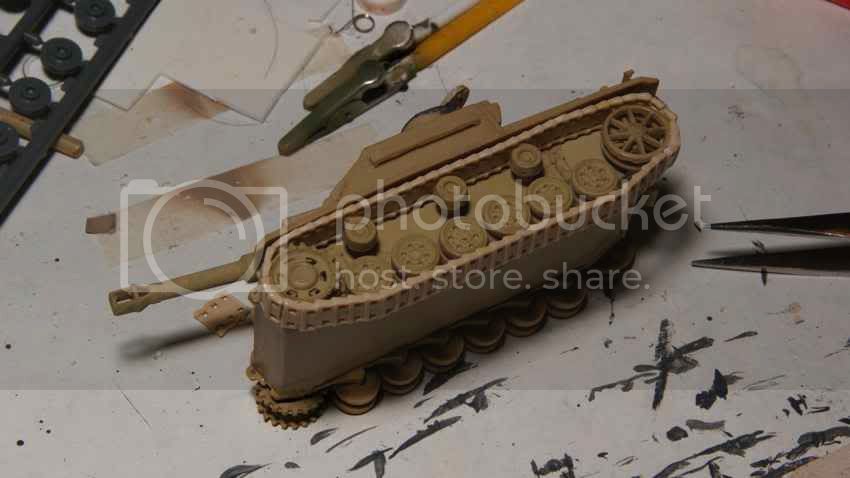
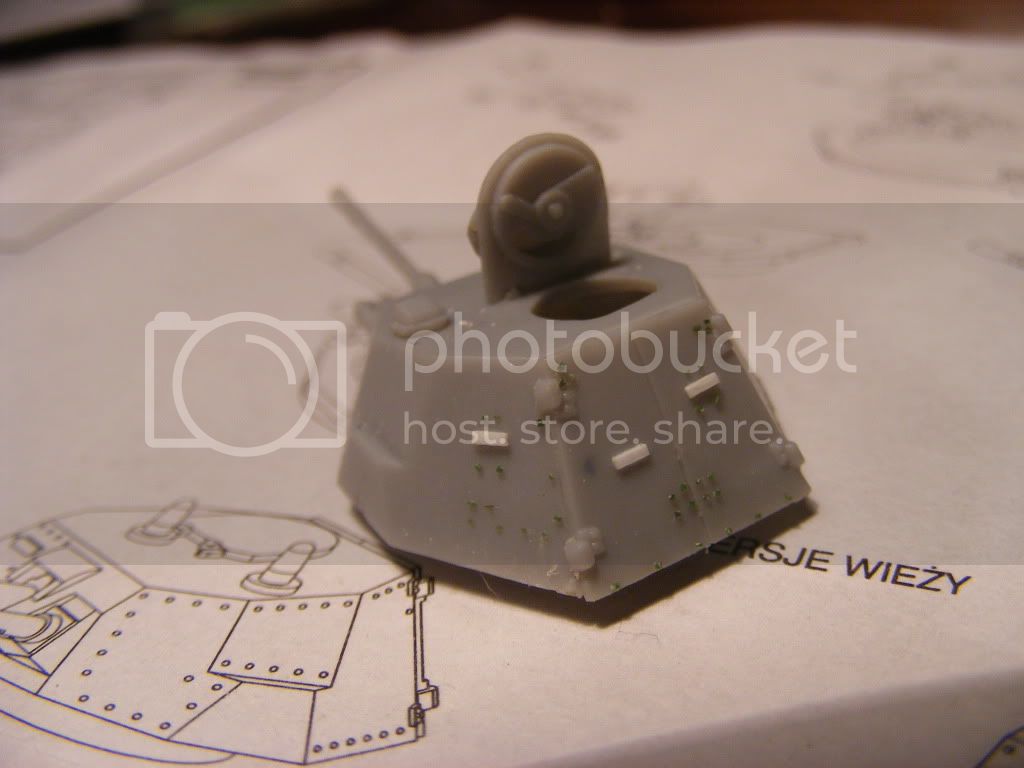
The subjects of builds so far in this thread are turning out to be quite unique and diverse. This latest of yours pushes the trend even further along. Your usage of the Bren carrier suspension is positively enlightening. I never would have associated the similarity between the two vehicles track sections. So, are you going to use your new found casting methods from the Mk 1 to cast new tracks for the Maultier? BTW, while there are some fuel drums from the kit missing from your first submission I shall invoke executive decision making and grant you one point for the tanker truck (see my logic in the section dealing with Jaypee). The Maultier truly makes up for a few errant barrels.

@jaypee - Hmm, two people from the same nation using Bren carrier suspensions to create unique vehicles! Makes the conspiracy advocate in most of us take notice. Who's to say that your proposed vehicle didn't at least exist on some drafting board.

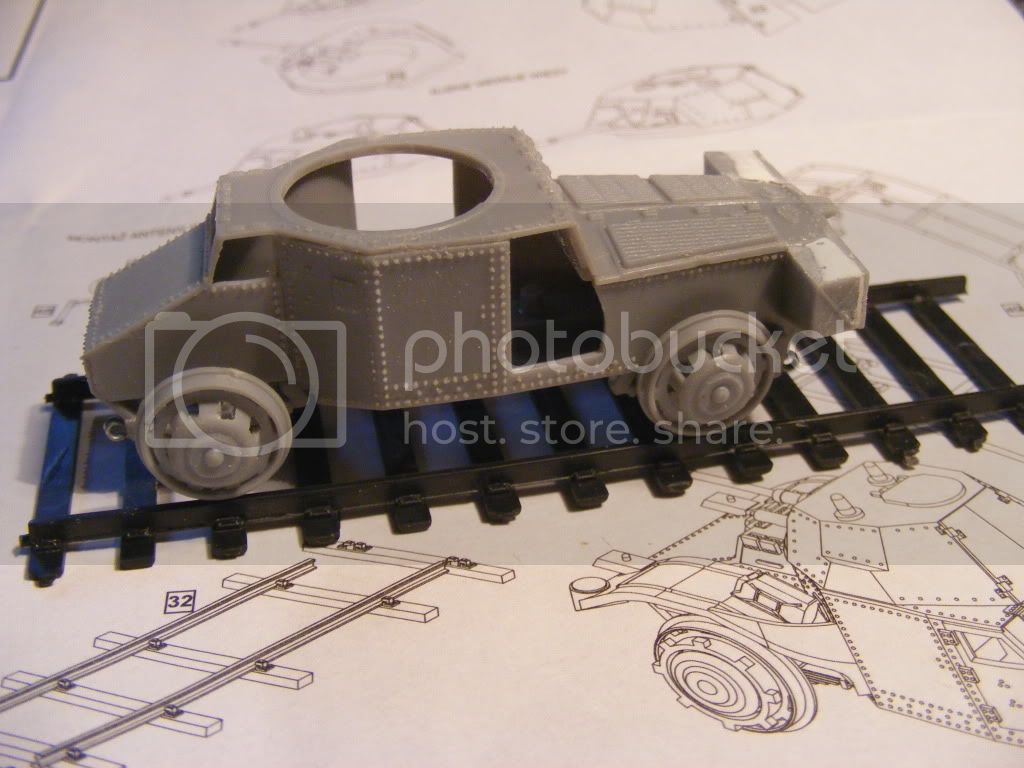
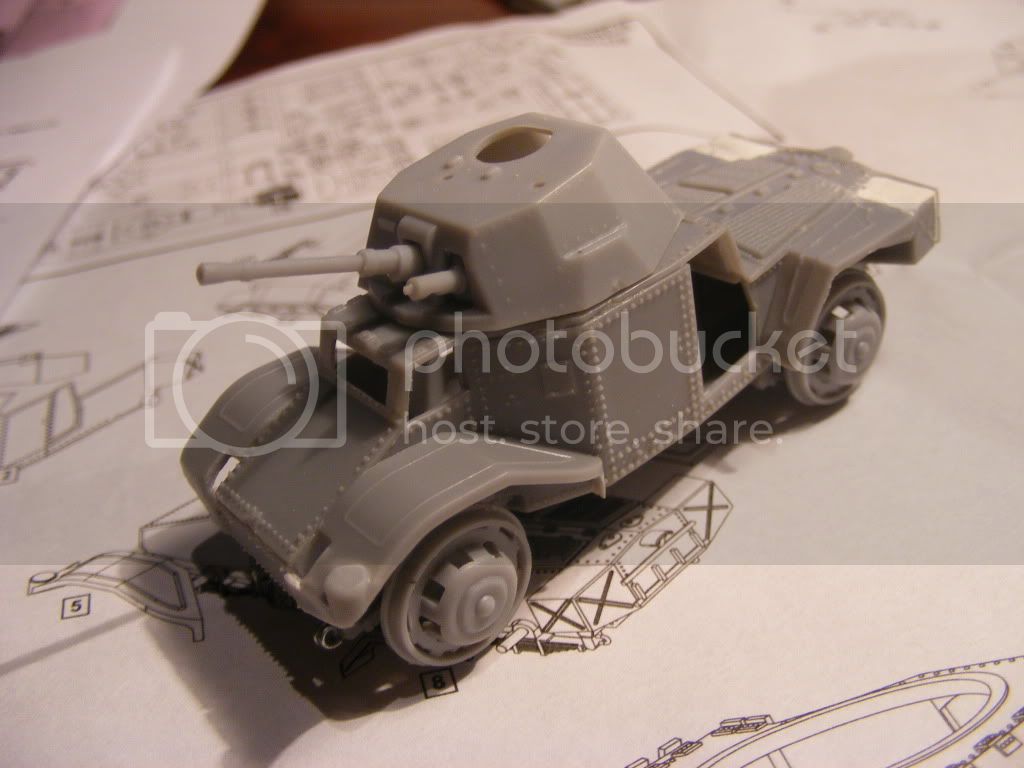
You have also thrown a monkey-wrench (spanner?) into the rule conundrum. The Bedford is part of a kit but the extent that you propose to modify it cries out for some recognition. On the one hand, you did not meet the rule requirement of providing prior construction sprue pictures for a new build. You state that this build was started during this beginning month so I will take your word on that. The extent of the modifications that you propose, and if they come to fruition, require some consideration. For a "new build" that meets rule requirements, only one model is required. For the completion side one must complete two partial builds to qualify for the ribbon. Looking at this situation mathematically, you get 2 points for a new build and only 1 point for each completion. Therefore to qualify you need a total of two (2) points.

As there was no sprue shots I tend to lean toward the AEC tanker as a completion with one point awarded. However, the proposed work you intend to do on the Bedford goes above and beyond a completion. This is particularly so as you intend to sacrifice a good many parts from a third kit. Unless there are any vigourous objections I propose to grant you 1 1/2 points for the conversion thereby putting you over the two point requirement.

You sure don't make a campaign leaders job easy, Jaypee!

_____________________________________________

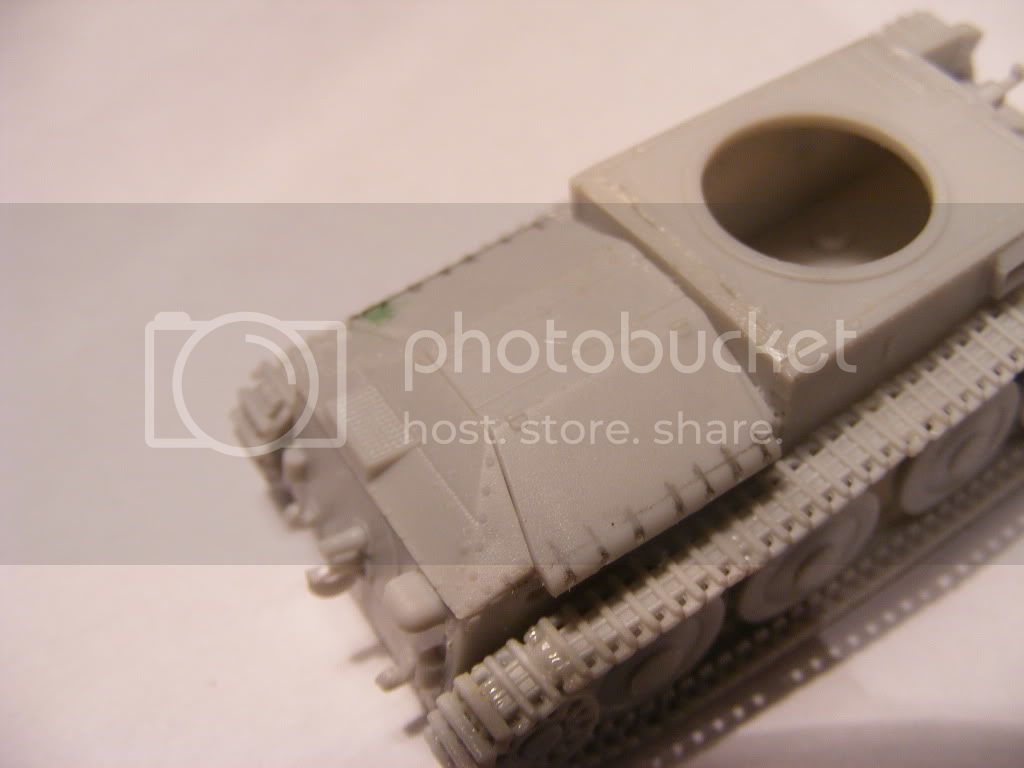
As pour moi! I finally after all the tribulations and deleted expletives have the two assault guns ready for final finishing. The victory over the tracks on the StuG.


The pair together.


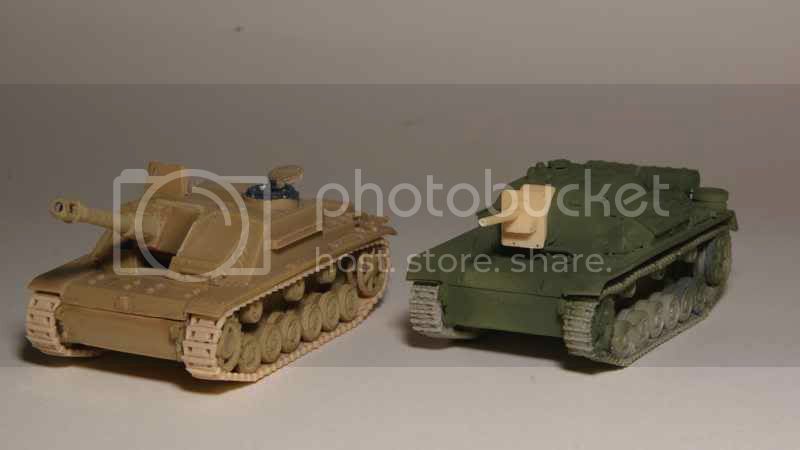
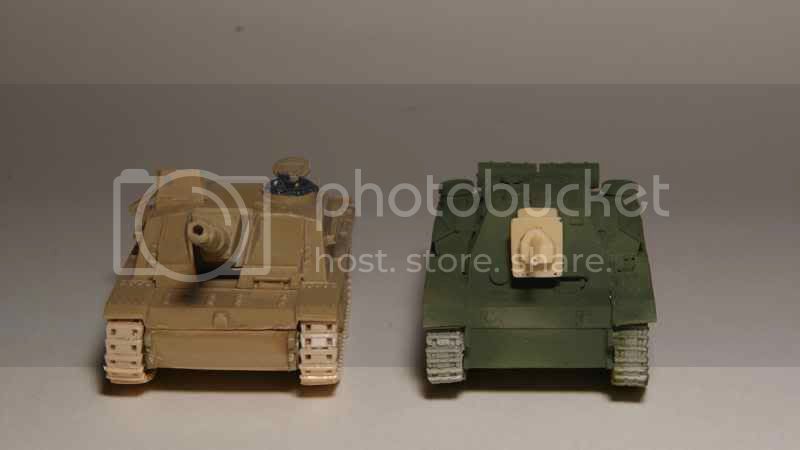
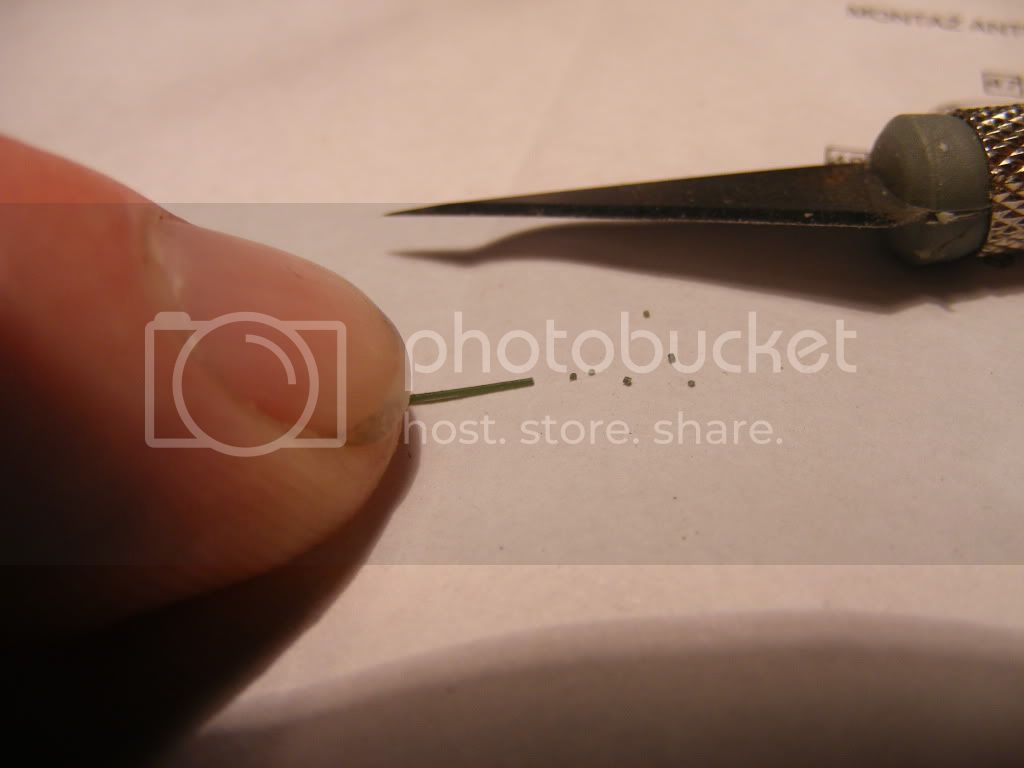
The holes for the headlights on the SU-76i are drilled but as luck would have it I can't find the little sprue with the parts. I am torn whether to finish it as a Russian unit or as a recaptured German one. I've only about a dozen or so pieces left to go on the Stug and then painting can begin. I have four potential colour schemes from the Panzer Colors book to choose from. At present I am leaning toward a dark yellow overall with a sloppy and hastily sprayed red brown mottling.

Cheers,
Jan
weathering_one
Visit this Community
Ontario, Canada
Joined: April 04, 2009
KitMaker: 458 posts
Armorama: 456 posts
Posted: Tuesday, November 30, 2010 - 09:41 AM UTC
Congratulations to Radek on your prize and congratulations to Jan on finally getting the tracks on the Stug.

Thanks to all that commented on my painting first.

woltersk Keith, the entire black part was totally done freehand. I used a lightened black wash to outline the approximate area of the squiggles. It was dark enough to see but light enough that I hoped it would have no effect on the final outcome. Sort of like a paint by numbers. Spray along the outline and them fill in the rest.

The next two progress pictures aren't that good but show the attempt with the same process with the brown.


For some reason the brown doesn't show up too well in the pictures except the blotch surrounded by black.

I'll mix up some more paint tomorrow tomorrow a bit more lighter and see what happens.

Regards,
AJ
Maurice
Visit this Community
Friesland, Netherlands
Joined: September 11, 2006
KitMaker: 254 posts
Armorama: 75 posts
Posted: Tuesday, November 30, 2010 - 10:06 AM UTC
@AJ, that camo on the M1 looks awesome. Maybe the color will come out better on the photos if you use a different color background, light blue for example.

@ Jan, nice work so far, but are those tracks fixed in place already? If so, how do you intend to paint them?
jaypee
Visit this Community
Scotland, United Kingdom
Joined: February 07, 2008
KitMaker: 1,699 posts
Armorama: 168 posts
Posted: Tuesday, November 30, 2010 - 11:02 AM UTC
HI Jan, If it was easy everyone would do it. You are running a great campaign, the level of involvement is nothing sort of astounding.

To be truthful the refuellers I've never seen on sprue. I got this off ebay and some kind soul shipped it with all the pieces off the sprue I was eventually able to seperate what was AEC and what was QL. Learned a lot about the trucks that way.


I've made a start to the portee base.

It is a bare platform only at the moment but it's been fun so far. I've been using a touch'n'flow for the first time this week, must say it is great. An epiphany.

Portee 1/76 scratch
Portee 1/76 scratch
Portee 1/76 scratch

So next up, add details to the top of the portee platform, and the interior of the cab. I;ve kept the rear drive shaft of the QL in place just in case.

THat's enough from me. Keep posting folks this is the #1 campaign on Armorama!
Korpse
Visit this Community
Queensland, Australia
Joined: October 06, 2009
KitMaker: 382 posts
Armorama: 378 posts
Posted: Tuesday, November 30, 2010 - 08:09 PM UTC
Hello all

I'm really enjoying all the updates of your builds, theres too many to comment on


An update on my build.

I've been checking the scale diagrams of the Series 1 and 2 Panhards (from the french Trackstory publication Panhard 178).

Both the 1 & 2 series turrets in the plans have small visors and a number of rivets that are not moulded on the kit turret. I'm not sure if there were turrets that had less vision ports and rivets, but to be on the safe side I decided to add them as per the plans.

I usually add rivets by the drill and insert water filter balls, (as per the example of the two illustration belows on a 1/72nd T-38) .


However the rivets on this model are tiny (the hull and turret has literally hundreds of very small rivets moulded on). Even using the smallest water filter balls was no good for this model, as they would look too big.

I resorted to a method I saw on another forum. I melted and stretched some sprue (like the old fashioned way to make aerials). I then sliced the stretched sprue into slices. Then stuck these on the turret. I purposely chose a darker colour sprue to make it easier to see these for placing them.


The end result is not perfect as its a bit like trying to place specks of dust in place

I think they will barely be noticeable once painted anyway, but I'm happier knowing they are there. I added 44 of these to the turret. I need to add another dozen or two to the hull as well.

anyway I'm enjoying the build, and enjoying everyone's posts

cheers
Neil

Firefly74
Visit this Community
Queensland, Australia
Joined: April 15, 2010
KitMaker: 224 posts
Armorama: 205 posts
Posted: Tuesday, November 30, 2010 - 08:56 PM UTC
Hi all, so much activity going on here!
Radek: congrats on your well deserved award!
First circle & Jaypee: Great conversion ideas! Will be watching with interest.
Jan:Very nice work on those tracks! Nice to see all your hard work paying off.
AJB: Your camo on the M1 looks great.
Korpse:Your panhard is looking good. Those rivets are are just crazy! Making me feel lazy for not doing them on my Vickers VI.
No photos today but the lend lease valentine is nearly done and have brushed on the first coat of paint on the Vickers.
Cheers,
Tim
eremzet
Visit this Community
Katowice, Poland
Joined: September 10, 2010
KitMaker: 89 posts
Armorama: 87 posts
Posted: Tuesday, November 30, 2010 - 10:16 PM UTC
So quick progress on so many workbench. It's really cool. All of You are doing the great job here. This campaign is really full of living.

@AJB maybe try to brighten the middle of black and brown spots. This should make them more visible. In fact NATO black is ... not the 100% black

Now i'm painting Flak and its sled for DAK Opel Blitz project. Also I'm finishing a very very tiny cockroach - CV33 from DOC Models. It is pretty advanced but anyway I would like to share it with You and get Your opinion.

@Jan maybe in the end we can make a one big campaign gallery of all finished models.
weathering_one
Visit this Community
Ontario, Canada
Joined: April 04, 2009
KitMaker: 458 posts
Armorama: 456 posts
Posted: Wednesday, December 01, 2010 - 07:30 AM UTC
Maurice, I tried retaking the pictures with a lighter blue background.

Radek, I believe that some of my problems are with the camera settings. The Tamiya Nato Black is more a deeper grey and appears more black in the pictures than in person.

Here is my attempts after about a dozen pictures with different settings.


My target picture.


The duplication attempt.


Obviously I still haven't got things quite right.

I can't believe how fast the postings are accumulating in this campaign. I'm sure the Matchbox one wasn't this active so early.

Regards,
AJ
Korpse
Visit this Community
Queensland, Australia
Joined: October 06, 2009
KitMaker: 382 posts
Armorama: 378 posts
Posted: Wednesday, December 01, 2010 - 10:21 PM UTC
Hello

@weathering_one - you are achieving a good match to the camouflage pattern shape on the Leopard in the photograph. I'm not sure whether the lighter or darker picture of your model is closer to how it looks to the 'naked eyeball' . If it ends up a bit too light, a dark wash can help to darken it, as you know.

I've made more progress on the Panhard.

From my last posted pictures you can see I made rectangular vision ports for the turret. These were a simplification from the real shape, and I wasn't happy with the shape & look , so took them off.

I have now made ports that are much closer to the actual shape, and applied them.

Ive also fixed the 3 window hatches to the front of the vehicle, in the open position, and added missing rivets to them. Photos in my references show these were held open by adjustable 'arms', so I made some out of card, and again added missing rivets to them.

All doors hatches and window covers had to be sanded down a bit as all were quite thick

The kit seemed to be missing the opening window hatch for the side door. I made one out of plastic card and attached it, and made door handles for each side door out of wire.

I now just need to make two round covers for the front and rear guards, that are placed where the french radio aerial mounts were. The germans didnt keep the french radio aerials, amd mounted the large 'bedframe' aerial instead, and thats the last job to go on the construction phase..

updated pics below

cheers
Neil