Hi folks,
I recently reviewed Kit no 35092 the new MiniArt Valentine Mk IV. So I thought I'd start a build blog and see how the kit turns out. The kit comes with a Red Army figure set and Decals for same but I'll build my version as a British/Commonweealth Vehicle.
You can read the review here:
Valentine Mk IV
If anyone would like the figure set and/or decals just PM me and I'll put them into the post, waste not want not etc, etc.
Well here's the beast:
The Valentine is a really interesting British Tank , it was produced in a wider variety of Gun Tank Mks and used as the chassis for the Archer, Bishop and a Bridge Laying version.
There are some good References about at the moment.
Dick Taylors British Infantry Tank Mk III Valentine which I reviewed recently here:
https://armorama.kitmaker.net/review/5418
and a recent publication from Squadron SIgnal which Jim Rea reported on here, but I've not seen yet:
https://armorama.kitmaker.net/news/7341
With both MiniArt's Mk IV and Mk II now out and now AFV Club coming into the frame with an as yet unreleased Mk I and the production of a 17pdr A/T gun by both Bronco and AFV Club it would be nice to think that somewhere along the way a Valentine Archer might finally emerge too. These are interesting times for us Allied modellers.
The kit comes with a partial drivers interior and a gun breech and radio for the turret and I'll see if I can add anything of interest in that area too. With Inside the Armour producing AFV interiors who knows where all this will lead to if that is a route Chris decides to go down.
Anyway time ot put the bits in for a wash.
Al
Hosted by Darren Baker
Building the MiniArt Valentine Mk IV
Posted: Saturday, August 21, 2010 - 10:13 PM UTC
Posted: Sunday, August 22, 2010 - 03:19 AM UTC
Hi folks,
Well the instrujuctions say to start with the main gun and turret assembly and for once that's where I'll start.
Two further publications that many be of interest are the:
Military Vehicle Woorkshop Series MV-05, Valentine IV interior ISBN 978-184768-976-4
and
Military Vehicle Workshop Series MV-02, Valentine IV - Exterior ISBN978-1-84768-973-3
Both of the above are available for £3.00 so very reasonably priced.
Instructions
If anyone would happen to know the diameter of the turret basket floor that might be helpful.
Cheers
Al
Posted: Sunday, August 22, 2010 - 04:57 AM UTC
The first thing I noticed is that the kit contains 2 gun mantles Parts D 11 and Parts D 5. Part D11 is the recommended part in the instructions so that is what I'll go with. The inside of the turret has 8 small ejection holes that will need filled (well if you have a mind to).
The 2pdr gun is a small work of art on it's own. Made up of 18 small parts.
It's been about 3 weeks since i build anything and boy does it feel good to be sticking bits of plastic together again
MiniArt have done a really nice job on the 2pdr gun and mantle, I have only part D68 x 2 to add and this part will be done. it is excellent that they provided so much detail on such a small item.
Clean up of the parts is minimal, but you need to follow the instructions when inserting Part 2 through part D66 otherwise it won't fit, so don't fit part D28 until you've done this.
Al
Posted: Sunday, August 22, 2010 - 05:11 AM UTC
Sorry Alan I have checked most of my ref material and cannot find what you are after.
Posted: Sunday, August 22, 2010 - 05:27 AM UTC
Hi Darren,
Thanks, no problem I can improvise.
Al
Thanks, no problem I can improvise.
Al
Posted: Sunday, August 22, 2010 - 10:01 AM UTC
Great start Alan, definitely count me in for this one
I read somewhere that the valentine was the most numerously produced british designed tank of WWII. Not sure how true this is, but if it is it makes you wander why its taken so long to replace the single option previously available!
Posted: Sunday, August 22, 2010 - 10:40 AM UTC
Hi Chris,
Yes it was, production started in 1940 and continuied throughout the war, can't remember the figure but it was well over 7000 gun tanks plus all the rest.
Cheers
Al
Yes it was, production started in 1940 and continuied throughout the war, can't remember the figure but it was well over 7000 gun tanks plus all the rest.
Cheers
Al
Posted: Monday, August 23, 2010 - 06:50 AM UTC
Hi folks,
Well the gun and mantel are finished and I've started to add a little detail on the inside of the turret. You get a nice 2 piece No 19 radio so with the full gun breech and the radio plus some wiring and fixtuers it should look fairly busy in there.
On the inside of the pistol ports I filled in some of the mould and have staretd to add a few bolts there as well. I'll have a go at making some handles for the ports as well. On the back plate on either side of the radio I've added 4 bolts that seemed to live either side. I don't have detailed photographs of the interior of the Mk IV but I do have some for the Mk V, so a bit of best uess here and there.
Prime Portal has some useful references:
http://www.primeportal.net/the_battlefield_armor.htm
as does Toadman's:
http://www.toadmanstankpictures.com/index.htm
progress
Al
Posted: Tuesday, August 24, 2010 - 09:22 PM UTC
Morning folks,
A bit more work on the turret, started to add some additional fittings and wiring. Decided to have a go at making a basker for the turret. Might work, might not. The floor of the basket looks quite complex, I think it had fold out extensions, but i'll be happy iif I get the basic shape and it fits. The rds were stored in a metal surround so something that will give the illision of this will have to do as it would really need to be a PE job for any real accuracy.
There are a lot of ejection marks on the underside of the hull so some filler or Mr Surface needed there
I'll also make a rear firewall to help block out any unnecessary light, again it's more as a filler than an exact.
Al
Posted: Wednesday, August 25, 2010 - 02:16 AM UTC
Great Start Al
Are the fittings in the turret in the kit or are they from the spares bin?
Chris
Are the fittings in the turret in the kit or are they from the spares bin?
Chris
Posted: Wednesday, August 25, 2010 - 03:38 AM UTC
Looking good Alan. Will be following.
Posted: Wednesday, August 25, 2010 - 04:27 AM UTC
Hi Chris,
In the kit you get the full gun breech and a No 19 radio. The other fittings are from the spares box.
Hi Frank,
Thanks for dropping in.
Al
In the kit you get the full gun breech and a No 19 radio. The other fittings are from the spares box.
Hi Frank,
Thanks for dropping in.
Al
Posted: Wednesday, August 25, 2010 - 04:47 AM UTC
Hi Guys.
Bit more work on the basket. As far as I can tell the turret basket had and extension that foulded out once the basket was in place. I made my base the witdth of the turret opening to take this into account. If you look at the Mk V on Prime Portal you'll get the idea. The centre box is one from the bren carrier, it should have a rounded short end but at elast it's L shaped. Other fittings are from the ITA besa boxes and the Tamiya Carrier. There should really br 2 Besa boxes in front of the L shaped bin, but I was looking at a different pictuere when it got fitted so it will do. I still have a second 'metal' ring to fit above the original. As best I can tell it extends about 3/4 of the way around the basket. Sort of Heath Robinson stuff but good fun.
Also need to make a gunners seat on an extendable pole.
What will make fitting all this together difficult is that with the turret in 2 halfs you need to fit the gun breech when you join the two halfs so that won't leave much room to connect things up easily.
Al
Posted: Wednesday, August 25, 2010 - 05:14 AM UTC
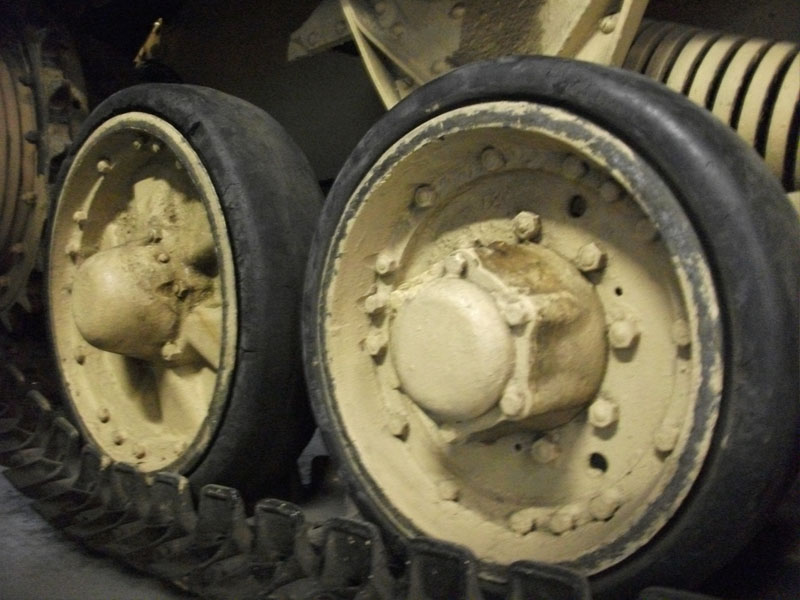
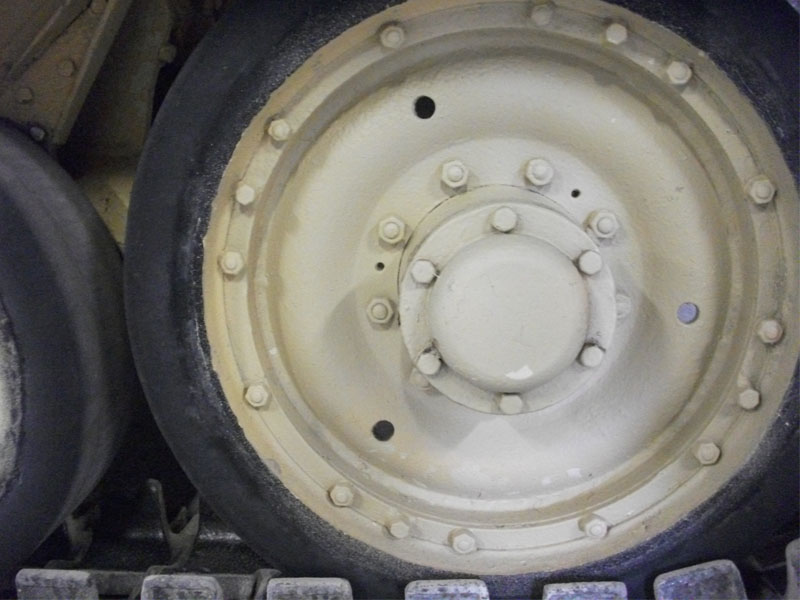
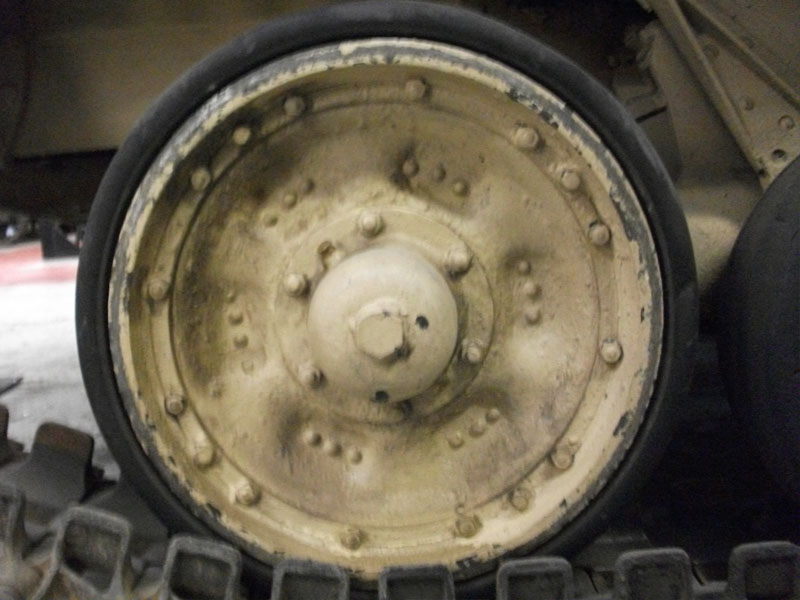
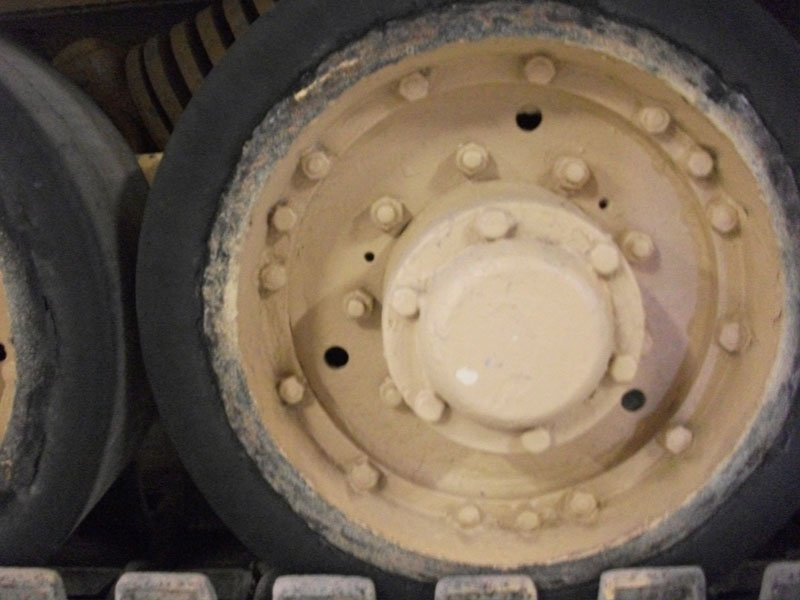
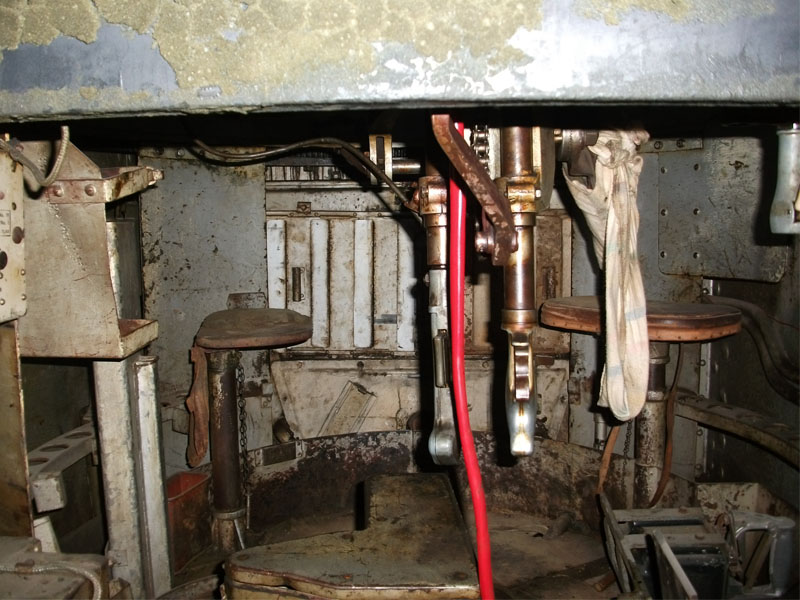
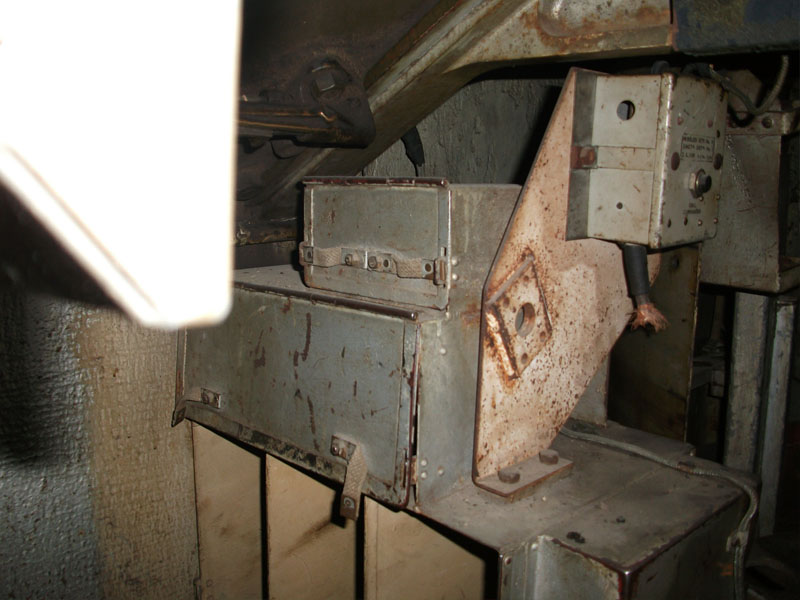
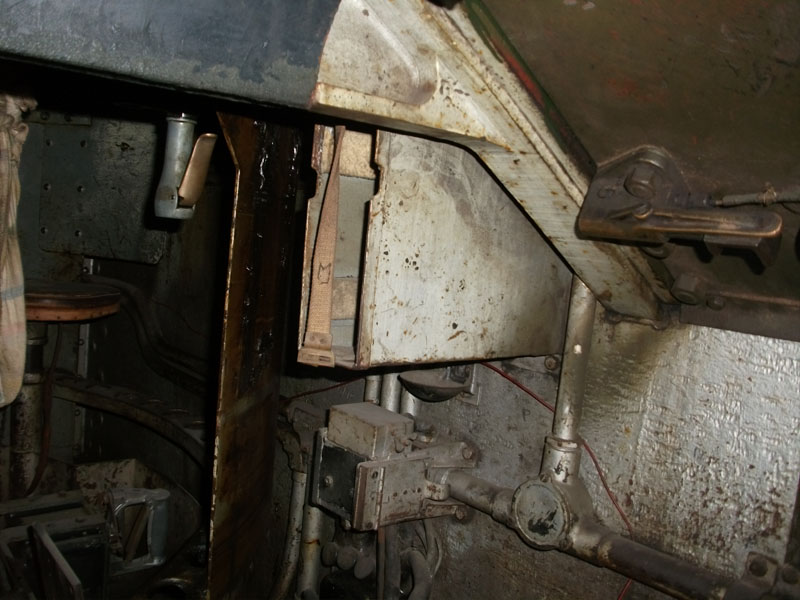
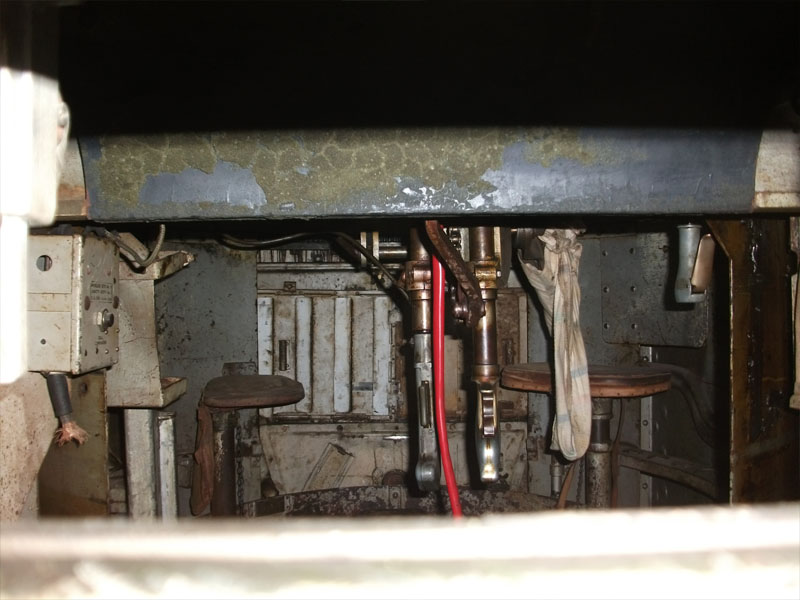
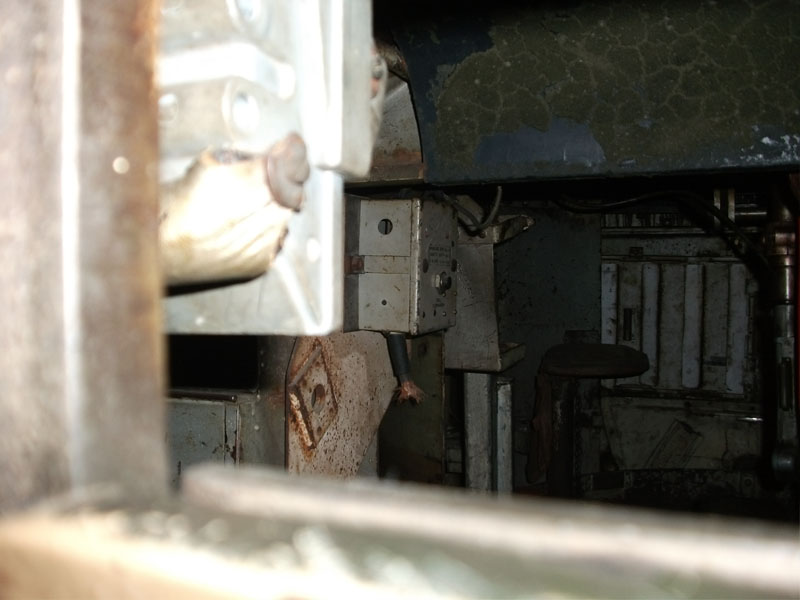
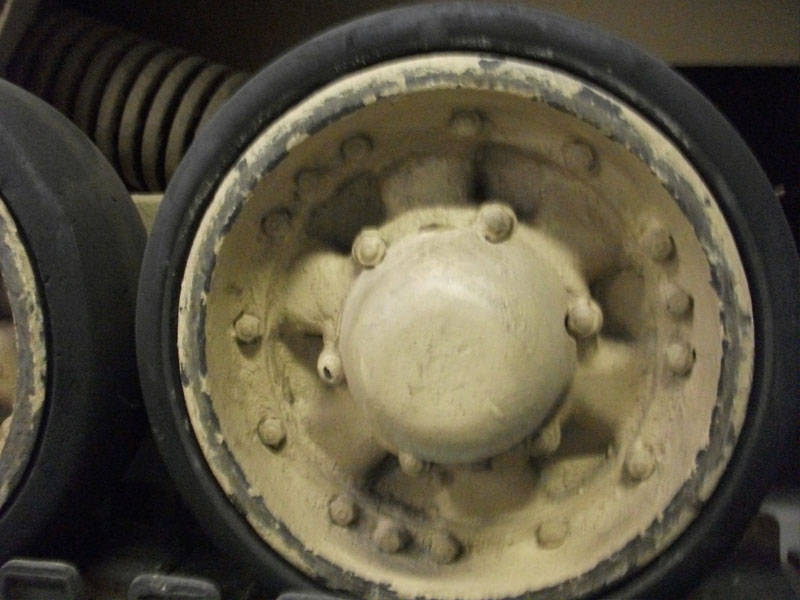
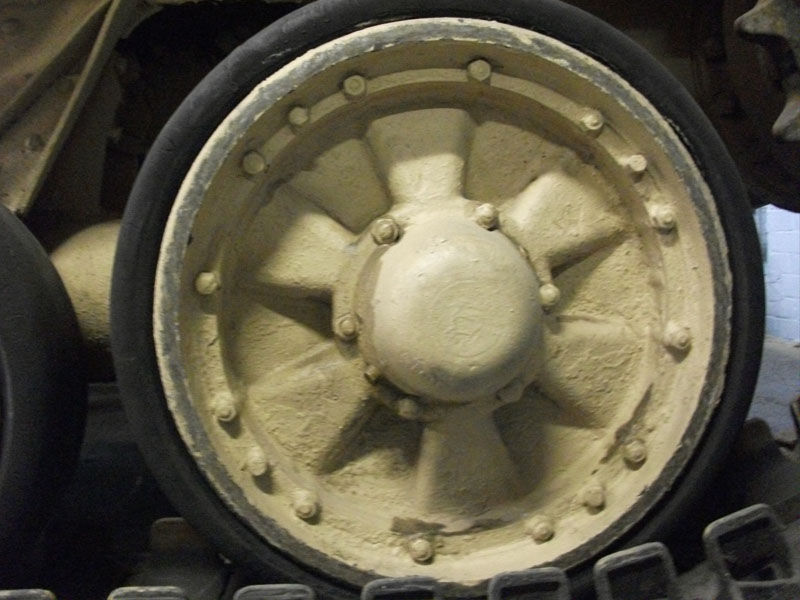
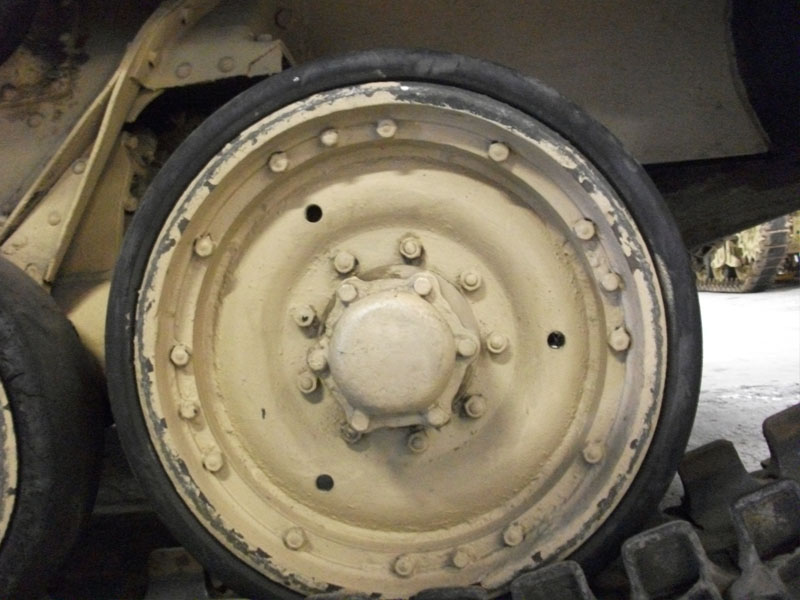
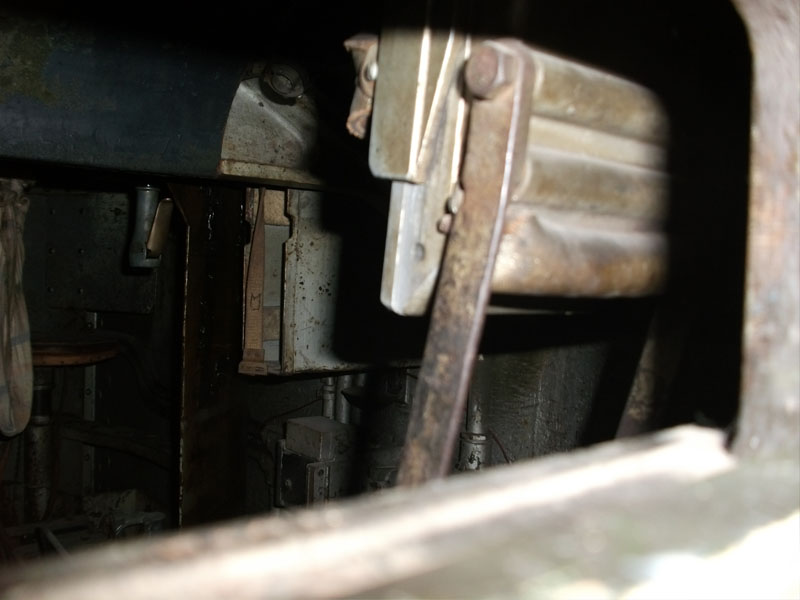
Alan; firstly here are some pictures of various wheel patterns used on the Valentine, and secondly I have some pictures of the interior of a Mk II Valentine taken through the vision slot. Yes I did get my hand stuck for a little while, and yes it was embarrassing.
Posted: Wednesday, August 25, 2010 - 05:29 AM UTC
Hi Darren,
Many thanks and excellent timing as I need to add the seats and I was wondering what the rear firewall looked like.
Much appreciated.
Al
Many thanks and excellent timing as I need to add the seats and I was wondering what the rear firewall looked like.
Much appreciated.
Al
Posted: Wednesday, August 25, 2010 - 05:54 AM UTC
So do you have any idea what those 2 metal arms are that come straight down from the turret but dont seem to connect to anything?
Posted: Wednesday, August 25, 2010 - 05:57 AM UTC
Looking good as usual Alan
Darren - what I want to see is the pic of you with the stuck hand!
Posted: Wednesday, August 25, 2010 - 10:05 AM UTC
Hi Darren,
Don't know. Wasn't the Bovington one use as a training tank, maybe some klind of experimental thingi.
Thanks Neil.
Al
Don't know. Wasn't the Bovington one use as a training tank, maybe some klind of experimental thingi.
Thanks Neil.
Al
Posted: Wednesday, August 25, 2010 - 11:35 AM UTC
Quoted Text
So do you have any idea what those 2 metal arms are that come straight down from the turret but dont seem to connect to anything?
Do you mean the two behind the red cable Darren? if so those are the besa and 2pdr triggers. It looks like the breech has been removed and as the are usually couple to the breech assembly they have dropped down
Chris
Posted: Wednesday, August 25, 2010 - 11:44 AM UTC
I cannot answer that Alan as they seem to be getting more and more Valentines in all the time, I went Monday and a referbed Mk IX is sitting inside. I know they have a number of training and experimental tanks but I would have thought the Valentine being as common as it was it would just as likely have been a gate gaurdian or such.
Posted: Wednesday, August 25, 2010 - 11:49 AM UTC
Thanks Chris I had not even considered that due to the angle iron also coming down from the turret and connecting to them.
Posted: Thursday, August 26, 2010 - 01:56 AM UTC
I think that angle iron shoul be more horizontal Darren, which would skew things
The interesting one for me is the trigger thing on the right hand side of the pic as we look at it, and the left hand side of the turret from the crew's perspective, just under the turret ring. I'm guessing its the turret power traverse release, but I've not seen that type before. Most of the ones I've seen are the rotating D grip/ box one
panzerserra
Goias, Brazil
Joined: March 29, 2002
KitMaker: 730 posts
Armorama: 688 posts
Joined: March 29, 2002
KitMaker: 730 posts
Armorama: 688 posts
Posted: Thursday, August 26, 2010 - 03:07 AM UTC
Great work, Alan !!!!
keep moving....
keep moving....
Posted: Thursday, August 26, 2010 - 10:09 AM UTC
Hi Marcus,
Thanks, the tricky part now is to make the upper ring and drill the holes big enough to accept a few 2pdr rds without the whole thing falling apart, lol, lol. The lower ring just needed holes to accept the point of the shell.
I have about 12 shells left from the M3 Grant build so I wil see if I can achieve this. A little glint of brass would be good. but, the whole thing could fall apart very easily!!
Al
Posted: Thursday, August 26, 2010 - 01:06 PM UTC
I think the best way would be to mark out the ring and drill the holes first before you cut the ring Alan. You should be OK