

Tom,,
I just want to thank you for all the infos you are sharing with us with your built. I am waiting for my M7 and I am following your tips and exchanges with other modellers with keen interest.
Hosted by Darren Baker
My Dragon M7 build

nolifoto

Joined: September 19, 2006
KitMaker: 146 posts
Armorama: 136 posts

Posted: Monday, September 20, 2010 - 11:30 AM UTC

PvtMutt

Joined: July 01, 2006
KitMaker: 614 posts
Armorama: 601 posts
Posted: Monday, September 20, 2010 - 11:31 AM UTC
Alright Tom you're back on the right path again. Good progress I might add too. 
Tony the Mutt
Tony the Mutt

MUNROS
Joined: September 24, 2010
KitMaker: 75 posts
Armorama: 43 posts

Posted: Thursday, November 25, 2010 - 06:42 PM UTC
HI Tom. I'm new to modelling, and just finished a DML FLAK 88. I really like best building. I think my rookie efforts at painting and weathering, have come out well so far, but the focus needed for a complex build, is what i like. During that time i am so involved, none of my problems can haunt me. Was looking to build something open top, Maurder 3, but after seeing your blog the M7 it is. Really, thanks for taking the time to post. It really is not only of great help, but inspirational for less experienced modelers. My 4 builds so far have all been OOB. I'm going to do more on this kit. RONNY.
barkingdigger

#013

Joined: June 20, 2008
KitMaker: 3,981 posts
Armorama: 3,403 posts
Posted: Thursday, November 25, 2010 - 10:16 PM UTC
Ronny,
Glad it inspires you! I am overdue a new progress update - hopefully I can get it posted here this weekend.
Tom
Glad it inspires you! I am overdue a new progress update - hopefully I can get it posted here this weekend.
Tom
barkingdigger
#013
Joined: June 20, 2008
KitMaker: 3,981 posts
Armorama: 3,403 posts
Posted: Wednesday, December 01, 2010 - 11:17 AM UTC
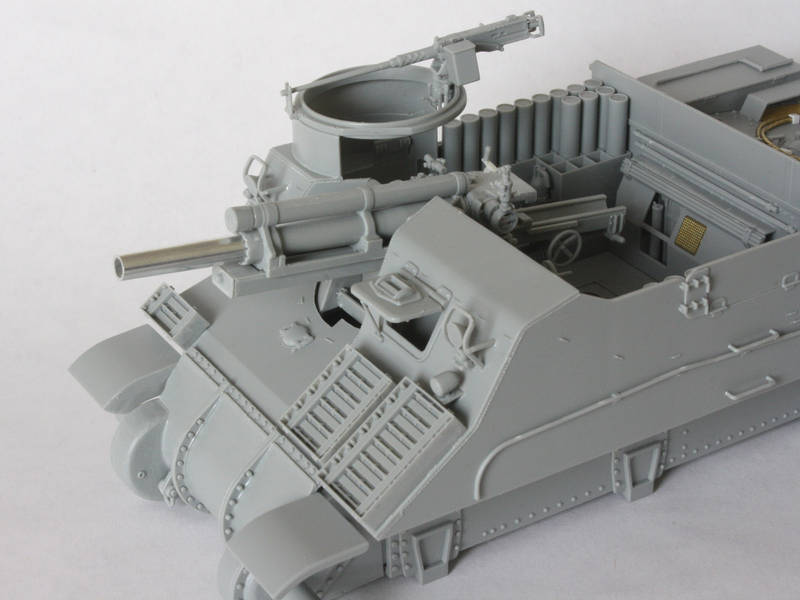
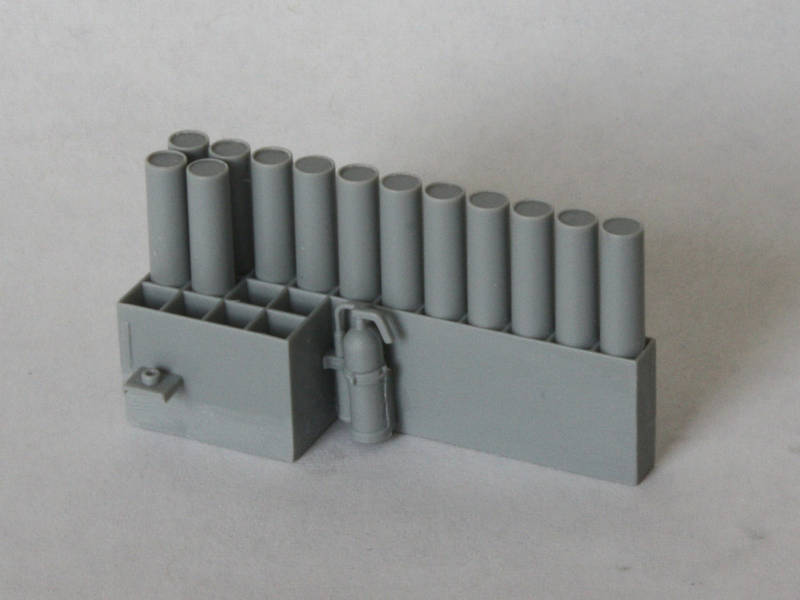
Its been another long wait, but Ive managed some progress finally. I added the kit details to the front and the insides of the hull, and the only deviation from the norm was to glue the fire extinguishers to the ammo bins rather than the sponson floors so I could paint up the bin assemblies separate. I found the fit of the bins was tight so I carefully shaved & filed the back faces to thin them enough to allow a slip-fit. Then I scribed a mark around the edges where they touched the sides so I could mask the area before painting that way I wont need to scrape paint before gluing them in.
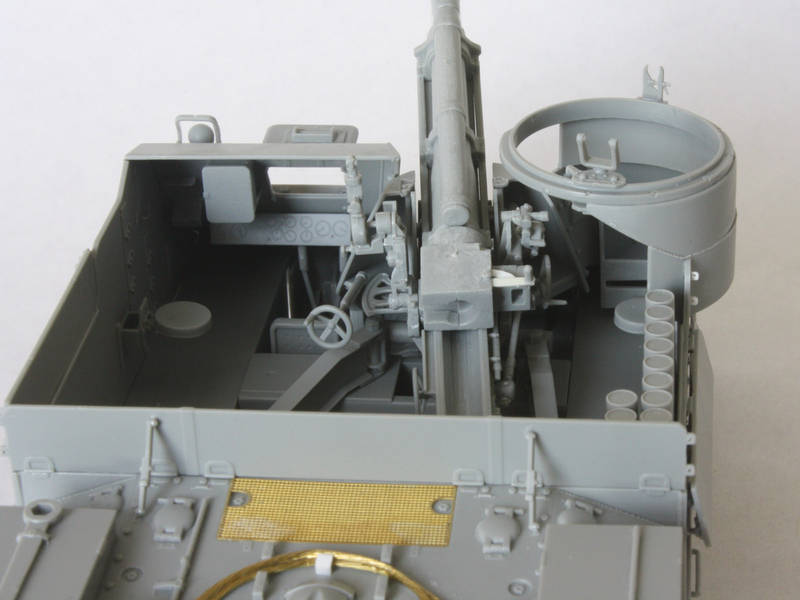
In the pulpit I added the MG travel lock and the skate, but to be different I placed mine far from the MG at the front, ready for action position that most others will use! The MG itself is nice enough, but the cocking handle is way too small so I plan to make a new one from 0.030 rod. Then theres that big unnatural hole in the back of the ammo can that needs filled
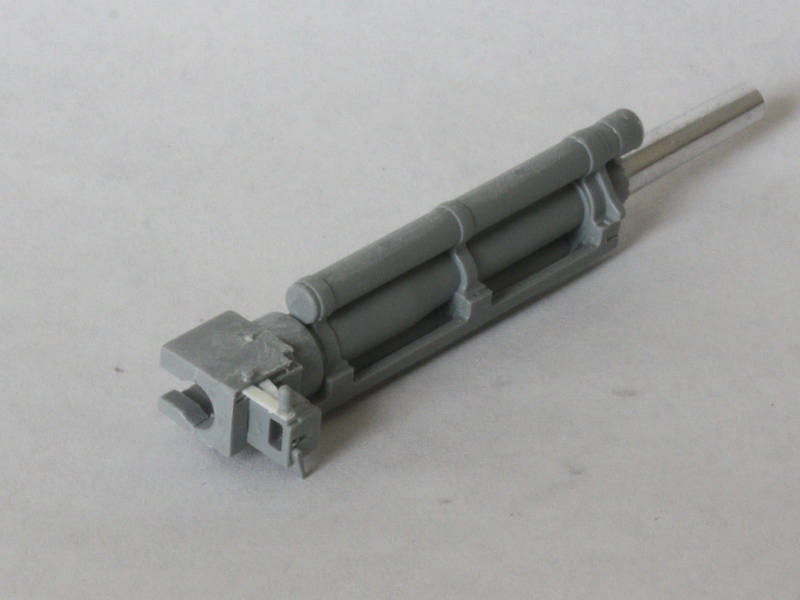
Going back to earlier stages I finally got round to carving off the breach operating handle so I could rebuild it in the open position. First I carefully shaved the upright grip off the top corner of the breach so I could reuse it. I then used a knife blade to scribe open the groove where the levers fit. These were made from evergreen strip, and are very wobbly until the glue sets!
The one thing every M7 needs is lots of stowage, inside and out. Dragon has let us down there, so I need to do something about those missing small-arms. Ive scrounged enough M1 carbines from the Italeri & Tamiya small-arms sets, and plan to make the scabbards from 0.010 plastic strip glued to the guns. I gather there is a PE set out there that can offer the scabbards, but instead Ill make the ten nearly identical side parts the hard way. The scariest part is bringing myself to carve off the nice magazines since stowed guns would have been unloaded. While Im at it the ammo shelf in the pulpit will get a .50cal ammo box, and that empty space opposite the drivers seat will get some rucksacks, again from the spares box.
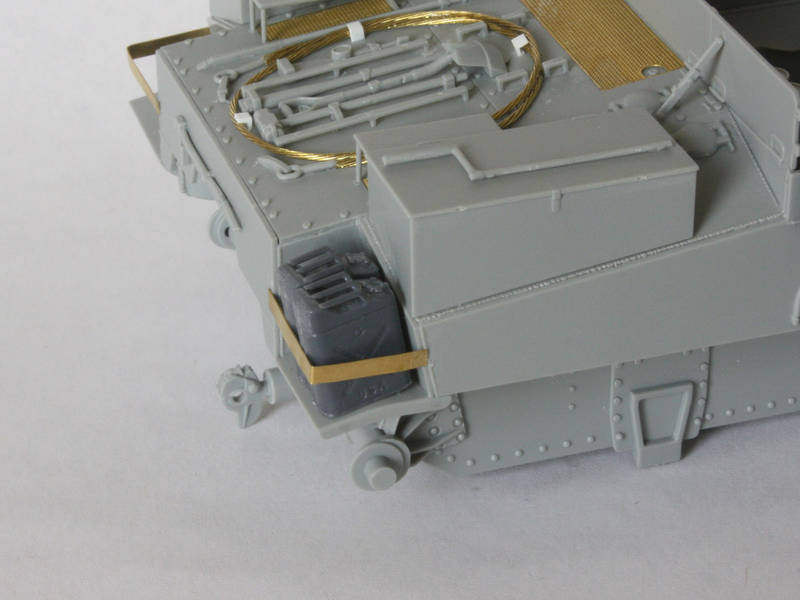
Outside I added simple brackets to hold a couple of fuel cans on each rear fender based on a photo I found on the web. These were recycled from the edges of the kits PE fret, filed smooth before trimming and bending. The cans themselves are from the venerable Italeri fuel cans set well worth its cost. Ill pile the back deck with a mix of home-rolled sleeping bags, tarpaulins, MG ammo, and other junk after basic painting at least thatll cover up the poor tool clasps. Up front I have some spare road wheels (from an Academy kit), an oil drum (from Tamiya), and Ill add more soft stuff as well as some spare track links.
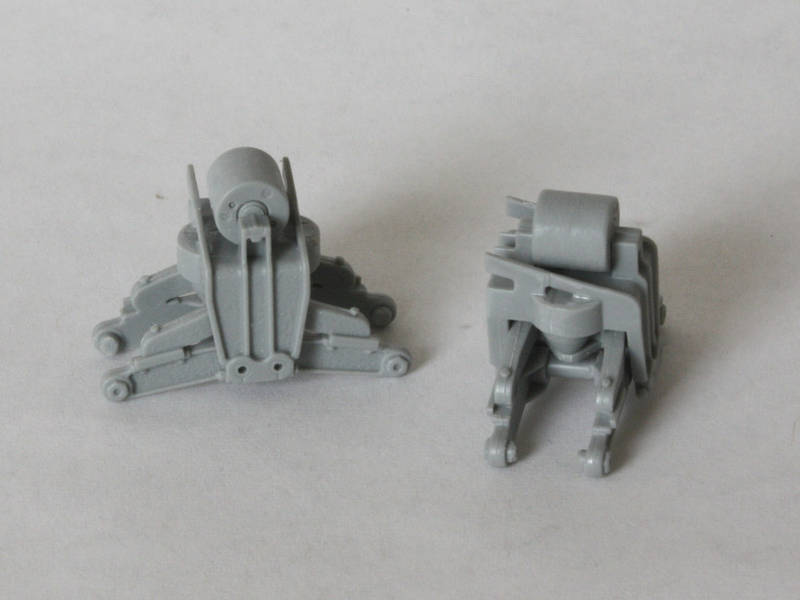
Next up I built the suspension. There are no options here, so if youve ever built a Sherman by Italeri, Academy, or Dragon youll be on familiar ground. The only tricky part here is getting the two halves of the main bogie casting to fit tightly I resorted to clamping them overnight. And as usual I cut the axles down to stubs so I can snap the wheels in later.
Looks like its off to the paint shop next!
Tom
Dangeroo
#023

Joined: March 13, 2009
KitMaker: 2,058 posts
Armorama: 1,656 posts

Posted: Wednesday, December 01, 2010 - 08:05 PM UTC
Still following, Tom. Sure looks like a marked improvement over the Italeri kit... Thanks for the tweaks. I seem to notice some seams on the suspension arms?
Cheers!
Stefan
Cheers!
Stefan
barkingdigger
#013
Joined: June 20, 2008
KitMaker: 3,981 posts
Armorama: 3,403 posts
Posted: Wednesday, December 01, 2010 - 11:53 PM UTC
Stefan,
That's a mighty sharp eye you've got! Yes, there are seams that will be dealt with... (The curse of all the Italeri-inspired copies of the "rocking horse" design!) It's these close-up pictures that give away all the flaws - now I know why actors are so scared of Hi-Definition filming!
Tom
That's a mighty sharp eye you've got! Yes, there are seams that will be dealt with... (The curse of all the Italeri-inspired copies of the "rocking horse" design!) It's these close-up pictures that give away all the flaws - now I know why actors are so scared of Hi-Definition filming!
Tom

Iraqiwildman
Joined: November 24, 2008
KitMaker: 93 posts
Armorama: 81 posts

Posted: Tuesday, May 10, 2011 - 03:07 PM UTC
Is this build still going on?
barkingdigger
#013
Joined: June 20, 2008
KitMaker: 3,981 posts
Armorama: 3,403 posts
Posted: Wednesday, May 11, 2011 - 02:36 AM UTC
Quoted Text
Is this build still going on?
Hi Tim,
It is, but in truth it has sat in a box for several months now while I dealt with other things and worked up the energy to tackle some extra stowage! I'm hoping to get back onto it shortly, but will definitely post more progress when I do.
(Too many campaigns, and not enough time...)
Tom
Joel_W
Joined: December 04, 2010
KitMaker: 11,666 posts
Armorama: 1,143 posts
Posted: Monday, September 26, 2011 - 02:24 AM UTC
Tom, I've been following your build, as I'm also building a M7 for the Strictly Out of the Box campaign, Without your help I would have made several serious building errors.
I know that you've put this build down for a while, but I, along with everyone whose followed it, would sure like to see it finished. Any chance that you'll be picking it up soon?
I know that you've put this build down for a while, but I, along with everyone whose followed it, would sure like to see it finished. Any chance that you'll be picking it up soon?


BLACKWATER

Joined: August 05, 2010
KitMaker: 449 posts
Armorama: 441 posts

Posted: Monday, September 26, 2011 - 03:12 AM UTC
Hi Tom
Thanks to share, M7 will be my next production. I need such detailed information.
Thanks again
Blackwater
Thanks to share, M7 will be my next production. I need such detailed information.
Thanks again
Blackwater

staybolt
Joined: September 21, 2011
KitMaker: 20 posts
Armorama: 12 posts
Posted: Monday, September 26, 2011 - 04:17 AM UTC
Wish I'd have waited for the Dragon offering before I built my M7, but who knew ? I wound up using the Italeri kit and added an Academy transmission and suspension. The main gun was Dragon's towed behind 105mm modified to fit the fighting compartment just like they did on the real ones.
I also added PE from Royal and Eduard plus a resin engine from Verlinden. Put a total of about 500 hours into it. Dragon has saved you a lot of building time with this kit. I wish you all the best and hope you complete it.
Pat.
I also added PE from Royal and Eduard plus a resin engine from Verlinden. Put a total of about 500 hours into it. Dragon has saved you a lot of building time with this kit. I wish you all the best and hope you complete it.
Pat.
barkingdigger
#013
Joined: June 20, 2008
KitMaker: 3,981 posts
Armorama: 3,403 posts
Posted: Monday, September 26, 2011 - 05:24 AM UTC
Hi all,
Yes, I've been dragging my heels on this one!
Looks like I definitely need to get it moving again, with the aim of finishing by Christmas.
Pat, your build sounds like it was a real fun kitbash - are there any photos on line? (I've got both the Italeri and Academy versions still in the stash...)
Tom
Yes, I've been dragging my heels on this one!
Looks like I definitely need to get it moving again, with the aim of finishing by Christmas.
Pat, your build sounds like it was a real fun kitbash - are there any photos on line? (I've got both the Italeri and Academy versions still in the stash...)
Tom
staybolt
Joined: September 21, 2011
KitMaker: 20 posts
Armorama: 12 posts
Posted: Tuesday, September 27, 2011 - 01:32 AM UTC
Tom, here are some shots of my junkyard M7.


Maybe this will help with some detailing ideas. All the best.
Pat.
Maybe this will help with some detailing ideas. All the best.
Pat.
barkingdigger
#013
Joined: June 20, 2008
KitMaker: 3,981 posts
Armorama: 3,403 posts
Posted: Tuesday, September 27, 2011 - 02:07 AM UTC
Pat,
That's some beautiful work you did! I like it a lot. Can't see that the DML kit has anything to offer that would improve on it, other than saving a little surgery time.
Thanks for showing it off!
Regards,
Tom
That's some beautiful work you did! I like it a lot. Can't see that the DML kit has anything to offer that would improve on it, other than saving a little surgery time.
Thanks for showing it off!
Regards,
Tom

Tojo72
Joined: June 06, 2006
KitMaker: 4,691 posts
Armorama: 3,509 posts
Posted: Tuesday, September 27, 2011 - 03:34 AM UTC
Holy crap,that's unbelivable work,truly impressive
staybolt
Joined: September 21, 2011
KitMaker: 20 posts
Armorama: 12 posts
Posted: Tuesday, September 27, 2011 - 03:47 AM UTC
Quoted Text
Pat,
That's some beautiful work you did! I like it a lot. Can't see that the DML kit has anything to offer that would improve on it, other than saving a little surgery time.
Thanks for showing it off!
Regards,
Tom
I think that Dragon kit would have saved a LOT of surgery and pieces parting together. Looking forward to your take on this thing!
Pat.
 |

WEB HOSTING BY


Copyright ©2021 Armorama and Kitmaker Network, a subsidiary of Silver Star Enterprises
All Rights Reserved. Please read our Conditions of Use and Privacy Policy.
All Rights Reserved. Please read our Conditions of Use and Privacy Policy.