_GOTOBOTTOM
Armor/AFV: Braille Scale
1/72 and 1/76 Scale Armor and AFVs.
Hosted by Darren Baker
Monogram T80
tread_geek
Visit this Community
Ontario, Canada
Joined: March 23, 2008
KitMaker: 2,847 posts
Armorama: 2,667 posts
Posted: Friday, September 10, 2010 - 07:22 AM UTC
Greetings all. 
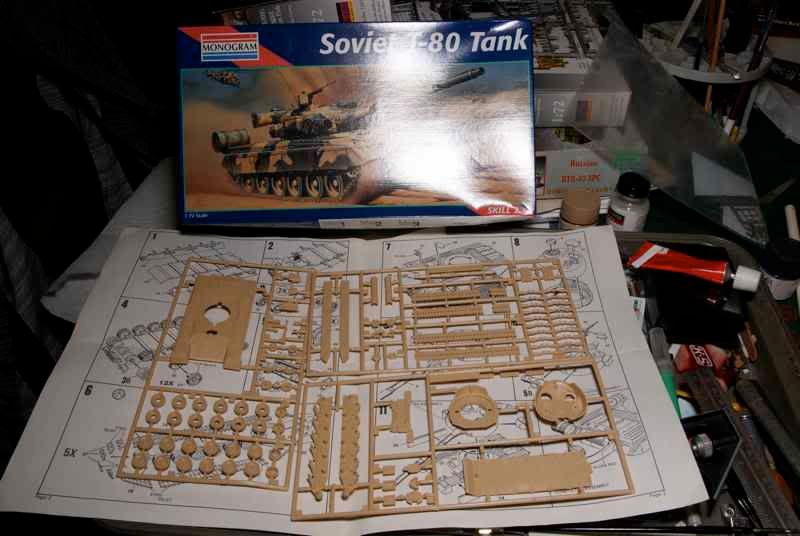
While still working on other projects, Paul (spacewolfdad) and a few others have intrigued me to try a simpler kit for a change. After sifting through the stash, I found that I had a couple of "Monogram T80 Soviet Tank" kits. At about 100 parts this seemed like something simple enough to throw together.

A bit of research has shown that this kit is actually an old Revell T80B. It was released under the Monogram and Matchbox names so you can somewhat guess its age. Unlike the initial Revell offering, these re-boxed kits had a number of parts missing or in actuality, not included. These include the smoke dischargers, additional turret storage and a couple of hull details. Eduard made an upgrade set for this kit but it has been discontinued for some time.

At this point I decided to do it OOTB with minimal detailing (don't hold me to that). 
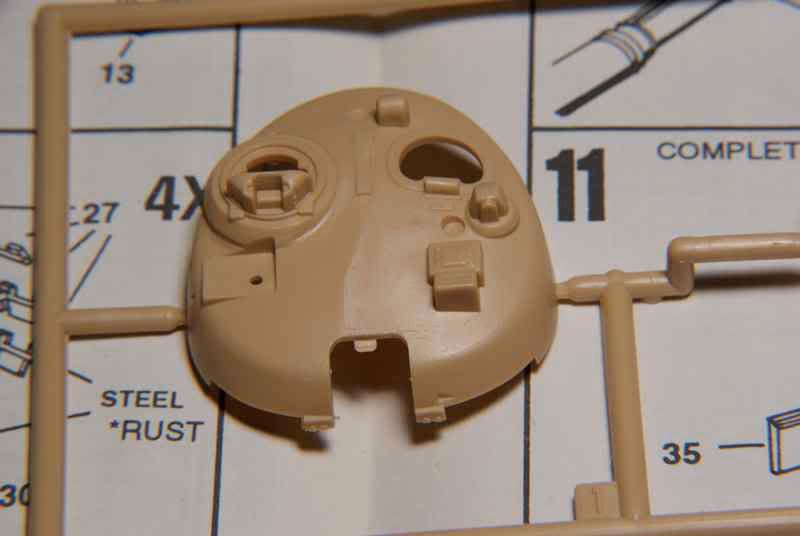
There are some inaccuracies with this kit and the most glaring is the turret rear. As I have two of these kits and want a faster build, I will ignore it in this case.

Here's the target:


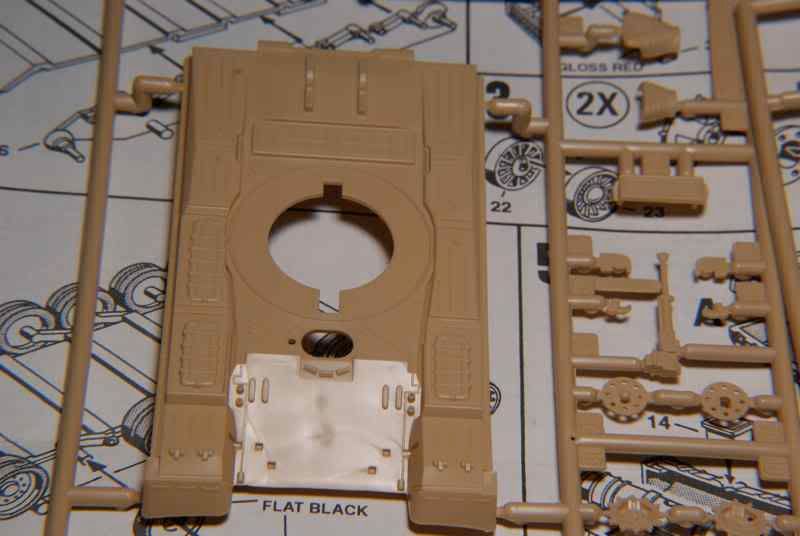
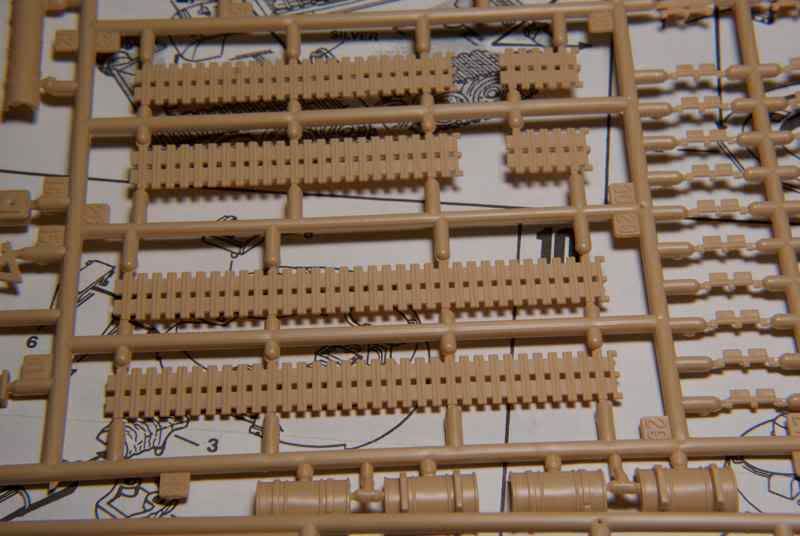
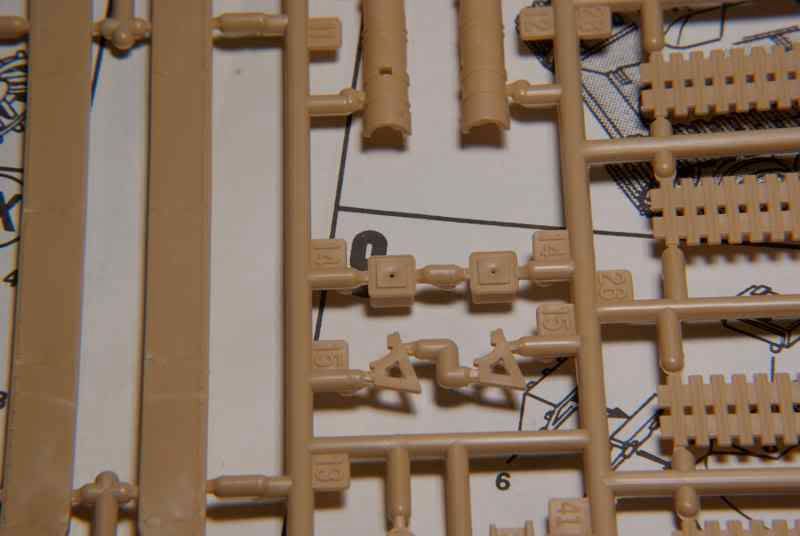
The moulding and details are moderate to fair, there is very little flash and minimal seem lines. Ejector pin marks will be mostly hidden but there are a few sink marks that will need to be taken care of. A few shots of the sprues.


As I mention, I want this to be a fun and somewhat experimental build. I have a few techniques that I'd like to try, especially with airbrush camo.

Thanks for looking!

Cheers,
Jan
Gorizont
Visit this Community
Sachsen, Germany
Joined: November 28, 2007
KitMaker: 1,462 posts
Armorama: 1,289 posts
Posted: Friday, September 10, 2010 - 09:07 AM UTC
Nice to see this kit again.
I also built 4 vehicles from Revell (B-version), 2 x BV-version also one BV again and one from Matchbox (the B-version).
Are together: 7 built and painted and one still in progress. (BV)

Perhaps you can make something good from this nice kit!
Have fun with this one.

geetings...
Soeren
tread_geek
Visit this Community
Ontario, Canada
Joined: March 23, 2008
KitMaker: 2,847 posts
Armorama: 2,667 posts
Posted: Friday, September 10, 2010 - 09:14 AM UTC
Thanks for dropping in and commenting, Soeren. I am glad to hear you are an "expert" on these kits so if you see me do anything wrong, please let me know. And you have built seven! WOW, I guess I have a ways to go to catch up. ;-)

On to the next instalment. The hull tub is made up of four pieces and they aligned fairly well but did need a bit of sanding on the edges. The rear plate needed a bit more work as two rather large ejector points had to be sanded down to achieve an acceptable fit. The plastic is not like the standard Revell brittle kind and is quite easy to work with.


As another modeller mentioned that was doing the Revell version, some of the holes in the drive sprockets will need opening. I used a pin vice to do a pilot hole and then enlarge it with a #11 blade.


The last two pictures of of the bogie wheels. I decided to put the two halves together on the sprue to assist with painting later.


Meanwhile, in between letting parts dry I have been refurbishing the kitchen taps.

Cheers,
Jan
weathering_one
Visit this Community
Ontario, Canada
Joined: April 04, 2009
KitMaker: 458 posts
Armorama: 456 posts
Posted: Friday, September 10, 2010 - 11:59 AM UTC
This one really made me look through my accumulation and I found that I have the Matchbox release (I think it's the same). I bought it from the sale bin when I bought the Challenger. It was only $4.99. There is something that reminds me of the other MB kit that I've made. Looking forward to see what this will turn out like.

Regards,
AJ
Sabot
Joined: December 18, 2001
KitMaker: 12,596 posts
Armorama: 9,071 posts
Posted: Saturday, September 11, 2010 - 02:33 AM UTC

Quoted Text


A bit of research has shown that this kit is actually an old Revell T80B. It was released under the Monogram and Matchbox names so you can somewhat guess its age. Unlike the initial Revell offering, these re-boxed kits had a number of parts missing or in actuality, not included. These include the smoke dischargers, additional turret storage and a couple of hull details. Eduard made an upgrade set for this kit but it has been discontinued for some time.

Cheers,
Jan


Actually, this kit first appeared in the Monogram (US) and Matchbox (Europe) boxes although it was made by Revell of Germany. They had not yet established their name in the 1/72 armor field and were capitalizing on the more common brand names.

I bought and built one first in the late 90s, 1998 if I was to hazard a guess. Benefits to having lived a military life, I can remember where I got a kit so that always narrows down the "when" to a block of 2-3 years.

My kit did not come with all the bits highlighted on the instructions; I believe stowage boxes on the turret and some other turret details are not included. I remember buying the old school Eduard set (my first effort using PE on 1/72 scale armor) that added the missing items.
Gorizont
Visit this Community
Sachsen, Germany
Joined: November 28, 2007
KitMaker: 1,462 posts
Armorama: 1,289 posts
Posted: Saturday, September 11, 2010 - 05:25 AM UTC
No, I´m not an expert of this kit.
Revell´s basekit was easy to build and had a nice result.
I tried to make different colorschemes from a computer-game.

Some years ago, I bought one additional kit including an PE-set from Eduard and tried to build some parts/ replacements made from metal in this small scale.
The result looks good to me, but I stopped this build.

greetings...
Soeren
tread_geek
Visit this Community
Ontario, Canada
Joined: March 23, 2008
KitMaker: 2,847 posts
Armorama: 2,667 posts
Posted: Saturday, September 11, 2010 - 07:55 AM UTC
@AJB - I have the Matchbox Chally 1 and this kit has a bit more pieces to it. As I am discovering, there are a few issues to be dealt with but they don't look too bad.

@Sabot - Revell bought the Matchbox moulds for the whole range of kits and got a ten year lease to use the Matchbox brand name from 1991 up to 2001. At what exact point they introduced the T80, I can't be sure. However, they did release two or three of their kits under the Matchbox and Monogram name during the same time period.

@Soeren - The more you talk about these builds the more I want to see pictures of them. I don't know if I would have bought the PE set but I am sure that I'm going to miss the missing extras.

Not a lot of progress today as far as building is concerned. I started painting the main road wheels in Russian Green and the tracks in a base coat. I dry fitted the upper hull to the lower and the fit is pretty good, except for near the upper rear. That will need to be taken care of.


The fuel drums come in two halves and the centre section of each has a rather pronounced gap. I used a trick suggested by Braille to try to rectify the problem. Basically, you use gap filling CA glue to fill the gap. The one I use takes 15 sec. to cure so you have a bit of working time to smooth things out. Thanks for the tip, Eddy.


I don't know what I'll do with the 12.7 mm machine gun. It's so big that it looks more like a 37 mm. More to follow and thanks to all those that have commented.

Cheers,
Jan
tread_geek
Visit this Community
Ontario, Canada
Joined: March 23, 2008
KitMaker: 2,847 posts
Armorama: 2,667 posts
Posted: Sunday, September 12, 2010 - 08:44 AM UTC
More progress but it's slowly coming together. As I envisioned, the road wheels were quite time consuming to paint the rubber sections. These were done by hand using a 10X0 brush. As luck would have it I ran out of the dark grey that I usually use as a base coat for rubber. I resorted to flat black and it should look okay once it's properly weathered.


I put some turret pieces together and they fit surprisingly well. The red arrows are locations for the missing parts that are not provided with the Monogram or Matchbox kits. I've been studying walk around pictures of the real vehicle and noticed that there is a thick "grab handle" type thing on the left side of the turret. Out came the pin vice and copper wire to fashion one.


I know, I know, I said this was going to be out of box, so sue me! I also managed to dig out some smoke dischargers from the spare parts box but there were only five singles and a couple of six-packs. They seem a bit short compared to the Russian ones but I'll see what I can come up with. I'm still mulling over what to do about the other turret storage.

It appears that Braille's gap filling technique worked quite well and was much faster than using putty. I use the flat black to look for flaws.


Thanks for looking and I hope this little build inspires some of you to give a simple small scale build a try.

Cheers,
T80_tread_geek
Gorizont
Visit this Community
Sachsen, Germany
Joined: November 28, 2007
KitMaker: 1,462 posts
Armorama: 1,289 posts
Posted: Monday, September 13, 2010 - 07:41 AM UTC
Looking good so far!

I´ve built my kits about 10 years ago, so I have only "real photos" of most of them.
I will search and post these images - but beware... these are not very good!
At this age, I was at the beginning of my twenties, and the time of my "good looking kits" was only ca./about 10 years ago from now. (my early 20´s)

I have to say, my first, or one of my first "better built kits" was Dragon´s BMP-2, which I built about 10 years ago. For his kit, I tryed some "dirting" using brown colors.
The small T-80´s doesn´t have this type of "dirting up".


greetings... and don´t
Soeren
tread_geek
Visit this Community
Ontario, Canada
Joined: March 23, 2008
KitMaker: 2,847 posts
Armorama: 2,667 posts
Posted: Monday, September 13, 2010 - 09:37 AM UTC
Hey Soeren, I would never laugh at older builds that anyone has done. No need to post any pictures. I was just curious. It is quite something how as time passes, we look back at our older builds and wonder why we thought they were so good. I know that is my case.

As for this build, I've just about finished the painting of the road wheels. I decided to try my hand at scratch building the missing ammo boxes for the turret sides. I used the kit ones for dimensions and pulled out my chopper.


I've made two bodies by sandwiching two 5 mm X 5 mm pieces of .040" styrene together. Each box will be made up of four parts plus some sort of mounting frame. I originally thought that I'd just make two (one for each side) but I have seen some pictures of tanks with three and four of these.

Cheers,
Jan
ChaosXVI
Visit this Community
Metro Manila, Philippines
Joined: October 24, 2009
KitMaker: 128 posts
Armorama: 126 posts
Posted: Monday, September 13, 2010 - 01:18 PM UTC
Next time you say you're building something out of the box, I'm not going to believe you


I have the same kit but in a Matchbox box. Started it and almost finished building it. I took it to one of the IPMS PHILIPPINES-Bert Anido club meeting around 1999 and a master braille modeler told me all the wrong things about the kit. In the end, he said "paint it well and it'll still come out a good kit." Yeah right. I've not touched the kit eversince. Hope I learn more from your build and one day maybe have the balls to finish my T-80.


Good luck and Mabuhay ka!
PantherF
Visit this Community
Indiana, United States
Joined: June 10, 2005
KitMaker: 6,188 posts
Armorama: 5,960 posts
Posted: Tuesday, September 14, 2010 - 01:24 AM UTC
Looking good so far and making progress too! I really admire you guys with the smaller scales. I remember a few years back having to give it up but always like seeing build threads on them.

Are you going with the boxart paint scheme?


- Jeff
PanzerEd
Visit this Community
Northern Ireland, United Kingdom
Joined: January 14, 2006
KitMaker: 432 posts
Armorama: 402 posts
Posted: Tuesday, September 14, 2010 - 02:00 AM UTC
I use NATO black for road wheels. Seems to come out ok for me once it's weathered.

I might give these smaller scales a try myself. Thanks for the inspiration.

Des
tread_geek
Visit this Community
Ontario, Canada
Joined: March 23, 2008
KitMaker: 2,847 posts
Armorama: 2,667 posts
Posted: Tuesday, September 14, 2010 - 04:27 AM UTC
@ChaosXVI - Hey Toby, long time no see! Like I wrote earlier, it was supposed to be OOTB but...you know how these things go. So, you have a T80 that you haven't finished! Sound like a good reason to join my Braille Battlefield campaign (unabashed plug). Did you ever manage to complete your Challenger 1 from the Matchbox campaign? Glad you could drop in and I hope that this build will inspire you.

@PantherF - Thanks for dropping by and commenting. Small scale presents its own challenges and rewards and is often dismissed; but that I think is changing. As far as painting goes, at this point I am leaning toward the kit scheme. Its colours are not quite accurate so I'll use similar but more authentic variations of them.

@PanzerEd - As I mention above, I normally use Tamiya German Grey for the rubber but had run out when I started the road wheels. Weathering can cover a variety of sins so they should turn out looking okay. As far as trying small scale, might I recommend something simpler than a Dragon kit. They can get a bit intense and require a fair amount of time to complete. Trumpeter makes some nice subjects and Revell is also a good option. On the plus side, with Braille scale you can display six or more vehicles in the space taken up by one 1/35 one. I must say that I am rather surprised at the interest that this build seems to be generating. As of this writing we're almost at 800 hits after only a few days.

Nothing further to report at this point other than I've bored out the main gun and it turned out quite well for a change. I'll work some more on this today and perhaps have an update a bit later.

Cheers,
Jan
Bentham
Visit this Community
United Kingdom
Joined: September 14, 2010
KitMaker: 3 posts
Armorama: 2 posts
Posted: Tuesday, September 14, 2010 - 11:16 AM UTC
It's great to see a build of this kit!

After several years away from modelling this was the kit that got me back into it in the mid 1990s (Matchbox version), so I've got a bit of a soft spot for it I also built the Revell BV and converted another into the later UD version a few years later.

I keep meaning to have another go at one, especially since the B was re-released by Revell with the additional parts that were missing from the turret in the first release.

tread_geek
Visit this Community
Ontario, Canada
Joined: March 23, 2008
KitMaker: 2,847 posts
Armorama: 2,667 posts
Posted: Tuesday, September 14, 2010 - 11:46 AM UTC
John, welcome to Armorama and thank you for posting. As I state earlier, I have had two of these sitting around forever. What I considered a simple and quick build has caued me to try to do it justice. As with all builds it is all about it being a learning experience.

Cheers,
Jan
spacewolfdad
Visit this Community
England - West Midlands, United Kingdom
Joined: May 23, 2010
KitMaker: 642 posts
Armorama: 593 posts
Posted: Tuesday, September 14, 2010 - 10:08 PM UTC
Hi Jan,

OOB? Can a true Brailler ever do a pure OOB? Don't think so myself, there is the compulsion to put the bit of bent wire on as 'it looks better than the moulded handle'. It is at that point the whole thing becomes a monster of extra detailling.

Nice to see you are true to type.

Interesting build and I will be looking forward to seeing how much more you add to this kit, it's looking good so far.

All the best,

Paul
tread_geek
Visit this Community
Ontario, Canada
Joined: March 23, 2008
KitMaker: 2,847 posts
Armorama: 2,667 posts
Posted: Wednesday, September 15, 2010 - 12:16 PM UTC
Thanks for taking the time to comment, Paul. Truly I had seriously thought I could actually do this OOB. Obviously it has become not quite so.

No pictures today but I got a bit of work done on the storage/ammo boxes. They seem to be very close to the kit ones and as they won't be too close to the others, they should look okay. Also worked on a few joints and they are looking good. Hopefully there will be pictures tomorrow.

Cheers,
Jan
tread_geek
Visit this Community
Ontario, Canada
Joined: March 23, 2008
KitMaker: 2,847 posts
Armorama: 2,667 posts
Posted: Saturday, September 18, 2010 - 07:42 AM UTC
I got distracted for a few days so I hardly looked at the T80; except for walk-around pictures. The ammo boxes are coming together but the going is slow do to their rather small size. They won't be perfect but I think they should pass.


In both pictures the left most one is almost complete but still needs the centre raised portion attached. The centre one needs the outside edges rounded and the right is almost ready.

While I was looking at pictures of the actual vehicle I decided that I didn't like the periscope/sight in front of the loaders hatch. Can you say "so much for out of box!" So out came the pin vices, knives and Testors Window Maker. Now I know the purists will say that it's not exactly prototype but I just wanted to enhance it a bit more than the slab it was. I thought about scratching something more accurate but that would defeat the purpose of trying to keep this build simpler.


I tried to get the Window Maker to fill in further to the back of the opening but it's a bit tricky to work with. It's foggy at the moment but when it cures it is crystal clear.

Cheers,
Jan
tread_geek
Visit this Community
Ontario, Canada
Joined: March 23, 2008
KitMaker: 2,847 posts
Armorama: 2,667 posts
Posted: Sunday, September 19, 2010 - 08:13 AM UTC
More progress and another thing to be wary of. The drive sprocket is a three piece affair and it has the absolute minimal of alignment features. Here's how it looks in the instructions.


The idler wheels attach the same way but might not be as critical. With the sprocket it is a must to make sure that the teeth and inner and outer radii align as close as possible or the individual track links won't sit right.

The pieces with one pair started.


The completed sprocket.


The road wheels at least fit nice and snugly and are tight enough to not wobble yet easy enough to slide on. The builder should note that this sprocket issue will probably arise with other Revell based T80's variants, including old Monogram and Matchbox releases. Also, the pin that the sprocket mounts on could have been longer and the fit tighter.

Cheers,
Jan
tread_geek
Visit this Community
Ontario, Canada
Joined: March 23, 2008
KitMaker: 2,847 posts
Armorama: 2,667 posts
Posted: Wednesday, September 22, 2010 - 08:02 AM UTC
In this update I tackled the T80's tracks. I have never been that thrilled with the link and length tracks and this build has done nothing but reinforce my disdain for them.

The instructions show that five single links should be placed around the sprocket. This turned out to be time consuming as the sprocket teeth had to be filed wider and the pivot or link end of each track piece also needed widening to sit properly.


As there is no form of alignment tabs or other indicators this seemed the most logical place to start. With the sprocket not glued to its axle I tried to position track part #30 (6 links) where it would look most appropriate. I marked the sprocket and body and finally glued the former to the axle.

Next up was a single link and the larger run of tracks for the bottom.


This was followed by the upper long run. All track pieces needed some sanding or filing at their joining ends.


I

I put the idler on its axle and then tried dry fitting the remaining track links.
The instructions show that four single links should populate the sprocket.


The dry fitting showed that this would not work. Part #28 (7 links) would not mate correctly with the lower larger track run. What I did was use one single link to act as a transition between the two multilink sections. The remaining single tracks where then attached to the idler.


I cleaned and added the main gun and straightened up the sight that I earlier bore out. The hull was dry fitted.


Hope to get the other side of the suspension done today.

Cheers,
Jan
tread_geek
Visit this Community
Ontario, Canada
Joined: March 23, 2008
KitMaker: 2,847 posts
Armorama: 2,667 posts
Posted: Friday, September 24, 2010 - 08:35 AM UTC
I'm not exactly rushing this build but any progress is good progress. I have finally finished the suspension and am extremely glad about it. Here's an overall shot.


You'll note the observations in my last post about the track links on the left side. I was a bit more careful on the right side and got a bit nicer interlocking fit. One thing that I forgot to mention is that you will need to remove the track guide horns from any links that go around the sprocket. The centre disk of the sprocket interferes with placing them properly.

While the last links were drying (glue followed by paint) I attacked the "sink hole" in the front glacis plate. This appears to be an issue with these older kits and even to newer T80 variants by Revell. A touch of putty and then sanding can rectify it.


With this update, I have attached the side skirts to the upper hull. The right one fit perfectly but the left one required some work. It seems that the front hull there was warped just enough to not allow a proper fit. Running the plastic under hot water and forceable bending allowed me to get things the way they were meant to be. The last picture is of the dry fitting of the completed pieces so far.


Next up should be the finishing of the ammo/storage boxes for the turret and adding the final detail pieces. After that the fun of finishing can begin.

Cheers,
Jan
weathering_one
Visit this Community
Ontario, Canada
Joined: April 04, 2009
KitMaker: 458 posts
Armorama: 456 posts
Posted: Saturday, September 25, 2010 - 09:31 AM UTC
Hey there Jan, I have been watching this with interest. With what you are running into I think that it's safe to say that I think that I'll pass on building mine until my skills improve. I'm glad that you've posted this build and thanks for sharing all the pitfalls of it. Its got me to shy away from these Revell tanks subject for the time being.

Regards,
AJ
tread_geek
Visit this Community
Ontario, Canada
Joined: March 23, 2008
KitMaker: 2,847 posts
Armorama: 2,667 posts
Posted: Sunday, September 26, 2010 - 09:18 AM UTC
AJ, thanks for looking and especially for posting. I am glad to help people but at times some acknowledgement of what I am doing is greatly appreciated. I must admit that these kits do have their issues. Don't force yourself to try anything that you aren't comfortable with.

More little pieces adding to complete the puzzle. I started on the snorkel storage tube and it raised its own problems. The two halves refused to mate properly when using the alignment pins. I had to sand them down to get them to come together better. It still required some careful filing with jewellers files to get out the rough spots. At least the brackets that attach to the turret weren't too much trouble.


In this picture I added the only turret storage box that comes with this and the Matchbox versions.


Finally, the T80 with one of my home made ammo boxes placed by the turret and the other two lying near by. I still need a bit of work to do on them but they don't look too bad. Not sure how I'll mount them on the model. The real ones appear to mounted on steel bars that are welded to the turret side. At this small scale I doubt they would be too visible so I may forego that route.


Cheers,
Jan T 80B
majjanelson
Visit this Community
South Carolina, United States
Joined: December 14, 2006
KitMaker: 1,355 posts
Armorama: 979 posts
Posted: Sunday, September 26, 2010 - 12:32 PM UTC
Jan,

Your T-80 is coming along nicely! It's so difficult to resist the urge to fix or add something if you know the model needsit.

Have you seen this T-72B by Alex Clark? I realize this is the newer, much better T-72 kit, but I just wanted you to see what can be done with the one of the Revell kits. Of course, Alex did just a little bit more than build it OOTB!
 _GOTOTOP