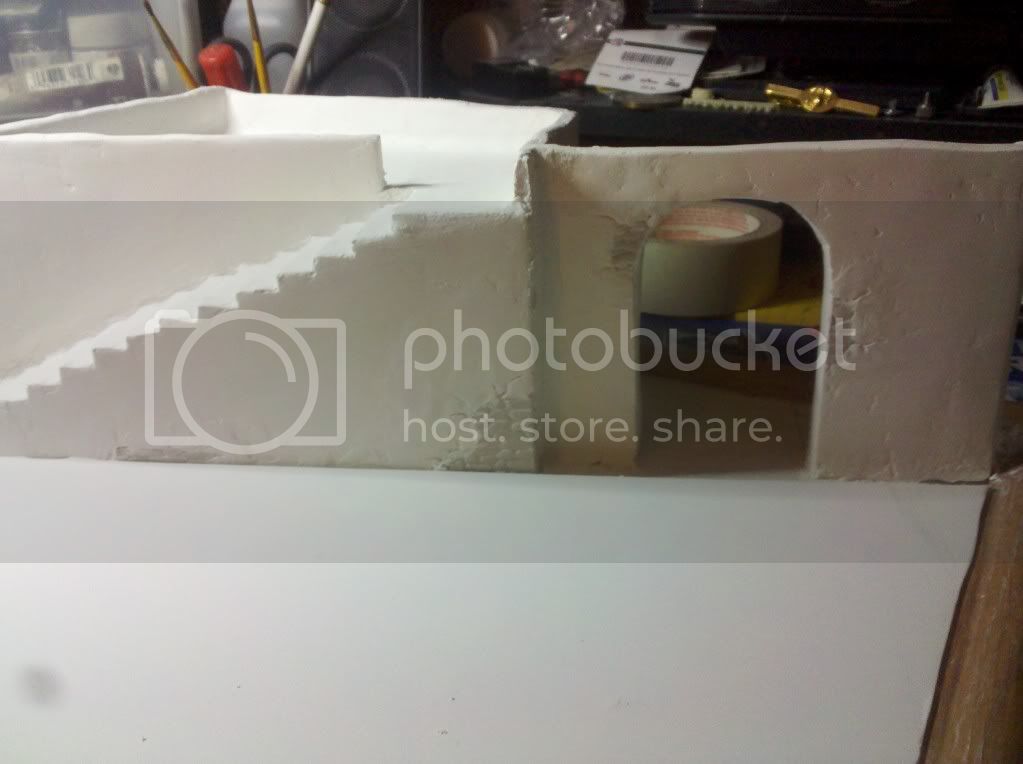
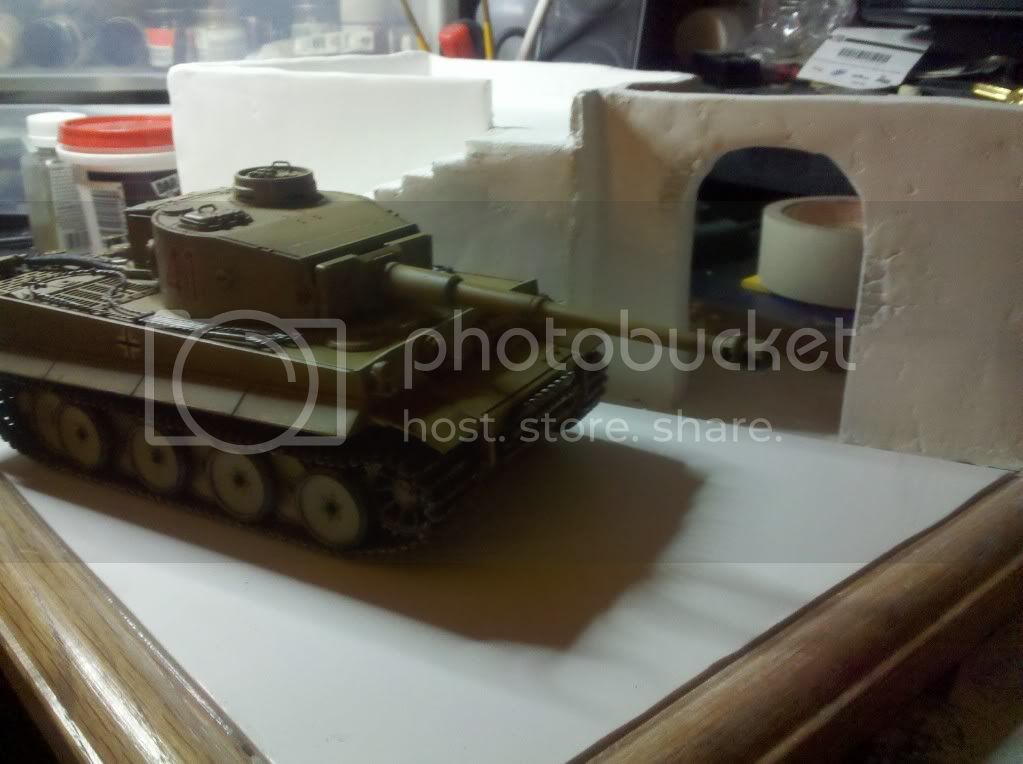
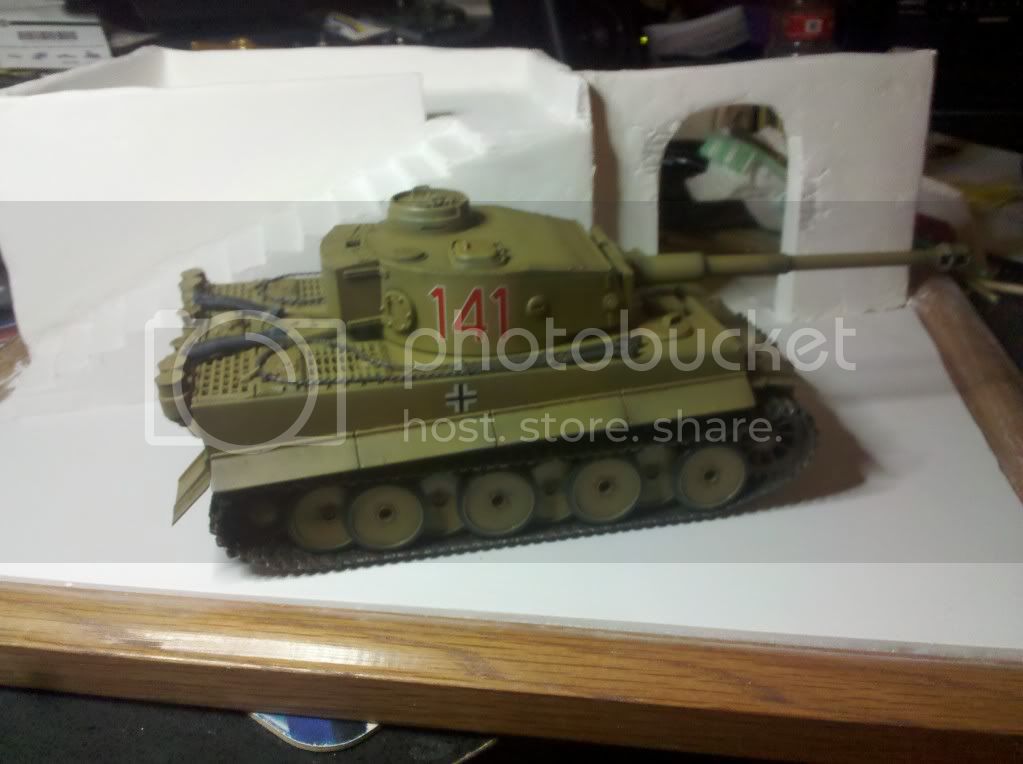
New York, United States
Joined: March 08, 2010
KitMaker: 3,662 posts
Armorama: 3,078 posts
Posted: Friday, March 18, 2011 - 01:00 AM UTC
Quoted Text
Sal: Interesting, is that just the glue I'm looking at or is it the glue with the plastic?
Yes that is a combination of glue and plastic. I'll try and get you a better picture over the weekend just worked a 19 hr shift and need to get some rest, I have a pistol match tonight before work


Active Campaigns on the bench:
Operation Fall Gelb - Pz.Kpfw. IV Ausf. C
Engineering the Future - M-26 Recovery Vehicle
115 Campaigns completed
Wisconsin, United States
Joined: July 29, 2010
KitMaker: 662 posts
Armorama: 457 posts
Posted: Friday, March 18, 2011 - 03:01 AM UTC
Quoted Text
Excellent, that's pretty standard housing for at least North Africa and is still in use today so you are in luck. Just google North African house or something along that line and you will be good to go.
Just fyi, Miniart's North African House 35540 is a good reference to look at for ideas.
ps: Correct me if I'm wrong guys, I don't want to steer our friend in the wrong direction here.
ive done multiple searches for north africa, north africa house, etc etc. not pulling up much. seems to bring up the el alamein memorial alot though.
http://mymilitaryminiatureworld.blogspot.com/
Wisconsin, United States
Joined: July 29, 2010
KitMaker: 662 posts
Armorama: 457 posts
Posted: Friday, March 18, 2011 - 03:03 AM UTC
Quoted Text
This is the only picture I have of North Africa, small but rather clear. These houses had a lot of arches, and the houses used to be painted white to reflect the heat.

Hope this is of some help,
thank you. this should give me a good base. i may have to use some artisitic licensing if i cant find any more. but this one will at least get me started
http://mymilitaryminiatureworld.blogspot.com/
Nordrhein-Westfalen, Germany
Joined: October 22, 2008
KitMaker: 1,280 posts
Armorama: 1,015 posts
Posted: Friday, March 18, 2011 - 03:26 PM UTC
I have selected the kits I will use and started cutting:


I will likely add some more infantry (Dragons MG troop) to support the gun (and populate the upper floor
Free men are their own masters. If you are not - you are a slave.
Nordrhein-Westfalen, Germany
Joined: October 22, 2008
KitMaker: 1,280 posts
Armorama: 1,015 posts
Posted: Friday, March 18, 2011 - 03:34 PM UTC
Free men are their own masters. If you are not - you are a slave.
Texas, United States
Joined: June 29, 2010
KitMaker: 5,854 posts
Armorama: 4,817 posts
Posted: Friday, March 18, 2011 - 06:03 PM UTC
Quoted Text
Quoted Text
Excellent, that's pretty standard housing for at least North Africa and is still in use today so you are in luck. Just google North African house or something along that line and you will be good to go.
Just fyi, Miniart's North African House 35540 is a good reference to look at for ideas.
ps: Correct me if I'm wrong guys, I don't want to steer our friend in the wrong direction here.
ive done multiple searches for north africa, north africa house, etc etc. not pulling up much. seems to bring up the el alamein memorial alot though.
Try this out
North African House image results Dublin, Ireland
Joined: November 27, 2004
KitMaker: 6,048 posts
Armorama: 4,619 posts
Posted: Friday, March 18, 2011 - 11:13 PM UTC
@Bill- great layout
@Sal- good work so far
@jesse I like what you have going there
@mmeier good choice- one of my favourite Miniart buildings
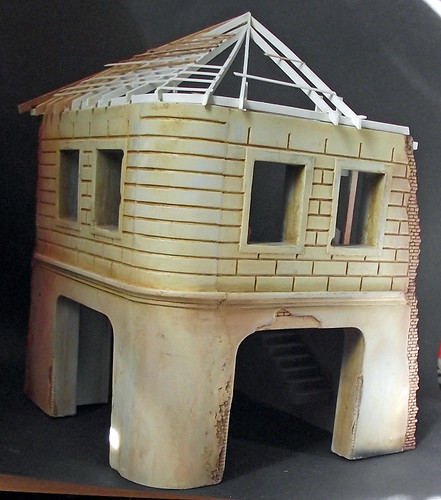
I hope to get some work done myself today
Pat
work to become not to acquire
Queensland, Australia
Joined: January 17, 2006
KitMaker: 752 posts
Armorama: 569 posts
Posted: Saturday, March 19, 2011 - 12:08 AM UTC
those miniart buildings look awesome!
i have the dioramas plus bagdad street, and am going to use this with some modern us figures.
Texas, United States
Joined: June 29, 2010
KitMaker: 5,854 posts
Armorama: 4,817 posts
Posted: Saturday, March 19, 2011 - 03:00 AM UTC
Pat: That is looking awesome!
Matt: I have that one too, and it's a great choice. One of their best

Hawaii, United States
Joined: August 27, 2006
KitMaker: 1,646 posts
Armorama: 1,557 posts
Posted: Saturday, March 19, 2011 - 02:39 PM UTC
Okay, I've joined the fray on this one too, although I'm bordering on campaign overload. I plan to set mine on the outskirts of Baghdad during the initial OIF push in 2003.
I saw this as a great opportunity to park my SAM-6 for the AA campaign as an abandoned piece of equipment that a US vehicle has come up on. For the US, I'm thinking either a LAV-25 or a Bradley, depending on what strikes my fancy when the time comes and how my wallet feels about acquiring them. I will also do some figures.
This will be my first foray into a dio, although I have another one in mind that might start first. It will also be my first go at 1/35th figures, so it should be fun. I will scratch the base and a garden wall / gate for sure, and might scratch some the shops, but might also get the Iraqi Street kit from Dioramas Plus. Will have to see how it develops.
Happy Modelling, -zon

"Certainty of death.
Small chance of sucess.
What are we waiting for?"
-Gimli, Return of the King.
Nordrhein-Westfalen, Germany
Joined: October 22, 2008
KitMaker: 1,280 posts
Armorama: 1,015 posts
Posted: Saturday, March 19, 2011 - 03:00 PM UTC
Since in another thread someone said it would be nice if we provide some detail for builds:
+ Miniart Building "Ruined Garage"
Brush painted with Valleyo Red and IIRC Khaki (for the concrete), Old/New Wood and Gunmetal (for the roof tin). Light overspray with thinned "Tamiya Nato Black". Later I did a light wash with black oil heavily thinned.
+ Rubble and floor tiles
I used an air hardening clay. Rolled it out thin then marked the tiles with ruler and knive. I did not cut all the way, rather made a minor groove. Then layed the tiles and fixed them with IIRC white glue. The clay shrinks a bit producing the bigger seams. Rubble was done the same way but broken up into smaller parts. When the tiles where dry i rubbed some Celluclay over them, allowing it to settle in the seams
After drying it was painted as above.
+ Models used
Tamiya Jagdpanther/late with Eduard Etched parts
Zveda (also boxed by Revell) L4500 Maultier OOB
Academy "German tank loading crew"
Tamiya "German fuel drums"
Masterbox "Germans with fuel drums"
IIRC the "Kettenhund" is from Masterbox "Checkpoint"
Vehicles are sprayed with Tamiya Paints, the camo on the Maultier is hand-painted Valleyo
Free men are their own masters. If you are not - you are a slave.
Nordrhein-Westfalen, Germany
Joined: October 22, 2008
KitMaker: 1,280 posts
Armorama: 1,015 posts
Posted: Saturday, March 19, 2011 - 03:05 PM UTC
@Pat: Wow. Looks good. Never envisioned the building with a "normal" roof but it fits
@Bill: That church looks great. And like a lot of work.
@Jesse: The building matches what can be seen on the one photo WITH building in Piecalcewith "Krieg der Panzer". Strange that there are so few pictures taken in Afrikan towns but tons taken in Russia etc. One would imagine towns (and their water) being more important (and more often photographed) in Afrika
Free men are their own masters. If you are not - you are a slave.
Dublin, Ireland
Joined: November 27, 2004
KitMaker: 6,048 posts
Armorama: 4,619 posts
Posted: Monday, March 21, 2011 - 06:39 AM UTC
Okay, this is going more slowly than I had hoped due to real life interference

here is the facade of the Factory building made from several Form-u-lay castings joined together.
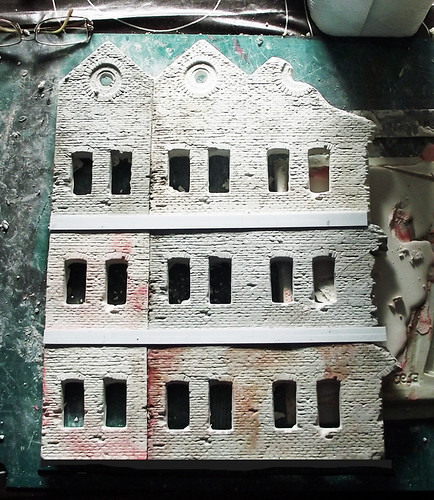
Looking at the photo I see I have to work on filling in some missing bricks and knocking out others to disguise the repeat pattern of the mould
Pat
work to become not to acquire
Wisconsin, United States
Joined: July 29, 2010
KitMaker: 662 posts
Armorama: 457 posts
Posted: Monday, March 21, 2011 - 02:33 PM UTC
to go along with some of the photos, ive decided to try to incorporate some of the arches that would commonly be seen.
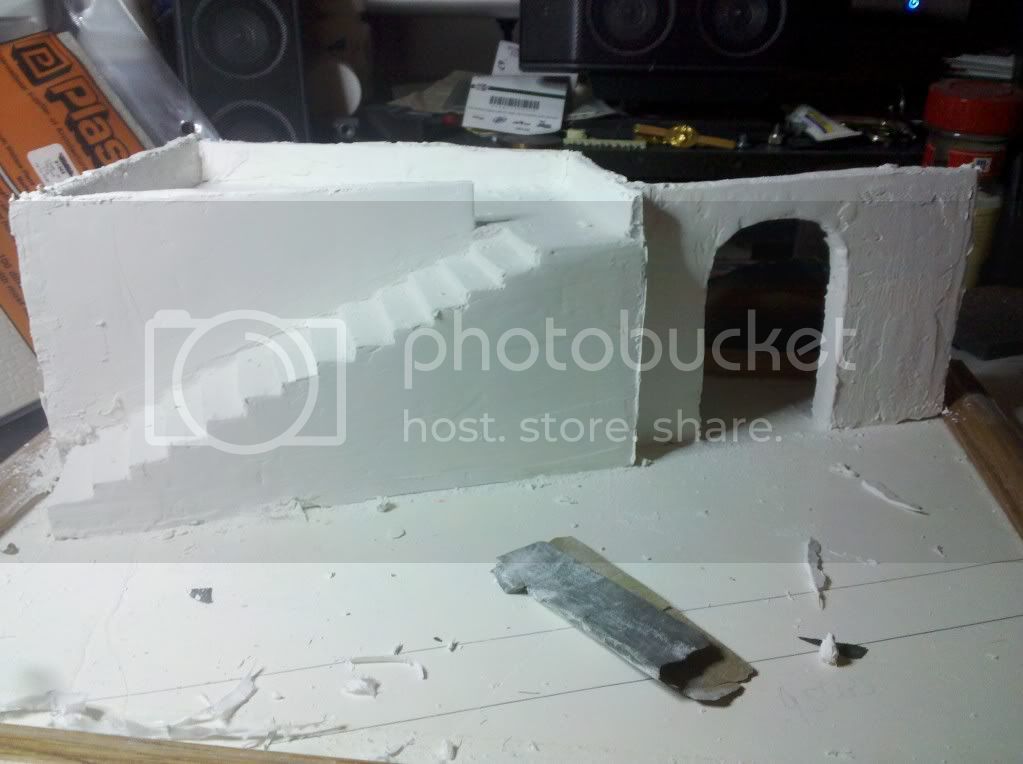
http://mymilitaryminiatureworld.blogspot.com/
New York, United States
Joined: March 08, 2010
KitMaker: 3,662 posts
Armorama: 3,078 posts
Posted: Monday, March 21, 2011 - 03:02 PM UTC
Pat, a 3 story building

Nice you gonna add a basement too

Jesse, looking good I like the dessert village theme

Here is where I'm at main building is complete minus the upper roof
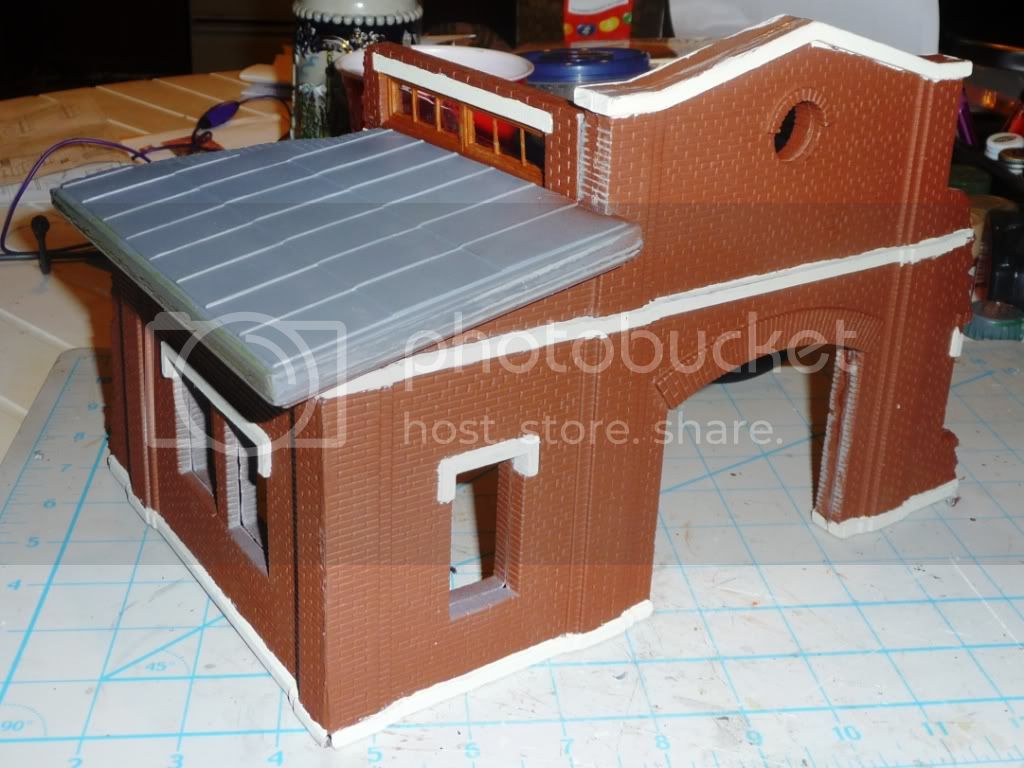
Started to get some paint on it and on the window frames
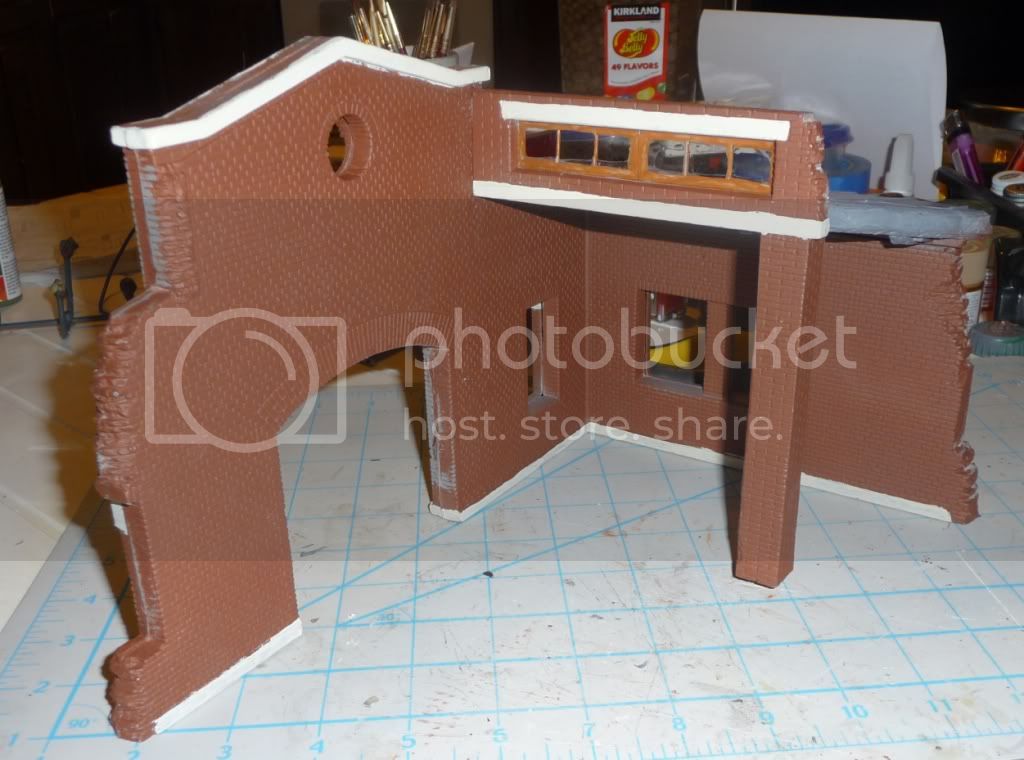
The equipment/tools are assembled and primed they just need some paint too


Active Campaigns on the bench:
Operation Fall Gelb - Pz.Kpfw. IV Ausf. C
Engineering the Future - M-26 Recovery Vehicle
115 Campaigns completed
Lebanon
Joined: December 20, 2010
KitMaker: 568 posts
Armorama: 549 posts
Posted: Tuesday, March 22, 2011 - 12:20 AM UTC
Pat: that is a huge building, is it 1/35th scale?
Found this picture, might be of some help to you:

Jesse: I like how your diorama is coming along; the arch has made it even more interesting.
Sal: I think that the window frames would be metallic, wood is usually used in houses.
Here is my progress on my diorama. This is building “A”, It is the largest of the four that I will be making. I cut the frame out from some thick cardboard, used the “stirring” stick that you find at coffee shops for the wooden supports and plaster. I know it’s a little out of scale, but I am not planning to rebuild it. I have made adjustments to my other plans though.

I hope to have part of building “c” ready soon, but progress is always slow!
Advice and comments are always welcomed!
Regards,
Wisconsin, United States
Joined: July 29, 2010
KitMaker: 662 posts
Armorama: 457 posts
Posted: Thursday, March 24, 2011 - 03:56 PM UTC
http://mymilitaryminiatureworld.blogspot.com/
Lebanon
Joined: December 20, 2010
KitMaker: 568 posts
Armorama: 549 posts
Posted: Saturday, March 26, 2011 - 06:50 AM UTC
Hi again guys,
This is my progress on building “c” from the last few days. I finished sticking the wood to the building outline and painted it. Tomorrow I will be adding the plaster to the walls.


Dublin, Ireland
Joined: November 27, 2004
KitMaker: 6,048 posts
Armorama: 4,619 posts
Posted: Saturday, March 26, 2011 - 07:38 AM UTC
Interesting technique Vladimir. that looks like regular cardboard, won't it soak up water from the plaster and distort?
The lattice work on the lego block looks interesting what's that going to be?
Pat
work to become not to acquire
Lebanon
Joined: December 20, 2010
KitMaker: 568 posts
Armorama: 549 posts
Posted: Saturday, March 26, 2011 - 08:20 AM UTC
Hi Pat,
I have tested this on scrap pieces of cardboard and it seems to work well! (Although if I put a large amount it starts to spoil and bend) I built the first building using this method.
The up side to using this method is that you just need a thin layer of plaster so it dries rather quickly. Unfortunately I am restricted by the lack of material here. A good method if you have a low budget or a small amount of materials to work with.
The wood on the Lego piece is what I hope will be the window for the store/café on the lower floor, but I am out of wood!
This was my reference, took it when I visited “l'alsace” the region of France on the German border:

Regards,
Lebanon
Joined: December 20, 2010
KitMaker: 568 posts
Armorama: 549 posts
Posted: Sunday, March 27, 2011 - 09:03 AM UTC
Here is my progress:
Added the plaster on the exterior of the building and painted part of the lower floor.


Regards,
Dublin, Ireland
Joined: November 27, 2004
KitMaker: 6,048 posts
Armorama: 4,619 posts
Posted: Sunday, March 27, 2011 - 11:02 AM UTC
Great work Vlad I remember I tried a timber frame house myself before inspired by but never finished it. I used fibreboard and for the timber -coffee stirrers, twigs and pieces cut from a picture frame just to vary the thickness. I fill the gaps with acrylic modelling paste mixed with sand- never finished it- I think I sat on it by mistake one day

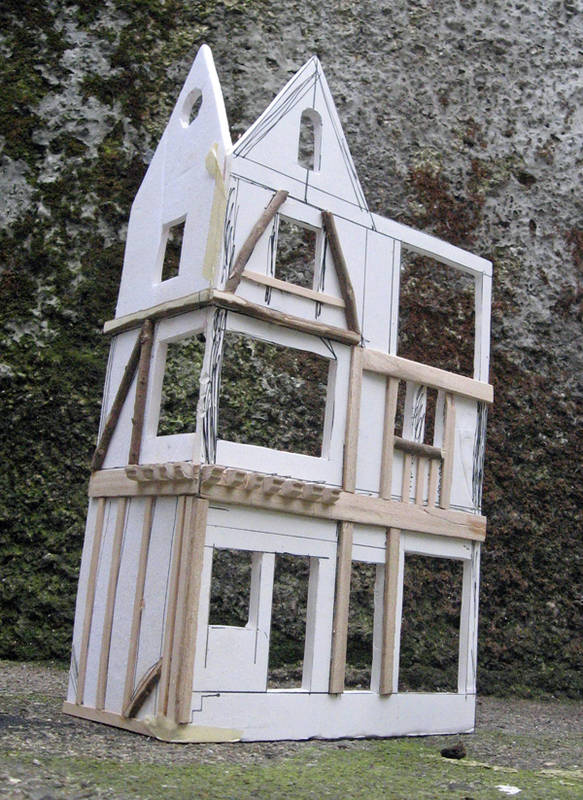
Pat
work to become not to acquire
Dublin, Ireland
Joined: November 27, 2004
KitMaker: 6,048 posts
Armorama: 4,619 posts
Posted: Sunday, March 27, 2011 - 11:17 AM UTC
@jesse this might be a bit late but I came across it while looking for something else - it's Carlos Elias (Blokhaus) take on a
North African house Pat
work to become not to acquire
New York, United States
Joined: March 08, 2010
KitMaker: 3,662 posts
Armorama: 3,078 posts
Posted: Monday, March 28, 2011 - 04:03 PM UTC
Nice work here guys, here is where I'm at. I cut a 1/4 inch piece of plywood 16 x13 inches for the base and will glue the poster board down as a sidewalk and floor on the inside of the garage
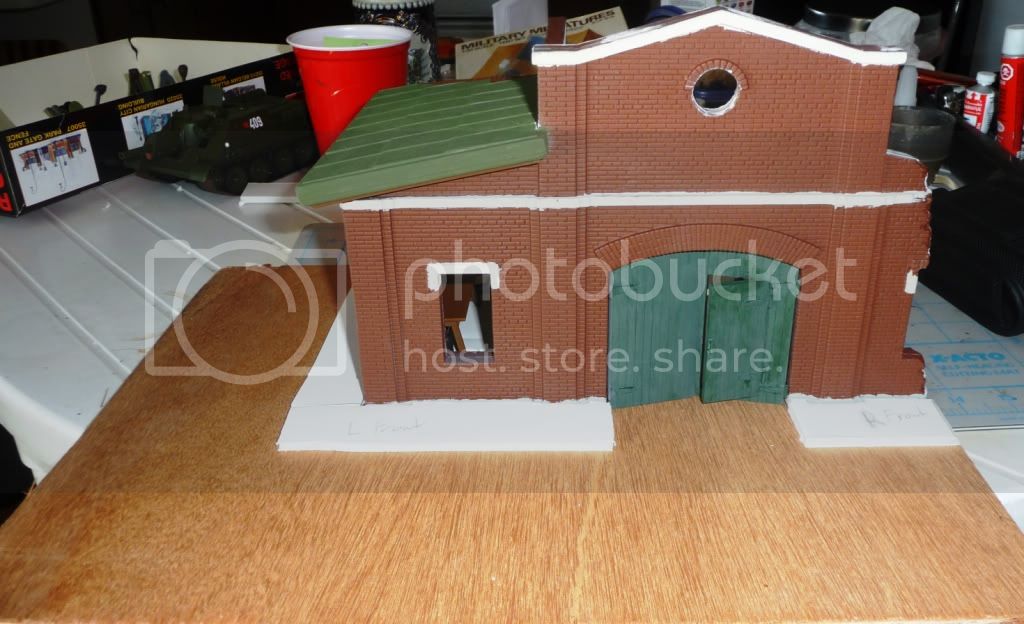
The seam lines in the floor are impressions in the poster board and this show some of the tools and equipment that will be on the inside
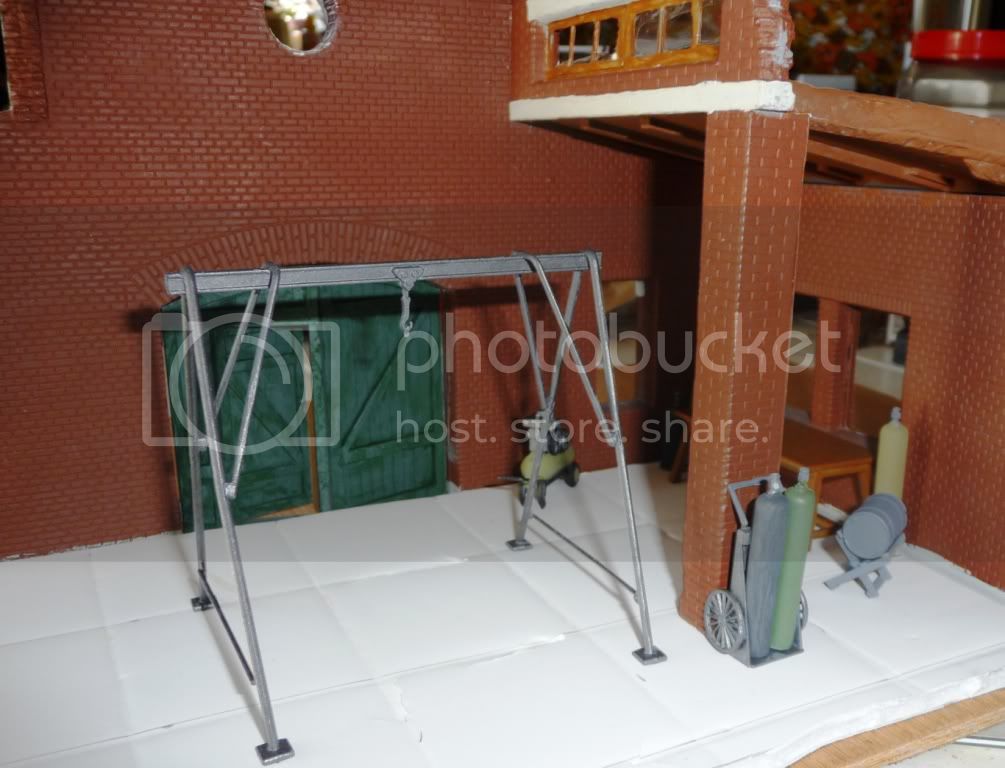
No work tomorrow so I should get some more done


Active Campaigns on the bench:
Operation Fall Gelb - Pz.Kpfw. IV Ausf. C
Engineering the Future - M-26 Recovery Vehicle
115 Campaigns completed
Lebanon
Joined: December 20, 2010
KitMaker: 568 posts
Armorama: 549 posts
Posted: Monday, March 28, 2011 - 08:42 PM UTC
@Pat: It’s a nice building you should try to finish it! I am also going to use the same method to make the balcony on my forth building.
@Sal: Great progress! I love that set from Italeri.
Very little progress on my side, trying to work on the floor now but I am out of wood!


