Campaigns
Where Armorama group builds can be discussed, organized, and updates posted.
The Desert Fox
vonHengest
Visit this Community
Texas, United States
Joined: June 29, 2010
KitMaker: 5,854 posts
Armorama: 4,817 posts
Posted: Tuesday, March 01, 2011 - 05:37 AM UTC

Quoted Text

hi there!
may i still join?
i was planning to do a dio based in the desert and involving a destroyed Italian Semovente and a PkwIII.
the semovente is,alas, already finshed, so it will not qualify for the gb, but i have still to start on the panzer III...
thank you
ciao
edo


Yes, you may join at any time during the operational duration of the campaign. Welcome to the Desert Fox, and great diorama idea!

Great photos Ralph and Erich! And good points as well, the desert certainly offers some interesting effects and I'm really looking forward to your dioramas

Sal: Looking good!
Bigrip74
Visit this Community
Texas, United States
Joined: February 22, 2008
KitMaker: 5,026 posts
Armorama: 1,604 posts
Posted: Tuesday, March 01, 2011 - 06:06 AM UTC
Sal, that would be unsporting and a bit of overkill dont you think . What a/b are you using the color went on nice and even.

Bob
spearhead21pz
Visit this Community
California, United States
Joined: May 11, 2009
KitMaker: 128 posts
Armorama: 127 posts
Posted: Tuesday, March 01, 2011 - 03:59 PM UTC
Edo; Welcome to the Desert! A Pz III, I love Pz III's, have built the G and J, both Afrika Korps.


Sal: I don't think that a Tiger commander worth his salt would waste ammo on a Dingo!!! Nice paint job on the Tiger. I have not built a Tiger as yet, will have to do do so someday.

I hope to do more work on my "suprise load" item for the Blitz this weekend.
When I get the Blitz finished, I have to find the time to build the Pz Kpfw IV F1, item two for the dio.
For now,

Ralph


Pz Kpfw III, Ausf G from the above photo, interesting and fun build.
edoardo
Visit this Community
Milano, Italy
Joined: November 30, 2007
KitMaker: 642 posts
Armorama: 234 posts
Posted: Tuesday, March 01, 2011 - 06:12 PM UTC
thank you Jeremy and Ralph!
i'll sign in today and ill post some pics too...
Ralph, your panzer III is a beauty! the picture is also very interesting... i still have to find some ref for my build and this pic will surely be one.
ciao
edo
vonHengest
Visit this Community
Texas, United States
Joined: June 29, 2010
KitMaker: 5,854 posts
Armorama: 4,817 posts
Posted: Wednesday, March 02, 2011 - 05:43 PM UTC

Quoted Text

thank you Jeremy and Ralph!
i'll sign in today and ill post some pics too...
Ralph, your panzer III is a beauty! the picture is also very interesting... i still have to find some ref for my build and this pic will surely be one.
ciao
edo


You bet, and looking forward to seeing those pics!


Ralph: Can't wait bud!
edoardo
Visit this Community
Milano, Italy
Joined: November 30, 2007
KitMaker: 642 posts
Armorama: 234 posts
Posted: Wednesday, March 02, 2011 - 06:07 PM UTC
hi jeremy,
sorry to ask a silly question, but do i have to post in this thread or am i supposed to start a new blog?
thank you
ciao
edo
vonHengest
Visit this Community
Texas, United States
Joined: June 29, 2010
KitMaker: 5,854 posts
Armorama: 4,817 posts
Posted: Wednesday, March 02, 2011 - 06:32 PM UTC
Post your pictures here, there is no need to create a separate build log.
Don't forget the photo criteria for this campaign, you can review the requirements here
FAUST
#130
Visit this Community
Noord-Holland, Netherlands
Joined: June 07, 2002
KitMaker: 8,797 posts
Armorama: 4,190 posts
Posted: Friday, March 04, 2011 - 10:51 AM UTC

Quoted Text

Robert, No problem more then happy to help. I attempted to use the PE that came with the kit. It was very soft. Some things that I found were make sure the hatch and door hinges are facing the right direction when you glue them on I also found that if you leave the strut nuts on the spruce and glue the PE bracket to the nut while it is still on the spruce its easier to work with, lost 1 of those strut nuts in my glue tube


Ola Sal Thanks for pointing those things out. So the PE from the kit is a bit fiddly. Well I hope the ET models PE set will be better. It is also more detailed and consisting of more parts. So maybe I escape the kits PE I probably create just a bigger minefield for my self
By the way your Tiger starts to look the part. Very good color choice for an Africa Kitty.

@ Ralph
I know what you mean... I think it would be nice to have a lot of modelling time. I only have a few hours each week and try to get the most of it as well. And I always try to keep the momentum (that is why I have so many models on hold while waiting for parts to arrive.
Got this one on hold since a few weeks as I need to get me rivets (Which will be ordered together with the hornet heads for the Desert Fox Project)
TK3 part Scratchbuilt And to keep the momentum I just spoke off I'm also working on this Wespe superdetail project

Also that will be a very nice combi the Panzer IV next to the Blitz. will be a very interesting diorama. Also that Panzer III G looks really nice. Really dusty bugger.

A little textual update. The PE set is on it's way from China and the heads will also come in somewhere next week. Which means I will have all the ingredients to start the built.
trex10
Visit this Community
Upper Austria, Austria
Joined: January 17, 2011
KitMaker: 70 posts
Armorama: 69 posts
Posted: Friday, March 04, 2011 - 07:48 PM UTC
Hi all,

After 3 weeks of working, I think I am so far to show my actuall status of my project.
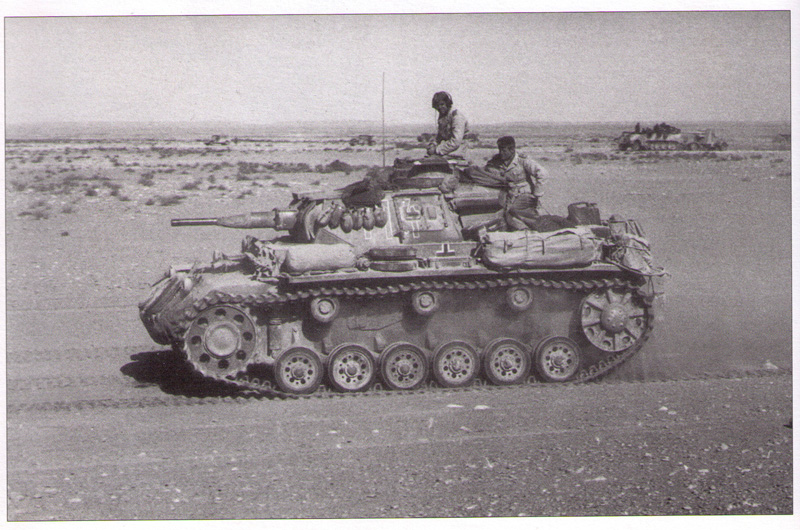
I decided to make a Italian M13/40 “carro comando”, with this picture as reference:


I choose the M13/40 “carro comando” from Zvedza, which I discovered on ebay, thinking to get everything for this job. In fact this was a disappointment, because this is nothing more than the Italeri/Zvedza M13/40 without the turret and “only” a cover ring to close the turret hole. In fact I would have got the same, plus turret, buying the Italeri M13/40, with even better moulding quality.


And: This turret ring cover shows only the 1st prototype version, with 2 part top hatch and not the serial production with his 4 part top hatch.

I even try to use the Royal Model photo etch set nr. 199 for some specific items, but as I am not the best worker on photo etch. I try to use mainly plastic sheet for detailing, which is much easier to be glued and especially to be handled by me.
After starting I decided to cannibalize even a cheap bought “Semovente” for the interiour parts, like gear box, seats etc., upgraded with Evergreen plastics.

So the actuall build status is this:


Most time consuming was the big amount of rivets and screws which has to be added on the lower and upper hull.
As I will build the modell with open hatches, I try to reproduce the interiour as best I can.
Over the last year I have colletcted a lot of interiour pictures of the M13, but exactly for the seat arrangement of the “carro comando”, I have found nothing. So there is a little bit “estimation” done for the seats of the radio operator and commander which I “lend” from the new Italeri L6 “Semovente”.

For the tracks I choose Model Victoria resin tracks, because I bought 2 sets for the money of one Fruil-set. But even as I am a fan of Model Victoria, again some disappointement:
The M13/40 needs 2x 84 tracks, but in the box are only 2x80, fixed on 10 lines with each 16 tracks.


As I had a second set, I start to cannibalize, and was happy to realize, 11 lines, BUT:
9 lines with M13 tracks and 2 lines with L6 tracks........

Erich


AgentG
Visit this Community
Nevada, United States
Joined: December 21, 2008
KitMaker: 1,109 posts
Armorama: 1,095 posts
Posted: Sunday, March 06, 2011 - 04:26 PM UTC
Despite the fact I live near Area 51, I haven't dissappeared.
Two hectic weeks at work have kept me from posting, but I have been building.


Tracks, turret and a bit of etch. More to come!

G

vonHengest
Visit this Community
Texas, United States
Joined: June 29, 2010
KitMaker: 5,854 posts
Armorama: 4,817 posts
Posted: Sunday, March 06, 2011 - 05:52 PM UTC
Erich: Thanks for the heads-up, that's good intel. You're build is looking good!

G: Either that or you were abducted and your modeling skills were enhanced You've got me wanting to build one of those kits myself now..
trex10
Visit this Community
Upper Austria, Austria
Joined: January 17, 2011
KitMaker: 70 posts
Armorama: 69 posts
Posted: Sunday, March 06, 2011 - 11:02 PM UTC
Hi Wayne,

Wonderfull build, but forgive me to correct you:

The cover plate for the starter entrance on the rear engine deck panel (beside the fog launcher), which you have used on your model is from the "Ausf. E/F", part number A43.
Their is a failure in the Dragon instructions.
For the "Ausf. G/H" you have to use the part C14, which is one of the main differences to the E/F version. Above part C14 you have to fit C18, which is the closing of the T-shaped connection line for upper and lower hull.

Erich
AgentG
Visit this Community
Nevada, United States
Joined: December 21, 2008
KitMaker: 1,109 posts
Armorama: 1,095 posts
Posted: Monday, March 07, 2011 - 05:32 AM UTC
Thank yor Erich! (I think)

I'll be making those changes shortly.

G
Tojo72
Visit this Community
North Carolina, United States
Joined: June 06, 2006
KitMaker: 4,691 posts
Armorama: 3,509 posts
Posted: Monday, March 07, 2011 - 12:22 PM UTC
Lookin Good "G"
spearhead21pz
Visit this Community
California, United States
Joined: May 11, 2009
KitMaker: 128 posts
Armorama: 127 posts
Posted: Monday, March 07, 2011 - 04:02 PM UTC
Hi Gents;

Erich; Nice progress on the M13/40 "Carro Commando", unusual vehicle and a very nice start.

"G": Nice build so far on the Pz Kpfw III Ausf G, clean. You might want to check out the Bill Cross build on the same kit.


Like I said previously, modeling time has been tough to come by, but I do have some progress photos.

This a BMW R75 to go it the back of the Blitz.


Other load items in various stages, base paint, some items weathered, etc.


A long ways to go, I have ammo boxes, crates, cardboard boxes yet to build, and a Pz Kpfw IV F1 yet.

Ralph.

ltb073
Visit this Community
New York, United States
Joined: March 08, 2010
KitMaker: 3,662 posts
Armorama: 3,078 posts
Posted: Monday, March 07, 2011 - 04:06 PM UTC
Hi Guys some good looking stuff here. I got some work done on my Tiger here is what its looking like
Photobucket
the 1 piece rubber tracks are very thick on this kit and their gonna need some weathering
Photobucket
The Commander still need to be worked on
Photobucket
and the whole thing will need some weathering and washes but its getting there
vonHengest
Visit this Community
Texas, United States
Joined: June 29, 2010
KitMaker: 5,854 posts
Armorama: 4,817 posts
Posted: Monday, March 07, 2011 - 05:06 PM UTC
Great progress everyone!

Ralph: Is that BMW the LionRoar kit?

Sal: Looking great, can't wait to see the weathering!
Tojo72
Visit this Community
North Carolina, United States
Joined: June 06, 2006
KitMaker: 4,691 posts
Armorama: 3,509 posts
Posted: Tuesday, March 08, 2011 - 02:26 AM UTC
Going to be very cool project Ralph

Sal,the Tigers looking good

Will start my 232 later this week
edoardo
Visit this Community
Milano, Italy
Joined: November 30, 2007
KitMaker: 642 posts
Armorama: 234 posts
Posted: Tuesday, March 08, 2011 - 06:25 AM UTC
Hi there!
this is my entry for the campaign...


I have to start it yet, but I have completed the destroied semovente... here are some pics, hope you enjoy...


Here are a couple of pics of the inside...


And this is from where the inspiration come from...


As usual, any comment is most welcome!
ciao
Edo
Tojo72
Visit this Community
North Carolina, United States
Joined: June 06, 2006
KitMaker: 4,691 posts
Armorama: 3,509 posts
Posted: Tuesday, March 08, 2011 - 08:26 AM UTC
Fantastic work Ed,looks like the real thing.would make Scratchmod Rob Ferreira proud if you ever saw his work with burned out hulks !!
vonHengest
Visit this Community
Texas, United States
Joined: June 29, 2010
KitMaker: 5,854 posts
Armorama: 4,817 posts
Posted: Tuesday, March 08, 2011 - 08:36 AM UTC
I agree, very impressive work Edoardo!

Anthony: Looking forward to your 232
zontar
Visit this Community
Hawaii, United States
Joined: August 27, 2006
KitMaker: 1,646 posts
Armorama: 1,557 posts
Posted: Tuesday, March 08, 2011 - 11:23 AM UTC
Ralph: good looking motor bike. Those little bits of PE really set it off.

Sal: I'm always impressed at how quickly you get these done. The tiger is looking good.

Edoardo: Awesome!! I can smell the thing from looking at the photos.

Happy Modelling, -zon
spearhead21pz
Visit this Community
California, United States
Joined: May 11, 2009
KitMaker: 128 posts
Armorama: 127 posts
Posted: Tuesday, March 08, 2011 - 03:00 PM UTC
Jeremy; Yes it is the Lion Roar kit, those teeny weany parts drove me a little crazy. I kept dropping a piece on the floor, I bet it took me an extra hour or so looking for them, but I did find them.

Sal; The tiger is coming along nicely, moving fast on it.

Edoardo; Wow!, very impressive semovente hulk, looks like the real thing. The Pz Kpfw II Ausf J is a very nice kit, can't wait to see your work on that one.

Anthony; Now I get to do the detail paint on that Lion Roar BMW. Hope to see some progress pictures from you on the 232 soon.

Ralph
edoardo
Visit this Community
Milano, Italy
Joined: November 30, 2007
KitMaker: 642 posts
Armorama: 234 posts
Posted: Tuesday, March 08, 2011 - 06:07 PM UTC
thank you guys!
you are much more than kind!

actually it has been Rob Ferreira who planted the bug in me, but I'm not half as good as him

ciao
Edo
AgentG
Visit this Community
Nevada, United States
Joined: December 21, 2008
KitMaker: 1,109 posts
Armorama: 1,095 posts
Posted: Wednesday, March 09, 2011 - 04:51 AM UTC
Ralph, that Beemer is the bomb! I'm looking forward to the finished truck and contents.

Sal, loving that big kitty. What color did you use for it?

Edoardo, moremoremore!

Question for the group if I may?

I haven't built that much armor, and only a few with indy link tracks. I am comfortable with the indy links, but............

I assemble the tracks, remove them for painting after a day or so, then It seems that the tracks shrank(?) before I remounted them. I make alllowances for paint, yet in three instances they came apart as if just a bit too short.

I did speak to another armor modeller at a recent IPMS show who expressed the same opinion.

Thoughts?

G