New York, United States
Joined: March 08, 2010
KitMaker: 3,662 posts
Armorama: 3,078 posts
Posted: Tuesday, May 17, 2011 - 02:03 AM UTC
Quoted Text
Sal: You're rocking that thing!!! I've barely sorted out and washed the sprues. Keep the heat on.
Happy Modelling, -zon 
Yeah had a day to myself on Sunday and wasn't in a painting mood and needed to put down the Mini-Art Garage to collect my thoughts


Active Campaigns on the bench:
Operation Fall Gelb - Pz.Kpfw. IV Ausf. C
Engineering the Future - M-26 Recovery Vehicle
115 Campaigns completed
Arkansas, United States
Joined: June 29, 2009
KitMaker: 11,610 posts
Armorama: 7,843 posts
Posted: Tuesday, May 17, 2011 - 08:44 AM UTC
Ok. I've finally settled on Italeri 1/35 Kfz. 15 Horch German Command. This will let me use some German motorcycles from my stash.
Sal, looks like you have been itching to start this campaign.

Ideals are peaceful. History is violent.
England - East Anglia, United Kingdom
Joined: May 08, 2011
KitMaker: 9 posts
Armorama: 8 posts
Posted: Tuesday, May 17, 2011 - 09:42 AM UTC
I know it's already started but is it OK for me to join this campaign?
I have a MasterBox "PzKfw 1 Kleiner Panzerbefehlswagen KL1A" (small armored command vehicle)
Is that OK?
California, United States
Joined: December 06, 2004
KitMaker: 3,694 posts
Armorama: 2,693 posts
Posted: Tuesday, May 17, 2011 - 10:31 AM UTC
You can join anytime during a campaign.
England - East Anglia, United Kingdom
Joined: May 08, 2011
KitMaker: 9 posts
Armorama: 8 posts
Posted: Tuesday, May 17, 2011 - 01:10 PM UTC
Washington, United States
Joined: September 21, 2010
KitMaker: 1,846 posts
Armorama: 1,509 posts
Posted: Tuesday, May 17, 2011 - 01:19 PM UTC
I am in. What is the deadline for completion?
Never mind the above. I am in #14. Cheers.
On the workbench:
Trumpeter Faun SLT 56
Tamiya A- 10 1/48
Academy 1/700 USS KITTY HAWK
California, United States
Joined: December 06, 2004
KitMaker: 3,694 posts
Armorama: 2,693 posts
Posted: Tuesday, May 17, 2011 - 01:22 PM UTC
Quoted Text
I am in. What is the deadline for completion?
See the campaign page for details.
Command Campaign If you are new to campaigns (and image uploading), you might want to check out this thread as well.
TUTORIAL: Armorama CampaignsI am sitting on the fence with this one. I have a Pit-Road (Trumpeter) 1/35 JGSDF Type 82 Command & Control Vehicle but I am probably over committed on campaigns as it is.
Hawaii, United States
Joined: August 27, 2006
KitMaker: 1,646 posts
Armorama: 1,557 posts
Posted: Tuesday, May 17, 2011 - 02:42 PM UTC
Sprues sorted. Letting the cutting begin...

Happy Modelling, -zon

"Certainty of death.
Small chance of sucess.
What are we waiting for?"
-Gimli, Return of the King.
Nevada, United States
Joined: December 21, 2008
KitMaker: 1,109 posts
Armorama: 1,095 posts
Posted: Wednesday, May 18, 2011 - 02:00 AM UTC
Sal,
Here's a link to a method I use all the time.
https://armorama.kitmaker.net//features/1737G
Lasci la pistola. Porti le cannoli.
New York, United States
Joined: March 08, 2010
KitMaker: 3,662 posts
Armorama: 3,078 posts
Posted: Wednesday, May 18, 2011 - 06:47 AM UTC
Thanks G, I'll read through that when I'm more awake


Active Campaigns on the bench:
Operation Fall Gelb - Pz.Kpfw. IV Ausf. C
Engineering the Future - M-26 Recovery Vehicle
115 Campaigns completed
Nevada, United States
Joined: December 21, 2008
KitMaker: 1,109 posts
Armorama: 1,095 posts
Posted: Wednesday, May 18, 2011 - 12:37 PM UTC
Lasci la pistola. Porti le cannoli.
Washington, United States
Joined: September 21, 2010
KitMaker: 1,846 posts
Armorama: 1,509 posts
Posted: Wednesday, May 18, 2011 - 05:29 PM UTC
Ok. Here is my entry. I know that some people are going to be upset by this, but get over it. Have had this kit since 1999 it was a replacement for the one that I bought in 1987 and lost when I was in the Army. Very excited to be part of a group build. Cheers.
The box. Unopened and still with the original price sticker and the card of the place I bought it. Does anyone know if Trains & Lanes still exists?

A different angle on the box so that you can see it is sealed.

First crack at opening the box, everything still in the bags. On a funny note the instructions were yellowed a bit on one part, even thought the whole kit had never been opened.

On the workbench:
Trumpeter Faun SLT 56
Tamiya A- 10 1/48
Academy 1/700 USS KITTY HAWK
Wisconsin, United States
Joined: September 11, 2009
KitMaker: 1,917 posts
Armorama: 735 posts
Posted: Thursday, May 19, 2011 - 02:02 AM UTC
Quoted Text
Ok. Here is my entry. I know that some people are going to be upset by this, but get over it. Have had this kit since 1999 it was a replacement for the one that I bought in 1987 and lost when I was in the Army. Very excited to be part of a group build. Cheers.
I'm over it! (Whatever the problem is with your entry.)

Did the rivet-counters say it was inaccurate or something? I'm in this hobby just for the fun of it. Sometimes you just have to let those guys rant, if that's what makes them feel good.

Should I ask about the Army vet building a USMC vehicle?
Cheers!

-Sean.
Current: model railroad layout
Stalled a while ago:
. 1950's Chrome, WW II Twins
Last completed: Police Car
Arkansas, United States
Joined: June 29, 2009
KitMaker: 11,610 posts
Armorama: 7,843 posts
Posted: Thursday, May 19, 2011 - 06:01 AM UTC
Some people are professional about building models and the rest of us like having fun.
Ideals are peaceful. History is violent.
Washington, United States
Joined: September 21, 2010
KitMaker: 1,846 posts
Armorama: 1,509 posts
Posted: Thursday, May 19, 2011 - 06:26 AM UTC
I am in the having fun camp (camp should be fun!). And just so we are clear, tankers need SOMEthing to shoot at (jk). I actually thought the LAV was a cool looking AFV and still do. There were a few vehicles the USMC fielded that I always liked including the P7.
Have not decided if I am going to build this OOB or soup it up Cookie Sewell style. Will keep you posted. Cheers.
On the workbench:
Trumpeter Faun SLT 56
Tamiya A- 10 1/48
Academy 1/700 USS KITTY HAWK
Hawaii, United States
Joined: August 27, 2006
KitMaker: 1,646 posts
Armorama: 1,557 posts
Posted: Saturday, May 21, 2011 - 02:37 PM UTC
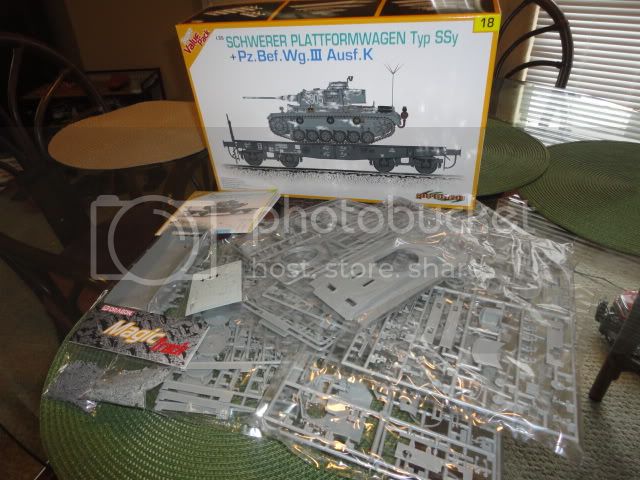
Aloha All: Made some progress on the Pz.Bef.Wg III ausf. K last night. Hopefully some photos tomorrow.
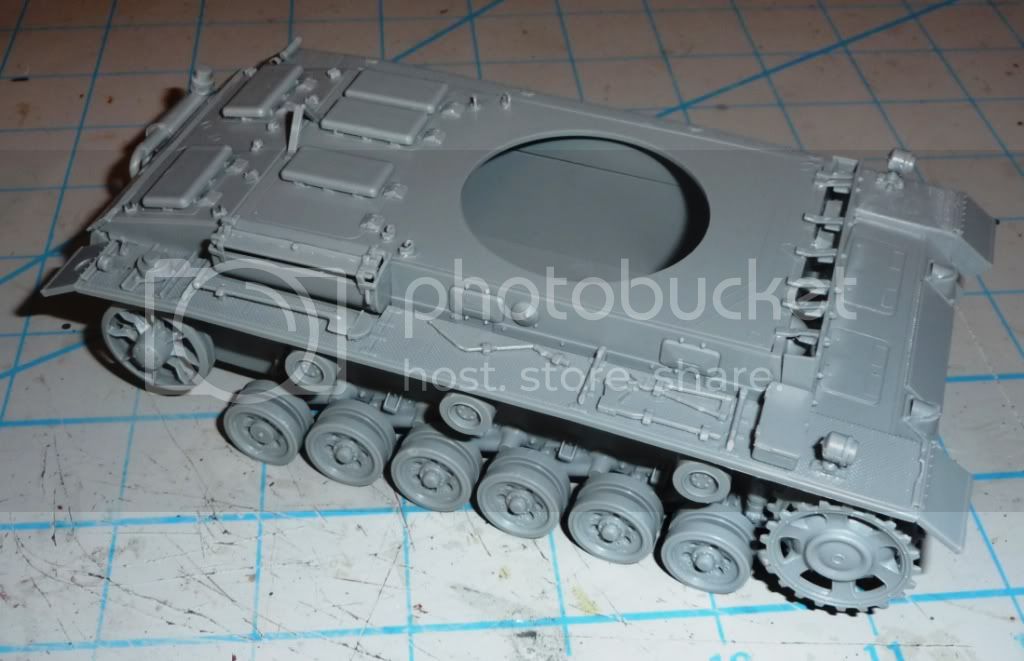
A caution about the kit: be sure to cut the turret hole larger before glueing anything onto the upper hull, otherwise you could have some trouble. Fortunately I averted that disaster, but figured there were enough of us building that kit that I should share.
Happy Modelling, -zon

"Certainty of death.
Small chance of sucess.
What are we waiting for?"
-Gimli, Return of the King.
New York, United States
Joined: March 08, 2010
KitMaker: 3,662 posts
Armorama: 3,078 posts
Posted: Sunday, May 22, 2011 - 06:53 AM UTC
Active Campaigns on the bench:
Operation Fall Gelb - Pz.Kpfw. IV Ausf. C
Engineering the Future - M-26 Recovery Vehicle
115 Campaigns completed
Hawaii, United States
Joined: August 27, 2006
KitMaker: 1,646 posts
Armorama: 1,557 posts
Posted: Monday, May 23, 2011 - 12:00 PM UTC
Sal: I'm at work and my instructions are at home, but I will try to explain as best I can from memory, then clarify later tonight after I get back to the instructions.
The provided turret hole is too small for the turret bottom you are supposed to use per the instructions. There are two turret bottoms included in the kit, but the instruction call to use the one from sprue "O". The "sleeve" going down into the turret on the O part is larger than the provided hole. On the underside of the turret deck (upper hull), there is a groove cut into the bottom of the deck. To make the O part fit, you have to cut the hole larger to the outside of the groove, and even then sand some more to get the hole big enough for the turret bottom to fit easily. It is easy to do with an X-acto knife, but only if the upper hull is still loose from the lower and care must be taken for anything else glued onto the upper hull so you don't break them off.
If it's too late, you could try to use the other turret bottom, but I've not tried whether the upper turret mates with both turret bottoms or not. You should try this anyway, as I will too.
Tonight I will confirm and clarify further.
-zon
"Certainty of death.
Small chance of sucess.
What are we waiting for?"
-Gimli, Return of the King.
New York, United States
Joined: March 08, 2010
KitMaker: 3,662 posts
Armorama: 3,078 posts
Posted: Monday, May 23, 2011 - 02:01 PM UTC
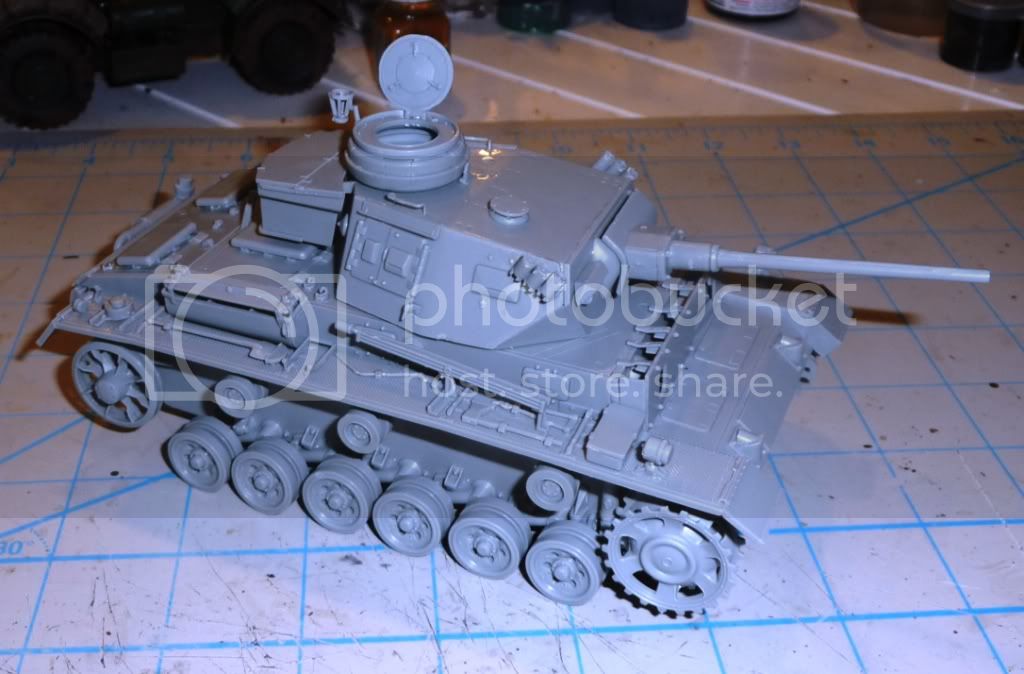
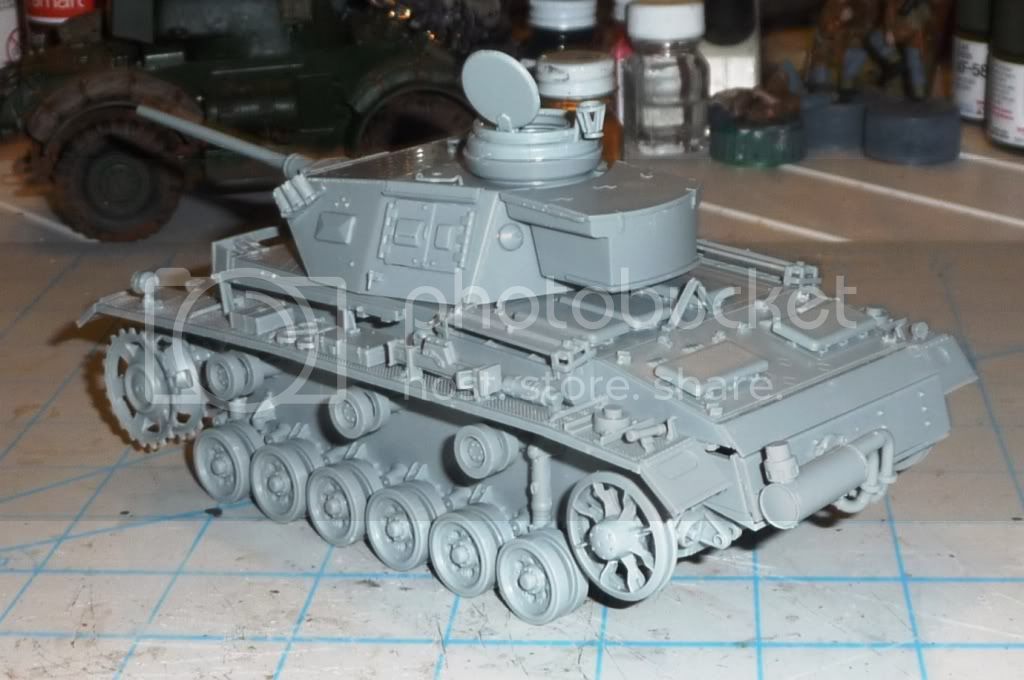
Zon, Thanks for the explanation but once I saw the problem I put a new blade in my knife handle and away I went

Fit is nice and snug and nothing broke off. I had a full day of building yesterday so most of it is done

Still need to do the tracks and antennas, hull is dry fit and wheels are just held on with white glue. Long OT shife today so no build time

But lost of $$ for more kits


Active Campaigns on the bench:
Operation Fall Gelb - Pz.Kpfw. IV Ausf. C
Engineering the Future - M-26 Recovery Vehicle
115 Campaigns completed
Texas, United States
Joined: June 29, 2010
KitMaker: 5,854 posts
Armorama: 4,817 posts
Posted: Monday, May 23, 2011 - 02:26 PM UTC
That's the way to do it Sal!


Hawaii, United States
Joined: August 27, 2006
KitMaker: 1,646 posts
Armorama: 1,557 posts
Posted: Monday, May 23, 2011 - 04:14 PM UTC
Sal: cool! Looks great and glad it went well for you. I just saw that in the instructions and thought that could really trip someone up as it says to glue the upper on much earlier than your told to enlarge the hole.
Happy Modelling, -zon

"Certainty of death.
Small chance of sucess.
What are we waiting for?"
-Gimli, Return of the King.
Washington, United States
Joined: September 21, 2010
KitMaker: 1,846 posts
Armorama: 1,509 posts
Posted: Wednesday, May 25, 2011 - 06:00 PM UTC
Started on the build tonight. I have decided that I am going to re work the suspension but not the upper hull. Really the difference between 68 and 71 degrees on a slope is just not that important and especially since this is never going to be judged in any show.
I will be starting a new Build Log for this kit as well so there will be some repeats here to keep up with the progress. Here is what things looked like tonight.
The patient prepped and ready for surgery.

The implement of destruction and the new "bionic" part. . . .

What Cookie says it should look like when we are done. . .

Parts removed successfully now to replace them.

Where we ended up tonight. . . .

On the workbench:
Trumpeter Faun SLT 56
Tamiya A- 10 1/48
Academy 1/700 USS KITTY HAWK
Arkansas, United States
Joined: June 29, 2009
KitMaker: 11,610 posts
Armorama: 7,843 posts
Posted: Thursday, May 26, 2011 - 04:11 AM UTC
Ideals are peaceful. History is violent.
Washington, United States
Joined: September 21, 2010
KitMaker: 1,846 posts
Armorama: 1,509 posts
Posted: Thursday, May 26, 2011 - 04:32 PM UTC
So far not bad at all. Much easier than I expected. Have to say that I was quite a bit nervous picking up the saw after like 20+ years. But went well. The directions are clear once you can figure out how he talks/writes. Cheers.
On the workbench:
Trumpeter Faun SLT 56
Tamiya A- 10 1/48
Academy 1/700 USS KITTY HAWK
Washington, United States
Joined: September 21, 2010
KitMaker: 1,846 posts
Armorama: 1,509 posts
Posted: Friday, June 03, 2011 - 09:46 AM UTC
No one has made any posts recently so I am keeping the dream alive boys. Been working on the LAV and was kind of enjoying it and not really worrying about the simplicity of the kit. Then I ran across Adamskii's ASLAV R build and realized what a giant piece of crap the ESCI kits are.

Anyway, I will post some pics later today when I have more time. Once you start looking though, you can really see where ESCI has skimped on the details. Prime Portal has been a great resource in looking up reference photos, not that I am going to super detail this one, but for the future it will be worth while. Cheers.
Here are the photos:
The rear suspension is on. . . .


Re working the swim propellers and mounts, cause they suck and they sucked even more the first attempt at scratching.

After looking at Prime Portal photos the swim gear is angled out and has a look that is MUCH different than what the kits supplies. That coupled with the 20yr old photos from the FSM article and you have a dodgey idea of what is supposed to go where, until you look at the real deal. So this new piece will help angle the propellers out and away from the hull AND correct the "too close to the hull" issue that cutting the "L" bend on the original part created. That is it for now. Cheers.
On the workbench:
Trumpeter Faun SLT 56
Tamiya A- 10 1/48
Academy 1/700 USS KITTY HAWK


