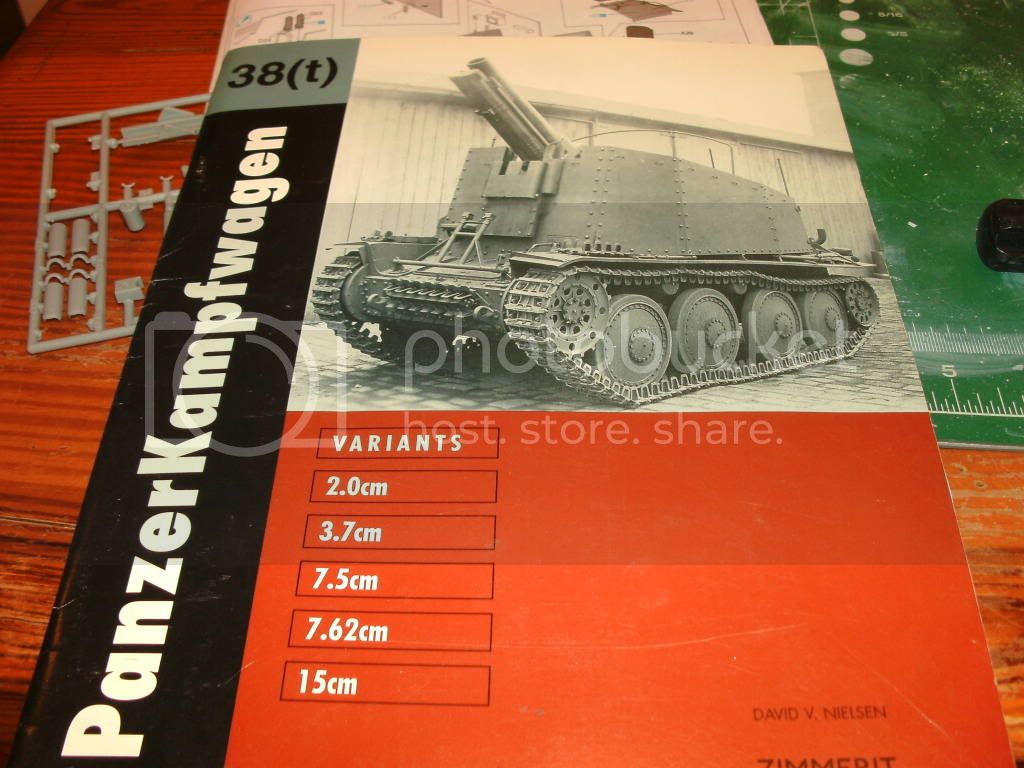
15cm Schweres infant. geschutz 33(sf) Ausf H
New Jersey, United States
Joined: August 01, 2007
KitMaker: 179 posts
Armorama: 144 posts
Posted: Tuesday, March 22, 2011 - 12:14 PM UTC
New Jersey, United States
Joined: November 02, 2009
KitMaker: 609 posts
Armorama: 433 posts
Posted: Tuesday, March 22, 2011 - 02:48 PM UTC
Horst - I was just asked to make this kit for a local historian, so I'll be following along. I'll be especially interested to see how the fighting compartment goes together. Good luck!
Texas, United States
Joined: June 29, 2010
KitMaker: 5,854 posts
Armorama: 4,817 posts
Posted: Tuesday, March 22, 2011 - 02:53 PM UTC
Awesome choice Horst! Quick question for you, how far are you holding your camera from the model when you take your close ups?
New Jersey, United States
Joined: November 02, 2009
KitMaker: 609 posts
Armorama: 433 posts
Posted: Tuesday, March 22, 2011 - 09:34 PM UTC
Horst - Your build log motivated me to pull the kit out of the closet to take a closer look. It really is a simple kit when you subtract the sprues with the track links and the figures. It's also clear at a glance that it's not up to current standards as many of the parts lack detail (e.g. the road wheels have no back side). Unfortunately, I don't think there's a more recent kit of this vehicle.
To Jeremy's point, you might want to get a simple tripod for your camera. I picked one up at Target for my point-and-shoot for $8-$10. Couple that with the camera's macro mode and you'll get clear shots.
New Jersey, United States
Joined: August 01, 2007
KitMaker: 179 posts
Armorama: 144 posts
Posted: Wednesday, March 23, 2011 - 01:37 AM UTC
HEY Bill and Jeremy
Glad to have you guys around hopefully i can ask questions along the way.
Yeah i am pretty new to all of this stuff but having fun with the construction and
taking the pics.
I am getting pretty close to the model and shooting on Macro without a flash
on my kitchen table. I will try to take some better pics in the future i have a little more progress to post but will have to wait till tonite to do so.
Again thanks for your interest.
Regards
Horst

Utrecht, Netherlands
Joined: February 23, 2011
KitMaker: 74 posts
Armorama: 68 posts
Posted: Wednesday, March 23, 2011 - 02:57 AM UTC
Quoted Text
Unfortunately, I don't think there's a more recent kit of this vehicle.
not sure what the differences would be but perhaps this is a newer version of this kit?
click New Jersey, United States
Joined: August 01, 2007
KitMaker: 179 posts
Armorama: 144 posts
Posted: Wednesday, March 23, 2011 - 03:09 AM UTC
Ibelieve you are right Remco
I have seen them for sale at Sprue Brothers for around thirty bucks.
not to bad considering all the stuff you get.
I got my kit a couple of years ago at Mosquitocon and i think at the time
i paid about 15 dollars.
Thanks for your info. and post
Regards
Horst
New Jersey, United States
Joined: November 02, 2009
KitMaker: 609 posts
Armorama: 433 posts
Posted: Wednesday, March 23, 2011 - 03:37 AM UTC
Looks to be the same kit to me too ... too bad I'm not making that one.

New Jersey, United States
Joined: August 01, 2007
KitMaker: 179 posts
Armorama: 144 posts
Posted: Wednesday, March 23, 2011 - 09:50 AM UTC
O.K.
Continuation of the build!
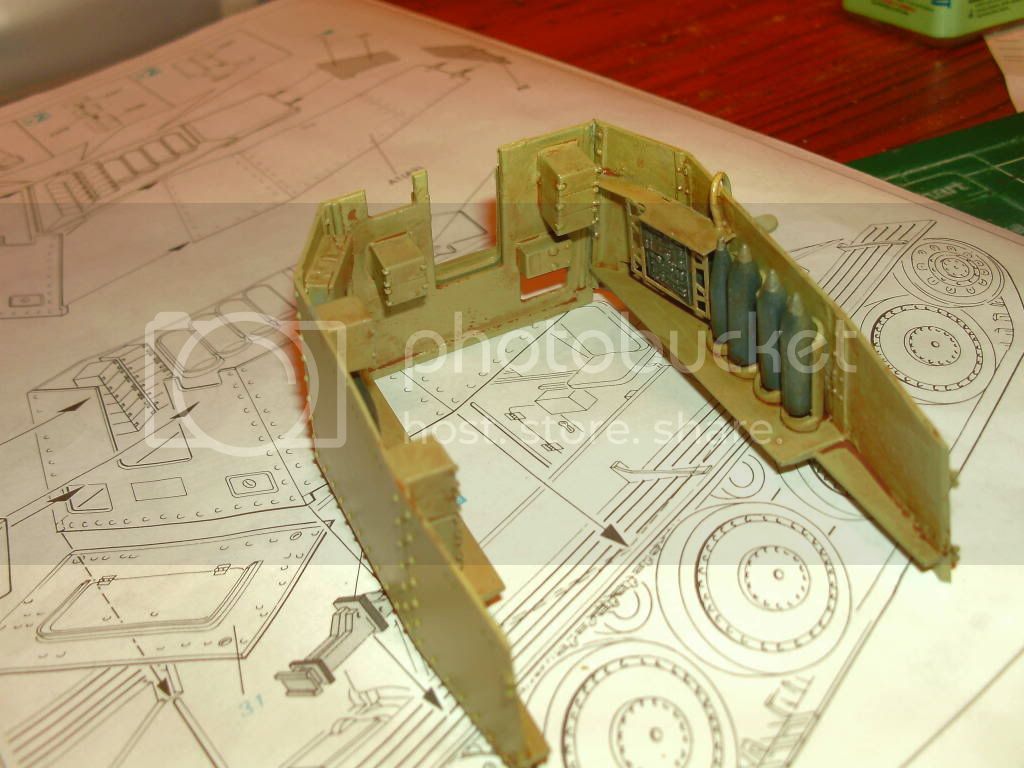
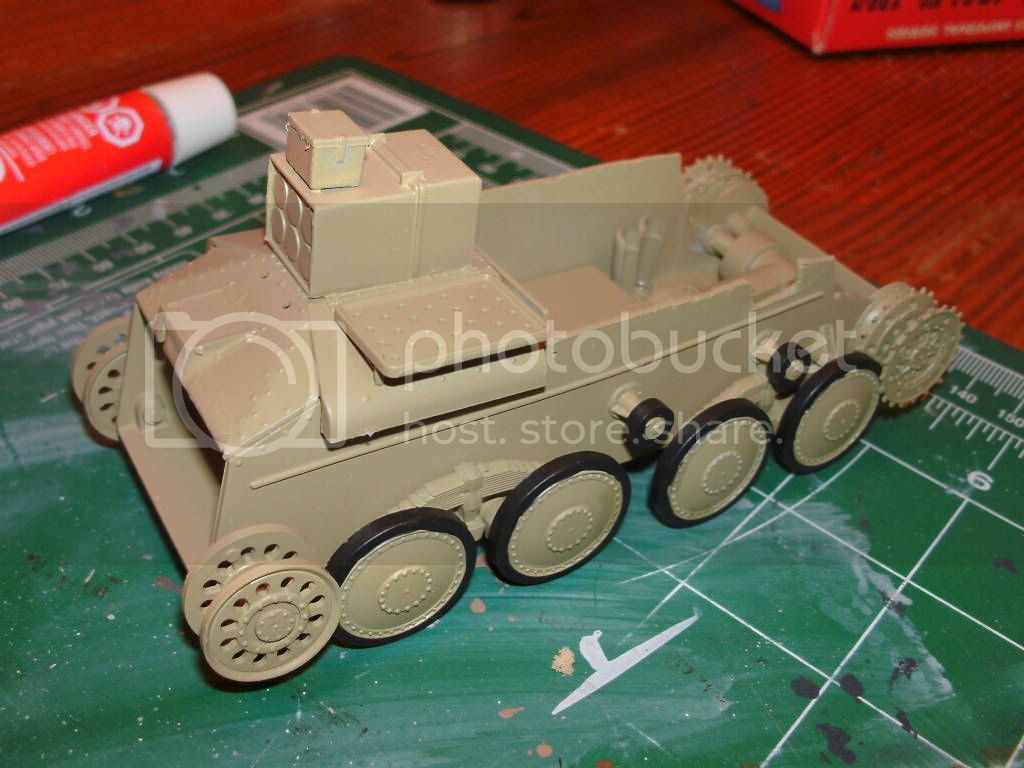
i started to study the directions for the left and right side panels

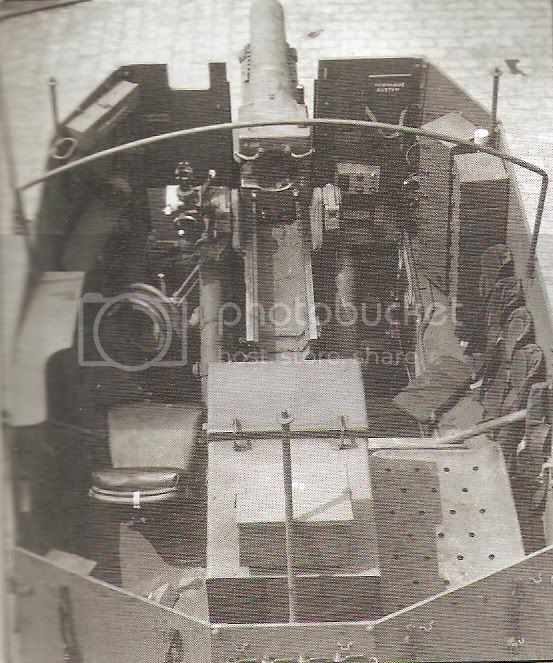
i happen to have in my pocession a technical manual of this vehichle from Zimmerit Press which has some wonderful photos.
As you will notice and i dont think that i am wrong but i believe that dragon has mixed up the left and right sides so i took a executive decision and fabricated it to the
manual, first i will show a pic of my bent radio housing which i did not document to well sorry.

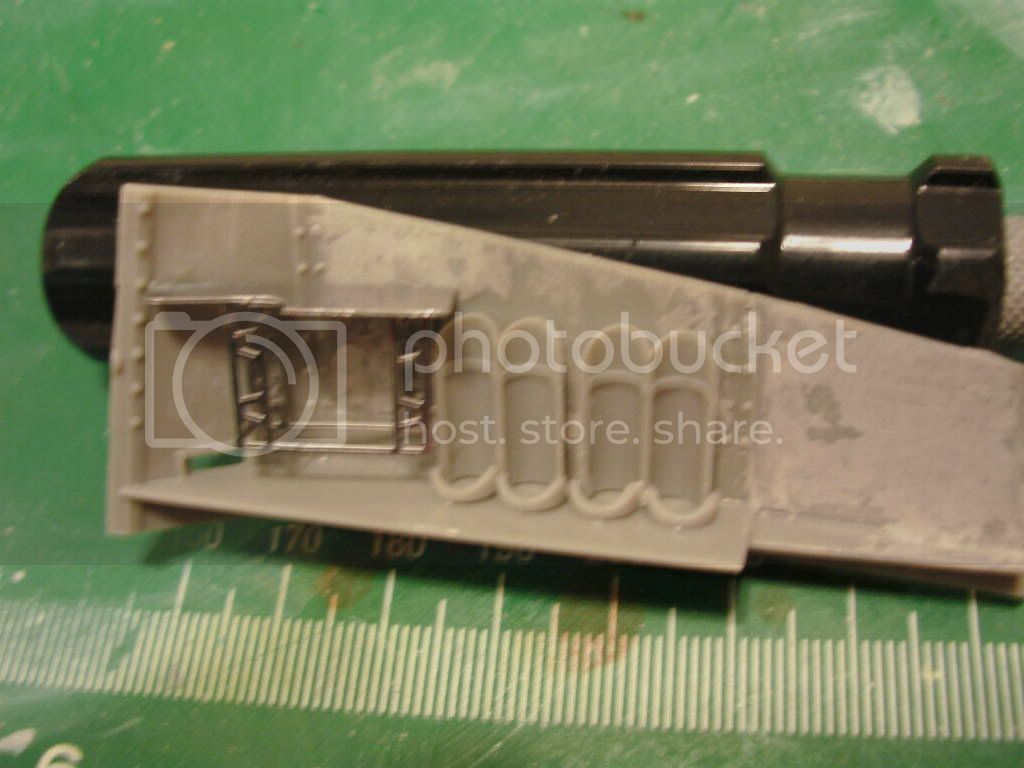
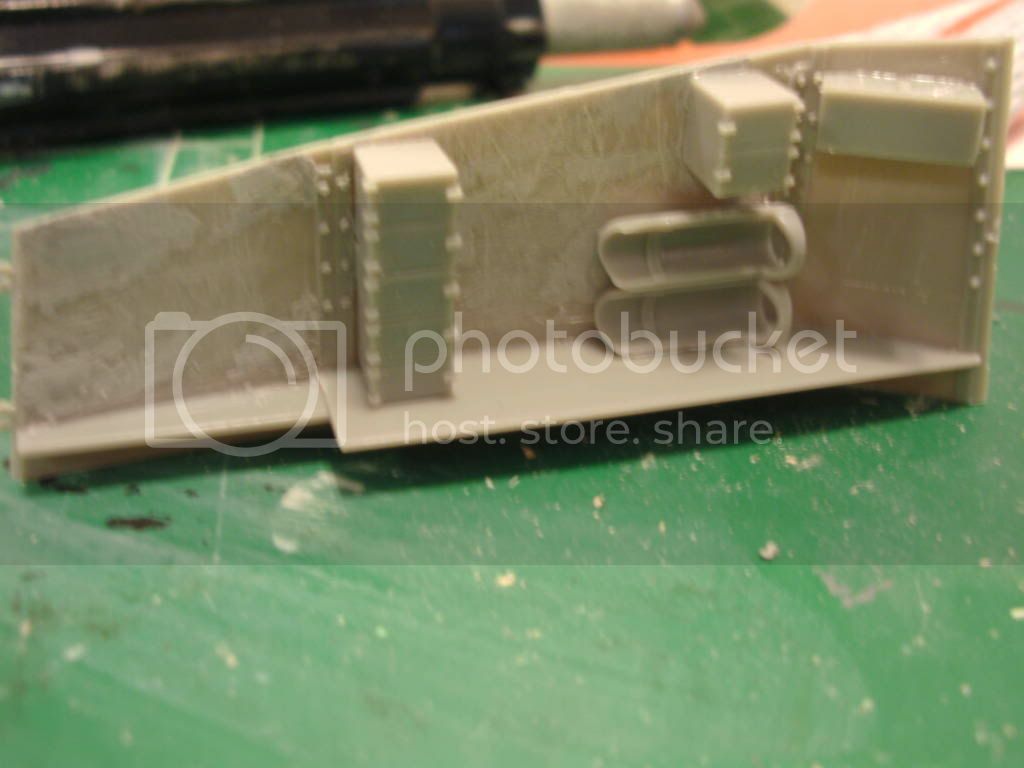
a quick note the shell holders do not seem to fit very good they didi not seem
to be engineered to fit well.
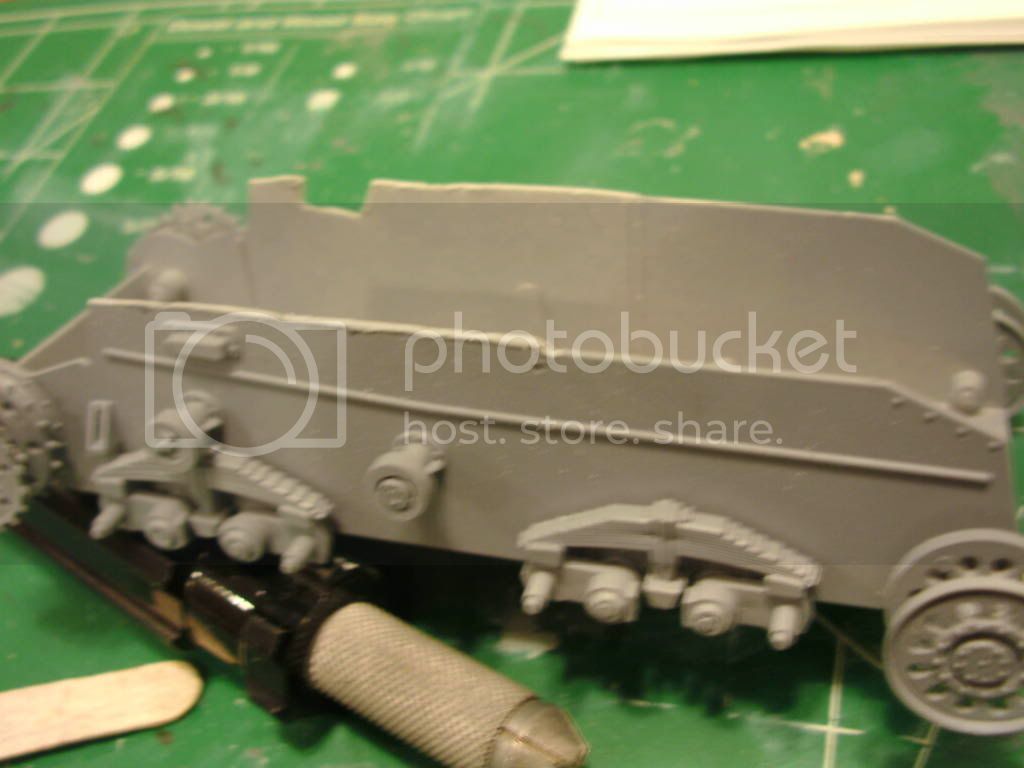
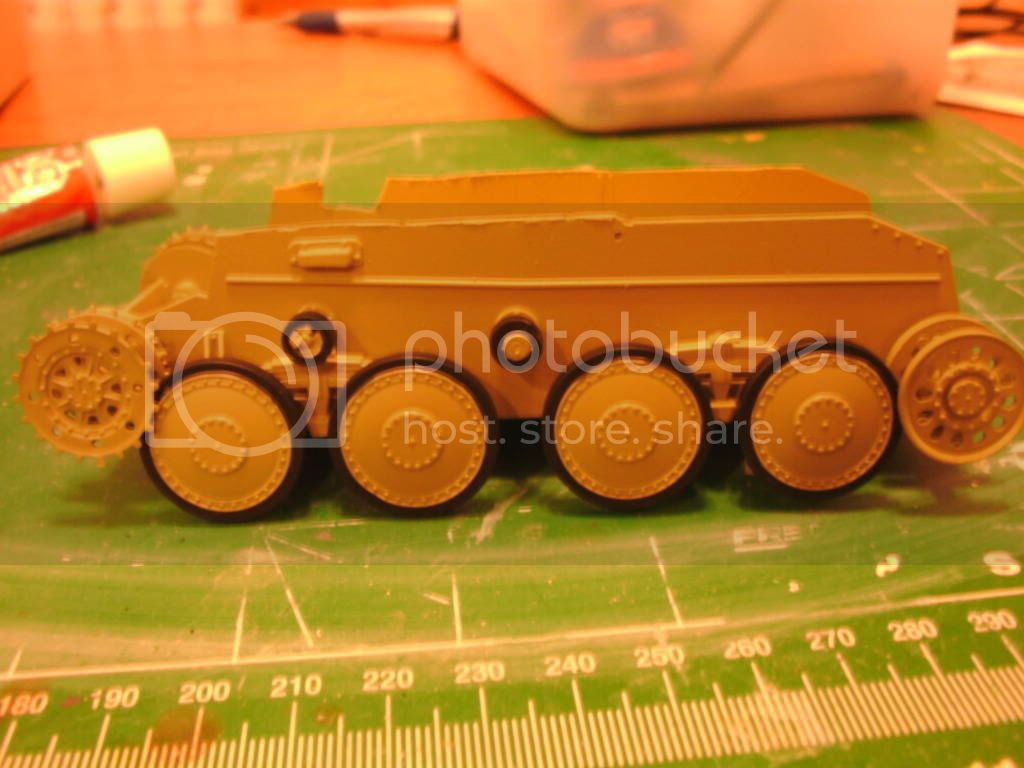
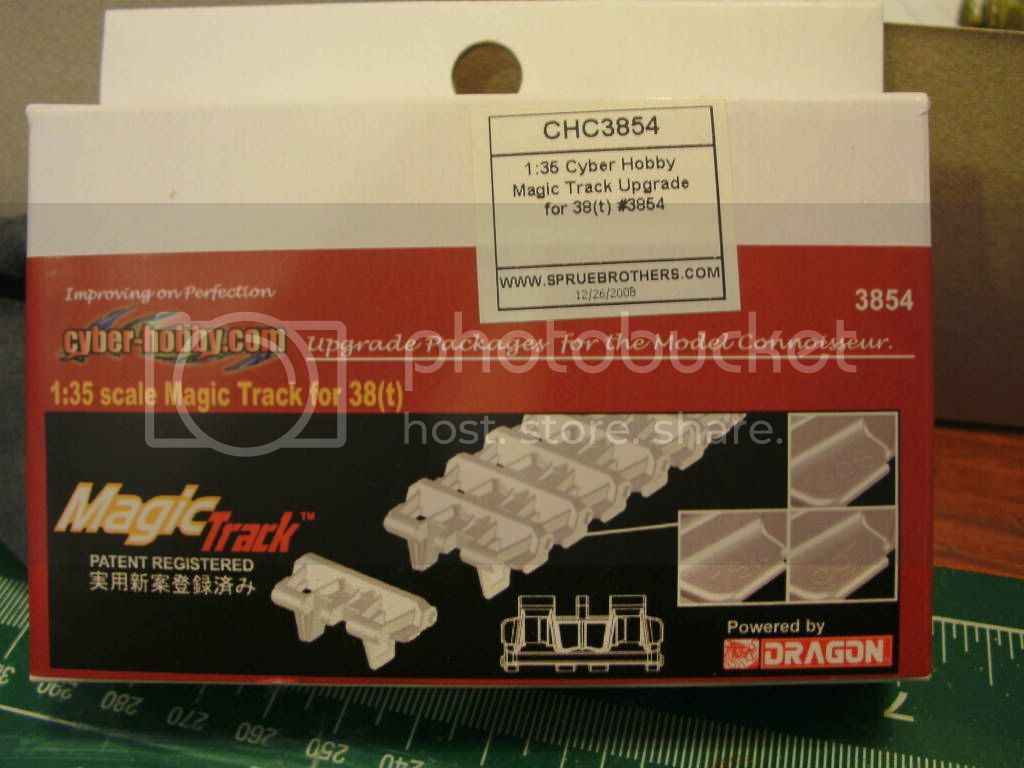
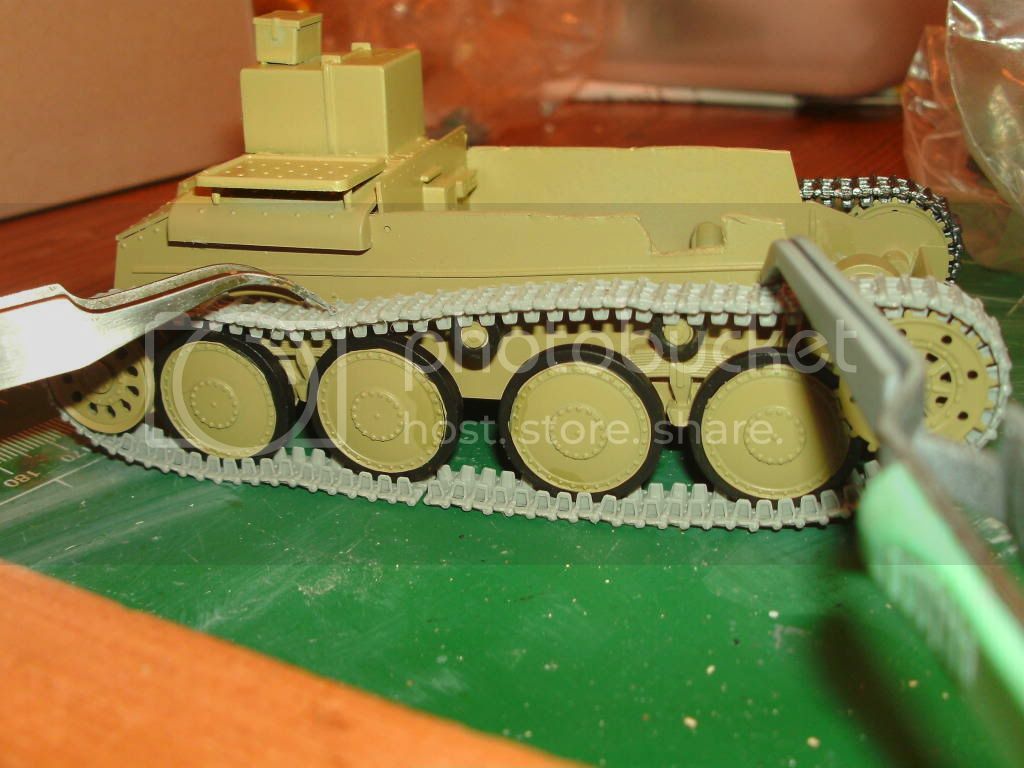
i also constructed the bottom hull with the wheels as shown i am waiting for a
cyberhobby set of pz 38t track to come from sprue brothers because the kits tracks are not very good i will post pics later see you guys soon
regards
Horst
California, United States
Joined: October 21, 2007
KitMaker: 3,684 posts
Armorama: 2,938 posts
Posted: Thursday, March 24, 2011 - 01:49 AM UTC
Looking good Horst. Just an FYI, the pic you posted is of the prototype which was well photographed. Some differences in the layout of the production vehicle can be seen below.
New Jersey, United States
Joined: August 01, 2007
KitMaker: 179 posts
Armorama: 144 posts
Posted: Thursday, March 24, 2011 - 03:34 AM UTC
Thanks James for your information.
Well i rolled the dice and it seems i lost
I thought that i had a picture of the actual production model.
Well i had already glued the parts in place so i cannot undo what has
been done. A perfect example of a novice at the helm here i hope that you
guys dont mind but i will continue as is and i hope you will overlook my mistake.
The tracks came yesterday so i will begin this weekend.
I will post soon.
Regards and Oops
Horst


California, United States
Joined: October 21, 2007
KitMaker: 3,684 posts
Armorama: 2,938 posts
Posted: Thursday, March 24, 2011 - 12:21 PM UTC
I didn't mean for it to sound like you were doing it wrong, Horst, I think it's great that you are making changes to the kit to model the prototype. In fact, the newer Cyber-Hobby kit depicts the prototype, and they market it as a 'Limited Edition' kit

. I'm looking forward to what you do with this one as it's looking great so far

New Jersey, United States
Joined: August 01, 2007
KitMaker: 179 posts
Armorama: 144 posts
Posted: Thursday, March 24, 2011 - 12:50 PM UTC
No sweat James

I appreciate your interest in this post and welcome any pointers/help i can get.
I had no idea that what i was looking at was the prototype. It was the only reference book that i had and every pic that i saw of this beauty was an external shot.
I am new to plastic cutting and i am sure in the future i will get another chance to build a new tooled kit some day...
But i will continue with this one as is for now.
Againg thanks
Respectfully
Horst
Texas, United States
Joined: June 29, 2010
KitMaker: 5,854 posts
Armorama: 4,817 posts
Posted: Thursday, March 24, 2011 - 06:18 PM UTC
Quoted Text
I am getting pretty close to the model and shooting on Macro without a flash
on my kitchen table.
Not sure how close you are getting, but a general rule of thumb for most cameras is to make sure that you are far enough away that you can't touch the model or at least are at arms length. Another thought is that when not using your flash in low lighting situations the camera's shutter stays open longer which easily results in a fuzzy/wobbly picture. A tripod or other firm base will resolve this.
Keep up the great work, looking forward to your next post!
New Jersey, United States
Joined: August 01, 2007
KitMaker: 179 posts
Armorama: 144 posts
Posted: Saturday, March 26, 2011 - 08:08 AM UTC
Hello everybody
Well let us continue with this build.
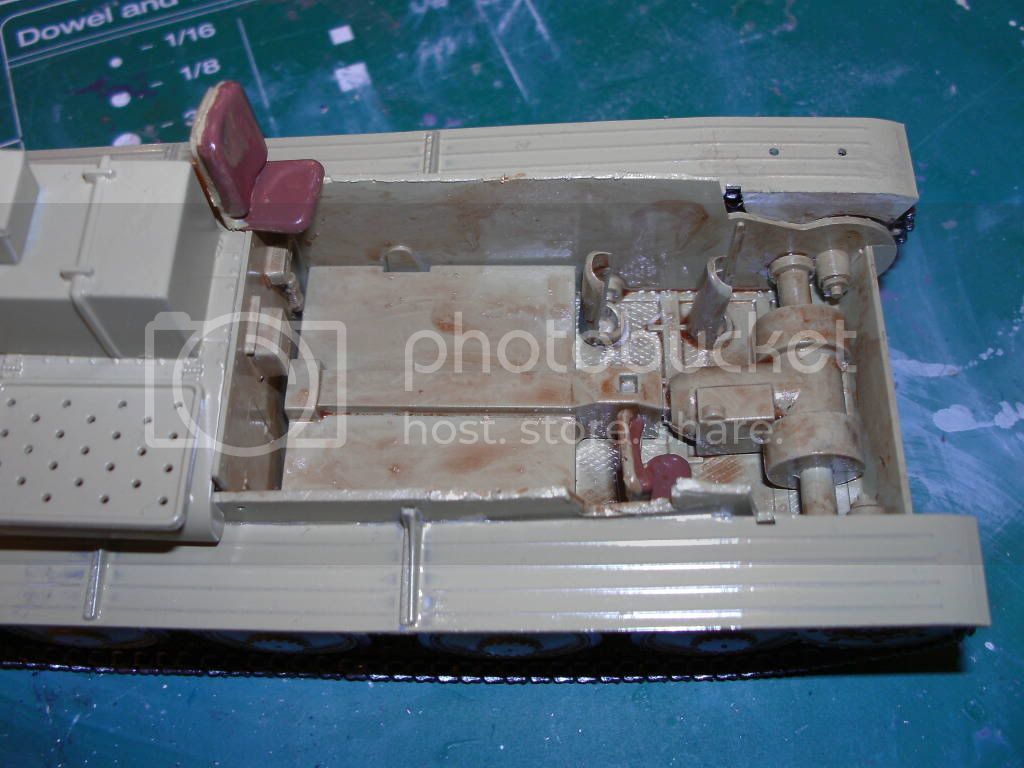
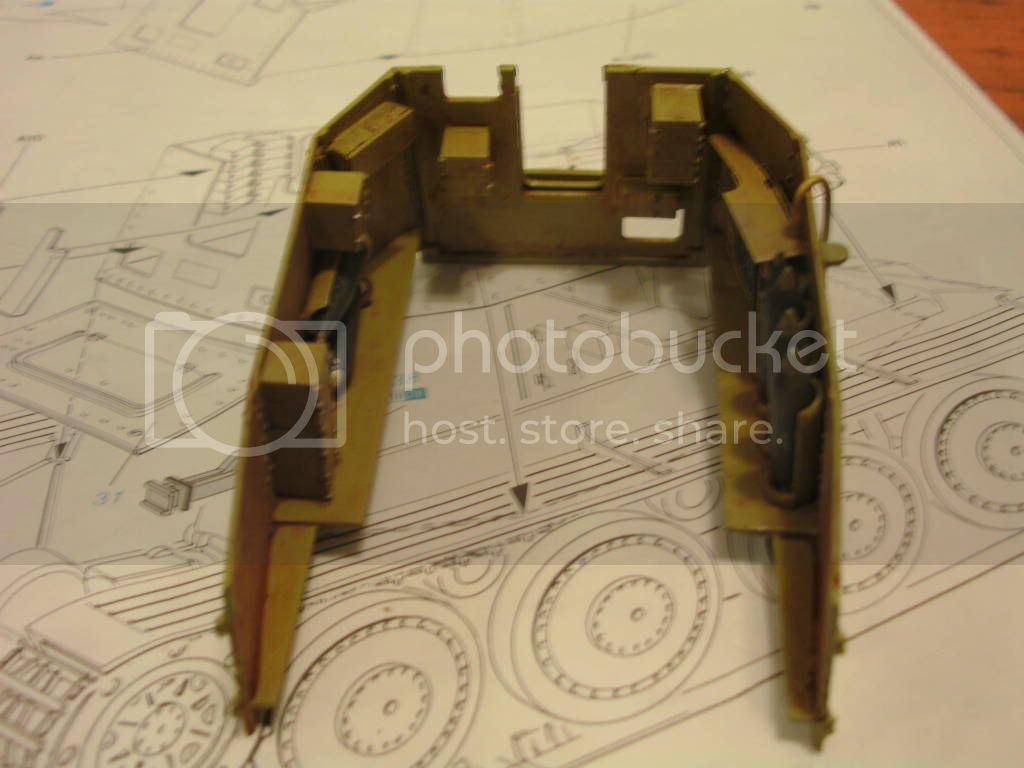
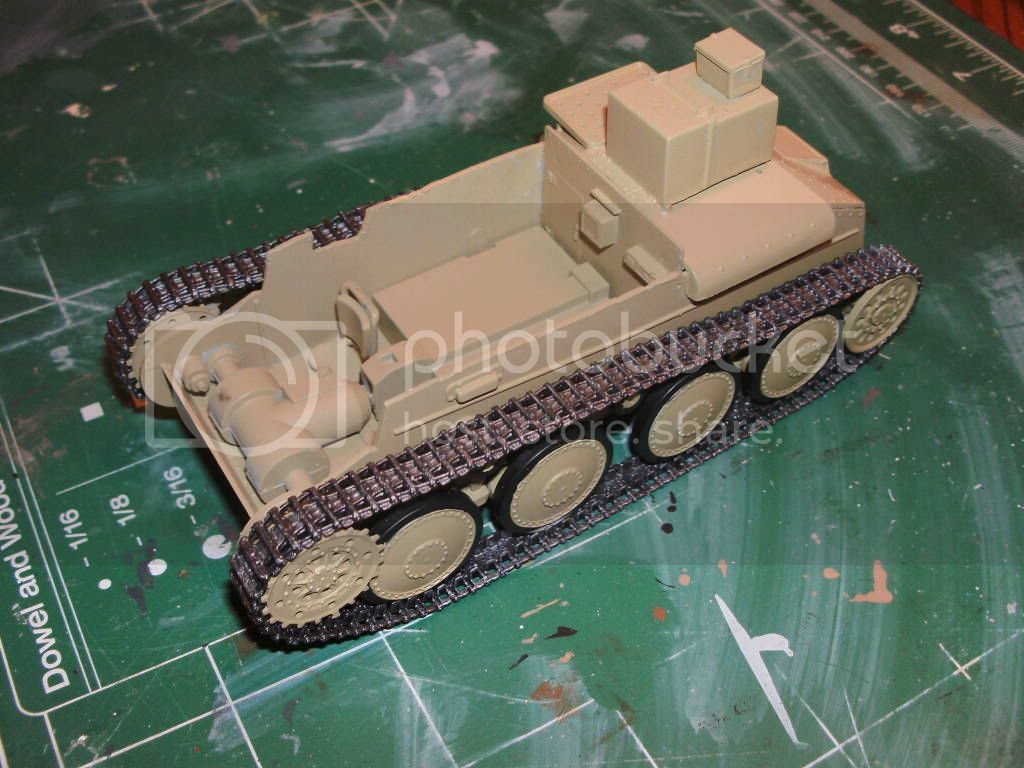
I am going finish the construction onf the inside of the hull before
i constuct the tracks.
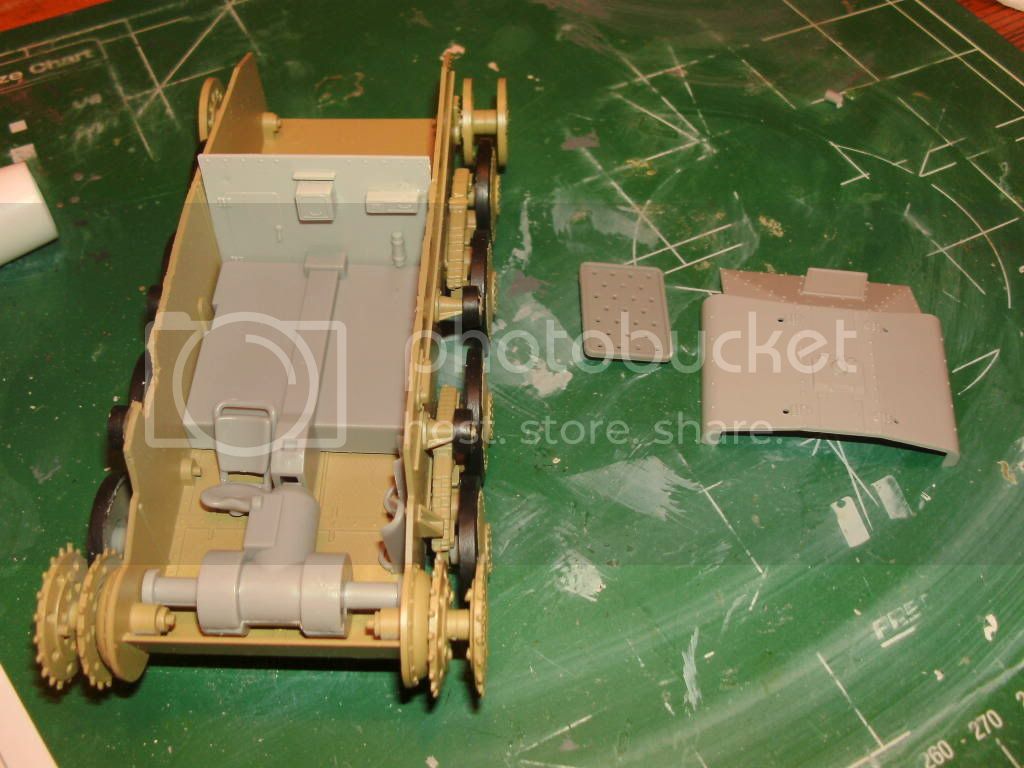
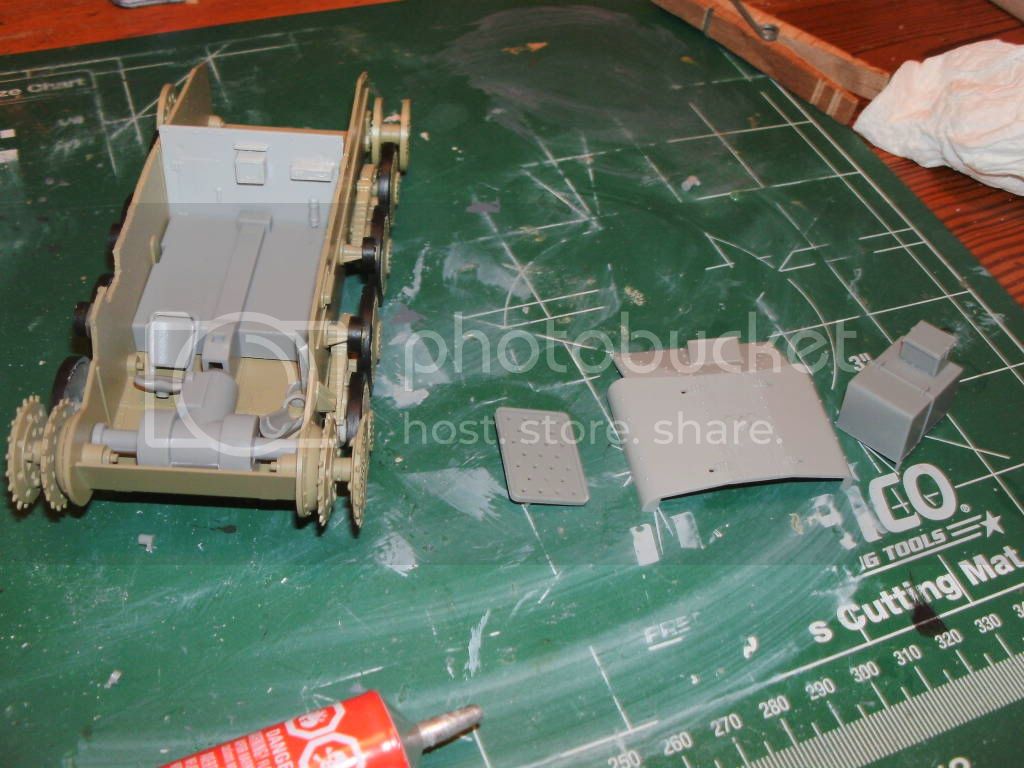
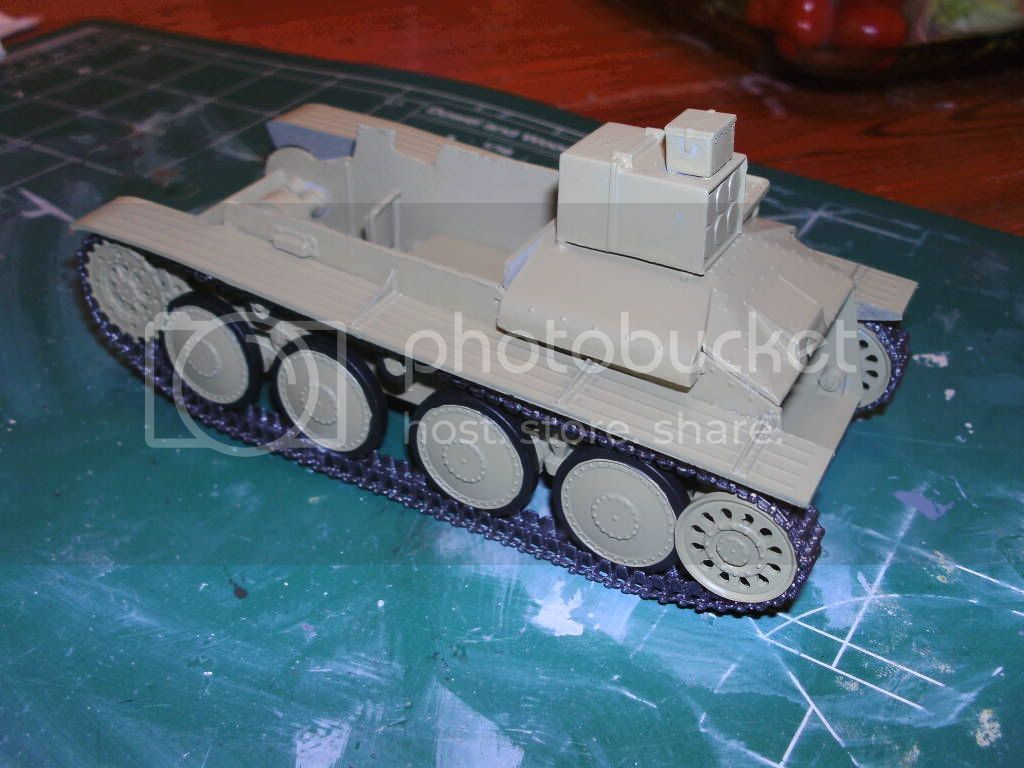
So i dry fitted the interior just to get a handle on it and see if there was any
problems.


Like Bill said it is a little lacking in detail but when the sides are installed i dont
think we will see much. so i painted the parts and glued them in place.


So i am ready to start installation of the track.
I will post again as soon as i get the tracks done.
Thanks for following.
Regards
Horst
New Jersey, United States
Joined: May 28, 2009
KitMaker: 239 posts
Armorama: 94 posts
Posted: Sunday, March 27, 2011 - 01:23 AM UTC
Way to Go H-Man. Nice build log and nice work.
Is it going to be ready for next weekend?
One of the few things I miss about working at the big G is comparing notes with you in person.
New Jersey, United States
Joined: August 01, 2007
KitMaker: 179 posts
Armorama: 144 posts
Posted: Sunday, March 27, 2011 - 09:42 AM UTC
Hey Scott
Was good to hang out with you yesterday!!!
No my friend she wont be done for Mosquitocon this comming saturday.
No biggie....
I am about to start the tracks this afternoon wish me luck.
This will be my second time that i am using magic tracks i think they are great.
I will post soon
Horst is out
New Jersey, United States
Joined: August 01, 2007
KitMaker: 179 posts
Armorama: 144 posts
Posted: Monday, April 04, 2011 - 10:37 AM UTC
Hello everybody i am sorry i am delayed in posting my progress...
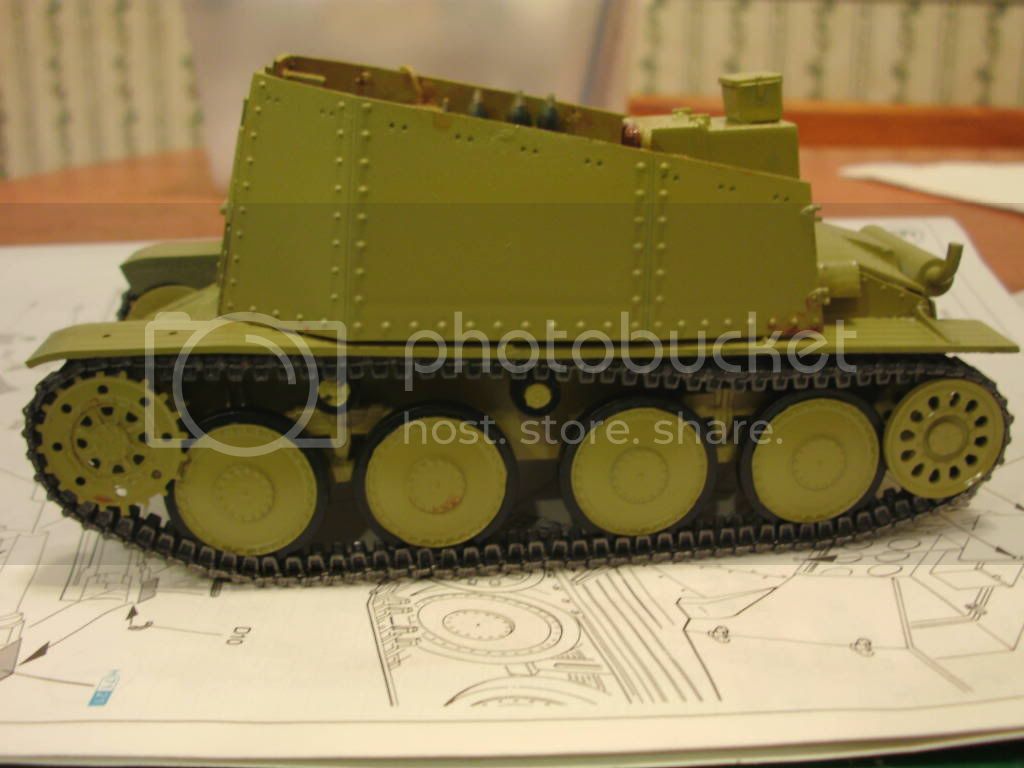
So onto the tracks!!!!
Please excuse me fot this is my second go with Magic Tracks but i do
love them.
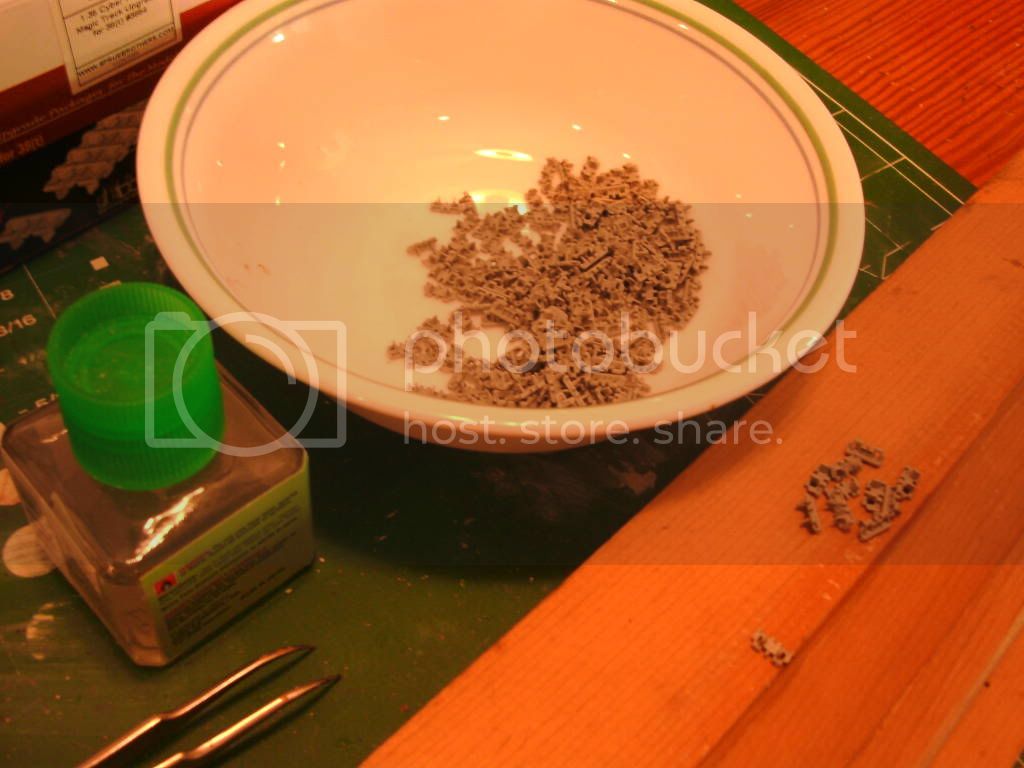
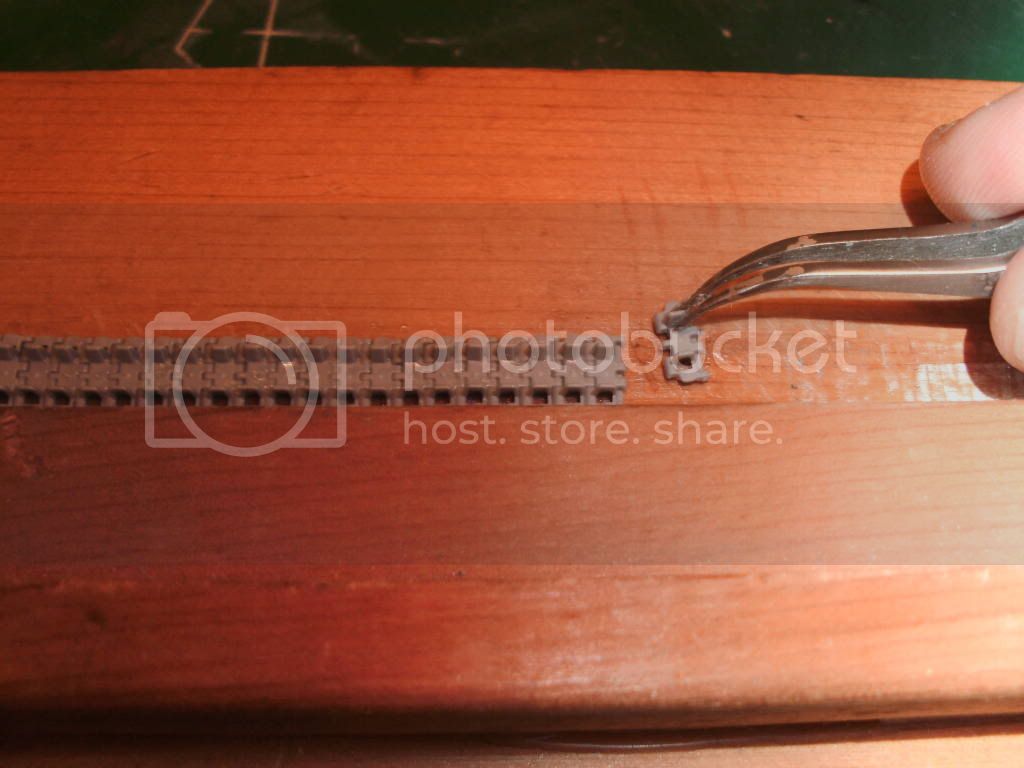
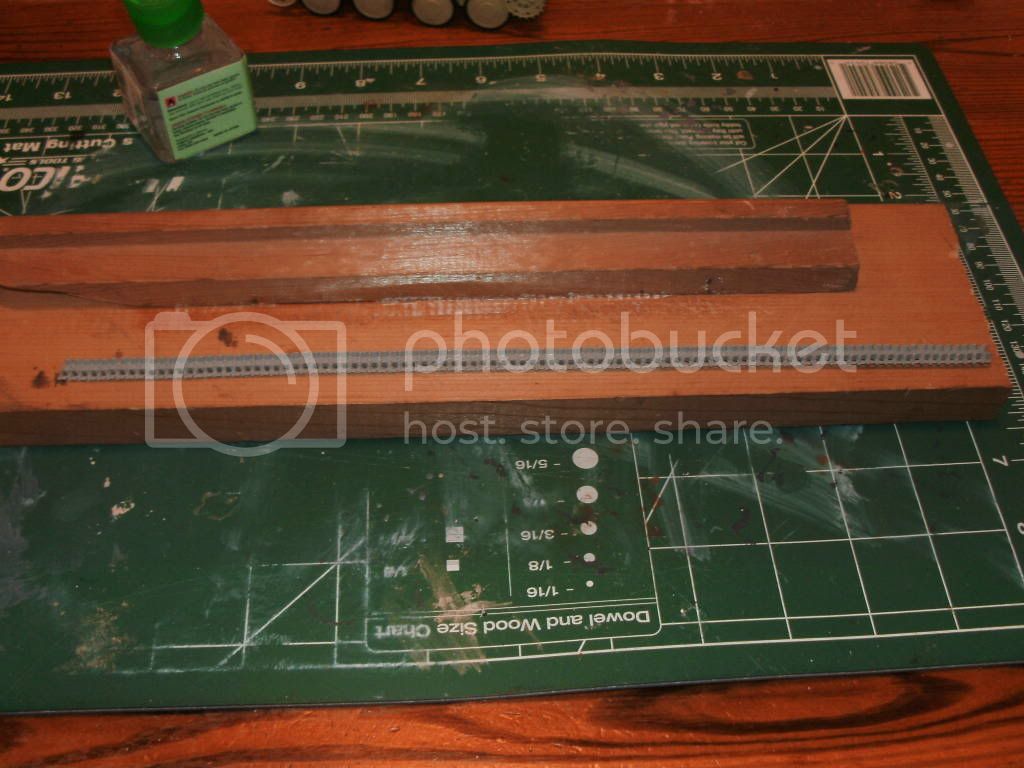
So far so good i complete an entire run and let it set up a little bit.
and then i wrap it around the bogies and drive wheels but i do not
secure them un till they are dry.
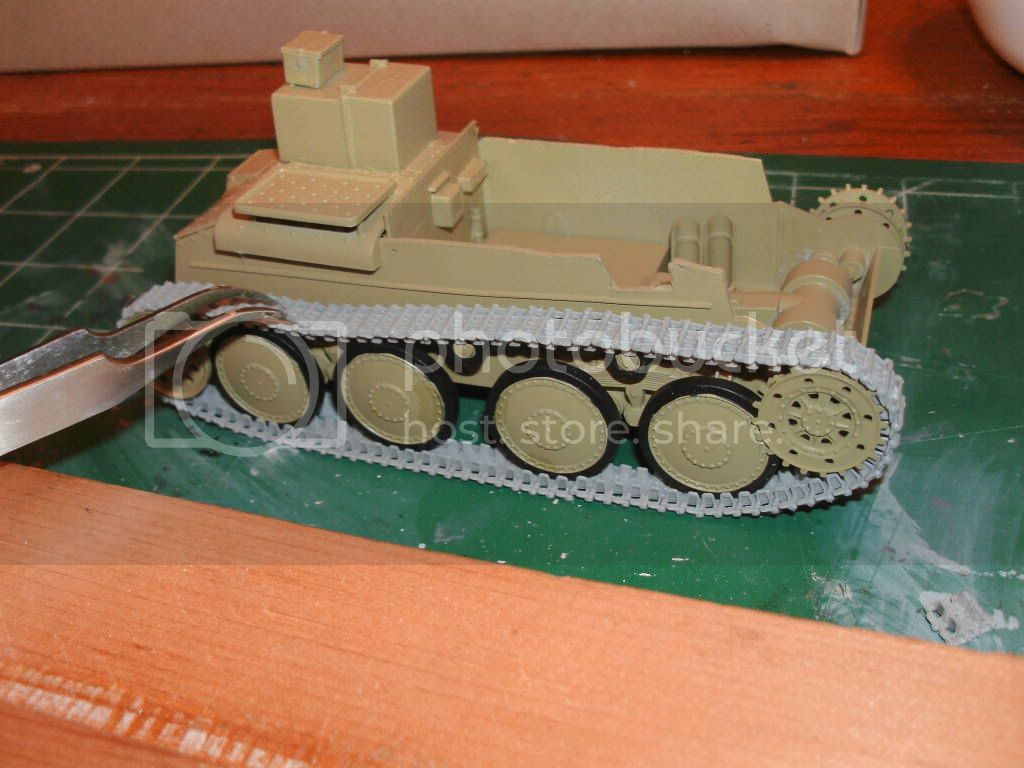
After they are dry i paint them.
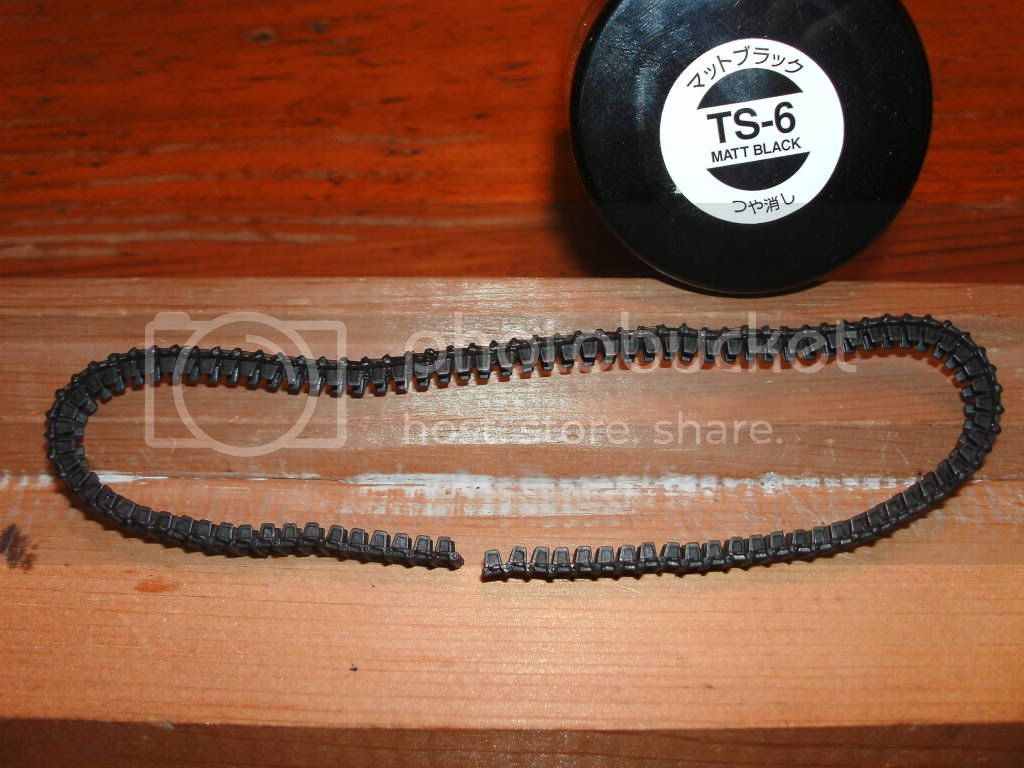
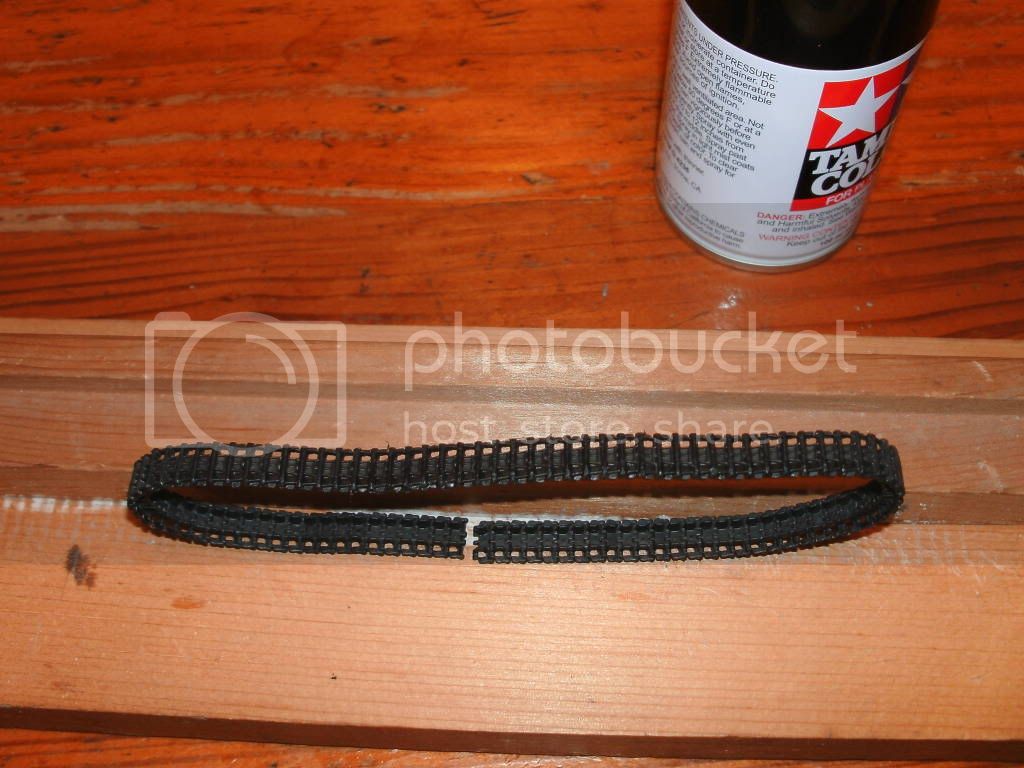
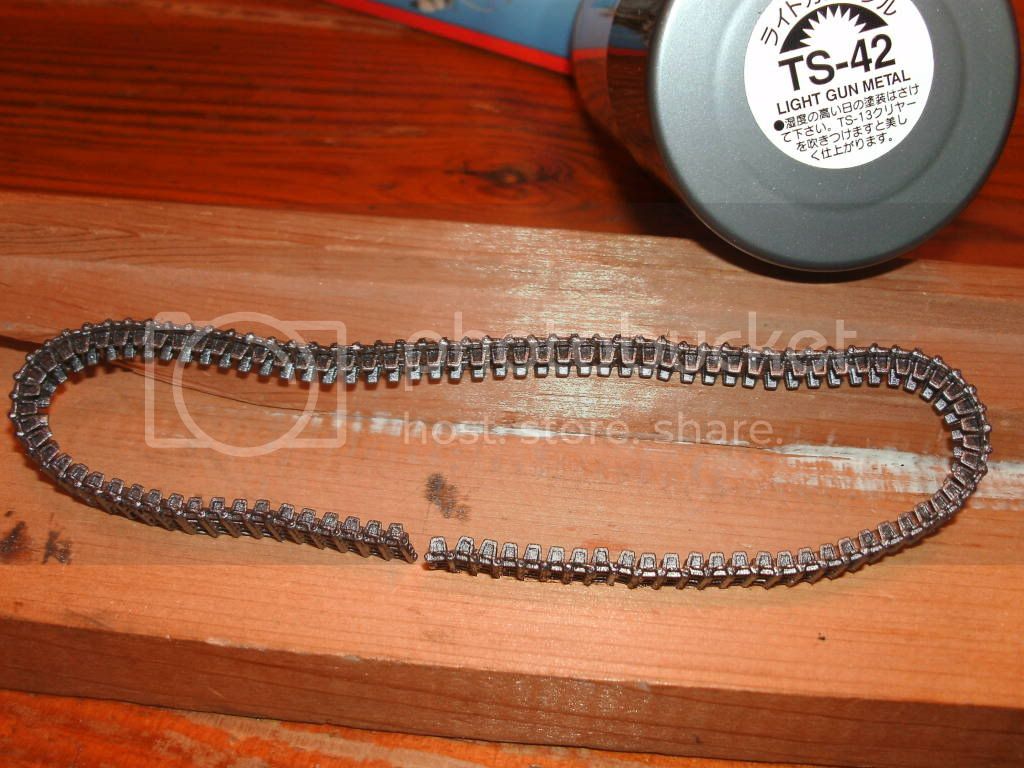

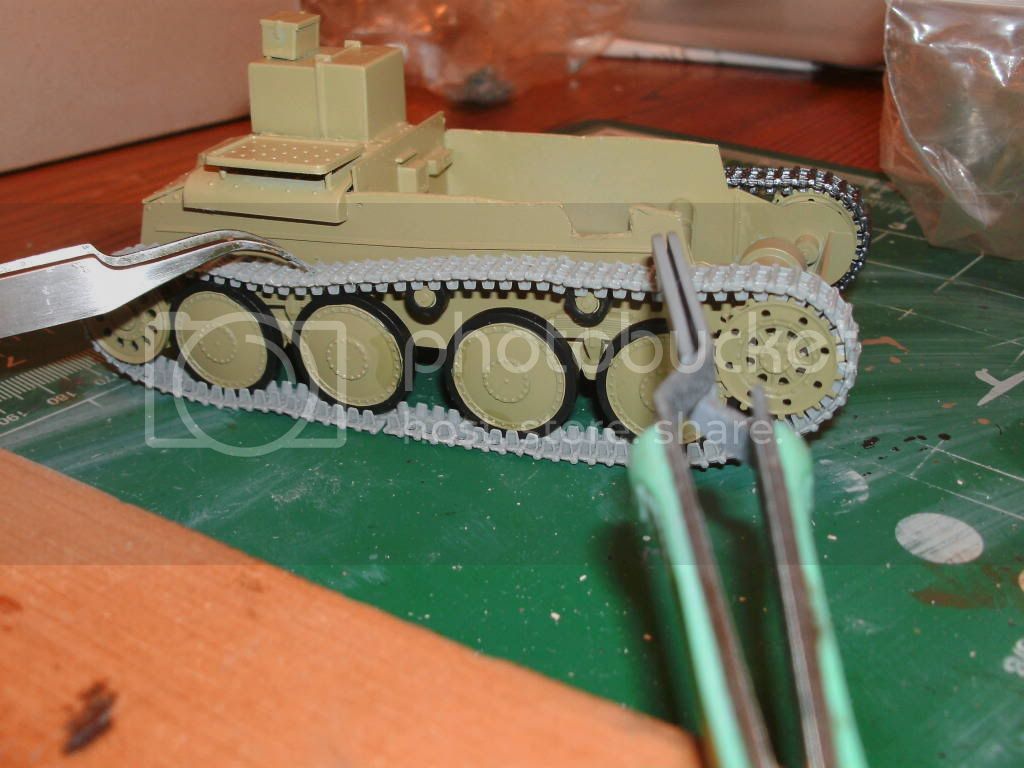
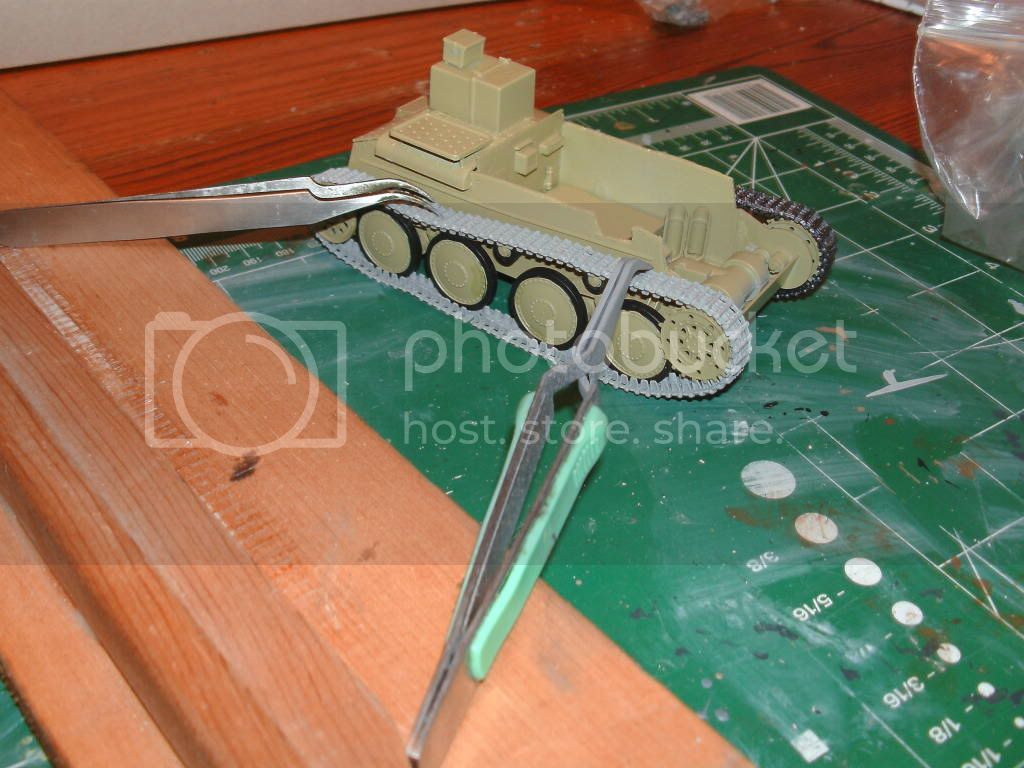
AS you will note i had to use some of my questionable tools to achieve track
sag.
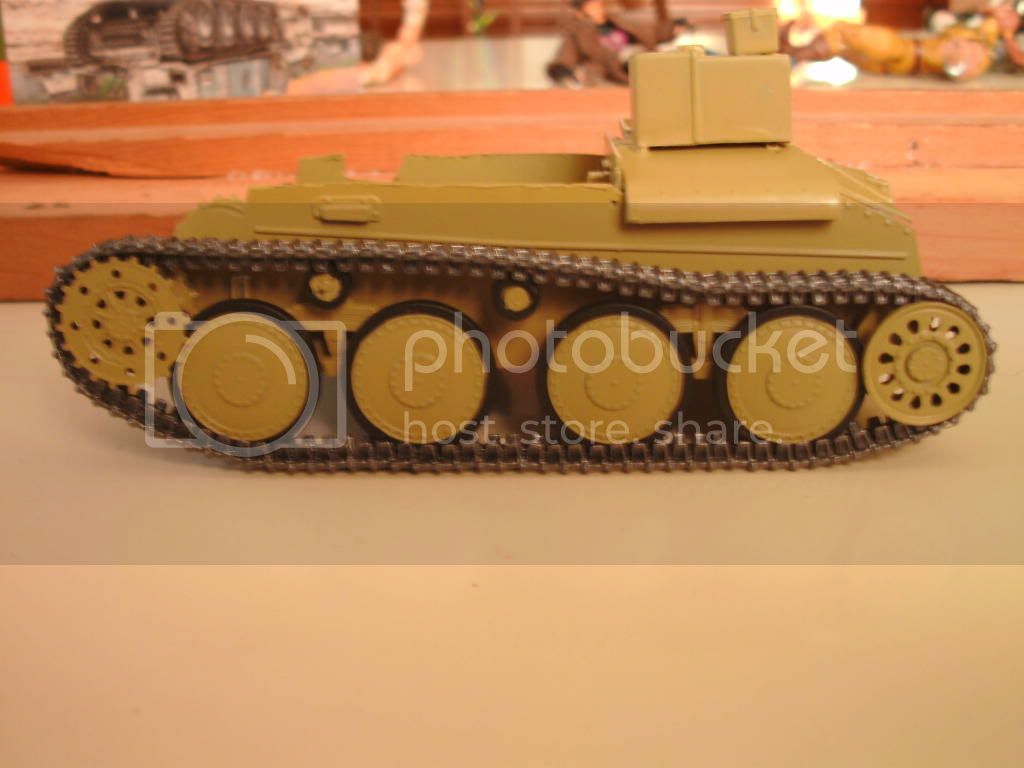
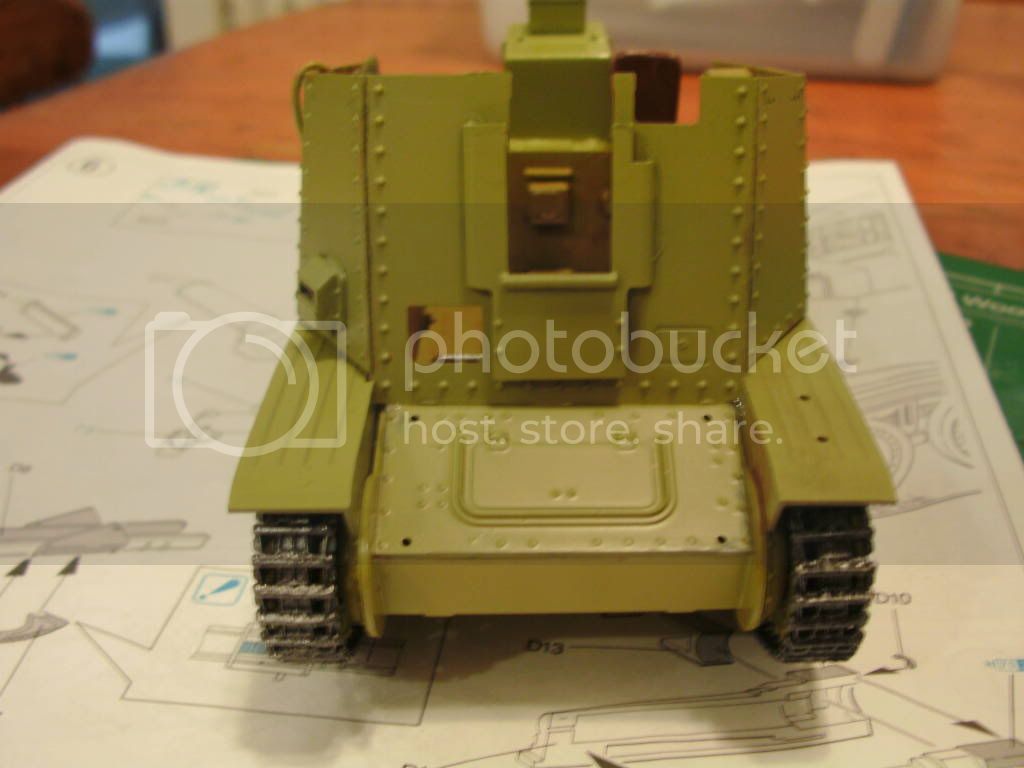
and to finish i installed the fenders...

Thats it for now i am about to work on finishing up the interior and will post soon.
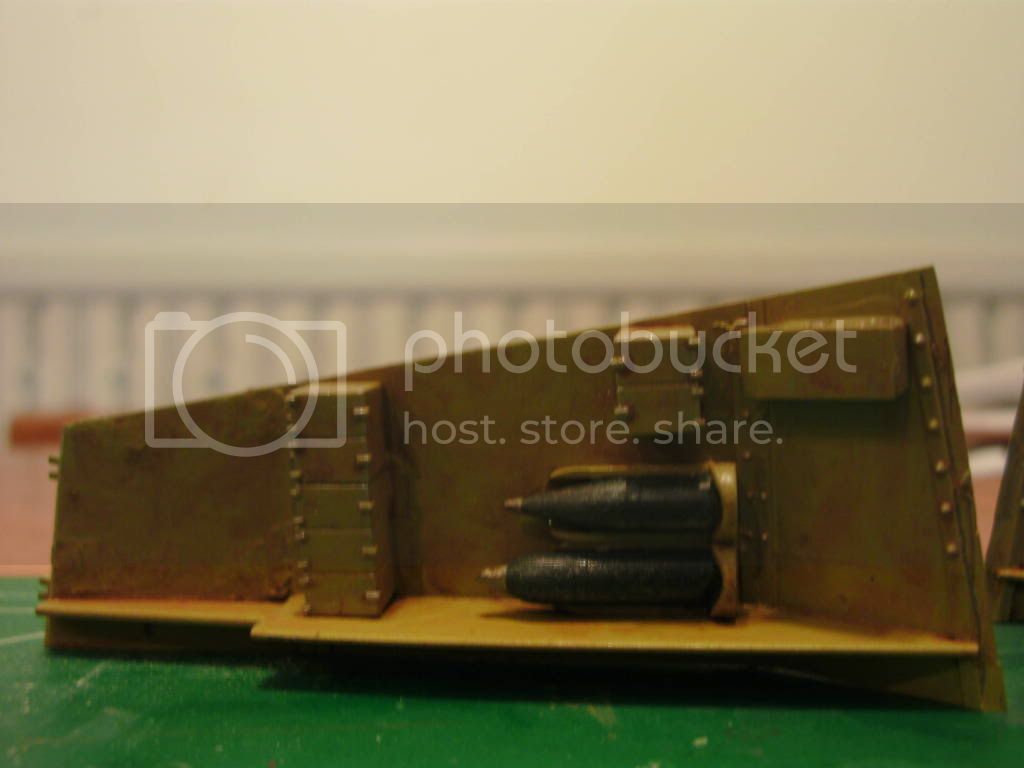
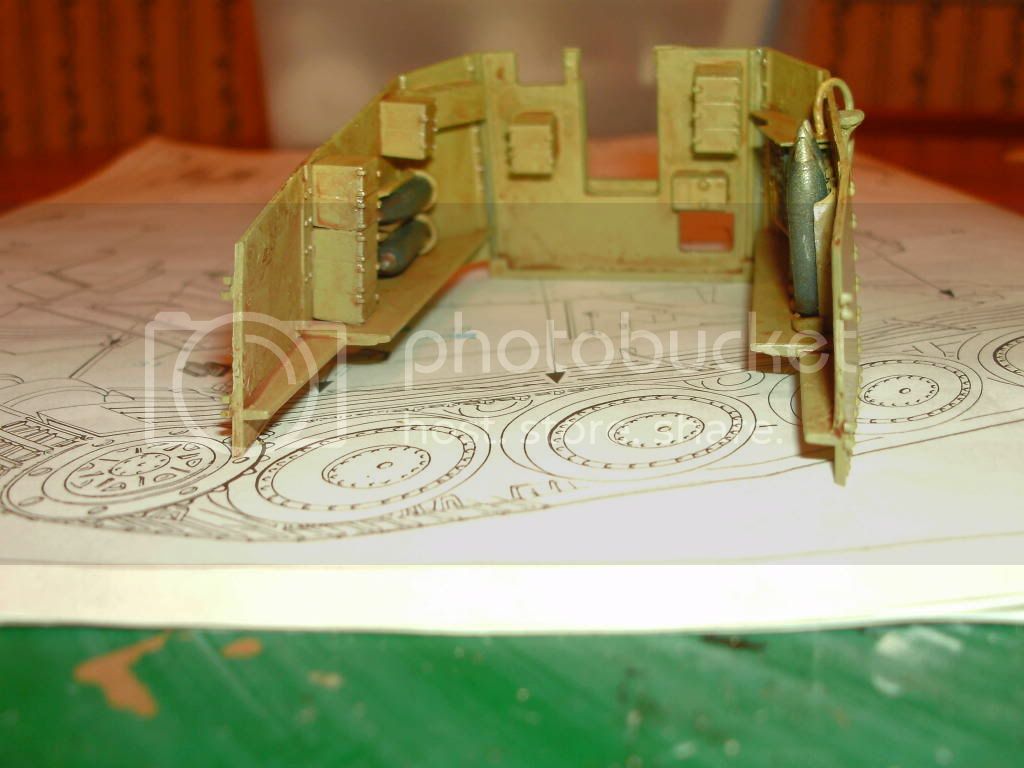
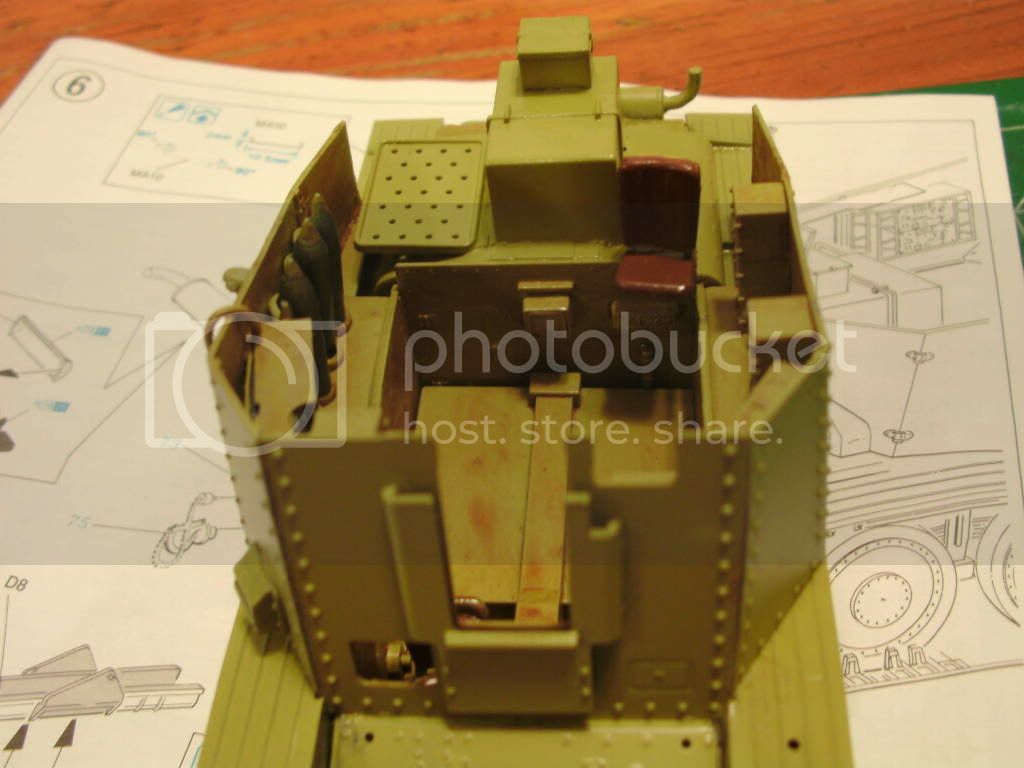
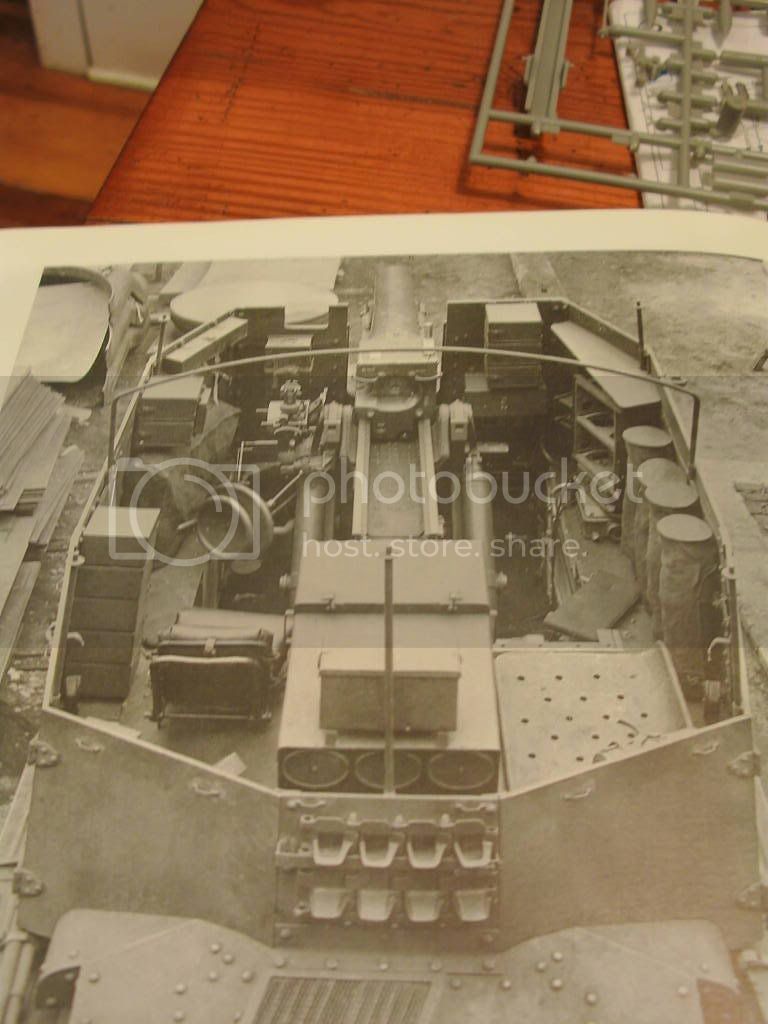
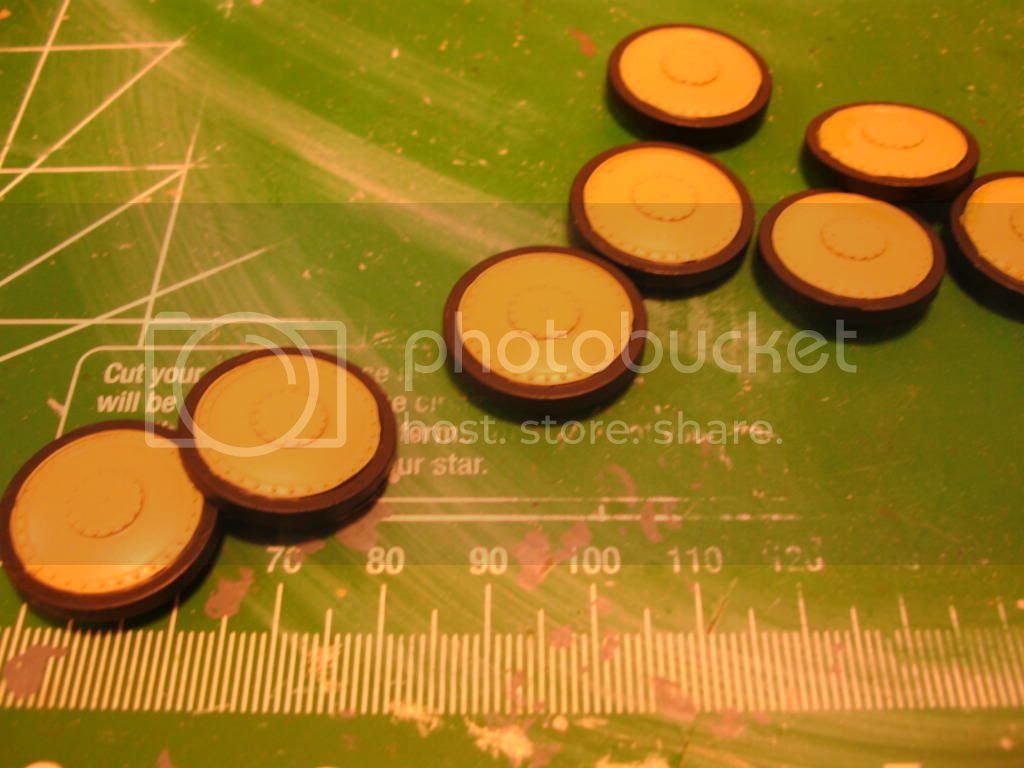
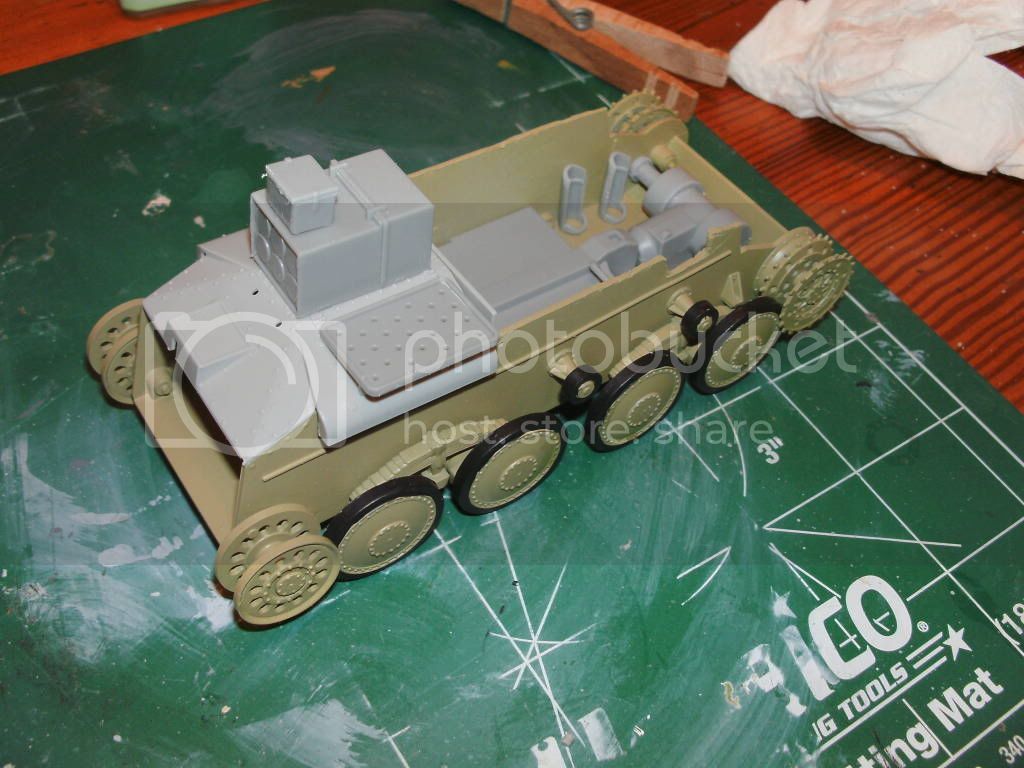
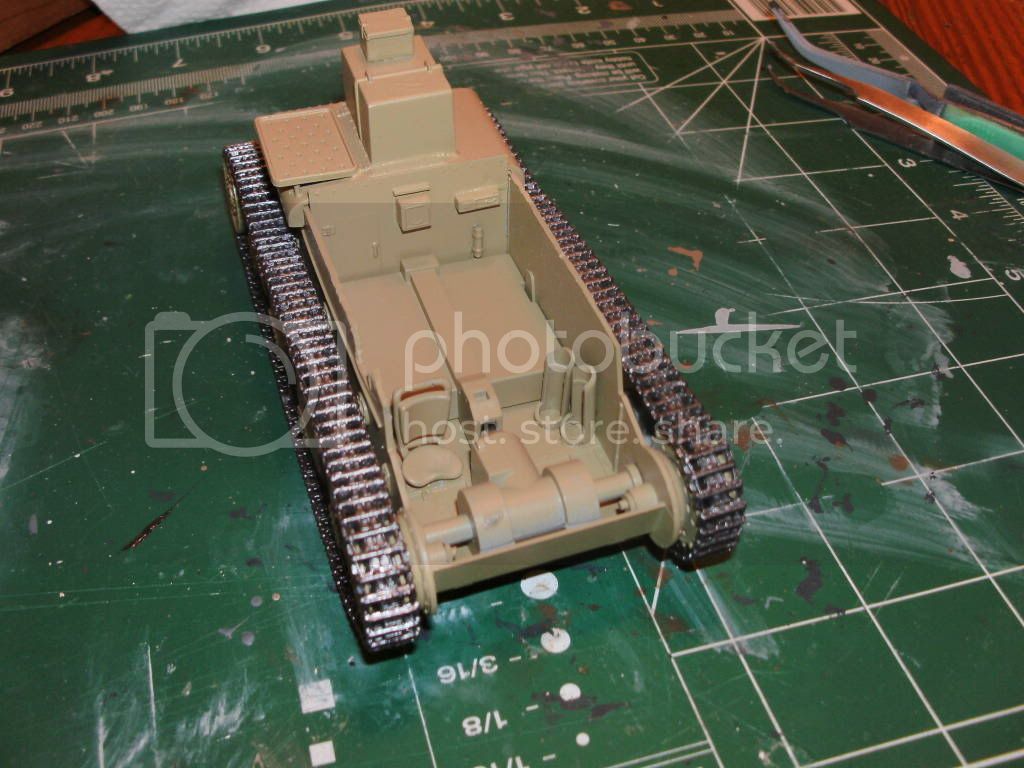
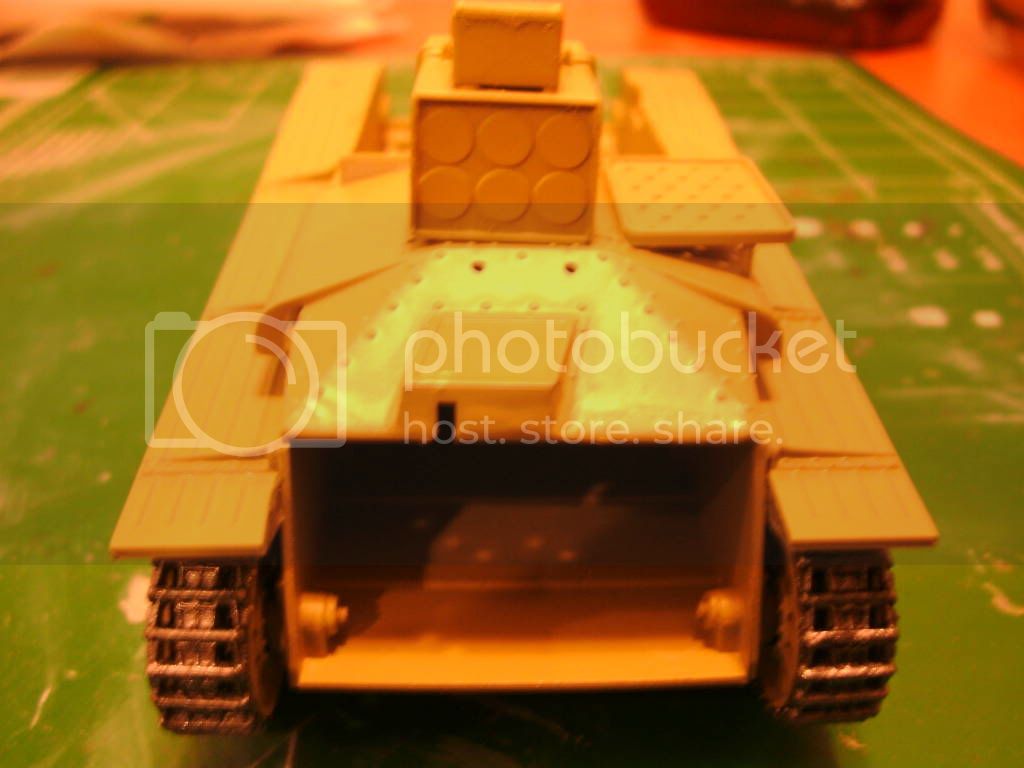
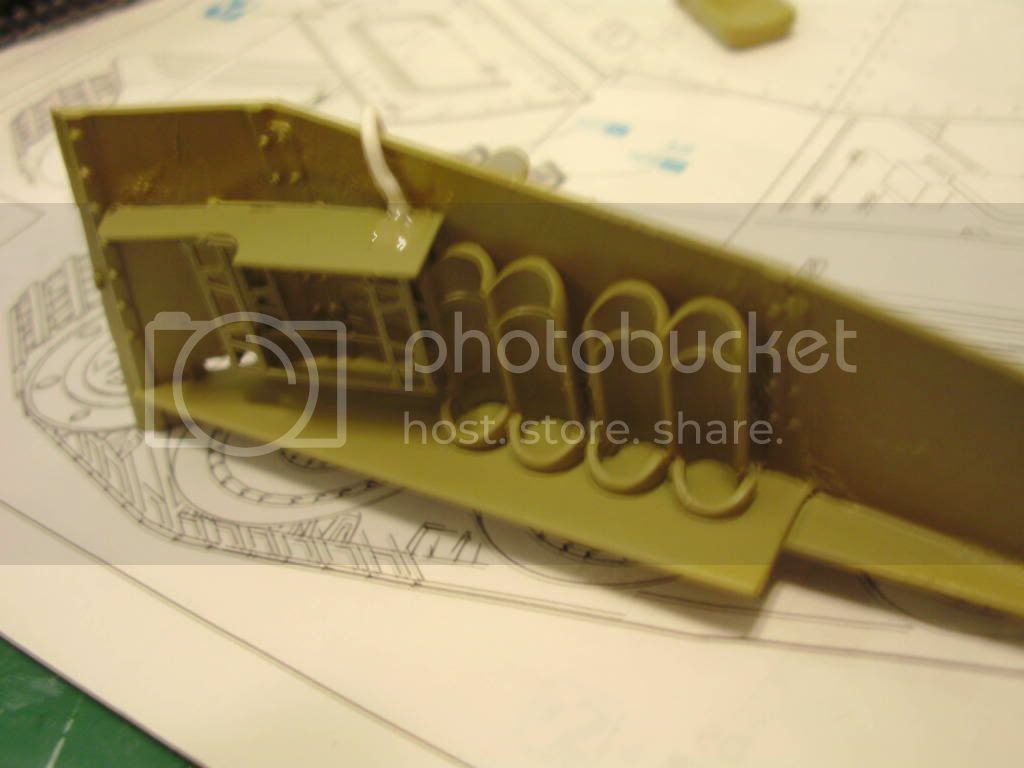
Oh yeah cananybodt tell me the function of this back panel with the
wall of round disks as shown in this last pic.
Thanks all for watching
Horst
New Jersey, United States
Joined: November 02, 2009
KitMaker: 609 posts
Armorama: 433 posts
Posted: Monday, April 04, 2011 - 02:38 PM UTC
Hi Horst - I believe that's a six round ammunition locker and you're looking at the bottom end of the shells. Bill Plunk references it in his build of Dragon's newer kit (6470). Here's the link - his comments are about 2/3 of the way down the page.
https://armorama.kitmaker.net/forums/136212&ord=&page=2 New Jersey, United States
Joined: August 01, 2007
KitMaker: 179 posts
Armorama: 144 posts
Posted: Tuesday, April 05, 2011 - 12:33 AM UTC
Thanks Bill for your responce i thought that was what it was just wasn't sure.
I will assume that it was accessed from the front only because there is an armor plate behind it and i dont believe that it was removable during firing missions.
Boy that newer kit of the SIG looks awesome!!! I've got to get one of them for my stash.
Thanks for your help and interest. Oh and by the way if you and or anybody might know how or where the trigger for firing this gun is or how it was done
i would appreciate it.
Regards
Horst
New Jersey, United States
Joined: August 01, 2007
KitMaker: 179 posts
Armorama: 144 posts
Posted: Thursday, April 07, 2011 - 12:44 PM UTC
Hi all
i have a short update to post.
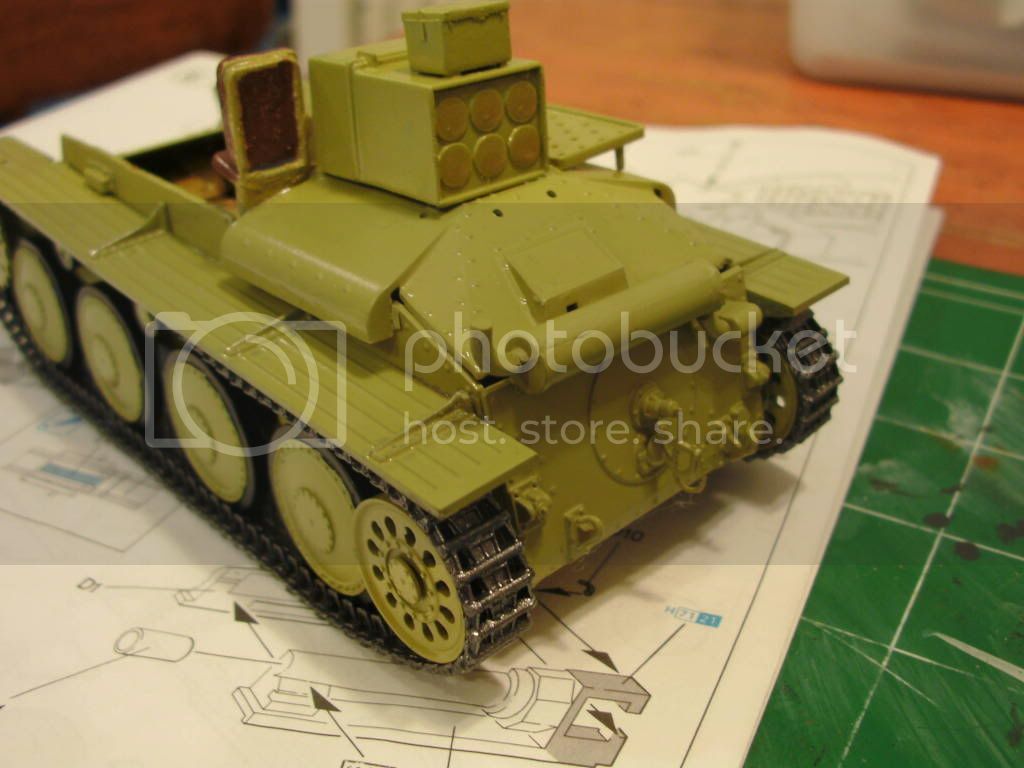
So since i have the radio on the right side i have to move the antena mount also.

so i removedit and reinstalled it as shown,


As you will note that i tried to scratch the cable fot the radio,
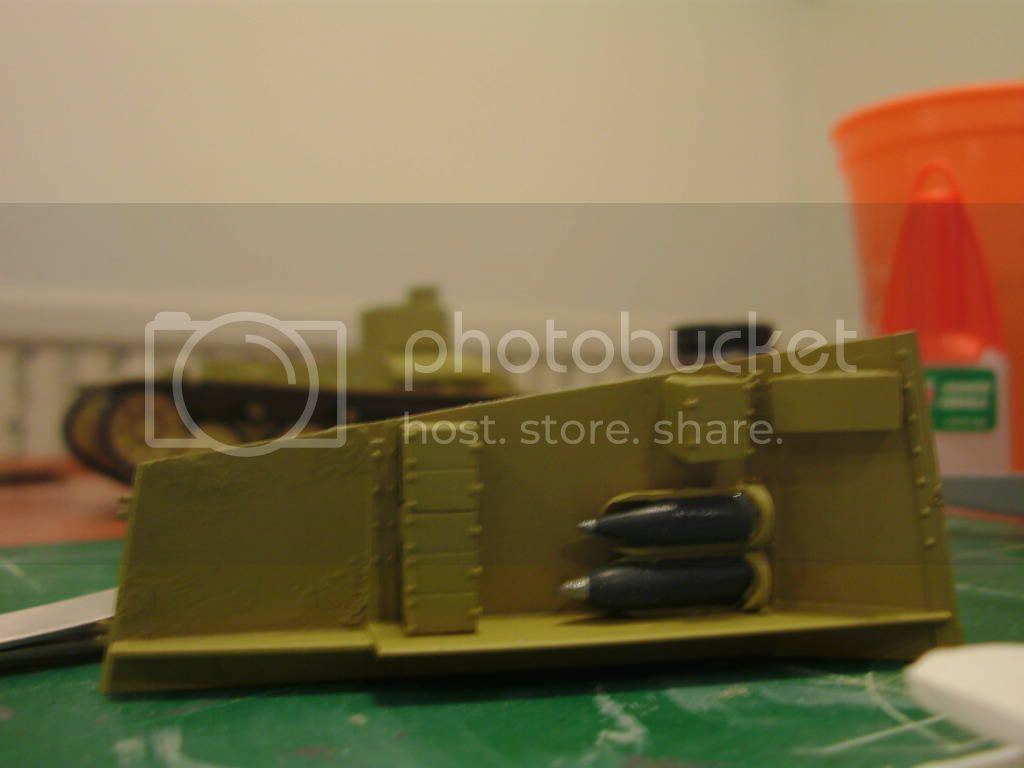
and then i installed the radios and the shells which i will have to touch up.

That is my short update for now i will continue and get back soon.
Regards
Horst
New Jersey, United States
Joined: August 01, 2007
KitMaker: 179 posts
Armorama: 144 posts
Posted: Saturday, April 09, 2011 - 12:32 PM UTC
New Jersey, United States
Joined: November 02, 2009
KitMaker: 609 posts
Armorama: 433 posts
Posted: Tuesday, April 12, 2011 - 04:10 PM UTC
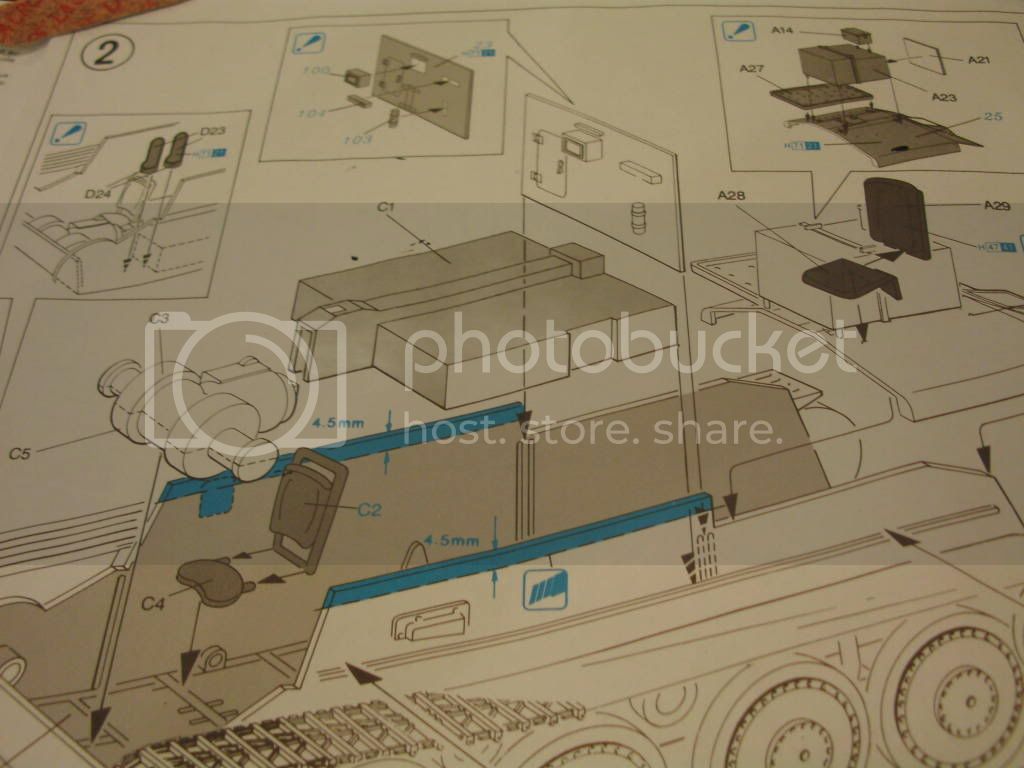
Horst - Did you have any trouble fitting the armored shields to the lower hull? Step two of the instructions says to shave 4.5 mm off the lower hull but when I measure 4.5 mm it's much deeper than the accompanying photo (which looks more like 2.5 mm). Are the cuts critical to fitting the armored shields properly later on?
New Jersey, United States
Joined: August 01, 2007
KitMaker: 179 posts
Armorama: 144 posts
Posted: Wednesday, April 13, 2011 - 01:06 AM UTC
Goodmorning Bill!!!
The fit went good... The Armor Shield slips/skirts around the hull.
(see the fifth picture above) The shelf should be even with the cut off section on the hull, and is secured to it from the front Glasis plate (slides right in) and actually rests on top of the fenders.
I hope i explained it right.
Again aside from the lack of interior detail it seems to be a pretty good kit.
Hope this helps
Regards
Horst
New Jersey, United States
Joined: November 02, 2009
KitMaker: 609 posts
Armorama: 433 posts
Posted: Wednesday, April 13, 2011 - 02:07 AM UTC
Quoted Text
The shelf should be even with the cut off section on the hull, and is secured to it from the front Glasis plate (slides right in) and actually rests on top of the fenders.
Not sure what you mean by shelf, but based on the first set of photos you posted (the eighth in particular) it appears that you cut down far enough to make the sides completely level from front to back. That may be what the instructions intended because it's really close to 4.5 mm ... the illustration in the instructions might just be off. Also, what did you do to repair the hole on the right side where you removed the armored visor ... or is that hidden from view once the armored shields are installed?


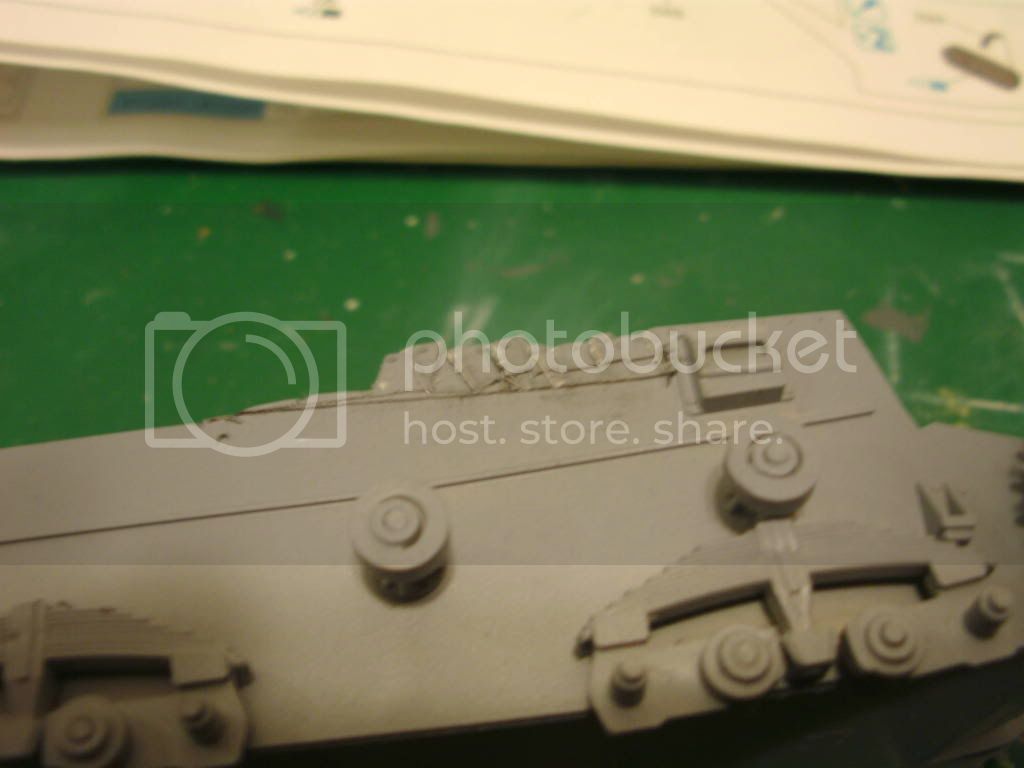
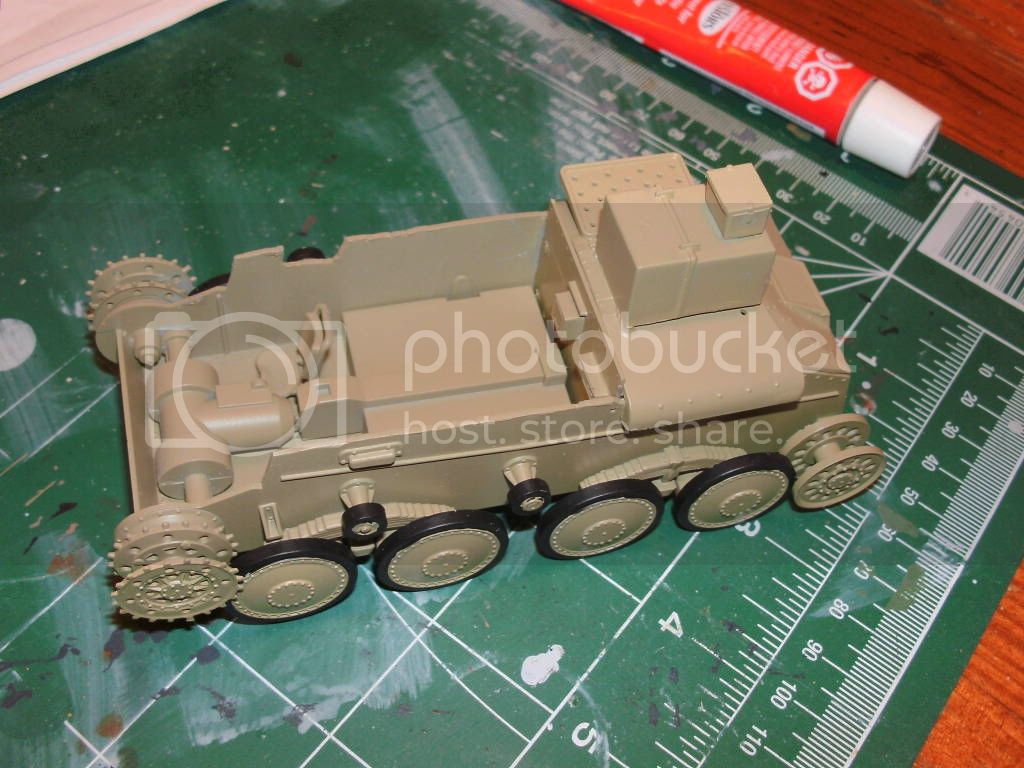
 So to begin i started with the bottom hull which was pretty straight foward.
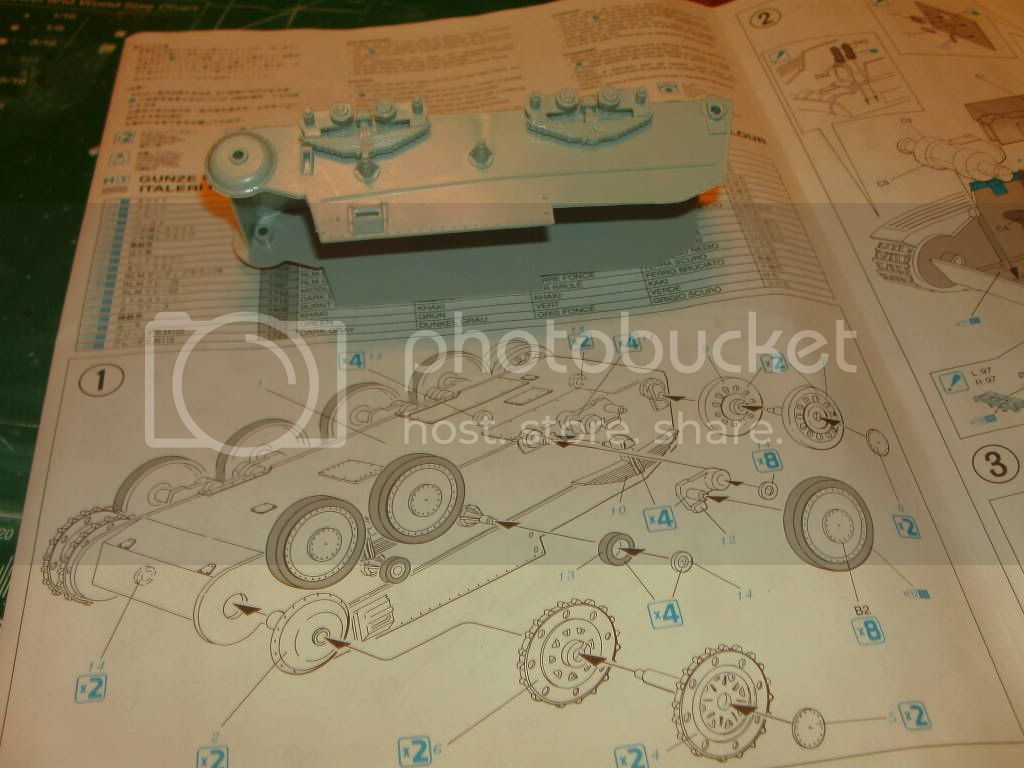
 Per the instructions i had to cut the hull on both sides to accomodate the side upper hull which i cut using some queetionable tools but i believe i got it worked out.