

Lots more detail form the Panzer IV G I built last time and still enjoyable although one of two bits of PE were a bit tricky.
More up soon.


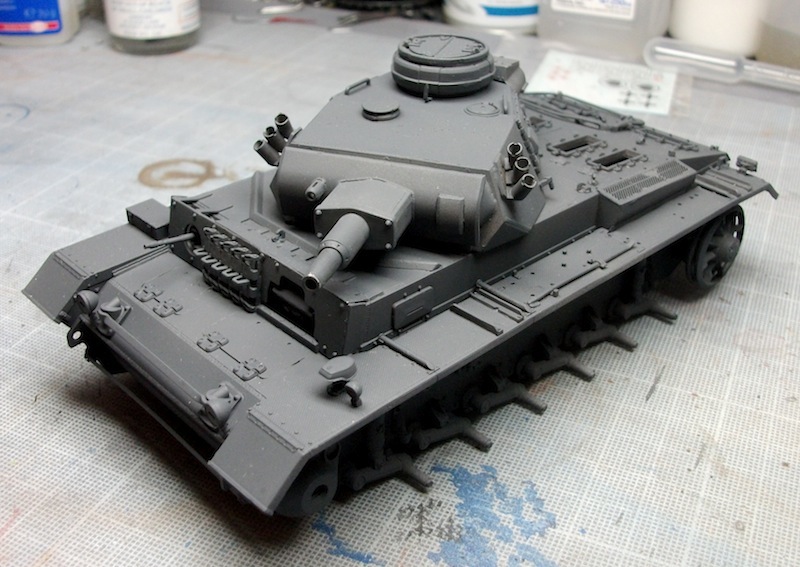


Looking good so far Mark. I see you´re keeping all the small details seperate for painting. I usually fix these in place as its easier to hold the complete model than work with so many small fiddly items ... Im also a bit ham-fisted with glue!


HI Mark
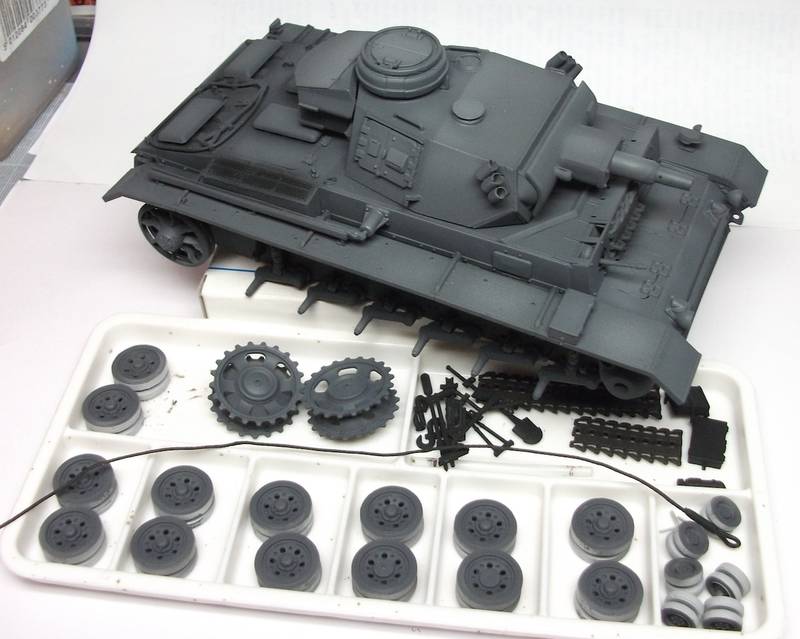
Nice build so far. maybe it's good to add some wire for headlights.


 " BORDER="0">
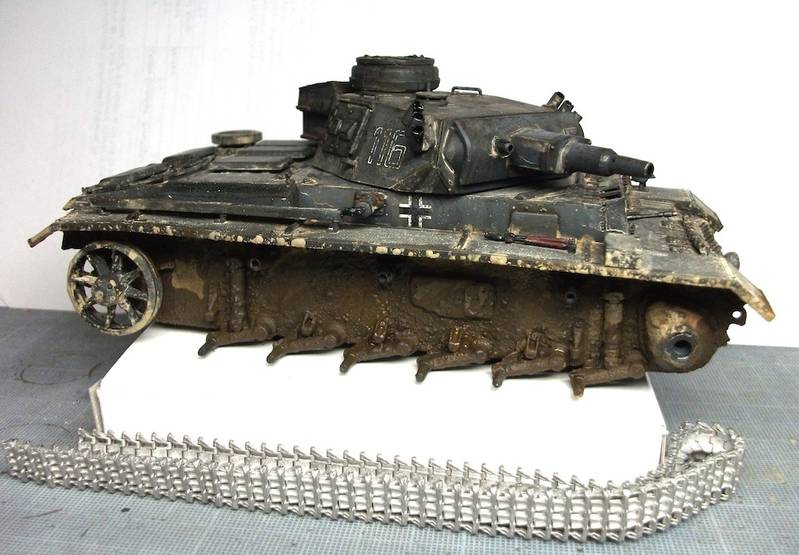
Well, I decided to forgo the oil filter in favour of some AK Interactive dust/earth effects later on. I figure the oil fading will get covered up and therefore be a waste of time. More on this later when I get to those stages.
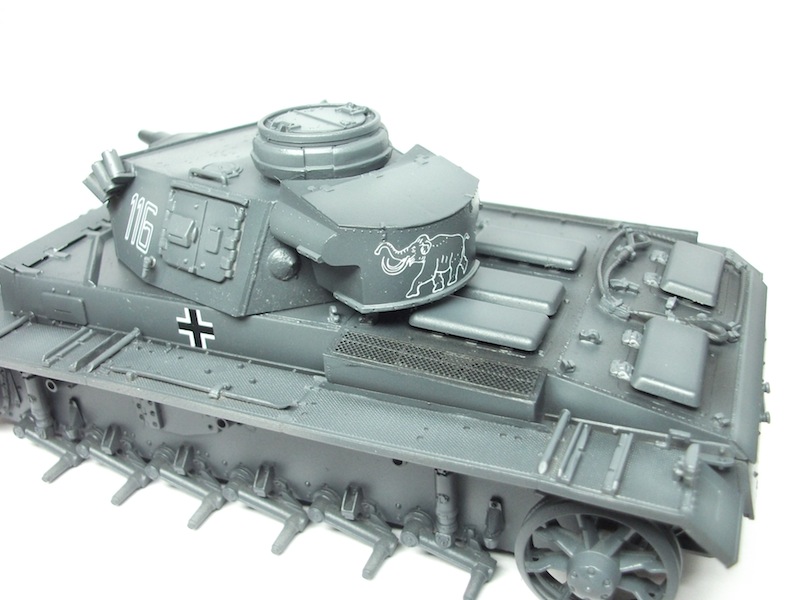
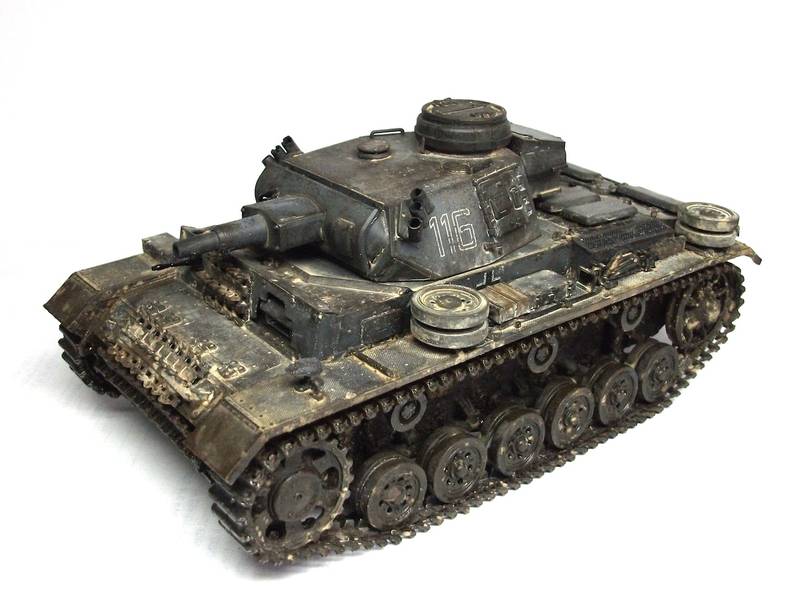
So, I applied some chipping tonight (sponge and brush) as well as a Mig Productions dark wash around the details which was blended using white spirits once dry. I'll touch some of this up later once I've added the dust and dry mud. I'm going for an Eastern Front 1942 autumn look with lots of ingrained dust, rain marks and fresh mud from the beginning of the famously muddy Russian wet season.
Over the weekend I hope to paint up the running gear, tools and other details prior to adding the dirt and grime. I think I'll also apply a light matt varnish to dull the paintwork down slightly.

I just love these little panzer 3's
The chipping effect is fantastic Mark, can I ask what type of sponge you used to get this effect ?, I want to do something more or less the same on a T-55, I had read in a magazine about doing this type of heavy chipping with a sponge, but I am not sure what type of sponge would work best.
I have Tamiya's Panzer III N stashed away and I am tempted to start it now
Quoted TextI just love these little panzer 3's
The chipping effect is fantastic Mark, can I ask what type of sponge you used to get this effect ?, I want to do something more or less the same on a T-55, I had read in a magazine about doing this type of heavy chipping with a sponge, but I am not sure what type of sponge would work best.
I have Tamiya's Panzer III N stashed away and I am tempted to start it now
Thanks !
I use two different densities of sponges. I use the most dense one for areas with lots of small chips like around hatches. I mostly use a less dense foam though and apply more or less paint depending on the size of chips I want. To give you some idea of the type of sponge I'd say the sponge scourer you get for cleaning dishes is the dense type and a bath type sponge is the less dense for larger chips. I tear a chunk of so its and irregular shape and this helps keep it random.
I do like this technique as its very quick but I'm planning on trying out a different technique in the near future involving painting the chips on using a brush. It'll take forever but i think painting chips with highlights on the lower inside edges is far more striking and dramatic effect. There's no reason why i couldn't touch up some of the chips and highlight them so they look deep but I don't think its worthwhile on this vehicle with other effects effectively neutering any hard work in the chips.

Really nice finish Mark. I like the heavy weathering. All it needs is some signs of life ... some personal stowage and maybe a figure or two. Will you add this to a base?


 |


