Hosted by Darren Baker
Dragon6606 Panzer3 ausf.N winter camo

vonHengest

Joined: June 29, 2010
KitMaker: 5,854 posts
Armorama: 4,817 posts

Posted: Tuesday, April 12, 2011 - 12:58 PM UTC
Very interesting guys. I'm still wary of using food type products, but I may try a little bit with some white paint added to the mixture and leave it by a window for a while and see if it yellows are draws attention from any unwanted "guest".
Pookie

Joined: March 27, 2011
KitMaker: 127 posts
Armorama: 123 posts

Posted: Tuesday, April 12, 2011 - 01:04 PM UTC
To Trifon
thanks man,really inspiring reply. i'm planing to make such a tutorial to share some of my experience.
I use zippo fule for filter and washes, it's clean and dries really fast. mineral spirit on the other hand, dries too slow. i don't like waiting.
A good plan can be truly helpful
thanks man,really inspiring reply. i'm planing to make such a tutorial to share some of my experience.
I use zippo fule for filter and washes, it's clean and dries really fast. mineral spirit on the other hand, dries too slow. i don't like waiting.
A good plan can be truly helpful


Pookie

Joined: March 27, 2011
KitMaker: 127 posts
Armorama: 123 posts

Posted: Tuesday, April 12, 2011 - 01:13 PM UTC
Quoted Text
Very interesting guys. I'm still wary of using food type products, but I may try a little bit with some white paint added to the mixture and leave it by a window for a while and see if it yellows are draws attention from any unwanted "guest".
Hi Jeremy, don't worry that “turing yellow” problem too much, that mixture is really
easy to remove. Even if that problem do occurs, just clean it and add some new.
just have fun


Pookie

Joined: March 27, 2011
KitMaker: 127 posts
Armorama: 123 posts

Posted: Tuesday, April 12, 2011 - 01:52 PM UTC


Pookie

Joined: March 27, 2011
KitMaker: 127 posts
Armorama: 123 posts

Posted: Tuesday, April 12, 2011 - 06:13 PM UTC
thanks guys.as some of you asked. I just made a simple step by step tutorial about how to gain a good looking whitewash paint.
here we go
First, u must have suitable tools and paint.


2 brushes at least. make a smaller brush by cutting the front hair
remember to use animal hair brush, nylon ones are too hard for this

with these stuff, we can start to creat winter camo

in step 1. DO NOT USE Tamiya's paint as base color.


in step 4,dip some water with larger brush and scratch these areas, be cautious when this small chips appear, cos water can run into the gaps between hairspray and the basecoat, melte the hairspray rather easily. so be gentle and make scratches little by little. until u achieve the wanted result.

after making bigger chips, use smaller brush to make tiny chips
always remember to remove extra water in time with napkin paper. otherwise, it will leave ugly white spots after dries.


now u have already gained a nice looking
add more small chips by using a super fine brush and sponge method afterwards.
In general, we should always be patient and observe real pictures before painting. Combining different techniques and it's easy to gain such look.

that's it. I hope my sharing can be helpful. thank u guys
here we go
First, u must have suitable tools and paint.


2 brushes at least. make a smaller brush by cutting the front hair
remember to use animal hair brush, nylon ones are too hard for this

with these stuff, we can start to creat winter camo

in step 1. DO NOT USE Tamiya's paint as base color.


in step 4,dip some water with larger brush and scratch these areas, be cautious when this small chips appear, cos water can run into the gaps between hairspray and the basecoat, melte the hairspray rather easily. so be gentle and make scratches little by little. until u achieve the wanted result.

after making bigger chips, use smaller brush to make tiny chips
always remember to remove extra water in time with napkin paper. otherwise, it will leave ugly white spots after dries.


now u have already gained a nice looking
add more small chips by using a super fine brush and sponge method afterwards.
In general, we should always be patient and observe real pictures before painting. Combining different techniques and it's easy to gain such look.

that's it. I hope my sharing can be helpful. thank u guys


vonHengest

Joined: June 29, 2010
KitMaker: 5,854 posts
Armorama: 4,817 posts

Posted: Tuesday, April 12, 2011 - 06:40 PM UTC
That was a great mini tutorial! 
One question, what are Gaia paints?

One question, what are Gaia paints?

Pookie

Joined: March 27, 2011
KitMaker: 127 posts
Armorama: 123 posts

Posted: Tuesday, April 12, 2011 - 06:51 PM UTC
Quoted Text
That was a great mini tutorial!
One question, what are Gaia paints?

it's the same kind as GSI/MR hobby's color.
google it, or find it on ebay
spitfire303

Joined: December 22, 2006
KitMaker: 1,437 posts
Armorama: 1,406 posts

Posted: Tuesday, April 12, 2011 - 09:14 PM UTC
Great build! I love the look of the winterketten.
BTW, nice Armorama email count
BTW, nice Armorama email count

DRAGONWAGON

Joined: February 05, 2003
KitMaker: 1,041 posts
Armorama: 501 posts

Posted: Tuesday, April 12, 2011 - 09:55 PM UTC
Thanks a lot for the outstanding Step-by-Step explaining the whitewash technique!
Your model is looking VERY sharp, I'm looking forward to the additional groundwork....
Keep the pic's coming please, best regards, John.
Your model is looking VERY sharp, I'm looking forward to the additional groundwork....
Keep the pic's coming please, best regards, John.


Pookie

Joined: March 27, 2011
KitMaker: 127 posts
Armorama: 123 posts

Posted: Wednesday, April 13, 2011 - 12:14 AM UTC
thanks man, oops that's maybe just a system error,i mean about my count.

Pookie

Joined: March 27, 2011
KitMaker: 127 posts
Armorama: 123 posts

Posted: Wednesday, April 13, 2011 - 12:24 AM UTC
Quoted Text
Thanks a lot for the outstanding Step-by-Step explaining the whitewash technique!
Your model is looking VERY sharp, I'm looking forward to the additional groundwork....
Keep the pic's coming please, best regards, John.
hi John. thanks for the reply. i'm just working on that base.
more pics will come

Removed by original poster on 04/13/11 - 13:42:08 (GMT).

Pookie

Joined: March 27, 2011
KitMaker: 127 posts
Armorama: 123 posts

Posted: Wednesday, April 13, 2011 - 02:58 AM UTC
hi all. here are some pics about base building
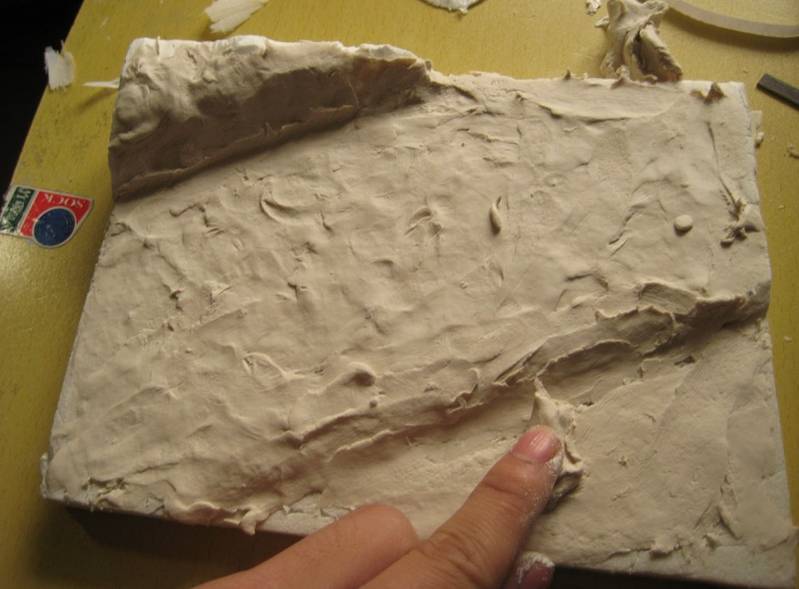
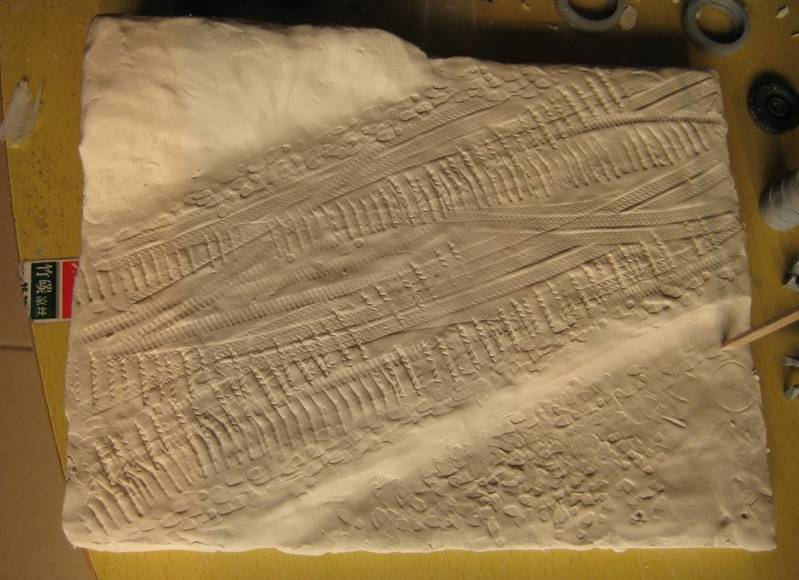
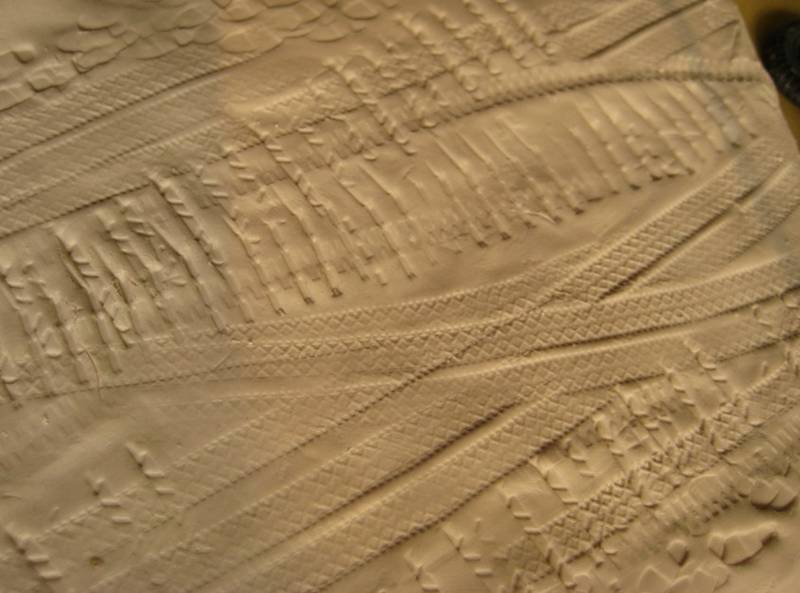
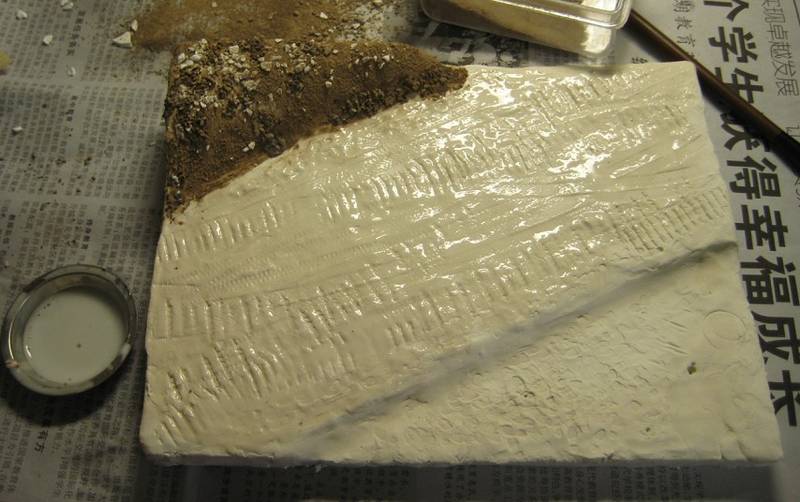
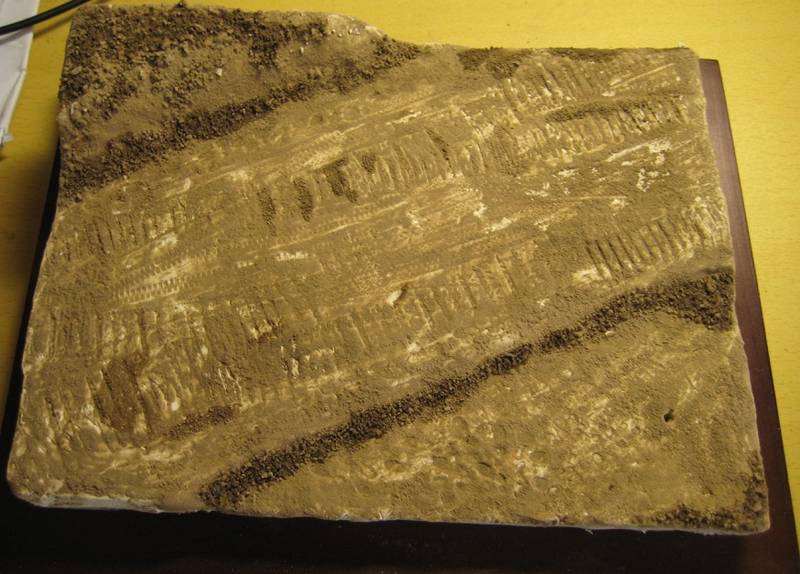
spray primer before painting. as russian earth is kind of dark blackbrown, use xf52+xf1+xf64 to paint basecoat
then add pigment of different tones
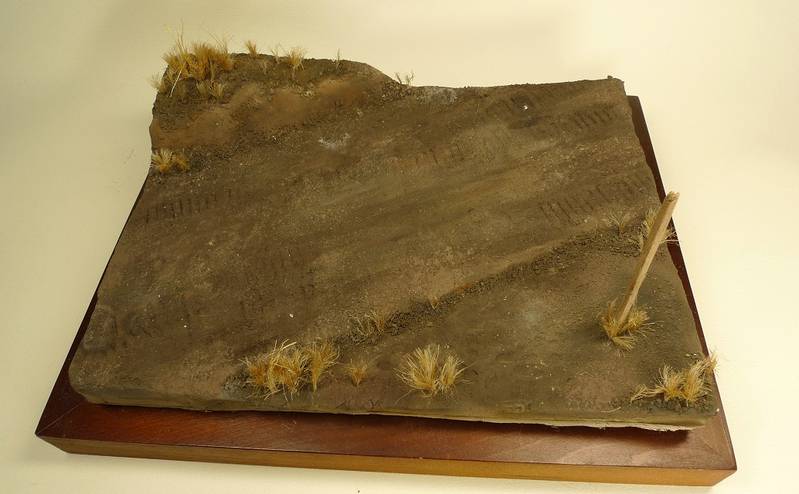


spray primer before painting. as russian earth is kind of dark blackbrown, use xf52+xf1+xf64 to paint basecoat
then add pigment of different tones


Pookie

Joined: March 27, 2011
KitMaker: 127 posts
Armorama: 123 posts

Posted: Friday, April 15, 2011 - 12:29 AM UTC
hi there, quick report
finished one of the figures


finished one of the figures


mharris79

Joined: March 22, 2011
KitMaker: 51 posts
Armorama: 42 posts

Posted: Friday, April 15, 2011 - 01:21 AM UTC
Nice thread!
I'm doing a Panzer 3 N also. Keep up the good work.
I'm doing a Panzer 3 N also. Keep up the good work.
milvehfan

Joined: June 26, 2007
KitMaker: 2,116 posts
Armorama: 1,080 posts

Posted: Friday, April 15, 2011 - 03:27 AM UTC
You have Outstanding modeling skills, Its a Very Cool build. Thanks for shareing. milvehfan
DinggoElite

Joined: June 15, 2004
KitMaker: 38 posts
Armorama: 19 posts

Posted: Friday, April 15, 2011 - 03:52 AM UTC
Thanks for sharing, makes me wanna do a winter dio as well, haven't done one before. I can get alot from your thread 
Impressive work on the figure as well.

Impressive work on the figure as well.

Pookie

Joined: March 27, 2011
KitMaker: 127 posts
Armorama: 123 posts

Posted: Friday, April 15, 2011 - 04:27 AM UTC
Thanks milvehfan


Pookie

Joined: March 27, 2011
KitMaker: 127 posts
Armorama: 123 posts

Posted: Friday, April 15, 2011 - 04:29 AM UTC
HI Dinggo
thanks for the comment.
Then just do it,It's a lot of fun
thanks for the comment.
Then just do it,It's a lot of fun

GewoonWouter

Joined: March 31, 2010
KitMaker: 227 posts
Armorama: 123 posts

Posted: Saturday, April 16, 2011 - 04:50 AM UTC
Hi Eric, great build mate, I really like the look of your panzer, nicely weathered. Great that you're doing an SBS on the hairspraytechnique too. For some of us it comes in handy.
Now one remark though: in your SBS you mention not to use Tamiya colors as basecolor...why not exactly?
I'm finishing my Dragon kit 6600 Tiger I and did a whitewash with the hairspray tech using Tamiya paints and it worked out fine to be honest
Anyway, looking forward to the finished dio
Cheers
Now one remark though: in your SBS you mention not to use Tamiya colors as basecolor...why not exactly?
I'm finishing my Dragon kit 6600 Tiger I and did a whitewash with the hairspray tech using Tamiya paints and it worked out fine to be honest

Anyway, looking forward to the finished dio
Cheers

Pookie

Joined: March 27, 2011
KitMaker: 127 posts
Armorama: 123 posts

Posted: Sunday, April 17, 2011 - 01:30 AM UTC
HI wouter
thanks.
tamiya's paint will dissolve in water more or less,so when rubbing the surface hard with brushes, some of the basecoat will fall(i got some bad experience)
well using acryl paints for basecolor is ok, by spraying a matt varnish.
so to avoid this problem, i just use natrolac paint(GSI Gaia)
thanks.
tamiya's paint will dissolve in water more or less,so when rubbing the surface hard with brushes, some of the basecoat will fall(i got some bad experience)
well using acryl paints for basecolor is ok, by spraying a matt varnish.
so to avoid this problem, i just use natrolac paint(GSI Gaia)
filthpig

Joined: March 16, 2011
KitMaker: 13 posts
Armorama: 12 posts

Posted: Sunday, April 17, 2011 - 07:22 AM UTC
All I can say is "wow". You, sir, are VERY talented in all areas of this art. Fantastic work!

retiredyank

Joined: June 29, 2009
KitMaker: 11,610 posts
Armorama: 7,843 posts

Posted: Sunday, April 17, 2011 - 07:30 AM UTC
I don't know why I didn't catch this and now it is too late for your kit; but I grind up wet foam or florist's foam and mix it with white paint. This achieves a moderate representation of snow and it doesn't yellow, ever.

Spiderfrommars

Joined: July 13, 2010
KitMaker: 3,845 posts
Armorama: 3,543 posts

Posted: Sunday, April 17, 2011 - 07:56 AM UTC
Great work!!

vonHengest

Joined: June 29, 2010
KitMaker: 5,854 posts
Armorama: 4,817 posts

Posted: Sunday, April 17, 2011 - 08:26 AM UTC
Great work on the figure! Can't wait to see this project fall together 
I've never seen those Gaia paints before, but we have the others here.

I've never seen those Gaia paints before, but we have the others here.
 |


